Description
About This Video
Transcript
Read Full Transcript
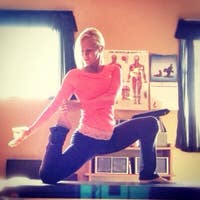
Hi, I'm Carrie Macy Samper and this is the third class in this postnatal series. It's called back to your body and it's definitely meant for 12 plus weeks postpartum when you're, when you're much more ready to come back to regular exercise. And it does assume that you have been doing the exercises from the one and two classes or at least preparing your body to get back to your regular pilates workout. It can be done in pieces like the other ones, but hopefully by the time your baby is three months old, you're able to leave him or her with somebody for an hour or two so you can actually get a workout in once in awhile. It's so good for you to be able to do that. And um, my hope is that you can and that you'll be able to flow through this class a little bit more. It also assumes that you were doing polarities to about an intermediate level before you got pregnant.
So there are intermediate level exercises in this modified and a little different because your body is still changing. But, um, it does assume that that you had this background. Okay, we will start on the reformer. So please lie down on your backs. For footwork, you can have either four or three or even two springs. I have three on right now. The foot bar is up on the high setting and the head rest is just at the level that's comfortable for you. Your feet are fist distance apart and your knees are about shoulder width apart with high lifted heels. Open through the collar bones and begin with your toes.
Pilates Stance
Foot work, 10 repetitions, 10 breathing as you go. Nine eight, try to keep the heels still in space. Bring your legs together on the way out an open the knees on the way in and really feel the press and the pole in this exercise, bringing life back into your muscles. One more time on the toes, then change to your arches. So legs parallel together on the middle of the foot. Wrap your feet around the foot bar and push away. Pause for a minute and really press into the shoulder Brocks and length in your head. Push your feet in the opposite direction and come in.
Arches
Bringing connectivity back into your body after having a baby is paramount to feeling good and getting back into your regular workouts. Five more. So 10 of these as well. For press three reach back to one more time and then when you come in, slide to your heels hard. Flex your feet, push the carriage all the way out in against you there for a minute and create length. Inhale, exhale as you come in and nine more go for if you can get the muscles stimulated in your legs. Five more, five wide collarbones four tens across the core. Three push from your abs too and stay in tendon stretch. They'll come onto your toes, a little bit of space between your toes or parallel hip width.
Heels Parallel
Push the carriage all the way out. Then lower your heels under the bar, kind of grabbing the bar with the feet and then push the bar away as you lift the heels lower under. Pull your abdominals in and up to help lift the heels. 10 of these. That was three under enough for reach and lift. Five reach lifts, six, seven and eight lift through the quad nine one more and vendor needs to come all the way in. Good the hundred. If you can lower the foot bar with your feet, just lift the bar a little bit and push the bar out. Lower it down.
Tendon Stretch
If you're not able to do that on your reformer, just sit up to lower it. Come a little bit away from the shoulder blocks. I'm staying on the same springs. I have three springs on. Take the handles, reach your arms to the ceiling and bring your knees to your chest. So we'll modify this just a little bit because your abs may not quite be back yet. Breathe in on your exhale. Curl your head and shoulders all the way up and just reach your legs to the ceiling. Breathe in as you pump. Exhale, push through the handles, curl through the ABS.
Hundred
Inhale and exhale. Good. Do three more here. Breath, inhale and exhale. Two, three, four, five in and out. Two, three, four, five and in and out. Two, three, four. Hold. Bring your knees in, lift the arms, so that was only half of the hundred. I'm going to show you a different variation that you might like to do where the legs stayed down on the foot bar, arm, state of the ceiling. You take a breath in and on your exhale, just pull your arms long by your side.Lift the head and shoulders up. Keep the legs on the foot bar, but pull in and up through the abs as you push the handle. Then five more breaths in and out. Press your legs together in curl the chest. Exhale three more in two four, five and out. Two, three, four or five into four or five an ounce and this really works in your core a lot even though your legs are down on the foot bar and then release. All right, moving on. Place the straps in one hand.
Sit yourself up. Sit over to the side. Remove one springs. You have two springs now and lie back down. For me, it still feels a bit strange in my body to go upside down overhead for short spine. So I'm going to keep the head rest up, but use the short spine level strap. So I'll pull the leather through the handle. And this is a grots reformer. Do you want shorter straps?
Bring them to your feet like you would do for short spine, but you will just do frogs. And the reason you want this strap shorter as it gets a little more attention and what you're focusing on as you press out is to pull the abdominals in enough, get back and connect it into your center, squeeze through your heels as you deepen and press your body back and pull and press and pull. And remember, you're not letting the legs come in, you're pulling your knees to your shoulders as you reach your tailbone forward.
Frog
Coordination
Bend the knees, Bend your arms, take your handles into one hand. Help yourself to sit up, and then you'll turn around and face back for the rowing series. So remove one spring. You have one spring left and lower the headdress. Okay.
Back - One
Give yourself a hands with the distance from the edge and bring your arms up in front of your chest. So work into the abdominals. Curl back. As you bring the hands towards your chest, press your arms out to the side, move the arms back in the head, forward at the same time, and then press your arms back. Not very high yet. Let's open wide to the side and just focus on the shoulders drawing down and the reaching of the arms. Just getting movement back in. The shoulder joints roll up to more of these curl back. Press the arms side, shoulders draw down to pull back, head to the knees, lift the arms slightly, and then pushed to the side as the abdominals. Pull back, reach to the toes, roll up again, curl back, press to the side, move the arms back and the head forward.Press back to the hands forward with the head. Rotate through the shoulders and reach forward. And then to come all the way up and lift up, sitting straight. So here you'll lift. Very tall. Arms are 90 degrees. Squeezing the glutes and hinge back just a few inches.
Back - Two
It's a much harder, I've found to go farther back yet. Reach up and forward. Push the hands down toward the ground and back and it's the same ending. Press the hands back. Rotate through the shoulders. As you circle around, roll up again, lift and hinge. You're just trying to create length on return. Lift from the waist, reach the arms, then dive down, press back to the hips.Big rotation through the shoulders and set up again. One more time. Feel so good to start moving your core with your arms and connecting through the shoulders, stretching the back of the lakes. It's bringing you back to your body. Literally Roll yourself up. Turn right around for the rowing, facing the front. Same spring.
Sit back to the shoulder blocks. Take the handles by your chest and take a big breath in. Big Breath out. Big Inhale. Reach up toward the ceiling. And on your exhale, press y to the side and lift through your corseted waist. So we're really focusing on this course that here striving to get stability. So as you move your arms forward, corset more in your core, lower the arms down. Reach up.
Front - One
Circle why to the side. One more. Inhale, exhale. Lower. Inhale, push the handles to lift and exhale as you open from the hips, flex your feet round forward. Slide your hands forward towards your heels. Push into the handles as you roll up, reach to the ceiling and push wide out to the side. Round forward. Slide forward as the abdominals. Pull back.
Front - Two
Keep the ABS pulling back as the hands push forward. And on this one, if you'd like, your hands can go a little behind you to get a little stretch on the chest, which feels very lovely. Round forward. Slide to the heels. Roll up and wide to the side. Okay. Rotate the handles in your hands for shaving. Cross your legs. Lift right up out of your hips and take your hands behind your head, thumb, and forefingers touching slightly hinged forward. Before you move anywhere, draw down in the shoulders and in and up in the apps. As you push your arms forward and up, bring it back.
Shaving
It's all just PyLadies, right connecting arms to core, but it's so much more important or demanding or something after you've given birth. And one more time, reach up and then open your arms and switch your legs for the hug. Inhale, as you close, exhale as you open in hell from your back body. Exhale, open from the back. Inhale again. Exhale, reverse your breath. Breathe in. Exhale as you close. Inhale as you open, exhale as you close.
Hug A Tree
Inhale as you open, exhale as you close, and then open the arms to bring back the straps. Okay. Stepping off to the side, you need to get your long box. One spring stays on one spring. We'll do one of my favorite modified swan exercises cause I'm not quite yet. Four months after giving birth ready for the full swan on the reformer.So just one spring. This is a modified variation. I'm going to lie down with my chest off the front just because I'm still breastfeeding and it's painful to lie on my chest fully, so that might be very common. From here, I'm going to leave my legs about hip width apart. Now to keep my back from clenching up and I'm going to reach forward and hold onto the edges of the frame. I'll let my head hang a little bit to begin just to release the neck. And then I begin to draw my shoulders down on my back, engage and connect in my core and inhale as I lift my head, lift my chest and pull my arms towards my body and then exhale as I lower down.
Swan
So I'm strengthening my Serratus, my lats, but also getting a little bit of extension but it's not too intense. And the extension yet, and two more times. Inhale. It's like as you pull exhale as you release one more. Inhale and exhale. Now move right onto polling straps and again I'll just move back a little bit so I'm more secure on the box. Take hold of the strap, thread your hand through the handle and choke up pretty high on the straps.
Pulling Straps
Take your arms to the outside of the frame. Again, legs are just hip with the part. You can also put a small ball between your ankles if you need that connection here. Okay, from here I start to pull my arms down. It's the same feeling as that Swan, but I get to go a little farther with my arms and then return and I'm thinking more of length forward. Then lift up. Inhale, pull back, reach. Exhale. As you return again, pelvis presses down into the box of the chest, peels open and return. So three to four of those. We'll do three. Slide your hands down a little bit more for your t pole so your arms are just above your shoulders and same idea in how pull back. Exhale, reach wide to the side in help pull wide and back.
T-Pull
Exhale to the side. One more time. Inhale, pull and reach and exhale to the side and then hold onto the frame. Carefully step off, guiding yourself off, and go ahead and put your straps down. So for now I'll skip the backstroke and the teaser, which might be a little bit too much just yet. If you're feeling up for it and know them, you can always add them in by moving onto the short box, which also will address some important parts of your body. Postpartum. I'm going to add one spring, so I have two springs on just to hold the carriage still.I'll slip my feet underneath the strap. Now I'm going to focus, throws my legs, go on the strap, coming to my ankles and really pressing my legs out really very wide. So I work my outer hips here, the round back. I sit nice and tall. Curl slightly forward, and then roll backwards. And this you'll just modulate where your abs feel like they can take you and then round yourself back up. Inhale as you roll back, pressing your legs wide. Exhale as you round back up. Just one more. Inhale back, focusing on the scooping down as much as you can in the core and then roll up for flat back. Now I'm going to change the grip of the hands.
Round Back
Instead of holding the bar from the top, I'm going to hold it backward and that helps you to get your shoulders a little more set down. So if you roll the shoulders back and down and lift the bar, you're only gonna lift it where your shoulders still stay connected. And then you inhale, lift tall, exhale, hinge, back and return. And again, this might be quite challenging still as far as how far back you can go. So just listen to your body, but you'll feel a great connection through the whole side because of this hand position side to side. Lift up and reach over. Still push your legs wide to either side.
Flat Back
Just breathe normally as you go, pushing your heels and feet apart. One more each direction last time. And then rest your arms for a minute. If this feels funky with your arms this way, just to go back to straight, but I find it's very helpful for the shoulder set. Lift tall, twist to the right and hinge. Again, only the distance that you can control. Lift and twits, hinge back and return.
Side Bend
All of these exercises are just building back up the tissues that got a little deconditioned when you were pregnant and reach and return one more and reach and return and then slide the bar. The tree feels so nice. Lifting nice and tall. Stretch the leg and bend, stretch, bend, stretch and stay. Walk up to your ankle, adjust the hips so they're square. Lift nice and tall and then round forward as you rock back. Keep tension on that strap as you lower down towards your hip.
Twist and Reach
Just go probably to about here. Climb yourself back up and then lower down. Pulling your waist down into the box. Keep your waist down as you make your way up to your ankle one last time and bring it all the way back up. Then come up to seated hard. Flex the foot, lift tall out of your back and release. Switch sides, so get right under that left leg lift tall, stretch three times of the stretch. Stay up on the third time.
Tree
Walk up to your ankle, flex and point and then round forward with your head and rock back. Walk your hands down towards your hip. Waist pushes down, head comes back towards your knee and again, lower yourself down. Press your leg up into the strap and try to keep pressing up as long as you can. As you come forward one more time. Lower. It really gets more into your abs. If you can keep the pressure up in the strap, which I have a challenge to do. That feels really nice.If you can lift nice and tall and then release. Okay, the side setups here, this is a variation that I used while I was pregnant too and I still am using it now as I get back my strength. So again, this part is still weak, but we can start to work our obliques a lot more too. So your right hand is behind your head, your left hand is on the shoulder, block your squared off to the side. Use that left hand, like a little bit of a helper as you bend over and as you come up, so you're only using the hand as much as you need. You still want to really be feeling the work on your side body and we'll just do five. So two more. Inhale over an exhale as you come up.
Side Sit Up
Place your hand on the box to help yourself up. It's quite challenging on the rectus abdominis to do these side bends and you don't really know that until you don't have as much rectus back hand behind your head. Other one on the shoulder block length and out and bend over. Now as you come back up, push a little with your hand and push up into the strap. Then over and bring yourself up. Three more. Inhale and exhale.Inhale and exhale. Last one, exhale, and then help yourself come all the way back up. Now you can step off and let's put our bat box back or take the box away. Moving onto long stretch. Now the plank position is challenging for your core, so if it still doesn't feel quite right yet, you can just eliminate the long stretch or just hold the position. I'm going to do three reps of it, so I'm on two springs, high foot bar, feet together in between the shoulder block soldiers down on the back, push the carriage through the heels of the hands and the toes, and then pull your chest forward.
Long Stretch
Try to pull the foot bar apart with your arms to engage in the shoulders and strengthen those shoulders. Again. Let's do two more. Inhale as you pushed back, exhale, come forward. Inhale, push back and exhale forward. Kneel down for down, stretch feet. Go pushed back on the blocks. Pelvis forward, chest open. Try to create a straight line from knees to hips to shoulders.
Down Stretch
You don't have to go into excess extension yet and how push through the heels and the hands. Exhale wide in the collar bones and lift the chest. Inhale back. Exhale as you lift. Inhale, exhale, open and lift. Two more. Inhale, exhale. Last one. Inhale, exhale. As you come in. Stand up for elephant. So come up just to regular elephant heels right in front of the shoulder blocks.
Elephant
Round the body. Lift the toes, five elephants push back. Dig The heels in as you lift the abdominals up. Push the heels. Pay attention to the heels, digging in the ABS and ribs lifting. Pull in to more read as you come in. Last one. Hold it now to get a little extra work in your backside.Take your right leg off, press your leg up behind you. Make sure your hips are square and then just pulse up for five, four, three each. Pulse up with the leg you lift up with the ABS. Hold now do five single leg presses of elephant for the ABS are working very hard. Three dig through the left heel to push out with the right heel one and come back down.
Single Leg Elephant
This is so important to do these single leg things for the increased stability that you need in your core pulse. Five, four, three, two, one. Then press out and pull in. Five, pull in four. Hang your head for three. Push and pull two and pull in on one. Then you can step all the way down and off to the side. Okay, now we'll go onto the depths. So this is a modification of the um, the, the backstretch. So if you could put the ball between your thighs and bring your legs out, your hands are behind you.And it's as if there's a little stool right in front of the reformer. And all you're going to do, keeping the chest open and the core tight is bend your elbows and lower down to your bench. Then straighten your arms and come up bend and stretch. This opens your chest, works your arms and triceps. And if you can do up to 10 of them, that's great. So that was five.
Tricep Press
Six. Breathe, seven. Inhale, exhale, eight, two more, not last time. 10 and step back in removing the ball. All right, you're on the home stretch with your reformer here. So place the pad down and we'll go right into chest expansion so you can actually cover the springs. I'm still on two springs with the pad just for safety. Grab your handles and come to kneeling.Your toes will hook over the back edge, hold onto your straps and bring your hips forward and your chest open. And just finding this position is challenging enough to first stability in your core. Working by pressing the inner thighs together and opening the chest. Pull the straps back and return and just start with that initially. Inhale, as you pull, exhale as you return working core stability and your upper back. Now you can add the head. Inhale, pull, hold the breath. Look right, look left. Look, center. Exhale, bit of a next stretch.
Chest Expansion
Inhale, hold stable. Turn your head. Turn it again. Center. Really, one more each side. Inhale, exhale. Last time. Inhale, hips. Stay right over the knees. Chest is open and return. Okay. Place your handles back up. We'll go right to running. So you go back to the same springs you did foot work on.So I will put three springs on. So three or four lie down. Come on to your toes, adjust yourself, see your centered, and press yourself out. Feel the length again through your body. You should feel much different than you did with foot work. Lower one heel and lift the other need of the ceiling. And then you're working on stability. So yes, it feels good and your feet in your legs. But let's keep the hips stable. Course it around your waist, find your core stability while your legs are moving.
Running
Bring that memory back into your body and do about 10 sets of these. So one more each side. Lift your heels and come all the way in. All right. For a final stretch on the reformer, we'll do eaves lunge. So place your hands onto the foot bar, your outside foot.So my right foot is going to come right up near this, uh, front of the reformer. My left foot will come here against the shoulder blocks and I need actually to, or one spring. I'm going to go on one right now. Two, we'll give you a little more stability. Now be careful as you go back with your pelvis. If you have a lot of sensitivity in your pelvis, just do this mildly, so we're pressing back until you feel a good stretch in your hip. Hold here, open the chest, lift up through the ABS, but push through that back heel and then bring yourself back up. And then do two more of those. Press back.
Eve's Lunge
You're stretching through this hip flexor, opening the chest and return up in an and press back. There's so much sitting when you're a new mom holding your baby that this kind of thing feels so good afterwards. Okay. Three or so on one side and then switched to the other side. So both hands on the foot bar, my left hand comes, sorry. Left foot near the front, right foot against the shoulder, black.
And then as I press back, I'm sending energy through my back heel and up through my abs. And then bring yourself back in. Um, press out again. Hold for a minute, keeping the strength by pushing back, lifting up and come in. And one more [inaudible] bring it all the way in.
Moving onto the Cadillac w we'll start with the single leg spring series and we're actually going to use the spring. Um, we'll work both the outer hip and the inner thigh and I'll talk you through where, what leg the springs are going on. Um, and we'll do it all on one side and then switched to the other leg. Okay. The level of the leg spring. So you want the legs springs on whatever Cadillac you have. And on this balanced body Cadillac, I have this bar at the, the third divot, there's three little divots, it's at the third one up on the grots a Cadillac. It's going to be the high leg spring setting where you want it to be. Okay, go ahead and lie down on your back. Um, push, start out with yourself about like a little greater than 90 degree arms length here. And then you can move down. If you want more challenge, grab hold of the right leg spring and place it on your right foot.
Single Leg Press
So it's the same leg spring as leg, and you can keep this leg bent for a little more stability or you can place your hands behind you. So what we're working on here is pelvic stability. And then um, strengthen the inner and outer thighs and pelvic floor. Flex through the right foot and just press your leg as straight out as possible in line with your hip. So you go from your hip socket straight out and bring it back in. So if your heel is just pushing along a straight line all the way out and you'll see the wobbles, your leg will be moving a little bit.You're trying to stabilize it. Do five of these, so two more as you coarse it around the waist last time. Stay out. Now just lift your leg up toward the ceiling and lower your leg towards the floor. And again, you're staying straight out from your hip, you're pushing back with your arms, you're breathing your ribs into the mat and you're keeping your pelvis as still as possible. After five up and downs, you'll start your bicycle. So you bend your knee in. Now the spring will go on the outside of your leg, stretch your leg up, lower it down, slide your heel along the mat. As you're doing this, lower your leg down and as you come in, pull up and in with your abdominals. Make your abs, help your leg. Come back after three in one direction, reverse it, go up, pull your knee in with your core. Put your heel down, spring on the outside, slide it out three times.
Single Leg Lift
Breeds Oh and when you're finished with that, bring the leg in. Now remove this spring off your right leg. Take the opposite spring, so the left side spring, put it on the same foot, so the left spring goes on the right foot. Now this is going to work a little more of your outer hip. The first one was more of your inner thigh. Same exercises you press out and you pull in and start to feel you'll feel immediately the difference of which spring you had on your leg.
Single Leg Bicycle
So five times of out and in and for more challenge. Of course you can straighten this bottom leg and I would flex the foot just to keep it stable. Stay out on your fifth one and go up and down. Push back with the arms. Breathe your ribs down into the mat and watch the wobblies trying to keep it nice and straight and in line.
Single Leg Press
And you should be feeling it in your leg a lot. Then on the fifth one down, do your bicycle. And this time, this spring will go on the inside of the leg.
Single Leg Lift
Now you can do a nice little stretch here. Hold onto the um, uh, strap and push your knee out and pull your leg in. Feeling the stretch in that outer hip and then release your foot from the strap. Feel the difference in your two legs. I always like to do that when I've done a single leg exercise. And now we'll start with that. Sorry, that same spring. So the left spring now goes on the left foot and I'll go back to the bent knee cause that's how I started the first side. So pressing out, pulling in the spring is on the outside of the leg and you'll feel more activity on the inner thigh. Trying to keep the leg in line.
Single Leg Bicycle
Do two more. So five reps, stay out on the fifth one and then go down and up, pushing the arms back into the, yeah, pulling in and up through the core. Nice and strong and stable. Two more times here.
Single Leg Press
It's almost like the abs are bringing the leg in. One more time. Then reverse. So go up in the back down, lift up in and you can watch your own leg. Mine was getting a little rogue. They're going off to this side and you'll really feel where your slight imbalances are.
Single Leg Lift
Single Leg Bicycle
Keep pushing back with your arms. Your arms are always working. Your shoulder blades are drawing down to control it. Staying out on the fifth one, down and up. Five times four still stabilize across your core three neutral pelvis, two and one. Now the bicycle. Bring the leg down, slide your heel along the mat. Bring the knee in, stretch it out, press down, slide along.
Single Leg Press
Pull the abs in to bring in the knee. One more. And then reverse lift. Ben, slide it out. Lift. Pull right in line with your hip. Try to keep your ankle in line with your knee in line with your head and then bring the leg in. You could do that stretch again. So grab hold of the strap, push your knee out a little bit and just get a little stretch on that outer left hip. Feels so nice. All right.
Single Leg Lift
Are you leased the strap from here? Try your roll up to sit all the way up and then turn around and we will do the roll back with the field variations to further work. The connection of the arms into the core. Okay, so I'm sitting up nice and tall. My legs are bent slightly. I'm going to grab around the bar, press down into it a little bit and begin to roll back. Curl that tailbone towards the heels, pull the waist into the, take advantage of the help of the spring to really pull the core in opposition.
Single Leg Bicycle
Once you're down on the mat, do your shoulder rolls. We visited these in the first class of the series and this is a little bit different placement, a little more challenging, but still feels nice. So you do three rolls, one direction, three rolls the other than connect down in the shoulders, lift your head and as you roll up, allow that bar to pull you and really try to leave your waist down. It'll give such a nice stretch in the upper back and then in the middle back and then bring yourself up to seated going again. Breathe. Then exhale as you roll down, tailbone toward the heels and then open through the chest and keep your pelvis neutral. Your legs are straight, chest is open, and try to press the bar down toward your thighs.
Roll Back Variations
It's almost like the lying down chest expansion. Inhale and exhale. Inhale and exhale. And then inhale and exhale. Bend your elbows to the side, pull the bar towards your chest. One more.
Now usually in the push through we would just round back like this, but instead I want you to look up and arch back so you go into a nice extension. Until the bar is almost shoulder height. Then look forward, push the bar down, tuck your chest, use your belly to round forward and through, and then come back, tailbone towards the heels, waist towards the Mat. Once you get to here, go back to that extension. The bar kind of stays still. You pull the chest through and look up and then lift up nice and tall and then come back again. Open the chest down through, and so much of your time when you have a baby is rounding forward.
Push Through w/Extension
It's very hard to have lovely posture when you're breastfeeding or even just bottle-feeding holding a baby. So that's why I have a lot of these opening here. Pull the chest course at the waist, tuck around forward and bring it back. Really work the course. You're going slowly through that transition and then lift the chest up toward the bar and then reach up nice and tall. Hold on with your left hand.Take your right hand across and do a little bit of a twisty stretch, pulling with the right arm. Push up with the left, but keep both hips grounded and then switch sides. Press up with a right hand pull with the left, but pulled back in the hip. A nice stretch for that upper back between the shoulder blades and then release. So go ahead and take this spring off. The final two exercises really will be on the barrel, one exercise and one finisher.
A small barrel, a spine corrector, either one are are just fine. Lie down onto your back. For the arm series, you want to have as much extension through the upper back and the neck is feels comfortable. Of course, if you need a pillow, you're welcome to get yourself a pillow, but you really want to take advantage again of that opening in the chest. Still try to coarse at the waist, let the ribs be a little more connected so we're not just splitting apart. The legs can go straight or B, stay bent and inhale, lift the arms up to the ceiling, plug the shoulders into the back, exhale as the arms reach behind.
Arm Circles
As I reached my arms long back, I'm pulling my lats down. I'm pulling my core down nice and tight and then I circle to the side. So nice big circles. Inhale, exhale. We're not doing this. Inhale, relaxing and all around. We're bringing it back to the center. Inhale, exhale, and then reverse in hell to the side.Exhale down. Inhale as you open, exhale as you lower. Do you open to the side, draw the arm bones into the sockets and exhale as you lower. Nice. And then lift the arms all the way up and overhead. Bend your elbows and take your arms back for just a little more stretch where ever that feels good, but you're not letting go of your core, so you're in kind of a diamond shape with your arms. It gets a really good stretch through the chest of the upper back. Then place your hands behind your head. Help yourself roll up.
It's a little stiff cause you did a lot of stretching there. And then help yourself come all the way up to the top. The final resting pose. I call Palladia Shavasana turnaround. Lie your legs over the barrel.
Be careful of your head back there and just lie yourself down. Turn your palms up and rest. And as a new mother, you probably will fall asleep and there you go. Take a few deep breaths here and zen out for a little bit. You just did a great thing for your body.
Postnatal Pilates: Postnatal Mat Pilates Series


Comments


You need to be a subscriber to post a comment.
Please Log In or Create an Account to start your free trial.
