Description
About This Video
Transcript
Read Full Transcript
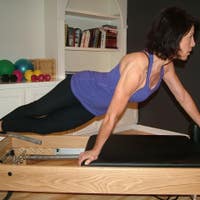
Hi and welcome back to our third class with Tara, and I'm super excited because I really have enjoyed getting to teach her and strengthen her. And we've done two classes so far. So we've done a mat class, where I've checked her range of motion and gotten to know her injuries and what hurts her, what doesn't hurt her, and how I can challenger her. And then we took a class on the reformer, and we got to challenge her with against the springs and an apparatus and see what that felt like. And today we're gonna do a class on the mat adding some one chair at the end and some big chair, see if we can keep strengthening her glutes and her hips and her powerhouse.
And what I love is she's been able to take these classes at home while seeing herself move against and hearing my cues, and it's been really, why don't you tell us about it, Tara? Anything? It was really helpful because I think left to my own regard I do things quite poorly, incorrectly. I don't challenge myself enough. And even in the cues from the video you're able to call out things to me that I'm already finding I'm not doing.
Like going stronger in the powerhouse and the transverse-- Transverse abdominis, that big word. Your powerhouse. Yeah. Big suction cup muscle. Yup, yup.
I'm very conscientious of that now. That's so great, so good. So we're hoping to keep building on all of that and then also so that when she's not doing Pilates and she's going about her day that she's able to use all that powerhouse strength to keep propelling her forward. So we're gonna start on the mat, and you're gonna lie down with your head here, okay? So like I've mentioned we've already gone over her range of motion, and maybe slide over just a little so you're centered, and what feels good and what doesn't.
And for Tara, flat feels great. Mm-hmm. Rounding does not hurt her. Arching maybe we can introduce it one day, but right now we're gonna still tread water gingerly here. And my main goal is to really strengthen her powerhouse so that she can feel it like a corset and secure, and that she's not gonna hurt her back.
We worked hard at making her feel comfortable with these crazy Pilates exercises, whether it's on the mat or reformer or another apparatus that's maybe a little medieval and doesn't seem quite normal, but we want our muscles to not brace. We want to relax and get more out of it. So I'm really excited about today. So we are gonna start off with a lot of work again with the magic circle. And we're gonna start off with the hundred.
Okay, so we're gonna put this between your ankles. There we go. And you can put your feet down. I got it, good. All right.
And I want you to put your hands one over the other behind your head. Good, and relax your head. Good, all right. I also have recommended, maybe slide just a tiny bit to me, to Tara to check out class 3333, so four 3s. That's just primarily a stretching class if she ever wanted to do the workout but felt tight, needed to limber up her lower back or get just a little more awareness.
Hundred Preparation
So we're going to pull your belly in. That's it, good, and then relax. So take a big breath. We've got our box, and then exhale, draw your belly in, good. Don't worry about legs so much, good.And I want you to take a big breath, and we're gonna pull in to that herniated L5 by pulling your belly in and then see if you can feel that as you round up. That's really great. Take a big breath. We're not gonna lift any higher. But I want you to exhale and just try to draw that navel in.
Great. We're gonna do that again. Big breath, most important thing is just trying to pull in, in, in. Good. And a big breathe, excellent.
You're gonna pull in and lower your neck, and lower your head. That was awesome. Good. How'd that feel? Good. Good.
Really good. And we're gonna take a big breath. We'll do it again. We're gonna pull in, exhale, good. Take another breath, and I want you to exhale and draw in.
Awesome, now we're gonna talk about your tilting pelvis, so we're gonna drop your tailbone a little bit. Good, 'cause we don't wanna engage these hip flexors for you. Big breath, and keeping that down, can you just draw the belly in more keeping your tailbone? Then you try to clench a little bit with the right, yup. One more breath.
And exhale drawing in, and rolling down your neck and head. Excellent. Good, good. So a few things that you have going for you that maybe not everyone is in the same boat as you have zero weight to lose, so you're in great shape somehow that way even though you have a herniated disc, so you're able to really pull in. And you're also very active.
So we're able to get you to do some things that maybe not everybody can do, which is pretty impressive. So you should not feel like you're completely injured and involute, okay? So let's put your hands behind your head again and we're gonna transition out into the full hundred. Okay. Taking a big breath and then exhale.
Breathing is important so you're gonna exhale, pull in, rounding up, awesome. And stay there as you inhale. See if you can drop your tailbone a little bit. Good, and then exhale pulling in. Maybe come up a little higher, great.
And a big breath. And I want you to exhale into the mat and see if you can hold on to my hands. Wait, no, my hands with your hands. There you go. Let's hold hands and stay right there.
Hundred
And we're gonna pump. Did you see how I pulled you a little bit with your left? Let's get your head to be over your left too, uh-huh? Yes. So now you're square.For whatever reason, you like to just curve a little bit right in those shoulders. You do take your neck and head with you. Good, is your neck hurting right now? If it did, all you wanted would like lower it down, okay? But now instead of squeezing from the feet, keep going, or your knees, or your thighs.
try your hips and then keep scooping in. And from those hips, we're gonna bring those knees right up over your knees over your hips, good. And keep pumping, good. And we're just trying to really use your transverse just like a big suction cup muscles, so great. Great pumping.
We're inhaling for five counts. You're doing it exactly right. Go in a little and exhale, stay on your, aha. Let's do 20 with the legs straight. Squeezing the legs a little up.
Yes, not any lower, good. And I'm holding my hand just so that you don't go any lower. How about one more breath? Is that too much on your neck or head? Good?
Big breath. And last time scoop in, squeeze your bottom, squeeze your bottom, squeeze your bottom. There you go. Bend your knees and rest down your neck. Great.
How was that? Good. Good. Yeah. What did you feel?
I did get, my neck did get tired at the end I realized and it's resting. Yes. But at the time I felt this felt strong. Good. And solid.
Okay, good. You can always rest your neck and head-- Okay. And keep everything else going. And then on the next I'll bring it back up again. Okay.
Okay? Yup. That was a lot of pumping, so-- Yeah. Mm-hmm. All right, now I'm gonna have you go ahead and sit up anyway you can.
You might need to roll over to the side, whatever you need to do to sit up. Good, that was okay? Uh-huh. All right. Put this back within your inner thighs.
Knees will be bent. Feet will be flat. Mm-hmm. Hands underneath each knee. Good.
Half Roll Back
And you're gonna round your back. Good, good, good, excellent. So your shoulder still are over your hips, because that's your box, so almost touch your forehead to the circle. Excellent. Good, take a big breath and exhale round your upper back more.We're really good at rounding our upper back so let's really feel it. Big breath and exhale into my hands expanding those ribs and lungs, and relaxing those shoulders. Excellent. And taking a big breath. Because you're doing that, exhale, you can now draw your belly deeper into here and pull your waist back, back to the mat, yes.
Until your arms are just straight. Excellent. Stay there. Squeeze your hips together and draw your belly in to come forward. Could you feel that support and security for your lower back?
Low back, yes. Good. Yes, definitely. All right, we're gonna round again. Okay.
And we're gonna do that again. So we're going to exhale, round the upper body, rounding it forward. Good, let's press that circle from the beginning this time and draw that waist back towards the mat. Yes, yes. We're gonna keep trying to stretch this forward.
Good. Take a breath, exhale draw the belly in and come forward. Good, let's go again. Press, we're gonna keep you moving a bit today. And we're gonna roll back.
Let's go a little further. I heard a little pop. And we're gonna go down, so we're dealing with the herniation. Take a breath and exhale into the mat to go forward. Scooping in.
Mm, beautiful. Excellent. And we're also dealing with your hip dysplasia, right? So I want you to press a circle with your hips. Okay. Beautiful.
Draw that head forward, draw it around your back, and draw the belly in to go back. And these hips keep movin', they're wanting to go this way. They're wanting to stretch your tailbone away from you, reaching, reaching. The more that happens, good, good, good, the more we're gonna strengthen that hip, a little down to right there. Take a breath and exhale forward.
Squeeze, squeeze. Thank you. I want one more of those. Actually, two more. Squeeze 'cause that's as low as we're gonna go today.
We're gonna press. We're tryin' to keep goin'. Stretch that lower back, right? So we're gonna keep your hips goin' this way. Mm-hmm, good.
Very good. Down to the bottom of the shoulder blades and then round. There we go. All right, so that was one way your hands were kinda floating. I want you to do the last one with your hands staying under your knees, because I want you to pull like opposition, okay?
And round your back. Press the hips, good, and rolling back. It's like you're curling your tailbone under, you're reaching it that way. I love the scoop. That is beautiful.
It looks just like the assisted teaser. Going down a little further, further. Going down the straight line. So we have to go a little left. Yeah, okay?
Take a breath and exhale forward. Mm-hmm, mm-hmm. And I kinda lied we're gonna do one more 'cause I saw that little off to the right. Okay, so last one. Press those hips.
I feel that, that's a funny-- Well. Just know how to do it. Yes, it is. And press. But you may not feel it today, but then you'll feel it later as you get to know your body more.
Within your lower back, you go down pretty even. It's more with through your ribcage that you just slightly go, it's like right now just a little bit right. And now exhale. So we might need to strengthen this left side. Mm-hmm, beautiful.
Beautiful. Good. And now we transition into the next exercise by doing another exercise. You're gonna squeeze again. And round your back.
Good. And rolling back. Beautiful job with the waistband, but always remember that you're lengthening your hips this way, stretching your pelvis away this way while you pull your upper, stay a little more left with the shoulders. Fantastic. And go ahead and rest.
Good, as you advance, you can keep your feet there. Give me your hands. You're probably gonna do a, I'm gonna stretch your neck just a little but, yes. You end up having your, don't do it, but you end up having your legs straight. And then you end with this reach, okay?
And when you're doing that, it's really helpful on your own that you hold like a dowel. And you might see that it goes like this as you reach back. Because it will be in your fingertips, it will be more extreme than what happens in your upper body. So that's a great way to see if you're going straight or not. Mm-hmm.
All right, you're gonna rest your arms down by your side and we're gonna do, not a standard mat exercise, but we're gonna do a little bridge right here. Really important to keep limbering up, beautiful. So without tilting your pelvis, so drop that tailbone down more. Mm-hmm. You're gonna press your hips together.
Bridge with Adduction
Press those inner thighs, hold. Try to find the inner thighs and your pelvic floor and your little lower belly to curl the tailbone towards you. Beautiful, your feet will stay there but they're not gonna work. You're gonna use the hamstrings and glutes to lift your bottom up. Good.How does your back feel? Good. Good. Yeah. Supported.
We're trying to strengthen the hamstrings and glutes, keep lifting up. Curl it up like a strand of pearls coming up. Good, good, good. Very nice. It's even working hard on this one.
Good job. You're gonna stay here and you're gonna squeeze the circle 20 times trying not to drop the bottom at all, but to keep stretching up, maybe even curl the tailbone a little more towards you instead of, uh-huh. So you get just a little more juice out of that. Okay. And then hold it tight and you're gonna roll down your upper back.
And while you're squeezing, see if you can pull your belly into each vertebra especially L5. So right through here, if I was on your back, that's probably the stiffest and hardest area. So stuck, yes. Yeah. So you wanna squeeze that circle and pull your belly into those as you roll down.
As you roll up too, but, so we're gonna keep the tailbone down for a moment just as we start so that we press the side of our hips and the outer thighs and inner thighs squeeze the circle. And then draw the pelvic floor and lower belly towards you. Good, keep using these muscles and start curling up. Mm-hmm, beautiful. Beautiful.
Keep lifting from here. Yes, I can really feel you working when I keep my hands here. And you're gonna do 20. Beautiful, keep this working. Keep it lifting.
We're gonna do a terribly hard exercise at the end. So fun. And so you really wanna get this feeling (laughing). After 20, hold it tight. And now, exhale drop down the bottom of your shoulder blades.
Good, holding this here if you can. Drop your chest bone more. Excellent. And now you're really able to pull your belly into those bones we're just talking about. So good, Tara, good job.
Yay! All right, we're gonna slide your knees together and then draw the right knee into your chest. Good, and we're gonna use a circle to stretch, because it's here and we can. So both hands there but shoulders will stay right there. And we worked hard on keeping it rotated, right? Mm-hmm. So we're gonna keep it
Hamstring Stretch
rotated and lift it up to your nose as high as you can for a stretch, good. Good, all right. Now it's okay while you're stretching but this side's working a lot right now. Oh, yeah, totally. (both laugh) So we're gonna try to relax it a little.That's a competitive side in you. Bigger is better, right? So we're going to take this down now and you're gonna press your arms down into the mat. And we're gonna use your obliques like anchors and we're gonna drop anchor. And we're gonna draw a circle on the ceiling within our box.
Single Leg Circles
So here's our Pilates box. As you cross over, this guy comes right over. It's gonna stay there. We're gonna gain strength there. Now we're gonna cross without it coming over around up.Good, cross, around up, mm-hmm. 'Cause I want both sides of the lower back to stay on the mat supporting that back. I think that was five or six, but let's reverse. Down, cross, around up, good. I'm gonna let go and have this leg relax.
'Cause if it relaxes, cross all the way to me, yeah, crossing over that box, right? If it relaxes and the other one gets to work a little harder, we have one more circle. I decide to count this time. And then hug the knee in. Doin' okay? Yeah.
Okay, good. So that's almost twisting, which we're not allowed to do with a bad back. Mm-hmm. Okay? 'Cause you twisted a leg.
Hamstring Stretch
We just don't wanna twist the spine and we wanna make sure that that lower back right where your herniation is does not twist at all. Okay. I see that 'cause we're gonna add it kind of a harder exercise today that if done incorrectly would really hurt you. Okay. But we're gonna do it like that.So we're gonna draw this knee in, and we're gonna straighten it up and stretch. Good, turn out the knee. Good, good. 'Cause that's what the muscles that we need to work on for you is what the leg turned out. Yeah. Good.
Nice, I will now take the circle, and you're gonna press your arms down by your side. You wanna do that, see if it gives you any extra stability, like when you press down, do you feel your belly able to pull in to the mat more? And we're gonna cross towards our right shoulder around and up. And so those hip bones don't move at all, because then we support that back. Yes, last one.
Single Leg Circles
Really good. And go the other way. So the hip bones are almost across from where you're herniated. So if those stayed square, you'll have a much better chance of keeping your lower back. One more.Great turn out. And hug that knee in. Awesome. Good. We're still gonna keep up rolling for a while, okay?
We're gonna put this foot down. Good, and we're gonna draw the belly in, and we're gonna do the series of five today. We've only done the series of one and two. But these are really great powerhouse building exercises. So we have our box.
I talk about this all the time. If we keep our box square, then your back will stay straight and supported. Okay. Okay? So that's what we wanna do.
And we wanna pull in to it. But you might be tempted when you move your arms to like move your shoulders and do a little bit more stuff or go up and downward. If I looked at just this area, I wouldn't know anything was happening, okay? So you're gonna draw the right knee into your chest, mm-hmm. And you're gonna put your right hand on your ankle.
Single Leg Stretch
And the arm that crosses over your body has to go to the knee. This is a little tricky, good. And you're gonna put that foot down. This one? Mm-hmm.Okay. Yeah. Awesome, and you're gonna do the left, pull in the left. And this hand is gonna go on your ankle, and this one's gonna cross over. Yeah, 'cause it crosses the body.
Look at you, super good. Let's do one more each leg. So we keep our nice box, perfect. And we're gonna put that foot down, good. And we're gonna switch again.
Good. So now we know how to stay square with this exercise, we're gonna stay here. We're gonna start working. We're gonna pull our belly, and like you did in the beginning for the hundred and use it to lift your head into your chest and round your shoulders up. Awesome, this one's gonna stay stretching.
It's called single leg stretch. Good, stay there. This leg wants to be, you one day will have it low. I don't want it low today, I want it not challenging, you're arching your back; I want you to feel really good about it. And switch.
So you're gonna bring this knee in and give me your other leg. Perfect. How about the, ooh, she fixed those hands. And pull in and switch. Someone who doesn't have an injury, they're can do whatever they want with their hands, but if you had a bad hip, bad knee, bad shoulder, bad back, you have to do your hands right.
And pull them in. You gotta stay square and support those joints. Excellent. Pulling in, neck okay? Mm-hmm. Okay.
Scoop in. You could do this all day long with your strong legs. Channel, channel your belly. Yeah, one more side. Pulling in, one more.
Good, bend the knees in. Good, and rest your neck and head. Awesome. So whenever you hear a click in your hip, turn your leg out a little more and pull that belly in more. Okay. Okay?
I can hear it. Uh-huh. Mm-hmm. And then finally squeeze that cheek a little bit more. Okay.
Okay, double leg stretch. So we did the single version, now we're gonna do a double version. Your hands are on your ankles, good, and you can keep your head down. And you stretch in like this. You did it last time, okay?
Double Leg Stretch
And technically, your arms are gonna go straight up over your head, and both legs will go out to that angle, not too low, just below a 90 degree angle and then bend back in. Good. But when your your legs go out, I want you to rotate those thighs, turn them out. Okay. And get a Pilates stance, so that you can squeeze your bottom and draw that belly in more.Excellent. And bend the knees. Okay? Now we're just gonna do the same exact thing, but our head will be up and we're adding a circle to strengthen our hips. Okay.
So we're gonna put the circle right here, good. The knees should be a little wider than the, uh-huh, good. Press already and pull your belly in to lift your head up. Great. Good, good, good.
And you're gonna, arms straight up, legs not so low. Good correction with your feet. And then pull back in. Oh. Sure, okay (giggling).
Let's keep going. Go up with those arms. And good correction with your feet. And come back in. Scoop it in.
Watch out. And reaching up. Yes, and comin' in. I want your belly to look like that when your legs go out. What do you think?
And out. Oh, so good. And come in. Two more. Pull in your belly in just like that.
Yes. And one more time. Squeezing, pull in your belly, yeah, and rest your head down. I once had a client when I was doing the wall, and they had a weight in their hand, totally didn't see that one comin'. I was like, oh.
So that was nothing. That was good. I'm gonna take this circle away. Good, it was more me not thinking. Let me get right in your way of your hands.
Okay. So how'd your hips feel on that one? Better. Good. Yeah.
They're clicking. So single straight leg. Okay. So we're gonna lift both legs up. Okay, and they're both up, right?
But I want you to lift your head up and crawl only up behind your right leg. So we're gonna pull your belly in, put your hands behind your right leg, and crawl up as high to your ankle as you can. Okay. You're so flexible. You're gonna stay down with the shoulder blades, the bottom of your shoulder blades.
Single Straight Leg Stretch
There we go, scooping in. Good. The shoulder's rolling over a little bit. Can you square off? Awesome.Okay? Keep scooped. And we're just gonna reach this leg like this. Basically, can you feel me pulling your leg out? So we're stretching.
And we're gonna pull the belly in and bring it like all the way up and switch hands. Yes. Reach up, reach out with the little turn out, so you can get that. And pull up all the way, and switch. Squeezing a little rotating.
It goes down the middle of your body, Tara. Yeah, and then back up, woo, good! Switch. How's the back? Really good right now. Good, down the middle.
This gets a lot more complicated, but this is what I want to see. And switch. I love seeing your belly in a leg reaching out, and then in. So good for you. And switch.
Very safe. You're staying like as if there's a belt pulling you into the mat. Awesome. One more. But when you're advanced, you're gonna be switching these, they're gonna pass each other.
Bend the knees and rest your head down. Good. Yeah, they're gonna pass each other and they're gonna be flying through the air. Yes, seen that done. You've seen that, yes.
I know that you've done it too. Yeah. Yeah. But you're gonna be doing it next time. You do it, you're gonna be doing it with all the correct muscles, yeah.
So you're gonna put this between your ankles. Good, and then bend the knees for a little break, good. And we're gonna put your feet down. We're gonna put your hands behind your head. So the way the series of five goes is single, double, single, double and then a crisscross.
So you did single leg stretch with the proper hand placement and the double version of it where I was in the way of your hands. And then we did single straight leg just now. We used switched ankles. Okay. Now we're gonna do double straight leg.
Okay. Okay? So you're gonna pull the belly in, and this is exhaling for, up, something that is really, really something I have to introduce cautiously to you, okay? Okay. Lot of like red flags going off right now.
Double Straight Leg Stretch
A lot of like, don't do this, okay? Yeah, yeah. All right. So we're gonna keep this anchored and bend your knees into your chest. Awesome.Good. And now keep this anchored and straighten your legs up to the ceiling. Good, rotating the knees a little bit, good. Squeeze the circle. And instead of going that way, pull your belly in and touch my hand here.
Good. Keep your belly and let the legs go a little bit away and then touch my head again. Yes, and down, that's it. And then up to here. Yes, see between my hands right here.
And pull. Where is your belly? Get your head up and look at your stomach and pull it in, yes. One more pulling it in and bend the knees and rest down your neck and head. It's hard.
Was that hard. Yeah. Did that hurt your back? No. No.
So we stayed in a very small range of motion really anchoring your lower back. And really we're able to pull your stomach into it, because that becomes easily a leg exercise, which forces your back to arch, and that would only hurt it for you. Yeah. So we're changing it around into a hip and stomach exercise instead of a quad and back exercise. Okay, yup.
Very different. So now we're gonna do also another exercise that's a lot of red flags would be going off, and that's the crisscross, because it's adding twisting. Okay. Okay? But we are not gonna twist anything from the bottom of your rib cage down, okay?
So we're gonna put your feet down for a second, mm-hmm. Good, and we're gonna put this between your ankles again. Okay? So the crisscross is like a bicycle, a traditional bicycle exercise that people would like hit as many elbows as they can, get a hundred in a minute. We do it where we keep a plum line down the middle of our spine and we twist around it as far as we can and we take our time and it's agonizing than a lot of strength building.
But we're gonna keep the range of motion a lot smaller. Okay. Okay? We're not gonna move anything from here down. And how we're gonna know that we're not moving anything from there is we'll have the circle between our legs.
And when you move anything from down here, it'll look like you're driving a car. Okay. Your feet will move, your hips will move or one will come towards you or the other one, and that's no bueno for your back, okay? So the circle is gonna have to stay absolutely perfectly still so that you get the work in your upper stomach, not anything down there. Well, it's gonna work, 'cause that's stabilized, but it's not gonna hurt.
Does that make sense? Yup. Okay. So we're gonna put your hands behind your head again. Good, and we're gonna pull your belly in and we're gonna keep your head down for a second.
Criss Cross
We're gonna lift the knees up over. Good, good. And I'm gonna come up here just to have a little more view, good. And you're gonna press the circle with your hips. Good, and you're gonna pull your belly in and lift your head and shoulders.Good, scoop it in. Awesome. This is now not gonna move a little bit right here. There we go. Okay, I'm gonna let go.
Okay. And let's see already is your one side, there, it's a lot of work already, okay? Staying there, just take your right elbow to your left knee. Ah-ah-ah-ah. Do not move that circle.
Pull your belly in, so this guy came to you. Okay, pull your belly in and just your elbow to the knee. Better, come center, I know it's tough. Pull in and the other elbow. Oh.
It moved? It did. (both laughing) Come on up a little bit, good. You're just used to part of the choreography of bringing the knee to your, so don't bring the knee towards you, press with your glutes, and up, you go up to, yes. And scoop in and come up, hold.
Hold, can you? Sorry. Hold. Hold. Come center.
Pullin' in just one more set. Come up to the, up, that left knee away, right here. Now come up to to it, hold, excellent. Come center, last one. Good for you.
And rest down. And now hug your knees into your chest. So like I said, that one normally would be have like, ooh, all kinds of danger, danger going on. Right. And we wanna take that danger out.
Okay. Okay. How did it feel? Good. Good.
Was it hard? Yeah. In your upper belly? Yeah. Okay, good.
All right, 'cause we're gonna get you dancin' again, remember? So we gotta move those ribs instead of it all being a block. Yeah. So that was a twisting your ribs rather than your herniated lower back. Okay.
Does that make sense? Yeah. Okay. So you sat up, was that okay? Yes.
That didn't hurt you? No. You can always roll to the side or whatever you need. No, that was fine. Okay, we're gonna straighten your legs as straight as you can.
Open them to the side all the way to the edge. Mm-hmm. And we're gonna try to put one hand over the other, see if we can pull out belly not just in, I'll move it in a second, but it's gonna lift up. So we're gonna bring it just here so you can sit. Shoulders directly over your hips.
Spine Stretch Forward
Excellent, good. And you're gonna, do you feel your sit bones in the mat? Mm-hmm. Good for you. Good, that's what I want.And then you're gonna draw a line from one hip bone over the other and they should be over your sit bones, okay? Excellent. This you really wanna know because when we'd lie on our side in a second, that's super important how that alignment goes. So I want you to pull your belly in. Lift off your bottom.
And then when you pull your belly in, I want you to try to pull up from my fingers as your head goes down to that circle. Squeeze that circle down, but lift, lift, lift, and come up to a tall back again. Great. Pull the belly in one. Squeeze up off your bottom.
Yes. And lift, lift, lift. And come in, that's right. One more. Sit a little more in your right hip, the other hip, uh-huh.
Good. And pull the belly in. And we're gonna press down as we lift up from my fingers. Come on. Up, no, not your chest.
Your powerhouse, up, up, up. There you go. And rest. Switch hands, we're gonna do three more on the other side. Viola, did you switch?
Yup. And squeeze, draw the belly, ooh, that's such great engagement, drop your shoulder blades. And we're gonna pull in, in, in. And come up. Two more.
Squeeze and draw the belly in and reach, reach great. This in and up is so good. We're gonna see it again on the reformer next time. One more time. Squeezing up, scoopin' in and lift, lift.
Can you feel the belly pulling in to your L5 and then trying to pull up from it stretching? And coming up. That's a hard feeling. It's a hard feeling. So we're trying to not just pull in to it but like as if they're coils stretching away.
Nice job. Okay. We're going to lie on your right side facing that way. And we're gonna slide back to the back edge. Perfect hips, take your shoulders back another inch.
Good. And you're gonna bring your feet forward a little bit. And we're gonna put the circle between your ankles. You're doing great, Tara. How are you feeling?
Great. Good. And now we're gonna bend your right elbow and put your head on, yes. Excellent. Good.
Side Leg Adduction
Yeah, I want you to stay there and I just want you to stretch here a little bit. Yeah, stretch you out. Didn't that feel a little better? Yeah. (instructor giggles) And that is true.When someone's hands are on you, they can really get you in the right positions. Yes, so I'm forcing this hip to be over this hip. It was wanting to hike, so we're gonna keep it there. Good, and you can use that hand as a kickstand. We're gonna, from this hipbone we're gonna use those barbershop holes that you've heard me say so much about, good.
Now we're gonna try to use those muscles to pull your belly in, squeeze down the circle for five counts. Hold it down, hold it, hold it, hold it, hold it, hold it. And release, good. Squeeze down and hold. Hold the belly and squeeze.
Great, good. We're gonna do three more but something I'd like you to also throw in there is posture work. So I want you to look straight ahead. I want your hand to be behind your head as if when you put both hands behind your head and kinda lengthen your neck. Mm-hmm. Good.
So now the crown of the head's going that way, beautiful. Again, that hip hiked a little bit. Very good. Turning that leg out. So this time we're gonna pull in and squeeze down.
Squeeze down. Hold it down, and while it's squeezing down, try to stretch your spine that way away, away, away, and release, good. And pull the belly and squeeze down and feel your spine nice and long. Really good. And release.
And one more time, stomach in, squeeze, and see if you can feel that belly pulling in and up. And release. Excellent. Good job with these muscles. We're gonna bring this leg down, I'm gonna put the circle on the outside, and very good.
Side Leg Abduction
Rotating that knee up a little bit. That's it, good. Excellent. And we'll see if we can regain that feeling again. So you're gonna, good hip line, pull the belly in.Use this muscle to stretch up that circle, and as you do that, grow taller, grow taller grow, grow taller, yeah! And release. And pull the belly in. We're gonna do that two more times. Use the outer thigh right here. Can you feel that muscle?
A lot? Good. And release. One more time. Scooping in, pressin' up, ooh, that was your best one.
I find this pretty delicious that it feels this, yeah, stretch of that back. Good, and move down. So we're gonna take this away and leave your legs there. And we're gonna do the same thing but without a circle. We're gonna use these muscles.
Side Kicks
We're adding sidekicks today, okay? So we're gonna keep those hips here. We're gonna lift this leg up here, good. And the first thing you're gonna do is pull the belly in and you're gonna get taller and longer and longer. Mm-hmm.And then this leg wants to try to pretend that it could be longer than your bottom legs. We're gonna rotate it a little. Okay. There so that the heel points more down than here. Yup.
And we're gonna pull your belly and we're gonna reach out of that hip. Feel that length. So that's touching the wall behind me and it's gonna keep trying to, don't let your pelvis move, the pelvis stays. Your leg reaches out of it as forward as it can for one, two. It keeps this rotation as it reaches long.
Now here it's as if you're standing, okay? You're standing on that leg. Okay, yeah. We're gonna take the leg a little bit behind us but you're not able, allowed to roll on to your, instead you actually really wanna feel your hamstring and glute like crazy. Okay.
Don't move that pelvis. Don't move those ribs. Just squeeze that to lengthen, so good. So that little range from here to here could really hurt your back if you did it incorrectly. Yeah. Okay?
So we're gonna do five more. I'm gonna let you do it. You're gonna go forward and do a little double one, two, and then take it back to where you're standing. And this is gonna stay here as you work here. That's it.
And forward. We do one, two in the back? You can. Okay. Add.
You really want it to be more lengthened stiff. Reaching. Good. The only stiff thing I want is your stomach. And two more.
That has to stay rock hard, but this is all can reach and lengthen. That's it. One more time. And reaching. Awesome and then legs together.
Now we're gonna go up and down. Okay. Okay? We're gonna keep strengthening that. So I want you to stay here and we've got your mic packed but can you hold your hip like that?
Side Leg Lifts
Yes. Good, 'cause I want you to really feel this muscle. Rotate that knee a little bit, good. Pulling the belly in, you're gonna lift this leg up as high as you can without moving that hip bone. Up, up, up, up, up, awesome.And now squeeze my hand down. Turn the knee up. Uh-huh, and press me down. Yes, and up. Yes, and then squeeze me down.
Good, now stay here. Did motion perfectly but I know you can pull your belly and grow taller and get that delicious feeling. Okay. Okay. So we're gonna hold here.
Push that leg up. Up, up, up, good. And then as you squeeze, I'm pulling and grow taller. Oh, that's good. And you got it to actually got into joint.
And you're gonna go up, the click, and you're gonna come down. Rotate that knee please. Reach it out. So you're gonna feel (blowing). Good, and one more.
Can you get those ribs in? Thank you. Thank you. Very good. Stay here, lift a leg just a tiny bit.
Perfect, and five little circles. One, two, three, four, five. Go the other way. You're like, what am I doing, but you did it perfectly. Don't circle the back.
Side Leg Circles
Oh. And excellent. Could you tell a difference? Yeah. It was really good.Very good, okay. And now we're gonna roll to your other side but be really careful, okay? So you're just gonna roll on to your stomach and then just keep rolling over to your other side. Was that okay? Yup. All right.
Okay, so we're gonna bring your legs forward to the front edge. Uh-huh, and then I want your seat to touch my hand. Good, good. You're perfect, great alignment. Love this, good.
All right, bring the feet just a little more forward, that gives you a little extra stability just like when you're on your back, I don't like your legs go too low. Right. So it's the same thing. As you get more advanced, your legs can go further back and that'll be more challenging. But we wanna make sure we are really training our powerhouse correctly.
So good. So this hand's gonna go here and your stomach is in. We're gonna lift that right hip. This is our hip, right? We did the left leg first to kind of give you an idea of what it should feel like.
Side Kicks
Mm-hmm. And this is your hip that likes to give you problems. This is your hip dysplasia, right? So you're gonna keep your hand right there. In fact, make sure you feel your stomach is pulling away from your hand.Yeah, you could do it like that or it could be flat on the mat. But never let your stomach push in to your arm. Okay. Rotate from that hip bone. Get those barbershop poles working.
Super important, right? And you're gonna keep your belly in while I give you a little pull 'cause we want this length. We're gonna keep your pelvis there as you take the leg forward. Don't let me pull your pelvis. The right hip stays, right, uh-huh.
And you're just gonna stretch, one, two. Everything okay? Yup. And you're gonna keep pulling your belly in. And we're gonna go TO standing.
Right here it's tempting to roll forward unto your chest. Yeah. You're gonna keep right there and just squeeze the hamstring and glute a little bit to go back with the leg. Yup, one, two, really good. You all right?
Yeah, I'm not gonna fall off. No (laughs). And going forward. Only I'm allowed to do that. Not my clients.
And one, two. And you're gonna go to where you would be standing. And now don't change anything from my hand up, just squeeze this, straight back. One, two, perfect. And go forward on your own.
Knees starting to roll in. Mm-hmm, no energy in this foot. Yes. Stomach pulls out like forward. Turn the knee up a little bit, uh-huh.
And squeeze, two, good. Stomach, reach that leg longer. Reach it. Yeah, and keep it turned out a little. Uh-huh! Excellent, one more, scoop your belly in.
And squeezing, it's squeezing, good. And legs together. Was it clicking the whole time? No, just once. Great.
Awesome. Very good job. Okay, so now we're gonna do goin' up, up and down. So the hips have to stay stuck. You're gonna put your right hand right here, so you feel that hip stay a little higher.
Side Leg Lifts
So you're gonna-- Feel that? Yeah. Good. Turn the leg out a little bit, good. And we're gonna push up.Good. And as you squeeze down like a thousand pounds, you're gonna pull your belly and then grow taller. Ooh, I like that. And up. And pullin' in, squeeze me down.
That's nice. And up. And pressin' down and pulling in to L5 as you reach out. Yeah, two more. Good outer thigh.
And pullin' in and squeeze down as you pull in and one more time. Up with that out of the thigh. Great job. And pullin' in. Good, now you can put the hand right in front of your stomach.
Hold that belly in and circle this leg five little times reaching it longer every time. Three, turn the knee up a little bit more. And go the other way. One, stomach. Three, two, one, and down.
Side Leg Circles
Great job. Lie on your back and bend your knees and we'll do one more exercise here before we go over to the Wunda Chair. Okay. Those exercises are also a little bit worrisome, but you really held it like you're a weightlifter's belt and supported that back, and that's gonna really help your hip and your legs if you can keep practicing it with those cues, so good. Nice job. Thank you.
Teaser Prep
Good, all right. Okay. So I'm gonna be up here for assisted teaser. Good, and then if you were doing this on your own like you've been practicing, you can put your feet up against the wall. I don't know if I told you that but you can rest them on the wall at this angle or a little lower is fine too.Okay, and then when you do that, you wanna feel the hamstring and glute like you just did when you were takin' it just a little bit behind you. Okay. You could even practice right now pushing in to my thighs a little bit from those muscles. Okay. So that's what should hold you, not the front of 'em.
Oh. Yeah, it's tough. None of these should work. It's gonna be more from here. Okay. Okay?
Relax for a moment. Okay. All right. But straight legs, yes. All right, give me your hands, awesome.
The most important thing is that you use me to feel your belly pull in to each bone and to stretch you, okay? Okay. So you're gonna inhale, lift your head up. And then stay here and just look at your belly and exhale into the mat. Exhale, exhale.
Like let it hang. Let your spine hang into the mat. Oh, such a difference. You changed your energy. Very, very good.
Take another breath. And as you pull in to your back, I'm gonna pull you up. Great, so beautiful. Take a breath. And now you're gonna hang into your lower back.
I want you to pull in, good. Good, good. I want you to almost picture. You're trying really hard to stay to that side, that's good. I want you to almost picture like when you're going down you can pull that herniation back into place.
Mm-hmm. That's what I want you to picture, okay? Okay. Takin' a breath, inhale, look at your belly. But then exhale, relax, and hang in to that mat and that upper body, good.
Take another breath and then draw specially into your lower back and round up, yes. Beautiful. Take a breath and exhale, round down. And you can feel yourself squeeze the seat a little pushing into my legs, yeah. Pullin' in.
Good, good. Now here you're goin' quite a but left. Are you trying to go a little left? No, I don't know what that was. All right, that's okay.
You did. Yeah. Yeah, and relax, that's fine. And we're gonna do it one more time. Inhale, lift the head.
And then exhale, drawin' it so good with your stomach. It's really working. Take a breath, squeeze your bottom. Mm-hmm, and then exhale rolling down. We're gonna keep going a little right with the ribs.
Yup. Beautiful, beautiful. And we're gonna draw the knees in. Did you feel your stomach pull in? Yeah. A lot?
Oh yeah. Good, because we're gonna do table and the pull up right now. And we're gonna want your stomach to feel just like that in the pull up. Okay, let's go to the Wunda Chair. All right, so we're gonna do the table on the Wunda Chair and it is really, really challenging, but it's super great 'cause you learn different things about your muscles.
So one of the exercise that you have been workin' on is the bridge where you have the circle between your inner thighs, and I make you roll up one bone at a time 20 pumps and then roll down. So this is it on a Wunda Chair. I'm gonna demonstrate it first. Okay. And then you can do it.
Okay, it has one spring in the middle and one spring at the bottom. This exercise is pretty much always done on those springs but it's a very interesting piece of equipment that as the springs get lighter, exercise gets a lot harder. It's not like, mm-hmm, trying a brute force is actually all you that has pull it up and pull it together, okay? So when you're on the mat, your feet are parallel. And you can have them parallel here but I think I'll have them Pilates stance, okay?
And so there's not much, the spring load, see I could really push it, right? So when you're on the mat, we may push in to the mat with our feet a lot to lift up our body. Mm-hmm. So this guy is gonna ask you not to move the pedal and it will let you know if you do. So it's a little mean. Yeah.
So you're gonna put your hands here, okay? And you're gonna slide your bottom towards the front edge, okay, just so that it's a little less, a little easier to get in to. And then we're gonna try to make a table. That's what's called table, from our knees to our shoulder. When I imagine a table, straight line, I don't hit it, so I try to think of a rainbow so that I could get even a little higher, and even that I'm a little shy.
So I'm going to not push down the pedal. I'm gonna pull my powerhouse in first. I'm gonna squeeze my seat, maybe more in my head than anything but I'm gonna send a message to those muscles and then I'm gonna start lifting up my seat until my bottom was all the way up, and then I'm gonna come down, okay? Oh man. I think I'm gonna switch the springs for you to one top, one bottom.
But that's what I'm gonna want you to do, okay, we're gonna squeeze and we're gonna curl up, and you're gonna try to make a straight line and then if you feel good, we might push down the toes, not the bottom. Okay. A few times and then come back down. Okay. So let me give you a little more help.
I don't want to be too mean. (Tara laughs) Okay, so just go ahead and sit and face that way. Okay. Good. And you're gonna put your toes.
Yep, good. And then you're gonna, hands are gonna go behind you. Perfect, and you're gonna shimmy your bottom forward. Excellent. Good job.
We're gonna try not to hyper extend those elbows. Mm-hmm. Okay, so you're gonna pull your belly in, number one. Squeeze your bottom and then we're gonna lift, lift, lift, lift, hold. Is it hard?
Table
No. It's not, and then you're gonna come down. You're helping. (both laugh) Well, I love that. My hand placement helped to trigger those muscles and initiate it, awesome.So we're gonna squeeze, heels together, good. Squeeze your hips, draw the belly in and coming up. Up, up, awesome. Now see if you can hold this here and push down at the toes and then pull it up, mm-hmm. And down and up.
Nope, the pedal. Couple more pumps. Pumping, ooh, yeah, good. Lifting here. Mm-hmm, lifting here.
Good, there, pull your belly in more. And four, pull the pedal up. Pull the pedal up, two, one more. And go ahead and sit down. That was really good.
Good. Nice job. Maybe another time we can do it one-legged. So we'll get really good at this and then you hold one leg and you make sure the hips don't do anything. Carefully step off forward and you're gonna turn around.
So we're gonna stand facing here, but you wanna have your toes on the floor 'cause the pedal will come all the way down and smash your toes. Okay, so we're gonna reach your arms up to the ceiling. We're gonna do one more exercise here, good. So right here we'll just work on your posture. You're gonna bring your heels together.
Good, excellent. And toes apart for nice solid foundation. You're gonna squeeze the hamstrings and glutes. Oh, that's good. You're gonna have your weight a little on the ball of your foot.
From this line to this line, what are you gonna do? You're gonna pull your belly in, right, scoop it in, good. Now you're doing everything great from here down, but you're taking your upper body behind your lower back so you gotta lean this forward. Oh, forward. Uh-huh, uh-huh, good.
Keep that there and your belly in. And can you squeeze your bottom forward? Forward? Forward. Yes, this is a nice line for you.
Okay. Okay? That takes it out of your lower back that you're doing in. Keeping your belly in. Start rounding forward, taking your hands forward.
Pull Up
Yup, take this bone forward. I'm purposely not letting you push your bottom back. And you're gonna rest your hands on the mat. A little in your business but I, and then you're gonna put one foot up on the pedal. Which one? Any one.And we're gonna bring it all the way down. I'll help hold it down while you put your other foot up there. Oh. There we go, good. And you're gonna take your toes back just a tiny bit, heels together, maybe a little narrow with the toes, good, and walk your hands forward to the back edge.
Awesome. Remember that rainbow I was talking about? Okay, so I want you to try to get that rainbow right now. Round your back into the shape of a rainbow. Beautiful, good.
You are doing it perfectly, your belly's in. Only problem is that if you try to pull the pedal up right now, which is what the exercise is-- Gosh. You couldn't, because your center of gravity, all your weight's on your feet, holding the pedal down, okay? So we're gonna get back into that rainbow, pull up even into here and we're gonna bring our weight forward, okay? You now straightened out.
Can we round our back again? What's gonna have to happen, you're gonna have to squeeze your bottom, curl your tailbone under you. Awesome, good. You're almost in position, but your center of gravity is now here so you have to have your shoulders right over your wrists, good, and we're gonna widen this a little bit, awesome, and give me that rainbow again now. Oh, now we're talking, but you came back a little, come forward, hmm.
Curl that tailbone under you, awesome. Okay, stay here, Tara. This is so important for you. Taking a big breath, squeeze the heels together and exhale. Just pull your belly away from me, good.
Stay here, yes. Taking a big breath, I want you to exhale, scoop in, yes. And we're gonna hold our belly, and do you feel your belly pulling in right here? Mm-hmm. It's doing really, really good, okay?
You're gonna be able to pull your weight in here if you keep thinking of it like that, okay? And I think we're gonna end on this exercise because this is a really, really important one today. So no big chair today. We're gonna visit that another time. So you're gonna squeeze those heels together, which might squeeze the heels, and let's show everyone how much you can round your lower back.
Come on, come on, yes. Good, good, good, good. Take a big breath. On this next one, you're gonna pull in and we're gonna come up with the pedal. Pull your lower belly in-- (Tara laughs) I can't. You can do it.
Pull your lower, uh-huh, uh-huh, uh-huh, uh-huh, and now control it down. I'm here to help you with the fear factor. (Tara laughs) And you're gonna exhale. Draw the belly in, awesome. And now keep pullin' in, oh, that's good, keep pulling into your back.
Come on, come on, come on, more stomach, yes. And down, good. Can you lift your heels up a little bit? Mm-hmm. I'm gonna come on this edge now, okay? Okay.
So you're gonna tuck your head between your arms and I want you to round more. Curl your tailbone under, yes. Squeeze your bottom, good. And you're gonna pull your belly in and come up on that exhale. Up higher, higher, higher.
Now curl your tailbone under right now and push your toes down to go down, yes. And we're gonna come up one more time. I am working you, girl (Tara laughs). And you're gonna squeeze, oh, that's so good, and you're gonna come up. Stay here, lower just an inch, and pull your lower belly in to come up an inch.
Curl your tailbone under. You can curl it. Come on, curl, yes. One more, pull your belly into your lower back and go down, lengthening down, down, down, so good, stay there. Don't come off, don't do anything 'cause we need to be safe.
Let's go ahead and take your left hip to the floor, okay? Other left foot, foot. Yes, I should've said foot, good. Stay here. This guy is hikin' like nobody's business.
Square off your body. That's why we put the left hip first so that we strengthen this hip as the pedal comes up. It has to work every time like that, square. It doesn't get to take a break here. And then there, good.
Pilates stance, good. Now walk your hands back to the front edge, awesome. Keep your head down and your head between your arms, squeeze, awesome. This is your ending. This is how you're gonna take away for the day.
So I want you to pull your belly in and take your weight slowly off your hands as you roll up. Curl your tailbone a little bit under you just so that you're pushing forward with your seat. Stay here with the upper body and lift your hands forward, pulling in, and lift your arms up from here, arms up towards the ceiling, staying here. Are you okay? Right here, good.
Keep this in. Turn your palms out. Keep your weight a little forward on the ball of your foot, yes. Take a breath and push me down, good. Take a breath.
And now exhale as your belly pulls in even more. Beautiful. And now you are ready for the rest of the day. Good job. Nice work. Good.
Back Care: Back Care for Beginners


Comments


You need to be a subscriber to post a comment.
Please Log In or Create an Account to start your free trial.
