Description
About This Video
Transcript
Read Full Transcript
Hey everyone. Welcome back to class. Thank you again for being with me today, whether it's morning, afternoon, evening, or the replay. Thank you. Thank you so much. And coming to Move with Amy. So what does that mean?
You never know what I'm going to do, right? There's always something a little bit different based on all of our wonderful Pilates principles. Last week, we took a kind of basic, kind of a quiet session. Today, maybe is going to be a little bit more movement. I'm thinking weightbearing today, so a little bit more weightbearing on our hands when we're in front and when we're in the back and when we're on our side.
So, let's get moving. I want everybody to start with your feet apart. Okay, and just softly bend your knees. And let's just get a little bit of kind of easy, kind of pulsing, getting into those larger muscles in the legs. Just getting some blood pumping there.
Yeah, no real technique to do this except for tracking of your knees. Right? So (indistinct), they're not going in, you're going out over the second toes a little bit. Okay, and then just a little bit of side-to-side with your hips, just loosening things up. Yeah, so for some of us, you know, that are moving in the morning, like me and many people here, we're waking up, we're getting, you know, blood flow and heat into the body. Some of you, this is the end of your day.
So you need to kind of wind it down or get the ya-ya's out, from whatever happened during the day. So just kind of do what I'm doing if you like, and I'm just moving my arms a little bit, swaying. Yeah, just don't don't really think about it too, too much. And then we can pause right there. Okay. Let me stand to the side.
And what I want everybody to do here is again, stand with your feet apart, bend your knees. You'll be able to see me better from the side view. That's why I'm standing this way for the first part. So if we all bend our knees and get your hands right on the front of your knees here, okay? Yeah, like at the front of the knees, and then align yourself into a neutral spine.
So those nice, easy shoulders that are back and down, that abdominal wall that's in and supporting your lower back and the SI joints, all of this region here, and then feeling that energy in this elongation from the head and the tail. Okay, so we've got that wonderful long extension line which we do a lot and we'll come to that several times, but let's move from that extended line to flexion, but let's do it from the lower back. So let's breathe in together, and I'm thinking to come mid-back to tail and yeah, tail. Curve that as much as you have right now and then elongate yourself back to neutral. We'll do that about four more times.
Exhale into mid-back to tailbone flexion and inhale into extension. And as we're doing this lower back c-curve, we want to keep the upper back in its alignment of extension and openness through the chest. We'll get to thoracic flexion in a minute. See if you can get as much in your lower back, right? I'm going to need more than five.
So stay with me here. This is number five. Yeah. I'm going to go three more. So let's take it in sets of eight. Okay, so make these last three really trying to elongate the quadratus lumborum muscle, the lower back extensors, flex those and extend. And two more.
C-curve. This is one of my very favorite things and most challenging things still in my Pilates practice, and I know some of you feel the same way about your own back, because you tell me in the forums. Okay. And so it makes rolling exercises really hard, right? Because we just have to get through that spot in our back, but, okay, going back to it, let's add. So let's take our flexion, and we're all doing beautiful work.
Now take it into upper back. So the whole, and maybe the neck too. So we've got a whole back that's in flexion. Yep, stay in the lumbar flexion and just re-elongate the upper back, inhale and exhale. Re-flex the upper and neck, upper back and neck, while you're holding that lower back in your c-curve and then extend through the thoracic, okay?
Couple more only with that, so we'll take four of this one because I think it's easier for everybody to flex their upper spine and neck. Okay. Hold this when you've got a nice c-curve everywhere. Take your hands in front of you. I've got my hands clasped and I want to just almost imagine I'm pressing something away lightly with my hands and really holding that abdominal wall in and back; feel how that nice centering on your feet and your tripod, replace your hands on your legs. Extend the spine from the tail all the way to the head, so we're going to add a little pattern here, guys.
Get to neutral. We'll inhale. Exhale first through the lumbar spine, inhale again, exhale through the thoracic spine and head. Stay there, now extend just the lumbar, tail lumbar, mid-back, and then carry it all the way through the upper. Inhale. So it's lower c-curve first. Second, upper back c-curve second.
Lumbar extension, then into thoracic extension. Twice more. Kind of warming up that whole beautiful spine. Inhale, exhale, extension, into extension. One more. And lumbar flexion into thoracic flexion. And lumbar extension, thoracic extension.
Let's come all the way up to standing. Good! Be a little warm. You can walk to the back of your mat. Raise your arms up just a little bit. Stretch. Just one real quick.
One inhale, exhale, rolling down. So let's start moving more. Now, as you're walking out onto your hands, take your time. I do want us to stop when we get weight on the hands. Weight on your feet.
You're not quite in up stretch, you're not quite in down stretch, you're not really in elephant. You can think of all those names if you want. What I want us to feel is where the weight is. The weight is on the feet and the hands. Spread your hands open.
Try to spread your toes wide. And then just pause here for a minute. Can you just be your little detective inside your own spine? If you need to extend somewhere, do it. If you need to flex somewhere, do it.
(Amy exhales) Okay. Good, now keep walking out into your plank, lower the hips. See if you can keep that, whatever you did, if you needed extension somewhere, if you needed a flexion somewhere, keep what you did, 'cause most likely you need it still here. Okay? Told you we'd get into weightbearing. So adjust your shoulders.
Now let's go back to where we just came from. So you need to walk your hands back, just a couple steps. Get your heels flat and see if you can reconnect to what you did, your extension or your flexion somewhere. Okay? And walk your hands back to your feet. We're going to do it all one more time.
Bend your knees to roll up if you'd like. Here we go. No need to take the arms up. Take your breath up. And let's roll forward, head, neck, shoulders. All right, now, this is abdominal contraction, so, you know, we may not do all the standard ab work, so do some in the standing roll downs and things. Same thing. Pause on your hands and your feet.
Do you need to flex your spine? Do you need extend your thoracic a little bit? Maybe you need to flex your lower back a little and extend your thoracic. In fact, let's all do that just real quick, check that out. Can you flex your lumbar spine a little bit?
And then extend your upper back a little bit? And keep doing that as we walk onto our plank? So by the time we get to our plank, long stretch, we've got that beautiful harmony of support, lumbar, which for me feels flexed but it's basically long, right? And a thoracic extension. Place your knees down.
Shift off your hands, keep looking at your fingertips, though, please, keep looking at your fingertips, reach your hips as far back from your hands as you can. And shift your weight from side to side, let's try not to, you know, park it and, like, rest in rest pose. We're moving, we're in our bodies. So I want you to sway across your shins, let your rib cage kind of translate from left to right. You're breathing. Four, my tummy just growled.
Three, two, and one. And we'll come up into an all fours quadruped position. Yeah! Probably the same cues for some of us. Elongate that lumbar, which may feel flexed, and some of us may need to extend that thoracic spine. So let's just hold for a moment.
We're not really stopping, but we're in a position. So we can really focus on the external rotation of the upper arms, how that connects into our upper back for strength. I want everyone to bend their toes, tuck them down, and just kind of tap those toes so you know for sure. Yup, toes are down. Let's stand on those toes, hover the knees.
Now you've really got to pull up into your body, right? Not drop your chest down. You've got to pull up. Let's go. Pick up your knees. And you're just going to hold it, holding it. Your arms are helping you, your legs are helping you, but that support of your tummy, that support of your upper back is holding you.
Set your knees down without changing that support. Breathe in. (Amy inhales) Let's do it again. Exhale, hover the knees, hold your stomach in. Still lengthening and extending your upper spine.
You don't have to think swan so much, but just not flexion of your upper spine. Set the knees down with control. Two more. Inhale, exhale. Keep those arms externally rotated. Yeah, guys. Hold, hold, hold. Very strong.
Lower the knee. Inhale, one more. And it's like a whole body exercise, isn't it? Yep. And release. Take your toes down. Shift off your hands. Bend your elbows.
And now kind of head can come a little bit lower. We're going to go into some more cat from here. So I need to kneel back a little bit, so I want to really extend those arms forward and knees can be open, everybody, you can go open. So we're going to, this will be a slower movement flow here, still working that idea of flexion to extension in certain segments of the spine. Why am I doing so much of this?
It's going to help us when we get into those bigger weightbearing (indistinct). Okay, breathe in. So if we start the flexion in the c-curve, lower back, let's go for it. Take your time. The upper spine is still in flexion as well, but I'm emphasizing my lower spine.
I'm continuing to emphasize my lower spine in flexion. So we don't hinge and just dump that lumbar spine. Okay? So keep that there. We're kind of in down stretched from the reformer and now let's go for that thoracic extension we did in the standing warmup, whatever you have, breathe into it. We're going to go back with lumbar flexion, thoracic flexion, cervical flexion, and take that all the way back.
One more exactly like that. Breathe in. And just nice to kind of syrupy, right? Nothing too fast. Here we go. Lumbar flexion. I'm trying to really lift that spine, the backbone, skyward, wide skin, wide back.
Okay, this is kind of pivotal, as you're getting lower or more forward, keep the integrity of that lumbar security. Right? So you're kind of in flexion; it feels like it. Although it's moving toward extension. You all know what it is, I think. And then now comes the sternum and thoracic extension.
Right? Maybe you have a little more. If you think of tailbone under, you might be able to lift your sternum higher. Okay. Now let's reverse this. Let's go head first in de-flexion. Thoracic flexion merges right into lumbar flexion, all the way back, okay?
Choose the one that felt that best for you. You may not remember that they were slightly different. Breathe in. (Amy inhales) Here's our last one of this. I'm going to think lumbar fluxion.
The whole backbone of me is lifting to the ceiling. That's what I'm thinking: the whole backbone. The farther forward I come, some of that backbone is getting closer to the earth and that's my lumbar. But I'm not thinking that, I'm thinking extension. Here comes extension through thoracic.
Open your chest broad, everybody. Keep your legs tidy. Keep them active. Look now, hold here. Can you look over one shoulder? Yes you can; do it. Look over one shoulder.
Bend whatever you need to do to look back to see that foot. Okay? You know I do this a lot. Come on up. Change sides, adjust your hands if you need to. Look over that shoulder. Whatever you need to do to look, to see the foot.
You probably need to bend a knee. Your body rotates a little bit, very natural. Let's come back to that position. And then flex of this whole spine, come all the way back. Good, a lot of weightbearing early in the session here, so just do what you need to do with your wrists.
Kind of leaving it up to you for some of those, a little do what you need to do's, okay? Let's come down on our back now, guys. That'll feel fun. Come on down. Bridging, of course. It won't be basic. Let's add some spice and pepper to it.
Okay? So arms long by your sides or out to the sides. How about that today? Maybe that's what we should do. Open the arms a little bit. Palms face up. Keeping the theme of external rotation of the shoulder.
Heels close to the sitz bones, curl your way up. Yeah. There's that lumbar flexion to extension. Same things, through an extension in the thoracic. Inhale, rolling down from the sternum, ribs, lower ribs, lumbar and sacrum. Twice more plain, inhale. (Amy breathes deeply)
Trying to identify if there's any sticky segments. And if there are sticky segments, take your time and kind of move through them. You can do your own, do your own thing there, okay? Now one more to go, plain, up and down, all the way. Rolling, rolling, rolling. Lifting up, inhale.
And I'll come down again, all the way down, down, down. So next little sequence I'd like us to do is bring ankles together, knees together, lift your hips, but maybe just about halfway up your spine, everybody? Certainly not the whole bridge. Take one leg and lift it to the ceiling. Okay. Just add a lot of energy up.
Now has your pelvis shifted? Hopefully not. You haven't rotated. Re-curl your tail please. Re-curl that tail so that you're not hanging on your lower back. Let's take the pelvis down to the mat, down with the pelvis. Up with the pelvis. Five of these.
And down; you're going to need some glute strength in a minute for a couple exercises, so we're getting it here. Down and up, with a curly tail. Two more. Down and up, with a curly tail. One more. Down and up, and then re-bend this knee, set it down. Everything can come down.
You may need to readjust everything. Breathe in. Same thing, pick up your pelvis. Try to keep lumbar flexion or curly tail. Same idea, for me. Other leg comes up. Lot of energy up.
Lot of strength in the standing leg pressing you down. Here we go. Whole pelvis down. Curly tail. And lift. Five times, lower, exhale and lift. And lower, exhale and lift. Twice more, nice square hips.
And up, and last one down, and up. Re-bend the knee, set the foot down, and then roll all the way down your spine. Nice, you guys. Take your breath in through your nose. Exhale, let's lift head, neck, and shoulders. Let's go ahead and do some curly moves.
If you need your hands behind your head, you can do that. I'm going to take one knee up and down. Other knee up and down. I'm not stopping right in table top. I'm actually creasing this hip very deeply to get my thigh closer to my body, to my chest.
The opposition of my arm is reaching forward, and pull. I'm really thinking that, pulling it to my chest. And pulling it. One more. Keep it in, bring the other one in, double leg stretch. Let's stretch, circle around and hold onto your shins, pull.
Inhale, exhale, around and pull. Three more. When you're having your hands on your ankles, shins, pull them in tight, deep. Stretch your back. (Amy breathes deeply) One more. (Amy breathes deeply) Hold onto your shins, lower your shoulders, and head back.
Place your feet on the floor. One leg comes up to the sky. Cross that knee over the other knee. Open your arms wide in a letter T, like, you know, big expansion across your chest. Rotate your knees. I'm going toward you.
My right knee is on top. I'm rotating left, enjoying a nice side body stretch. Some twist. Let's do a little Ron Fletcher infusion of breathing rhythm. Here we go. (Amy breathes sharply)
I'm pulsing my knees toward the floor. (Amy breathes sharply) Four, three, two. We're going to do another set, you guys, keep going. Opposite shoulders on the mat. And the whole side body is long.
The one that's to the ceiling and six, two more here. Seven and eight. Okay, we're ready to come through center. Leg goes up and down. Second side, up we go and cross. So maybe your first rotation sequence or cycle is mellower, so you can feel it out. So leaning the knees to the side.
I need to be careful of my technology on my hip. Okay. Yeah. And we have inhale, inhale, exhale, exhale. It's not so bouncy. Think about reaching the top knee toward the wall or the other side of your room.
We're going to do a whole 'nother set. So it's (Amy breathes sharply) Opposite chest is open. (Amy breathes deeply) Tummy in. (Amy breathes deeply) And four, three, two, and one, and then come back to center, and everybody just undo the legs. Okay, knees to chest.
Put your hands behind your knees, let's do a little rocking. I know. So you can see it's definitely a different sequencing of things today, right? Never the same for me. So here we go. Let's come back onto quadruped, okay? So do what you need to do to get into quadruped.
We're going to do a little bit of walking, kind of oppositional hand and knee walking. So I've walked, taken myself all the way to this back end of my mat, 'cause I want to achieve four steps this way. I need the whole runway, in other words. Take the runway, ladies and gentlemen. Okay. So hands and knees.
Neutral spine. This is not a race. One hand and one knee lifts up. Whichever you'd like to do, go, lift, take those limbs forward, like a couple inches, you're going to put them down. Other knee and hand. A couple inches forward and put 'em down.
We're crawling. Hand and knee. I know you know that. And set 'em down. Hand and knee. And set 'em down. I have actually room to do two more, how about you? And set them down. And up, and set 'em down.
Now, the other way, whatever hand you just moved down, lift it, and the knee. Walk backward. Woo, it's so weird. Hand and knee. Don't overthink about it, and put it down. Hand and knee.
You're walking back. You're quiet. It's like you're sneaking up on someone. I've done this with my puppy before; she loves it. And back one more time, hand and knee. How'd you do? Let's do it again, ready?
Hand and knee, take a step, pause. Hand and knee. Take a step, pause. Be real quiet. Hand and knee and pause. Hand and knee, and pause. Two more.
All in a neutral spine, but there's beautiful, kind of natural rhythm going on in that spine. Can anyone tell what it is, it's around your pelvis and sacrum? (Amy breathes deeply) Just let it happen. Hand in knee. And hand in knee. One more.
Yeah, guys, good. Pretty natural little stuff. We overthink some of those, like it's not feeling natural. Come back out onto your quadruped. We're going to work into some tricep work now. So I like to keep on here on quadruped, excuse me, externally rotate the shoulders and lower the elbows down.
Okay? Elbows and forearms. And then from here, we'll just lift those up. Now, if you want the easier way, let me just show that real quickly. The less strenuous way, I'm going to say it that way. You do get to shift back then lower the elbows and forearms.
This is not nearly as challenging for the muscles in the back of the arm, but certainly an option. And then you'd return over your hands. I'll show it again. You'd go back, then you'd lower, all the while, the upper spine is in extension. Okay? Or if you don't need that one, you go straight down. You don't shift back. A little more work.
Quite a bit more work in the triceps and the upper back. Kay, and again, elbows down. So the pelvis is right above the femurs and then the knees. So it's not a movement in the hip joint. Okay? Two or three more, guys.
It's the movement is at the elbow joint primarily. Yeah? Keep your collarbone extended left to right. I think one more, we'll be good because we have a few things to do from here. I don't wanna get you too, too burned on those arms.
Okay? So here you go. Now, take one leg back into extension, your leg extension. And just hold it there, okay? You know, I do a lot of this because I think it's healthy for our back. It's also great for weightbearing, so all of us who need that, right?
Engage your glutes. Lift that thigh up. Basic, take it down. We've already done some planks, so we're going to kind of work into a planking thing here, so, okay. Bring it up. And then just bring the knee in. We did three of those. Take your other leg back.
Okay, keep the integrity of all the work in your upper body, guys, three times, lift the leg. So the shoulders are rolled. You've got your upper back (indistinct). So that was pretty easy. Let's pick a little pattern here. So first leg, take it back, lift it up.
Now, open it out to the side, so my left leg is the up leg. I'm going to open it and reach it toward you. I'm going to tap it on the floor. I'm going to arc it and lift it back and tap. Let's do that twice more.
Use those big muscles in your glutes. They're there for a reason. We need to strengthen them. Okay? Use 'em, lift and lower, and lift and return. Other side. Okay, I'm going to move toward you so I have a tiny bit more room for that gesture. So up with the leg, arc and tap to the side and lift.
And return to center. Trying to keep even weight on the upper body, but again, notice there's a natural change that might be occurring of rotation. Don't fight it. Let it happen. Okay, yup. And then we'll add a little pattern.
Here's what it looks like. First leg goes back and up and out. And in, step to it. Go to plank. Hold, set the first knee down. Pretty easy pattern. Second leg is ready.
Lift, arc, touch it out to the side, lift. Put it back for your plank. Ready? Step into plank and hold. And that same knee comes down. So we can do a little more rhythm.
We can lift, touch, lift, foot down, hold your plank. First knee down. Second leg is ready. And it's up and open and up, touch down. Hold your plank. Second knee down. One more each side. And up, and touch.
Good, and a plank. And down, second leg ready. Touch, lift, back, and hold your plank now. Hold, hold, hold, hold your plank. Lift those hips up. I'm going to walk onto my mat. I want us to rewind our brain when we are near the beginning of class and I said put your hands down and weight on your feet.
Let's re-go. Get back to that. Weight on your hands, weight on your feet. If you needed to flex your spine to feel connected, maybe go there. If you needed to extend your spine to go there, right? Good. Come on down and rest.
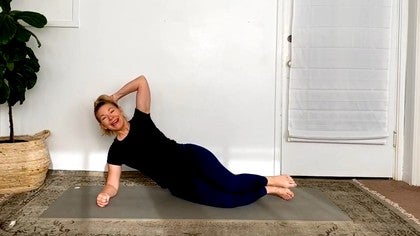
Okay, so we're going to go on to some side work now. Let's go first really long on the mat, just flat. Get the side body really ready and then we'll come up for some weightbearing, okay? So stretch yourself out. Legs in line with pelvis.
Bottom arm can be long. If you have a pillow nearby and you know yourself to need a prop, you can put that right here. I'm actually going to bend mine, everybody. Two reasons, it helps me support my neck and it also protects this microphone, so I don't knock it on the ground, okay? Let me just double check that it's still where it needs to be.
It is, okay. Legs long. Spine long, waistline long. We're ready. We don't need this arm on the ground. Unless you do, you put it here, but let's not, let's try. Okay. Both legs up, and both legs down.
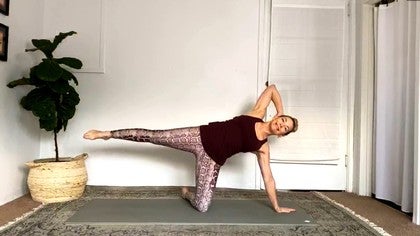
So I did want to do side bend today. So, you know, side bend requires quite a bit of oblique work, hip strengthening, the side body muscles, to get us up off the ground. And certainly some nice solid weightbearing on the standing arm. Certainly warmed up that idea. The glutes are ready.
We just did that wonderful hip extension. We got some of those glutes workin', right? So now it's going to be more of our lateral. Hold this position for me. Take the top leg up. Let's really focus on this back round part of your hip.
Not the hip joint in the front or hip flexor, go behind. Right, and lift from your behind. Yes. Exhale and up. Four more. And up, and up. And up, and last one up.
Good. And then lower the arms and the legs. Now you can keep your arm down or up again. Take your top arm up. Focus on the bottom leg, inner thigh, but it still obliques, you know, and pull up, hold it for a minute. Can you feel the relationship of your inner thighs up into the oblique diagonals of you?
Hold it there and feel it, and then lower the leg. Just two more times like that. Pull up. I really want you to feel that relationship of inner thighs up into your obliques. And then bottom leg down. One more time, guys. Pull it up. Energy in the top arm.
And let's let everything come down. Okay? Good. Bend your knees. Come on up. Adjust this. Want you to take your hand out. Cross your feet or stack them, is two choices, stacking or cross.
I'm going to go for cross. Take your feet a little further out away from your hips. You're not going to start all the way in, okay? I want you to go kind of out there and here we are. Let's just get into this side support for just a moment.
Just feel the depth of this, right? So this oblique part of you, yes, has contracted. This has got to lift. Knees are pressed together. Oh yeah, there's some adduction. There's some single arm shoulder support.
Take the time to set up; it's important. Make sure you're externally rotated here and that shoulder's nowhere up by your earlobe. Just has no business up there. Keepin' it down, okay? Can we lift the hip off of the mat, even like two or three inches, let's get it to go.
Feet help. Push the feet into the mat. Lift your pelvis. It can't only be only the arm. We've got all of this to access. Ready, go up. Lower with control. How'd that go? Pretty good?
Think of using your legs to help you lift up. Use your hips. Use 'em! That poor little arm can't do all of that, my goodness. Okay? Couple more times. We use it and we use our obliques and we lift. So that same feeling I had, you come down, come down.
That feeling of inner thighs to obliques, that connected? Use that. And for me, it's like a letter x inside. And up it goes. Interesting, right? Now stay there, lift. Maybe add a little more bend if you want to, of reaching your ceiling, waist to the sky.
As I get older, my bend is less and less and less, but that's okay. I feel like it's a good bend. I'm going to level myself out and re-bend those knees and come down with control. Are you ready for one or two more? If you're not, don't. Join me if you are.
Use it. Exhale. Use your feet, your hips, your legs, your waist, your arm. Let's keep going, bend, bend, bend. If you like variations of twist, you can go there. I'm not going to. Just gonna hold.
And as you come down is with control. A lot of controlling your shoulder girdle that you're balancing on. Let's go one more time. Inhale. Ready? Legs, hips, waist up, spine goes into flexion.
Sideways flexion. Breathe and exhale. And everyone gets to come down. That's plenty. Good! Even though I can't see you, it's great. I can tell. Okay, guys, so on the other side. Stretch out.
Nice and long. Strong. Self-affirmations always help. Okay. Breathing in to get ready. Here we go. Both legs up and both legs down. And both legs up and both legs down.
So if you wanted that arm up, yeah, we took it there and exhale up and down. So I'm already thinking inner thighs toward obliques. That relationship for me is just there. But I am feeling a lot of work in this top waist. That's going to help us when we go into the bigger part of the lift.
And we're thinking about my feet out there in space, helping to lift, although they're not doing a lot. Just twice more. Up and down. And up and down. And let's just give the arm a little rest. Now it's the legs' turn. Top leg, we need that. Ready, go. Eight.
Really want to get it up there. We're going to do it in kneeling side in a minute, too. And three. Keep that spine elongated on both your right top waist and left waist, right? Especially in your lower back part of your spine.
Both sides are long. And four. And three. (Amy breathes deeply) Excellent. That's your last one there. And then we took the hand down. I had a little moment.
I think we did the bottom leg up. We sure did, and we went up and down. This is that oblique connection. Up and down. Just twice more. Up and down. And lift. Okay, and everything came down.
Okay, now we're ready for the side bend. Come on up. Okay. Open the hand. I didn't really detail for you where that hand should be. I'm going to take the time to just do that quick. Most of you know where it should be in proximity to your hip.
It's certainly not all the way in. Okay, not too far out. That's going to quite unstable. You'll know your sweet spot. You really will.
And you can get there with your shoulder positioned. Again, your feet aren't super close either. That's another version of something, but today we're out here, okay? And just feel again, the connection in here. This position, the waist is pulled up and in, shoulder blade is low.
You've got some readiness in the feet to step on the mat. The adductors are connected, obliques. Okay, ready? So we're just going to prep with a little hip lift. If you'd like to, it's just can you lift? And can you lower, with control?
Yeah, you can. This is definitely externally rotated, isn't it? It's not rolled forward. Roll that sucker back. Lift. And lower.
How are we doing? Stay with that if you'd like. I'm going to go for a little more lift. I'm going to stretch my legs. I'm going to let that movement carry me into more of a bend. In a bend, lifting up, bottom waist up, away from floor as much as possible.
Ceiling waist to the sky as much as possible. And come down with control. That's the hard part with that shoulder strength. Let's go, twice more. And knees together, obliques connected. Lift.
Stand on your feet. Open. Open. Yes, and come down. Right. And then one last time. So you notice I'm kind of doing extra little things with my hands. Just make it your movement.
That's how I always feel in our Pilates practice. You guys know that, that's why you're with me. You know, make it yours. We all have a unique kind of punctuation mark on things. Sometimes I do this with my hand. Just makes sense for me.
Okay, really nice. Come off that hand. Now we need to do some back support. Okay. So what I had planned here, let's go this way. Sit towards your, facing your feet. Feet are apart.
Okay? So thinking back support. Not straight legs quite yet. And I would like to place your hands behind you. You guys can take it however you need to have your hands. What I mean with that is your hands can be sideways, fingertips toward your pelvis this way or fingertips back.
I, for me personally, don't like this position at all. I think it's a not-as-stable position, I'll just say it that way. For me, most days, sideways feels best. Where I can feel like I get most control in how my shoulders roll back and the connection of muscles in my upper back. But this is also pretty, pretty good, to try. Okay?
Somewhere between is also pretty cool. I'm going to try that. Okay. Here we are, feet are down, open your chest. And then let's go back to the standing warmup that we did where we did flexion of spine, lumbar flexion, and the whole thoracic flexion. Okay? So in other words, I need to move my hands, is let yourself almost slouch, guys.
It's allowed. You can do this. Let your body round. Can you get your lower back to curve? Can you get the tailbone to curl? Okay. Now from here, let's go through lumbar extension.
Not too much. More into thoracic extension. Shoulders need to go back and really get those muscles to connect between the scapula. Whatever wall is in front of you, lift your breastbone to it. Lift it even higher now. Okay? Notice that that lift of the chest puts a tiny bit more weight on your arms.
Stay with me if you can, please. Start to bear some weight on your feet and curl your tail. And we're going to just lift the pelvis so slightly up off of the mat, so slight. Are you curling your tail? Okay, good, I thought so.
Curl that tail and uncurl and set it down. Okay? Step-by-step, here we go. Round back. You're in that lumbar flexion with the curly tail. You're letting your scapula rise up and open.
It's a good stretch. You're just working all those muscles, they need to stretch here. But now we need to bear weight, so extend a little through the lumbar, just enough to allow this extension to happen, the thoracic. How that rhythm of the scapula go together. Collarbone open.
As you're ready to bear weight on your feet, can you curl your tail a little? Now I'm going to ask us to go higher with the pelvis. If you're ready, you're going to need more curl of your pelvis, please. More curl, more flexion, if you want to use those words. Oh, look, we're getting a little higher.
Push the arms down. Hey, are you still looking forward? Are your scapula still together? If not, do it, get them together. You need 'em back there. Okay? Stand on your feet.
Lift those hips up. Where is your chest? Can you lift it up the wall? There we go. Breathe in, everybody. We're going to come down. I want us to come down slowly. Can you come down through flexion please?
Curly tail, curly tail. Almost like you're going to slouch. C-curve your spine. And set your hips down and take a little rest off your wrist. I know today's class is so wrist-y. Just is.
Weightbearing. Catch 22. We must bear weight here, right? Building this bone, keeping these bones solid, strong. But in doing it, it can get a little extensive and a little bit like, all right. We've got one more round.
If you're up for it. Most of you are. I think everybody is. Here we go. Breathe in. (Amy breathed deeply) Slouch first. Oh, slouch. Yep.
Here we go. It's going to get more fun, I think. Extension. Scapula, feel the rhythm. Scapula back around the ribs, allows that chest to be so open, sternum up. Okay, as you bear weight in the arms and feet, between the hands and the feet is the middle body. Let's c-curve that in the pelvis.
Okay? Hold and hold and hold. If you'd like to come higher, keep coming along with me. They're coming up. Try to press your hips as high as you can. Shoulders need to also do that.
Now, choose a leg. Well, actually, first, bring your ankles together. Not. Take a leg and extend one leg forward without dropping your pelvis. Stretch. Hold, hold, hold.
Bring that leg back in. Second leg. (Amy exhales) So we did this bridge earlier. When one leg left the bridge position it went to the ceiling and we put a lot of responsibility on the standing leg. We're doing it now and isn't it so much harder?
And second leg extend. Four more. Okay, lift your hips, press your hands down. One. And in. Keep the tail curled, everybody. And in. One more each side.
Reach and in. And reach and in. I need to come out of it. I think you probably do, too. Roll down, roll down, roll down.
And I'm not doing two legs out there. Come off your hands. You can do two legs out there. You can do the kicks if you want, real quick. I'm not doing that these days. It's not feeling good to me.
So, you know, I can do the two legs balance. Let's do that together. But you, and if you want the kicks, you can. I'm just not doing the kicks. Okay? And let's actually start it from way out here.
You can do it. Breathe in. Let's do the same sequence, last time through. We're going to flex. (Amy exhales) And start building the extension just a little bit through lumbar. We don't want to hinge.
I want you to focus more about this is thoracic extension. Shoulders are back, breathing in now. As you load your legs, press your heels in the mat. Lots about the heels. Heels, especially for those of us who likes to hyper-extend.
If you want to keep going and point your toes down, you can do that. Press those hips, curl the tail, guys. Curl that tail. Curl it, curl. Hold for three breath cycles. Smile, it might help.
Did it? And come out of it and round, round, and round. Stay curled. Can everyone flex the feet, your ankles? Now lift your hands off the mat. We're going to go walking our hands down toward our toes.
Try to stay flexed in your lower back. Round, round, round. Walk those hands out. Yeah. Round, round, round. Big, deep breaths. Good. I promised a little side kneeling.
Oh yeah, I did. Come on up. You're not quite done with class. Ready? Pick a side. (Amy giggles) Choices. Fist.
Fingertips. Flat hand. Notice they're all different. It's like a yoga block has like three levels to it, you know? Fingertips, look how much higher up off the ground I am.
Kind of interesting if you've ever thought about it. Fist isn't too far from fingertips, but it's different. Fingertips is going to be hard to balance on, though. Not a lot of surface area on the fingertips versus the fist. Now hand.
(Amy chuckles) Going down a level. So it depends on what you want. I think I'm going to go midway. Going on my fist. I'm still in external rotation on this arm, that scapula, it knows where to go.
Now, here we are on our knee. Other leg is straight out. All I want us to do first is just feel this position. Just like we warmed up with the side bend. The kneeling knee and this hip, this hip in fact should be extended forward, not hiding back here somewhere in, somewhere back there.
Extend the hip. That comes from the glutes and hamstrings, you guys know that. So this knee that you're on? Use that leg, okay? Now hand behind head. Open that elbow. This should feel really lovely to stretch.
Don't go anywhere. And this is fine. You can lift your leg if you want to. I'm not going to, might surprise you. I'm going to take this top body down. I'm taking my top elbow and rotating toward the mat, trying to keep the standing hip in extension.
Inhale, return to the front. Twice more like that. So the standing hip, the kneeling hip, stay in extension as you rotate over. And inhale, front. (Amy inhales deeply) One more time. Exhale, rotate. Rotate, rotate.
And center. And then just lift and lower two or three times. Because you can. You don't need to do 10 of everything, right? There it is.
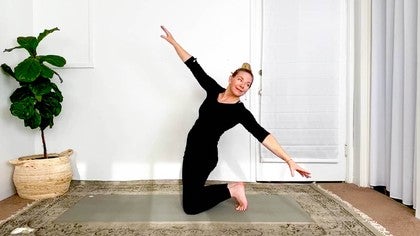
And now we'll come up to the other side. Just pass through, lift those arms. (Amy exhales) And lower and knee in, other side. So taking the knee out, leg out, come down, pick your position, externally rotate your upper arm. Get yourself acclimated.
Might feel different on each side. Of course it will. This hip forward, remember, right? So just give yourself time. So the knee that you're kneeling on, the hamstrings and glutes behind there should be pressing the thigh forward, helping to open up this musculature and the joint, okay? And then take your arm and really stretch your body open.
Energize your leg, the long leg, out from the side. A lot of fluid breathing in through the ribs and the lungs, which so open here now. Okay, hand behind head for rotation. Take a deep one in. (Amy inhales deeply) Here we go, without changing the pelvis.
This is above the pelvis we're rotating. Elbow rotation, but it's thoracic. Has your pelvis shifted? Readjust if it has. Inhale, return. Last two, exhale.
I like to feel my leg long on my outside, that top one, really kind of extending the length of that top body, helping me keep my bottom body organized, right? And up. One last time. And rotate. Should feel good. If you're feeling any crunchy bits, guys, just, you know, if they don't hurt, you're probably having natural sound in your body, but any twisting things that pinch, sometimes you've said that, don't do things that pinch, okay? Kind of back out of the pinch.
And let's do four or five lifts from your hip. And three. Just one more, we did four. Okay. Last little bit here. I want you to come up on, oh, we need to do this stretch. What was I thinking?
I want to do thigh stretch. Okay, so it's kind of a continuation of what we were just talking about here. So come to the knees, both of them. We'll only do three. Don't need to do lots of them. Again, whatever arm work you'd like to do.
I think I'm just going to keep it really basic and keep my hands on my thighs, so that I can continue to concentrate. One more round of deep concentration of this connection. Pelvis toward wrists, okay? We're weightbearing on the knees. We're weightbearing on the shins.
So press them into the mat. We're still engaged in our upper back, and here we go. I am thinking curly tail. I am, I am. As soon as, as far back as I go, I'm still thinking curly tail and I'm still thinking extension in my thoracic spine.
And coming back up. So try that with this again, right? So curly tail, it's the tail, it's not the whole pelvis. It's just the tail. We're not, we're not talking. We're just elongating lumbar.
And up. And last time, guys. Yeah, tail, curl, thoracic extension. Good. And in. Okay, last bit, hands, here we go. Walk back a little bit and I want you to stand up on your hands.
Stand up on your legs again. Get into that same third and final connection of, yep, I've got my hands there, I've got my feet there. If you need to re-curl tail, thoracic extension. (Amy exhales deeply) Bend your knees, shift your hips back. Now, I've dropped my knees close to the floor.
I'm not completely on the floor because what I'd like to do from here is walk my hands out and then come out onto a plank and then back into that, almost knees on the floor. Just keep moving through this. You're going to feel your legs and your whole body, right? (Amy exhales deeply) Try to get those hips as far back to your heels as you can, hips to heels. Heels. I want you to do curly tail.
Curl, curl. Four more, guys. Four, three, it's like knee stretch round on the reformer. Two. Last time, I'm going to jump my feet to my hands. Yeah. Just stay here. This is nice.
Go upside-down real quick, just stand and re-stretch your hamstrings for one final moment. Spin the feet so you're parallel, making sure the weight is not shifted back on the back of the knees. Drop that head. We're going to do a real slow standup, you guys. I like to count to 10 sometimes; there's a whole reason for that.
But today I'm just going to count real slowly to 10 to roll up. No arms needed. You're just going to bring your spine to standing, okay? So take your time. Here we go. One.
Two. Curly tail. Three. Four, take your time. Five. Six.
Start shifting your shinbones forward. Seven. Eight. Nine. And 10. And then just finally, just stand there. (Amy exhales deeply) Oh my goodness.
Thank you. Thank you for joining me for class and movement session. Moving with Amy: you never know what you're going to get. Oh gosh. I thank you so much, you guys. And for all the forum questions that come in, I really love those.
So keep them coming in and I do like those and if there's something that works, please let me know so I can keep adding it in, because if it works for you, it probably works for others. So we teach each other that way. And also if you don't like something, let me know, because there's a chance someone else didn't like it. Can't be for everybody, but we learn with each other, right? So that's also part of what this big community is.
And all week long, we're here for you in the morning at our time, 8:30, so keep looking for the schedule. I'll be back next week. I'm not sure what I'm going to teach yet. So if you have requests, you can let me know. But also forums are good to me, okay?
So everybody have a good week. Take care of yourselves. Bye!
Pilates with Amy Havens: Move with Amy
Mention
 |
Amy Havens (Teacher) |
 |
Patricia Quayle Wickman |
 |
Norita |
 |
SILVIA C |
 |
Katia B |
 |
Lucía S |
|
|
Helen |
|
|
Patricia I |
 |
Rajashree Srirangarajan |
 |
Eleanor |
|
|
Caroline C |
|
|
Jennifer H |
|
|
Cigdem A |
|
|
Chuhang G |
|
|
Sara S |
|
|
Zofia R |
|
|
CJ Z |
|
|
Alexandra D |
|
|
Lyn G |
 |
Melissa G |
 |
Tammy W |
|
|
Anna H |
 |
Gary M |
|
|
Judy G |
|
|
Alexandra M |
 |
Amy V |
|
|
Catherine M |
 |
Sutthinee S |
|
|
Lisa B |
|
|
Kalli B |
|
|
Jos S |
 |
Allison O |
 |
Jordan R |
|
|
Katherine R |
Comments


You need to be a subscriber to post a comment.
Please Log In or Create an Account to start your free trial.
