What's a Course?
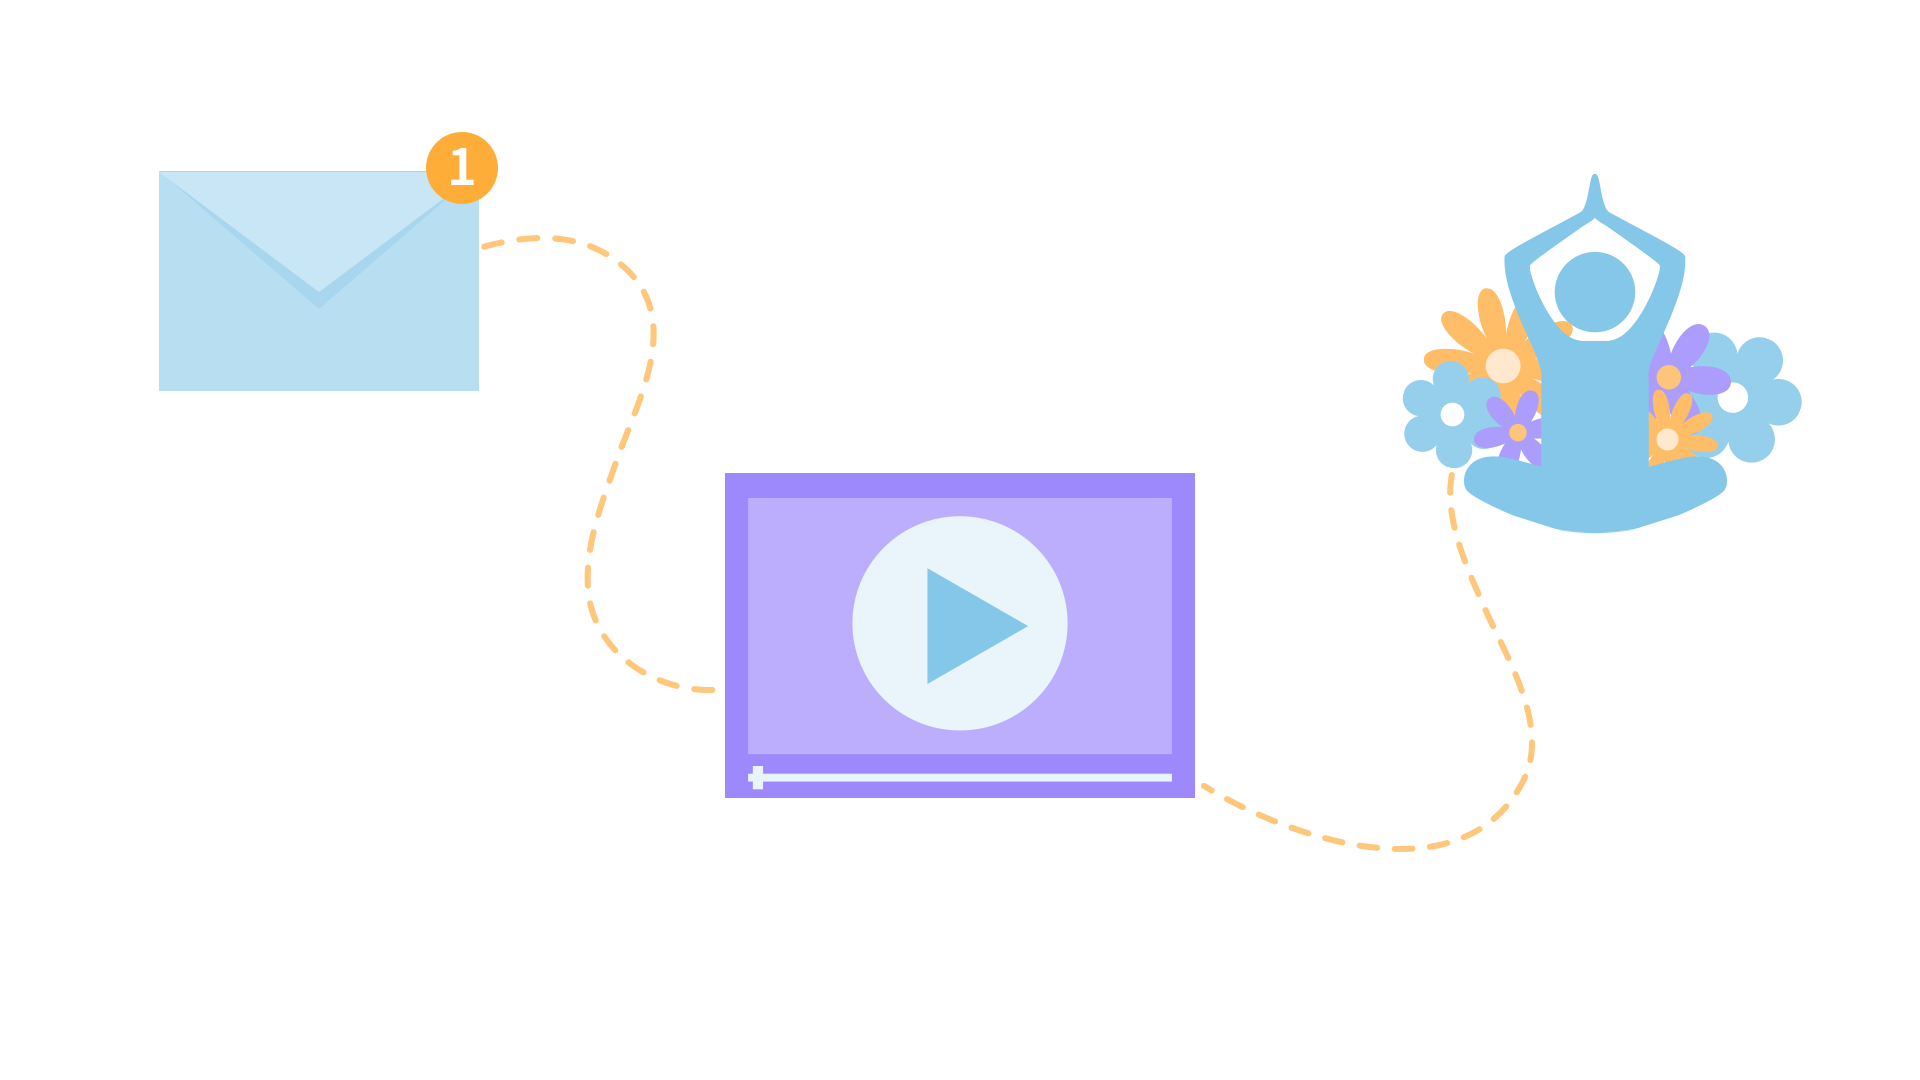
You can now make playlists of select programs into courses!
1. Schedule regular emails to deliver the content direct to you.
2. Watch your assigned videos to focus on the course goals.
To take a course for this program, first select a playlist and then click the "Take as Course" button for that playlist.Description
Shelly gives a brief explanation of the class at the beginning of the video. The movement portion starts around 3:00.
About This Video
Transcript
Read Full Transcript
Hi, everybody, welcome to class. I'm Shelly Power from Polestar Pilates and today's class or today's session is really built around the older adult with some degenerative changes happening in their body. So arthritis, everybody has it, it seems like, and this is what we're going to be working on today. So one of the main things to really keep in mind is that the range of motion somebody has, the comfort doing different things, is going to change probably daily. And so we really need to be checking in, not to focus too much on the pain because that's not where we wanna put our focus.
We wanna put our focus on function, but being respectful of the pain so that at any given time during a workout, you can do more if they're able to do more and you can back off a little bit if the symptoms are a little bit stronger that particular day or with that particular, just with that particular exercise. So that's one of the main things that we're going to keep in mind. And this again is often a pretty active population. Just because somebody is older, I mean, hopefully we're moving away from that stereotype that you're older and you can't do anything. We have a lot of adults who are really are older in their 70s and 80s, and even into their 90s, who still really want to be active and do the activities that they want to do, whether it's a sport or just simple things like getting up and down from a chair, being able to walk around in the grocery store.
So it's really important that we know what does this particular client want to do, what do they wanna participate in, so that we can gear our sessions to make sure we're giving them the functional movements that they need to be able to do these things and participate as fully as they possibly can. So that's our group for today and we're gonna use the trap table and use quite a few of the different attachments that we have. So we're gonna use the trapeze bar, we're going to use the neoprene cuffs that go around the legs, we're gonna use the tower bar a little bit, and then we're gonna go to standing and do some functional movements in standing, but with the assistance of the apparatus. And that again is a really important part. Something that sets Pilates apart from other types of movement is we have an opportunity to create the perfect environment for this client at this moment.
So we can use the springs to assist them to where the movement is completely passive, and we can use the springs to challenge them when we want to have the challenge. So please keep in mind that spectrum that we have, because a lot of people just view the springs as resistance. But with that resistance, if you kind of flip it over, you have assistance. And it's really important to support the joints in these movements and support the person, but then when you wanna add a challenge, get in there and do it. So we're gonna start with the 90/90 exercise, and I'm gonna have Leslie lie down on her back head here, and then I'm going to use the Velcro neoprene cuffs.
And a lot of times these come with your apparatus and you often don't really know what to do with them. There's a bigger and a smaller size. So one is for the thigh and the smaller one, when we put it on, usually goes around the ankle. I will say, in some of these movements today, we're gonna do it with the cuff more toward the knees. So you may have to cinch it up a little bit more, and this is gonna help support the knee when we do some side-lying work.
So just to get started now, I'm gonna have you lift your foot and I'm just gonna glide these on and then you can put your foot down. Because this is Velcro, and most of the workout wear that we have now is really expensive Lycra, right? Well, it's the better version of whatever the new Lycra is. Be careful that you don't snag your client's clothing with the Velcro. It happens, but you don't wanna ruin a $100-pair of leggings for sure.
On this piece, the smaller one, the D-ring typically goes flat side in and then the rounded side is out. For comfort, I tend to put the rounded side in and the flat side out, and when it's on the ankle, just above the ankle, it's gonna glide a little bit more and it's not going to feel like it's digging into the skin. So try that out, see if you like it. I find them every day in my studio turned back the other way and I keep telling people, "Please leave them this way, this is the better way." But easy change to make. So you're going to put all four limbs in.
You could also just put the affected side, if one side was more tender on a particular day, or if you were doing this exercise maybe with somebody coming back from a surgery, you don't have to do both legs. But it is nice to get the buoyancy, the lift from the springs. And I'm using the purple springs, the long, heavy leg springs on this side, and I'm using the short yellow light springs on this side. And this is what's going to suspend Leslie's legs in the air. You've probably also seen this exercise or this movement.
It's not really, I guess, an exercise so much. And I'm just gonna let you go there, yeah, and you just kinda hold. With using it with somebody with low back pain, you can put your other foot down for a second. Just gonna see how this feels for you, is that okay? Yeah, should feel really nice.
Just check with the client as you slowly let go of the spring tension that something's not pinching or there's not something happening right there. But we use this a lot with our clients that have low back pain. Maybe they have a good amount of muscle guarding. Just hold right there. And this is a way to unweight the system, to take the weight of the legs away and provide just a little bit of tractioning and clients love this.
This is one that you have to talk people out of doing because they like it so much, like "Can I do 90/90 today?" And like, "Well, you don't actually need it." But it feels so good, they wanna do it. So sometimes I just end the session with it. So first, she's just lying here passively. She's not doing anything. I might even just make some small talk because if there is some guarding, if there's discomfort or pain and we're trying to protect the body and not get into pain, sometimes we have a little extra tension.
So it's nice just in the beginning, you know, "How's it going?" And we'll just let the body settle and let everything feel good. You can definitely use different springs. So you can create tension in one direction or the other direction. You can use the crossbar, you could go up and down. There's lots of different ways to change it.
This is kind of the standard, kind of starting place. Now I can just very gently guide her in some movement. So again, if we're thinking about a client who maybe has a little bit of arthritis, they've had some wear and tear in their joints, this is a nice passive way to move. We're in kind of the mid range. We're not getting all the way straight.
We're not bending all the way. Nice place to get some lubrication. And you've heard that phrase before, that motion is lotion. So the more that we move in an appropriate way, the healthier the cartilages, and just the better, the better that we feel. So now, Leslie could do a little bit of motion on her own and these springs are heavy.
So I don't expect her to go very far, but it is a nice way for her now to become a little bit more independent. And can you let your pelvis just rest onto the mat? Yeah, so you really feel, it might be heavy enough that it's lifting you up a little bit. Yeah, that looks great. She could do some circles.
So you could bring your knees a little bit towards you, open in a way. So lots of different patterns of getting more mobility in the hip, and we've talked about this in other sessions, of the importance of hip mobility, the importance of ankle mobility, and thoracic mobility. So we're working on the knees and we're providing a really positive movement experience there, but we've gotta look at the whole body. So make sure you're incorporating all of these motions into your sessions. So once we're done, I'm gonna take her out.
And again, you wanna make sure you're supporting the limb. I don't wanna just let go and let the springs take over. This is where you become a little bit ambidextrous and you can come down here, and I'm, just for ease, I'm gonna take it off from back here. And I'll get this guy off. And if I need to, I can assist her with the strap or my hand under her thigh.
And we're gonna slip these off and we'll move into our next motion. And again, this isn't something I do every single visit. This is more of a, "I'm not feeling so hot today," and we'd like to do a little bit of gentle movement, or like I said, it's a nice way to end a session and just let the body calm down a little bit. Our next exercise is the breathing exercise, and we're gonna use the trapeze bar, I'm gonna set that up. And I'll give you just a little hint as to placement because sometimes it's hard to know where should this bar be in relationship to the client.
And sometimes clients will say, "Oh gosh, it feels like my feet are gonna slip out." And that's definitely not the sensation that we want them to have. We want them to feel always very secure. When you're using this, you might wanna use the little fuzzy that goes over here or a towel or something. Some people don't mind the feel of this and some people, the back of their ankles' sensitive and it doesn't feel so nice. So do what you need to for your client.
So, Leslie, I'm gonna have you put your feet up through here and just kind of rest at the back of your ankle, that's it, and let the legs lengthen. So you can see for her, the springs and the rest of the apparatus is not vertical, it's a little bit tilted, and that's where you want it. So if this crossbar was further this way, it would almost be not supporting her as much. So when it's on an angle, it feels better usually for the client. Now I'm gonna make some spring changes and I'm gonna bring the yellow springs down and hook them here and we're going to use the purple ones later on.
So I'm just gonna lay them just here so I have access to them. And I like to do this with the handles, which is not traditional. It's traditional to do it with the roll-down bar, but I really like the handles because now, we can work on being a little bit more responsive in the body, in the trunk, and I'll show you how that's gonna be. This is a great exercise to progress for somebody to do at home. So you can use a ball and we'll show that in a moment, a gym ball, maybe 65-centimeter ball, and you can create the same thing at home.
So you're gonna take a hold of these handles and I've got the yellow springs on, the short ones. She's not going to be able to really push down very far. So if you wanted a big arm movement, use the longer, light springs, yellow in this case. All I want her to do is just start to engage the muscles of her back a little bit, that connection of the shoulder blade down, crossing through to the opposite glute and hip. That's what I wanna help activate a little bit for support of her torso.
So first, you can just leave the arms where they are, press down just a little bit into your heels. Feel like you're also pressing into your thighs and you're gonna lift your pelvis up in a bridge. That's it, and then come back down. Very good, and each time, make sure the client gets their pelvis all the way down, that the buttocks muscles really relax at the bottom and then they can start to move again. And it's more of a feeling of pressing the thigh down than it is of tucking the pelvis back.
So you'll see that often, do it kind of incorrectly, tuck your pelvis a lot. So that's not the first thing you wanna see. We really wanna see hip extensors kick on. So more feel like you're pressing toward my arm a little bit, yes, and then keep going. So it's less articulation.
It's gonna be less curved and it's gonna be, hopefully, more comfortable and more fluid. So, and let, come all the way to the bottom, that's right. Now, as you do that, you start to lift your hip, just start to push into the springs a little bit. Don't force anything. Yeah, and just roll your hands a little bit so the wrists stay long and then let everything return back.
Now this time, do the same thing and just a little bit, let one arm come up and then down and the other arm come up and down. So now I'm challenging her rotational control. So sometimes we want people to rotate, other times, we want them to have control of rotation. And that's really important again in absorbing and stabilizing the upper body so we're not sending the torque or the force down into the knee, good. Let that go and roll down.
Great, I'll take the handles. And now let's substitute. You can take your feet down. Substitute now, instead of the trapeze bar, we're gonna use the ball. And again, this is one of those decisions you might make in a session where the trapeze bar seems pretty easy for your client.
They're not doing a lot to manage the bar, and a ball might be more appropriate. Other days, the ball might seem really out of control and so something a little more steady like the trapeze bar is better. So bring your legs up onto the ball. Walk it as close to you as you feel like you need. So obviously, the closer, the more support there is, just because the ball is closer to the center of the body.
But also, start into your bridge, so long legs again. So let the knees lengthen. You can see how we're almost even supporting the back of the knee. For some people that's gonna be important. And if the ball was way out under her heels, she might not have comfort in that end-range position.
So just move it as you need to and roll down. Very good, and again, press like you're gonna straighten your legs, really nice, Leslie, that looks great, and then roll down. Here's our rotational challenge, roll up again. I'm here for moral support. Reach your arms to the ceiling.
Yes, and now you've got the poles and the handles and things back there, but maybe take one arm overhead and one arm down this way. So now, she again has to manage her trunk, manage the control and the awareness, but she's doing a great job, yes. And then bring both hands down to the mat. Roll your body down, very good. So again, play with the distance.
Let's let's do one just to show how when the ball is farther away. So walk it away a little bit. And you'll notice that it's a lot wigglier. Often it is, anyway. So start to straighten the leg first.
Good, that's it. So do you, feels any different? Yeah, I can see she's moving just a little bit. And remember, such an important point, go ahead and roll down, you don't have to hold too long. Whenever you're doing a balance exercise, the wobbling and wiggling is normal and you need it.
If you pretend to be a statue, you'll just fall over because there's no mechanism for bringing you back in balance. So please, with your clients, with yourself, be kind and use it as information. Instead of, "Oh my gosh, you wobbled," like, "Okay, you wobbled. "What do you need to do to come back to center?" Whatever the goal is of the exercise. So just be sure in your queuing you're not making more of a big deal about the wobbling and finding center than really needs to be.
All right, take your feet down. All right, so now we're gonna go into some footwork with the tower bar and even in thinking about the tower bar, this might be a good place too to do just the beginning of something like parakeet. So the progression from the trapeze bar to having the feet on the bar to do the straight-leg bridge there, I wanna show that I think it's actually an important movement just to show. Now we're not necessarily gonna do full parakeet, but we could do the beginning part of it. It's actually quite fun.
I have a client who saw one of our people in our teacher training doing the parakeet and you know it's the full one that goes through and up, the hips stay up, and he looked over and he says, "I wanna do that." And I thought, "Oh my gosh, okay, how am I gonna do this?" So we just started slowly and he was able to do quite a bit of it as he practiced. So take your feet to the bar and, yeah, and then I'm gonna have you lengthen your legs down and then we'll probably move you down a little bit. So scoot forward, I've got the bar. Keep going, keep going, keep going, about to there. Yeah, and then roll back and then straighten your legs again.
Yeah, that looks good. So she can go through bending the knees, and I have the bar set low on purpose. So I might have it a little higher if I was doing this in the studio. And lengthen her legs, here's a nice place to work on control. Press your feet into the bar and kind of feel your body lengthening to go up into a bridge, and keep long, yeah.
So here's the progression again of that, roll back down. Let the tailbone reach to the mat, bend your knees, pull it down. So I'm not helping her too much, but I'm there in case there's anything that's uncomfortable or the feet start to slip, whatever is happening. Bend your knees one more time. I'll just show one variation at the top.
So straighten your knees fully and then press away and up. Very nice, that was different that time, stay here. And if the client, if this is a day where things are going really well, there's not a lot of discomfort, bend one knee and bring your leg to tabletop and then place it onto the bar. So some days they may be ready, go on the other side, for a single-leg stance. Other days they may not.
So again, just play it by ear, roll down, and you can take your feet away from the bar, I've got it. All right, so now we're gonna set up for footwork and I wanna just show something with the safety strap and depending on what era and what manufacturer you have, your safety strap might actually be a chain instead of a strap. It might be a chain that has a lot of these little daisy loops on it. Or you might have one that don't, they don't have them so frequently. So if you can find one that has a lot of the little adjustments, that's really great, because that means you're gonna be able to, you'll have more sensitivity with where you're putting the bar.
You can change it a lot easier. The other thing to look at is where the bar is in terms of how high on the uprights. And I love these new bars with the pulling pins because I can actually change it, and I'm just doing, I probably wouldn't change it in this position, but I want you to see what happens. As I raise the bar, the end goes down. Sometimes we think raising the bar is great because it's higher.
But if you keep the strap the same, it actually goes down a little bit. So you may not want it to go down. You may want it to stay up. So I'm gonna choose the middle setting. And again, I'm just doing it while it's set up simply so that you can see it change.
I probably wouldn't change it with the safety strap on. And as you know, we have a couple of options for setting up for footwork. Traditionally, the head is underneath here and the legs are on quite a big stretch. And it also, because of the way that the bar moves, it actually is going to push into you more. So as the bar is coming down, it's coming into you and it's gonna push you into more hip flexion and knee flexion.
So for this population, that might not be the best way to go. But it might, again, you can save that for the days that they're feeling pretty good and don't have a lot of discomfort. You could certainly do it that way. So for today, we're gonna do it with Leslie on the table here. And I'm gonna have you scoot just a little bit this way so your pelvis is a little bit closer, yeah, let's try that.
And I've used the long springs and traditionally we use the short springs here, but I really like the feeling of the long springs. You don't run out of the extensibility so soon in the movement. Use whatever you have, but I really like the feeling of this. So you're gonna bring your feet on and I like to kind of have ball of the foot, more or less. Good, and then extend your legs, and I'm here helping.
If there's anything that's uncomfortable, right away, I can take the weight of the bar. And then start to bend and straighten. Right, that's it. And so be mindful when you're bending. So bend and pause there.
If she goes a lot lower, now she might not find the same comfort as maybe footwork on the reformer. So this again is maybe mid range and mid range for people is usually pretty comfortable. And mid range is also where they can take a little bit more resistance or a little bit more load. It actually makes them feel more comfortable. End of range, not so much, but in the middle range they can actually, they can actually do a little bit more.
So bend again with the widening of the sit bones and then press back up. And I would say don't go quite so low. We'll just do a couple more. Good, and I can tell she's changing her body alignment. I don't know if it's, you can see it really from the camera, but she is moving more in her hips and allowing the buttocks muscles to be a little more, a little bit longer as she's bending, she's allowing them to stretch a little bit more.
Pause right here, and now we'll go into some pointing and flexing. So again, be sure that the underside of the toes is on whatever the surface is that you're pressing against so that you actually can use the toes. So start to do, yes, and then go into your heel raise. And I would say if you could scoot your feet, yes, that's right, and then flex and point. Sticky socks are sometimes good here.
But for this exercise, they need to have the sticky stuff on the outside and on the inside 'cause they slide on your feet. Good, and then we can again make the emphasis of keeping the heel where it is. So stay there for a moment and begin to bend your knees, both knees. Yes, that's right, and press with your heels first. Heels, try to get your heels to go above the bar.
Keep going, heels, no, not pointing, heels, yes! I know, it's such a funny, such a funny thing. When you do this the first time, you'll think, "Wait, what?" So bend your knees and what I want you to do, just pause about there, press your heels higher than the bar, keep going. Heels, heels, heels, heels, heels. Right, so we're staying in dorsiflexion. Here's one of those mobility points that we wanna make sure we have, bend, and this strategy of reaching through the heel is important.
We're less in the front and a little bit more in the back. So heels up, heels, heels, higher, higher, higher, higher. You got it, so in two repetitions she was able to pick right up on that. So make sure you're doing that here as well. All right, let's take the feet down, I've got the bar, and then you can come down there.
So, and you can do other foot positions. You could certainly do wide and close and I always encourage people to do a narrow stance because it's really important, especially as people age, they tend to walk with their feet a little wider. It's more secure feeling, but it's not really good mechanics. So get the feet under the body, make sure that you're working there as much as you can, including, do your wide stance, but also do your narrow stance. And if this is a day where things feel really good, go to single leg, you could do a single-leg press, maybe change your springs.
Again, depends on the person, but do as many as you can, as many different variations as you can here with comfort. So you can scoot back a little bit less if you want. I'm just gonna take this down. And you can just come to sitting for a second. This is where you get very, very quick at moving, moving things around.
So the next piece we're gonna do is look at some movements with the leg springs. And you have leg springs that you can do supine. You also have leg spring work that you can do in side-lying. So we're gonna do side-lying today. And this is one of those places where you might need to use the Velcro cuff on the knee.
So you're gonna lie on your side, facing the camera. And then of course, people ask all the time, "Where do you put the spring? "Where, is it in the middle? "Is the client in the middle? "Are they at the edge?" The main, main thing is that the client and the spring are aligned.
So if you trust them to come up close to the edge and you know they're not gonna fall off, great. If you're not so sure, put them in the middle of the table and then move the spring to the middle of table. And that's gonna give you your best alignment. So you can actually lie all the way down on your side. Right, and then in this starting position, Leslie has really good alignment here, but you may need to use towels, a yoga block, pillows.
Maybe the client's not comfortable with their arm here. Their arm needs to be extended. If you're at the front of the table, you can always do your hand up on the upright bar. So lots of options for comfort. I'm gonna put your foot in the strap and I'm again using the long yellow.
So on this table, it's the long spring that's light. And so you're gonna take your top leg, and we're gonna slide it in, and oop, let me turn it around the other way. Slip your foot out for a sec, there we go. These are nice foot straps because they have the little heel lock. So if you have this or if you have the new reformer ones that have the little gray heel strap, use those.
A lot of times people complain that it feels like their feet are gonna slip out of the strap. So you wanna just be having the best experience for your client, so find some strap that has the little piece that goes over the heel. They'll do a much better job and feel a lot more secure. So I'm gonna stretch the spring out. I'm actually pushing here.
And my main concern right now is does this position where she's being pulled into abduction, does this stress, right? So a valgus stress or a varus stress, the bending either direction, is this uncomfortable for her? So I don't think it is, in reality, so pull down, yeah, and then back up. And of course you can set this spring on the crossbar. It could be a little bit lighter, so they're not having to work so hard.
But remember, hard work going down is easier coming up. So that might be something you wanna do with a lighter spring some days and a heavier spring just to get both sides of the exercise. If this was really uncomfortable for her, I would take one of the Velcro neoprene straps that we used before and I would place it up on her thigh, above her knee. Now, when she pulls down, she's not having the same torque go through the knee and it will be a lot more comfortable and she could do all the same movements. Good, I'm also here again spotting, just in case something is like, "Oh," suddenly that's not comfortable anymore.
I can take a hold until I know that the client is really comfortable there. And you have all the choreography circles, and up and down, and bicycle, and all the different things that we do. One in particular that I like to do is kind of a half squat, more or less. So you're gonna start to bend your knee, and let, yes, your shin becomes parallel to the table and then press away and through the heel. Yeah, and then bend.
So again, I'm looking at how does she move here? Is she able to move in the hip joint, have the widening of the sit bones every time she bends, and the control? Because as, she's doing a beautiful job, as it's coming in, the knee sometimes wants to lift up, it wants to dip down, all these things wanna happen. So this is where it's a little bit more dynamic and that's important for returning to function. And let that go, so you can bend your knee, and this is again, what often happens, bring your leg out a little bit.
I wanna show kind of the wrong way to do it, is people will let their foot go up and their knee come down. And that quite often is uncomfortable. So make sure you're in control, you're managing this. I'm really holding the spring quite, quite a lot. So there's not much tension here.
And I can take the strap off of her foot and then she can take her foot down. So just be mindful again of torque or positions where there's a lateral force going through the knee because that sometimes is uncomfortable. Of course we would do both sides, but I wanna keep moving on so that we can get into the side kick which is the home exercise of this series. So I am gonna have you face, keep facing forward, but have your head down here and we'll use the other leg. So, depending again on your client, you might wanna have them all the way down.
You might wanna have them up in the traditional side-kick position. It's up to you and up to obviously what they want and need. And how much you bend the knees and shorten the lever and increase the base of support again depends on the client. So I've done it with both knees bent, bottom knee bent and top leg straight, bottom leg straight and top knee bent, both legs straight. So there's lots of variations here.
Do straighten your legs a little bit. All right, and if you're gonna go to both legs straight, try to be in the longest line that you can. So we often teach it, people do it with the kind of the banana shape, which is fine. It just doesn't relate to the functional position she's gonna be in when she's standing up. So I wanna make sure we get to that point at some point.
Lift your leg, right. So now, with the spring earlier, she was getting assistance into the abduction position. Now she's having to use her outer hip muscles to lift her leg and then allow it to come back down. So make sure you're doing the assisted one with some springs or a TheraBand or something, and then make sure they're also doing it at home without any assistance where they are more in control of their own body. And it's important to kind of have the sense, you want the leg to be parallel, but have the sense that the heel is lifting up a little higher.
Because what happens often is we get turned out, the front part of the hip and those muscles start to work more instead of the back. And I want the back part to work a little more. And then again, you've got lots and lots and lots of choreography here, circles. There's all the traditional choreography of just the plain side kick going front and back. And these exercises are great because there's really no, because it's an open chain exercise.
There's nothing against the sole of her foot. There's very little discomfort in the knee. Most of the time people are able to do this really comfortably. Let's just show the other body positions. So come up onto your forearm, right.
And so this would be the other place that you could do it where now you're having to deal with the upper body and the lower body. So this would be another, another option to be pushing down through the arm and lengthen here. And I really don't have a preference of, go a little bit longer, so keep your elbow where it was, and then just decrease this curve a little bit. So some people like to be here, it's a little straighter. Some people like to be here and a little more curved.
That's fine, you can do whatever, whatever you like with that. So that's the side kick. Come back down onto your side again. And I wanna show one more variation, the bicycle. So lift your leg and this will take the place, so we do a lot of things in Pilates in a high-kneeling position where the knee is bent at about 90 degrees and the hip is neutral.
A lot of times this population, it's not so comfortable to kneel. So I wanna mimic that position as much as I can 'cause it's in a lot of the exercises. So this is a great way to do the bicycle, taking the leg behind and then leaving the thigh here and starting to bend the knee and then bringing it forward and stretching forward. So add this in, again, it's a way of using the hip extensors to help lengthen the hip flexors a little bit. So hold your thigh here.
Keep going, keep bending, keep bending. I know she's gonna fall over. Not fair when somebody's pulling on you, and take the leg forward. So the most important part, I'll let you do it on your own. Hold the knee where it is, beautiful, and then come forward and take a rest.
So again, that's usually pretty available to people. Make sure their alignment is spot on though, that the knee isn't dropping or the foot is dropping. All right, come on up to sitting. We're gonna go into some movement for the torso now, which is gonna feel really nice, of adding some rotation. So you're gonna scoot forward and you're gonna put your feet up against the bars.
So depending on the age of the person and their bone health, you might be doing the push-through which goes into flexion. But a lot of times by this age, when somebody's in their 70s or 80s, they probably have some degree of osteopenia or osteoporosis. So it's probably not safe to do the push-through, but we can do the circumduction because that is a wonderful exercise to add spine rotation. So you're gonna take a hold of the bar and you're gonna keep holding onto it the whole time. So I just wanna get my safety plug in there, and with a long body, I want you to start to lean back and you're gonna almost feel like you're just hinging back at your hip joints and kind of hanging from the bar.
So this is another place where she can get a little bit of connection of her arm down into her torso. So it's not about pushing the shoulder blade down. It's about actually getting the extensor muscles of the arm to work to, again, tap into the back of the body. And then press the bar up, and if you need to, soften your knees, you can even bend them a little bit, and just sit a little taller and get length there, yeah. And then lean back, so this might be something that somebody practices for a while.
And press up, bend your knees, and sit up here, right. So I'm just helping her get a little higher here. This time, lean back, keep a hold with this arm. Let this hand come down and you're gonna start to rotate and just watch where your hand is going, until she gets a long reach from this hand to that hand, and then place it back onto the bar. I can come in and help here.
She doesn't need really any help with it, but I can guide her ribs so that her ribs are turning this direction as she's going. 'Cause sometimes people don't turn their body and they just move their arm. And then go back, we'll do one more. Nice, you're sitting taller that time, great. Lean back, push down here.
Let the arm go, back and over. And then if you wanted to, you could do a little turn to face the front. Again, if there was bone density issues, I wouldn't go much into the side bend, but we could even go into a little bit of the mermaid position just a little bit to see how that feels. Yeah, and go up and face the front. So she's moving around the shoulder.
Again, we're focused on the knee, but we don't wanna forget the other parts of the body. And let that go, and you can let the bar come to rest. All right, that's a favorite. That's another one that people ask for all the time. All right, so our next whole series of exercises are in standing and now we're gonna take what we're doing on the table.
So the things that are in, as we refer to it, in a foreign environment. We don't squat lying on our sides or squat lying on our backs like you would in footwork on the reformer. So we learn things there. We improve our alignment, we improve our awareness. Maybe we're improving mobility, if that's part of it.
And then we need to take it into functional positions that people are gonna actually do every day. So that's the part that we're gonna go on to now. So we're ready for the standing part of the class now. And it's really important, remember, to get people to standing 'cause that's where they live life. We don't lie down all the time, even though it's very good to learn and to work supine, side-lying, prone, all of those positions, but we eventually have to bring people up to where they will do their activities.
So we need to bring people into standing, walking, lunging, squatting, and that's where we're going now. And we're gonna use the springs. Again, this is a great look at the assistance that the trap table gives because we're gonna use the springs. We're even gonna use the table itself, the upright bars to assist people. First though, I thought we would review just a basic, small part of the bone rhythms, what we call that, that's what Eric Franklin calls it.
And it's really the arthrokinematics. So it's the movement that's happening in the joint, in any joint in the body when we're moving. And oftentimes we get in the way of that. So life happens, sometimes injuries or bad habits, and we change that timing and how the bones work together. So this is one of the ways that I've found to almost get rid of people's knee pain in squatting is to work on the bone rhythm.
So can't always guarantee to get rid of the pain entirely, but you can certainly decrease it and give people a better strategy. So anytime you're squatting, I'm gonna face sideways, Leslie's gonna face you, so I'm gonna face this way. Anytime you're squatting, just a small little half squat of bending the knees, so you can go down, there is an outward spiral of the femur. This is what's happening in the joint already, you can't see it, and the sit bones or the back of the pelvis is widening. You could also think about it, with the same outward spiral, you could think about your pubic bones, the two sides of your pubic bone, actually coming together a little bit.
And then that releasing as you come up. So that outward spiral, as you go, right, so I'm thinking outward spiral here and opening here and then back to where she started. So keep that in mind and this really, one of the ways that we see it where people don't have very good mechanics here is in a classical ballet dancer. And for years, and it's still unfortunately being taught, when people are taught to do a plie, I'm gonna just show it from the side, is they try to turn out everything, their legs, their feet, their thighs, their pelvis, their everything. And then when you bend, you're either putting the force through the knee, through the ankle and the foot.
You're not actually bending at the hip joint. So you wanna make sure that you're allowing that widening feeling of the sit bones to help that. Super important when you're working with somebody with arthritis. It's one of the big, big game changers. So here we go, we're gonna start now working on some standing activities with the springs.
And you know, if you've been on a trap table, you've used springs before, they're helpful and they're kind of not helpful too. So it's gonna be very dynamic at this point. And actually before that, come up and just stand a little closer and hold onto the bars. So this might be a place where we could introduce a squat where Leslie can really kind of lean against the trap table a little bit and do her squat where she's sinking the widening of the sit bones or the narrowing of the pubic bones, and then coming back up, she senses a lot of control having her hands here. So it's not scary to do it holding onto something big like a trap table.
If needed, I could put a stool here or a chair if I wasn't quite sure if she was gonna know how and when to stop, maybe she goes a little too far. But with the use of her arms, that often doesn't come into play. So this is a great place to practice it. So now, and we'll take that stability away and use the springs. So depending on the client, their height, their strength, everything, you can certainly raise the springs higher or lower, just depends on what you want.
And this is not so much the standing arm series where we're going into a lot of shoulder extension. This is more kind of pushing back a little bit and down. And I kind of think of it, so push kind of down into the spring a little bit, yeah, just like that. I kind of think of it as you're pushing down into the spring to levitate. So how light can you get, right?
And you can see how, if we had the spring, I'm just gonna take this one off. If we had this up higher, you can keep holding onto it, her line of pull would be a little bit different. So again, play with it and see what works with the client that you're working with. So press down a little bit to get that feeling of, yeah. Can you, you can feel that sense of, almost like you could levitate?
Yeah, now do your small squat. Right, and back up. So again, I'm connecting the whole arm and shoulder girdle into the cross of the body and the fascial lines there so she can push and levitate and you don't have to push too much and you can kind of feel like you're pushing down, yes. And then bend the knees, and come back up, great. So that's the first kind of step into it with the springs.
Now we can also add the box and the box is great because now we're working on going up and down stairs. So we have just the standard moon box. I think a step, I can't remember exactly, but I think a standard step is seven inches. If I'm wrong, don't write me. But it's similar to this height.
You may have a client that needs to start on something much lower, maybe half of this height. So find the thing that is the best for you. Make sure it's solid. A yoga block is often the right height, but yoga blocks are really wobbly and they're tiny. So that's not a great idea unless you have a really big one.
Make sure it doesn't slide, we're using a mat, so make sure it doesn't slide. The old moon boxes used to have plastic here and they would slide really, really quickly. So this is a foam one, it's pretty steady. And just make sure again, safety, safety first. So bring your hands to the outsides of the poles again and bring your right foot up onto the box.
And you're gonna push down and we've talked again about pushing through the heel in some of the earlier exercises. You can use your arms as much as you want to and you're just gonna step up and then step back down. Right, so if we're working again to get the heel pressing down a little bit more, we're tapping into the hip extensors more than we're just solely using the quad. And this is very misunderstood. People think, "Oh, I'm doing squats.
"I need to strengthen my quads." Well, maybe a little bit, but it has to be in conjunction with the buttocks muscles, the hip extensors, because part of straightening your leg is straightening your hip, and part of it is straightening your knees. So we need these muscle groups to work in concert with one another. So go again and pull up, right, and back down. Pull up one more time and now we can just practice. Maybe you just have your fingertips on the bar.
So she's getting some help with balance, but more it's awareness. And then she can step back without pulling. Yeah, one more time, press up. And this is very reminiscent of the forward lunge on the chair that people often do, where we really wanna get the pelvis to come forward over the ankle and up. It's as if her pelvis, I could lift her pelvis and lift her up into this position.
Great, and step down. So let's combine that. I'm gonna move the box back. I'm just guessing where it goes, it's about here. We'll have to figure out if that's the right amount of tension.
So take a hold, and now the spring is gonna wanna pull her a little bit forward, which is helpful, 'cause that's the direction she's going in, but it also can be a lot of momentum. So again, be mindful that the person may kind of stumble and go forward. So go ahead and put your foot on first and then press down to the springs and then come up to stand and then put the foot back down. So pull down first, get that sense of levitating, and go up and let your weight shift more forward next time. So come down as if you were really going up a step.
So pull down and go up. Right, now, stay there and just move this foot forward and back a little bit. So here's sidekick that we did earlier, but now she's having to deal with her balance while she's doing it. The right leg that she's standing on, the abductors are really being called into play as she moves her leg back. Great, bring your leg back one more time, yes, and step down, very nice.
So anytime you're gonna have people stepping onto things or chairs behind them or anything in the area, make sure they really know where things are. 'Cause I've had, I've seen people, they have a stool behind them for squatting and then they step back and trip over it. So just be mindful of that. Sometimes people lose their, kind of the sense of where they are. And also be careful with things like mats on the floor, a mat like this is fine, but sometimes if there's a lot of things on the floor, people will trip and fall over them or catch their foot on the mat, and I've seen that happen.
So put it down, use it, then pick it up and get it out of the way so we're not having a problem there. Now we're gonna work on a little bit of upper body work. So I'm gonna have you turn around and this is where you might wanna use the long, the long yellow springs or the short yellow springs, just depends on the person that you're working with. So let's see how this goes and we can change it if we need to. All right, so the very first thing we're gonna start working on is the stepping motion that we just did with the box.
But now instead of stepping up, we're just stepping forward. So I like a little tension on the springs. So you lean into it a little bit, about there, and then just step forward and then step back, and change legs. And I have been known to sit in here and kind of manage the client. Be mindful of things again, in your own area, but I'm here sometimes helping them as they come back.
Because again, the pullback is where they'll lose their balance, forward is usually fine, and I'm here if needed. Right, and I'm just kind of watching what's going on. Now, bring both feet in, leave your feet in, and just do a little punch forward. You can maybe straighten the arm. If it's too heavy, you can step back a little bit.
These yellow springs are deceiving. If you've worked with them much, you know it's like, "Oh, this is easy. "Oh my gosh, this is really, feels quite a lot of tension." Yeah, and as you're doing that, let your ribcage do that. Yeah, that's right. So just that little shift in rib position.
Ready to put 'em together? So, oh, yes. Ooh! Yeah, I know, good, and good putting together. Yeah, that's it, and I was thinking together, arm and leg together. So I will be clearer with my queuing.
That looks good, I love it. So now, one foot, and the opposite arm, yeah. And back, and again, it's the back where people need to slow down a little bit. They'll get kind of pulled off balance, then press. Good, and I can change the spring to have it much higher, which is gonna give her some lift.
I can have it down a little bit, which is gonna be more straight in line. And as you step forward, make sure you keep your ribs pulled back a little bit and push the arm forward, yes, nice correction. And come back in and take a break. So you have all of the punching, all of the movement that we have for all of the punching and the arms back and forth. So going on, let's finish up with the big squat, you ready?
Okay, so I'm gonna use the purple springs. Now we really wanna suspend somebody from the springs. So I again like to use the handles once somebody has experienced this. If it's the first time, maybe you just use the dowel. You can choose whichever handle or dowel you like.
But when again you have the independence of the two springs, now becomes a little bit more interesting and functional. You can, I'm gonna just step just to the side for one second and just show here. What we wanna make sure is that the arms, the tension on the spring stays high. So I don't really want people pulling in very much. I want the springs to stay high as they come down and go back up.
This is very similar to holding on here. There's a lot of support and people can get back a little bit in kind of a 90/90 knee and hip position. Whereas if I let go, this is not a functional squat, right? If I let go, I'm gonna fall over. My functional squat is more right over my ankle, but this client probably doesn't have a need to go this low.
Probably doesn't want to, and it may not be comfortable. So this is where you can change the squat to be a little bit more open and a little more 90/90. So here we go, and it's quite heavy and it'll really suspend you. Okay, so step back a bit. Keep the arms up, and they could bend or not.
It kind of, you have to see what feels good for you. Think about your bone rhythms of the sit bones widening and the thighs spiraling out and go about halfway down, yeah. And then back up. And you could, yeah, you feel how it wants to pull you. So the more that she sits back, almost like she could sit toward my knee, that's gonna give her more openness in her knee flexion.
If for some reason she wanted to go lower and she could, we could certainly explore that. So as you start to squat, go a little lower and see how that feels for you. Yeah, and then press through the foot and come up to your standing-tall position, beautiful. So kinda just depends on the day, how the client feels, what they're experiencing. Again, when you're getting that open-knee position, you're gonna be able to go a little bit lower than if you're forward into the foot where I would have my clients who didn't have these problems, I would have them doing their squat there.
So really explore. Again, the bone rhythms are key to really making this comfortable. The last thing we're gonna do is a stretch. Normally it's done on the table, but we're gonna do it on the floor 'cause it's just more comfortable and they're already here. So standing next to the trap table, sitting back to go into the lean here and then go into an arch, into spread-eagle, and then come up tall.
I'm gonna move the bar. When you step in, I want you to put your toes against this. If that's not comfortable, you could have the feet flat as well. I'm just gonna move this bar so it's not right in front of Leslie's face. So you can come in to stand and you're either gonna finish with 90/90, which clients love, or you're gonna finish with something like this.
So elongate your arms, and then sit back a little bit like you're gonna do, it's almost like an inverted V position. Yeah, and let your arms lengthen as well. And then start to have your pelvis come forward and do a little ripple. Some of you that know up stretch on the reformer, you might recognize this almost like an up stretch, and then go into a little thoracic extension. Yeah, and then come up to sit tall or stand tall, and then hips back.
If this is uncomfortable at the knee, you could certainly bend the knee here, that would be fine. And then just let the pelvis go first. So go a little round, yeah. And then up, hang back with your arms, and let your head rest back in my hand. Ah, that looked good.
And then come up to stand and you can rest and step away from the table. So I hope this has been some information that is useful for you for your clients who have again just the general degeneration. Maybe the cartilage is not like it used to be. They have some arthritic changes in the joint. Motion that feels good, again, motion is lotion.
You wanna make sure that we're working on as full of a range of motion as possible, really being considerate of not going to end range if it's uncomfortable that particular day. Play with the bone rhythms, play with springs, where are you suspending people from? Where are you supporting them? How can you make it still challenging? We don't want it to be snooze-alotes.
We still wanna have a good challenge, but again, appropriate for whatever day it is and make sure you know what your clients want to do and you're doing things that are moving them toward doing that activity. Hope this was helpful, and I look forward to seeing your comments.
Knee Health: Whole Body Movement for Knee Function


Comments


You need to be a subscriber to post a comment.
Please Log In or Create an Account to start your free trial.
