What's a Course?
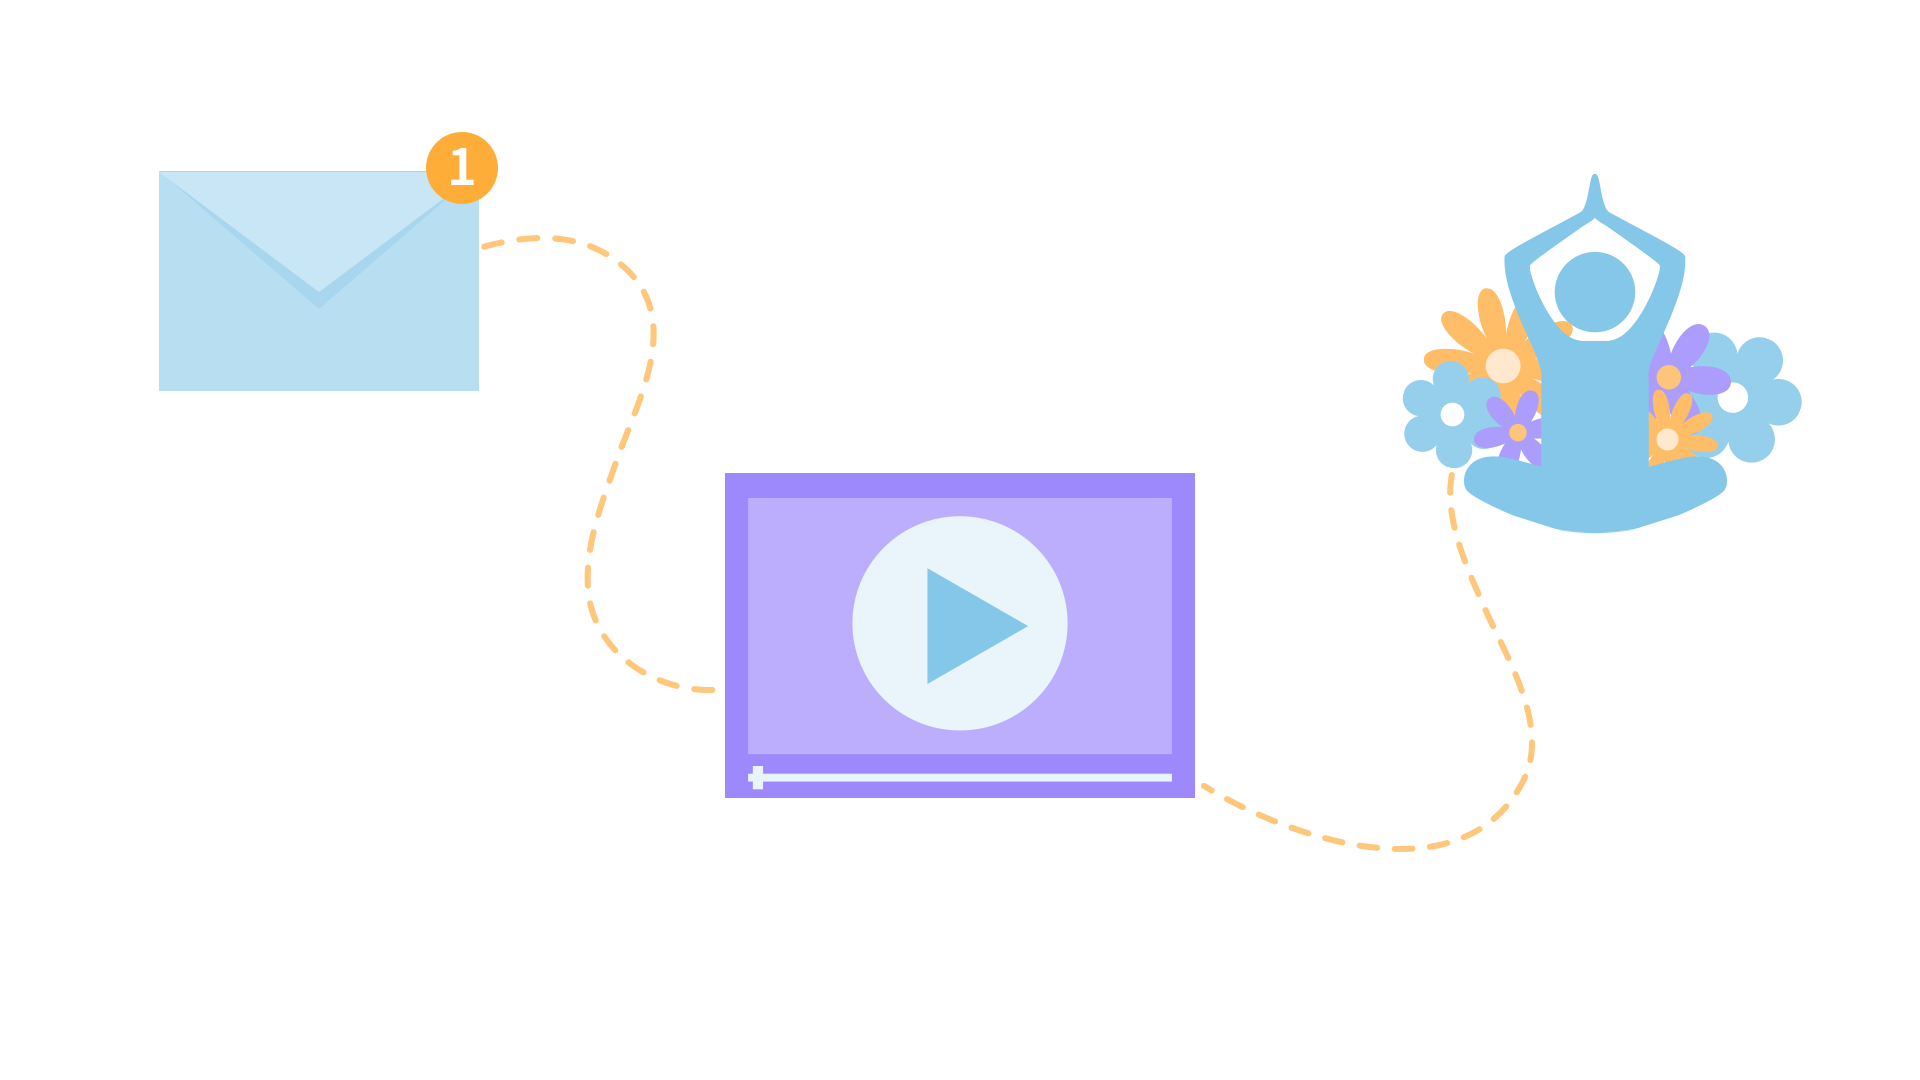
You can now make playlists of select programs into courses!
1. Schedule regular emails to deliver the content direct to you.
2. Watch your assigned videos to focus on the course goals.
To take a course for this program, first select a playlist and then click the "Take as Course" button for that playlist.Description
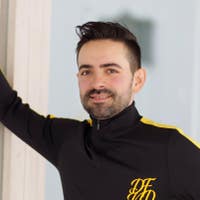
Shelly gives an overview of what to expect and how to stay safe during your recovery. The movement part of the class begins around 2:24.
About This Video
Transcript
Read Full Transcript
Hi, everyone. Welcome to class. Thank you for joining me as part of the knee health series. And this class is looking at the active adult. So people who are involved in sports or maybe their job has something active to it, but a very active adult who either has an injury or potentially is coming back from a surgery. So maybe they've had a surgery to go in and clean up the meniscus.
Maybe they've had an ACL repair. So this is the active adult returning from those injuries or those surgeries. They've been cleared by their physical therapist to start going into more training now. So no longer in the physical therapy mode. We're now getting into return to function.
And that's important to have a communication with the physical therapist or the physician or the surgeon so that you know you're following their protocols. And there aren't that many precautions for a Pilates class right now, but each individual person may have a precaution. So you just wanna make sure that you're in communication with the medical team so that you're following along in what they need. The things that are really important as we're coming back from surgery is making sure that we have good ankle mobility, especially dorsiflexion, where you're flexing the ankle, or when you go into a squat and you keep your heels down. That range of motion is really, really important.
Hip range of motion is also important, both in flexion and in extension. And we think, you know, we have such a sedentary society that we sit in hip flexion, or kind of in the position that Leslie's in right now. But that's not active. That's passive. So we've kind of lost both the range of motion and the strength or control to pull our leg up or to press it behind. So we're gonna look at those as things that we want to make sure that we're including in our class, as well as thoracic mobility.
So you might not think, you know, how does spine mobility have anything with the knee, but the upper body is carried over the hips, the knees, and the feet. So the better the upper body moves, the more mobility we have, the better control we have, and it makes it more efficient of just doing our everyday tasks. So we wanna make sure, again, following Joseph Pilate's principle of whole body health, we wanna make sure that this is a whole body movement. So all the things that you would typically do in a reformer class are great. We want to keep doing those, but we're gonna bring some attention to a few key things that are gonna help the return to activity.
So Leslie's gonna be this adult who is returning to her sports after a knee surgery, and we'll go through some things. So we're gonna start lying down on your back for footwork. And it's important when you're setting up the bar to make sure, again, you're meeting the person where they are. What I typically find is for most people, they set the reformer bar too far away and too high. So if it's far away, you're not getting into deep hip flexion.
You're also not getting into deep knee flexion. So again, you may have to adjust that in the beginning, but know your goal is to get more range of motion there. And then the same thing when people extend their legs, if the foot bar is up high, the legs are up high, and you're not getting to the more neutral alignment that we need as we're walking around and doing daily activities. So keep that in mind as you're adjusting the bar. Let's start with the heels on to just begin.
Yeah, that looks good. And then press back. And lower down. One of the things, and you can keep moving. One of the things that I often get asked or people make a point of is, do I lock my knee? Well, no, because locking the knee is passive, and we're not actually in control of our own alignment.
But I do want you to straighten your leg fully. And one way you can get that is imagining, just pause there for a moment, that the leg is straightening kind of in this lengthwise way, as opposed to if I was to push backward on her knee and it pushing down to the floor. That's gonna get you the bones aligned, and you're less likely to go into hyperextension or not straighten the knee fully. We need to straighten the knee fully. That looks great. Bend your knees.
Another thing that you can kind of play around with is what moves and what doesn't move. So obviously the carriage moves. The foot bar doesn't move. But if you were to imagine pushing the foot bar away, sometimes that changes the feeling of what's going on. And so that control, the range of motion that we have, and then control of it is really important. Now, come down onto the balls of the feet.
And you can continue with all of your foot positions that you use. Just remember if you're going to externally rotate, make sure you're talking about it from the hip joint, not the foot. So make sure that the knee and the toes are always pointing in relatively the same direction. So now on the ball of the foot, press back, I'm gonna add in a different pattern to make sure that we're working through the ankle. So when you push back, Leslie, send your heels more under the bar, great.
So that just feels nice as a stretch, but now to bend her knees, what people often do is they lift the heels up to start the knee bend, but really the knees should bend first. So start to aim your knees to the ceiling. Yes, that's great. And then pause here and lift the heels. Now, scoot your feet down just a little bit, back and down.
Really important when you're on the foot bar that you have the underside of the toes against the bar. Otherwise you're using the front muscles to lift your heel up, and that's not how it works. We wanna use the muscles in the calf. Press back. Pause right there, lower the heels. Now, I'm just giving her just the littlest bit of a pull down as she starts to bend her knees.
So I'm preventing the heels from lifting right away. Do it just one more time in that direction. So lift the heels, lower the heels. Now, I'm not gonna pull this time. Start to send your knees up to the ceiling.
Good. And pause right there. Now to go out, start with your heels. Yeah. So lift the heels up and press out. That's it. Now, hold here, bend your knees. Now the heels are lifted to bend.
Heels down, and press toward my hands as you go. Keep going, keep going. Very nice, lift the heels. Keep your knees straight. So lift up, that's right. Bend. Heels down under the bar. Push the heels under, push under, push under.
And in the beginning when you've not done this before, it feels very funny. It's a strange pattern, but it's really important to know that we're getting into the ankle dorsiflexion and getting length through the back of the calf, but also the control at the ankle joint. And then lift your heels with straight knees. Bend your knees and come down. So work that pattern into your footwork on the balls of the feet.
You can still do all of your wide positions and turned out and turned in. And then when we get to the running part, or some people call it prancing or running in place, I wanna just bring one other point to your attention. So press back. And start in, you've done the alternating before, so you stretch one heel down and then the other. Quite often people put almost all of their weight on the straight leg and do very little with the bent leg.
So I want you to as much as you can, Leslie, yeah, feel like you're putting most of your weight into this leg. So keep your heel up and hold with this leg. Yes. And then change. It's a very, again, it's a very different feeling. So if you're, I mean, this is really good for anybody, not necessarily somebody coming back from an knee injury, because we want to work the intrinsic muscles, the deeper muscles from the foot and into the lower leg.
And that's something that's often missing. Great. And then bend your knees and come all the way down. Now, that may be where you start with somebody, again, with the bar farther back and maybe a little bit higher. Meet them where they are. Work to get them into the position where their legs are straight or their hip is also straight, and as deep of a bend as they feel comfortable with.
This now transitions into jumping. So now we're gonna put in the jump board. So you can just bring your knee to your chest for a moment, and we just hang out there. We're gonna put the jump board in. And now we're coming into something a little bit more dynamic.
And this is really important. We think when somebody comes back from an injury that we need to baby them. And yes, you want to make sure that you're being respectful of their movement, of their body, not causing any pain, but we also need to get people moving a little bit more in these dynamic ways. So I'm gonna change the spring to make it a bit lighter. So I'm using a red and a blue, but you could start wherever it feels appropriate for your client.
And then press back to straight legs. And just hold there. And you can bring your feet up just a smidge. Yeah. So all of that, working through the foot, that pattern that we did during footwork is really important now, so that when the person lands, if you just lift this foot up a little bit, as she's landing, her toes are going to touch, and then the ball of her foot, and then her heel, and then she starts to bend the leg. That's an important pattern that we need to make sure is there, because otherwise the heel will drop, and we're not decelerating. And that control is really important.
So have your feet. Yeah, that feels okay? So now just start to bend your knees a little bit. And it's kind of, it's on the light side. So just do a little baby jump, and just kind of, yeah, experiment with that. And then you can start to take it a little bigger.
That's right. And so we're working to lengthen the legs, that's right, each time, lengthen the legs, good. So you're gonna go back to the feeling from footwork of lengthening the leg in the jump. Yeah, and you can go a little higher. Right, that's right. And jump.
Good. And just do two more. That's right, and you can see again, a little bit of a, pause for a moment, a little bit of a myth buster. Sometimes people say, oh, you need to get your heels down and you need to keep them down. Not possible. (laughs) So don't go so far as to get the heels all the way down and try to leave them down. They'll land, and then they'll come up a little bit as the squat goes deeper.
It's just the mechanics of this, where the feet are, where the body is. So don't require that of people. Now, let's change to a single leg. And I'm gonna make the spring just a little bit lighter. So start on two legs, and then progress to one leg.
So push back and bring one leg to tabletop. And again, go through that same process. And we'll do a few on this side of just a gentle jump. That's right. And so you might notice at first that the heel trembles a little bit as it goes down.
That's normal, that's normal. So keep going with it. And again, you wanna have the knee feel like it's aiming up. Good. Do a couple on this side. And it's important to work both sides. So obviously if somebody's coming back from a surgery, typically it's only on one leg.
So make sure you're doing both sides. Some people avoid the side that had surgery, and some people only do the side that had the surgery. So make sure you're changing back and forth, and make sure that the technique is good on both sides. Yeah, great. And then rest for a moment. Play with tempo. Play with your spring settings.
So much lighter, much more control of the body. Much heavier, you have a lot less time to do the things that you need to do because the return back home is so much shorter. So again, set your spring where there's enough support of the body, enough support of the legs, where the person can really learn this new motion again, 'cause it feels different when you've had a surgery. Then progress to single leg, progress to more springs, which is gonna be faster, progress to less springs, which is gonna be a lot slower, but a lot more demand on the body. There's lots of choreography all over the place.
So you can start to get fancy with your choreography. Make sure that you're doing both your footwork and you're jumping with a more narrow stance. You can also do it with a wide stance. But do both because there tend to be sometimes when people are walking, their feet are a little bit wider for balance. So get the feet under the body while you're doing your footwork and your jumping.
All right, good. You can just bring your knees to your chest for a moment. I'm gonna take the board out. And I just wanna touch on one thing for feet in straps. And again, this is a common motion, our feet in straps exercises.
But I want to again bring your attention to the movement at the hip joint and the position that we're in. I would teach the same thing if we were doing a healthy spine class. It's really important in the healthy knee class, too. So push back slowly. And again, just thinking about working with people, let's say Leslie had surgery on her right leg, and tend to use the left leg to come up into the straps first, just because that's gonna be the less stable side, 'cause now it's against the strap.
And then put the surgical side in, or the one coming back from injury. And so you can come into this side. You got it. And then press the legs long. So again, here, you're looking to make sure that the person has a straight knee alignment, not letting it hyperextend, but also not keeping it bent, so we're working for that. And then I want you to continue to work on getting toward a hip neutral position.
So as you press long, so you're gonna keep your legs straight, and as you press long, almost feel like you could get your feet to the foot bar. Yes. Beautiful. And then slowly let the legs come up, and keep the pelvis and the body just where it is. So you'll allow yourself to really fold deep at the hip and come up, and down, yeah. So this motion, and you can come up a little higher if you want, mm-hmm, and then press away and down.
This motion of length and getting to the hip neutral position again is really important. You know, we're not looking at the knee right now. We're looking at the hip for our posture and returning to function. So that's something that I want you to really be aware of for all your classes, but especially with this group of people. Good. And then come up.
And start to bend and straighten your knees like a squat. And lots of choreography here. So you can turn out, you can be parallel. You could turn in even if that was necessary. And make sure that you've got the proper bone rhythm.
So anytime you're doing a squat, bending more at the hip and going into flexion, there is, underneath in the hip joint, there is an outward spiral of the femur and a widening sense at the back of the pelvis. So every opportunity you have to remind your clients of this bone rhythm, it's really important. And we're gonna learn the opposite way too when we get into scooter. One more. And then press away and pause, very nice. We'll take out, again, if she had her surgery on the right side, I'm gonna take the right leg out first and guide that to the bar.
And go a little bit deeper. You're just about there. And that might be a place too, when you're just bringing somebody back, maybe there's a nice place to put the foot bar up so the client doesn't have to search for the bar. Both feet on, and then lower yourself all the way down. And pause there. You can roll to your side and come up. All right, we're gonna go into a little bit of seated footwork.
So if you haven't done seated footwork before, sitting on top of the foot bar, it's really important to instruct your clients of where the sit bones need to go. And it feels like it should go behind, but your sit bones actually have to be a little bit forward of the foot bar so that when you push you don't slide off. And of course the worst part about that's not falling over, it's it often takes your pants off, too. So we wanna maintain some modesty. Sit forward on the bar. Get your sit bones a little bit forward.
So I'm gonna change the spring to a little bit lighter spring, and go ahead and you can step off for a second, and then you can kind of come up to sit here and your feet are gonna be here. And just make your way on there. And again, if knee flexion hasn't returned yet, so if somebody's, this is maybe early on in their sessions with you, maybe the person doesn't have this much knee flexion. You can do a couple of things, depending on the type of reformer you have. You can either scoot the foot bar farther back, which will give more space.
On these reformers, you can actually move the whole carriage forward. That might be another way. So just make sure the appropriate amount of knee bend is there. You want to keep challenging it, but you don't wanna go too far. So we again wanna have as deep of a knee bend that we can.
Just keep it where it feels safe. So you're gonna start to have your heels just hooked a little bit over the edge. Yep, and then I'm gonna make it even just a little bit lighter. I'm gonna drop down to one red, just so Leslie has a feeling of the movement. Keep your hands on, and start to press away.
That's right. And the first couple, as you know, are a little bit wobbly. Sometimes it's more of a balance challenge than the leg press challenge. And she's doing a very nice job of keeping her body upright. The other thing just to watch out for and keep in consideration is how much hamstring length does this person have?
So maybe I do need to put the bar up again so that their body is relatively higher than their legs to accommodate anybody who doesn't have really good hamstring flexibility. So now pause when the legs are out here. You can straighten fully. One of the benefits of this is she can see what's going on. So she can see her ankle and foot alignment, she can see her knee alignment, and again, coming back from a surgery, that increase in proprioception, right, sometimes after surgery, the proprioception is not so great.
The visual on it is really, really helpful. So that's something that she can look at and have control over. Eventually we wouldn't want her to have to look to maintain good alignment. So as you bend this time, I want you to think of sending your thighs long this direction. So I'm kind of gently just pulling the knees lengthwise.
And you do that as you go. So right. And what you'll start to feel is a little just more co-contraction, a little bit more work around the whole thigh and leg with no one muscle group taking over. That looks great. One more. Good. And let's work on the lengthening part.
So as you press out this time, imagine your leg is like a telescope, something that's going to slide. Right, like this. That's it. So I wouldn't wanna see the knee bend a little bit, and just kind of gently press your knee back. I don't really wanna see that motion. What I wanna see as she's straightening is this motion, and that continues from the footwork that we did earlier.
So do two more like that. So again, in a controlled way, we're getting the alignment and the awareness to where later she doesn't have to think about it, and she might be running or jumping and doing something else that looks great. And pause for a moment. Good. So that's the seated footwork. Of course you don't have to hold on after a while.
You can add all of the body movement to it that we often do. In fact, let's do that in case people aren't familiar with that. So you're gonna press out. The spring feels okay? Mm-hmm. Okay, so press out.
And then with good balance, I want you to do a spine stretch forward. So you're gonna round your spine a little bit and stretch forward. And then as you start to bring your body up to sitting tall, bend your legs. And then here, go into a little bit of extension in your upper back, so you can kind of stretch your back this way. Yeah, and you can let your gaze rise just a little bit.
And then go forward. So now she's able to work through her spine. And arch as if you were gonna do a swan. Yeah. And then forward. And as you come up this time, sit tall.
I'm gonna hold here. You're gonna push gently into my hand, and rotate and twist your spine, yeah. And then come back in, reach forward in your spine stretch. So balance challenge, awareness challenge. Come up, press here, and open and twist.
So she's able to use my hand to help her. And she has great range of motion, but maybe somebody doesn't. So again, we wanna take every opportunity to get more mobility in the spine. Fantastic, great. I'll hold the carriage. You can step off to the side.
All right, and we're gonna go into now a little bit of mermaid to continue working on the spine mobility. So I'm gonna keep it on one red, and go ahead and climb up into your mermaid position. Facing the camera. Yeah. And this is where you have a lot of options for the leg position. So somebody may be coming back and sitting in this position.
This amount of knee bend is comfortable. If it's not, you're gonna put the feet, and this is where there's a benefit to having a higher reformer, you're just gonna drape your legs over the front edge of the reformer. So let your feet come off to the floor. Right. And then sit back far enough where you feel like your feet may be touching the floor, but they can glide a little bit. And I've even taken a hand towel or something, have the client wear socks so their feet glide a little bit.
So until the person can comfortably sit in the mermaid position, this is gonna be where your position is. Scoot a little bit closer. And I want you to keep your feet there. Yeah, scoot a little bit closer. Hand onto the bar. And begin to press away. Take your left arm to the side.
Yeah. And you're gonna just reach it up and over. This will be your mermaid position here. Right. And so the client can move the feet or not, as they feel comfortable, they can kind of glide with it. Come back up to sit tall, and go again, pressing away and over. So as much stretch here as we can. And then back up.
Go again and press over. Hold here. And now turn to face the foot bar. So you may have to bend your arm a little bit. And you're gonna put both hands on the bar. That's right. This is where nice to be able to let the knees, your thighs can just turn a little bit so you can accommodate the body.
And you're gonna press long and away. Let your spine lengthen and get longer. Yeah. And then come up into a little bit of extension. Keep coming up, let the carriage come in, let your heart lift, that's great. And then press away and get long.
And I don't care if this back hip stays down all the way. At a certain point, it's probably gonna have to move a little bit. But you can add this in to make sure, again, we're working on spine mobility, and especially thoracic extension. That's just missing. That should be in every class every time.
And then press back a little bit. Bring this hand back over to where it started. Turn back into your starting position, and come back up. Good. Let's do just a couple on the other side. You can stand up and walk around and come to face this way.
So feet down, and begin to press over. And it's a good thing to watch here, because you might, again, we're dealing with a knee injury. But you know, is there something in their movement that maybe is one-sided? Maybe they have a job where they're only rotating one direction, or they don't rotate much. Or you can look for little asymmetries there too in your teaching.
And go over and hold here. Right. And then turn forward toward the bar. Bend your arm a little bit and just kinda get yourself there. And what I'm really interested in is these lower ribs. That's where I really want the expansion.
So as you press away, you could let your hip lift a little bit and kind of wiggle around, yeah. And then come up into extension. That looks great. And I'm just gently guiding her with my hands. I'm not pushing or pulling very hard. I'm just getting this bit to come open, and I'm saying, hey, go up and around my hand here.
Yes, beautiful. And then go. See, you ask for it and you get it. This will be the last one coming into extension. And then press back a little bit. Move this hand back to where it started, back over to your side stretch, come all the way up.
And take a break. Good, so that is mermaid. Important to include it. And important to remind the clients of how they should be sitting, what the best position is for them. Keep trying the Z-sit or the legs crossed position. And eventually that will become more comfortable.
The same modifications that we use in a mat class where you might sit on a block or a bolster would be totally appropriate here as well, especially if you have a low reformer that's down on the ground. All right, so let's get into, I think let's get into a little bit of scooter. So I'm gonna move the box over. And one of the things I love about a reformer all the way down on the floor is that you have a lot of options for movement. If somebody, especially on this reformer is standing on the floor, and there are even reformers that are higher, and I'm trying to do my scooter, my knee is hitting the mat.
I can't even go anywhere. I have to stand on something. Sometimes we forget and we just start to do scooter this way. Make sure that you're raising the floor so that the person has more options for bending or straightening the standing leg. That's really important. So you're gonna step up onto the box.
Your hands are gonna come onto the bar. And I like to align the toes that are staying on the floor with the front edge of the carriage more or less. And again, if you're on a different reformer, those proportions might be a little bit different. So scoot your foot back just a bit. And then you're gonna stand up.
So this leg is gonna straighten. That's right. So square the hips off the best that you can. And again, it's a little wobbly, so it's not gonna be exactly perfect. But do the best that you can. You know what, Leslie, move your foot closer to the reformer.
That's better. Yes. And then straighten this back leg. And we're gonna start with a version of a standing hip stretch, or even you could think of it as Eve's lunge. And then start to bend this leg and keep lifting this thigh up. And then glide forward and let this knee bend.
The reason we're doing it that way is because we wanna promote more movement in the hip and lift up this side. So lift up off of my hand. That's right. And you can see her whole position comes up a little bit and she gets longer. Bend the leg. Straighten this knee. So we're gonna start with this leg straight.
Press this leg straight before you bend. So get the leg all the way straight. Start now to have your bend. That's right. Bend the knee, but keep lifting this up. And when you talk to people and you're focused on this leg, what they often start saying is, oh my gosh, I feel that in my other buttocks.
And that's what we're after. So I want her to be really active in her hip because that's controlling the placement and position of her knee. And then come up and come back in. Good. So this time you keep this knee straight to start with, that's right, and push back. Good. Keep lifting the hip up as much as you can.
Good. And as you bend, keep lifting the back thigh up. Right? Do you feel it over here? (laughs) Yeah? Good. Now, we can start doing the scooter motion of bending and straightening the leg. How deep she is, that depends on her and how much she can control.
So maybe if this is the first time, come up out of the bend a little bit, maybe you're more up here bending and lengthening. And make sure that this motion is really a swinging quality, back and forth, in and out. And I'm watching the alignment here, and I'm watching the alignment here as she's going. Great. And then pause for a moment. And you can just kneel back down onto the mat for a moment.
Come into any position that's comfortable to hold for a second. I mentioned the bone rhythms earlier with hip flexion. So when we change sides, I'm gonna have you feel the hip extension moment, too. And that is relatively an internal rotation of the femur. And again, this is all happening under the skin, right, in the joint, but you can imagine it happening.
And then that is gonna provide for much more efficient movement. It's not a physical turn. It's more of just imagining it. So go ahead and step off to the side. I'm gonna move the box around. And of course at first you're gonna use the hands on the foot bar.
You might want to put the foot bar up higher. That would be fine for better assistance. Leslie was doing fine with it, so we're gonna leave it where it is. So you're gonna come into the same position. Good, and so the cues that I can give, and this would be something you could use in just the regular quadruped exercise on the mat of lifting the leg, lifting the legs in swimming, anything that has hip extension, you're gonna think of.
So come up to standing. So you get started, right? When you start to push back and you start to bend your standing leg a little bit, mm-hmm, imagine that you're spiraling the inner thigh up to the ceiling. Now you're not, again, you're not physically doing that, but you're trying to do that. And then come back up and bend the knee. That's right. And push back.
And as you bend, not only are you lifting up off of my hand, yeah, and you can see that change. that's exactly what I wanna see. I'm having her think of spiraling her inner thigh to the ceiling. Good. Lengthen your spine a little bit longer. That looks great. Press back.
Bend. Very good. And she corrected it. She started to go down, and then she pulled herself back up. I love that. This time we'll go into it to start the scooter again, wherever it feels comfortable.
And then start to bend and straighten your back leg. Mm-hmm, let it swing forward. So stand up a little higher. Yeah, that's fine. And press, good. So you wanna leave enough space that the knee clears the carriage, back and forth, and she's doing a very nice job of keeping the movement happening like a swinging quality in the hip. Her standing leg alignment is great. I'm watching for that.
The lateral hip control is really, really important. We don't want the knees to collapse in, so that lateral hip control is really important. Good. And then take a break. And then you can even just have a seat on the carriage. If you wanted to practice that at home without a mat or just in a mat class, I've often had people just do it, almost like a hurdler's start where they're here and they're kind of resting on their leg.
And then you start to engage and lift a little bit more. That's gonna help you get the support on the leg. And just like we were looking at it in jumping, we wouldn't want the knees to be collapsed in. So we want the outer hip muscles really working, and then the deceleration of the heel. So that's important here, keeping the outer legs working.
All right, so come up to standing, and actually go ahead and just swing around the back, and you can stand there. And we're gonna get into some pulling straps. Again, it doesn't seem like a knee exercise, but we're going to use it to work on hip extension. And we're gonna use it to work on thoracic extension. And if somebody again is coming back and they're not feeling so confident about moving so much, this is a nice intermission where they're not using the knee, but they're using all the surrounding parts of the body.
So you're gonna lie on your front. Head goes that way. And the carriage is kind of lightly sprung, so just be careful as you get on. And I'm gonna make it even lighter. I'm dropping this down to a blue. But you could certainly use a heavier spring if you want.
And then come forward enough so your chest is off and your lower ribs are kind of on the edge of the box. That's it. And then take the straps. And you're actually gonna hold somewhere up here. And you'll kind of figure out where that feels comfortable for you. Let your arms reach just outside of the frame and kind of down to the floor, that's great.
So again, here is a place, scoot your legs a little to the right, yeah, where I want the legs to be active. I don't want her though to go into any lumbar extension. So I want the pelvis to stay flat against the mat in her position that, you know, her neutral position. And then just the littlest bit of energy of lifting the thighs. But I don't really want them to leave the box.
It's more just that they're lengthened. Start to pull with your arms. And your arms are gonna come up just kind of to the top of the box, and then return them forward just on outside of the frame, that's it. Lengthen your head and look down a little bit more. So this first motion, just for the arms, again, pulling straps.
But then we can start to get into adding a little bit of thoracic extension. And I think of this as a chest lift, just going the other direction. So the prep for the swan, mm-hmm, and back down. So this time, instead of lifting your head so much, think of allowing this area here to melt away from my hand. So maybe just look at the end of the frame there.
That's nice, and keep letting this area here melt away from my hand. Good, nice change, and I don't know if you can see it, I don't know if it'll translate to the camera, but she is getting a little bit more use of the extensors. And let your gaze come down a little bit. That's great. One more. So move in and away from my fingers here. So hold right there, and exhale right here.
Yes, that's it. So you can feel that in your clients. Take a break for a second. You can let your body relax. Now, to add more interest up here, and again, to work on the hip joint as well as the upper body, and to work a little bit more coordination, we can do coordination here. I know it's usually face up, but we're gonna do it here face down just for some more interest in your classes. So start to pull with the arm, and hold right there.
Go into a little tiny bit of extension. Open and close your legs just a little bit. And then bend your knees, and bend your elbows. Stretch everything long to your hundreds position. So stretch the arms long as well. So there's point one.
Open, close. And then bend here. Yes. And then bend the arm, do it one more time. Important to keep the front of the thigh, the quadriceps lengthened. So this is a great way to start practicing that. Very nice, and rest.
And you can put your hands, you can keep the straps and just put your hands there to rest a little bit. So when you're bending the knee, make sure you have the feeling of going around something. So I sometimes will say if you had a bubble behind your knee, could you go around it without squishing it? That helps to turn on the glutes a little bit more and the hamstrings a little bit more, and hopefully you're getting a little bit of the reciprocal inhibition. So that natural one side of the muscle group working, the other side having to eccentrically lengthen, that's a really important point.
So this would come later on for somebody, once they've gained a little bit more mastery of the proprioception and the awareness of this to get into the knee bend, and just bend as much as it feels comfortable. All right. And you can let your legs come down for a sec. All right. And I'm gonna put on a little bit more spring. You can hang the straps just up on the, we'll just put those on the, let's go to the long ones on there, yep. And then you can slide off back here.
Feet come to the floor. Go to the side, I think. Oh, yeah, that'll be great. All right. And so we'll come away now and go into some standing work, and I'm gonna put the standing platform on, and I'm gonna keep the box because I wanna give Leslie a little stair step to get up and down so that she doesn't have to feel unsecure about going into the position. Trying to make as little noise here as possible. So into the standing platform.
And I always tell this story when I'm teaching my students to put the platform, the standing platform on, really make sure that it's into the bracket. I had once an experience where somebody had put it in, and they had done all the right things, tightened the knobs and had it down, but it wasn't in the bracket, and the person stepped on it, and of course the board tipped. So always make sure that it's in there securely. We're gonna use one red spring, because it's just introducing this, so we don't want it to be too light or too heavy. So you can step up onto, then onto this platform first, and onto the carriage.
All right. So just give it a test drive. Do a little press out. And back in. Feels okay? All right. So as she's going, I tend to move around to the back. And I'm looking at a few different things.
First, I wanna make sure the client is comfortable. So is any of this uncomfortable as they're pushing out and in? It shouldn't be, but if it is, we can change the springs a little bit. We can also change the foot placement. So sometimes if the spring is on the light side, people will feel not pain, but almost just some uncomfortable feeling in the inside of the knee.
So you can turn the legs out just a little bit, so if that was the case. And that makes the lighter spring a little more doable for people at first, so you wanna make that correction. Let's go back to parallel. And you can also think about how you're weighting, weighting, pressing into the outside of the foot as you're going, and especially as you're pulling in. And that will activate some of the muscles in the inner leg too, and help to connect the femur and the tibia.
So that's another way, it's almost like a circular motion, like you're doing hug a tree, but with your legs. And just the image of that is sometimes helpful for people. I'm also looking at her knee position. Is it straight or is it hyperextended or is it a little bit bent? So again, we really want the anatomical straight position as much as we can.
And then I'm taking a look also at how the rest of her body is lining up, and she's doing a great job. But often people will stand with their pelvis and ribs out of alignment. So as much as you can, get the ribs and the pelvis aligned on one another. Now, this time, come back in a little bit. Keep a little tension on the spring and bend both knees.
And I would probably, in introducing this, I would come to the front, and I would just let her hold me at first. I could also do one hand. Really important. And you can pause just for a second. Really important that you don't grab the client. So if I hold her hand, she doesn't have the same control of her own balance, so I'm there if she needs me, but I'm not gonna hold her.
So squat down and push out just a little bit. Hold right there. Now, let's go into just straightening the carriage leg and bending it. So again, we're looking at the control of the knee. And we're putting her into the position of dorsiflexion.
So how much dorsiflexion does she have? That's why we're working on that in the very beginning with that pattern of footwork. And how is she straightening and lengthening her leg? Fantastic. One more time. Lengthen the leg, and come in, and pause.
Good, stand up. You're gonna put both feet over here. And I'll give you my hands, and you can turn around, and we'll go the other direction. Okay, so you might see some different things on different sides, out and in. And just like you would in your regular class, you're gonna start to progress toward a heavier spring to get more work in the abductors, to a lighter spring to get more work in the adductors, making sure you're doing a lot of the same patterns, but they're having to control the weight differently. So again, we wanna start getting back into that spontaneity.
Bend both knees, and then put a little tension on the spring, yeah, that's right. And then extend the leg. And there will be at first a little bit of a hesitation to want to straighten fully. That's where you're working on the control of the knee joint lengthening in things like footwork, where they have less demand, less load, and they can work on the technique of it. That looks great. Do one more.
Good, now this time, hold the squat, and keep the carriage pushed out just a little bit. I know we didn't do this on the other side, but I wanna make sure we get this one in. Straighten both legs. Keep the carriage in place. Yes. Very nice. Keep the carriage in place as you bend both legs into your squat.
And up and down, that's it. So now again, a little bit more dynamic control, and you can do this with wider stances, narrower stances. How does a person control but not stop moving? So sometimes, again, we think, oh, I have to control, and that means all the glutes are engaged, the thighs, everything's really tight. You lose mobility in the hip joint.
That looks great. One more time. Yes, good. And then stop. Bring the carriage all the way in. Just hold there for a moment. I'll move the box back over. And you can step down.
And sometimes people really prefer stepping down backwards. That might be something you experience, that going down forward is a little bit more challenging for people. So if needed, they could turn around and step down backwards until they can go forward. And this really brings in the importance of the half squat. And if you've done anything with Polestar before, you've seen that that's part of our screening process.
And people have a very difficult time keeping their body upright when they go into a half squat. And really that position is what you use if you're walking down stairs. So if I go to step down off of the box, I'm going to do my half squat to there. I'm not gonna do it with my body tipped over. So if you're ever wondering why do we do it that way, that's one of the reasons, because functionally, that's a movement that we need to be able to do.
So one last thing, and this is gonna be just on the floor. So come around, Leslie. I'm gonna give you one little thing to do. And this is something we do often. You're gonna stand just here facing me.
Of getting into a little bit of a, what I call a bounce or a jump with the legs straight. So at first it feels like you don't go anywhere. You have to bend your knees to do your jump. But what you'll find is you can start to push until it becomes a little bounce. That's right.
And you're trying to keep the knees straight as possible, yeah, while you bounce, you keep going. Right, and every time, let the heels come down with straight knees. Straight knees. Straight knees, I know. It's really awkward at first. Yes, you're getting it. Good, take a break for a second.
You can also do this as part of footwork, I mean part of jumping, so you can practice that. The control and the spring is really important. So we don't always wanna rely on our muscles as we're doing a lot of our activities. Obviously the muscles have to work, but sometimes they work a little bit too much. So if we can rely on some of the rebound of our tendons and ligaments and the fascial system, we become a little bit more efficient.
So definitely practice that at home, knee injury or not, to make sure that you're getting that feeling of rebound in spring. It's really kind of funny at first, once you get it though, you'll start to notice it become much, much more efficient with it. So I hope that this helps you bring some ideas into your classes of what you're looking for with people returning from a knee injury or surgery. Again, this is really the active adult who wants to get back to doing their sports or activities as quickly as they can. Sometimes we have to slow them down a little bit.
Remember, we're trying to restore mobility. Hopefully in the knee joint that's already been done by the physical therapist. So you wanna keep going toward end of range without discomfort, it might be a little bit, but we don't wanna be causing pain, but you wanna take that process to get full knee extension, full knee flexion. And again, that's really the job of the physical therapist. We're gonna support it in here by what we do.
You wanna have good mobility also at the ankle, the hip joint, and the thoracic spine. That's really important as we're going forward. Do things with a little bit more control at first where it's a little slower, we're starting to rebuild the awareness in the proprioception. Start to change the tempo. Make sure you're including things like the bone rhythms so that when you're flexing again, it's always just, where do I go, I always think when I bend my knees, I'm widening my sit bones, and then coming back up.
When I'm gonna lift my leg out to the back, I'm thinking of the inward spiral. So outward spiral, inward spiral. That's what's really happening at the hip joint. That's what's necessary to happen. And then again, start to change tempos, bring it out of being supine all the time to things that are upright.
Make sure that we're getting back to the functional position that we're gonna go into for our daily life. So I hope that was helpful. And we'll see you again in class soon.
Knee Health: Whole Body Movement for Knee Function


Comments


You need to be a subscriber to post a comment.
Please Log In or Create an Account to start your free trial.
