Description
About This Video
Transcript
Read Full Transcript
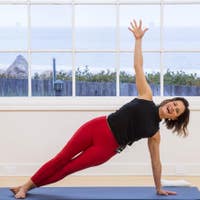
Hi there, Sarah Bertucelli here, and we are going to do a grounding powerful mat class. Let's get started. So I'm gonna come to the end of my mat here, you find a place where it feels right for you, please and stand with your feet underneath your hips and just breathe in for a moment, feel your body. Feel tall through the crown of your head. Take your arms up, look up at the sky, at your hands, stretching your front body there.
With an exhale perhaps roll down one vertebrae at a time. If you can make your hands connect to the earth, that's wonderful. If you need to connect to your legs, that's fine. Allow your head to relax. Bend your knees as much as it feels good to you, allowing the back to release, the neck to release, and then straighten your legs.
I'm gonna push my hands into the earth and stretch my back there, and then bend the knees. My head's relaxed. And as I straighten my legs, I'm pushing my hands into the earth and hollowing through my belly, stretching my back. And just one more time like that. Always encouraging you to kind of wave in the wind and move around and wiggle.
Shift your weight back to your legs. Roll up to a standing position. And let's do that again. Inhale up. Big stretch.
Exhale, roll down. Hands to the earth, bend your knees and straighten This time, bend your knees all the way down. Can you bend? Let your heels lift if needed, into a deep ball squat. Head relaxed.
If you can keep your heels down, please do. My heels need to come up in this shape and then straighten with energy and bend your knees all the way down. Trying to push through the heels, but just noticing where they lift and straighten. And then this time, let's just hold that deep squat for a few breaths and please notice where your restriction is. Do you feel it in your feet, in your ankles, in your back, in your knees?
And certainly modify this shape if your knees or hips don't allow you to go this low. And then press up. Let's separate the feet turning out just a bit. Your hands can be wherever they are comfortably on the earth. Mine are flat and that feels good.
And then I'm gonna bend down deep into my squat and see if I can keep my heels down here, which in this shape, I can a little more. So you're gonna keep your arms perhaps forward-reaching, let your head relax. And again, just notice where your restriction is. If your heels are lifted, it's okay as long as your knees and your ankles and everything say it's okay, and modify as needed. And then just shoot your body back up to straight legs and come down one more time there, just kind of feel that stretch, relax, breathe, wiggle room.
And then take your body, your legs straight again. Walk your feet a little closer together. Come high up on your tiptoes and take your knees to the mat. Put your hands out in front of you in a quadruped position and just stand on your hands, knees, and toes for a few moments here. Push with your hands back to your feet, trying to stretch through those feet, perhaps lifting the knees a few times.
And then with your feet, push forward, stretching your wrists. Repeat. Push back, feel the stretch and push forward. And push back. And push forward.
And then find center, and let's do circles in one direction. Feel the circle in your wrists. As you go back, you're gonna feel the circle more in your knees and hips, circles in your wrists, circles in knees and hips and feet. And just one more time in that same direction, just noticing what you feel. So center yourself on your four limbs, and then go the other way, so just notice what you feel.
Notice if you feel hip clunking or wrist tightness or hip, neck tightness, whatever. Just see if you can iron it out a little bit with this beautiful movement. And I'm just letting my body respond to the shape here. So come back to all four limbs, untuck the toes. You can tap them out a little bit and relax.
Beautiful. Let's go ahead and sit back on our feet, roll over and bring the feet forward. So I've got my feet toward the front of my mat so that I can roll back comfortably. Sit equally on both sides of your pelvis and sit tall here. with an inhale, prepare.
with an exhale, roll back to a comfortable position for you flexing the spine. And we're gonna come up, open the knees and the arms, roll back and come up and open, look up. So flexing the spine and opening. So classically with bassie, we keep our fingers tight together, which is something that I habitually do, but I also like playing with opening and closing my fingers too, so I'm going to suggest that you play with the hand position that suits you. Notice I'm just changing back and forth.
We're gonna roll back this time and stay. Roll yourself all the way down, sliding your feet closer to your bottom and settle in on your mat. So settle into your positioning. Your head is heavy, your ribs are heavy, your pelvis is heavy. Feet in a comfortable position for bridging for you.
Arms are relaxing by your side. We bridge up, exhale perhaps to find the pelvic curl using glutes and hamstrings curling down one vertebrae at time. Repeat. So we're looking for articulation through the spine, enjoying the intensity and of using the back body, back of the leg, back body is working. Exhale to peel up and let's stay.
We're gonna march. Keeping your pelvis level, we lift one leg up. I like to work with a foot flexed foot here and keep the energy through the foot as we march. Keeping the pelvis level is the idea. Changing legs and breathing, please.
Two feet are down, roll down. Let's repeat that sequence, please. Inhale here. Use an exhale perhaps to roll up. Stay, glutes and hamstrings, inner thighs.
We march, flexed foot. We march, flexed foot. And again. So this should be something that you can do with ease for the most part, challenging your body separately each side. Roll down.
Beautiful. Take your arms wide to the side and just sway your legs passively in one direction, enjoying the release. And gently go the other way. My palms are facing up. My arms are just comfortable.
I'm not shaping anything right now. We'll shape things again in a moment. Swaying and pay attention to the idea of pushing with that one foot that's still kind of on the floor and stretching a little bit through the front of your hip. I always welcome you to do that. Just one more time, a little stretch through the front of the hip and we're gonna come back to that feeling a little bit later in the class.
Come back through to center. So here, let's go ahead and take your legs first to tabletop and then stretch two legs straight to the ceiling, flexed ankles. Stretch two arms straight to the ceiling as well. So what I'd like you to think about is look at your feet and we're gonna try to reach one foot toward the ceiling so it's not bringing the leg closer to you, but toward the ceiling, so there's a little rotation in the pelvis. And then do the same thing on the other side.
And just notice if one side seems harder for you to move than the other, do try to keep your legs straight, strengthening the knee joint by strengthening the quad. Now I want you to think now about the rooting, so you're gonna root through the same side shoulder blade that you're lifting. So right shoulder blade grounds, right pelvis lifts, that's opposition. Left shoulder blade grounds, left foot pelvis lifts. Now see if you can just alternate that root to rise without thinking so much about it.
And what happens is, just like with cross patterning when we're swimming, if you find that one side is a little harder for you to do, there's a good chance that you have just a little bit of a hiccup in your patterning there, so this is a good time to practice that. Hug two knees into your chest. Ah, stretch the back for a moment. Take the legs to tabletop, bring the arms behind you. Use your breath to lift your head and chest, please.
Nice big abdominal curl, and lower down. I like to exhale to lift and inhale down. Just make sure that you're breathing and that you feel that you can support this shape with your abdominals, not your neck. Hold here. Bring one leg in for your single leg stretch and change.
We're gonna change kind of quickly here. I like to bear down through my knee into my hip to help ground my leg to my pelvis. Breathe and move, my friends. Now keep the same idea of the hand shape, but just cup the knee on the outside and now leave just the inside hand there and push with intention and twist a little, twist. The other arm can just go where it makes sense.
And we're breathing and we're moving and we're twisting. And a couple more on each side. Beautiful. Now just change where you're pushing, so now you're gonna push on the outside and still rotate. And notice how that feels different, changes a little bit.
The intention of which muscles are being amplified to work here. One more time on each side, please. Two knees into your chest and then rock and roll until you find yourself in a sitting position. Relax forward in your diamond shape for a moment. Long diamond.
Sway side to side. Remember to be curious and patient in any stretch position to allow the little feels to show up. And then sit. Beautiful. Let's roll like a ball, so sit equally on both sides of your pelvis.
Curl your pelvis back and feel fully committed to your abdominals, before you lift your legs up fully commit to the tightness of the ball before you place your hands wherever they need to be for you fully committed to the shape when you begin to breathe and roll. Away we go. And again, inhale back perhaps and exhale to balance perhaps. Breathing, my friends. You can go fast, you can go slow.
I like to sit for a moment in my balance position every single time so that I'm very conscious of where I'm holding from. One more time, please. And then take your legs to shins parallel to the horizon. With or without the help of your hands roll back. I'm gonna hold with my hands today.
Draw your legs into your chest and put your head down. Hold one leg in. How about right leg stays in, the other leg goes long? Relax that leg down for a moment. Sway side to side.
And then settle the leg that you're holding to. Just a passive position here, so we're setting up for leg circles. Can you really ground down through the leg that's on the earth? So that's my left leg and I'm really using my glute. I'm gonna stretch my other leg up to straight.
I'm gonna flex the ankle and I'm thinking almost of lifting it toward the ceiling like we did earlier. And as a result, the opposite arm or the right arm is pressing down like we did earlier. So I'm rooting my right shoulder blade while I lift my right foot, yeah? Okay, so just see if you can keep that feeling as you do three circles inward. One and two and three.
Reverse. Hopefully, that just made it a lot easier to do the circles without thinking about them. Hug the knee into your chest and the other leg comes to join. So let's set that up for a moment. You slide the other leg down, relax a little bit, side to side.
Settle in. Find your pelvis position. Ground through your standing right leg. That's the one that's on the earth. The other leg then goes to straight.
I'm using my grounded right leg. My opposite shoulder is grounded, so I have same opposite shoulder as arm grounded, really grounding there. And then just make your circles inward. So I just took my arms out to the side. Passively reverse your circles, just three of 'em real quick and nice and small.
Focusing more on the grounding. Hug the knee in, bring the other leg in. Stretch two legs up to straight. Reach your hands to the ceiling. We're gonna exhale and lift.
Hold onto to one leg. Again, ground the opposing leg down, really actively ground. And we're gonna change. Focus just on that grounding and pushing and pushing down. So by doing that, you're going to engage a little bit more your abdominals so you're gonna be able to stabilize your pelvis just a little bit more easily.
One more time each side here and then we change the arms just a little bit. So you're just gonna reach up, flex the ankle and opposite arm reaches the foot, ground down through shoulder blade. Change. Ground through shoulder blade. As you reach, you can flex the ankle and we're gonna change reach, and reach.
So really pushing into the shoulder blade to create a little bit of a different rotation sensation. We'll do a couple more here. Beautiful. One more on each side, please. And draw your two legs into your chest.
Put your two feet on the mat and settle for your bridging. Arms can be down by your side or wherever they'd like to be. Inhale. Use your breath to curl up. Feel the backs of the legs and let's curl back down, adding on with the next one.
Hmm. Find the height of your bridge, stabilize your pelvis. Try to keep it level. Lift one leg up, flex the ankle. Point to your foot to touch the floor perhaps and flex to lift up.
And let's do five, four, three, just find your breath, two and one more here. Change. We're gonna keep. The pelvis is gonna go down with the legs, so we tap the body, we lift up, five and four and three and two, and one. Place your foot down, let's change sides.
Press the pelvis, reset. Feel the support from your standing leg. Lift your leg up, flex the ankle. Point the foot, maybe you tap and then you lift. And here we go, five.
Breathe. Four and three and two and one. Now, the pelvis goes with the leg. We go down and up, so the whole spine comes down and up. Three more here.
Three, two, and one, two feet down. Separate your feet a little bit. Press your pelvis up nice and high. See if you can get your hands underneath your pelvis in a bit of a supported back bend here. If that suits you, great.
If it doesn't, it's okay, you can just push into a high bridge position, pelvic curl position without the use of your hands. And then everybody kinda let go of whatever it is you chose to do and come down. Take a beat before we continue on. Feet are gonna go wide, about the width of your mat, but still on your mat. Take your hands overhead.
And if you can, try clasping your hands together and really stretching your elbows to straight and your biceps kind of almost resting on your head or the sides of your head if you can, okay? So now we're gonna do first the spine twists that we did earlier with the legs. So you take the legs side to side, and that's gonna create a little bit more of an extreme stretch. And now we're gonna add on to this, so we'll do just one more. I'm gonna go to face you guys first, so my legs come to face you and then I'm rolling, I'm pushing myself around until I'm resting on my nice straight arm here.
I've got this back leg active pushing with my glute, feel that. Undo it. Legs go first. You're pushing with that glute and I'm stretching my body. I'm getting a nice openness through the front of my body.
And then we're gonna unwind. And now we add on. Are you ready? So here we go. We're here.
You're gonna lift the leg up and you're gonna kind of a donkey kick. Push through the heel and bend and push. Good, like you're pushing a wall away, feeling the glutes working. Push. And let's do three more there.
Nice gluteal engagement. I love it. And we come out of it and go to the other side. So just find that wonderful shape and we are pushing. Now, of course, if you needed to modify this arm position, you know you should do whatever makes sense to you, right?
I didn't say that earlier, but I probably could have. Let's do just three and two and one more. Put the foot down, unwind, take the arms to a comfortable position for you, and just take a beat settling here. Beautiful. Sway side to side a little bit.
Lift the legs up, hug the knees in, stretch that low back. Let's go ahead and take those legs to tabletop. Lift your head and chest. We're gonna hold the backs of the legs and then we're gonna part about shoulder width and find that rounded shape to roll. So here, we'll stay with this shape and we'll find the open leg rocker when we get up, so rock and roll until you're up.
Straighten out your spine and hold. So you could keep your legs like this, or you can go to straight legs. You hold where you think you can do it. Inhale, roll back, please. And exhale.
Woo, find your balance. Go again. And find your balance. And again. Okay, we're gonna really get juicy with the rocking and rolling next, so are you ready?
Are you sure? Here we go. One more. And now release your hands, bring your legs together. Hold.
Take a breath. Yes, we're gonna roll back to the rollover. Here we go. Up, up, up, up, up, up. We're in rollover.
You're gonna flex your feet for me, separate your feet, perhaps you'll tap the floor. Feel that. You're gonna roll right back up to balance like this. Roll. No hands.
Separated feet, balance. Feet together, point. Roll over. Flex, separate, tap. Roll up and balance.
Hold it, together. One more time, please. Flex, separate, tap and balance. Pa, pa, pa, pa. Point the feet.
Let's take a break. Diamond shape, just relax side to side a couple times. All right. I do wanna do a little more vigorous rocking and rolling with the attempt to roll up to a standing position. So here we go.
For this one, you're gonna want your arms to go overhead, so you'll roll back. So we're just gonna see if we can start with our knees bent and find a comfortable position. Can you just roll yourself back and sort of catch yourself with your arms, and then put your feet softly down. Now we'll shape it, roll back. You have one knee bent, one leg straight, hold.
So we're gonna kind of stomp that one foot down, stomp. And again, changing each time. One leg straight, one leg bent. Good. One more time like that.
Can you just do it? Now two legs. Can you get both feet connected? Knees super bent. Try it again.
And yeah. Okay. If you can do it, you get the momentum to stand up or get up however you need to. Ah! That wasn't my best execution, but here I am, standing. Okay, I'm gonna do a little bit of standing work here.
So I'm stepping back to the back of my mat again and we're gonna do a lunge, okay? So you're standing on one leg and you're gonna balance for a moment. Ooh. And then you're going to step with as big of a step as you can forward. However you land is fine.
Okay, so here I am. Now I'm going to bend as deeply as I can, so let your knee transfer over your toes. Go as far as you feel your body says you can. Here, try to straighten your leg. It's not about making it pretty, it's about creating strength and agility.
And then we're gonna do our best to push back to where we came from and it shouldn't feel easy. If it feels easy, you're not going far enough, okay? Change sides. (chuckles) And I'm gonna take a big step. I'm gonna hold it and I'm gonna see how low I can go. And then we're gonna straighten that back leg, going deeper into the stretch and then I'm gonna get my energy together and I'm gonna try to push myself back to where I came from and it's not supposed to be easy.
Push. Yeah? Let's do a few more. So changing each time. Big step, bend deeper, straighten and push.
Again. And notice my arms are just doing what they need to help me and I'm fine with that. This is more about life, just kinda letting your body do it, not trying to make it look perfect, yeah? Again, bend, go deeper, push, back, bend, straighten the back leg and push. I think we should do one more on each side.
We're bending, straightening the back leg and pushing. Whoop. (laughs) And one more time. And straighten and push. (sighs) Shake it out. Here we go.
Coming to a quadruped position, roll yourself down again. Walk out to your quadruped with your hands underneath your knees. And I'm sorry, your hands underneath your shoulders and your knees underneath your hips. Do have your feet tucked to your toes tucked so you can easily lift your knees up. So I'm gonna walk my hands just a little further forward so it feels quite comfortable for me to just shoot my legs just straight.
Give it a go. Shoot. If you're not in the right position, make your adjustment now. Bend and shoot and bend. Two more.
Shoot. Nice, powerful plank. Shoot and hold. Powerful legs. We're gonna do a shoulder tap, so hand touches.
Opposite shoulder, marching with our hands, just change and change. Trying to work up a little bit of agility in this position. Beautiful. One more time. Same thing with the legs, we're gonna march.
The leg can go out to the side, a little more gluteal focus when you do that. And just marching to the side, to the side, to the side as you lift. Good. Maybe you can try lifting one leg and the opposite arm and holding. Then maybe you can try lifting the other leg and the other arm.
And then take a break in a rest position for a few breaths. Breathing in and breathing out. We are gonna come back to our hands, which requires a significant amount of wrist support, so do any stretches you might wanna do now. Perhaps circle your wrists, do some fists, whatever makes sense. Or you can always go down to your elbows or modify as needed.
We're gonna come back to our hands and our knees and take that arm marching thing into a side plank. So if you start with your feet in the right position to be able to push, you can keep your legs really actively flexed here, your feet actively flexed here, so it should be easy enough to just roll around to one side and be in a side plank. Change. Roll around and hold. And we're gonna change.
Roll around and roll around and roll around a couple more. And here we are. And here we are. And one more time. Here we are.
Two feet, two hands down. Put your knees down, come back to your child's pose and take a moment there. Hmm. Let's come through to our hands and knees one last time. Bend your elbows, so you come to the floor and roll onto your side until you're facing me.
And then see if you can stack your shoulders, stack your hips and hover your two legs. Feel free to use your handout in front of you if you prefer, or if you wanna challenge yourself, just take your arms straight up from here, so we're in a nice little side body balance here, focusing on using the upper side obliques. So let's lift those legs up. Five and four and three and two, and just one more here. One.
So let's just roll back to our bellies. This time, have your hands be about the width of a little outside of your shoulders. And for now, I have my elbows lifted, my toes are tucked. I just want you to not yet use your arms, they're just here. And feel your first little beautiful thoracic extension.
And then with your arms pulling you forward, your hands pulling you forward, find just a little bit more range, thinking of stretching your front body rather than pushing yourself up, so it's pulling forward to stretch. Lower down again. Inhale. And maybe an exhale to pull forward and feel that stretch. It's almost like I'm just floating myself up when I do that.
One more time. We're gonna add onto this back extension and make it a little bit bigger when we come back to it. Beautiful. So let's go to the other side. I'm just gonna roll away from you and we'll do those same little leg lifts we did facing each other, so hover the feet, stack your pelvis, stack your hips.
I touched the wrong thing. Stack your shoulders, stack your hips. Okay, let's speak clearly, Sarah. So here we are hovering here. You can take your arm up to the ceiling if you'd like.
And let's lift five with breath and four, please. And three, just working on your balance. And two. And just one more. Thank you.
Go ahead and rest that. Come around to the belly again and let's set up for the swan prep here. Anyone who wants to do the swan dive is welcome to as well. So we're gonna inhale to lift the upper back into extension, use the arms to pull you forward and up, but limit the amount that you're using the arms. There's a lot of gluteal work, there's a lot of abdominal work, a lot of back extension work, and lower down.
We go again. We're gonna inhale. Notice I don't have my hands down. And then I'm gonna use my hands to just help me create a little bit bigger lift. Maybe a full lift, maybe fully straight arms, and lower down, good.
Now if you wanna rock and roll and do swan today, feel free to. I don't really feel like rocking and rolling and doing swan, so I just feel really good and grounded here and this is what I wanna do. Feels really powerful today. And lower down. And one more time, please.
Beautiful. Okay, now let's go ahead and just find our way into a beautiful little rest position, sitting your bottom on your feet and stretching your arms, perhaps out in front of you. Or if you prefer, you could take your arms down by your side and touch your feet, whatever feels right to you today. Breathing in and breathing out. So let's re-explore those squat positions we started with.
So tuck your toes under on your quadruped position. Shoot your hips up to the ceiling. Walk your hands back to your feet. Be in a forward fold. So let's just feel how that feels.
Roll up to a standing position, nice and exploratory. And then when you're upright, lift your arms up. Feel how you feel. Lighter, more grounded. Roll forward again.
This time, do you notice that it's easier to touch the floor or your legs or whatever it may be? With my hands on the earth, I'm gonna bend as far as I can and then I'm gonna keep bending down into my deep squat and it feels just a little bit easier for me, but there's still some stickiness. My heels are still lifted. Just relaxed here and then straighten, push into the earth and round, and come in again. Deep bend and round.
So as I straighten, I'm rounding my back. That's where that cue came from. Now, separate your feet a little bit, your toes are turned out perhaps and see if you can get into a squat, perhaps keeping your feet closer to the earth for those of you that are tight, like me here. So here, let your head hang, let your arms hang. You can swirl around a little bit.
I like to lean into one leg and feel where my restriction is on one foot, knee, hip, ankle, whatever. And then the same thing on the other side. Just notice it and breathe. So if you feel this particularly sticky spot, breathe into it. Hmm.
One more breath in whatever position you're stretching in, and then in your own way, please make yourself make your way up to an upright position, taking your time, doing it in a way that feels like a good idea for you and let's stand to face each other and take three breaths together, please. Inhale, opening, lifting. And as you exhale, allow your arms to float down, but your body stays light and lifted. And inhale, lifting up. And exhale, arms are light, floating down, but body is lifted.
And one more breath together, please, inhale. And exhale. Thank you so much for playing, and I'll see you again real soon.
Pilates with Sarah Bertucelli: Creative Flows


Comments


You need to be a subscriber to post a comment.
Please Log In or Create an Account to start your free trial.
