What's a Course?
You can now make playlists of select programs into courses!
1. Schedule regular emails to deliver the content direct to you.
2. Watch your assigned videos to focus on the course goals.
To take a course for this program, first select a playlist and then click the "Take as Course" button for that playlist.Description
About This Video
Transcript
Read Full Transcript
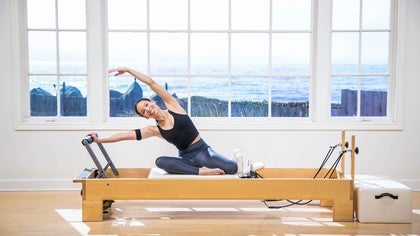
Hi I'm Gia, and today we're gonna do a class that's focusing on expanding your body, stretching and just feeling good. So let's get started. So we're gonna warm up our legs first with some footwork. So I have my springs on three reds and one blue. But you can do whatever springs work best for your body.
I'm gonna start with my feet together, on my balls of my feet. Toes are wrapping around the foot bar and my heels are pressing under. And for this prehensile position, I'm really focusing on driving my heels under the foot bar. So as you inhale, you're just gonna push those heels under. Exhale to come all the way in.
Inhale, stretch long. Exhale to come in. So while I'm moving out and in with my legs, I'm focusing on squeezing the legs together. Expanding as I stretch, really getting that nice length in the legs. We have four more, heels under.
So it kinda stretches the calves as you're working. Two more. Should feel good, last one. Good, we're gonna slide up to the heels, keeping the legs together, flexing the feet. All five toes back as you inhale to stretch, exhale to return.
So while I'm expanding my legs, I'm pulling my abs in, feeling my pelvis heavy into the mat, ribs are connected. The back of my rib cage, I should say. Trying to keep the chest open. Four more. And return in three, two, by the end of the class I'm hoping to feel a little bit taller.
Last one. Good, slide back down to the toes. We're gonna come to first position, heels together, toes apart. All five toes on the bar. Inhale to stretch long, and then coming back in.
So because it's been so long since I've been on the Reformer regularly, I have to keep checking to make sure I'm centered, 'cause I know probably from working at my desk all day, every day, I'm probably very crooked. So using this as an opportunity to center myself as well. Let's do four more. Finding that fluid movement. Last two.
And last one. I'm gonna stay on my toes, coming to second position. Heels are lifted high. This time I'm gonna actually turn out as much as I can, just to get a little bit of a stretch in my inner thighs. So I'm not going so far that my pelvis is out of alignment or it's coming out of neutral.
I wanna keep that neutral pelvis. So I'm just using my max rotation with control. So I'm pushing out and then back in. And stretch and in. And keeping the weight over the big toes and the second toes.
Knees are tracking in alignment with those toes as well. Good, making sure your pelvis is neutral, you're not tucking under, you're not arching. You're in a nice straight position. Four more, trying not to drop the heels. Three.
Two, last one. Good, come all the way in. Bring the legs together again in parallel. You're gonna push all the way out and just push the heels under. Get a nice stretch.
Should feel good, just breathe into it. If you wanna bend one knee, you can. You can also hook the foot of the bent leg under the foot bar and kinda pull yourself a little bit more to deepen that calf stretch. Should feel nice after the jumping that we did in a previous class. Switching sides, bend the other leg.
Hook the foot of the bent leg under the bar, and then pull yourself in. Just watch that you're not locking your knees. So you really protect the back of the back of the knee. Good, both feet on the bar with both heels up, bend your knees, come all the way in. So I'm gonna change my springs, I'm gonna come on up.
I'm gonna do two red springs, take off anything else and then lie back down. So I'm away from the shoulder blocks. I have about a couple inches away so I don't get jammed up. Hands in the straps, make sure they're even. Legs in tabletop.
So we're gonna do a nice circle. So with my arm circles, I wanna focus on expanding again. So I'm reaching as far as I can with my fingers, fingers are long. I'm gonna open the arms out to a tee, push down to my hips and then back up to the ceiling, good. So think of reaching out as wide as you can.
Up, circle out and around and then back up. So as I'm reaching out to this tee I'm trying to keep that connection to my ribs so I'm not letting them flare out. We have two more in this direction. And lift up, one more, trying to keep the back of the neck long, reverse, lower, open, and lift. So if you can, keep looking up toward the ceiling so that way you're not dropping your chin down to your chest, you want everything as long as it can be.
And lift, two more. And up, last one. So I'm gonna go back to that first direction, we're gonna add a little chest lift. So you're gonna open out to your tee. As you push down to your hips, curl your head up.
And then lower back down as the arms come up to the ceiling. So you open, curl up as your hands come to your hips. And then lower back down. Two more in this direction. Curl up and lower, one more.
And then reverse. This time as you push down, you curl up. And then you open as you lower your chest down, back up to the ceiling. Press down, curl up. Open and around two more.
And around, last one, reach those arms long and around. Good, so I'm gonna hang up my straps. We're gonna come on up and grab our long box. So you're gonna put the box just in front of the shoulder rests. I'm keeping the foot bar up this time and then I have a little sticky pad on so that I don't slide.
So you're gonna lie on your stomach. You want your chest right at the edge of the box, hands on the foot bar. You can have your hands in line with your shoulders. A little bit wider is all right as well. It depends on how tight your shoulders are.
So shoulders are coming down the back, legs are active, abs are pulled in. I'm just gonna push out and then come all the way in. So stretch long and then back in. So my elbows are wide, but not all the way out to the side. They're at an angle downward.
Two more. Last one. This time I'm gonna push out and hold, keep the arms straight. I'm gonna lift my chest up into a swan and then lower back down. I'm lifting up, still keeping the legs active, and lower.
It's getting a nice stretch on your back. Also feels good on the abdominals to stretch them. Lift, keeping the shoulders down the back and lower. Two more. And lower, last one.
And then come all the way down, bend your elbows, come all the way in with control. And then come on up. We're gonna turn the box around. So I'm gonna get rid of my sticky 'cause I don't really need it. I'm putting my headrest down.
And then I like my box over the shoulder rest but you can put yours where you'd like. And then grabbing our strap, we're gonna sit on the box with the strap over our feet. So I have my feet hip distance apart and flexing my feet as much as I can and then pushing my ankles into the front of the carriage. So that way I don't grip in my quads. So arms are gonna wrap around you.
We're gonna do a full roll back. If you only wanna go halfway, that's all right as well. So I'm gonna round into a C-curve. Shoulders are down. Staying in this rounded shape I'm gonna roll back.
And I'm gonna keep going into a little back bend. Should feel good, and then roll up. Abs pull in. And then I come over. Again, rolling back.
Arch if you'd like. If you wanna let the arms go is also an option. Hands come back over your stomach. Chin to chest, roll up. And forward.
Slid a bit, and roll back. If you are doing this full roll back make sure you're moving kind of slow 'cause if you go too fast you can get a bit of a head rush. So chin to chest, control it up. Good, one more. Rolling back.
Reach the arms. And then hands over your stomach. Chin to chest, roll up. Good, sitting up tall, hands behind your head, lifting your spine, think of lifting up off your seat. You're gonna hinge back with a flat back, and then come all the way up.
And flat back, and lift. Think of up and back. So you're finding length in your spine, and lift, two more. Keep pushing the backs of the ankles into the front of the carriage. Last one, pulling all five toes back.
Good, coming all the way up, without changing your spine bring one leg out, hold on behind that leg. So the other foot is still flex. You're gonna kick the leg out and in for tree. Kick out, chest is open. Out and in, hold it out this time.
Walk up to your ankle, make sure your hips are square. You're gonna bring your forehead to your knee. Roll back, walk down. If you wanna stop here, you can. If you wanna keep going come all the way down.
Chin to your chest, walk up your leg. Come back over your hips. Two more. Rolling back. Walking down, full release if you'd like.
And then come back up. So feel free to repeat that again if you'd like, or you can bring this leg out to the side. Hold onto the strap with your opposite hand. I like to hold onto my heel. And then you're gonna roll back again.
Try to keep the hips square. Bring that leg with you. Get a nice stretch in that inner thigh. Come on up. Use that hand to help you bring your leg back in front, flex your foot, hold onto the top of the foot and try to lengthen your spine.
And lower that leg down underneath the strap. Adjust if you've slid and then bring the other foot out. Long spine, we're gonna kick that leg out and in. So kick and bend, kick. So one leg is obviously gonna be tighter than the other.
Hold this one out and you just adjust where necessary. Hold onto your ankle, square off the hips. Forehead to your knee before you start, and then roll back. Walk down your leg, release your spine, and then chin to chest as you walk back up. Really let your arms help you.
Roll back again. Bring that leg with you. Keep the leg at 90 as you roll back. And then roll up, hands walk up the leg. Option to bring that hand, the same hand on your heel, other hand on that strap, and bring the leg out to the side if you'd like, and then you're gonna roll back, bringing the leg with you.
This should feel really good. Let's hold it for one more breath and then roll up. Bring that leg back in front of you. Flex that foot. Grab onto the sole of the foot, lengthen your spine.
Try to flex as much as you can. One more breath, lengthen and then bring the foot down. So we're gonna keep the same foot in the strap. You're gonna tuck this free leg underneath the foot and underneath the leg that's in the strap. If you wanna bring that leg in front of you into a 90 degree angle, you can.
I just prefer mine underneath. So bottom hand's gonna go onto the headrest. Top hand behind your head. And then once you find that long position you're gonna bring that bottom hand up behind your head as well. Hold it here.
You're in that nice long line. You're just gonna twist up toward the ceiling and then back to center. Twist up to the ceiling and center. Two more, twist. Last one.
Now we're gonna twist the other way. Twist to the floor trying to stay at the same level the whole time. So you're not lifting or lowering your body. Last one. Good, hand to the headrest.
You can bring it all the way down to your elbow if you'd like, into a side bend to stretch. And then if you like a little bit more you can have one hand on each side of the frame, into a twist. And if you want a little bit more, the foot that's in the strap, you can bring that same hand over to the opposite hand, opposite frame. And just deepen that twist a little bit more. Good, untwist your body, hand back to the headrest.
Come back to your side bend. Pull yourself back up and then we'll switch sides. So the other foot's gonna go in the strap. Make sure that foot's flexed again. I'm bringing the free leg underneath the leg and the strap.
Bottom hand on the headrest, top hand behind the head. Once I find my long position my top hand comes behind my head. I hold that long line and then twist up to the ceiling and center. Twist. Two more.
Try not to move my hips, just from the waist, twist to the floor now. Twist, good. Twist, elbows are wide. Last one. And then bring the hand back to the headrest.
All the way to the elbow if you'd like, into a side bend. And then once you're ready you can twist, one hand at each side of the frame. If you want a little bit more the same arm as the leg that's in the strap. You're gonna bring that over to the other side of the carriage. And just get a nice stretch in that long line.
Come back out of your twist, hand to the headrest. Back to your side bend, and then come all the way up. Take your foot out of the strap and then we're gonna take the box off. So just move this off to the side. (box thumps) And then we're gonna do a little bit of arm work.
So I'm gonna switch to one red. You can also do one blue. It's gonna be a little bit more challenging on your balance if it's lighter but it'll be a little bit easier on your arms. So knees are right up against the shoulder rest. I'm gonna grab onto the straps.
I'm holding onto the ropes. So I'm trying to push my hips forward so I have a straight line all the way down. There's no little hip crease. You wanna keep this as flat as you can. Arms are straight.
You're standing up nice and tall on the knees. You're just gonna push your arms back behind you and then bring the arms forward. Just a little chest expansion, reach the arms back. So I'm trying to use opposition so as my spine is lifting up, my arms are pushing down. We have four more.
Keep the backs of the legs strong to help you balance. Just focusing on length in your body, length in your arms, opening your chest. One more. Good, hang up these straps. Nice and controlled as you bring it to the stopper.
And then turn around. Feet are gonna go against the headrest or against the shoulder rest this time. I'm getting my toes as flat on the carriage as I can. Heels are gonna push against the shoulder rests and I'm gonna grab the straps again. Gonna be careful with balance, lighter makes it harder for balance but easier on the arms.
So again, I'm trying to not have a little crease in my hips. I wanna keep this as flat as I can. Arms are slightly bent. Abs are engaged. I'm just gonna scoot the arms up.
I'm going to about shoulder height. If you can go higher, go for it. This is about as far as I can go while maintaining my control. Lift up and back, lift, good. Keeping the chest open, even though the arms come forward.
One more. Then we're gonna turn this into a circle. So you're gonna lift up, open, down, back and around. So I'm trying not to let my arms get behind me so I can always see my fingers in my periphery. One more.
Now for my reverse circles I need to make it a little bit smaller, just 'cause I find this one a little bit more challenging. Trying to keep my arms the same so one's not making a bigger circle than the other. One more. And then bring the carriage all the way into the stopper with control. Hang up your straps.
And we're gonna add one more spring. So I'm gonna have two red springs on and then I'm gonna lie down on my back. We're gonna put the feet in the straps. So make sure you have a little bit of space between your shoulders and the shoulder blocks just so you're not jammed up there. Headrest should be down.
We're gonna start with short spine. So bring one foot into the strap, hold that foot there and then bring the other foot in to the strap. You want it right on your arches. So start with your legs out. I have my legs parallel to start.
My toes are pointed, my legs are glued together. So for the version of short spine that I like we're gonna bring the legs up for a nice little hamstring stretch. Go as far as you can, try to go all the way to the stopper, it's okay if your tailbone lifts. Once you get all the way to the stop you're gonna lift your spine up, still in parallel with the legs. Now here I turned out my legs, heels together, toes apart.
I'm gonna flex my feet, bend into a little frog. Knees are over the shoulder rest. I'm gonna keep my feet over my face as I roll down so my tailbone is going away from my feet. Once I can't go any further I'm gonna bring my feet down to my tailbone. Push out into a frog, back to parallel.
So hamstring stretch first, once I can't go any further I'm gonna roll my spine up. Make sure it comes all the way into that stopper. Heels together, toes apart as you bend. I flex my feet 'cause I have small feet and the straps fall off. Roll down away from your feet.
But if you wanna keep them pointed, that's all right. Feet down to the tailbone. And then back out, parallel, lifting up the legs. Tailbone lifts. Think of reaching the feet toward the corner of the ceiling and the wall.
Turn out into your frog, bend the legs. Feet stay over your face as you roll down, really enjoy this part of the stretch. Bend the knees, feet to tailbone. Push out one more time, stretching up first then rolling the spine. Bend the knees to your frog, roll away from the feet.
And then feet come in and then push out. So keep the legs out and then lift your headrest up, watch your hair. And then we're gonna have the heels together, toes apart still for frogs. I like to flex my feet again 'cause I have small feet and they tend to fall outta the straps. So you're gonna bend in and then push out.
So bend in as far as you can, keeping the tailbone down. You don't have to just stop at 90. So you wanna get full range of motion in your hips. Bend and stretch. Bend, stretch.
Make sure you're breathing, chest is still open. For some reason, I'm having trouble keeping my heels together today. We're really focused on that connection. You have two more Last one. And keeping the legs turned out, we're gonna go into Peter Pan.
So you're gonna bend one knee into your frog, the other leg goes out to the side. And then bring them back into the center to meet. Other side, bending the other leg to the frog, out to the side with the opposite. And then back together. Try to keep the leg that's bending, keep that heel in line with your sit bone.
So it's going in a straight position. It's not moving in and out. And then also focus on your hip bones staying up toward the ceiling. So you're not rolling from side to side as you're moving. I like to imagine my hip bones are headlights and they're always pointed up to the ceiling.
I'm not turning to either side. One more each way. Last one. Good, staying turned out, let's point the toes. And we're gonna go into circles.
Up and around, go as wide as you'd like. Up and around. Really take advantage of the resistance of the springs to really get you into that hip, into the hip socket. Kinda massaging that joint. Two more in this direction.
Last one, and then reverse. Again, making sure your tailbone stays down so you really have stability there so that everything else can move freely. Two more. Last one. Good, bring your legs back up.
I'm gonna hold on to my straps. I'm gonna bring my legs out to the side to get a nice stretch. I like to hold on just so it doesn't feel like all of gravity's pushing on my legs, but if you wanna let go you can. Just breathe into that stretch. Should feel good.
Again, I like to flex my feet just to make sure my straps stay on. I don't like the feeling of when it feels like they're gonna fall off, even if they aren't. Just feels a little bit more secure for me. And I'm gonna I use my arms to help me bring my legs back in. I'm gonna bring it into a frog position and then I can take my feet out of the straps.
One foot out, bring it against the foot bar. And then the other foot out. And then use the foot bar to control yourself back in. So we're gonna come on up. We're gonna change the springs.
I'm gonna do one red, one blue and then I'm gonna lower my foot bar down to the lowest setting for a little front slip to the stretch your hip flexors. So feet against the shoulder rest just like we had them before. I'm gonna bring one foot onto the foot bar. I want it in line with my hips, so it's not right in the center. It's a little bit off to the off center.
And then I'm gonna try to get a nice stretch in that hip flexor. So before I even push out, I'm pushing my hips forward and trying to lengthen my tailbone down so it's not dumping into my lower back. Now you can stay here if you'd like, if you want a little bit more you can push the carriage back. Just go where you can and then come all the way in. Try not to let the chest collapse.
You wanna keep that lifted and open. You can try and go back a little bit further. And then back in. Let's do two more, trying to stay parallel with the feet and the square in the hips. I haven't done this in so long, it feels so good.
One more. And if you're really bendy and you want a little bit more you can bring your hands onto the frame and then push down a little bit more. And then with your hands are on the frame, carefully bring them back up to the foot bar. Lift your chest when you're at the top and then come out of it. We'll switch sides.
So if you really bendy, you can do full splits in all four sets. I have to build up to a little bit just 'cause I am a little tight today. So before we start, find that nice hip flexor stretch, tailbone lengthening down, chest is open. And then push out. And then come back in.
And a little bit further if you can. Yeah, this is my good side. So I can go a little bit further with it. And back, last one. Again, if you'd like to bring your hands onto the frame, to push a little bit deeper into it.
Try to keep your chest up and then slowly with control, back to the foot bar, lift your chest at the top. You can even just have your fingertips on the bar, come on out of it. And then take off that blue spring for our mermaid. So we're gonna do a Z-sit. So one leg against the shoulder rest, the other leg is in front trying to get both sit bones down as much as you can.
Most likely they won't touch, but that's our goal. I'm gonna bring this foot bar back up actually just to make it easier to reach. So your hand is in the center of the foot bar. You're gonna bring the opposite hand out to the side. You're gonna push out with the hand on the foot bar, lift up and over into a side bend and then come all the way up.
Now with the hand that's free you're gonna grab onto that shoulder rest. Lift the other hand up and bend over toward the shoulder rest. And then coming up, hand on the foot bar, reach out and push over into that side bend. Try to keep the shoulders away from the ears, both sides up. Grab that shoulder rest.
Other arm comes up, lift up to come over. And lift, one more time 'cause it feels good. Push out. I'm still reaching that sit bone down toward the mat. It's come up a little bit but my goal is to try to keep it there.
Lifting up to come over toward the shoulder rest. If you wanna twist toward the shoulder rest you can just pull. It's a nice little stretch on the back. Come back to that side bend and up. Good, turning to the other side.
So one leg is against the shoulder rest again. The other leg is in front. I'm trying to reach both sit bones down, hand in the center of the foot bar. Reach that arm out to the side. You're gonna push out, lift up to go over toward the foot bar, finding a nice long line from your hand all the way down to that hip.
Come all the way up. Grab onto the shoulder rest. Lift up to come over toward the shoulder rest. And then back up, hand on the foot bar, push out. And then come back up, hand on the shoulder rest, up and over.
Make sure you're not collapsing. You want to find that space before you do your stretch. One more time, up and over toward the foot bar, shoulders down. Find that connection into the back. And then back up, grab onto your shoulder rest, up and over.
All right, come all the way. Oh, sorry, I forgot our little twist stretch. How could I forget that? Grab onto the shoulder rest with both hands, just pull away and then come back to your side bend and then all the way up. Good.
Hopefully you feel a little bit looser, a little more open. And get ready for our next class where we have a little bit more fun and play. Thank you.
The Pilates Daily: A Class for Each Day of the Week: On the Reformer
Mention
 |
Gia Calhoun (Teacher) |
 |
Gianna A |
|
|
Kayla B |
 |
Lori Anne Thompson |
 |
Sarah Jane Conrad |
 |
Vicki O |
 |
Lyn O |
 |
Sarah M |
|
|
Cass H |
 |
Rachel |
|
|
Luisa C |
|
|
Margaret B |
 |
Lacey |
 |
Robin S |
 |
Judith R |
|
|
Mary R |
|
|
Jo P |
 |
Amy V |
 |
Laurie V |
|
|
Therry D |
|
|
Dawn U |
 |
Joan Breibart |
 |
Lori M |
|
|
Kristen S |
|
|
Elissa D |
Comments


You need to be a subscriber to post a comment.
Please Log In or Create an Account to start your free trial.
