Premium workshop

You can view a 2 minute preview. For details, scroll down below the video.

Workshop #1908

Powerhouse Revisited

60 min - Workshop
39 likes

Description

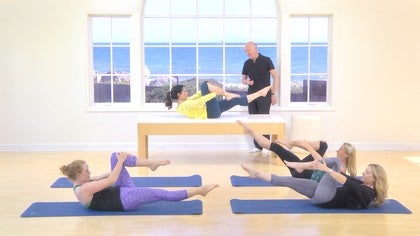
Join Alan Herdman in a workshop where he discusses the question, "What does the Powerhouse mean?" He reinvents the term to be more relevant today, and he shares new ways to use the abdominals successfully. Alan's techniques help keep tension out of the neck and shoulders, so you are free to move in exercises like the Roll Up.

Objectives

- Discover what is meant by the term "Powerhouse"

- Learn how to use the stability of the pelvis to connect deeper to the abdominals

- Discover which muscles need to be turned on to make the whole body work efficiently

What You'll Need: Mat

About This Video

(Pace N/A)
Nov 28, 2014
(Log In to track)

Transcript

Read Full Transcript

This workshop is going to be focusing on the powerhouse. And I'm smiling because I don't know what the powerhouse means. And I'm still battling with it after 45 years. For me, the powerhouse is, there's not enough information. And if you'll say to a student, use your powerhouse. What, can you explain why your saying that word? Is it because Joe used it or I just don't like it, period. So we're gonna look at it less. Let's think we'll have, uh, reinvent the powerhouse. Cause for me, the power house is not just the abdominals, it's the whole area from maybe from the ribs down towards the knees.

So the to come, you can bring everything together. If we're going to use the abdominals successfully, what, what do we have to have? We have to have stability of the pelvis. Cause if the pelvis isn't stable, you're not going to get the correct use of the, the, the center of the abdominals, the back. It's, it all goes to, comes together all, we can't just say this is working, this, it's what's happening around it. So for me, um, when we think powerhouse, it's the whole area that needs to be recruited to do something rather than just sucking in the stomach, stomach muscles and doing something. So we're going to think of the whole area working so that to get that we need to train, train the area. And for me, I started with the pelvis and I start with on a semi supine position because it's a more comfortable position for people. So Jennifer, would you come up onto the bench here and we'll, let's go into the position.

So semi supine is lying on your back with your knees bent at 90 degrees, would you like to go into that position or do you want to watch me first? Just have a look. So in this position again, make sure that people are not in an uncomfortable position, that they're not, that this area is not causing them a discomfort because of it. If it is, they're not going to do the exercise very well. What I want is that the feet are in parallel, the outside of the foot, each, the outside of each foot is parallel to each other. And the foot is like a triangle.

So the apex of the triangle is at the front of the heel and the base is across the tassels. So you feel that in an equal position, the legs are at 90 degrees. That pelvis is what we call neutral. So the whole pelvis is on the ground from the coccsyx up across the ridge, the pelvis. So that is comfortably on the ground. There's not a tipping this way or that way. So there's no pelvic tilt, there's no pelvic arch, you shouldn't, you shouldn't feel the bottom of the pelvis or the top. It's all together. Okay. And the ribs are wide.

Just allow the ribs to be open. And a a, imagine that the back of the rib cage is just spreading out along the floor and the head is nicely elongated. And quite often you looking at the shape of the lumbers, uh, of the thoracic spine. If you've got someone with a slightly a slightly kyphotic spine, you would need to change the position of the head. So then they're not in this position. So raise the head slightly. Okay. And the arms are just very nicely set by the side.

Again, if there's a, uh, quite a, uh, marked Lordosis, you need to adjust. What I usually do is raise the feet slightly. So if you, if there's a really marked a tip, which means this, that led a lot of pressure onto the Coccsyx, I would raise the feet. Even if there's not a Lordosis, I will quite often put start people in this position that that will help them to feel where they're supposed to be. The other thing is quite often you'll get people with pronounced muscle development on the outside of the quads. So that position will do that.

So they'll go off the feet. So I just play something very light between the knees not to squeeze, just to hold. So they have this squeeze that they're going to restrict. So they're just going to hold that just to keep the, the everything in line. So we're from here, we're just going to feel where the abdominal wall is. And first of all, we're just gonna take a deep breath in through the nose and allow the breath to fill the diaphragm. And then breathe out and just allow everything to sink down.

Think of a pair of bellows. In fact, you're not placing anything. You're filling the lungs and then you're entering them. So it's an inward breath through the nose. As long as can maybe for four counts and exhale for about six cards. So you all the exhalation, we wanted slightly longer than the inhalation and just let this happen.

Let's do one more thing, then we'll have a go with this. With the same breath. You take a breath in and you're going to focus on your floating rib, your hipbones, and just sit, Burns. And as you breathe out, you're going to feel those areas just gently pulling together. So you're narrowing the waist and narrowing the hips. So that's a feeling of everything come to coming together. Obviously the hip bones, unless you're pregnant, will not move.

But it's the sensation of pulling across through here, which will help the low abdominals to work. Shall we try that? So semi supine. Think of that 90 degree bend. Make sure the feet are the outside, the foot is in line. Just this way just slightly. Yep.

And imagine that triangle under the lower part of your foot. Think of where the the apex is. It's at the front of the heel and the base is across the metatarsal. Go up towards your pelvis and I just feel, just imagine your pelvis is in sand. Nice soft sand. So just finding its own level and now move up to your rib cage and just imagine the ribs are wide.

Feel that the ribs are opening out to the edges of your mat. Now take your hands and just get hold of your head very lightly and have it just gently give yourself an elongation. Just the light's poor. And then bring your arms by your sides. Now just think of your lumbar spine now and just feel the weight of everything. Just letting it find its own level. You're not imprinting, you're not arching. It's in between. Okay.

Take a deep breath in through your nose and slowly breathe out through your mouth and just let everything drop down. Don't force it down. So to breathe in, try and get the breath as much in into the lungs as possible. Feel the diaphragm move as you do it and breathe out. Making sure your pelvis doesn't move. One more time. Breathe in and breathe out. Long slaughter cancellation. Good. Now think of your stick.

Think of your sip burns, your hipbones and the floating rib. Actually just just place the heel of your hand on to the waist just above the pelvis and allow your fingers to spread for into the center of your, of your lower torso. Take it down a little more, Juliana. That's it. Take a breath in. Now as you breathe out, feel those areas pulling together. Just gently push with the heel of the hand and wrap around with your fingers and feel the waistline narrow. As you do that, and then relax. Breathing in and breathe out and just be gently drop the fingers down into the center. Just see if there's a slight more of a drop down there and relax. Breathing in. Breathe out.

Gently push the heel of the hand in fingers just towards the navel and just a very gentle indentation with the fingers and an okay. Place your arms by your sides. Now you're going to do exactly the same thing, same breath, but as you do this wrapping around, you're going to base slightly tip the pelvis about that much off the ground, no more than that. And then slowly place a Baghdad and breathing in. So take your breath in and breathe out, stabilize and at the same time tip and then slowly take it back down so you're getting a little more right the bottom of the abdominal wall to a couple of those. And now this time what I want you to do is with that, don't think of the breadth so much on this. Just think breathing, but I want them. What I want you to do is to do a tip and an arch, so to sort of rocking affects its back and forward. Put your hands on your hips with your fingers at the front and your thumb around towards the spine and just get the hands to help you do that through the movement.

Just think of rocking back and forward so you're just mobilizing the spine, the lower spine. Just keep the movement below the rib cage just working from the pelvis. One more I addressed Jennifer. Place your feet back down. Put your hands on your hips again. Just watch what I'm going to do with Jennifer here. We're going to do a bridge.

Well, what I want you to do is to place your hands here, which will lengthen the waistline. So you're going to keep the gentle pressure, so you're opening out the waistline. Take a breath in. Now as you breathe out, you're going to lift the hips straight up to the ceiling to there. Hold that position, breathing in. Then as you breathe out, row the back down. Okay? You've all done. What I don't want you to do, you thought about your spine cause I said roll the back Dab so I could see you thinking. Rolling your spine down sort of Vertebra by Vertebra.

I want you to try it again. Ignoring the spine. So what you're going to do, you're going to go into the bridge, you'll hold it, they're breathing it. Then you're going to go down from the front of the torso. Just imagine the, the, the roll down the, you know, you do in class. Just think of that happening so you're on the spine will go down, but you're thinking of what's happening to the front. In fact, when you go down, you're working very deeply into the abdominal wall, so breathe out and lift. As you breathe in, place your hands back down onto the floor. As you breathe out, start from the upper torso, softening the further the ribcage done. Slowly, slowly, slowly sunk, sinking, sinking, and I'm pulling more, pulling more. Pull in, more pull and more pull and more. Pull in. What?

That's it. Right down to the pubic bone. Do you see the difference? Yeah. Let's try one more. Breathe in. You don't have to use your hands after a while when you get used to it. Breathe that. Now. Really don't think of your spine.

Just curl the front of the torso. There's more here, more here and here. Right down to one in more, in, more, in, more. In, more in what? That's it. Yeah. I do like this because people's spines are not necessarily same flexibility I've been as each other to start with and sometimes spoils the flow of the class. But also you'll get quite a lot of people at the thoracic spine may be tight or the lumbar spine may be tight. Now the teacher has said move your start spine down Vertebra by Vertebra.

So they get to an air that's tight. So they stop pushing, trying to make it work and it's tightening the back extensors. So it's, we're taking that away to get a little more freedom of the movement. Okay. To get strengthened with flexibility so that when we do things like roll ups and sit ups, we can get a little more work into the area. Okay. Okay. Place your hands behind your head, elbows wide. Separate your feet too about the width of your elbows.

The, some people find this position not easy because you know, if they're not to, um, to, to mobile in the upper back. So if you've got a position where the elders are here, place a pad on each elbow so that they've got something to to hold on to. What we're going to do is take one leg, in fact, on this one, we'll take the left leg. Now just allow the left leg to open out to the side and then slowly stretch the right knee diagonally across the body towards the left foot, turning the head to the, to the right side, and keeping the rib cage down and lengthen away. Hold that breathing in.

Now as you breathe that work onto the right side of the abdominal wall, think of the obliques on the right side, pulling in to lift the legs up, and then go over to the other side. So the right leg drops over the left leg, stretches away. Just imagine that the leg is being pulled away as it goes down. Pause, breathing in, breathe out, lift up through the obliques on the left side, and then come back. So make an at an abdominal exercise to come up.

Also allow the hip to come off, but don't push it off. So as we go over, it's not the pip lifting. This is dropped open. It's that elongation which is allowing the, it's gently pulling the hip off and what you can do is to hook this foot over the knee and just get a little more stretch so you feel the pull through here. Take the foot off, breathing in, breathe out. Now imagine the knees are quite the right knee and this point is quite heavy so you have to pull up and [inaudible].

Okay, so it's an oblique stretch, but also that you're using your center at the same time. Bring your feet together, keeping the hands where they are. Bring your elbows up is so that your [inaudible], if you've got your head in a sling, okay, you take a deep breath in. Just watch for a second. Now as you breathe out, you do the stabilization for about a third of the exhalation and then you lift your sternum forward. What do you mean him a little more? But again, that's it. And then relax back down. Breathing in.

Now you're not lifting with your hands. It's almost as if you've got a hook on the center of the state and you're being pulled up. And this, the hands are just supporting your head. So this, the throat stays very soft all the time. So deep breath in. And now a third of the breath to pull in and there's two thirds to lift and relax. Back Down. Remembering about the pulling everything together.

So breathe in and relax this down a little more and bring your head up. No lift. The sternum, sternum, sternum, stone and stone and stone, the stone. There you go. That's it. And that gently think of as you do it very softly. Draw the scapula down. Not a lot, but just feel, it's sort of dropping slightly, a little higher. Amy, a little higher and dog. So there's no tension in the neck at all. Pretty much. I, I, hopefully you know, you, you're never in this position. The people that you didn't know who know how to have, what is this signifying to your back?

It's an extension. So we're uh, uh, and we want flection. So this is why I like the arms here so you can get the curve forward, okay? Once you've got that under your belt, once you going to do is you're going to come forward, then you're going to slide your hands off your head and stretch towards your fingers, towards your knees. Okay? So take a deep breath in. Stabilize, breathe out and lift the chest. Breathe in and slide your hands towards your knees. Breathe out and lift a little higher. Lift lift, lift it, hold it there.

Place your hands back behind your head. Breathing in to go back down and stabilize out and sternum forward. Lift a little higher. Elongate your arms, dropping the scapula down. I lift up, up, up, up, up. Hold it hands behind your head. Breathing in and breathe. She go down and [inaudible] co forward and rich. Lift Justin and lift your sternum. Lift your sternum, hands behind your head again. And uh, how's that?

We're going to use that for the single leg stretch. Okay. I like linking exercises together. So rather than doing everything in, in isolation, just I, this is a very good preparation for the single leg stretch. When I asked the lifting the sternum, it's forward. Yes. Because your, your, your coming forward and the Sta, your bringing the sternum forward towards your knees. Maybe something. Yeah. So it's because we're doing a curve. It's not a up, it's forward. Yeah.

So this time what you're going to do, you're going to come forward. You're going to reach your arms out. Now hold that there and there you bend your right knee up and take hold of your right ankle. Bend your left knee up and take hold of your left ankle. Elbers lifted. Now move your knees away from your sternum so that your knees are in line with your lower rib cage.

And now do the single leg stretch in that and dressed. Okay. Can you do it again? I see this is, I mean this is, if you see the pictures of Joe, he was doing it this way. Now it's fine cause it gets the hip flexes working, but in fact it's not helping anything up here. So what I want. So what does stay there?

The sensation I want on this is not change legs. Stay there. Stay up there twice in this place and change. Not too quick. Breathe in and out. Shoulders out of your ears. That's it. That's good. Let's try that.

So the emphasis is forward not back. So you're not pulling your legs into your, your legs are bent, but not in into this. Okay. So let's start. Start the same way. Hands behind your head. Take a deep breath in and stabilized first and sternum lifted. Slide your hands away. Reach a little higher now.

Lift your right knee up. Take hold, lift your left. The uptake. Hold Elbers wide and stretch. Breathe out. Reach and reach. Keep lifting. Keep lifting. Elbows wide, elbows wide. Think of your sternum coming forward towards your knee rather than the knee to the sternum and reach.

That's nice and rich and rest. Good. W W I mean there's the normal way is to have the outside hand to the ankle. So you don't twist your knee if quite often, if it depends on the, the um, proportions of the torso to the leg or the length of arm to the leg, you put your hands where we'll, we'll work. It doesn't have to be here. Quite often people will just hold on here, which is, which is valid. Okay. How do your stomach muscles feel? Right?

We're going to do oblique curls. It's the same thing. So as you exhale this time, you're exhaling, coming straight to the curl, not lifting and turning. So you're doing the oblique. So you're going to go over to your right side with the upper torso as you come forward to breathe out and uh, and breathe in. Come down and breathe out and turn and in good dad. Okay? That's okay. But what I want you to do is to take your right arm and make a fist in front the torso like that, and bring your left out the hand behind your head. Just the same judge. And from there. Now you take a breath in and now you're going to hold that hand where it is and term as you come up and the hand stays in the other direction.

Giuliana into yes and lift and then dad stabilize and the to about three and then and uh, and then change over. If you think of lifting that weight just, there we go. That's it. That's where you'd go aiming for when you're a restaurant. You've done three. That's good. What do you, what do you find happening there with your arm in that position? Stabilizes the shoulder. So we're not getting this unless we wanted.

I mean, you can do this. Uh, you can do, um, the crisscross, which in fact you can either do the crisscross for the obliques or for the thoracic spine, but right now we're working much lower down so this stabilizes so you can get much further over and you know, you can make a sequence of this and sometimes just to, what I find is if people have done this, the single legs, either they cross papers over and over again, it becomes like, oh, here it goes again. And they, they get messy. So think of working out little sequences for it. For example, they just, let's mark this. What hand behind your head actually let's do it. Facing your, your public. So your one hand is on the floor. You take a breath in. Now as you breathe out, you stabilize and that as you curl, you Lenten this arm along the floor. Then you breathe in and lifted up and turn it out.

Turn it over. Sorry. Then as you breathe out, you take this hand away. Give me this hand and rich across Dan. Bring the hat, you have to reach the, the hand reached the hand. That's it. Thumbs up. Breathe in to come through center. Take this hand behind your head, reach this one away and then go back down. Little choreographic number.

So one hand by your sides as you call for to your left, you Lenten the left hand along the floor. Now lifted up and Richard Away. Still breathing out. Turn the hand over. As you breathe out, bring as you, sorry. As you breathe in, bring the hand over, lift your thumbs up to the ceiling and breathe out and come over left hand behind your head. Turn the right one over and reach and then go down. I think I did the breath different when I'd demonstrated it.

So let's change the breath again just to make sure. So let's work through this again. Stabilize and breathe out and uh, and reach and lift and reach your arm away. Now as you breathe in, take the hand across the body and get it onto that hand. Breathe out and come through. Center.

Breathe in to go back with the hand and eye down to the floor. Hand behind your head. Uh, breathe out. Turn and reach the hand away. Breathe in and lift this hand up and bring the other one over. Breathe. And then these go in the opposite direction. Breathe out and come all the way over.

Right hand behind your head. Breathing in and then go down. There we go. Just so you're getting a different way of working. So you're really working into this area here, which will help when or when you're doing all the other, you know, sideline leg lifts, all that sort of thing. Once on each side. Okay, take your breath in. Now as you breathe out, Carl, lift your arm up and turn. Breathe in and reach across. And take your knees in the opposite direction. Breathe out and come up.

Think of lifting your upper torso a little more. Go to the other side, hands behind your head. Uh, reach the hand away and breathe in. To go down. Last one and for try and push a little more into the positions. I really reached that arm and as it towards someone, go on retreats, lift higher, lift high all of time. That's lovely. Hand behind from your head onto the hand, knees in the opposite direction. Now come through center, lift a little higher and over right hand behind your head.

Stretch the other arm. Take it down. Nice. Nice. Straighten both legs as we've, let's do the roll ups now. Okay. Arms back behind you. Can you, can you just show me your normal roll up position? Okay. In your own time. Do it. Yeah, just do it.

Okay. That's okay. Just it's [inaudible]. First of all, I think it's pointless doing a roll up with someone with a very tight back. Why? So we'll do this one first and then um, uh, we'll, we'll try it in a slightly different way. Okay.

What I want you to do in here is bring your arms to that elephant. This is no breath. You just bring your arms up. Then as you inhale, you're going to lift your upper torso forward into that position. You're going to pause there and focus on the low abdominals and then as you exhale, lift over that area that you're focusing on. There you go. Flex the feet and stretch over with your arms parallel.

Now there I want you to allow the shoulder blades to slide in. Cha is ah Ha. Then before you go down, you slide them back into position, breathing in and then breathe out to go back down, keeping your arms parallel. Point your feet as you go down. Flex on the way up. That's it. And then back.

So when you're there, just allow that to happen and then draw them down. Breathing in. Ready to roll back down. So flex feet to come up. Arms up first. No breath, Arthur, back and head forward. Breathing. Incent. Gonna look down at your feet. Palm. The arms should be parallel to the floor. Pause and focus now as you breathe out, lift into the curve.

Lift, lift, lift, lift, lift, lift. Keep your hands and the arms parallel to the floor and reach. Now slide the scapula up. Slided down, breathing in and then slowly go down. Leaving your hands where they are. So in fact you're pulling the torso away from the hands, pulling more, pulling more. That's nice.

And back. [inaudible] I don't mind if the hands are there or there, whichever is comfortable. Try a couple more like that. So it's flex to come up, point to go down. So bring your arms up first, lift and pause. Focus. And now lift from that focus part. Slowly, slowly, slowly, slowly and rich. Shoulders into your ears. Stretch over a little more. Pause. Breathing in, drawing the scapular down and now leave your hands where they are and slowly go back dad.

That's it. That's nice. Do you see how it helps to organize so it doesn't become a throw up as far as the roll up. Okay. Also be careful with your arms. I want the hands to be straight but not rigid. So when you stretch forward, it's the scapula comes up and goes down.

But the hands aren't like this. It's an easier movement. Okay. Should we have one more? And um, so first up, a back and head forward breathing and pause. Focus on that air. Flex the feet and lift soft, easy hands and stretch over and reach. If the head up just a little, there you go. The heads in line with your arms and now draw the scapular down and slowly pull down or the scapula down a little more.

Pull your navel away from the direction of, think of your tailbone sliding towards your heels. Lovely. For a long time I would say no, I want your spine to go over. Don't let the shoulder blades go. But then I thought if I, and that I was getting a restricted stretch cause where people were holding back cause I've got to keep my shoulders down. So I've worked on this bender cause then you get a nice, as you say, openness here, then pulling back down to go down. So you've got that feeling of working back and forward.

Actually how I got it working on, um, where I have a studio in London, there's a gym, there's, it's in a big gym and there's the Ibex machines, you know, where they're all that. And I'm doing a lot of work like this with it and I'm feeling much more mobility in my, around my scapula. So I'm trying to fit it into the exercises. So you see how it's easier on this position? No, Amy, you have a terrible spine in that. It's so stiff. So we're going to watch Amy now. Stretch arms are slightly heavy arms.

I'll take a breath in. Now as you breathe out, just feel the tailbone. Just gently slide towards your heels, feeling your shoulders quite heavy. Keep that feeling of sliding. You're not talking about it. The sensation of the tailbone sliding along the mat and pulling your abdominals away from your thighs as you go down. Slowly, slowly, slowly, slowly, slowly, slowly, slowly. [inaudible] and now place your hands on the floor and push yourself up.

Just lift yourself up at any which way? Start again. So it really is, you know, you, you, you're fighting a battle. If someone's got a stiff spine and they get very frustrated when they can't get up. So reverse curls and I won't in a classroom, if there's a couple of people with very stiff backs, I'd say, okay, you two do the road dons instead of the roll ups because that makes them feel so I'd get everyone to do it. Yes. Help yourself up each time. Good. Roll over onto your front.

Just rest your forehead down onto your hands. Now, quite often when you're doing things like the roll ups and uh, the pelvic tilts, we need to train some time with some people. We need to train the glutes and the hamstrings a little more to, to get the feeling of doing the work. So if with the pelvic tilt, I don't want people to squeeze the glutes to do the tilt, I want the tilt to activate the glutes, but some people can't because there's not a lot there. So we'll do this. Normally, if I'm working individually in this position, I'll put a pillar under the, the torso to help to support. Otherwise just feel you're quite long there. Field's spine has, um, elongated.

So take a breath in. As you breathe out, just squeeze your sit bones and feel the abdominal wall. Lift up towards your ribcage, not towards the lumbar spine. And then relax, breathing in. And just to do about four of those, just relax through here just to make sure. Yeah, that's good. Okay. Okay. Now stretch your arms out in front.

Palms down your nose, just hovering from the floor. Okay. Now just get that very gentle pull, not as not as much as you've been doing. Now from the, as you breathe out, just gently float your right arm and left leg off the floor. Not very high. And inhale to go down and lift and don, keep the scapular in place and just float up. I call this modified swimming.

So you have time to control what's happening in the lumbar spine as you do it. And rest, always make sure that when you've, when you do this, that you start completely stretched out. So when you're lifting, you're not doing that sort of movement. You're just lifting back. Okay? The other thing that I find a lot of people do in this, they will there, there are, and the teachers do this as well. They ask people to lift their navel away from the floor. You're so pull your stomach muscles up where? From the floor.

So we're going to have an experiment. Stretch your arms out. So what I want you to do is to lift your navel up off the floor. Uh, no lift your right arm, left leg, and then don and left arm. And right leg and then done. Now low don, relaxed completely. No, just gently squeeze your sit. Burns and I feel that from the tailbone, from the pubic burn up towards the rib cage. It's nice and long.

Now do the same thing. Breathe out and the lift and okay, what's the difference? Your arm is much, much lighter because what happens if you, if you're lying in this position and you pull your navel, Lin, you press the sternum, Dan, which means you can't lift your arm. Well, okay, so stretch your arms and legs out again. Elongate now gently lift both arms and both legs off the ground. Justin, the position you're in before, no higher, no, as you brew that, lower your right arm and your left leg and lift and low the other side and lift. So it's the reverse of what you're doing. Whatever you've been doing, and lift low and lift and rest it really, again, it works all the way around here. Okay, rollover on your backs. You can go.

I'm going to give you a rest state. Juliana. If you can come up and have a little girl, have your arms by your sides and quite a strong fist, you going to take a breath in and as you breathe out, you're going to do a chest lift and at the same time slide your right leg away from you and the hands are coming up, up to mid thigh, really rich through your foot. And then breathe in to go down and breathe out. Chest lift, arms up, slide your leg. We're gonna keep it like on the ground. Jennifer, keep the lake down there. Come on, lift, lift, lift, lift, lift. Flex the foot hard as you push and bend the knee up as you go down and stretch and slide and one more and brew that stabilized first and rich and Dan. Okay, let's try it again. This time.

Juliana will, you are going to demonstrate for us, curved forward, breathing out and slide your leg. Now you're going to hold that position as you breathe in. You're going to lift your arm up and then Johnny up towards you and then go back down. So it's in leg up, out, and then into go down. So take a breath in, breathe out to the same principle as before with a chest lift in as you lift your arm up towards the face out as you keep the lift and bend your knee up. So you're using the, keep the foot on the ground and then in to go down.

Keep the feet on the ground all the time and breathe out and curl forward. Keep the heel down, arms up, pulling in, pulling in, pulling in, pulling and out as you lift your leg up, up, up, up, up, up, and to go down. Okay. Okay. Dressed. Do It on a diagonal. So as you take your arms to the left, your right leg goes away. So it's the opposite side.

So the same thing that you are doing an oblique. So stabilize first, breathe out, turn and reach across the body. Lift your arm up, breathing in, breathe out and lift your right knee up and then in to go back down. Good other side and re and lift up, pulling it in, pulling it, pulling in and [inaudible] and come back. Always think of the spiral turning around the spine rather than going off to one side. One more to each side.

And Dan. Yes. That's good. That's lovely. That's nice. I had a good, maybe, maybe your arms are too high to try one more. So just to lift an edge for you, I think just to there. So if you think of your arms at right angles to the spine, okay, I think you're now ready for the double x stretch, but not on two cans. I want it on four counts. So you lift your knees up.

Just watch for take hold of your knees and have your knees quite close to, to start with. Not Keeping your knees close to you. Push them away from you. That will bring you up a toss a forward until you feel your lumbar spine. There you go. That's your starting position.

Then from the, as you breathe in, you're gonna stretch your arms and legs to about 60 degrees. Flex and turnout. Rotate your arms, breathe out, take your arms back over your head, breathe in and come right back around. Point your feet, lift up towards your toes. And then bend your knees and get back down. Once you've, once you've got the curve forward, you're going to keep it. Okay. I was just being kind to Julie under that to let it go down. So once you're up there, you're going to do four without letting your head go back down.

So say from there, take, take, hold of your knees, not bring your head forward. No, just feel it all ties like glue to your rib cage as you push your legs away to get, if you feel where your lumbar spine is. Okay. Now as you inhale, stretch your arms and legs flex and turnouts. You're using your inner thighs, rotate your arms. Brusha is with your arms as you go back around and up, reach up and bend your knees. Take hold of your ankles this time as you breathe out. So breathe in and stretch up. Flex in turnout, breathe out. As you go back, breathe into come up, point your feet, reach, reach, reach and bend your knees and down. Okay, addressed. What I would want, I want you to try and do is to get into position. On the end count.

So from here it's and one, so you're there, two, three, and then down for [inaudible]. And I imagine that this, again, as you go back, allow the shoulders to come up. Really get your shoulders into your ears and then you can get a full rotation in through the Scapula. So you're getting much more freedom of the arm here. If there's too much of, I've got to keep my shoulders down. Let them go up because then they come down again. Okay.

And Joy. Actually, no, everyone's back is all right. Okay. So let's add two more counts onto it. So breathe in, flex and Tenet. Breathe out. Breathe in, breathe out.

In and out. Huh? [inaudible] if you really want. Okay. So try that with the um, with the legs lowering Dan. So get in a good position first. Okay, so color forward now breathe in and stretch out. Flex and turnout, ums, breathing out, ums, breathing in, flex the feet, legs down, breathing out. Flex, flex, flex point and come up, bend your knees and then, and breathe in. Flex and turn up. Oops. Breathe out as you go back.

Breathe in and reach up. Flex the feet, breathe out as you go down. Breathe into lift and that, okay, not bad, but when you just just give me your legs from here. Flex. Now as you go down, it's lower abs, doctors, hamstrings and glutes. So you really feel that you're pushing your legs away from you as you go down. So that's that feeling of lengthening and now you point and push even more, which will bring you back up again.

So it's not a case of just allowing the legs to go down. It's really working the legs as you go down so you can, it's almost like a spring. You stretched on set comes up a little quicker. Should we try one more? Okay. Upper body forward first. Now I want strong legs and strong arms. Breathe in and reach.

Flex in turnout. Breathe out. Brusher is with your arms. Breathe in and reach in our whole the curve. As you learned od, push your heels away from your better point, Richard, and lift and done. Very nice. Okay. Undressed. So do you understand what I'm getting about? What I'm on? About the powerhouse way. It involves much, much more.

You have to think of an abdominal exercise as building up to a whole body movement, which I mean that was, you were using everything, but it's being able to recruit all the muscles and the more you recruit, for example, on the going down, the more you recruit the adductors, hamstrings and glutes. The legs are much more useful to you. There's a lot of, uh, there's a lot of those stuff with the legs elevated in parallel and that makes the leg much heavier. Whereas if you've, if it say Julian's got long legs, you can lie down now there that is on her lower back, that is harder to hold in that position. Whereas that flex the future, now it's inner thighs, abdominals see the difference and bend. It's deciding what needs to be turned on and what needs to be left. Not turned off but just held. Yeah, no I don't want you to turn off, but it's, you know, you need to think this, your, the full body.

Like you know why we're doing all this sort of thing. It's just that feeling of getting it working. Let's finish with one thing. You are for clients who have absolutely no abdominals whatsoever. You've allowed it to go, you know, you just spent years child bearing, flapping rod and nothing so, and you asked them to s to pull in and there's no, there's just no no happening.

So can you lie on your side facing me, whichever side, it doesn't matter. And you can face your waters, bend your knees and have your heels in line with your tailbone and again, have the back in line. You can have a slight curve at the lumbar spine there and allow this hand to be here just so we can see what's happening now without moving your back, just let your abdominals hang out. Just let them fall forward. Let them let them go. That's it. Now breathe in and push them out even more. There you go.

Now as you breathe out, pick them up off the ground and pull them in and hold and then let it all hang out again at all. Hang out, hang out, hung out, hung out, breathe in and push it out even more. And now as you breathe out, lift and pull back, naval back. There you go. That's it. Try the other side. So in fact, what you're doing, you're using your obliques as well as the transverse. And by allowing it to hang forward, you've got much more movement. And as the teacher, what I'll do is I'll just sit behind like this and my fingers onto the waste and ask the, let it all hang out. Juliana, you do that extremely well.

I breathe it and push out. Now as you breathe out, just lift away from my fingers and I will give her a signal with my fingers. And now my thumb was going to the navel. That's it. [inaudible] so you're giving some feedback. So to help them and really it starts getting them to feel what's happening through here. What I really want to do is to get everything working together.

So it's not just pulling your stomach muscles in, it's involving the back and the waistline, the lot. So it's a bit, again, becomes the beginning of, of full of body movement. Okay. Thank you very much.

Comments

the whole workshop is SO helpful! thank you, Alan!
Thank you so much for the workshop!!!

You need to be a subscriber to post a comment.

Please Log In or Create an Account to start your free trial.

Footer Pilates Anytime Logo

Move With Us

Experience Pilates. Experience life.

Let's Begin