Workshop #2563

Reformer Springs

35 min - Workshop
181 likes

Description

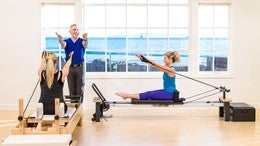
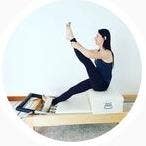
Learn about the history of the equipment and the springs with Kevin Bowen. He offers interesting tidbits that you may not know, and talks about how we use the springs and why they are important. You will see the differences between three different brands so you can learn how to make necessary adjustments for your own workouts.

Read our in-depth blog post to learn about the springs we use in many of our videos.
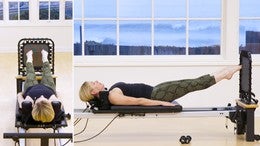
What You'll Need: Reformer w/Box

About This Video

(Pace N/A)
Apr 08, 2016
(Log In to track)

Transcript

Read Full Transcript

Chapter 1

The History of the Equipment

Hello everyone. My name is Kevin Bolin and I'm here today at Palladio's anytime to talk about one of my favorite topics and that's the equipment. Uh, we're going to talk a little bit about the history of equipment, some little interesting tidbits of information that some of you may not know. And we're also gonna talk about one of the other very important factors of the equipment and that's the springs and the springs are very important because they are so unique to the polities method of exercise. But we'll talk about that in just a few moments. Let's first start with the history of the equipment.

This piece of equipment right here is a growths reformer. The interesting thing about this piece of equipment is it is sized on what was considered the original specs of Joe's equipment, which was an 80 inch length. Uh, there's some very important aspects about this. Um, we're not really quite clear exactly what the original length was of the equipment. And I have actually myself measured three different original reformers and they're all a little bit different. Uh, at the same time, Joe made some equipment for Eve gentry and Cathy Grant. Kathy's ended up staying in New York and Eve's actually went out to Santa Fe and those equipment from our knowledge was made basically in the same year. However, the dimensions are about an inch often length and about three quarters of an inch often with, so who knows really what the original specs were for the equipment. We're not quite clear about that.

And yet we still refer to the equipment as Pele's equipment. I say it would be Polonious equipment if Mr Palazzos was still alive and he made it, but I'd like to refer to it as the equipment that we use to exercise the Palladio's way. So one of the interesting things is that there was actually not a patent on what we now know as Palladio's equipment, especially the most important piece of equipment, which was a reformer. That patent was for a another piece of equipment and it was done in 1923. And the interesting part about that is is that this particular piece of equipment was only patented for parts of it.

And instead of using springs, it used a weight stack. So it was set up sort of like a table and there was a stack or a cable off the end with weights at the bottom, which is very different and the legs were patented and parts of the other side of this system, but not the entire piece was patented. So I thought that was kind of interesting and kind of perplexing to me because you think, why was the original piece not involving springs when the springs were so important to the equipment? Very interesting. Something to think about. Uh, it was also a titled for Resistance based Corrective Exercise. That was what was on the original patent for the piece of equipment, resistance based corrective exercise. Another interesting thing, when you look at how Palladio's equipment has evolved through the years and how important it is now in a corrective exercise or physical therapy. So the other very interesting thing about this is that the patents actually went later on three pieces of equipment. Uh, the one to chair the bed Naseum, which was more or less a precursor to the Cadillac and the magic circle.

Very interesting. Uh, another little interesting tidbit about the magic circle is in its original design when it was made, this is a modern one. Uh, this size was kept around 16 inches and that reason was so that you could place it into your suitcase and packet and take it with you for a trip or take it home from New York City if you had gone to see Joe at the studio. Uh, one of the other little interesting tidbits was as the equipment started to evolve, um, when the handles were made, these are very nice metal handles with uh, wood dowels on them. Uh, these things were not common at the time. So the way that, uh, you could tell if there was an original piece of equipment is this, Dow was actually what was used with toilet paper rules before they became plastic like they are today. So I thought that was a fun fact.

Chapter 2

The Evolution of the Springs

We could talk actually about the equipment for quite a period of time. There's a lot of interesting facts. It's evolution over the ages. But what I think is really important and for us to discuss is the springs because they're so intrinsic on the equipment, the feel of the equipment, the feel of the exercise and perhaps even an understanding of what it was like to workout on very historically based equipment and what the new modern equipment is like and how the springs play a role in all of that. Let's take a look at the springs. Uh, what we have here are some retired springs that pull out these anytime has taken out of their spring library. Um, there are two different manufacturers. Uh, one, this one is rusted.

This is what happens when you have a studio that's close to the ocean. The springs do tend to rust. This is a grot spring. So one of the traits of a Grotte spring is that it's not coated and without being coated, they tend to oxidize and will rust. This is a balanced body spring. It too is coded, but it too has rusted just a little bit, especially the section of the spring that's exposed to the air. These things happen.

The best thing to do is to check with your manufacturer to make sure how long you can use a spring like this as it's rusted. Now let's look at this. So let's say for example in this happens, some people like the feel of a particular spring and they may want to put a spring from a different manufacturer on their equipment. If you're going to do that, you're going to have to find out the spring length. Now this particular spring, or these two springs, I should say seem to be about the same size, one might be a little bit longer than the other a and I'm talking about what happens with the ends.

Sometimes they can move and they make the spring a little longer, whereas the spring itself is actually longer. The rest of the spring is a longer than the other spring. So you'd have to look at these things. Typically they might fit on almost any piece of equipment, but there are manufacturers who do make springs that are different size, so you need to check on that. Then we have to talk about how the springs actually start to function.

So in order to do that, let's kind of take a look. These are reformer springs that go underneath the carriage. Um, typically older equipment and more classical or historical equipment has four springs on it and the springs are all the same weight. Things changed through the years and there was an evolution with the springs where the equipment went from four springs to five springs and some manufacturers chose to do four regular weighted springs or a medium to heavy and one lighter spring to make an adjustment. Some other manufacturers chose to color code the springs, which started to become kind of common in the industry. And it's very easy as we teach group classes to have color coded springs to say to your clients, the blue is a half spring, the yellow is half of that, or whatever it may be for the springs, you're using color coding came later.

So four and five springs was kind of an evolution. Color coding came even later after that. And there have been some manufacturers that actually have six springs on a reformer. Let's take a little bit of a closer look at color coding, especially if you're trying to work with a piece of equipment that you may have in your home and is different than what we have here in the studio. So the color coding was used to delineate or differentiate spring weights. Um, typically, as I said, the older reformers were four springs with the same weight.

Sometimes what has happened is it was found that those springs were a little too heavy for some clients and we decided to lower the weight down and actually there was at the request of teachers going to the manufacturers to say we needed to add a half spring. Let's look at the color coatings. For example. If we're going to look at Cadillac Springs, we have a red and a yellow spring here, and these are balanced body springs. Red Spring typically means it's a medium to heavy weight. It will also be a red spring, not only on the Cadillac, but on the reformer. The really tricky part is if you're looking at peak equipment, their red spring, it does not equate to a balanced body's red spring. It's not a medium weight.

They're red. Spring is a heavyweight and peaks yellow spring is the medium weight that would correlate to the balanced body red spring, so it causes some confusion, especially if you're in a studio and there's two or three different types of equipment or if it you're at home and someone is deciding to do a polities anytime workout, which we know lots of people do and one of our teachers here says, Hey, put on a red spring and their reformer doesn't have a red spring. It has a yellow spring, or maybe it has no color springs at all, or maybe it has bungee cords like some other pieces of equipment do that our clients use at home.

Chapter 3

How the Springs Work

My goal here is not to discourage you or to confuse you. It's hopefully to enlighten you to let you know that there are those differences. If you're unclear, you could certainly contact your manufacturer and find out what the springs equate to, or you may even contact the studio owner that you know, they may have that answer for you or that information.

But let's talk about how these springs actually work. And let's more importantly, how they're made a springs date back in usage. Believe it or not, around 1300 a d during the Roman empire and springs were first used on the chariots and it was a different type of spring of is called a leaf spring. That kind of hung down and had a couple of descending pieces that allowed the chariot to have a little bounce to it. And then later on they were used also, believe it or not, I'm one of the first cards that Henry Ford produced and he made the car a little bit different.

The way that the leaf springs were put into the manufacturing process actually allowed it to sit in the middle between the two axles on either end as opposed to sitting on the ends, which is what the Romans did. Little bit of interesting information about springs, but it's kind of fun. Later on through the years, springs started to be used in clocks in different, different aspects of timekeeping pieces. Um, some very small, which requires a very different manufacturing process in some larger for big clocks such as something like a big den. But through the years they had to change the metal and as the metal changed, what was discovered, the best metal to use per springs is actually piano wire. So most of our springs these days are made out of piano wire that have been wound.

That's the beginning for you to understand how we have a manufacturing process for springs and how they can vary very differently. Piano wire, very interesting talking about springs and as I said, they were made with piano wire. Um, there's also other aspects to the manufacturing process that may or may not affect the integrity of the spring. Uh, some manufacturers choose not to coat their springs. Here's an example of a piece that's not truly coated. It's got a matte finish to it. And here is a piece from balanced body that is coded. Uh, depending on what the specifications are for the manufacturing of the spring. Sometimes they coat in zinc, sometimes they quote, they coded a nickel.

Uh, also the majority of the springs that I'm holding here, actually all of them I can tell you are made proudly in the USA. If you pick up a piece of equipment that is usually in the metal line of equipment and depends, you have to check to see where it's manufactured, but if it's manufactured overseas, then the springs on that piece of equipment are going to be very different than the springs on American equipment because the SPEC standards are different. So when they start to manufacture springs, they first have to decide if they're going to be coated or not. If they decide that they're going to coat them. The interesting thing that happens is the spring manufacturer makes the spring in the spring manufacturer has to send it to the coding facility, which is usually a separate company completely.

And the reason for that is there's a lot of environmental issues that are involved with the process of coding metal and the baking process that has to go on. So the spring manufacturer may not have the level of environmental protection standards that the coating manufacturer does. That's the interesting part because now we're changing hands. If the coding manufacturing company or the company that coats the springs has a problem with the baking process, that is where we could see an issue with the springs and the manufacturing of them. If air bubbles get into the coating, then they start to wear into the spring itself and they can cause the spring to have a very low tolerance or snap and break. Um, if there is a spring failure, it's not a pleasant thing. Uh, in most cases, uh, it could be okay and that the spring would just break into, but many times the spring will break in pieces of shrapnel we'll come off of it, in which case you could have an injury. Um, God forbid it gets in someone's eye or anywhere. So that's why it is extremely important to replace the springs on a regular basis, to follow your manufacturer's warranty and to figure out how to get the new ones and how to install them.

So you may have to call someone and speak to them about it. Typically they give you a range of time that the springs are supposed to last. And I suggest that you follow that. Something else you can do yourself is if you notice that part of the spring is bent out a little bit and the rest of it is not, that indicates that there's a problem with the spring and you should discard that spring immediately because that's a low tolerance point and there could be a failure with it. So you want all of the wound coils of the spring to be right next to each other.

Anytime you see a separation, especially on one side, there's a problem. I also would like to talk a little bit more about the manufacturing process of the spring to determine how the weight of the spring is made. Because this is also interesting. There's a spring constant for all springs, which is how many pounds per square inch as the spring expands, uh, is created basically. Uh, the interesting part of that is that everyone has a different standard for their springs. So while one company may have one standard, another company has another standard. And then the industry itself, the spring manufacturing industry has agreed that they can produce springs for the [inaudible] industry that are basically plus or minus 10 points. So we have to think about that and what that means because I've talked to so many people and explain this, uh, in some of my travels, um, we might get some new springs for our equipment. We put them on, you may get some new springs for your home equipment that you think are matching and maybe they are, but you put them on and they feel so much heavier. Now, why are they heavier? Well, if we go back to plus or minus 10%, imagine this spring a from manufacturer a was produced in 2011. They ordered it specific quantity and the manufacturing standard was appearing on the scale at minus eight.

Then spring manufacturing, a company I should say had to make spring a again and it didn't happen to 2014. So the manufacturing companies, still the spring manufacturers still has this plus or minus 10%. But the new spring comes in at plus seven, so the old spring was minus eight on the center standard and the new spring is plus seven. That's a difference of 15. That's pretty major depending on the pounds per square inch that the spring has actually been manufactured to. So that's why many times springs come and they feel heavier or they feel lighter. It's a very big difference. And what we're dealing with, one other thing I wanted to address with the springs that may make a big difference in what's your piece of equipment feels like are actually the wheels underneath the reformer.

So on a more historical piece of equipment, let's say for example, the actual pieces of equipment that Joe made for Kathy grant or Eve gentry. Uh, those pieces equipment have metal wheels and they run on a metal track. They're not a wailed and they have no ball-bearings, uh, very similar to these type of wheels. But without the ball bearings, what happens is when you press, the carriage basically stops itself on a more modern piece of equipment. The wheels do you have ball bearings on them and they tend to glide a lot smoother. So there's a difference with the feel of the wheels and heavy your spring on any piece of equipment. The wheels that do not have ball-bearings have a drag to them.

So when you load the reformer up and you press it out, the inward motion, the ecentric motion tends to be with a little drag to it. So there is a field difference with the equipment that has wheels that don't have a drag to them and a heavier spring. The interesting thing about that, I really think this is interesting, is to actually experience a workout on a piece of equipment that way because that's how the original exercises were designed, was antiquated [inaudible] that had form of a drag wheel and a heavier weight spring. But modern innovations have made a lot of changes and these changes have been welcomed. Uh, it's just important to note that one is not better than the other one. One is simply different. And that's something that I think is very important about understanding plot is the plot is method, how the equipment works, how you can adjust the equipment to make it work for you and for your workout.

Chapter 4

Spring Resistance

Let's talk a little bit about spring resistances. Um, I have a really cool chart here that I was done independently and it maps out the resistances of several of the top manufacturers, springs and how they relate to an older style spring. Um, very interesting if you look at things, the reason why some pieces of equipment feel very different is because the graph may go over and then all of a sudden goes straight up and that's as the spring stretches, how many pounds are being exerted. Some start a little lower and they just go up to a specific point. Others come over and go up and then go down. In other words, or maybe even flat. So sometimes some springs feel very heavy on the initiation and the longer they become, the lighter they become. So these are all very interesting factors. Um, I had a conversation with Cathy grant once and one of her biggest concerns was why aren't the springs all standard? Uh, they simply aren't.

And the thing to think about here is we could make them that way, except I don't think any of us could afford to pay for them because we probably have to go into the aerospace industry to actually produce a spring that's going to be the same every time it's produced. So instead of paying 250 for a set of springs or 300, you may be paying that price per spring.

Chapter 5

Gratz Reformers

What I'd like to do now is talk about various pieces of equipment. I have a garage reformer in front of me. Uh, we'd like to also look at a balanced body. Reformer wouldn't reformer. And we're going to look at a home piece so we can get our bearings on how they're different and how they're similar and how to adjust them for our purposes for workout. Okay, so let's take a look here. Uh, this is the, uh, front end of the reformer foot bar.

The bar has basically in this piece of equipment, two positions down and up. Uh, there's a space for in this reformer for a jump board as well. And then of course your strap underneath for a, the box exercises. Let's take a little bit of a closer look here as well. Uh, we have three gears on this piece of equipment. Uh, you can adjust those by moving the gear bar out and by putting in a block to push everything further away, especially if someone's taller. However, some people like to put their block in and leave it in the first gear so that what happens here is that the springs, now the coils are starting to come apart, which basically means you've put the springs underload and they're going to feel heavier than they would if you were starting them all the way in. So that does make a difference. Some pieces of equipment have one set up, there's no adjustment for the carriage, and you simply either load or unload the gear bar moving to this piece or it's side of the reformer. Uh, almost all equipment has some form of shoulder blocks in a head rest and of course there's handles and this piece of equipment has straps. Typically, uh, or historically the equipment had leather straps or more modern innovation was the addition of the ropes that allowed for adjustments.

So your piece of equipment at home may have those ropes. What happens here is that with this particular piece of equipment, there is a specific measurement. We know that exercise is like short spine use, these loops that will directly effect the weight that you would feel with the springs. Two springs will feel one way. If you were to not have loops that were already preset and you used ropes for example, which we'll look at later and they're much shorter than we may have a different feel to the exercise because you're going to have a higher load capacity and we'll talk about that, how the equipment moves and how it affects the springs and the feedback that you get from the springs. Now that we've taken a look at this piece of equipment, what we're going to do is move on to another piece of equipment that has a completely different setup and specifications and length. We're going to look at some balanced body. Here we are, and we're going to take a look at uh, a balanced body piece of equipment.

Chapter 6

Balanced Body Reformers

So this bar is a little bit different.

It has a mechanism that goes into three different spots so that you can have a different height for the foot bar and a different angle. Uh, this one also happens to lock in, which is great and it's protected that way. The foot bar will not pull back. Um, like the other pieces of equipment, the older pieces of equipment or the more historical equipment with the foot bar down and looking at, again, we have a gear mechanism here. We have five springs on this particular piece of equipment in their color code, or we've got three reds, a green and a blue, and an interesting mechanism that allows for it to adjust and move out. What this also does is it alleviates the need to have a block in this piece of equipment. Basically, same style of operation. You can move the foot bar in and out and on your piece at home.

You could do the same thing, moving the foot bar in and out. Let's put it back in the first position and take a another look at the back end of the equipment starting at the middle of and reformer and looking at the back end. This piece of equipment is very different in that it has ropes and the ropes are obviously narrower than you would find with the straps, the leather straps and on this piece of equipment and probably many of your home pieces of equipment or studio equipment. You can adjust the ropes and they can be made shorter or longer by using these little clips here to hold them in place. What we typically like to do here is you want to measure them around the shoulder block and told them a little bit tight so that both pieces on both sides are identical.

Just remember if you start to adjust the ropes, you make sure that they're both even because that's definitely going to affect the way the reformer feels and its movement, especially when you start using your hands in these elutes or the straps. Here we have just loops. If you look at the exercises and how most of them are done, this loop, uh, can be used specifically for short spine and exercises that don't require a lot of length. If for example, you decided to make a change and you put your loops here and you pulled and tightened these so that they were based upon the shoulder block handle holders instead of the shoulder blocks themselves. What happens is now you've created a shorter distance, so if your feet go in these, it's going to require that the carriage gets pulled out further for it to have a starting position. In addition, let's go back to the springs. The springs will have more tension on them and it might feel heavier, extremely heavy in some cases, and also there may be an issue with some of the exercises that require you to go over your heads such as short spine or long spine with inversion exercises.

Putting this away, let's take a look at the very end down here. This particular piece of equipment has what we call risers. Sometimes the risers are built into the equipment differently. Sometimes they're not made out of wood, sometimes they're part of a different piece that was added to the piece of equipment. The risers effect where the pulley goes. Let's go back to historic equipment in historic equipment, the pulley goes down inside the frame of the carriage in equipment such as this at the lowest point that we can put the pulley.

If you were to look at the center point of the pulley here and base it, if it was inside here, there's a big difference. Actually it's about five inches and it depends on which manufacturer you're looking at, so there is a difference there. The reason why I'm talking about it is because historically the pole king from directly behind and went over, you had the riser. Now it's not coming from directly behind the reformer. It's coming from above the reformer level of the carriage.

If you were to raise this up all the way to the top and look at the pool, and this is all very important because it relates to the springs. Once this comes up very high, we've shortened this and the pole, the force, you know the engineering aspect of exercises changes because instead of the reformer pulling back, the pull against gravity is back and up. So what's happening is the reformer carriage is literally being pulled up out of the track itself. Now, that can happen these days because there's a number of wheels that allow the track to actually hold the reformer down so it just glides through it. However, that does affect what the springs feel like. Two springs on a high folk room point here with the pulley is going to feel heavier than two springs on the lower fulcrum point with the pulley.

Therefore, if we're looking at all of these different changes and points, you have to realize it's going to affect the exercise. One is not necessarily better than the other, it's different. And as someone who's working at at home, I suggest that you try them in different positions and see what works for you. Um, if you're teaching and you're thinking this, I think you should look at that as well. Certainly the risers were added to make some of the exercises a little bit easier, especially if we're talking about perhaps growing exercises where you have to sit up on the reformer.

So having a higher point with the riser is probably better in some cases from a biomechanical standpoint. However, you really need to take a closer look and feel what the differences on how things are done. If we were to look for example at the exercise the a hundred and let's talk about springs and let's talk about the ropes. So we put these back down, which brings the rope in a little looser. And let's say instead of using two springs for the a hundred we use four springs for the hundred. Let's take a look at what might happen. They're looking at the hundred with different spring loads.

Let's just take a quick thought on this. If we're starting at one position and we have four springs on, it's going to be really heavy at the initial pool, but as the arm continues to come down, the amount of power or energy that's required to hold your arm down and pump them for the a hundred with four springs on or two springs on is basically the same. So the initial movement and force, the initial tension of the spring is greater, but as the arc comes down it lessons. These are just some interesting things to think about when you talk about equipment and you think of how you're going to perhaps adjust exercises or create something a little bit different for yourself. You have to take into consideration all sorts of different aspects of the equipment from a mechanical standpoint and the feedback that the springs give to the equipment and to the straps and to the handles.

Chapter 7

AeroPilates Reformers

Here we have a home piece of equipment that uh, many of you may be using. A, this one is made, uh, by stamina. It's called [inaudible].

And the interesting thing here is that it has a bungee cords instead of springs for its weight. Um, on this particular piece, there are just four bungee cords, which makes it in some ways quite comparable to historical equipment because it has only four choices. There's either one, spring, two, three or four. Um, these are probably not as heavy as you would find most springs and they do bounce back into place. So you pull them out and place them in or release them and let them go. This has a foot strap or a for some of the short box exercises and some of the other exercises. This one's a little bit narrower, it's different. And what we did is we took the foot bar out, but I'm going to show you the foot bar as well. And there's also a space here, um, the jump board or the Arrow portion of this piece of equipment.

Looking here at the end of the carriage and the end of the reformer. This equipment is a little bit different. It does have a headdress like most pieces of equipment do and it does go up and down in to heights and there's some padded shoulder blocks where you can also place your handles. The unique thing here is this piece of equipment has double loops. One loop is smaller, which you can use for your hands and the other loop is longer, which you could use for your feet. Keep in mind, we talked about this with the balanced body piece of equipment when dealing with the ropes and the loops where these gets set up because this piece of equipment is a little bit different. The shorter version may not fit some people's feet, the small loop, so you may have to go to this loop here, so there's going to be a slight difference in the feeling of the exercises and what happens especially as related to using bungee cords in this or springs.

Typically what I have been told by a lot of people who use this as it seems to work pretty comparable to a regular piece of blaze equipment with springs. So you just need to perhaps make some adjustments on the exercises. One other interesting thing too is that this piece of equipment is about 94 inches long, uh, which is about 14 inches longer than the classical or historical equipment was that we take took a look at and it's about the same length depending on which piece of more modern equipment you're dealing with. Field's going to be different. Uh, the track is very different as the reformer slides in and out, the wheels are set up differently. The foot bar does not have all of the adjustments that you may be used to.

So it has an adjustment in this way and there. And in order for the foot bar to go down completely, you would actually have to pull out thins and pull the foot bar out.

Chapter 8

Comparing the Three Reformers

Let's take one final look in closing at the three pieces of equipment lined up side by side, you've got your more historical dimension piece of equipment. You can check out the length of the carriage can move. You can check out the width and see the difference and how the foot bars are set up. One locks, one doesn't lock.

We've got the piece of equipment here that has the risers. It's got a slightly bigger carriage, five springs, four springs here. And then we have the home piece of equipment where you have risers that are always up. There was no adjustment to them, so just keep that in mind as you move and adjust your body to do some of the exercises you can't adjust. So all you can adjust is perhaps the length and whether you put on one bungee or two bungees. Hopefully this has been informative for you and you've taken away a couple of things that will help you out and make your workout here on PyLadies anytime that much better. Thank you.

Related Content

Comments

2 people like this.
Thank you Kevin forall of those information.
3 people like this.
That was great! I would love to see more of these on the other pieces of apparatus .
3 people like this.
Kevin, that was very informative and concise. Like you, I think the history of the equipment itself would be so great to discuss. Maybe that could be a separate tutorial. I think it would also be wonderful to see key exercises being done on the three reformers to people can really see the difference. I know there are lots of variables involved but would be fun.
Todd G
2 people like this.
Thank you for all the information. I appreciate the historical perspective.
Kevin Bowen
1 person likes this.
Glad to hear the positive comments - thank you!
2 people like this.
Very interesting workshop, thank you!
1 person likes this.
Thanks Kevin. Great information.
2 people like this.
Thank you! I find these kind of workshops and talks that inolve the history of Pilates motivate me the most in my teaching. I would love to know more about the type of exercises in Germany that may of inspired Pilates exercises.
1 person likes this.
Thank you very much for the great knowledge.
1 person likes this.
Thank you Kevin, I really enjoyed this, and you look fabulous BTW!
1-10 of 59

You need to be a subscriber to post a comment.

Please Log In or Create an Account to start your free trial.

Footer Pilates Anytime Logo

Move With Us

Experience Pilates. Experience life.

Let's Begin