Workshop #2794

Pilates for Athletes

80 min - Workshop
152 likes
Loading...

Description

In this session Michael Fritzke and Ton Voogt will show you how you can add exercises that are specifically designed for your athletes to your regular repertoire. The exercises are divided in categories so you can easily find what you are looking for. In addition to using them for your athletes, you might even want to use some of the exercises for your other clients!
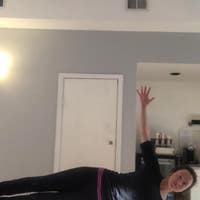
What You'll Need: Cadillac, Mat, Wunda Chair, Reformer w/Box, Wall, Triadball, Franklin Ball, Knee Pad, Towel, Jump Board, Fitness Ball, Theraband, Magic Circle

About This Video

(Pace N/A)
Oct 28, 2016
(Log In to track)

Transcript

Read Full Transcript

Chapter 1

Feet

Hi, I'm Michael and I'm done. And we're going to do a workshop ish, um, for the four plies with athletes. So it's not a full workout. What we have done is used some exercises that you can put into your workout or add to your regular workout as we know, politesse can really help athletes in restoring their balance with injury prevention and all that kind of stuff. But if you really want to be working with athletes, you want to make the exercises as specific as possible. So the exercises today are quite general and then you're going to have to make them more specific depending on who you're working with. Um, today's exercises are just to get your creative juices going, to give you ideas of some place to start from. Um, are divided into four parts, feet, legs, shoulders and rotation beliefs.

And the ex exercises are experts of our bigger workshop. And like we said, it's just to sort of give you a little idea and sort of stimulate you. Um, so I think we should get started. Oh, and with us today, oh, we have Andy and we have a guy. Yay. Um, and we've got sue, so you guys ready? Oh, let's go. So we're gonna start with the feet and the feet are very important, especially for athletes because a lot of the impulses from a movement pattern starts at the feet. So we wanna make sure those feet are ready to go. Also, a lot of specific sports shoes, um, are not really feat friendly. A lot of them are designed for the surface that are working on like, you know, the grass or the gravel or whatever, track and field. Um, but they're not really designed to help defeat that much. So we're going to start with the feet. We going to place one of our feet on top of these spiky little balls and you can do also a tennis ball or something. Um, make it not too hard and you just going to keep it very light and roll back and forth on your ball. So just, if you need to hold onto something, then hold onto it. The first part, we want to keep it light because there's a lot of receptors in the bottom of our feet and we just want to wake them up the feet and the eyes are probably the two most important parts for our propioception.

So we want to make sure that they are nicely engaged so then you can push it a little bit harder, putting a little bit more weight on it then and then you can roll out per toes. You're going to start on the outside of the heel and just bring the ball live closer and start here and then roll it to what your little toe and come back to the heel and then go to your second toe. And you're just gonna follow your whole foot from toe to toe. Now some people like for sous little fees and it might be easier if you use smaller for this specific um, exercise. But you can use the bigger ball if you don't have it. So let's change feet.

Here we go. So we keep it light first. Just getting the souls of the feet and receptors activated and going. Of course we want to make sure they stand correctly. Give them something to hold onto if needed and then put a little bit more weight on it. [inaudible] there you go. Make sure the Bible's not too far away from you so you get to the heel.

There you go. And then let's go from the heel to each toe. Again, if you need to switch balls out, this would be a good time to do so. [inaudible] and for littler people, we've also used those little balls that you can get like out of the gumball machines. You know they're for 25 cents. Those little rubber balls, the little Superbowls, and they work really great cause you can be any, you get the candy. Great deal. Good. How does it feel? Amazing. Amazing. Even loud.

Good. Then the next exercise is going to be the ball press down. So what you're going to do, it's very much like the foot corrector, but oftentimes we don't have a foot cracked yourself. You're just going to keep the heel down. You're going to bring the ball though a little bit more over so the toes are really curled under.

And what you're going to do is just press down and release and just press it down and release, press it down and release and then slide it up to your arch so you can really go over, toes are still crawled over that good. And then just press it down and up, press it down and up. Good. Then bring the foot forward so it's on the floor. Make sure the weights, even e c has two months to roll out. Just it had not too bad. So you wanted to keep the weight even across the ball of the foot and just press down and up. And again, like Tony said, it's just great to activate those foot receptors because especially with athletes, the surface is always changing from grass, rocks, gravel, et Cetera and relax and then change to the other foot.

So again, we just start with the ball and really make sure you curl those toes over so you have that nice grip on those toes side, this there that for ya. If you really work that muscles in the foot and just over and press it down, good from there and then just come up onto your arch of this foot. Just press it down. It really makes sure to you follow the tracking of the knee so the knees not rolling in. Okay.

And then we slide the bar, the foot again, making sure weight is even across the foot and just press down and n go ahead, press it down and good and same thing that we talked about with the ball of the foot. You really want to make sure when you look at their ankles that they're pressing down right through the center of the heel and relax. Then let's go back to the first foot for an exercise that we call ball rolling side to side or what we sort of nickname did after we set it created it was that the windshield wiper. So again, your toes are going to be crawled over that ball. So Andy, you can come up even more. C A, B, the s, the heel stays in the center. Now you're just going to keep that there. I'm going to hold Suze, he'll get Andes and he's just gonna try only rotating the foot. Try to just bring it out to the side and then back in.

So we just, how's it feel? So you get the whole foot's here and massage and everything over and relax. And let's do the other side. See, feel good. So toes are curled over. Make sure the toes curled over evenly. Wait right in the center of that heel. And you're just going to roll to the outside first.

But you could do what Andy started to do. You could roll to the inside first. It really doesn't matter. There we go. And you can see I as the teacher can help and stretch his foot a little bit more when I'm working with someone. Okay?

He can do it by himself, but it actually feels a little bit better when you get a little help. Good. Good. So let's go to the window chair for some Achilles tendon stretch. So today we have, we start off with heavy springs. So whatever your spring setting is on the grads, the heaviest is two on the top.

And on these balanced body, it's two on number four. So that's where we start. Now of course you can play around with that, but we started with as heavy as they can. Now the easiest way is to place your hands, um, against the ridge of it. There you go. And then place your knee inside your hands to be hands a little bit over to the side. So they didn't, the leg is right in line with this. It's bounced. There you go. So then the ball food goes on the pedal. You press it down, place the knee down.

And don't forget to wrap your fingers around that knee and that will help prevent them from sliding off. So now very slowly he's going to press the pedal down by pointing your foot. And then in slow coming back up, making sure that the tracking is exactly right. So as they're going to the point, make sure there's even weight on the big toe and on the little toe so that they keep it nice. And even there you go. And that the heel does not go site to site.

Let's do one more time. Slow per progressive through lengthen and think of pushing the pedal down rather than lifting the heel up so we don't pupping the heel. So now what we're going to do, change the rhythm for a lot of athletes. The essentially contraction is much more important than the concentric. So we're going to press it down quicker.

Push and slow back up. So we press and be slow, slow, slow, push and slow, slow, slow. So they get really a chance to feel that east centric control. One more time and then just step off. Let's do the other leg before we have to change the springs again.

So here we go. So the other leg, make sure your knee is inline with your sitz bone. We press it down, the knees on the corner, the hands covered in knee and we start slow. So go slow down. Slow up. Making sure that we create that nice control pressing through the big toe or the ball of the big toe and the bar of the little toe evenly. Now you might feel that as you come up, especially when you go up, let you go right there. You have that touch, that quiver, shiver, whatever you want to call it. Um, and that's totally okay. We're just going to ignore that personally through that and slowly go through.

Let's change the rhythm for the east control. Push and slow up. Now even though we go slow up, still make it as smooth as possible. Yeah, there you go. Perez. And even if you feel those little shivers in roar, try to move through that as smoothly as possible. Let's do it one more time. Woo. That was exciting.

And then step off, lot of energy from Andy. Okay, so now what we're going to do is we're going to lighten this spring again. You're going to have to play around with what light means on your equipment. And I'm going to give Andy one in the bottom. We still on the heavy. Yeah. And one bottom.

One bottom or middle [inaudible] middle or bottom for her. What do you think? Let's talk about them. So what are we going to do? Is we going to have a light spring? Basically the same exercise, but playing with the rhythm again by going quick, like you're bouncing on, um, on a trampoline, right? The Olympics. We're just here. We're going to pretend to be cmon. So here we are. The knee is right on the corner.

So press down and bounce up, bounce up, bounce up, up and up and up and still controlling it, right? So we actually are working a little bit more to Fascia connection there, but you want to make it as fast as you can and bounce and bounce. So for your athletes that need that recoil mechanism in whatever they're doing, and not only jumpers, but also sprinklers and runners, they need that push off as quick as possible. Let's change legs. How's it feel? Change in the difference, right? So you can play around and make it just keep going.

Make it as specific as possible or specific as needed, depending on what they need, depending on the sport that they're playing or what you need to work on. And three lacks great and let's move on to the legs.

Chapter 2

Legs

Okay, so we're moving onto the legs and with a lot of athletes, day movements are much more lateral actions or a lot of side to side movements and in we don't really always address that. So what we've done is adjust some exercises to address specifically the lateral action in movement. So we are standing on a balanced body reformer and we have it on a light spring.

You can do one, one and a half anywhere in that place we have the foot bar up and the foot bar up is only going to give him some alignment cues in regards to that meat. Okay. He stands really close to the edge and we are going to do a movement that we call the skater. So all the weight is going to be on the leg that's on the frame. He's going to bend that leg, sliding the leg does carriage out sitting in this hip.

And then he comes back up so he can go as far down as he can control. Making sure that all the way it is on that frame leg day go very nice. So what you'll see with a lot of people's as they go down, this knee wants to pop on out. So that's where the bar is really helpful to give them some alignment cues. So he's going to go out and stay out this time. There you go.

Now stay here, bend that leg on the carriage, bring the machine in and press it back out. There you go. In and out, in and out. Last in and out. Keep it out. And now stand straight on up. There you go. Just step off for a second for a variation. For the variation, we're going to bring the bar down.

It's going to stand exactly the same way as we started. Um, this is a little bit more challenging, but you'll be fine. So now we're going to reverse the movement action. So the leg on the frame is going to say straight. The leg on the carriage is going to bend. Now, here's what we have to watch out.

He does this on purposely wrong, come back in because we want this leg just like we did before, right underneath it. So bend and I'll push out and make sure that this foot does not go up, does not go further than that knee. So sit back more with your hip, stick your butt out, sit back more, sit back more. Sit back, more Daigo straightened at our leg. There you are. And then slowly come back in. So we have to watch the leg on the carriage that as he slowly goes out, that that knee and foot alignment stays there. And that is really difficult because that foot just wants to pop out right on out of underneath you. You feel that happening and going back. Fold in the hips, sit back into your squad strictness.

There you go. Very nice. And he really feels that glued media is working over there. And one more time and then we're going to stay there. Reach now, stay here, controlled his alignment. Now bend his leg. So we're going to move it all in. Stay above this leg and straighten the right leg out. Stay up at, stay on it, stay on it. There you go.

Bring it in and stay on that left leg as you go out. Nice. Bring it back in. Stay on it as we go out, come back in, stand up, and then we're going to do the other site. So we're going to step off. Bring your foot bar back up and start in our first squat or first skater standing right in the middle. Keeping all the weight on the leg that's on the frame this time. Oops. Sorry about that. Safety verse people. So then we go, we're going to squat on down. The weight stays on the frame, the other say straight and then you can make you really see how nicely nd sits back into that squat so that femur can really stay right there and does not pop out on him. Reaching back, keep it in like straight. There you go.

Bring it back in. Now press out and stay there. Sit in it and now bend his leg, pulling it in and like a normal skater pushing through the outside of the foot. Stay on the outside of the heel. There you go. Push right in there. Lovely. Bring it in. There you go. Stepping off and then doom do the other side or the other version of it.

There we are standing up, making sure the knee and foot alignment on the carriage stays exact as we launch on out. There you go. Nice. And then come back in. Yeah, so think of sitting with this. It's bone into that. Outside of that heel. Yeah, you go bring it back in. Let's do one more time and that will stay there. Folding a little bit more full, full, full, full day. You go sit into it.

Set it now. Bend the left leg. Bring it all the way in. [inaudible]. Stay on the right leg to come out. There you go. Throwing it in. Stem the right leg. Stay on the rider. There you go. Bring it in. Stand on up. Thank you. Carefully step off and then we'll move on to the squats.

So tone. Just finished the skater. I'm with Andy, so now I'm going to do the squats with sue, so she's going to hop up onto the reformer. So she's going to stand right on the platform. We're going to start just like you did for the skater. I'm just gonna spot from behind. All she's going to do is three squats here without moving the carriage one.

Bring it in to make sure you have the external rotation of the femur going. Ooh, I saw that move and now she's going to push the carriage out and we have three moves here and try not to move that carriage. It will move. God, I bring it in. Now listen carefully. We bend the leg that standing on [inaudible], we come center, we straightened both legs.

We pull the carriage in. Now we push out with straight legs. We bend both legs. This leg stays bent straight in this carriage like and pull in and straighten. Very good. Oh, that's reverse that. We're going to bend the carriage leg out. Ben both legs straight and and pull it in.

Then we go out with straight legs and the carriage leg [inaudible] stretch, stretch to the side. [inaudible] and pour it in. But you did it. Good job. So let's go to the wall for the wall squat. The next exercise, the wall squat variation. So we've got them lined up here. They're both can be standing against the wall with a ball right by their knee. From here, they're going to keep this alignment.

They're not going to move their hips than not can move their legs. And from here ims can be down or on the hips. I don't care from here without moving the knee or leaning, they're going to bend the leg fee out. She moved there a little bit. Hold it too. And the more you press in with this knee, the more you'll be stabilizing this leg and working this leg.

Do you feel that she really want to press in? I think that looks pretty good. So let's make it a little bit more fun and challenging. Let's add a squat on the squat. Make sure you're there and you really keep this knee here. Don't let it go up.

Think of sending the Fitz bones back and down, but not the ribs and when catch, don't move the ball. He's doing pretty good back there. So lovely chest, but let's keep it down and start again. So you really want to be balanced here. From here, you don't want to lean. Now think of sending the Sitz bones back. Sitz bones are going to open as you go back. If it's easy to bring your arms up above, that's fine. How's she looking from over there was good and come up there you go and relax. Oh yeah, it looks pretty simple. Hey, that's pretty, keep that.

Keep the pelvis, that pelvis, that side back. Yes. So guys, how was that? That was pretty good for a side, but let's see if we can do better. Turn around and let's try on the second side is going to place the ball right back in there. Now they all get to see your best view, so you really want to make sure you keep the weight even on the feet. You want it parallel. From here. What you're going to do then is just really pressing just a little bit.

Don't lean. I can only help you so much. Let's bring the arms down. You're cheating with that elbow. Notice how she's cheating from there. She's just going to bend this leg without bringing it front that you know you're on film, don't you? And from there you're going to squat. Keep those ribs underneath. Yes, there you go. Uh Huh. There you go. Nice. Keep it there.

How's he doing on this side? Even better. He's fantastic. Don't look, keep pressing with that knee into the ball and come back up. Now make sure the ball doesn't move. Send the Sitz bones back to me more. Send the Sitz bones back. Dropped those ribs, those ribs, Arion. Yes, there you go. And slowly come back up and relax it down. Well, I think you redeemed yourself a bit on that second side. Now let's go over to the reformer. Okay, so I'm going to move on with the legs and now we're going to focus on the external rotation of the femur and a slight internal rotation of the lower leg, especially for athletes that have a lot of one sided movements. That spiral, that counter spiral can sometimes get a little wonky and that is the technical term.

So let's go into our normal foot work position, but the same parallels. So you can use your same spring settings or you can take a little bit less. And I'm going to use the towel and I like to wrap it up a little bit and then we're going to place it around her leg in this kind of manner. So she's going to press out normally and I'm going to give in with the towel. And then as she slowly starts to bend, I'm going to pull her femur into external rotation as I pull her TBR, her lower leg into internal rotation.

And then I'm going to give in with the towel again as she's presses out. Some get a counter rotation and as we know there's always a slight rotation in the knee as they go, as they bend. Um, and you want to make sure that that is then back aligned. Now you can play around with that, depending on your, on your athlete or even your client. If the alignment needs more internal or more external, you just put a little bit more pressure on the one side or the other.

So let's try the other side, how it feel. Awesome. Awesome. Even so here we go. We are going to press it out and we're going to create a slight external, no slight internal rotation. If I feel that she has too much extra on the rotation, I let go of this and only work more on the lower leg or I can work more on the extra rotation and less on the internal rotation depending on what they need. So for the next exercise, we're going into a variation of the foot work and we're going to put ourselves onto a, um, the junk board and some extra stuff. So we're going to do the one leg foot work variation.

And for this we have quite a set up. We have the jump board, we put a foam extra foam, like a wobble, um, stability, foam pad. You can also use an air version of this and that just creates more instability. So we making it a little bit more challenging. The spring setting. Um, I, we put on two, two red ones on this case, um, because we only going to be working with one leg. So sue is going to bring one knee in towards her. Then the theraband goes around the top of the knee about the femur.

And I'm going to be on this side giving some resistance. So the whole point of this is that I'm gonna pull out, she's gonna make sure her leg stays parallel and then we're going to activate the VMO just a little bit more. Okay. So she's going to slowly press out and I'm going to give her resistance. She's gonna make sure she has that same spiral, the outward spiral, the external rotation of the femur. Now it's important that when you pull that you follow that alignment of the knee.

And that I don't keep my hand up high because they will change the tension on the knee, right? So we want to make sure the inner thigh, the VMO is really activated, which is important when we're dealing with athletes, especially for knee problems. Okay, how does it feel? Good. And then let's go to the other side. So if you don't have one of those instability, uh, props, you can just do it with the foot bar as well with the jump board as well. It would just give 'em a little bit more excitement by challenging that stability of the foot. So again, we're going to go around the knee. You just make sure you have a nice even pressure and she's going to make sure that leg says nice and parallel.

So we watch out for the FEMUR and we watch out for the foot so that she has even pressure on all the points of the foot. And you're just going to have to accommodate the, um, the tension, which might be different from the right leg. And the left leg. Great. So then we carefully stepping on off and we'll see you in the next exercise. So the next exercise is dynamic one leg squat and BombBomb.

See what you're going to do is have a spring setting on the ground, so the one in the middle and on the balanced body, it's one and number three. So you're going to have the box in front and the setup is you're going to want to make sure you clear the pedal clears and each chair, as you can see, the two chairs are different, so you're going to have to test it out. Now what you're going to do is have your client stand on top of the box like Andy and sue are. You're going to press put one foot on the pedal, press it down. Now you're going to want to bring the other leg that's on top of the box and he's pretty good over there. Under bring sue in a bit. From here, she's going to squat down, putting both hands on the one leg so he's got the support. Make sure the tracking is here and she is. Then going to bring this leg up and bring it down and up without moving anything.

Now I can't see her sitz bones, but in a perfect world, I mean imagining there, she's sending them back. They're all open. Now you want to bring the pedal only up to the height of the box, not past. Now what will help in the squat position is if you think a little external rotation from the head of the Femur, as you said that this sits bones out. You feel that I've both legs now Sue's having so much fun, she's dying to make it harder. So why not bring the arms straight up above her head? Still in that squat.

Now if I let go, will you stay in that fall over? Must be the wind. I guess they opened the door, Huh? And relax and step up on top of your box. Now we can also do this facing France. So you're going to have to step off your box most likely.

And you're going to have to move the box out a little bit so you make sure the pedal clears and also that your heel clears. Cause we're going to start with the arch across and we're gonna do the same exercise to the front. So you're going to place the arch across. You're going to bring the pedal all the way down. You're going to think of that squat sending the sitz bones. Sue's pretty good except for these ribs. There we go.

Open the SIP stones more there. Now from here, she's just going to bring it up a little high. You only want to bring it to the height of the box. Okay. She's a little ambitious. Same thing here. Think of the head of the femur externally. Rotating on both legs. Don't be selective. It's not one. It's not a or B.

It's see both. There we go. All the above and relax. Then let's do the other leg front. I wouldn't want you to be lopsided. Ooh, a little tipsy there. Huh? You wish it was happy hour here? Huh? Bring it down. Huh?

Breathe good. And relax then. So we're not lopsided. Let's do this leg facing side so we might have to step off again. Just bring the box in a little bit. So you're going to push it down and bring it up. Do you want to make sure this foot comes back a little bit more?

Sort of lined up [inaudible] good. Keep this X. Yes. You feel that? Thank you. Widen the Sitz bonds since that's what they're looking at in the camera. Hey, take the arms off. Look at Andy. Go five more and he's gone. Gone. And these guys, IMD wind, the trains laughed and stand up. Then let's do another variation. Let's do the balance squat. So what you're going to do, hmm, I heard that you're going to stay, you're going to face the camera. Just like we started.

Now you're going to again, put your foot right on the pedal. Same setup. You want to be a little bit closer with this leg. So yeah, more towards the edges even. Yeah. You keep thinking he had these big wild child, childbearing hips, and now from here, straighten this leg and bring both legs up straight. Now from here without moving, this does not move. You will see it move, but it shouldn't move.

And she goes squats up and down. What will help here is if you think of externally rotating the heads of the Femur, again, you feel that externally rotate as you send those sitz bones back. Yes. And of course you could do it with the arms up reaching up. Very nice. How's he doing over there? Well, he was fine until I asked. I had to ask and let's change sides [inaudible] and now just squat. Send the sits bones back.

Smile for the camera there. Yeah, send this back. [inaudible] got more of that. Send this. It spawns externally. Do it a couple times, but more external rotation from the head of the Femur in the hips. Soften the ribs down. Yup. There you go. You feel the difference and relax and slowly stepping off getaway. I D go ahead. D. Yeah.

Then let's go to the mat and let's start the shoulders. Okay,

Chapter 3

Shoulders

so let's move on to the shoulders. So for the shoulders we have to make sure that the shoulder blade glides evenly on that rib cage. We want to make sure that the rotator cuffs are strong enough and we definitely want to again, make sure that the east centric movement off the shoulder is top notch. So we're going to start with an exercise called the shoulder v. You're going to sit with your legs crossed and you're going to take your theraband. Are you going to place it underneath your, um, your sitz bone?

So it has so it doesn't slip it out. Then you're going to wrap it around that same shoulder holding onto it with your opposite hand. You want to make sure to challenge that east center contraction at each center control that. There's quite a lot of tension in the theraband at this moment. You stay nice and tall, you're just going to bring the shoulder with the fair man on an angle like a v. So I'm going to bring it up and forward and then you control it back on the same alignment as that deuce. As it goes forward, you feel the shoulder blade moving out and up.

It's sort of like spirals in and then it spirals out back onto the shoulder, onto the ribcage. Now be careful that there's a lot of tension on the band that it's going to try to bring your shoulder blade to fire down and to fight em. So that's where the east entry control comes in. Right? Bring it in again, moving it forward and backwards. You can make it more sports-specific if you need to make it faster or slower or whatever you need to do. That's what you do. Good. Let's go to the other side. Very nice. So please it underneath the same sits bone.

You want to try to make your the therapy and you want to try it. You can make the band as flat as possible. That is not only to make it more comfortable. It is also that it really wraps around it just go forward and back. So it has a lot of sensory feedback to the body. Right?

So the more of the fashion, the muscle is connected to that band, it actually really can feel and gets it feedback of the band. Does that make sense? Poorly. And bring it forward and up and back. Let's do one more time. I was sue doing well. This show is not as good as the first thing to be totally honest.

There's room for improvement, there's room for improvement and relax. Oh well such is life. It's coming. So let's move on to, maybe you're going to be better, maybe better with a sideline bridge. Maybe this time you never know. There's a song for that. So you're going to be lying on the deck edge of your mat. So your back is all the way straight.

Bring your shoulders a little bit further back. [inaudible] go. So the arm that you're lying on is exactly at a 90 degree angle. The legs are about either around 70 ish and your feet are in line with your hips. Again. There you go. If you want a pillow, you can place a pillow underneath the head butt. And he said he's fine. So there we are. [inaudible] so oh Su, you know, girl to special. So from here you're going to play tress, only the arm and the bottom meet into the floor.

Just push as hard as you can and you feel that whole lateral connection from the shoulder to the leg or especially the glutes. Over that glute medius and then relax. So nothing moves. You just push it down as hard as you can. Hold that conjunction for about five counts, 10 counts, whatever is necessary, and then you release, right? So we're going to move on. I'm going to start exactly the same way. You're going to press it down.

Then you allow that our hand to come up when it's about straight up to the ceiling, flip the hand forward and I'll push yourself up. Placing that hand straight down, making sure that that humerus and shoulder is centered again. Then lift the arm up or the hand up and then slowly rotate it back. Making sure we don't plop on down, right? So prs also don't forget the needs of pressing the knee and then we lift up.

There you go. Nice. And then the hand comes up. We control it back down in one smooth movement. Let's try it one more time is to better in this one. Yes, he is so good. It's all about redemption. Lift the hand. Keep it nice and long. Keep it long. Keep it long. Keep it long, keep it long. Keep it along. Give it a long Keven long. Keep it long. Give it along end.

There you go. Good. Let's try the other side. So we're lying down again. There we go. The hand is going to be at a 90 degree angle. The lexan about 71st we just going to press straight down without any movement. Getting that pressure, getting that lateral side completely engaged and then relax and prs. Now if you're dealing with an athlete that has a lot of um, firing of like getting on and off, on and off, depending on the sport that they're playing, you might want to play with them with the rhythm again and find it released.

Find it release instead of finding hold, right? So moving on, we're going to press the hand, goes up the palm phases forward and we press up right into it. And you might feel a big difference between one side and the other. He does not feel a difference at all because he's totally balanced, totally balanced per s end here. Push, get that connection. How is Su not so balanced? [inaudible] seems like it's picker sewers and lift. Andy is already on his last one. [inaudible] go and control back down.

There you go. Right. So this is quite a challenging exercise, right? So you want to make sure that you build it up and follow the steps. Good. Let's move on to the reformer. So we're back at the reformer. We just did some exercises for our lateral stability and our rotator cuff and now we're going to do some jumps. Um, so we put it under very light spring.

So in this case it was a um, one blue and Sue's going to kneel down very similar to what you do for your knee stretches except for the feet are going to be pointed. So we are going to do the knee stretch flat position. And depending on your machine, you want to try to get as flat back or as tabletop ish as possible with the, with the upper body. Now it's important that the body itself is not going to move. She's going to piss her hands under bar and she's going to push off as hard as she can, gets a lot of air and then lens quietly or almost quietly. Right? So she's just going to control that.

So now what we're doing again is that East centric control, right? For people with sports, you can make it as sports-specific as you as you want to. Like for example, if you're dealing with gymnasts, they have to have a very quick push off and preferably even with almost not bending the arms at all. So we're going to go push up right away and lend push and Len push right? Or I can really make her support and land never relax for a second. It's more, it's more challenging than you think it is. Um, of course you can play with the hand position, you can have the hands out, you can have the hands together, you can have dance and the knees, you can do all kinds of different variations that you can just go and play around with. So the next version is we're going to go back to the wall. So for the next exercise we're going to do the wall rotation.

So we're going to be angling ourselves against the wall on our elbows with the hands facing each other and the elbows about shoulder height. Now you're gonna walk yourself backwards with your feet to increase the angle of the body. The more they step out, the harder it's going to be. Make sure you're nice and long. Stabilize the shoulders. Now let's take the right hand off and rotate towards the right and we're going to make sure that the shoulder and the arm are centered exactly where they need to be and then come back forward. So watch out of the, as you rotate that the shoulder does not pop forward. Okay, so we're going to rotate and he's going to make sure that that humerus is centered into that shoulder. So what we're doing here is we strengthening the rotator cuff muscles to keep them centered because that's what they supposed to do.

Let's do it one more time. Keeping that rip in. There you go, which are, you don't shift your body towards it. There you go. Keep it a pure rotation and then come back. How sue doing? She's doing pretty good. She seems happy. And let's go over. It's all about keeping sue happy and then come back to the center and then slowly step off. And then we're going to change that movement pattern to the reformer. Okay, so we just did the exercise against the wall.

Now we're going to make it a little bit more dynamic on the reformer. So we're going to be exactly the same position that we just did on the wall with the four [inaudible] forms. The elbows open to fingers towards each other. We are no springs, so you're going to have to be careful. So because of that, we're going to start with the legs slightly apart, making a little bit more of a bit wider, stable base. You're going to round that back a little bit to connect it to Raiders interior, and he's going to lift one arm up and drive the body through, making sure the arm and shoulder are connected and then he rotates it back.

Bring it back home. You want to make sure that that rotator cuff that we just worked on on the, on the wall stays connected. There you go. He does that beautifully. And then come back in. Let's try it one more time if you, okay, so he sets it up. He wrote is rotate his ribs around. The machine might move a little bit through and then he brings it back to the center. He can controls it, sets up that shoulder blade, have a pure rotator cuff rotation in that humerus, and then he carefully steps off.

So the next segment, what are we going to do is the spine rotation where we work on spine and more of the connection between the pelvis and the rips.

Chapter 4

Rotation/Connection

So we're going to start the rotation section and we're going to start with the roll down with rotational punch. What we've got is we've put the handles on. A lot of times they have just the loops, but we like to use the handles and the handles are important because it helps you keep all fingers in the weight. Even on the hands, if you noticed it's in the position of the rowing, like into the sternum. She's going to just move a forward just a little bit. So that's still the same setup as normal rowing one hand from there.

Now the difference is that the feet are going to be on the outside of the shoulder boxes as opposed to the inside and it's, she's going to press into them, especially as she rolls down to punch. And for this spring setting, we kept her on one green on the balanced body. If you're on the grots, then you would just have one spray. So from here she's going to pull back just like into the sternum row. And now from here she's gonna Punch across her body and the arm is not going to move. It's the rib cage that's moving and as he's punching that way, if you can hold it, you don't want to stop.

But for the sake of the camera we're going to stop the second she's got the rotation happening in the upper ribs, they're following the sternum in the head. Bottom ribs are following here, pushing down the hip. If she pushes into this leg more, you thought you were just happens with the pelvis, bring it back in and come back center. Thanks for holding it. Now we're going to do the second side and she's going to pull back and we're going to make it a little smoother and a little easier. It's just going to roll a pot and punch. Punch me, my faces here, there, pull it back in and come back up. Now we're all back.

We really push with the flag. Punch the camera because he hasn't given you the closeup. Pull it back in. I roll back up. Now you can punch me, which is what he wants to do and pull it in their faces here and pull it in and slowly roll it up and relaxed. And why don't we head over to the mat? Okay, next version is a version of the crisscross variation. So you're going to lie down.

Now on this criss cross legs are going to be hit with a part. You want to make sure the knees are pointing straight forward, even weight on the hands on the hands. Those are your feet. Your feet. Find their hands every hide your head is what I was thinking and what you're going to do is curl up just like the start of a criss cross just to the bottom of your shoulder blades. Now from here you're going to take your right shoulder and twist and you have the rotation. You're going to bring that down to the mat. Now in this position, why sue is there, you're going to see the top ribs following that sternum, lift the sternum a bit more. Keep trying to increase that rotation. Then in that rotation she's going to allow the left pelvic half to come up a little bit and then drop it back down. As she's doing this, the top ribs are going towards the sternum and the head lifting bottom ribs are going towards that pelvic half as specially as she brings it down.

You feel that sea lift, it's very tiny up and pull it down up one more time this last time and relax it down. Then how the Andy do? Perfect. Of course you sort of infection of course. Second side. Well sue was perfect too and from there roll up. Not a competition. Where's she going to do? I thought it was an athlete workshop. It's a competition from there. You're going to Chris Cross from here.

You can see the top ribs following that rotation. Lift the sternum up. Yes. Did you see what sue just did with their back? That's it. Now she's going to lift the right pelvic half up and then lower it down. The bottom ribs are going to follow as she brings that pelvic half down. You're going to see the bottom ribs following.

So there's a great feeling of a great spiral through the whole entire spine. So bond ribs are going this way as she lifts the pelleve half up and she increases that. So you've got that spiral going to your torso. Yeah. Good. How's he doing? I hear the breathing over there. It's helping or it's huffing and puffing. Well, it's huff and puff over to the wall.

So the next exercise is the sitting thoracic rotation. You're going to need a theraband and to try the ball. So what we're going to have them do is sit down, cross leg style if you can. If you have bad knees than what you're willing to do is just stretch your legs out. You're going to place the ball right behind your back, right below, sort of around just shoulder blades. Then you're going to take the theraband and you're going to wrap it, cross your back.

You're going to hold the ends and the ball's going to be right there on top of the theraband and the ball will move the tri ball. Now you're going to keep your arms straight and the movements all from the rib cage. So what you're gonna do, the arms are just here and you're going to think of the rib cage moving. So bring it front as the right ribs come forward. They open. So you have that reverse thing happening. So as the ribs go forward, they open in the back of the ribs.

Going back our closing. Now make sure you don't use the shoulders. You're giving me a little bit show shoulders. I want the pure rotation all with the rib cage. You feel that? So the arms and the shoulders are just moving because the rib cage is moving as the ribs coming forward. Our opening the ribs, going back, our closing.

You feel that? So you're trying to get that rotation all happening in the thoracic spine. Now Watch your shoulders. Now try it. Just move the ribs. How is he doing over there? Doing? I'm pretty good. Keep that focus friend. I saw that. Yeah. Yes, I see Amy shoulder was, it keeps wanting to go up. This one down.

Good. And Marie lax. How'd it feel guys? Very challenging. All right then let's go back to the window chest. [inaudible]. Okay, so let's put the moving patterns of the crisscross and the sitting thoracic rotation together in the chair. So we're going to stand facing your chair. There we are. And we're going to start with an exercise of you probably already know the one leg bend. Press down. So you're gonna place your foot, the ball of your foot on the pedal. The leg is bent.

Now normally we make sure that everything is square. However, today as the leg comes up, allowed his pelvis to come slightly forward and inward. There you go. But keep the knee straight forward. So we're going to initiate with the pelvis. So you're going to create almost like an outward spiral with this pelvis and that presses the pedal down. We use the heavy spring for this and that's because we're going to combine it with a different exercise in just a second.

So if you want to do this by itself on a lighter spring, you could, but you're going to get in trouble if you're going to put the Combo together later on. There you go. You could also think of this sitz bone that's up and forward a little bit. You're going to press that sits bone down to the bottom heel and that creates that connection. And then change. Let's change Lex. For some people, the ball of the foot, it's hard to get in contact with the pelvic floor and you might want to use the heel instead. That heel impulse that goes right up. So you could do it on the heel as well.

So didn't have a slight internal spiral. And then spiral out, which I did. The knee does not travel with it and then release it and allow to hip to come with it. There you go. And is it the pelvis spirals back and down and then it comes forward and up. Does that make sense? As long as it makes sense. One more time her, I sit down at up, how's she doing? She's perfect. My best exercise here, it's her best one. We all have no time to spin and rotate and relax.

So let's do a variation of the going up front or you might know it as the lunch or w to balance control, whatever. So we've gone to place one foot on top of the pedal and the other one goes on top of the box. We're going to create almost like a very slow motion step. So he's going to stand the leg that's on top of that hip is going to go inward. The rib cage rotates against that as if we are making a step.

So he's going to start with the rotation of the sternum so the rib cage rotates. Then the pelvis rotates against that backwards and that makes you go up. Okay. You can go all the way up or you can go halfway up, whatever you're used to. This is the neutral part. And then as he comes down, he allows it hip to do and that ribcage to go. So the rib cage and the pelvis always rotate against each other.

Okay. So the rib cage moves to the right. The pelvis moves to the left. You feel that? Yeah. And then as he returns the, this pelvis moves forward and then their rip moves forward. There you go. Okay. Let's step off and let's practice the others.

Did we do both sides of the bottom? No, we didn't do both sides of this. Yeah. On this one. Yeah. Yeah. That's the other side. We did both sides with the press down. Okay. At least we did just want to make sure then I did too. Yeah. Here we go.

So we're going to rotate and rotate and again, you might feel it. Um, rotate your upper body down. Yeah, there you go. Find the pedal and then we rotate and we rotate. And the rip goes to the stuck this way. There you go. And I'll rotate this way and that way. There you go. Keep looking forward. And then we go back and then [inaudible] let's step off.

Now this can be quite challenging, right? Especially if you're dealing with people who are like sue and Andy are really good in employees because they're trained to be square. And then suddenly when you start adding rotation, their body's going like woo. Right? But they'll figure it out. So now we're going to put it all together as if we are making one big huge step.

So we're going to start at the bottom of one leg bench or the leg pedal is up. That hip is up forward. We, we're going to press and a rotation of the rib cages against that. So the paddle presses down and we go with us back into a neutral position. So this is the middle part of our step. Then we step right on up to the top, following through with our rib cage.

There you go. Then we'll do a rib cage rotates and the pelvis rotates against it. Back to our neutral position. Then the para, we find the pedal. We slowly come down. Now this is where you really have to watch out.

You don't lose the pedal as this foot comes back to the floor and we back to our neutral stance and then the pelvis comes up and we follow through with the rotation with the other side. Let's do it one more time. So the paradol for the pelvis presses, we go to neutral step up, follow through with the rib cage. There you go. And a rotate the rib cage back against it. There you go. Next find the pedal, rotate against it and step off or place a four down. Go to neutral position and then allowed a pedal to come up and rotate through.

Good. Let's change flex. Right? So now what we're doing is basically slow motion running, right? And it can be quite challenging, but if people cannot control something slow without resistance, actually with help, they can never do it fast against resistance, right? This is where we as pilots instructors can really help the body mechanics of our athletes by just accommodating and slightly adjusting. A regular plot is exercise and here we go. Allow that to rotate knights fan to neutral police the foot down and follow through us as better terms gay ago last time press follow through.

There you go. And step. There you go. He's got the rhythm I got here and there we go. Come back to the neutral position. Foot down and follow through. There we go. Nice. So there we are. So let's go back to the reformer. So the next exercise is kneeling thoracic rotation.

Ready for twist. So you're going kneel on the box, you're going to kneel. So your body is lined up right in the center. The headrest, which oops boy, you're anxious. You're going to have one hand this hand there and the other hand there. Now you'll notice that the whole carriage is moving. That's because we have no springs. So she's now that the carriage is the other way in.

You want to just sort of even her off. Now the sits bones are going directly back. Shoulders are in line, head long spine from here. She is going to send her sits bones back as she pushes the carriage out head go straight down the rotation. There we go and come back up. How's it feel? Yeah, that's great. And now it does and stretch. So you want to keep that alignment.

Sitz bones are heading back. Keep this there. Now she's doing this really well for let's make it a little bit more fun. As she goes down, she's going to let the rotation happen and they had and she's going to go all the way down, keeping the head long. So it's from here so it can see like the side top of the head that comes in and come back. People have a tendency, they want them around, but you really want to keep all that rotation happening so the upper ribs are following the head and that and the spiral is following this way. [inaudible] and come back in. Damn. Cause she's doing so well.

Let's even add on. So she's going to go out and she's going to go all the way down. Keeping this there from here. She's going to let the carriage go out and slide it back here and she'll go out. Right now I look like she's in happen and up.

Come back to the center. Slowly pull it in. I am relaxed, so then just stepping off. All right, just to move this out of the way, we can also do it standing with legs slightly apart again. It's right in the center. Yeah. Are there hand from here? She's going to slightly bend your knees.

Same thing here. That squat, so she's going to be here. She's going to send sits bones. Back. Head is in line first, so it's long down. It says if you're kissing that carriage, well not literally and come back up. Then she's going to allow the head to go down keeping this long. Ah, yes. It might not go all the way down. Down. Give me a little extra head Bob there and come back up.

Good. Eh, come back yet. Yeah. Then she's going to bring the legs together again. Oh, I ended up in the center. Ooh. Third Time's the charm. The right hands from here. She's going to straight down keeping the arms straight and keeping the legs right.

Not is going to be able to do this one, but sue special so she can do it and turn their head to this side. So yes. And come back in one more time and bring it back in and slowly come up. Then Oh, let's go around to the other side. Okay.

I wouldn't want to leave you lopsided in this. I know. I'm thinking like hopefully, well you're hoping was right. If you're gonna kneel in. Good, right? Very good memory from here. Sits bones going to go back. So she's just going to go straight down with the body and come back up right away.

They sort of want to move out and give you roadkill. We come from Arizona, so that's a lot of what you see and come back in. Now we're going to let the air go so she's going to go rotation. Good. And come back up. So the bottom ribs are helping stabilize this pelvis. Half top ribs are rotating there as she keeps, tries to keep the back flat. Last time.

Watch the head. Bring the Chin down just a bit. There you go. And bring it back in now, just like the other side, cause you were so good. Let's go down. We're going to let this slide out so you just let it move, but keep the sitz bone going to here. Yes, there you go. And it slides in. How's that feel? [inaudible] died and gone to heaven. Good. And come back center and slowly pull yourself up and step off.

We'll move this box over to the end and standing to stand hip with apart from there. Slowly bend, bring it down. Had this long in line. Make sure it doesn't go out. Keep those arms straight and come back up. And one more this way and back up. Now let's add the head so that the head guy keeps those knees slightly bent. There you go.

And one more. Just really let it go. Good. Then come back up. Bring the legs together. Grand Finale from there. Send the Sitz bones back, had his downs to the back. Flat back, back there. Yes. And come back up.

Send those sitz bones back and [inaudible] hot. Good one last time. Send it back and bring it up slowly. Roll yourself up. How do you feel? Awesome. Good job. Onto the next one. So are we going to move on to the kneeling lunch and for that we have the reformer on a light spring. If you have to choice and we need a magic circle and we need a little pad.

Now the pad is not necessary but it's kind of Nice. So she's going to be kneeling with her leg inside of the shoulder boxes. So the knee ends up against the front shoulder box, but it goes through the shoulder box to the end. And here is where it hits the outside. So if you are an ice teacher like I am, you put a little pat there, the other foot goes to the forefront.

There we go. And then we're going to give her a magic circle and she's going to hold on with the back hand holding onto the front handle. She's going to initiate the movement from her, her back sits bone, if we can call it that way. So she's going to control it, get it around the corner and then press the arm straight out to the front and then she bends it back and she goes back into her rotation. So she engages from the pelvis, pushing it straight on through and bring it back in. There you go.

And she does a one more time with the arms bend and then we were very variation with the arms strict. So as you're going to start with the arms down, she's going to keep her arms absolutely straight and she's just going to sweep it on to the front about shoulder height and then she's going to rotate herself back. We have to same initiation from that back pelvis. Thank you. And bringing it back down. Nobody noticed and we do it one more time to the front, bring it all the way through. Very nice. And then of course we are going to do the other sites so she's going to gracefully step off. There we go.

We moved the pad to the other site and she's going to kneel down. I got it. Okay. Sort of neat is going to the, there you go against the front shoulder box with a foot against the back. Her other foot is bringing a little more open so it's more in front of your leg. She holds onto it, elbows are bent. She initiates the movement from her back, sits bone coming around the corner and pressing it straight out.

And then bring it straight back in. There you go. So press it out. There you are. Let's see if we can get this hip. A little oops. Lower and longer day ago, eh. So press and get this long and down. There you go. Very nice. And then I think it was three. So I started with the arm straight.

Bring the pelvis around a corner, lift the arm straight up. There you are. Bring it back in. Get a little bit more elongation by pulling up. Yeah. And Rich, think of closing your zipper a little bit more. [inaudible] bring it back down one more time. Feel so good, so good.

And bring the arms back down and then we are getting ready to go to the Cadillac for our final exercise of the day. So we're going to do a variation on the site, Lex springs, so you can do it on the tower or on the wall units, but it's also very nice and especially nice for the teacher on the Cadillac. So we're going to um, we have set it up as the site like springs. So for sue it was the purple springs about this hate and we're going to need a theraband. So we're going to place the theraband down in such a way that the majority of the theraband is actually behind the client, right?

So she's going to lie down on her side with the middle of a rib cage on the theraband so it locks it in. She's going to bend her knees in for now. And again, we're going to keep the band as wide as possible as we wrap it around and just being kind on top there we go. Holding that in. She's going to make sure that her shoulder blade is angered so that we're only moving from the rib cage. The arm stays parallel to the floor. She initiates from her sternum, pushing the band and her ribcage forward and then backwards so she works against the theraband. Keep it in line, keep pushing the sternum forward and back and we try not to move the hips or the knees so we just having that wonderful rotation articulation going on in the thoracic spine.

After having done that a couple of times we are going to let go of the segment and we're going to start with a side. Let's spring, so we placed the top leg in it, straighten out the leg in line with the body and making sure that the pelvis is long and right on top of it. Then we're going to bring the like just to the front as high as comfy and then we bring it back in line and stop in inline position in a reset the pelvis and make sure it does not move as you bring the leg slightly back, keeping it parallel as you might feel a little stretch here in the front. We go to the front. The second time we going to go. Here we go in line. We pushed slightly behind ourselves. There you go.

Now we're going to allow the leg to go further back and this time we spiral that hip slightly outward, right? And then we bring everything back on top of each other. Let's do it one more time. We go to the front. Oh wait, you go in line. We set it up. The lego slightly slightly behind you. If you hit that stopping point, you allow the LE, the pelvis to rotate with you or jack for that line and then we come back to inline and then we're going to put it all together. Well, so have a nice little tension. The arms stay still.

We're going to go to the front. We are going to go in line. We set it up, we bring the leg behind us, we stop now the ribcage in the pelvis, remember we talked about it earlier, are going to rotate against each other. So the pelvis rotates back and the rib cage rotates forward. We get into the lovely opposition that legs days parallel to the floor and we bring everything back to the center. We go to the front and we go back in line.

We line it up, the leg goes back, the body moves forward as the pelvis moves back so they have to move exactly at the same time. And you might feel at one end, I give her little stretch, can um, can actually keep moving and the other end stops. So then you have to stop, right? So bring everything back in line. This feels really yummy. Bring it to the front. Therefore she's not complaining. Varying the liken line. Bring it back. Allow the rotation to happen. There you go.

Bring the rib cage forward. Then we can stay here. Field connection between the foot. And the hand and opposite directions and now just lowered his leg for an extra stretch and lifted back in line. Keep pushing the a rib cage forward. There you go. Let's do it one more time. Bring it back and up and then come back to the center and bend the leg again.

So especially for your athletes that are very one sided in their rotation or connection that might really, really be beneficial for them. Okay, let's do the other side quickly or let's make it the same tempo. So are we going to make sure the thera-band is lined up? She's going to lie down with the middle of the rib cage on it so it is nice and secure. Then the knees in and the arm goes around. There we go. You get the nice view and we lengthen.

So she's going to make sure the shoulder blade is connected to the rib cage as you move from the sternum forward. And then she moves backwards. There we go. And forward. So it's really a thoracic movement and not an arm and shoulder movement. As we do the top part of the body, keeping the hips and knees still there. We are just relaxed. That arm, we go into our side like spring, push the leg out, keep that nice and long feeling the leg goes to the front and it goes back in line. Stay in line, set the pelvis and I'll bring the leg slightly back with out moving that pelvis, come back in line and bring it to the front and we bring it to the back or in line. Sorry. Then we bring it slightly back behind us.

[inaudible] and now allow that leg to pull that pelvis slightly in external rotation. Not Too much in this period. Yeah, there you go. And back to the center and to the front and two. Let's do it one more time. We line it up. The leg goes back and out of us. Key Pauling. Yes. So the pelvis and the hip are connected. You feel that alignment and then come back to the center.

Let's put it all together. So here we are. She is going to line herself up. She's going to go to the front. She's going to have to the back in the arm. Up Bell. Then the leg goes behind her. No, she's going to spiral the pelvis outward. Does that make sure this goes here and then the rib cage come forward and then come back to the center. She goes to different and in line we lengthened. Bring it back behind.

You rotated back. Ooh. Don't forget your pelvis and it goes backwards. There you go. Keep going to me. You don't want to move this back. There we go. Yeah, so really make sure that this pelvis goes into outward spiral as the third one. The thorax goes forward. And one more time. One more time for good luck. It's the magic number.

That's what they say. Bring it back. Oops. Where's the hip going? There you go. Now bring the sternum forward. Yeah, so you can really see that this side is a little bit harder for Su to coordinate all the different parts. Been the roof. Catch a little bit more forward. Huh? Now get the connection from the foot to the hand. Push those in. There you go. Push the arm and leg away from each other. Nice. Nope. Stay there. Keep pushing.

Now lowered leg and keep it thorax coming forward. Push the sternum into the ocean. There you go. Keep going. You're almost there. And then bring the leg back to center and then relax everything down and just roll yourself back up. So she looked pretty good. She looked pretty bad.

So we've gone to the end of this whole workout. I'm hope it was helpful and thank you. Well, thank you. Thanks to thank Andy and thank floods at anytime.

Comments

Great workshop! Can't wait to try some of these myself, thank you!
Great exercises again. Such a great teachers. Happily I followed their certification programm. Learned so much of you guys and still does. X
1 person likes this.
Only watched half so far but loving the workshop. Learnt so much. Love your teaching style and humour! Where do I get info on certification program?
1 person likes this.
Great, lots of learning.

Punch with rotation on reformer: legs outside shoulder rest for more stability ? or other reason ?
Thank you Maureen! We hope you will love the rest as well! We do not have a certification program, we do teach this workshop as a 3 hour workshop for numerous organizations. Hope we will see you there!!!!
Ileana! Thank you for your comment and question. For the Rotational Punch on the Reformer we like to place the legs on the outside of the shoulder boxes because you can squeeze the legs into the shoulder boxes and this will help stabilize as it will activate the adductors, which makes it easier to connect to the pelvic floor muscles and the abdominals. If this does not work for you, you can keep the legs on the inside of the shoulder boxes and press the legs out. You will activate the abductors more. Try both and let us know what you like!
Time to ditch the Nike shoes if you are teaching foot fitness
Go barefoot or wear a Vibram five finger shoe
Thank you for this great workshop. Loved the spine and sholder rotation in the reformer, soo deep. I have scoliosis so I felt chalenging to do the left side, that is my short side. I will for sure use this exercises with my clients! Hugs from Monclova, Mexico.
This was helpful - I got some good ideas thanks
fantastic focus, I would love if you could share more details on reason for side walk squat whilst keeping the ball still?
1-10 of 15

You need to be a subscriber to post a comment.

Please Log In or Create an Account to start your free trial.

Footer Pilates Anytime Logo

Move With Us

Experience Pilates. Experience life.

Let's Begin