Description
About This Video
Transcript
Read Full Transcript
What I'd like to do now is show you how to set up the spine for the supine exercises. We're going to be modifying for osteoporosis, but before that I want to look at the person in front of me and see what their spine is like in a neutral position and then I want to decide what position I want them to work in for the supine exercises. So Christie, if you would a lay down on your back. I'm so excited to work with her. She's a wonderful mover. So I want to see first what she looks like when she straightens the legs all the way out. So let's have you straighten your legs all the way out and basically I think of this being just the vertical posture turned horizontally and see what hor her body looks like when she's laying here. Main thing I'm looking at his neck relation to the chest and rib cage, rib cage relationship to the pelvis and really wanting to know how much space there is naturally under her lumbar spine.
Other thing I want to look for is tension in the lumbar spine. If there is tension in the lumbar spine, then usually there is either a guarding pattern or you're nervous and you want to relax. And so a lot of times what I want to do is maybe some pelvic clocks and maybe needs to chest hip circles, diaphragmatic breathing, which will calm the nervous system and see if that makes a difference in the spine. Now someone with chronic low back pain may have gripping in the paraspinal muscles all the time and never let them go. And those are the people that we want to work with, maybe in a physical therapy setting or in [inaudible] to get them to relax a little bit more and move with more ease. So I look at the, the tone of the person, is the person tending to be more tense and rigid or are they hyper mobile and more floppy and low tone.
And then I'll make the determination for what kind of breathing I want to give her, whether it's diaphragmatic or going right into costal breathing when we're doing exercise and we're trying to to work our torso muscles and activate the abdominals and do all that wonderful stuff that we do in [inaudible]. Um, we, we might, we always want to do the costal breathing when we're looking for trunk control. But when we're looking for resetting the nervous tissues and the nervous state of a person, we want to look at diaphragmatic versus costal breathing and the sympathetic nervous system stimulation with costal breathing in the parasympathetic stimulation with diaphragmatic breathing. So hopefully while I've been talking, I want to lower my voice and slow my voice down so that she can relax and she's fine here. She has really normal tone of these muscles. There's no rigidity. They're soft, so you're not doing anything. So she shouldn't be trying to lift her spine and she also shouldn't be trying to press her spine down, just staying relaxed. All right. Now when I measure here, I measure, yeah, she can sleep as she wants to. Perfect. I wake you up on wetlands, time to go.
Um, she's got two fingers stacked up in between the, the spine, the bones of the spine and I, I normally go with l three, that's the small of the back. If you want to find the belly button, it's just opposite to l three and then I stick my hand out of there and see how much space I get. And then I choose what prop I want to put under there. For someone with a very flat back, I'm going to choose a thin strap, maybe like the top table strap. And for Christy I'm going to try the Fletcher Towel. It's, it's a nice thick surface. Um, that will fill the space underneath the spine. Now if it's wrong, yeah, then I'll be able to, I won't be able to pull the towel out. If it's too thick, then I can't get the towel out very easily. And this is a little bit thick for her.
So I could take the sleeve of a sweatshirt and try that or double up, roll up a hand towel and, and find the just the right thickness for her. I could also try taking the trap table strap and making it a little bit sicker by doubling the layers there. So we'll start with this and then what I want to see also is when she presses into the strap [inaudible] what happens to her neck? All right, and if I see tension or jetting forward of the chin, I might cue that to see that she can keep the rib cage settled down and then try it again with the ribs funneling toward the pelvis. I don't want to see the pelvis tuck with this. I want to see, I want the pelvis to stay neutral and I want her to think of bringing the ribs toward the pelvis without the tucking of the pelvis. I don't want to see the hip flexor starting to grip.
I want the pelvis to remain in neutral. Okay. Now if you could bend your knees and I'm going to take the towel out for a moment. Now what I want you to do is press the back down as hard as you can, tucking everything and pushing your ribs down. And let's notice what happens to the neck. The Chin will that tend to jet forward and that would not be a great position for her to work in. I wouldn't want anybody to work in that kind of position where they're in extreme flection. They're really jamming their back down.
The neck is getting the overflow and then she's also gripping in the hip flexors, so I prefer to have it with the little bit of the CIC strap underneath the low back and then then it tends to make her not want to press all the way down into the mat and that's going to be a lot easier if we're going to keep the head down. Now for the hundred we're going to see first, can she hold this position without me? Allow allowing me to take the towel out now take the pelvis back to a neutral position and then draw the ribs toward the pelvis. Keeping the yes, keeping the neutral position here. Yeah, that's a, and then c. That's it. That's it. Now if I jerk pretty hard, I can't get the towel out. Now I'm going to have her lift one leg and then lift the other leg. If she loses control, then I'm going to be able to pull that towel out.
And I don't want her to be able to do that. So I'll, I'll do some more queuing, kind of work with her on that until she gets really good control and then extend one leg and that's it. And then I have tag on the towel and then come back in. And then the other one great and back in and really anchor that tailbone down a little bit more. I try not to tech, that's it. And then extend both legs out. Right. Cause I want to build strength in that neutral position and then back in again.
Exactly. So basically I've filled up the space there and then place the feet down. Now if you're getting a lot of overflow to the neck or you have somebody with a little bit of Kyphosis, uh, we're going to take a pillow, put it under the hedge. But what I want you to do is roll to your side and to get up. That's all people want to get up. Right?
And you don't want him to do a lot of thoracic flection. If they have osteoporosis. So we're going to use the pillow and the towel and now we're ready to go. All right, so take the legs up one at a time. Exactly. Extend one leg out. Right? So I'm looking for bulging of the abdominal wall.
Changes in the trunk, overflow to the neck, making sure the towel is down. Now you're going to take over. So you can do this at home. Hold the towel, pull on the towel. That's it. Now extend the other leg. Pull on the towel, lower the legs down. Keep the towel taught. Excellent. Lower down even more. There you go. And Pool. Exactly. Oh, see she started to loosen. Oh, all right. So now that would be your, your point of control. So if you go to the point that's too much for you and you lose control of your spine, then you've got to come back up again. Okay. So it's really tricky.
You think you're doing it and you're really not, you know, so that was excellent. So extending the legs out one at a time and then pull. Exactly. So that's her point of control. So I'm gonna work her there and then progress her legs lower as she gets better at it. Okay. Come back in. If you need an extra pillow. Sometimes I need two pillows. I also have a wedge cushion that I use sometimes.
So those work really well. So I hope that works for you. Our next exercise is the roll up, so we'll be starting actually in a seated position for that one. If he could bend your knees, roll to the side, swing your legs off the table and sit up. Excellent. All right. Now swing your legs this way. I've got a couple of prompts here to give some assistance if she needs it.
If you could straighten your legs in front of you. Uh, what I'm going to do to start the exercise is determine how flexible our hamstrings are and if she can sit in a neutral spine. I've established her neutral spine as a two finger distance for my fingers and for hers too. And if she's unable to maintain that neutral spine position, I'm actually gonna start her in a bent knee position. So she's completely flat here against the dowel. And if she could roll the pelvis forward a little bit and see how the rib cage tends to go forward with that. Now take the ribs back. Yeah.
So she can get maybe to one finger there. So she might need to warm up a little bit more in order to sit like this very comfortably without too much flection in the, in the lumbar. So I'll have you, um, we're gonna assume that you have longer hamstrings. Okay. And then straighten your legs. And then we're just going to, for right now, we're just going to do a hinge back and you're going to take your arms forward, palms facing each other. Yeah. And lengthening the spine. Breathe in and breathe out to hinge back.
And we're going to keep those three points of contact against the dowel and then back up again. So you can go pretty far because she's strong, so you might not be able to go that far at first. So taking those three points of contact, now I am, I'm holding the Dow for her. But if you're at home doing this, you want to hold it yourself. So hold the dowel from the top and the bottom. And what I really like to do is have you put your thumb in between the stick and the low back so that you can see that neutral position and you can feel the bones of your spine pressing into the doll as well. And then hinge back, maintain that neutral position and then come back up. So this is quite challenging and certainly a totally different focus from the articulation of the spine in the roll down that you would normally do. Yeah, yeah, that's it. So once you have the neutral awareness of the spine, then you could also assist someone, which this will be really nice. You'll see her probably be able to get into the neutral position by holding the straps.
And then she's going to take some stress off the hip flexors in order to get her pelvis to roll forward a little bit. Yeah, that's it. And then hinge back again. Right. And so you would kind of let go and then you'd have to bend your arms to pull forward. Yeah. So you just do a little row and just watch that you don't pull and lead with the ribs. I'm going to keep everything in that neutral position. Then if you have a teacher around or you could stick the doll inside your shirt.
Yeah, that's it. So it slides along the back there. Beautiful. Okay. Now if I wanted to add a little bit of flection with it, um, it could keep this strap and then let's do just a small curl back. But I want her to really maintain the position of the thoracic spine. So she's in a curl back and really bring in the low belly to pull away from the feet and then back up again. So just a small pelvic curl. Sometimes that feels really good to move the spine, just a small and then back up again. That would be enough. That's it.
And one more, curl back on the exhalation and then inhale to come up. Good. All right. So for those that can't even come near this position, that's bend the knees. Yeah. And you can hold onto the back of the legs. You probably don't need the strap. And then separate your feet a little bit [inaudible] and then you're going to do a hinge back first. So I always want to make sure that the person has good control of the spine in that neutral position can do those positions.
Any position in relation to gravity in a neutral position with control [inaudible] and we can put the dial to make sure she's got it. There we go. Nice. And exhaling and inhale to come back up. Now if you want to do a slight curl is sometimes feels really good after you've worked her back extensors curl back just slightly, keeping the thoracic spine lengthened and then back up again. So I think of rolling the pelvis back like a wheel. Uh Huh. And then back up again. Nice.
And then exhale rolling back like a wheel and then back up again. So very slight lumbar fluxion there. Very good. All right, so that was the roll up. All right. Our next exercise is the rollover. We won't actually be doing the roll over, but we'll be doing the preparation for the rollover, which I think is brilliant. It's a really nice exercise that I've seen done in many of the elders work where they're initiating the movement from the pelvis. So we're going to take a pillow under the head if the person has the overflow to the neck and needs the pillow.
And that is helpful for engaging the abdominals as well and changing the relationship of the ribs to the pelvis. It's a little easier to engage the abdominals and we're going to stay in a neutral position. So I'm gonna stick my fingers under there. She's a, she has a two finger stack. Yeah, she likes to press down and then lift one leg up into the air. So I really want to start in a neutral position. If she's already in a flat back, you don't have anywhere to go with this exercise. So we're going to do the initiation of the curl up of the [inaudible], which would start the rollover and then curl it and back down. Yeah.
So she's, I'm doing a really great job of this and what I'm looking for, not many people can actually lift the pelvis as high as Christie's doing. She's very strong. And what I want to see is the knees go straight up. Say yes and you'll see that row that overflow to the neck a lot with this one. So pressing the shoulders down and then you might need a pillow or two under the head. So if you go so high that you're really feeling like you're gripping in the neck, you want to ease off a little bit, but that that gets the pelvic floor working, that deep abdominal contraction, really nice work.
So you're just doing the, the pressing of the back down. You don't want anything under the spine at this point. You want the spine to be free to move a little bit. So just doing that little preparation. All right. And then it's actually easier with the legs straight cause the hamstrings will pull the pelvis into that posterior position.
And so a lot of times you'll see that now, not quite so high. You want to keep it. Yeah. So you just keep that top of the sacrum down and you just do a slight amount of flection there and then press up. And I just think that's one of the best exercises for getting control of the pelvis and the abdominals. Yeah. Not many people can lift that pelvis all the way off the mat like she can, so, so feel bad if you can only lift one inch, that's pretty normal for most people.
I'm not lifting it all. I know, I know you have a lot of mobility. This is a very tiny movement, so don't worry if you just can contract the abdominals and the knees might lift a quarter of an inch. That's actually perfect. All right, good job. Then the knees come down and then it's those really basic things that I think really can fatigue someone when they're really coming from the right place. The work is hard, you know? So those really basic things I think of Alan heard men, you know, and he really gets those details and gets those, those deep muscles really working.
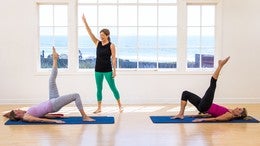
So that's what you want for this exercise as well. Our next exercise is the single leg circle. So this one I think is a problem much more for people with arthritis of the hip or hip flexor. Tendinitis. I'm not contraindicated at all for osteoporosis, but I just wanted to show you a couple of different modifications for someone that cannot get their leg to 90 degree angle. So I always say that the 90 degree angle is sort of the litmus test for people who are just couch potatoes, right?
So everyone needs at least 90 degrees of hip flection with the knees straight in order to have a healthy back so that your hamstrings are not putting undue force or influence onto your back. So let's see what you got right now. Lift your leg and let's see if she has the 90 degree angle. So let's push down into my hand a little bit. Okay. And then I want you to really keep that pelvis down and sink the palace. Let your leg rest in my hand. Yeah, there you go.
And I want you to press into my hand a little bit. There you go. And then let that hip sink in the socket there. Yeah, instead of reaching out of the socket, like sometimes I hear people cue is that I want to see the hip deep and in the socket. And you want that postier capsule of the hip to get a little stretch here and sometimes it just can't happen. So I'm going to give you a strap. You want that 90 degree angle obviously, and I don't like to have people do the exercise if they can't get to 90 degrees without a strap, without any assistance. All right, so you're gonna play around with that and see if you can get that hip to drop. And we want to try and get the pelvis level here. That's it. I want you to, I think of sending your rights it bone towards your left too. Great.
That looks better. And then that softens or hip flexor a little bit still on though. Let's see if you can see if he can let it go and drop it down a little bit more. That's it. Now press into my hand here. That's it. Good. All right. And then rotate inward. There you go. Nice.
All right. Now this position here, if you take it across like this, this is actually a Sadik nerve straight leg raise test and it's looking for tension in the side nerves. So if someone has tension in their siding nerve and they're getting pain down their leg, past their hamstring into their foot, this can be an issue for disc problems or Sciatica. If I flex the foot and it gets worse, and then I have you lift your head and that gets worse, then there could be a Sadek nerve neural tension problem. So what you would do is back off a little bit and work on flex and point gliding the nerve in the pathway and then gradually moving the leg over a little bit at a time to free up that nerve and let it glide freely. Now if it starts to get worse and worse, you certainly come out of the position and stop. So, um, or take it down quite a bit, right?
You want to take it out of the pain free range out of the painful range into the pain free range, and then work the ankle to floss the nerve. So it's a wonderful place to kind of work on that because there's no way I want somebody that is gripping in the hip flexor that is either bending the knee and then trying to whip that leg around. That's going to put a lot of stress on the capsule of the hip and it could put a lot of stress on the static nerve as well. So then once you can get to that 90 degree angle, and if you can't get to the 90 grand goal doesn't mean they can't do the exercise. They would just lower the leg a little bit. Right, and your, your circle's going to be down here, but if you've got somebody in the room that's really not that flexible, this is so hard. Have you seen men doing this exercise that don't have very good hamstring length?
They're sweating bullets trying to do this exercise and it's nothing about what it's supposed to be, right? So you're taking that leg across midline. That's a really important position. And this is how I think [inaudible] was really 50 years ahead of this time because this is a psychotic nerve glide. If you do it across the body, if you don't do it across the body, it's not so much. But yeah. Nice. I really liked that over or cross position in everyone. Now the other leg circles to where you take it across here.
I actually love that for osteoporosis as well because it gets a little bit of moving into the spine. You're going to release the strap slowly and push toward me. Let the pelvis come up. Now I want you to pull the pelvis down away from me. Yeah, and that kind of pulls the hip into the socket. She might be doing a little bit too much with the hip flexor.
Let's do it with your back a little bit more. So think of coming from the back of your leg and press from the back of your leg towards me. Yeah, and then when you pull back, I want you to pull back from the rib cage first. Yes, d now there is no gripping in our head flexor. Lovely. And then take it up and across. That's it. And then roll down from the rib cage first, then the waistline, then the pelvis. Then the hips into the socket. Beautiful. And then now let's take this off and see how she does with the, with the leg.
And now take, take the leg around without any assistance. And again, she's, yeah, that looks a lot better. She's an anchor that hip, right? Or not the hip but the pelvis. Beautiful. Now other way, three times. Exhale. Inhale as you go down. Exhale. Last one. Shh. Bring that knee to your chest and this is a great time to do the shoulder bridge. [inaudible] so after you've really worked the hip blocks, there's a little bit, the shoulder bridge is a nice one to follow. This one. Our next exercise is you like stretch. And one of the things I learned from the Fletcher program was a way to engage the abdominals with this exercise.
Now I know this is a lot like stomach massage or like a, like the wind relieving pose from, from Yoga. And I don't mean stomach massage from [inaudible], but from Yoga. And the way Joseph taught it was to really pull the knee firmly into the chest. And I like that. That's fine because everyone should be able to have enough hip mobility to pull the knee into the chest.
So let's take your right leg and pull it into your chest. And obviously she has really good hip mobility. I'm also going to be looking at what's happening on the opposite side. So I want this like to stay straight. I want the foot to stay pointed toward the ceiling and I want the pelvis to stay down. So I'd like her to be able to do this in neutral. So let's um, take it, take it out of the flex position a little bit, hold onto the knee, just gently and let your arm straighten.
So in order to get really good hip mobility, then I want the pelvis to stay more neutral and the hip to stay deep in the socket. Now pull the leg forward and we're going to watch to make sure she doesn't have any pelvic. That's it right there. That's her, that's her hip mobility. So she actually doesn't have as much hip mobility as she should have, right? Because she's getting the rest of it from. Go ahead and pull from her pelvis and from her lumbar.
So I'd like to see her work on this. Yeah. Yeah. And um, I'm going to get a little prop and what you can do is tie a strap to the trap table and put it around the thigh like this and you tie it up so it's tight. And when, when she is at a 90 degree angle, you want to set up the strap. So it's tight here. So imagine that I have the trap table here and I'm tying it to the, to the pole.
Now you're going to bring your knee to your chest. Yes. So she's actually going to mobilize her own hip. The other thing you can do at home is to put it on the opposite foot and [inaudible] and then I can buckle the yoga strap to the opposite foot. I'm just going to hold it without buckling it right now. And then you can bend this knee to tighten it up a little bit. Okay, now, now bring the knee to your chest. Straighten the left leg. Yeah, that's it.
So you're gonna pull the hip down in the socket as she does that. All right. And then release. Good. So I think that's something to look at in the single leg stretch. And then the other way I like it is to bring the knee in close but not too close. And then I want you to put one hand by your ankle in the traditional way, one hand past your knee. And then I want you to push up into your thigh, I mean into your Shin and take your belly away from your thigh so that your, it's more about the abdominals and engagement of the abdominals.
So you're pulling down toward the mat. And that's the technique that I learned from the Ron Fletcher program that you know, you pull using that leverage. So if someone has very weak abdominals, sometimes they can activate them by using that leverage of pushing it into the Shin and taking the belly away from the thigh. Great. And then take this like up and now you're going to go right into your single leg stretch. Yeah. From here. And you're going to take a moment like I take an extra breath and exhale, pull the belly away from the thigh. Inhale change. Exhale, pull, inhale, change. Exhale pole. Yeah. And then you can go into the quicker movements with a faster breath.
So a lot of times we do the pulsing breath.
So it's a lot easier to take both legs to the chest to get into that lumbar fluxion position. It's a lot harder to differentiate to what's going on with the hip versus the spine. So with this one where we definitely want a pillow under the head, because we are going to be doing that long lever arm that tends to put overflow into the neck. So we're going to take the, the grab the shins at the middle part of your Shin. Yeah, there you go. And then arms straight. Press into your hands a little bit to get that engagement there. Now I like to think of reaching the arms straight up to the ceiling and the leg straight up to the ceiling. Create a u shape. Do that. [inaudible]. Yup.
There you go. And then take the arms overhead, legs down. [inaudible] really making sure that they have the alignment of the spine. Now this is where this little guy comes in handy, so I'm going to make this a little bit thicker for her. Okay, let's put that, yeah, let's put this under your back because when you start to open up, you might arch. So I'm going to put this under her back and you go into your knees to chest, reach the arms up to a u shape, open to a v, that's it.
And then circle the arms and close. And I'm going to keep pulling on this. This strap, when she opens, as she lowers to make sure she stays in that position and then curl. That's it. You shape open wide. Circle the arms, then the knees up to the UW overhead. Circle the arms. Bend the knees. Nice. Okay. So that was devil like stretch. Next exercise is scissors.
Take the legs up in the air, straight up. So again, for this one I'm wanting to know if the person can easily hold their legs up to a 90 degree angle. And you can also take this as an opportunity to stretch the hamstrings so you can hold the back of your thigh or your Shin and wherever you can reach. Yeah, that's it. So if you can reach your stand, great. And then your calf and then lower the leg down and you're gonna Hover the leg and see if you can maintain that position. If it's too hard to um, grab the, the Shin or the thigh and the calf, then you can grab the fine. So take it a little bit further forward and then, then you don't have to have the leg so far back. Right.
So it depends on how flexible you are with this one. And you might have to do some theraband or some strap work in order to do this exercise and now you're going to scissor. Yeah. And scissor. That's it. And Change and change. Again, you're looking at pelvic stability, neutral pelvis, try not to talk. You want to really get that sense of rulings on that opposite leg. And it's almost more about lengthening the opposite leg than it is stretching the top leg. Beautiful and down right.
And the head is down pillow for the head if you need it for the overflow to the neck and then going right into the bicycle. So take the legs up and then you're going to bend your right knee towards your chest, lower your left leg down [inaudible] and then extend the right leg to the scissor position change. And that's it. And I want to get that extension of the top leg, but I also want to get that hip extension of the bottom leg. Yeah, that's it. So I want that healed to barely scrape the floor. Yes. As if you're trying to paint the ceiling, paint the wall in front of you, and then scraped the floor. Beautiful. She reached a lot longer on that one.
That was great. Excellent. Yeah, so it's feels really different to do these with your head down versus the head up. Um, with a little bit more emphasis on the hips and pelvis. Okay. All right. Our next exercise is shoulder bridge, which I'm sure you're gonna be thrilled to do, right? We're going to take the pillow out from under the head. Now I have done shoulder bridge with someone with a lot of Kyphosis, with a pillow under the head. Now if someone is really rounded up like that, and then their head is looking back like that, you really do need a pillow. And I don't think there's anything wrong with using a pillow under the head and doing a little bit of bridging work with someone that's very functional.
It's great for the hips. It may even possibly build bone in the hips. All right, so now coming back to neutral, rolling out pelvis, right, and then opening through the chest. All right. And then we're really going to be focusing on in articulation of the spine. We're also going to be focusing on hip stability and glute strength. Now let's lengthen the spine as you inhale and on the exhale, think of peeling just to the sacrum. Yeah. So I want to get that very first part of the bridge because I think people skip through it a lot and then exhale to the waistline. Hold there.
Inhale. Exhale, peel up to the back of the rib cage. Yeah, that's one of my favorite pieces of it right there. Cause people tend to skip and push the ribs up to the ceiling. The next exhale, you go up to the shoulder blades and when you get to the top, another breath in going all the way up to the top, shoulders, ribs, hips, knees, all in one line. And with this, there's a little controversy with osteoporosis. Is this safe for us to process? I'm going to keep doing it until someone tells me it's contraindicated on never heard of anybody having a fracture with it. There's no evidence in the research about the bridge causing fractures. So I'm going to keep articulating people's spine until someone tells me not to worry then and then breathe out to roll down.
Now as she starts to put each vertebrae down, there is a tiny moment of flection there, but as soon as she keeps that length and peels down [inaudible] I want the ribs to go down first and making sure you don't see the ribs ever during the bridge. You want to keep them hidden in the body, but that's it. Now appeal to the waistline and then peel to the rib cage. Peel up to the bottom of the shoulder blades and then lengthen the rest of the way up. Right there you go. If you're concerned about pressures on the upper thoracic, you can actually lay on a little mat like a thick Eric's mat.
Works well with the head off the edge so that takes some of the stress off the neck. Breathe in here and breathe out to roll down one bone at a time. I'm going to make sure that she keeps that back and that rib cage down. Take another breath here. If you do it very slowly, you might have to do it in two breaths. Rolling all the way down to that neutral position. Let go those hip flexors.
There Ya go. Excellent. All right. Now we're going to do the bridge for stability. So we're going to take the bridge straight up in a Lennar liftoff, which might be hard for some philosophies, teachers, or if a lot of these aficionados, we're going to see that the shoulders, ribs, hips, knees are all in one line. Place your hands on the pelvis and then let's lift your right leg up into the air with the knee bent. Right? Very good. There was no dropping of the pelvis so you could just show how the pelvis might drop. Yeah, so that happens a lot and that's usually weakness on the left glute that causes that and it can be abdominal control and it'll bleed control as well.
Extend the leg up toward the ceiling and then lower the leg and really reach that leg long. And then you can hover it all the way above the floor as long as you don't change your pelvis and back position. Now take it back up the bump Ma and stop here. Right, so you have control. It's more about pelvic control than flexibility. And then back up. Flex the foot, lower down. Inhale, take it up, exhale lower, and one more time. Inhale up and lower. Place the foot down and then let's go ahead and roll down one bend at a time.
Let's see what that looks like. And then lunar liftoff straight back up. All right. If you have a cramp in your hamstring, push into your feet and that tends to activate the quadriceps and comms. The the hamstring. Let's lift this leg up. Devil, pay the leg up. Nice. That's it. Another thing you can do is take a bar and take it across the pelvis to make sure the pelvis doesn't drop. You can kind of measure your altimeter reading, flex the foot, lower point the foot and lift.
Flex the foot and lower point and lift. [inaudible] one more time, place the foot back down. And then let's take the pelvis straight down. It's almost like you're going to aim your tailbone to the mat. Yes, that's it. And then she should land in a neutral spine position, which most people don't because they tend to be in that rounded position.
So we kind of practice with that landing in that linear lift, often dropping this, the sacred straight down so that you land in a pelvic neutral position. And that's just more about awareness and control. Neither one of the positions is contraindicated. Neither one of the variations is contraindicated, but I like that one for pelvic control. Next we'll look at modifications for the Jack Knife and corkscrew.
So if you're finding yourself in a mat class and you're doing the Jackknife and corkscrew and you have low bone density, this is something that you might do instead. So take the legs up to the air and you're going to do the exact same prep that we did for the rollover. So it would be the little scoop up. So you could do a few of these as people are rolling all the way over as they're wonderful. And then for corkscrew you could certainly do side keeping the rib cage down and not full range. So you don't want to go all the way to end range and really stressed the lumbar spine. You want to stay more to about 75% of the range of motion, making sure that the rib stays down and then inhale to lower and exhale to lift.
I usually think of doing it during the exhalation during the hardest part of the exercise. If you feel like it's hardest to control as you go down, feel free to exhale and if it's hardest to come back up from the position, then exhale on the way back up and then we'll add. Once you can do that with good control of the rib cage, then we would take the legs down across so the pelvis and the legs move as one unit. So I tend to think of keeping the knees glued together and you just do these small circles here. You can go as far down as you can control and this might be a good time to put the towel under your back and all the way down and around so that you can go all the way there. That wouldn't be contraindicated. The part that would be contraindicated will be going all the way over and doing it. I really liked this exercise.
I think it's a wonderful one to do instead of the corkscrew or the rollover. And it also worked for control balance as well. So that concludes our supine variations and modifications for people with low bone density. We'll be looking at sitting sideline and prone next, so I hope you'll take a look at those videos as well.
Bone Health: Modifications for Osteoporosis


Comments


When the pelvis moves into a posterior tilt, there is certainly some lumbar flexion. However, as soon as the L5 vertebra lifts off the mat (with length of course) the vertebra moves into extension. I advocate lengthening with the articulating bridge to avoid excessive flexion and compression on the anterior vertebral body. I think that the articulating bridge is a great way to keep the lumbar spine safely mobile and to strengthen the hip extensors, lengthen the hip flexors and promote pelvic stability. Just avoid excessive pressing of the lumbar spine into the mat with the articulation, keep the spine lengthened and watch for overflow to the upper body which is an indicator of excessive compression of the lumbar or lower thoracic spine. Experts agree that this is a safe movement to perform and there have been no reports of fractures in the research literature or anecdotally during bridging that I am aware of.
"Too Fit To Fracture: outcomes of a Delphi consensus process on physical activity and exercise recommendations for adults with
osteoporosis with or without vertebral fractures."
Giangregorio, McGill, J. D. Wark, J. Laprade, A. Heinonen, M. C. Ashe, N. J. MacIntyre, A. M. Cheung, K. Shipp, H. Keller, et al.

thanks for those modifications. I just wanted to ask why it is not good to bend the leg while doing leg circles? I heard that the most important point is to bring the femur ball in the socket in 90 degrees and for the majority of people it is not doable at all. Many thanks for the explanation in advance.
-silvia
I didn't mean to imply that it is not good to bend the knee in leg circles as a modification. However, if the client is only doing Pilates mat as their form of exercise, they would never do an effective hamstring stretch, nor a sciatic nerve glide which are both very important in lower body health. Also, for people who have osteoarthritis or other hip join pathologies, the stress on the hip joint tissues can be irritating with that long lever arm. I prefer the hands on knees circles modification for those with hip arthritis if a strap is not available. I also will often start with the bent knee version for beginners to focus on pelvic stability and then increase the lengthening of the leg to increase the lever arm and challenge to pelvic stability and control.
You need to be a subscriber to post a comment.
Please Log In or Create an Account to start your free trial.
