Description
About This Video
Transcript
Read Full Transcript
So welcome to phase one of post hip replacement exercises. This is typically starting immediately after the surgery in the hospital and continuing for the first couple weeks with the primary goal or objectives to have bed mobility, toileting, a little bit of getting in the shower that second week after the surgery and basically walking. So walking starts immediately with a walker and then eventually with a cane. I'll tell you a lot of funny story with me and we have a couple of video clips of me walking that we can share with you. But walking was very easy for me with a walker, and then I tried to transfer to a cane and the cane just didn't work out so well with me.
I went back to the walker for a day and then the next clip of me walking was with no walker. And there just literally about a couple of days in between these two walking scenarios. So I want you to know that gait can change very quickly day-to-day moment to moment. And that sometimes we got to go back to a more assisted device than not in a day that we feel weak, or if the cane for me was too asymmetrical because I was also dealing with a knee problem on the other leg. So it was putting too much pressure on my left leg using the cane for my right hip.
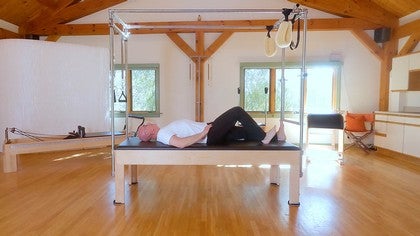
So just a little side note that one of our primary objectives in these two weeks is to get people walking without assistive devices preferably. Sometimes people need another third or fourth week, but typically the new total hips people are walking without assisted devices by the second and third week. So the exercises we wanna go over are the exercises most patients get when they come out of surgery. And we're gonna start with that with me laying down as if I was in bed or in the hospital bed doing some basic heel slides and some bridging with a primary goal of bed mobility. So just in a supine position, one of the first things that we want to do is to be able to start getting some mobility in the legs and rather than lifting the leg up, that's contra-indicated using the hamstrings in the back to slide the heel towards the buttocks is the proper way to bring the knees up.
Even at this stage of the game things like dead bugs are really contra-indicated. There's no reason to be strengthening this area even up into the first month or two months. We really can focus more on the back and not so much on the hip flexors and again I'm talking about an anterior approach surgery. So from here just simple heel slides, they sort of push their heel into the bed, slide it up multiple times. And if they have difficulty with it, they can also put a towel around their leg.
But the purpose is to get them to use their hamstrings in sliding the heel up into this position. Once we've gotten into what we call the hook line position, now we're prepared to start doing some pelvic tilts and some bridging, and that also is helping with bed mobility of them just understanding again that they can start their first articulation around the hip joint with some simple anterior and posterior tilting of the pelvis. And I like to make it more of an oscillation not really a strength exercise. And this is something again you could teach in the pre-phase that would make it a little bit easier for them starting their first round of exercises in bed. So a little bit of pelvic tilt.
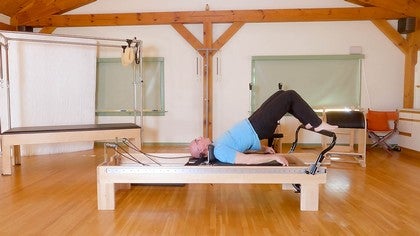
You can try going side to side, and even if you wanted to play with some diagonals, a lot of times with the dancers all create a more complicated variations of these simple exercises just so that we can entertain their mind when they're going stir crazy, not moving in the dance floor or their normal activities. From here we can go into our bridging and again, in this stage of the game I don't mind if they do a tabletop bridge or just a non articulating bridge, or if they go into an articulating bridge. For our concern the goal is to get them to start using their hip extensors right, to be able to lift up. So those work in both scenarios of articulating bridge and also a non articulating bridge. So we can do five, six of those, and as we progress, we can also add little things like little tiny shifts to start loading the abductors to the side and also getting good mobility in our spine.
Remember we said that getting good mobility in the spine is essential for bed mobility. In this position also, we could start to just let the legs do a little bit of what I call the wiggle and very safe range but just getting them used to knowing that they have abductors and abductors as the legs wiggle in and out, this is not a bent knee opening yet. So this still is precaution. I would just little tiny wiggles of the knee. And those are the basic bed mobility exercises besides rolling onto your side and then practicing learning how to roll up and get off of the bed.
Once you're at the side of the bed one of the things that we work on with them is a sit to stand. Now, the bed typically is higher so it's gonna be a little bit easier, and the key is to bring the feet underneath them. That often is scary though they have their walker in front of them or the bed. And if you happen to be somebody that is either going through this and you didn't get these exercises in the hospital, or you have a family member maybe not your client, but you're helping them, it's very important that we don't use the assistive walking device as the device to help us stand up if we need assistance. So one of the things I like to do is to teach them how to use the bed itself, something more sturdy or the table in this situation, bring the feet underneath, the walker can be in front of them, and the pitch comes from the hips.
So they pitch the body weight forward. And that puts that body weight right over the center of gravity. So if I was turned sideways it put my center of weight right between my feet so it's very easy for me to straighten my legs, right? And so we start off with that very simple range of motion feet underneath, tilt forward at the hips till you're in the center of gravity and then it should be very easy to come up. Some of the common compensations with sit to stand is that you get stuck back and your feet are too far forward and they can't get up off of the bed, right?
So primary thing of sit to stand, feet back underneath, pitch the hips forward on the edge of the seat and it's scary. That's why it's good to have the walker or a friend or a colleague in front of them just in case they need it. But the idea is to get the weight so there's very little work to get up into a standing position. Now, once in standing position, one of the most important exercises I think this first week or two is a heel kick. And it's just like what we would do in the mat exercises laying prone, right?
And the key is that as we do the heel kick we're again strengthening hamstrings, but more importantly we're causing a reciprocal inhibition of the quadriceps in the hip flexors. So we're continuing to give good love and good message to the hip flexors to relax during this healing time. Make a special note that we really don't want to activate hip flexors for like the first couple months volitionally like they'll work when you're walking but don't try to do dead bugs or straight leg raises those kind of things in the first couple of weeks. So here I love this exercise, they could hold on to a chair or the table. And again, trying to keep the knee below the body and pulsing the heel up towards the buttocks, right?
So these heel kicks, they feel funny at first. And I remember one of the things I felt with my scar is I could feel the tug of the quadricep on the scar. And I think that actually encouraged me because I was thinking like, oh I'm so glad I'm doing this exercise. I'm gonna have the myofascial release and the scar tissue release by doing this exercise immediately. So its a very good exercise.
And then I do it on the other side as well. So even though this is my new hip doing on the other side, just as many times being able to keep those hip flexors open and the hamstrings equally engaged is just as important. The next exercise that they gave us was sort of like that sit to stand exercise, but it's a half squat. So they could hold on to the back of a chair or onto the wall or onto a countertop, and they're just being asked with hip with the part legs is to just do a little half squat and come back up, right? So again, they've already done the bent knees right, the heel slides and they've already done a little bit the bridging so they should be able to do little tiny half squats.
And if you remember, we were practicing this all on the pre surgery episode, to have that strength there. So the strength should be there. It's just getting used to having the new proprioception or the lack of proprioception that we all feel after surgery. I remember thinking, is that my hip, what's in there? I don't know what's in there.
And one of the funniest things is while I was doing the half squats, one day I noticed I got a really deep pain right in my butt. And I was talking to the therapist that I went to up here in North Carolina and I was like, "Brian, man, my butt is really hurting." And he goes, "Well, think about it, you've had the scar tissue in the front of your hip now for 20 years since the arthroscopic surgery and the shrinkage and you had the restriction in the front of the hip is what stopped your hip from flexing not your posterior muscles." So for the first time now I'm starting to use my posterior muscles. And it was actually my butt waking up after being asleep for almost 20 years. So those are typical things I would tell people because we know the hip was an anterior there was no surgical intervention in the posterior capsule or to the gluteal muscles or to the rotator muscles of the butt and the hip. And therefore it was probably just using muscles that I haven't used in an awfully long time once the hip had range of motion.
And sure enough within a couple of days I felt those muscles kicking back in, I was able to do 20, 30 half squats at a time without any limitations. So that concludes the home exercise program that they have in those two weeks. They don't really need to do more than that other than walking and getting their walking back in. I'm even gonna put the stair climbing into the three to six weeks category in phase two post-op. Even though I remember having to go up and down some stairs I'm just gonna give you the rule of stairs when you come out of surgery is one that learned a long time ago is up with a good and down with a bad.
So what that means is if I'm gonna go up on a stair I'm gonna go with an unaffected leg. We don't really like to use good and bad leg but you remember thinking like going to heaven or going to hell kind of thing I guess but you're gonna go up with a good leg and then match it, and go up with a good leg and then match it. And when you're going downstairs you're gonna switch that and you're gonna let yourself down with the unaffected leg until the effected leg gets to the stair and then bring the other leg down. So always thinking of that in that first two weeks, we don't want them really climbing stairs with their new hip yet, right? Very basic and by the second, third week we're already starting on stairs, okay?
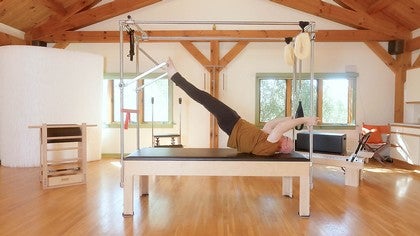
So that concludes this first part. I do wanna give you some precautions again. Remember how I've said it a couple times and I can't emphasize it enough, there is plenty of time in the future to strengthen your hip flexors and your abdominals. Right now is not the time to worry about those. So we don't want any long lever exercises or hip flection exercises that are going to in any way, shape or form irritate the muscles where the surgery took place.
It's just a simple thing. And sometimes people that are used to being movers like us that are going through this, feel like we got to get our abdominals and do some reverse abdominal exercises and strengthen up those hip flexors and do the hip circles and make circles, no, just don't. And just be patient because you'll have plenty of time to get that strength back. Right now, we have so many other things to work on and we'll see you in phase two.
Me and My New Hip: with Brent Anderson
Comments
You need to be a subscriber to post a comment.
Please Log In or Create an Account to start your free trial.


