Description
About This Video
Transcript
Read Full Transcript
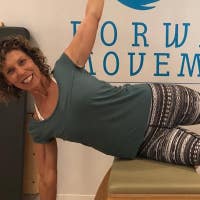
Our first example, to go through a process of a little assessment, a little resetting, and a little bit of strengthening for the pelvic health. This is Erin, volunteered, thank you for coming. Thank you. All right, so we're gonna start just facing this way, feet just hip-width apart, and then place your hands on the front of your pelvis, so that the top of your wrist is at the top of the bones and the pubic bone, fingers towards the pubic bone. Exactly.
So what we wanna see is one hand, is it more forward than the other? So what is your sensation with that? She says her right side feels more forward. And as I look at her, I will confirm, and you can also look sideways and see that the one hand is slightly forward. So her pelvis has an anterior right innominate and a left posterior innominate, which means that her pelvis is slightly facing her left, which is gonna influence her hip joint.
And the spine will most likely go in the opposite direction. So there will be a little bit of restriction somewhere within her movement based on this pattern. And then we're gonna do some movement to address that. And then we'll reassess. Okay. So first, also, turn and face that way.
I wanna do the few more assessments here. So first of all, I just want you to notice how she's standing. And can you tell from looking at her where most of her body weight is? So as we're viewing her from the back, you can see that her stance leg is more on the right side, here, through that. Now go ahead and cross your arms for me.
All right. So we're gonna do the Hip Drop Assessment here. So I'm gonna place my hands here. I shall do it this way, 'cause you can see. Now she's gonna slowly bend her right knee and that we should feel that that side comes down, which it does.
That's good right there, okay? And then the ribs should shift to the left and then come back up. Now, bend the left knee slowly. Okay. Here, she's actually rotating in the ribs here through there and come back up and do it again on the right. Okay, but her ribs actually don't move over to the left very well.
That's what I'm seeing here, and come back up and then the left knee, there we go. And then we see that rotation, but your ribs also stay on the right. Okay, and come back up. So we can address a number of things. There's also the hip joint, too.
So let's look at the hip sway so that we'll be able to see about that adduction part of the hip. So why don't you place your hands on the top of your ilium? Like, yeah, or put it on your greater trochanter, you're right, greater trochanter, a little lower. There you go. Okay. So she's gonna sway to the right.
Good. And she kind of likes being over here. Her ribs are to the right, the weight's there. I don't see a lot of this dropping though, but come on back and sway to your left. Okay. Well, she definitely goes further that way, so you can see that. Okay, and come back.
And just go one more time to the right. Yeah, so this is not coming down as well. And her ribs actually should be shifting to this side and come back and let's go to this side. Good. And this, I would say is her preferred way of moving. So we wanna address what I'm intuitively feeling.
Come back to the middle, is that this thoracic area is not moving very well. She's kind of staying over onto the right here. So I'm gonna want to work with her thoracic cage, moving to her left and dropping also the right sit bone down, but we'll play with that. Okay. So the first movement we're gonna do is gonna be seated to address the rib cage. She's gonna sit on the stool here, okay?
And let's have your back facing, so we can watch your ribs and she's gonna straddle a half roller and are your feet able to be flat on the floor? Okay, perfect. Now sitting on the half roller allows us to see the sit bones and how they're resting there. So a lot of times with people you'll see one extremely lower than the other, but with Erin, not really seeing that too much. Okay, so let's place your hands behind your head to begin with.
All right. And what I'm gonna ask her to do is to just sink her right sit bone down on the roller. Okay. And then bring it back. So this is the equivalent of the hip drop, just repeating that movement, and then left side. Okay. That's pretty good.
And come back. So taking her legs out of it actually shows that she's able to do this movement. And I still would like to see her ribs moving to the left. Okay. And come back, and then the other side, yeah. And come back. All right.
So let's put your right hand down. So when we do a thoracic rotation, when she rotates to the right, go ahead and start to rotate to the right. The ribs actually move over to the left. And that's the motion that we wanna emphasize for her. Okay. Now bring your torso back towards the window.
All right. And so we're gonna add just a slight, so I want you to start in your ribs. So translate to your left, breathe into that side and sink your right sit bone, just a little bit. See, I'm creating that S? Good and turn your sternum to the right. That looks good.
And then come back to the front and then level yourself out. So that's your movement. So it's rib cage to the left, dropping the right sit bone, turning your sternum to the right. Good. And then bring yourself back. And we're just gonna repeat that motion.
Rib cage, breathe into your left side, drop the right sit bone, turning your chest. Good. And come back to the midline. We're gonna do it three more times. So just on your own timing, breathing in, dropping, turning the chest, and come back to the front, and again, should feel really good. I always like using the pleasure barometer.
So making sure that it is feeling good to the person. Okay. We're gonna do one last one. Really breathe into this side, wanna open these ribs up. There you go. Nice, turning, and coming back to the midline. Excellent.
All right, come stand up. All right. Now we're gonna go onto the mat. Okay. And you're gonna kneel down in quadruped. All right. And bring your hands a little bit more forward than normal.
So it's not right under your shoulders and then shift your weight toward your hands a little bit, so you're not in 90-degree hip flexion, not that much, really. Just a little bit. I want it, like, let's say 80 degrees, yeah. Right. So what we wanna see is that her sacrum is able to stay. So you need to, that's pretty good. Pretty level.
She has a little bony sacrum here, so you can actually tilt just a tiny bit, just a tiny bit. There we go. So, that we see that that block is, that's perfect. So, can you feel that position? Yes So I want you to maintain that position and you're gonna push with your hands and just sit back towards your heels, but only keeping this position of your pelvis.
So we're going to hip flexion, go ahead and push with both hands, sitting back, your chest will naturally go down a little bit. And when you feel the end of your hip, where that your sacrum's gonna change, pull yourself back forward. That's probably good right there. Pull, pull with your hands, so you kind of pull. And think about that position of your pelvis.
Push and pull. Good. How does the hip flexion feel? Good. Okay. You don't feel any kind of impingement or anything in the hip? Okay, good.
Good. It's nice and smooth. Okay. Yup. Do a couple more. Okay, now come back to where you started. One more. Yeah. I said a couple more, right? Okay. (laughs) That's okay. (chuckles) It's all right.
I wasn't counting. All right. So now come back to where we started. All right. A little bit more forward. Yeah. Okay. So what I want you to do is I want you to think about the back of your sit bone going towards your heels.
So your right hip towards your right heel. Push with your left arm, and just think of a little bit of sitting back. Good. So what she's doing now, and then pull yourself forward. Good. So as she goes on that back diagonal, that right femur is going into adduction. Yeah.
And come back and again, and how's that feel? Now you're starting to exaggerate that a little bit. It's just, yeah. There you go. No discomfort there?
No. Okay. Good. Sometimes people will feel an impingement feeling, and you'll notice that with your clients when they wanna go into hip flexion and they feel there's like a tension or actually some discomfort in the hip. Okay, let's do the left one. Push with your right hand. That's it.
And I'm just watching her pelvis to see if she'll go into her rotation, but she's doing a great job, but she's a well-trained Pilates teacher (laughs) (laughs) as a profession. So we'll see some different bodies who are not well-trained Pilates teachers as well. So this is why she's able to have such good motor control and awareness about her body position and understanding how the body moves. So excellent. Okay. And then come back to the middle position. Okay. Since I got you on the mat, Okay we're gonna kneel with your left knee on the block because I want her to, if you remember, from the hip drop, we were working with the right and the translation of the ribs to the left.
So this side, her left hip, it's that rotation around the left femur, that is what I want to target and focus on. And this block is a, it's a three-inch block. So it's not a big block when it's a bigger block, the rotation's gonna be in a different spot in a person's body. If the knee is higher, so you might wanna consider not really using a yoga block, but maybe a book, a hardcover book. That's about three inches thick.
Okay, so now what I want you to think about is breathing into your left side of the ribs. So we have that translation, you know, as you're doing the movement, you're in too much hip flexion, walk forward a little bit, a little more, a little more. Very good. Okay. And bring this knee level with the other one. Perfect. That's better. Okay. So now what you're gonna do is lift your right knee off the mat and level your pelvis.
See if you can pull this posterior, remember that's innominate, could bring it up more, there, and then place your knee back down. So this is making her work towards that posterior rotation. Yeah, so this is easy for you to be in this position? (laughs) Yeah. 'Cause you like this rotation of your pelvis. So now bring the knee up and it's like the femur's pushing into your pelvis and it's right, there you go, right there, that's good.
And then lower it back down. And again, so that femur, the knee is pulling up into the pelvis. Great. And come back down. This is working her core too, because she's doing an arm support. Now you get to go past neutral.
So open all the way up, see if you can, not lean. This is working the lateral rotators of her left hip. And then back down, I'm gonna stand right here. So don't lean into me. (laughs) That's what people do is they'll start to lean to try to create, I want the pelvis to rotate around the femur. That's it. Find that, so now she's challenging herself.
Go back down by rotating in the direction that's not her preferred way of moving and try not to sway. I'm just the feedback here. There you go. You're gonna feel that left hip really working. There you go. Now I'm gonna step away and gonna do a few on your own, and lift, around, excellent.
Good. Can you handle another one? Yeah. (laughs) Okay, good. (laughs) And lift, Awesome. And come back down, you know, we're gonna do some on the other side (laughs) (laughs) because you'll start, go ahead and switch knees, because she'll start in the rotation, that's her non-preferred side. And then we're gonna, I'm gonna observe and watch what her rib cage does, how it will adapt to it. Yeah.
So, and again, I want you to breathe still into that left side there. Good. Yeah. Okay. So, we're gonna lift the knee up, mm-hmm, just to level. Awesome. And come back down slowly. See that's the direction that's challenging, right?
So lift up. Good, beautiful. And down. Keep going. Do you find it a little bit easier to rotate your pelvis?
Mm-hmm, mm-hmm. Yeah. Because as you're efforting, you're going into the rotation that you prefer. Mm-hmm. And that's why it's a little bit easier. Let's take it past.
So we're gonna go into that rotation. And again, you might find that this is pretty, yeah, that's pretty good, huh? Yeah. Yeah. Big difference between the right and the left side, then this is good to know. So I'm gonna have her do a couple more and for a training effect, I could go back to her left knee and have her do a few more repetitions on the other side.
But we've identified that pelvic rotation, which is an oblique front and back, you know, imbalance and the rotators around the hip. Okay. One more time. Excellent. Great. And then come up. Okay.
All right. All right. We're gonna work a little bit more on the hip joint and also that connection of your myofascial core. So you're gonna sit on the stool facing that way, okay? Okay. So I'm looking at the angle of her femur here.
Okay. So this is gonna be a longer distance to lift her knee up, which is okay. But for someone, you might want to start them sitting a little bit deeper in hip flexion, not 90 degrees, maybe more like 60. Here, you're like 45 or less actually. So, all right. So what I'm gonna have you do is you're gonna hip hinge, lean forward, take your right leg and your leg is relaxed, okay?
Just use your hands and lift your leg up and bring your torso back up, okay? So pause there. Okay. Now keep your leg where it is and do a lean back. So you're creating hip extension here. So there's an opening that's happening through here.
Now, let go of your leg and lower it very slowly. Four counts, 4, 3, 2, 1, and then come back upright. That's the exercise, okay? So you're doing a hip hinge, you're grabbing your leg, and your leg is relaxed, you're lifting it. Good. And then you're upright, and then stay there, leaning back, so you wanna feel your pelvis rotating around the femur there, let go.
And 4, 3, 2, 1, and then come forward. Repeat that. So, and you can do it as like a movement flow, it's fine. So you lean back, let go, 4, 3, 2, 1, come forward, pick it up. Yeah. Lift.
So here we're working. Just keep repeating for repetition. Here, we're working the eccentric contraction of the core and the hip flexor through this area. So it doesn't look very difficult, but you can feel in the trunk how you'll have to maintain your support of your myofascial core. And then we're challenging the eccentric loading of the hip.
Great. And this is wonderful for people who have the Anterior Hip Syndrome or a Torn Labrum, you know, any kind of discomfort in the front. And it's a great exercise, keep going. We need repetitions. (laughs) It's a great exercise, you know, to do for someone who says they have a discomfort in hip flexion when they're doing a movement. Okay, one more time.
Good. Right, good. And then come upright, let's do some on your left leg. Good. Back, and let go, 4, 3, 2, 1. Good. Mm-hmm.
And things that, you know, as you're watching someone do repetitions, it's not about just the counting, but I'm observing. Is she adapting in some way that's not optimal? So I'm tracking her rib cage motion. I'm tracking how the pelvis is rotating back. I'm tracking the line of her leg, yeah?
And if I can give her some little cues, you know, to enhance the movement, that's what I would do, but she's doing a really great job. I see that her ribs are staying level. She's got the core working. Like I said, she's a very finely tuned Pilates teacher. (laughs) (laughs) So it's working really well, but it's, it's not easy.
She's making it look good. Okay. So we're gonna do one more, yeah, so repetitions you wanna to do about 10 of these. Yeah. Good. Okay? Okay.
Yep. We're good? Good. All right. Come stand up. And so we did more of a resetting of your ribs and pelvis on the roller on the stool.
So that was more of what I call a resetting of the pelvis. And then also we did a little bit more of mobility with activation. So activating the hip through the quadruped and then activating the core, little more strengthening with the lean back and the leg lift. And then we're gonna do some squats, your famous squat, so just come on the mat, that's fine. And then just take a little wider than hip position here and then be comfortable with your hips.
And for some people, a little bit of, of turnout is nice for setting the femur in the socket. And everybody's hip socket has a little bit of different shape. So you wanna feel some freedom when you go into your hip hinge here. So just do a few hip hinges, okay? Excellent.
Then her ribs look much better here instead of being shifted off to the right. So that's what, keep going. So that's what can happen with someone who's starting with their weight more on the right leg, which is what she did, keep moving. You're exercising. So if she starts standing over here and she's doing her hip hinges, right?
Then all the weight is pretty much gonna be shifted onto that leg and not developing the strength of the other leg, right? Mm-hmm, mm-hmm. Right. Great. You can certainly add resistance through TheraBands. You can add, you know, you can do this on the reformer, holding onto the ropes, you can add a kettlebell, any of these things to load the body a little bit more.
Now, go into the squat and stay there. And now I'm gonna have you shift your weight to your right foot. And that's the side that you really like to bear most of your weight. Now shift to your left foot. Yeah. You feel the difference?
And you start to sway a little bit in your pelvis, meaning your, you kind of start to hike your hip a little bit. So be aware of that. Now come back to the middle, and go to the right again, Good. And come back to the middle, and we're gonna shift to the left note field, the outer edge of your left foot, just a little more. You see how that turns on a little bit more deep in the hip? Mm-hmm.
Yeah, so now come back to the middle, let's repeat the left. So go left, think little toe side of your foot and come back. And what she's also doing really well, keep repeating, is that she's not translating a whole lot in her ribs, she's really has evened them out. And you can think of your rib cage if you like, as you shift to the left, also shifting to the left, the ribs. So that's a great cue to use for someone, it's not only to shift their weight over there, but to shift the rib cage over to that foot.
So think of that cue. Shift your rib cage. Very nice. Good. Shift your rib cage. Excellent. Let's do one more. Shift your rib cage. Nice. Come back to the mid line and then standing up.
Good. Okay. So let's step onto the floor 'cause that's where we started and let's place your hands back on the front of your pelvis. How does that feel? Mmm. More level. Yeah. More level.
If I look at you from the side, I can see that definitely is a better rotation there. Okay, so turn around and just have your arms down for the start. Now we were looking at her stance where her weight is. Yeah. Do you feel like you have weights more in the middle? Mm-hmm. Yeah.
Yeah. So there's more groundedness coming through this side here. Good. Okay. And now let's bend the right knee. You feel your ribs go to the left? Mm-hmm, mm-hmm. Yeah. And come back, and bend your left knee.
This was your, that's enough. Good. And come back, let's look at it again without me blocking. So bend your right knee and notice how her rib cage shifts over to the left. Very nice and bend the left knee, This was your preferred side. You'd like to stand in that direction. Right? Okay.
Let's place your hands on the greater trochanters. And then let's just do your sway, sway to the right. And think about your feet too. Yeah, that's good. That was your preferred weight. Now go to the left. This is where you were like super loose. Oh, very good.
Yeah? Mm-hmm. You feel the difference? Yeah. And your feet, one more time to the right. And you can see how she's going to the little toe side of her right foot and the inner side of her left foot.
And when she goes to the left, she gets to go to the outer edge of that left foot, which she wasn't doing before, with a little more balance. Okay. Excellent. Okay. Thank you, Erin. Thank you.
Pelvic Health: Pelvic Assessments and Tips


Comments


You need to be a subscriber to post a comment.
Please Log In or Create an Account to start your free trial.
