Workshop #5371

BOSU Pilates Fusion and Flow

70 min - Workshop
120 likes

Description

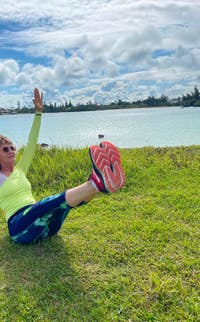
Learn how you can tackle the core in a variety of ways with this detailed workshop by Erika Quest. She teaches PIlates-inspired exercises and flows using the BOSU Balance Trainer that are designed to change what your nervous system is doing during movement. She starts with an in-depth explanation of the mobility core, stability core, and trunk integration then she moves through all six body positions to give you ideas of how to use the BOSU, whether you're training yourself or clients.

You can find all of Erika's classes that use the BOSU Balance Trainer here.
What You'll Need: Mat, BOSU®

About This Video

(Pace N/A)
Jul 20, 2023
(Log In to track)

Transcript

Read Full Transcript

Chapter 1 - Intro and Lecture

Hey, everyone! Welcome! I am super, super stoked you're here. I'm Erica Quest, if you don't know me. I'm pumped that I'm at Pilates Anytime to deliver this incredible workshop to you. It's called Bosu Pilates Fusion and Flow. This is Pilates inspired exercises, flows using the BOSU Balance Trainer.

This piece of equipment is near and dear to my heart. I've been working with it since 2009, and I'm delighted that you're gonna be taking this session with me. This is all about changing up what your nerve system, what your neural pathways are doing by using this piece of equipment. You can do many different types of Pilates inspired exercises using this piece of equipment, but change everything up for yourself and your clients. And here's the deal, team.

We're also gonna go through all six body positions so you get ideas and great ways to use this piece of equipment in standing, in kneeling, lying down on your back, seated, on your side as well as prone. So you'll understand great ways to use this tool and reference back to it, whether you're training yourself or whether you're training clients in whatever moving in environment that you're working with. So I'm delighted you're here as mentioned. You can see that I'm holding a session handout, and that's for you as well. So if you just go ahead and take a look down, below this workshop in the description, you're gonna find a link to download this session handout so that you can move along this journey with me as we go through all of the chapters.

Sound good? So let's get started. So what is today all about? Or what is this workshop all about? We're really gonna tackle the core in a variety of different ways. As Mr. Pilates explained, this is our powerhouse, and he was so, so smart, and he thought about it from a really whole body integrated perspective and it translating up through our arms as well as down through our legs, and that's what we're gonna do here with Pilates Fusion and Flow.

We're just adapting it and utilizing the Balance Trainer for these types of flows and these exercises. So I want you to think about that as you're going through these movement experiences during this workshop. You're gonna hear me talk about trunk integration a little bit in this lecture piece first. We're gonna do some movement experiences, and I wanna explain to you about the trunk integration that I'm gonna be talking about because it resonates to your session handout as we move page by page, and I'll explain it now. So you're gonna hear me reference to the inner unit as well as the outer unit, and we have a mobility core as well as a stability core.

And this is referenced from Diane Lee, she's a physical therapist, as well as Andre Leming. And I was taught this many, many years ago from my mentor Nora St. John, out of balance body. And it's a wonderful way to start to think about the why behind the what you are doing with your core training or your client's core training. So I hope you'll get some great nuggets out of this as we start to move through the concept of what's maybe mobilizing or moving a little bit more and what maybe needs to stabilize or stay a little bit more still when you're going through these movement sequences and these flows. So let's talk about the outer unit a little bit.

So our outer unit is really built for stability, and again, you'll see me reference back to the handout here and there in during this chapter so feel free to have that handy. But go ahead and stand up with me right now if you actually wanna do this movement experience with me. So we're gonna start with stability or more stillness in your trunk and that is your inner unit. So when we talk about the inner unit, we're dealing with four elements to the inner unit or relatively four. I'm sure there's a whole lot more, but I'm gonna give you four here.

We're dealing with the diaphragm, which is your dome at the top. This is your muscle of respiration because, yes, as we breathe, we're also using a muscle. We're also dealing with the dome at the bottom, that's your pelvic floor, right? And so the funny thing I say about the pelvic floor is it holds everything in when we need to hold everything in and it lets everything go when we need to let it go, which is awesome, we need that pelvic floor. In the middle, we have two pretty major things happening, and that's our transverse abdominis, which I like to say is a nice seatbelt of support, but it wraps all the way around through to your lower back.

And then in the back we have your multifidi, and I like to talk about the multifidi as a basically a braiding system that starts, and I'm gonna turn my back to the camera, right at the base of your occiput area, or excuse me, the base of your sacral area. It braids up each sides of the spine and it inserts kind of in the base of the occiput area. So come with me. What I want you to do is take your fingertips and put 'em into your bony landmarks of your lower back. So find your bony bits here, and I want you to walk your fingertips out just a little bit and find the two speed bumps on either side of your spine.

And don't worry, we're gonna have a little bit of fun with this because whenever I teach movement, whenever I teach anatomy, whether it's to my clients or to my classes, I want it to be interesting, and I want you to remember the why behind the what you're doing. So once you find those speed bumps of your multifidi, I just want you to simply tilt forward and hinge forward at your hips and then bring yourself back up. And underneath those fingertips as you're doing this, and you can also actually do it by just lifting one leg and lifting the other. So if you just wanna walk around your room, you can do it that way as well. But as you tilt forward, you should start to feel a little poofing underneath your fingertips, and that's your multifidi in your lower back area.

And as mentioned, it runs all the way up the back of that spine inserts on the base of the occiput, and here's how I like to talk about the multifidi. So the multifidi is like our police force. It's there to serve and protect our spine, which is why it's really, really geared towards stability or stillness of the trunk. So that's what I want you to think about when you're working with the inner unit and then talking through that transverse abdominus. So it's that nice low belly, that kind of like girdle that comes all the way, wraps around the lower back area.

So place your hands on your low belly. And what I want you to do is I want you to imagine that I just took you out for a really nice meal and you had all the things. You had the drink, you had the appetizer, you had the entree, and you also had dessert, and I want you to let your meal just hang out in your hands. So just let it go. It doesn't look very great and it doesn't feel very great, and we'll get through this together because I'm gonna bring your transverse abdominus back into action.

So I want you to use that muscle of respiration and take an inhale. And on that exhale, I want you to blow all of that air out, engage those low belly muscles. I'm gonna shift slightly to the side, kind of pull them in. You know, we use that navel the spine cue, oftentimes in Pilates, you can use it if it works for you. If it doesn't, that's okay.

But I want you to feel some engagement through this area. And as you do that, I want you to also get up tall through the top of the crown of the head, that's called axial elongation. Fancy term for stand up tall. And I want you to let your arms go. So now as you're standing here naturally, just give yourself a check.

Touch your body, you own your body, you can feel this. Something should be happening here from a stillness or a stabilization perspective. If I threw a ball at you right now and you caught it and I didn't want you to move, right, I'd want you to, I'd want you to activate that stability core. So that's your inner unit. And if all of that confuses you right now, that's totally fine.

Here's how you're gonna remember what the inner unit does. So I like to say, does the inner unit go to Zumba class? No, the inner unit does not do this kind of stuff. The inner unit really tries to stay still. So types of things that you're gonna experience in trunk integration that integrate the inner unit are exercises maybe such as planks, those kinds of things.

Now, it doesn't mean that if you start to change things in a plank that something doesn't need to come in from the outer unit, and we'll discuss the outer unit next. But just remember that inner unit is built for stillness and more stability of the trunk of the body. So let's talk about your outer unit. So if we're talking about your outer unit, we already talked about stability, so let's talk about mobility. We also have four elements of the outer unit that are involved here and they're listed for you.

You have your anterior and your posterior oblique slings, you've got your deep longitudinal system and you've got your lateral system. All of these are basically a cooperative quartet that play and work in harmony in your body, and they all have kind of specific designed things that they do from the mobility core perspective. We're gonna use the BOSU Balanced Trainer in a moment to do some movement experiences, but let's first talk through what these are. The anterior and the posterior oblique sling system. So this is the front of the body, anterior, the back of the body, posterior.

You basically have two big X's on the front and the back of your body, right? And your anterior sling starts in your serratus anterior, it comes across your external and your internal oblique, and it inserts on your opposite inner thigh. And so as I say this, for me, this was a huge aha moment when I started to learn this. I was like, wow. So the anterior oblique sling, it starts where?

In an arm, and it ends in the opposite leg. So that tells us that the core, the powerhouse, the trunk, whatever fancy term we call it, is so much more than just that person over in the corner of the gym crunching out and trying to get those six pack abs. It involves whole body integrated movement, which is super, super exciting. So just remember those big X's, anterior oblique sling is on the front and the posterior oblique sling does the same thing on the back. So it starts in the latisimus dorsi, it comes across the midline of the body and it inserts on the opposite glute max.

Now let's talk about what these slings do. There are many exercises that we do and see in Pilates and Pilates inspired world that do these types of functions as well as activities of daily life. So our anterior oblique sling, it's listed there for you. There's no quiz on this workshop, don't worry. It is designed to flex you forward and rotate you over to the side.

So think about that. Where do you see this in Pilates or Pilates inspired exercise or even in fitness or general fitness, right? This is somebody that's maybe doing a bicycle exercise or a crisscross exercise. So join me down on your BOSU Balance Trainer for a moment, and let's just experience this in a moving environment. You will be doing some of this with me as we go through these chapters, so let's get you a little acclimated to the dome right now.

I want you to move your bottom down a little bit closer to the base of the dome. You're not all the way on the floor. You could be if you wanted to, but we want this kind of gushy or labial surface to work with so that you can really feel how three dimensional this platform is, and it really helps promote invisible learning and that kind of illumination of your neural system. So from here, if we wanna rotate and we wanna flex forward, I'm gonna suggest that you take one hand and bring it back behind your head, and you start to roll back over the BOSU dome. Okay, I'm with you.

And then from here, if we were gonna lift up, here's your anterior oblique sling in action. So we are lifting, we are flexing forward, and we are rotating. So we talked about that serratus anterior across the internal external obliques, and there's that opposite inner thigh. Now team, here, let's just talk about life because that's what we're doing is we're training for life. Whether we're moving our bodies in a variety of different moving environments, that's what we should be training for is better and more efficient and ease and economy and efficiency of activities of daily life.

Where do we see the anterior oblique sling in life? Maybe you have a child, maybe you have a grandchild, maybe you need to just pick up a bag of groceries off the floor. Hopefully, you're all walking, maybe you're a runner. This is your anterior oblique sling system in action, which is why it's super, super important that we train it. It's also super important that we train the posterior oblique sling system because it's oftentimes forgotten about.

So the back body, huge conversation, especially, because most of us, all of us, are coming into our classes in life. Maybe we sit at a desk for our job a lot more now, or we have for our whole life. We're coming in like this, right? So it's super important to remember that we have that posterior oblique sling as well as our longitudinal system, and we'll get there next. But our posterior oblique sling is built for the opposite of what the anterior does.

So if the anterior flexes us forward, it's listed there for you, reference your handout, our posterior extends us and rotates us. So I like to call this the Nordstrom sling. It's a joke, but if you ever go into a Nordstrom's dressing room, and you are like, "I just got the brand new pair of jeans, I'm so excited to try 'em on." You're gonna go grab 'em, you're gonna put 'em on, you're gonna shimmy 'em up all the way up over your navel, you're going to button them 'cause they fit. You're all super stoked and pumped. You're gonna zip them up and use your transverse abdominis, that's part of your inner unit.

But what do you gotta look at behind you in the mirror to make sure it's looking good? You gotta look at your booty. So I want you to do what? To make sure that you can see yourself in that mirror? I want you to extend your spine and I want you to rotate it, and that is your posterior oblique sling system in action.

I told you anatomy has to be fun for me because this is how I remember things. So just know that I call the posterior oblique sling system that Nordstrom sling. So where do we see this? We see this in a variety of different places. Maybe you're teaching a swimming exercise on the mat where you're doing an opposite arm opposite to leg and you're extending the spine.

We also see this in just life. Maybe you train or maybe you are a tennis player or a pickleball player, that's a huge sport these days. Maybe you're a board sport person and you're really rotating, extending your spine, that's really what that posterior oblique sling is built for. I promise we're gonna get to the movement in just a second. So stay with me.

We've got two more things to talk about. That's your deep longitudinal system as well as your lateral system. So again, the mobility core is quite complex and it has to really function well together for your life. You have your longitudinal system. So simply put, the longitudinal system is back extension.

So it is built to do this. Okay? So swan would be an example here. So it is really geared to activate the whole back line of the body to get all of those things situated so that you can stand up tall, your postural muscles, something very important to make sure that we're doing in training all the time in our moving environments. And then finally, we've got our side body. So our side body, our lateral system.

This is a very common area of imbalance. So for all of us, not just you, not just me, but pretty much everyone has a common imbalance. And this is because our lateral system is really important in balancing the pelvis over the knees, the hips, knees, and the ankles. And so I'm gonna show you a common imbalance that is me every single day of my life. Are you ready?

Wait for it 'cause here it comes. Right? So if you're looking at my side bodies right now, which I hope you are, and you're paying attention to maybe where some of my bony landmarks are, I've got two hip bones that are not level. I'm not a mom, but like if you were a mom, maybe this is you as a mom, right? And this is you having to do activities of daily life, but they're setting you a little bit off balance.

And it's a joke, but it's not a joke, team. But like I hope that you wouldn't want me walking around like this, like we've got some issues here. So this is why the lateral system and balancing the lateral system is super important because you want to really try and get good both mobility and stability in the lateral system with side bending, with lifting those legs, which we do a lot in Pilates and a lot in Pilates inspired exercise. So you're probably already doing a great job with that. So put that big old green checkbox next to that area of the lateral system.

I'm gonna give you some ways to address it in a variety of different body positions using the BOSU Balance Trainer today. So there's your inner unit, there's your outer unit. And then the final thing that I wanna discuss in this chapter is really just, this is just kind of cool, you've got some mobility and stability relationships in the the body. And I love this, because as human beings we're perfectly imperfect, but there are certain areas of our bodies that are designed to either do more movement or less movement. So just take a look down at the bottom of your handout and note that you have a mobility side or a mobility line on your session handout and a stability line.

So we've got, obviously, our ankle joint is built for mobility. It can circumduct, it can dorsiflex, it can plant our flex. We've also got a really mobile hip joint, but in between we've got more stability. So could you imagine if you were trying to do a plank and your hip, your knee, and your ankle were all mobile joints? We'd be, you know, we'd be in a little bit...

We'd be having some issues, put it that way. So the nice thing is, is that throughout the body we're gonna be kind of going through and understanding and thinking about during these chapters what's mobilizing or moving and what's stabilizing or trying to stay more still, and maybe where's your dimmer switch where you need to maybe make some micro adjustments in your body or your client's bodies based upon the task or the exercise that you are trying to teach or do. And then adding in an unstable surface, like the BOSU Balance Trainer, is gonna also completely change things for that brain body connection. The inventor of the BOSU balance trainer is David Weck. And he said something beautiful a long, long time ago when I met him at one of our summits and he said, "Don't think of standing on top of this thing, kneeling on top of it or whatever you're gonna do with it as trying to be perfect.

In fact, it's okay if you have to step down. It's okay if you make a bobble or something moves because that's what balance training is all about." Balance training declines, or your balance declines at the age of 30. And if you don't train it in multiple body positions, which is why we're addressing all six body positions as we go through this workshop together, you're really missing out and your clients are missing out. So I hope that you'll enjoy, I hope that you'll get inspired to use this tool, it's really, really brilliant. And get some ideas and some flows and some exercises, if you will, that are Pilates based to bring into your moving environments, train yourself, train your clients, and have so much fun.

Let's move on to the next chapter.

Chapter 2 - Standing

All right, team. So we're standing, flip that page over on your session handout. Here's the deal. I wanna talk a little bit about the standing piece and I wanna bring myself back to being kind of like a newer instructor in the Pilates space.

And you know, I kind of moonlight in the fitness side of things and I kind of got pushed into fitness, and in a great way, by all means. And one of the things in fitness that I love that they do is that they warm people up and they get people standing pretty much right away, and that's kind of not what we oftentimes do in Pilates. And it doesn't mean that Pilates or Pilates based exercise is bad because of that. But I'm putting standing work into this workshop because we live our life in standing unless we're sleeping or we're having a bad day, right? We should be doing life in standing.

And so doing weight bearing exercise is wildly important, and getting yourself and your clients and classes to do this weight-bearing exercise is equally and the same importance level. So that's why we're starting with standing and then we're gonna move down as we go through each chapter. We'll begin with the stability core. Please know that the BOSU Balance Trainer is an amazing tool. Not everyone, or maybe not even you are gonna feel like super excited to just be like, woo, I'm gonna jump right on top of this thing.

It is a labial surface, it's an interesting thing to work with. And so I want you to think about what might be available to yourself or your clients to get started, which is why in standing, I just want you to start to acclimate to the BOSU or the dome by putting one foot up on the top, and we're gonna talk through frog squats. Now, do you have to always do frog squats? Could you actually do a little bit more of a bias squat with the toes forward and the heels back? Absolutely.

So play with those variations as well. For here, I have frog squats planned. And so what I mean by that is you're gonna be in a more externally rotated hip position. So your toes are facing out, your heels are facing more in, and we're opening up your base of support here as well. So you're having a bigger base of support, you have one foot up on the dome, and all I want you to do is just start to bend your knees and squat at the hips and the knees and the ankles and start to see how this feels having one foot on the dome.

I was already like, woo, where am I at in space? And that is the technical term for your body's riding response system starting to figure things out, and that's all well and good and fine. And if you have to make micro adjustments here, meaning you need to move your foot a little bit, you're going to hear me talk about that throughout this entire workshop. Micro adjustments are okay. Because we are all different bodies, I like to say we are all snowflakes in a good way, you may need to move something or move something slightly for yourself or your clients to make sure that that exercise is feeling good for their body.

Now as we're trying to get a little bit more hip opening here, we're also addressing the medial of the inner thigh line of the body as well as the outer thigh line here, tying nicely into our stability core, even though we're working with mobility at the hips, the knees, and the ankles. Remember that dimmer switch I talked about, right? So you wanna be thinking about what's having to mobilize right now and what's having to stabilize. So as we're coming down into these frog squats, I want you to actually take the squat and then see if you can transfer over to the outside leg and go into to a tik tok. And so you're leaving that dome for a moment and then you're coming back down and you're touching the dome.

Okay, so see if you can get that nanosecond of your lateral system, of your stability core to go for it. And then we're gonna head on over into a crossback lunge or a curtsy lunge and I want you to touch down on the dome. So thinking about now the different angle of the hip that we're in, hitting a little bit more of this gluteal coming back up and touching the dome. So it looks like this. And remember perfect is boring, and we're using a balance trainer, so don't even worry about it if you can't make all these happen.

We're gonna say a prayer. So say a prayer with me. You're gonna come out, you're gonna touch down, you're gonna come back out, touch the dome and say a prayer. I'm gonna make a micro adjustment. I'm trying it again, coming down and up and back down. So there's your frog squat to your tiktok, crossover lunge, touch that dome, hitting different angles of the hip.

All right, so now the big Kuna in this area is gonna be, are you willing? And do you want to stand up on top of that dome? So come with me, if you're willing and you want to, and take both feet, place 'em up on top of the dome. We're not gonna move yet because you're probably already negotiating as I am in this body position and I'm trying to look at you and I'm negotiating even more 'cause I'm turning my head. I'm trying to be like, come on team, we can do this together.

But if you look at my feet, you look at my hips, there's a lot of stuff happening in my whole body right now. From here, what I'd like for you to do is take your arms up above your head and then bring them back down. Try and bring your nervous system down. Let's add in some breath here. So inhale, take the arms up.

See if you can get that nice feeling of lift that internal suspension through the body, and exhale, bring them down. And are your feet starting to quiet a little bit on the dome? Mine are a little, I'm still working on it. And exhale, bring those arms down. So now if you're willing, you're gonna come with me, you're gonna inhale, take those arms up and you're gonna exhale, you're gonna start to roll up and over a big, big beach ball, if you will, and try and roll down, place your hands on the dome, and then maybe walk them forward to the floor and walk out a little bit.

So now we're in a roll down to a pike position. I brought my feet a little closer together and all I'm gonna do is bend my knees and straighten them. Okay, so now we're getting mobility, yes, at our knees and our hips. But you might be feeling a little bit more mobility also through your spine as you're doing this. Your lower back, specifically, and you're also starting to load up your shoulders.

Give me two more of these, and then we're gonna get a little bit fancier and start to add in a little bit of those slings with these oblique hops. So pivot your feet to one direction, bend the knees towards one elbow, straighten them, test the waters by pivoting the feet, bend the knees towards the other elbow, see what happens on the obliques in the side body. Come back to center, give me one at center. And then from here we're gonna have a little bit of fun if you can see me by doing some oblique hops. So bend those knees, you're gonna pop up, hop it to the other side.

So it's like you're doing a little slalom on the top of the dome with the feet and you're starting to get some angles through the trunk. Good, and give that a rest. Now, here's something I didn't mention. We're workshopping. We're not workouting. You saw me do one side and one side only.

You'd wanna make sure that when you're training these exercises that you clearly have yourself or your clients do that other side. That's what I had planned for you in standing. Not easy, super effective though. Let's move on to the next chapter.

Chapter 3 - Kneeling

All right, team, we are on kneeling.

So the next body position is kneeling. So we started standing, I'm gonna now move you down to a kneeling position. Now remember, I always like to remind myself that a lot of these things that we're going to be doing and/or seeing in this workshop and/or if you take the Fuse Workout that is on Pilates anytime as well, this changes everything, versus you having your knees down on a mat or down on a stable surface. We're moving from stability to instability using the BOSU dome. So we're gonna move into kneeling and we're gonna start in a quadruped position focusing on, yeah, some stability of our legs, working the backs of the legs with some variations when we remove a leg, but we're also gonna be working on some mobility as well.

So let's join each other or join me rather in quadruped. I'm gonna ask you to bring both of your knees up onto the dome and let's talk about where. Remember earlier in the chapter prior, I said micro adjustments are welcomed here. There's no one setup that works for every body, so you're gonna wanna figure it out on yourself and/or with your clients and classes. But essentially, I want your knees close to the apex of the dome, near the logo impression, if you will.

And then you're gonna come down and place your hands down on a stable surface in a quadruped position. Now, could you amplify this and move your hands up onto the dome? You certainly could, but here's the deal, you've also changed your base of support. And that's okay, but just know that you're in a smaller base of support and that may work for some people and it may not work for other people. So give some options as you go through this.

I'm gonna choose to place my hands down on the mat and I'm looking for, you know, decent relationships here from shoulder to elbow to wrist. And then once I'm set, I'm going to release one leg out. So now I have one contact point on the dome and I have my toes tucked on the floor. We'll talk about contact points along this journey as well, and I'll explain them as we go through this section. And simply all I want you to do is keep everything as still as you can through your trunk or your core as you lift and lower that one leg.

And you're trying to really create that sense of that energy line reaching out through the leg that's moving. So you're creating that long, long line through the toes. I always like to say like maybe you feel like there's a stream of water coming out of your toe and you're trying to power wash the wall or whatever's behind you as you go through this. Now, how could we make this a little bit more challenging already? Maybe you then take the toes up off the floor of the knee that's on the dome and that's gonna change things, and you're gonna see it happen on your body and you'll see it happen on your client's bodies.

And now we're gonna amplify it even more by changing the angle of the moving leg by bringing it back on a diagonal behind the other leg and then bringing it back up. So you're addressing a little bit more of the inner and the outer line of the moving leg right now. Again, keep pushing that floor away as you're experiencing this and then keep that leg up and let's go the opposite direction and go into that windshield wiper as you open and close that leg. Again, trying to go for what? Stillness and stability of that core right now.

Now, since you've done a few of those, let's add in mobility. So where can we head now? So let's add in mobility of the spine with a little cat. Rounding. How deep can you get that need of the nose? And then let's go into a little scorpion and going into that deep longitudinal system that we talked about so long ago in chapter one, finding that back extension.

So now you're in that flexion and you're in that extension with Cat and with Scorpion. And then finally we'll add in a little bit of rotation by pulling that knee towards the elbow and getting that lateral system engaged. So pull that knee in and then reach the leg back. You can also add in that rotation at the cervical spine, your neck, by looking towards that knee. And boy oh boy is my knee that's on the dome, that leg is getting some awesome work as well.

So there's stability and mobility in quadruped. Do yourself a favor, give those wrists a little bit of a rest. And let's move on to the side. Now remember, because we are workshopping and not workouting, I'm only gonna do one side with stability and mobility here. You would teach this in a class setting or go take Fuse and make sure that you get both sides accomplished because as mentioned, that lateral system is so important to work through symmetry for your particular body or what symmetry is in your clients and classes.

So we're gonna bring one knee up onto the dome. Now let me back up for a second. You could regress this to do all of the exercises. I'm gonna teach out to you with your hand down on the dome. And here's another thing that I love about the BOSU Balance Trainer is that, and by the way, I'm not here to make any money, but it is great for support of the wrist, is that you can really place the hand down on the dome and translate their load through the fingertips really nicely here.

So if this was a good setup position for you to get started on these exercises, absolutely stay here first. But I'm gonna take it straight up to one knee on the dome, and I'm gonna take it down to one arm on the floor. So we're gonna place one hand down on the floor. This is challenging, I'm already feeling, I'm already feeling it in this dome side glute. And then I'm on my side and I'm just gonna simply start to lift and lower that upper leg.

So stability core in action, that inner unit, right? I'm not in Zumba class right now. And then we're gonna again, change the angles, keeping this nice long line through this leg as always, that's what we're going for. We're gonna leave it lifted and then add in a bit of a sidekick. Whew, this is where things can start to get a bit dicey and that's okay.

Remember, you don't need perfection here. You're challenging your balance. So many things you could stay here, take some slide or some circles in both directions. You know, maybe 600 in both direction, I'm kidding, 10, eight, I don't know, six. And then we would add in those rotational obliques, and this is where your mobility core comes into action.

So you're adding in that rotation from the T-spine, your thoracic spine, and then you're unfolding the line all the way out. And as a reminder, we're teaching this out in a workshop format and it was a joke, don't teach 600 of these, but maybe think about eight, 10, six, whatever in each position, and work with both variations with the knee on the dome on the side as well as the hand on the dome and the leg off to the side or the knee on the more stable surface if that's where you need to get started. Awesome job, you guys. Let's move on to the next chapter.

Chapter 4 - Sitting

All right, so we're moving on to our next body position, which is sitting on the dome.

And much like I talked about earlier, there are micro adjustments that will be needing to be made as we're going through these seated exercises as well. We're gonna still be addressing both the stability core as well as the mobility core, but just know that you may need to move up or down on the dome depending on what the goal of the exercise is. So for the stability piece, I want you to find, or have your clients find, a nice perched position on top of the dome. We're gonna talk about wardrobe malfunctions. There won't be any of 'em here in just a moment, but so that you can keep yourself or your clients comfortable when we get to the rolldown or the mobility piece.

For now, you should be cool. So you're gonna find a nice seated position on top of the dome. And again, before we start to move, I just want you to notice in your system how this body position just feels different. Now you're sitting, you've got your two sits bones, your two butts on your butt cheeks, your bones on your butt cheeks on top of the dome. And so there's a little bit of movement that could be happening, and that's all well and fine and good for now.

But just notice how it feels. You've got your feet, two of your contact points on a stable surface, so on the floor, and we're gonna begin with some hinging here. So similar to some of the things that you see in other areas of Pilates, we're just experiencing that now with an unstable surface below our bottom. So you're gonna bring your fingers back behind your head if that feels good for you, you could also have your arms in front of you, that's just gonna change the base of support. It might give you a bigger range of motion.

And we're gonna start with a flat back hinge. So before we head there, let's set up the back of the head. So pull your head towards your hands, fire up, again, that upper middle back, that deep longitudinal system that we talked about, so you can get those postural muscles activated, and then see how it feels to hinge back. Where is that spot where you're gonna start to get that shakiness and then you might go over the falls if you start to tuck your pelvis and you fall backwards on the dome. You wanna negotiate that and stop on that little tight rope, and then bring yourself straight back up.

Now I'm not gonna lie, it doesn't feel hugely satisfying because your range of motion is not gonna be massive, but it's also super effective to start to let yourself or your clients understand what activating your stability core in sitting looks like. So hinging back into that flat back hinge, bringing yourself back up towards the ceiling, nice and tall and forward. And then let's do one more of those, and we'll start to add in a little bit of rotation. So remember that dimmer switch. You're like, "But Erica, this is stability core.

Why are we rotating?" Well, we need rotation right here from that T-spine. So now we're in that T-spine rotation and we're gonna take a little hinge, yes, back from our hips. So we're still activating the stability core, but we have a little bit of rotation happening. I'm gonna try my other side and see how that feels. You do the same 'cause you're gonna get a little bit of a different excursion or experience or range of motion, if you will, from one side to the other, and that's totally fine.

And then now we're gonna start to add a little bit of a lever length difference here, which might help you. So let's rotate. And then can you reach your arms out nice and long and hinge back? Did you find the floor? I did. Come back up and then face center.

Try one on the other side with me, please. Reach it, come back, tilt, touch the floor. And then on this next one we're gonna come back and do an around the world experience. You're gonna reach your arms out nice and long, you're gonna tilt back down, and then can you keep these helicopter blades and rotate all the way around, touch the floor, and come back up. Let's do one more, and then we'll move into a different seated position for some mobility core work.

Again, around the world, and then all the way back up. Nice job. So heading into mobility, we're gonna have to change the body position on the dome and everybody's body position is gonna be a little different here. Here's the wardrobe cue or the coaching that I gave you earlier, we don't want any malfunctions, but just know that depending on what you're wearing, you may need to shift things a little bit and move things because as you go further down the dome, there could be a little bit of a wedgie experience. So just make sure that you know that and that you make modifications accordingly.

I'm wearing a pretty tight outfit for this very reason. And now we're gonna head into a little bit of a rollback. So we see this, that nice scooped position, so we're in a little bit more of mobility now as we begin to roll the spine back along the dome. How far are you gonna take it? I don't know. Could you take your arms overhead? Yeah?

Does this feel good to you? I don't know. Maybe it does, maybe it doesn't. You need to evaluate the range of motion that works the best for you. And if your range of motion is smaller here, that's completely fine. And if your arms can't get to the floor because your shoulders can't manage to that, that's totally fine as well.

Let's add some rotation. So we're rolling back, we're rotating, we're reaching. There's the sling system in action, and we're coming back forward. Try one on the other side with me. Roll back and reach.

Bring it back up and forward and give that a little bit of a rest. Now we're moving into the tilt. So I'm gonna take us back up onto the top of the dome, back into that lateral system. I may have, if I was teaching this in a class format, put this right after our stability core work that we were working on previously, but I'm trying to keep these in categories. So bring those fingers back behind the head, and the tilt is really just a side bend over to the side.

So you're seeing if you can decrease that side body on one side and open up the other side as you come up to sitting and try the other side. Again, remember this is that nice balance of mobility as well as balance training having your tush or your bottom on an unstable surface. And you might not be able to see it a lot, but I can totally feel it in my body how my hips are wanting to, definitely, do a lot of Zumba class right now. I don't know if that's Zumba class, but it certainly feels like that to me. But because our goal is really the side body, you wanna really try and focus on that and notice how you're feeling in your body or what you're seeing in your client's and class's body and coach that accordingly.

And that is our tilt. We're gonna then move into a really nice traditional Pilates exercise that's done on the dome, the spine twist. So I'm gonna extend my legs out. Traditionally, this is taught about shoulder distance apart. Arms come out to the T, you can have palms up if you want more external rotation of the shoulders, palms down is fine too, and we're just gonna take straight thoracic or T-spine rotation here as we twist.

Twist a little further and then come back to center. Now I'm not coaching a lot of breath in this workshop, so do what feels good for you. Just make sure you're still breathing here. I might do this on an exhale and really get that nice interabdominal pressure to fire up a little bit more as I'm rotating. Just two more, and then we'll take you into the sprinter for the grand finale where we have only one contact point on the dome, and that's gonna be our lower back-ish.

So again, we're gonna come into a balanced position. You got this, don't worry, you're gonna find it with me. So I want you to test the waters. I want you to see how it feels to lift one leg off, and I want you to see how it feels to lift the other arm off. And I want you to feel like you're on your back and that you're getting ready to run.

Now, if this is too much on your neck, you can absolutely have one hand behind the head, but that's gonna actually make it more challenging, just so you know. From here, we're testing the waters and I can actually already feel, oh, I might need to make a micro adjustment myself, and we're gonna sprint. So we're gonna find that little air time and sprint and sprint and sprint and you can play with all different things here. You'll see this come into play in Fuse when I teach it in class format, when we pick up the pace, and we really start running on our back. But as a reminder, all of these nuances, and all of these shifts and changes in body positions using an unstable surface are gonna make your body, your client's bodies execute these exercises entirely different.

So make sure you have fun with it, that's the biggest thing entirely, and enjoy this seated chapter. Let's move on to the next one.

Chapter 5 - Side

All right, so we're on to the side body chapter. Remember I promised you six body positions. So we have moved through standing, kneeling, sitting, now we are onto the side.

We're gonna use the dome in a couple of different ways. So we're gonna have one hand up on the dome for this first part of stability core work. Yes, there will be a little bit of mobility. Remember, I'm your broken record here, so I want you to remind yourself, and I will remind myself that there's that dimmer switch of if I'm asking you to change a task or you're asking your clients to change a task, you might need to add in a little bit more mobility to get through some of these things. Now, you heard me mention it before in quadruped, but I'm gonna mention it again here in the side position.

What I'd love here too about the balance trainer and the dome here is the labial or the gushy surface of the balance trainer. Not only is it gonna create proprioceptively, that challenge piece, but it's also gonna be a nice bit of comfort for yourself or your clients or classes that might have some wrist issues. We all have those situations in life or have classes that might be like, "Ah, my wrist is hurting a little bit." And this is a great way to help translate the load through the wrist by putting the hand up on the dome. So some similar exercises that we see in Pilates or Pilates based exercise, we're just adding this inspiration of the balance trainer here, and actually bringing the floor a little bit higher to our clients. So I'm gonna set us up into about a 45 degree-ish angle of the legs.

I have my top leg forward, I have my bottom leg back, and you'll see why. We're gonna start with a T stand. So what do I mean by that? It's basically a high side plank. So I'm gonna say you're just gonna simply, even though this is not a simple exercise, 'cause it's unilateral shoulder load right now.

Come up into a T stand position. Boom, baam, digiti done. Are you there with me? If you like it, stay there with me. If you don't like it, come on back down and adjust this arm position or adjust your wrist position. So here's your T stand.

Can you make it into a falling star? So now we're adding in that mobility piece, and we're bringing it back up and then you're gonna come back down. So let's try that first. Let's try that T stand falling star first as well. I'm also giving you a moment.

Like for me, I was okay up there for that one repetition, but I might want to micro adjust and bring my hand a little bit forward. Again, this is a lot on this unilateral arm or this single arm. So come up, boom, hit it. Are you there? Yeah, you are. Good, so hold it, find your falling star.

Good, bring it back up, and now let's go into that toe tap. So get down and then try and reach towards your toe. I can't get all the way there, maybe you can, and bring it back around to your T stand and lower back down. So it's that navigation between, what am I asking your body to do? Right here, boom. I'm asking you to stabilize.

I'm asking you to mobilize. I'm asking you to bring it back into stability and then add in a bit of mobility here. So there's your T stand falling star into your toe taps. Now we're gonna move our hip up onto the dome, give that wrist a break. Remember, we are workshopping, not workouting this.

So I'm not gonna do the other side on my shoulder. I'll get that done another time, and so should you. But this is the first time you've brought your hip onto the dome. So find what works for you. And here's how we are going to start to test the waters here.

What I want you to do is simply lift your legs up off the ground. So what are your contact points right now? Woo. You can see that I have a forearm down on the floor. So that's one contact point. I've got a hand on the dome, which is technically unstable, and I've got a hip on the dome, which is unstable, and that's about it.

So remember, it's not time to watch TV, so make sure that you're really getting that side body fired up as you're setting yourself up for success here. So this is the dome up oblique kick. So let's get ready for that. I'm gonna bring you up onto your hand. You're probably gonna wanna bend this bottom knee a little bit. I'm not gonna lie.

But that setup position means something, and I took you through it now because you're gonna do it in a moment with the dome down. But for now, let's go into some oblique kick. So lift that top leg up and let's see how it feels to kick your leg forward and then to kick your leg back. Can you see that I have my bottom leg toe tucked? Do you think that if I lifted those toes up, that's gonna change it entirely?

Yes and yes. Right? So kick forward and kickback. So this is your oblique kicks, and maybe you wanna pick up your pace. Boom. And maybe you wanna add in a little bit of arm opposition here as well, all of those are totally great.

And you can see what's happening also on my floor arm, I'm getting a little bit of a bent elbow, but I'm still really focused in on my lateral system. It's time for your twisted teaser. So send that top leg out nice and long. What I want you to do is take your top arm up and over and rotate all the way down to the floor. So your hands are down on the floor, and you're gonna take your top arm, what I'm gonna call your top arm and your top leg, and you're gonna lift them up and you're gonna find a twisted teaser position.

You can see I have my bottom toes still tucked on the floor because I'm feeling a little bit of motion in my core with that dome underneath my hip. Great job. A little bit of party trick time. We're gonna flip that dome on over. And remember earlier when I set you up for that side lift position, it's gonna come into play right now because we're putting our hip up on the platform side.

What? Erica, you're crazy. It's all right. You can do it. And if it doesn't feel good for you, just turn that dome back over and put your hip back on that dome side. Now, let me give you a little disclaimer here, because this platform is firm. So if hips or your hip or your greater trochanter, if you want me to be all fancy, doesn't like this, pad it up, put a pad down, put a mat down, but let's try it. Okay?

So much like I did before, what I'd like for you to do is find a spot where you can bring your hip on that platform side. Now, we have changed the environment entirely, and we're gonna experience some side lifts here, but we're gonna use the rolling surface now of the BOSU dome to accomplish that lateral flexion of the waistline, that lateral system that we've talked about with your mobility core. So we're in mobility core work here, and I need to make it a micro adjustment because you know what we're gonna do. We're gonna try and do this with one less contact point. So that arm is up to the ceiling.

Can you see I'm rocking and rolling, woo, a lot here, and that's okay. Remember, perfect is boring. So we're gonna come on up. And then last and final here with that dome side down is can you take your top leg up and can you bring it back down into your star. So be the best star that you can or that you are.

And again, all of these can be done with that dome side up as well, and there is no judgment on yourself, your clients, or your bodies, because this is very challenging work on your nervous system as well as your soft tissue. So have some fun with that. That's all of your side work, using a little bit of the dome side up, using a little bit of the dome side down. And let's move on to our next body position.

Chapter 6 - Supine

All right, it's the supine chapter, team.

Fancy word for saying on your back. I mean, we all love being on our back in Pilates and we do a lot of it, and so we're gonna do some of that here. And some of it's gonna be more traditional, some of it's gonna be less traditional. And yes, I do have a little platform goody planned for you at the very end. One of the things, and as I mentioned earlier, is that the BOSU Balance Trainer is a great tool to not only challenge exercises, but to assist exercises.

And I don't know about you, but sometimes reverse planking can be a real challenge for a variety of different reasons. We don't have all the time to go through this, but it could be lack of a ability to open a chest, it also could be hyperextension of the backs or the knees, and that's the one that, actually, I find this labial surface really, really helps with. So we're gonna work with some reverse plank variations and leg pullback with your feet or your calves up on the dome. So come with me and join me. What I want you to do is bring just your legs, your calves, maybe your heels up on the dome.

Again, there's no right in this. I want you to make sure that you're doing what works best for you or your client's bodies. Also, these exercises are more traditionally taught with the fingertips facing your bottom. I'm completely fine with that. However, I will say, depending on who you're working with or if it's you, you may need to open up that chest a little bit more or bring a bigger base of support out with your arms and know that that's completely fine.

If your goal of the exercise is to really get that posterior chain, the backs of the legs fired up, that sort of longitudinal system that we've been talking about. So from here, I just want you to start to experience what does it feel like if you first push that floor away? We are in stability or stillness as much as possible, even though we're gonna be moving at the shoulders and hinging at the hips. How does it feel for you to just hinge up into a reverse plank position? Test those waters. You might feel actually a lot nicer.

It does for me. So I tend to lock out the backs of my knees a little bit much. Not that that's bad per se, but I definitely feel a lot more of what I want to feel here in a reverse plank position, which is my hamstrings, my glutes engaging, my triceps engaging, really my whole back body. So once you've found your sweet spot, as I like to call it, can we start to remove a contact point and add that extra bonus challenge with a traditional exercise called leg pullback? So where you kick one leg up and then you lower down and maybe you come back up and you kick the other leg up, and then maybe you come up and you stay up for several repetitions.

So that is your reverse plank, that is your leg pullback. Could you also bring your feet onto the dome? This is not in your notes, but also turn this into a bit more of a reverse tabletop position. You absolutely could. So think of some of these exercises as your platform and as your foundation of where you might want to go inside of your classes as well.

Alright, so now we're gonna move on to everybody's favorite, which is the traditional bridging. And you can go back to some of my active aging sessions here on Pilates Anytime as I talk about the science behind bridging and why it's so important. But we're gonna start in that neutral bridging position for the stability core, because we're moving on to mobility next, we've gotta get through stability. So bring your feet up on top of the dome, just about hip distance apart, which means they're gonna be probably on the outside of that apex or the logo impression, and I want you to bring your bottom really close to the base or the rim, okay? You're gonna lie yourself all the way down onto your back, and this is the first time you've actually been on the floor with a stable surface behind you.

So give yourself a moment to actually recognize and notice what's happening. 'Cause we oftentimes start in this position in Pilates, and we're three quarters of the way through this workshop at this point in time, and this is the first time I have you actually down on your back. So it's a great time to notice where you're at in space, how it feels with your feet up on this dome. And I know, I know you, you really wanna roll your spine already, but remember we are in stability core. I'm gonna let you roll your spine in just a moment, I promise.

But for now, I want you to turn this into a neutral bridge or a little bit more of what I'm gonna call a power bridge. So I want you to drive down the dome with your feet and hip hinge up. So if I had a piece of bread on the front of you and a piece of bread on the back of you, it's staying stable or it's not moving much. Yes, you've got mobility at your hips happening, maybe a little bit of mobility at your feet depending on how you're doing at your ankles. But I want you to really focus on engaging the glutes, the hamstrings, and keeping the trunk in that stable position for now.

And then after you've challenged and done a few of those, which that's plenty if you want to, you could also add a prop in between the knees if that was your goal. I want you to move one foot towards the actual apex of the dome, extend the other leg up. So now we have yet again removed a contact point and we're gonna go into your single leg stability bridge. And you can do all the things here, right? This is very traditional Pilates.

If you wanted to go into full shoulder bridges here, great, do it. Boom, have some fun. Yep. But unilateral bridging is really, really critical for lower body strength and power as we age, especially if squatting and lunging becomes difficult along that journey. So just know that. So now we are going to move into your mobility core and we're gonna work with the dome up and we'll do a little bit of bridging articulated, and then we'll do some hip dips and then we're gonna flip the dome over. So come back into the position that you were in.

And as a reminder, team, this is a workshop, not a workout. I would sequence this bridging altogether. I might do a few of these articulated bridges, meaning rolling of the spine. You can see I'm really trying to work through getting some segmental work on my spinal column down, really getting that juiciness through the joints, which just feels delightful. And I might combine that, maybe I do five or eight of these and then maybe I add in that stability bridge.

So think about that as you're going through this workshop, and as you may want to program some classes if you're an instructor. And then of course you'd wanna do some single leg mobility bridges if you wanted to or you could also add in some rotation by adding in some hip dips here. So unleveling the pelvis as you drop one hip down. So great way before you go into full unilateral to get people or yourself to understand how it feels to release one glute and hamstring and then re-engage it. And from side to side, you're gonna feel totally different, so don't judge yourself.

Great, so those are your hip dips. You're gonna bring yourself all the way down. You could also do this, team, with your shoulders up on the dome. Just know that. And again, if you're gonna take my Fuse session that's a companion to this workshop, you'll see that come into play in that session.

We're gonna turn the dome over and voila, it's time to turn around and place our shoulders on that platform. So the best way to do this is to bring that platform or the rim of the BOSU down to the floor and then find the spot that works the best for you. And have a little fun with this, shall you? Like, you're just gonna drive through those feet. Woo, you're gonna feel a lot more hamstrings here. (laughs) Remember similar shape, similar body position that we were just doing, but a totally different experience, and that's really the beauty of having kind of two tools in one.

And then maybe we start to add in a little bit more shoulder mobility here with the arms and see how that feels as we reach back. Now, could you really challenge yourself and go into single leg? Absolutely. Could you go into maybe a figure four bridge? Totally. Have some fun with it. But more than anything, I wanna bring you back into your back body, get you into understanding the importance of doing some bridging, some reverse planking, how important it is to that whole back body and our postural muscles in a different way.

Adding in that stability, adding in the mobility, as it feels relevant for you and your classes, and have a great time with it. It's time for our final chapter.

Chapter 7 - Prone

So let's move on to prone. You made it, it's time for some prone work. I know what you're thinking, you're like, "Erica, we did side planks so we didn't do any regular planks.

Yeah, those should have come hours ago or 30 minutes ago." It's okay, I got you. We're gonna do 'em now. And here's the deal, I only have so much time with you. So what I want to inspire you to do with this body position as well as all of the body positions is to get creative. I'm giving you some kind of base moves, some foundational moves, and use this as inspiration to really add onto some of these movement patterns in your moving environments, that's the whole point of this, and to enjoy using the BOSU Balance Trainer because it is such an epic tool. So let's talk about plank.

You can do this a variety of different ways. Yes, you can do it with the dome up. Yes, you can do it with the dome down. We will get there. We are also going to add in a little bit of a cardio experience if that's your jam here as well.

'Cause sometimes you wanna uplift maybe a cardiovascular level. So let's have some fun. From a setup standpoint, what I love about using the dome is that you can really set your wrists up for a nice placement here. You can see that I'm able to really translate the load through my fingertips here by placing my hands on these channels on the BOSU Balance Trainer. Some of your BOSUs may have them, some of them may not.

They all do the same thing, don't worry. So I have about a shoulder distance apart placement of my hands. I'm translating the load down through my wrists. And of course we wanna go through all levels of the plank. I don't have a ton of time here, but maybe you wanna start somebody in a more semi plank position before you pull them up into a full high plank position on the dome.

You're going for all of the same things if you had your hands down on a stable surface area. You wanna have good relationships from shoulders through the elbows, all the way through the list, the wrists, not the lists as you do this. And just note that as you're setting yourself or your clients or your classes up for success. So in this plank position, what could you do? You could do those nice slow mounting climbers.

You could also do your leg pull front. You could drop both knees down. All of those things are available. Changing angles, all wonderful, fine and great. You could also take a full pushup.

I actually like to start my clients and my classes with just a pushup with the hands on the dome and the knees out. But let's talk a little bit about if you did want to start to add in a bit of a cardio experience here. So we're gonna go into a full plank position, keeping that trunk nice and stable. Remember, we are in stability core here. And I want you to drop your knees, press back, and then open and close the leg.

So a little bit of propulsion here and a little bit of ability to bring the heart rate up if you want to. Now, how many of these are you gonna do? 600? No. So maybe you put in a ten second interval, a 15 second interval, or you count them through five or 10 of those repetitions. Those are your plank jack knee drops. Now we're gonna move on to a little bit of mobility core.

We're gonna keep the dome up for the time being and we're gonna set some angles and add in some rotation. How could you do this? Remember, I'm only giving you a few things here. We're gonna do a single leg plank with rotation, you could do a variety of different things. You could lift one leg and take it out to the side.

But for me, I want you to bring one leg up, almost like you're in a tree pose, you're gonna rotate it under and you're gonna thread that needle. So that's your single leg plank with rotation. And of course, I'm getting a little slippery on my hands, have a towel handy. You could do that on the other side. So single leg plank with rotation, and then we're gonna move on to a bit of swan.

So do me a favor. Place your hips on or near the top of the dome. Now, if you're like me and back extension is not your best look, no offense to myself. This really makes you look like such a rock star. So the great thing about the swan is we are addressing, again, that deep longitudinal system and you've brought the floor a little bit higher so you have room to actually move your body.

So what I want you to do is start to explore what it feels like to get that whole beautiful deep longitudinal system activated. Now, I have my hands on my floor. You can see I have my feet on the floor. If you wanted to, you can start to lift a contact point here as well and play with a bunch of different variations. So again, creative liberty is a beautiful thing in the world of movement, right?

But start with those base moves and then layer them as you go along. Okay, so we are flipping to a dome down position. So I want you to flip that dome over. I've got two last things for you so you can stay with me and I will stay with you, I promise. We've got handstand forearm pike.

Just know this is a challenging entry. It's not for everybody. You could have the toes on the dome up as well. But I want you to explore having a little bit more of this rolling surface, which is why I'm giving and infusing a little bit of this platform side up. Now, here's the deal, team.

You're gonna come on around and find your forearms down on the mat. And the best way to kind of enter into this is to, again, bring that rim of the BOSU down towards the floor and find the middle-ish area of the dome with your toes. Forearms come down. Now remember, what are you gonna see and what are you gonna wanna do? You're gonna wanna, ooh, sink.

We don't want that. So push the floor away and then come up into a forearm handstand pike, and then come back down. You can see my knees are coming on and off of that platform, which is nice 'cause it adds a little bit of a contact point here while you're working a bit of mobility through the trunk and loading up the shoulders. So there's your forearm handstand pike, and the grand finale, because you know I love you, is the swan dive rocking. If you know this exercise in Pilates on the mat, it's a beautiful exercise, but it is very challenging.

This dome and this platform is going to really let you have a lot of fun and some playfulness with this exercise. So bring your two hip bones on or near the middle of the platform. One of the best ways to do this is to come into a plank and then set the body position down. And again, you may not have set up perfectly for this, and that's okay for you to shimmy and make micro adjustments. Let's test the waters by coming down with the forehead and pressing up into a full swan that you did with the dome up.

Remember that? That was just a few minutes ago. So try that again. See how it feels, and maybe you stay here. I have my legs a little wider right now because it makes my base of support more comfortable for my low back. And then if you're willing and you want to, maybe you start to take one contact point away and the other contact point away.

And then if you really wanna have some fun, maybe we go into the full swan dive rocking and we make it really super beautiful and the most important thing, playful, and also really focusing on the back of the body and that deep longitudinal system. Thank you so much for joining me for Bosu Pilates Fusion and Flow. I hope you enjoyed yourself. I hope you got great inspiration from all six body positions, whether it was standing, kneeling, seated, side, supine or prone, and you'll take these exercises and really move them into your body, your sessions, give yourself some creative liberty to use this amazing three-dimensional platform and tool, and I can't wait to see you next time. If you wanna take some more sessions with me on the BOSU Balance Trainer, join me on Pilates Anytime and go check out Fuse.

Comments

Lori
Wonderful workshop!  Always appreciate your classes  and the level  of joy you bring to them.  Very happy to have the handout to help me remember all of the exercises.  Thank you Erika!
Erika Quest
Lori Hey Lori! I'm so glad you enjoyed it and happy the handout will help you. I always appreciate them as well. Also, look for the BOSU FUSE session coming out shortly that puts all of this content into a full class format as well. Much love, Erika
Hi Erika Where do I find the print out section Thank you a outstanding workshop
Carol S
Cheri D If you are looking for the PDF handout, the link is right under the description above. Functional Flows Handout
Erika Quest
Cheri D I think Carol S helped you out on this one, so I hope you were able to find and download! xo
Erika Quest
Carol S Thanks for helping  out, Carol! Hope you enjoyed. xo
1 person likes this.
Thanks Erika,  Nice workshop and demos. ( I just might have to invest in a BOSU of my own at home.)
Erika Quest
Don S Hey Don! Thanks for taking the workshop, and glad you enjoyed.  A companion class that puts this all together is coming soon too. Much love, Erika
Carrie Miller Smaczny
So good!  I loved it.  I really like the instablity of ithe BOSU as it changes our proprioception.  As the Pilates equipment is a hard surface.  Thanks again.
Diane Duvall
1 person likes this.
The BOSU is one of my favorite pieces of equipment for my own workouts and my clients!  Great, enthusiastic education (a new "twist"... different way  of thinking about the oblique slings for me) and some new exercises that I had never done on this amazing apparatus.  Loved this and the fact there was no charge.  Thank you!
1-10 of 26

You need to be a subscriber to post a comment.

Please Log In or Create an Account to start your free trial.

Footer Pilates Anytime Logo

Move With Us

Experience Pilates. Experience life.

Let's Begin