Description
About This Video
Transcript
Read Full Transcript
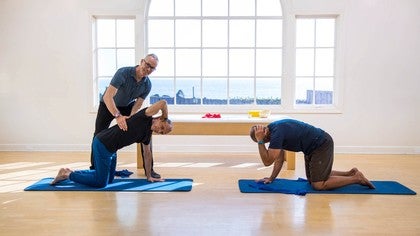
Hi everybody. I'm Tom McCook. I'm here at [inaudible] anytime. I'm here with Andy and John and we're going to do a lesson on the neck so you can keep your neck and spine healthy for life. And this will tie into some classes that we'll follow and I'm, one of the questions that I get as a teacher a lot is how do I get rid of neck and shoulder tension? It seems to be an overriding thing in our world with stress and current lifestyle. And one of the most important things that I learned is you have to know where your head actually sits on your spine.
And this comes from the Franklin method that I've been studying for the last 20 years. So I think you'll find this super useful, easy, and you can apply it to everything you're doing in your life. So what I'd like you to do is put your fingers just below your ears right below your ears. You'll feel a bone called your mastoid process. And I'm going to show this to you. It's basically this. If you can see that from where I am, where I'm looking right below your ears, you'll feel this rounded shape bone. You guys feel that? Now straight in from where you touching about an inch in is where the head sits on the spine. That's pretty wild, huh?
Now I'm going to show you what that looks like from a side view. So you can see that that's exactly where it sits. And that's also where it moves. So that's the side view of the head. Now it rocks right where and from where you're touching. And you can visualize that your head has these two sit bones called the occipital condyles that are the sit bones of your head.
This sit in these two spoons called the Atlas, which is the first cervical vertebra. And it's, it's the place where your head is designed to be carried by your spine. So let's say I'm gonna take this away. Notice, leave your fingers there again. Just take a moment and go, Oh, okay. So straight in from my fingers is where my head says to my spine. So just just gently nod your chin and then lift your chin and just visualize that your head is gliding in these two cups and you got, you have a fair amount of movement without the shape of the spine changing at all because the head is floating at the top in these two cups.
Now to make it even a little more clear, put one finger on the top of your head. Now imagine that the finger that's touching the mastoid process is going to represent the glide of the sit bone of the head. And this one's going to represent the direction of your head. So as you nod your chin, would that backhand just press back and visualize the, the head is gliding back in in the, in the first cervical vertebra. And as you lift up, push that finger a little forward and think of it's gliding forward and just let it be really useful.
So now you have an awareness of where your heads that sits on your spine. Now just take a moment with your arms hanging. Just do that a few times and notice that you can also do that and bend your legs at the same time and straighten your legs and just notice how okay all of my joints are fulcrums with gravity or the joints are designed to glide as I move. And then think of just keep your eyes on the horizon so your your chin nod and lift isn't that big more the way it would be if you were moving through space. Now take one hand and take it down the back of your neck into your running to that hollow space.
We'll call that your neck pit and put the other finger under your jaw. Now both of these places are not supporting any weight, so we want them to be soft and deep. So just push into your tongue muscles under your jaw, push into the back of your neck, and just think of massaging these points a little bit as you let your head rock in those same spots. And it's okay. I can let my head float where these two places where we tend to have carry a lot of tension are not not designed to carry weight. They're designed to be relaxed.
I just notice just from that, that might feel a little different than your neck when you stop, just okay. A little more awareness there, huh? That's kinda cool. Now we'll take your hands like this and you're going to put them on the back of your neck. Now imagine that you're holding a big juicy sponge and bend your knees slightly. Now on the exhale, just squeeze the sponge as you exhale. Relax your jaw.
I do that three times on the exhale. Squeeze. You can even imagine you're yawning out of the back of your neck.
So just reach your head forward and then back and when it goes back also think back and up. That's it. Forward backing up and you can think, are you talking to me?
Imagine you're going to lift your job up to side bend, keeping your shoulders level and then back to center. Then lift your job up and back to center. Now do the first side again and on the side you're feeling the stretch. Reach your fingertips down and take a breath or two and then back to center. Lift the job on the second side, reached down through the fingertips and take a breath or two. That's it. And then back to center.
Now we're going to tie it into this part of your spine because what we have with the neck is we have the most mobile part of the spine wreck right next to the most rigid part. So take your arms out to the side and just practice and you can have your hands a little bit in front of you. Just practice turning one Palm up, one Palm down and just start to alternate. There you go. Now, now let your spine side bend slightly on the Palm. That's turning down. Actually turning up. That was a test. There you go and see if you can feel that you can. You can start to feel that goes right into your thoracic spine, the part of the spine right behind your heart and let your head react by keeping your eyes level with the horizon.
And there's a slight side bend in the neck countering what the part of the spine is doing behind your heart. There we go. And let's just do two more and one very nice that, that go. Now you're gonna help yourself down onto all fours and we're going to do a rotation. I'll do it up here so you can see me for a sec. Now the first thing just to have your hands directly under your shoulders and come into a neutral spine so you feel like your head and tail have a straight line. And just like we did when we were standing just to your nose and your chin straight up towards the ceiling so you feel your neck gets a little longer. So just dress straight up as you look down because the head's heavy in this position and it tends to want to drop. Now what you'll do is I'm gonna, I'll demonstrate. I'll put my right hand behind my head.
Now as they push into the floor, I'm going to turn open and on the exhale I'm going to bring my other, my elbow towards my other elbow. So inhale to open and then exhale to turn down and just take a nice and slow like that. Now if you were doing this at home and this was uncomfortable for your shoulder, you could put your hand across your chest. That's it. Inhale as you open, that's it. Exhale to turn down acid. Feel that rotation and just slightly press your head back so that the weight of your head doesn't drop your head out of the line. That's it.
Just one more you guys. And then as you bring your hand down, we'll set up for side to bring the hand back there. Just lightly. Press your head back into your hands if you feel that spine length. Then inhale to open. Exhale the turn down. There you go. Now you're getting that mobility and the thoracic spine, which connects into the neck of those two places working together a little better. That's it. And we'll just do two more.
Nice and fluid. Awesome. And one more. Excellent you guys. And then when you're ready, just gently help yourself up to standing again. It'll grab your TheraBand. This will be our final exercise in the sequence. So this is the strength in your neck, specifically the deep neck flexors, and stretch the suboccipital the muscles. At the back of the skull.
I'll just demonstrate one with a side view. So you'll put the band thickness around the back of your head just above your ears and your elbows will be in front of you like this. Now your knees, a little bent. Imagine you're going to, on the exhale, you're going to draw your head straight back and up into the band and then just release it forward. Keep your eyes straight ahead and go back into the band with your head and then up. And you can even just leave your knees bent the whole time. Just feel that. So leave your legs bent.
Not think of the head's just going to go back into my hand. And then up. I give this kind of like this. There you go. That's it. Nice. You guys. Couple more like that failed. That opens up the back of the neck. It's also strengthening your deep neck flexors. Let's do two more.
This is our neck love for the day. One more. There we go. And then release. And now just take a moment when you bring your arms down and notice posture, head position. Uh, that was kind of nice, huh. So we're recap where the head sits on the spine. That's where I would start. And just do very simple small movements, keeping the jar relaxed and then [inaudible] under your jaw in the back of your neck to get those places to soften cause they tend to carry a lot of tension.
Then go into the mobility forward and back side and then come on to all fours, do the rotation and finish with a strengthening exercise. Thanks guys. Very cool. We'll call it right there. Enjoy.
Pilates for Men: Mindful Practices
Mention
 |
Tom McCook (Teacher) |
 |
Katia B |
 |
Grace W |
 |
Eveline D |
 |
Natalie H |
|
|
Michele M |
|
|
Laurel N |
|
|
Kate L |
 |
Nadezhda T |
|
|
Cynthia G |
|
|
Sharon C |
 |
Silke L |
|
|
Sam T |
|
|
Brinda C |
|
|
Marilyn H |
|
|
Grace P |
 |
Anna Price |
 |
Aileen C |
 |
Julia C |
|
|
Debra H |
 |
Jackie H |
|
|
Cigdem A |
 |
Julie D |
|
|
Nicola F |
|
|
Copycat |
 |
lorily |
|
|
Alex D |
 |
Lori M |
|
|
Catherine C |
|
|
Liz |
 |
Lauren Thornton-Brown |
|
|
Claudia M |
|
|
Jennifer H |
 |
Z A |
Comments


You need to be a subscriber to post a comment.
Please Log In or Create an Account to start your free trial.
