Description
About This Video
Transcript
Read Full Transcript
Reformer class. I'd say intermediate, intermediate, advanced. You can make it as fast as you like. It's an overall feel good class. Okay, so we're going to start lying down on your back in a small v position. One light spring [inaudible] the lights spring is so that you can start to feel the activation of your internal core. So it's, it actually makes you connect into pelvic floor. So as trans for everybody there. So we're going to have the big toe ball and the little toe on the bar in a small v Pelvis. Nice and weighted with the femurs in the socket. Now it's super light.
So you're probably pushing the carriage. Try to keep the care. Yes, it's very hard actually to keep the carriage in. And with the kerogen can you feel the activation in here? It's super. You're going to keep the activation in your pelvis and slide the carriage out, keeping the heels still. And if you can straighten your legs, great. And then slowly bring it in. But come all the way to the bumper. Good. And again, inhaling out, exhaling in, pull it in through the core. Good. And try not to Tuck your tail.
She's not just doing a great job, but it's very tempting to use your hip flexors to pull the kerogen, see if you can sit the pelvis down and really work more deeply in the hip joint itself. Good. We're going to do one more. This is just a little warmup and then come back. Now we're going to change the springs to a heavier spring that you're normally used to four foot and leg works. You want to change the springs to three springs, two springs, whatever it is that, yeah, so three red springs is great resistance and you can do the same position. Now I still want that core activation, but now you're going to have to recruit a little bit more through your leg muscles in order to put that much weight. Good.
And now inhale and resist the carriage a little more on the way in. Yes, good. And in two and and two. So it should actually take the same amount of time to go out and in so that you're not rushing the carriage coming in. You're actually resisting. Good. Keep going. I want to do about 10 repetitions, so looks very good. Keeping the heel very still so you're bending in the ankle joint.
The heels aren't lifting or lowering yet. Great. I'm going to do one more good and push out one more time and then we're going to go into heel lowers. Now let your heels come under the bar, really reach and lift the heels up and bend the knees and come in. So we're going to add that and out. Again, drop down, lift up and remember to resist in. Don't go for a free ride on the way in. There you go. I'll reach and lift and in and she's doing a great job of keeping the alignment of the thigh bones inside of her frame of her shoulders so that the feet are staying on the bar and not rolling to the little toe or rolling too much to the big toe. Good. We want 10 repetitions. Good, excellent. And come in.
Now we're going to change to a parallel position and prehensile the prehensile where you're wrapping all of the metatarsal arches around the bar and your heels are just relax down. Don't push too hard. Yeah. Now you got to imagine there's a floor here on the bar and we're going to keep the legs together. And same thing. Inhale on the out. Exhale on the end. So this is a quite a stretch for the metatarsal [inaudible] and that beautiful transverse arch. Yeah. So we don't want the heels moving, right? We're moving from the hip joint and the carriage keeps rolling. Inhaling out, exhaling in, good in hailing out. And she's doing a great job keeping her knees straight up to the ceiling.
So for some of you there might be a tendency in order to keep your legs together as to roll your thighs in, but don't allow that to happen. So you may have to feel that you're rolling out a little bit to come there. Good. Excellent. And if you're a knocked knee person, that would make her do a few more. They would want to have your feet as separate so that you could fully strain your legs before your knees knock. Okay. And we're going to add a heel lower. So let's lower your feet down. So now we can be able to lift our heels up.
So she's going to push out, drop the heels down, lift up, and come back. And very good. So a little different position for the balls of the feet. You want to feel that you able to lift the heels and come up onto the metatarsal is good and push out and drop and lift and coming in very nice and out. Drop, lift. Good. And I love doing the inhale out. Exhale through the heels. Inhale as you lift the heels. Exhale and inhale out.
Exhale down with the heels. Inhale, lift the heels and down. Two more times and out and down. And lift. Good and reach. Great lift and wide position on the heels. Now, okay, with this action, feel the femurs released sitting in the socket here. Now before you move the carriage, just press into your feet and move your thigh bones towards the bar.
So try to move your thigh bones towards the bar and then push the carriage out. There you go. Yeah. So if you really think of pushing your thigh bones towards the bar and pulling up the knee cap, you really fully activate the whole leg and the knee. Very nice. So it really gets posterior hip. Excellent, good. And everyone always forgets. Pull up those kneecaps at the very end there. Very good. Good, nice and easy.
With your breath in and out. Go ahead and again, don't release the end. Resist the end. It's very tempting to do that. Good. Keep going. Go ahead. I'm going to keep working the legs that way and rest. Okay. And we're going to work the post of your hip a little bit more. So let's lie on our side. We're going to go to two red springs. You're going to want something for your head, some kind of pillow or something to rest your neck on, right? And we're going to take a parallel position with the top leg on the corner of the bar.
You want your toes off the bar so that the Tibia or the lower leg bone is lined up with your knee underneath. Leg is straight out. So we're doing a sidelines. You have to work the add doctor to lift this leg, check your pelvis that you're reaching it away from your ribs. There's this space here between you have to maintain that. Contact the heel, connect the heel to the sit bones and go push out and really lengthen. Good. Give yourself a nanosecond there cause he had the top. So really feel your heel to sip on connection. Good.
And then release your knee before you bend in your hip. So reach the heel to the sip bone. Now stay there for a second and release your knee first and then the hip. Do you feel the difference? It gets into the back of the hip more so you don't have to do it slow.
If you can feel that my nigos first, then my hip. Exactly heal to sip bone. Soften the knee. Bend in the hip. Very nice, good and up. Soften the knee. Bend in the hip. Good. He'll just sit bone. Ah Yeah. It's really an important little police at the end. Heel to sip on connection. Soften the knee, bend in the hip. That's kind of the pattern. Heal the sip bone.
Soften the knee. Bend in the hip. One more time. He'll the sit bone. Soft the knee. Good. Now let's do a turnout position, but it's the same kind of timing, right? So be careful that your knee stays in line with your foot so you don't overturn. Very tempting to overturn out. It feels like you have more turnout when you turn your lower leg out.
But then we're not quite moving from the hip. Now reached that sip on away from your ribs again there. Gotta keep that length. All right, here we go. Heel the sit bone again. Very nice. Soften the knee and then bend in the hip. Very gun now. Huh? You have to soften the knee before the hip goes.
It really makes you east centric. Lee contract the back of the leg and the back of the hip. Very nice. Good. And again, resist the carriage as it's coming in. Soften the knee. Band in the hip. Good heel. The sit bone. Excellent. Nice. Keeping the space between the rib and the hip. Inhale. Exhale.
Good. Two more times to reach. Stop the knee. Bend in the hip. Good out and other side. Very good. Same cues on the other side. It might feel a little differently to a different hip. All right, so on the heel with the metatarsal is off the bar off the bar so that the knee joints not too compressed. This leg is straight underneath. Good stacking here. Feel the heel to sit bone and pushing out.
Soften the knee first and then the hip. Very good. And again, keep the rib and the hip space. Very consistent. Very nice. Heel. The sit bone. Nice. Soften for the knee. Then the hip. Good press. Good. Soften. Good breathing. Good. [inaudible] yeah, it's a little harder. You're pushing in your knee a little bit. Really pull up through here. This part right through there. They're good.
So it's not a pelvic movement. It's really, it's it's hamstring or pie there. That was good. Yeah, it's getting the lower gluteal area and the hamstring to work, so it's not just hamstring. It's actually the lower fibers of your glial. Your Butt. Yes. The fibers run in a different direction there on the muscular chair. So there it's a nice way to activate those lower fibers as it comes and joints into the Fascia there of the back of the leg. Okay.
I think that's more than 10 okay. Let's turn out pushing the thigh away. Yes. Pushing the thigh helps. Okay, great. The cue from the wide position. Same idea. So when you start the thigh bones pushing in that direction towards the bar, it's a little harder and turnout. Good. Excellent. Soften the knee and bend the hip. Push the thigh away. Good.
And I'm gonna move this leg back a little bit so it's in line. Good. [inaudible] very nice. Good stacking of the pelvis. One hip bone on top of the other. It's very important that your hip is in back or forward too much. Good. Same idea here.
Really concentrating on the back part of the hamstring where it meets the gluteal. They're good. And there's some deep rotators back there as well that we're working. Yes. Getting the whole package here. Okay. Very good. Let's do a few more. So we're even want to make sure you do the same amount of repetitions, unless of course you're working on a weakness. You could do a couple extra. Okay, come back. Good.
We're gonna stay with the two red springs and we're going to do a small v position of the feet on your back. All right. Just a small v. All right. I'm going to do a very small bridge. It's not a real big bridge. So what I'm looking for is that you reach your knees over your toes so you're gonna curl up. Yeah, keep the carriage at the bumper. Okay. But don't come up so high so it's a little, yeah. So I want you to think length. That's it. You have to pull the carriage this way towards me. Yeah. Sorry.
That's hamstring cramp time. Yeah, that's where you're working. I know, I know. Sorry. All right, that happens. Let's let some hold it so long. Maybe. So that's the idea is you reach your knees towards me. Great. And just rest on your shoulders. I'm trying to hold it there, but even lift your chest a tiny bit more. Good. And now push out and coming back in so you don't have to fully straighten.
Keep going. And what I'm looking for, it's not that you have to hold your chest down. Yeah, keep the width here, but I want the spine to be relaxed back here. Really. So we're really working more the local muscles and you're working deep in through the Hellness, that same kind. There you go. That same pelvic floor, tailbone to pubic bone feeling. It's not a tuck. It's more of a energy of it contracting together. It looks so much better seeing this. Less stress in your back. So think of it as like a hammock. Like you're just hanging there, but you're engaged in the local muscles. Yes.
That support you and now you're working your glutes again. Add doctors, AB doctors. Yeah, but with a nice support of your spine. Very good. All right. And come back in and we're going to go to parallel position. I call this the long bridge is a very nice stretch for the spine so you can come up into bridge without moving the carriage into a full bridge. This time really reached your knees. Good. Now you're going to lengthen out with the carriage, but slowly lower your all the way down. So lengthen, keep pushing the carriage away and lower down. Keep going, keep going.
Keep pushing the carriage away there. As you see it, feel the length. It's a very long. And then come all the way down and then come in like a regular footwork. Good. And Roll Up. Get the length, reach your knees over your toes, and then push away. And as you're pushing away, you're lengthening between the pelvis and the ribs. Keep pushing the Raleigh, the carriage the whole time until your butt hits the carriage. Very good. Two more. I usually do four in each direction. Lengthen and reach out.
Lengthen. Lengthen. Lower and keep lengthening. Yeah. So even through here it's less tucking really. And none more. Yeah. And up your linkedin and the fee right now low to keep rolling and the femurs are getting really along. You feel that? Yeah. If you keep pushing your legs, you're going to get that length. Okay. And come in. Now we reverse it. It feels very different. So you push out long. Now start lifting the pelvis up all the way up.
Bend your knees and keep coming up to the carriage. If more familiar with this and roll it down. Excellent. And again, push out. Lift the pelvis up. Good in the knees. Over. Great. Watch. This foot is starting to turn out a little bit. That means your dominant on the outside of your hamstrings being that heel that way. [inaudible] and go up medial hamstring yet. Look sorry. Out, up. Good. Keep coming. Excellent. Don't turn the foot. Work in here more. Turn your foot in. Yeah, and town.
It's funny he didn't do that in the other direction. Go ahead one more time. There'll be four and lift up. Lift, lift, lift, lift and coming down. Rest. Come on up. Let's do a hip flexor stretch. We just need one red spring. I'm going to put your right knee on this beautiful pillow with your foot against the shoulder rest. Yep. And actually let's bring the bar up high so that you have something to balance.
Great. All right, and bring this foot towards the front just a little bit. No, by tension here is that you really work and lengthen through the front. So put some weight in your right, right knee. There you go. Yes. And I'll start to slide back and let your left hip flex as well. So keep the knee over the ankle. Yeah, good. No, I don't want this twist. You say very good. And so come at it means you went too far.
So bring it back in and bring the carriage all the way in to the bumper. Right? So this hip is flexing, this hip is extending. So the both hip bones are gonna stay facing the front. There you go. Good. And you're stretching. But I'm thinking the femur. So put your weight in the pillow there.
That's a stretch here in front of the hip. That's it. And then bring it up. So we're not doing a full split or anything. I don't want any rotation in your pelvis. So go back. There you go. Opening the front there. So it's important that both hips keep moving. Yes. Equally. That's very nice. And come back up. Do you feel that?
So both hips are moving? One more. We'll do three. This hip is moving and this hip continues to move. As soon as one of those hips stops moving, you stop. And that's the stretch. Okay, let's go to the other side.
And then exhale and bring it forward and up. And your last one, reaching back.
So the first position we'll do 10 repetitions of a curled back. Right. And would I like to see is a nice angle of the thigh bones back and a real lift of the pelvis up off of the thigh bones. Very good. And a nice continuous curve through the crown of your head. So we'll come back a little more actually. Yeah. Do you feel this connection between the crown and the tail? Very good.
So you have to maintain that. Here we go. So you're gonna inhale, press back, exhale coming. Easy. Good. And XL come in. Good. And we want to maintain this nice curve of the bat using the breath coming all the way into the bumper without banging. Good. Seven, eight, nine and stay at the bumper 10 now that was extend through the spine. Nice. Flat back. Same thing. Inhale back. Exhale. Come in. No pause for a second. It'll tails a little bit too. Oh, that's it. You have to work in the TL junction.
Actually right here at the bottom of the ribs at cit. This is where you got to stay stable. This is good. Excellent. Good. Bring all the way into the bumper, right? Eight, nine, 10. Now we're gonna push back with your arms a little bit. So what? The arms, you move the carriage away. Now you've got a hold that position. So you're working your stabilizers of your shoulders and now you're going to pulse for your buttocks to push the carriage back. So you've got back and in, try to keep the pelvis. Watch this spot again. Yeah. TL Junction. Good.
Press into the heel. So the heel to sip on connection against stabilize there. Stabilizing that [inaudible]. Very good. So heal the sit bone again. That's it's a little bit of a glute work here. Heel into the sip bones. Good. Keeping the TL junction. Excellent. Good. Push back one more time and then drop into down stretch.
So bring your chest forward and not get a nice opening and stretch. Come in, lift up off the bar and push back. Yeah, good. You don't have to elect all that. That was nice and pushed back. And I just want you to get a nice opening of the front of the body. So the chest is coming forward and up. Good. And again, back and small lift. Beautiful.
Lifting up and back. Uh, last time and back. Lifting up
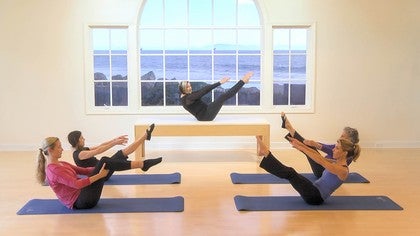
So we have the velcro feet that I love to use as an image that your feet are squeezing together. And W against your arms. Press your thighs out against the arms a little bit. So we have this counter of squeeze the feet and arms pressing. Nice curve through here. All right, so you're going to inhale. Exhale, reach for your knees, touch your knees. Good. And now inhale, bring your arms overhead, circle the arms. Exhale, touch your knees again and bend the knees and very good and out. Touch the knees. Now the inhale is here, Xcel and that's all right.
That's all right. I was making you hold longer and so touch your knees. Good and hold that position. Arms overhead. Exhale, touch your knees and then bend in. Just makes you hold the position a little more and reach and open. Now this is plenty of work. Keep going. We can add a little arch over the box if you'd like.
So reach and now as you read, you go back, easy circling arms. Exhale, reach for your knees again and bend in. Very nice and again reach. You don't have to do that part if it's too much, but it does feel really good to go into that arch and then reach for the knees. Perfect amount of curl. Good. Two more times. Reach. Nice arching. Good. Exhale, reach. And last one, reach, arching. Beautiful. Reach for your knees. Now hold the back of your thighs and rock a little bit gently to come sitting up like rolling like a ball and put your feet on the shoulder or the headrest.
Great. Perfect. Grab the straps now. All right, so what we're going to do is you want to have an enough position of your hips on the box, so when you roll back, your shoulders are going to be in the same place where you were. So reach the arms forward and you're going to hold the loops. That's fine. All right, so you're gonna start to roll back and you're gonna bring your legs up. That's it. The carriage has been very nice. Now here's a choice for you. You can hold the legs in this position or you can go into the teaser position and you're going to XL. Roll Up. Let the straps help you a little bit.
Rolling up and rolling back down, keeping the curl good. And again. Exhale, rolling up.
Good and curling up. Good. If you need more assistance, keep going. I do two more. You can always add a little more weight. She's got one red spring, so it's not a lot of weight. If you have like two springs, it actually helps you come up. It's a nice way to work on the teas are enrolled down and bend the knees and asked. Excellent. Nice work. All right, so come on up. All right, now we get to go the other way.
So we're going to lie on your stomach with your head this way and one red spring is still good. All right, so walk yourself up along the frame and grab the risers here. So we're going to little counter pose. Go now. Hopefully she's sweating so she's sticking to the box, so that's good. So you might have to put a sticky mat down so you don't slide off the box. Now just hang. Just let the carriage give you a stretch.
So the box is being pulled by the spring in this direction. Great. Okay. Now let's bring your hands down just a little bit more on this side if that's okay. Great. And I'll have your head in alignment. All right, now just give me a little bit of a scapular glide without bending your elbows. Pull the box towards the riser. Perfect. And then let it go. So you're getting a little laugh. Fascicles stretch here. And again, just contract is like your own muscle energy technique here and releasing it. Rage. Good. And again, contract and releasing.
Enjoy that stretch of the back. Good and reach. Go ahead one more and release. So we're going to do one more and you're gonna hold it for a moment. So they had in Poland, hold and now lift both legs up off the box just a little bit and down. Go ahead and separate your legs a little bit.
So we get them in line with the hip socket here. So again, lift the thighs just a little bit. Good. So here you are, stabilizing through the shoulder girdle, right, holding it there, and just working hip extension. And again, it's a small lift. Good. And lift. Good. And draw them together. Very nice. Good. Not your legs. I just meant the top of your thigh. Sorry. Yeah, I like to have the thigh bones in line with the center of the joint of the socket there and then using that. Good. Very good. One more time. Go ahead and rest and then lengthen out again and let that sit. Now you can let your head go. Excellent. All right, now walk your hands.
Want carefully back. You need to grab your straps. Okay. And we'll do a little polling straps now, but we're going to add a little rotation. All right, so you're going to look down under your left shoulder, so look down and under your shoulder. So it's over there. And you can do a diagonal. You're going to scan. So you're gonna look up, look center, and then you're gonna look over to the right behind your shoulder. And then the diagonal, you gonna look back to the floor and then back down. So it's flection under your arm extension as you extend, and then you're rotating back and looking back that way. So the small movement, it's not real big in the neck.
And we're working the upper area of your shoulders there. So here we go. Actually, why don't you more forward a little more? Cause you'll have more range than to curl over. Excellent. Good. Alright, here we go. So she's rotating to the left, looking under the left armpit. And as she's pulling the straps along, the head's coming center and this gradual movement. Good. And coming back down. Good. And again, up.
Now keep this part center. Just turn the upper back there. Turn, look over your right shoulder. That's it. And come back. So I'm interested in the upper area of your thoracic and looking up. Now look over your right shoulder and then reverse that path as you go down. Going down the head, the arms. No, no, no, no, no. So you're going, yes. Just what you were doing. Sorry. Yeah.
So I want you to look from the diagonal below to behind you on the right and then you just go back down. Very good. Yes. But I want you to keep the middle part of your rib cage stable. So the head, so this part's staying stable. You're lifting the chest is just the upper back and shoulder. How do you feel that in the upper back? More? Yes, very good. Try the other side. Looking under the right shoulder. This is not easy.
And look up and around to the left and then down. Good, right? Keep those ribs. The lower ribs on the box. Go ahead, look under your under. That's okay. Take your time. Lifting up, looking over. Very nice. That's a nice one. Good, good. And again, keep that lift up so you don't move the lower ribs at all and keep turning your head and upper back. Yeah. One more. I know it's not an easy one. So we'll work in the upper shoulder. You can feel that upper shoulder, upper back, and your neck. There we go. And come back down. Okay. Come on up and let's do a nice mermaid stretch. We care about that now. Yeah, a little bit. You could just stick to police [inaudible]. Yeah, yeah.
Okay. So let's just do a nice easy mermaid. Okay. Very simple one red spring. I'd like for your shins to be against the shoulder pads. Okay. So that this arm is actually as straight as possible right at the bumper. Bring a little bit in front of you. Alrighty.
So lift the arm up and go ahead and push out.
I'm going to have a little same thing with a little twist. Now lift up and bend. Easy. Good, right? So we get a little bit of twisting so you get a little more of the back. Yeah. And then a little bit more around the side so you can even move a little bit to get that fashion to lengthen out by doing a little bit of this gliding movement. And it feels good on your spine as well. So we get more of the posterior fibers, more of the anterior fibers and Russ, let's do the other side.
Very nice stretch. You'll see that from the back a little bit more. Okay, so nice. Straight on just year, everyday mermaid and reach. Yeah, and come back. It's always nice having a teacher there to hold your hip and come back. It always feels good. But if you just put your intention of putting a weight into that hip, you don't have to keep it down.
But the idea that your weight of your hip is dropping towards the carriage and you're opening up the intercostals on this side through here. Very nice. And come up and again and reach nice and do one more and lengthen and come back, right. Grab the front shoulder rest, stretch the arm up to create that length and then pull yourself over a little bit. Good. And just make sure you're not compressing too much on your right side. You're doing just fine. But just for the viewers, just be sure they're not pulling real hard.
We're really just trying to open up this side. Good. And breathing again, and just breathing into those guilds of the lungs there and there you go. And rest. Good. Now grab the back handle and we'll do a little bit of rotation with it. So you're gonna reach up and then just easing. It's not about cranking your spine as much. It as this feeling, the fascist sliding and the tissue lengthening. Right?
And then same thing here as you twist, just easy. Good. I don't want to see a lot of effort in the joints. I want to see the tissue lengthening and sliding. There you go. Can you feel the difference? Yeah. So we're getting that whole area front and the back. Very nice. Okay.
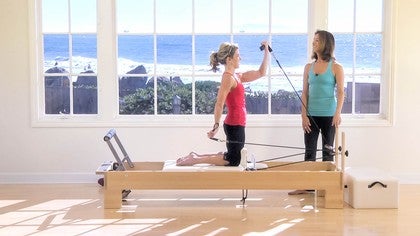
And come up. All right, so now we're going to kneel facing the risers one. Red Spring is good, right? And so we're going to do a little variation of posture arms. So we're going to hold the loops. You can hold just in your hands. And what I want you to do is you're going to start with one palm up and one palm down like this. Yeah. Okay.
And what you're gonna do is bend this elbow. You gotta reach that elbow forward as you pull the left arm back. So you're really pulling that forward and up. And then you extend the arm slowly. There's a Bicep, essentially contraction here, and then you're going to turn your hands over and do it this way. Pull and reach that elbow forward as you bend. That's it.
And of course you have to stabilize kneeling. Okay. And again, extend the arm, bring the arm up and switch. Good. And keep going. Good. Now if it's hard to kneel and balanced, you can always put the long box on the reformer and do this seated for just the arms. Okay. Maybe handles are better. Okay. And extend. Okay. They were just a little too long. Good. And bend good. Then stable. Another two, that's better. Actually don't want them to keep going. The ropes to be too loose.
They should never at any point come into slack. There you go. And see if you can also get the bicep to extent. So a lot of people need to really stretch. So keep it stretching as you. Yeah, it's very nice. And then you're contracting and you're lifting. So we're getting shoulder here and then extend resisting. Get the bicep going. Very nice. Let's do one more side and lifting that elbow up, lifting the chest to yes and extending very nice. One more
Strengthening. Okay. So let's do long back stretch. So I'm going to get you a small box.
So we're going to start seated on the bar and you're going to feel that elongation to the crown of your head. So what we're going to do is you're going to lift up and you're going to push the carriage out, curl a little bit through the tail, keep pushing. Is that too heavy? Okay. And now bend the elbows down, set your tail down long back even more and come in and then push up and you can sit on the bar. Okay, so that's one repetition. Okay. All right, let's try that again. So we lift up first and then curl the tail. Pushed the box away. So you're in a plank position, and then bend the elbows and now set your tail down so the back is long. And then push up and sit on the bar. Okay. Now if you're, that's could be enough for you to do three, five of those, or we can continue and not sit on the bar.
So let's try three in a row without sitting on the bar. So you lift up and curl and push and down. Good. Pushing up. And again, curl and push. Very nice as a more advanced version. And up last one. Good. And sit on the bar rest. Okay, reverse. You knew it.
Okay, so here we go. Go Up. And now you're gonna go long back down. So you'd come down. That's it. Now tail push is lift your chest and then come in and you can sit on the bar if you'd like. Go ahead. That's all right. I'll take that then take it and doesn't make it any less good lift. It's a matter of strength and endurance. You'd say. So sit.
Sometimes we need to work the strength a little more than the endurance. Endurance would be to keep going. Right? But the strength, credit, pause. Another rep, that's more important. Lift. Let's do the three and endurance training now and down curl, lift and coming in. Long back down, bend and lift. Good. Great. And down. Long back. Last one. Down and lift. Good.
And sit on the bar. Excellent. Very nice. Good. All right, let's finish with a look. They'll do a roll back with a little bit of a curl with on biceps. So come sit with your legs through. Uh, I think, uh, do you like handles or loops are fine too. I think the loops are mine. Okay. So what we're going to do is a rowing back. So you're going to sit up, but I want your arms straight. And what you're gonna do is we're going to roll back with the arm straight and you're gonna hold the position. We're going to do one row. Okay.
And then you're going to come up, we're going to do an accumulation. You're gonna roll back and do two rows and then three rows, and then we'll go to five rows. And then we're going to hold after the fifth row. And then we're going to bring the arms out to the side. I want you to reach the arms straight behind you and come forward in your forward bend. All right, so sitting up, right with the arms straight.
Everybody's in a habit of pulling, so keep your arm straight. So go ahead and curl back. Nice. You're going to hold that position. Exhale, row, arms forward, roll back up that one and again, curl row two, one and two and roll it sitting up. And again, roll back. Let's do three and one and two and three. There you go. And roll it up. Very nice and curl back.
And four, three, two, one and roll it up. Now our set of five and curl back and five and four, three. Excellent too. I'm going to hold the last one whole turn with the carriage. Bring your arms out to the side and move forward with a nice open, straight back. Reach behind your Django. Forward reach, reach, reach, reach, circling arms around in a nice stretch. Reach for your toes like this. Let the carriage pull you down. Gay, let your head go.
Get a nice stretch forward. Hold your feet. Good. Enroll up to sitting up. And then just one roll rolled back. That's right. Straight arms curl back. You're falling off and row. It's okay to adjust and out and go forward. Reached behind. Very nice and circle and then reach for your toes and or you can hold the shoulder rest if your toes are too far away for you and rolling up.
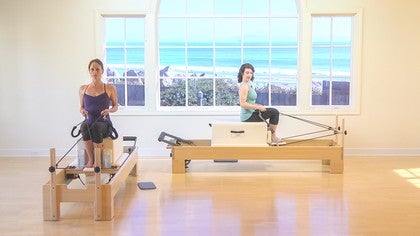
Okay. And rest. So let's just finish with a few leg circles and a short spine. So I do whatever your preference is to reds, uh, springs or, or red and a blue, right. And we want to just do some nice opening of the hips and um, a nice, easy on to talk you through short spawn in a very specific way. So pay attention closely to the cues. Okay? So it might be slightly different than what you're used to.
So check your straps to make sure they're even, cause even though the, they look even on the head rest, sometimes they're a little off. No. Why? It's always the right one. They must have extra padding on there. Rachel arrests in their left. Okay, so push out. Okay. Uh, all right, so we're going to start with that frogging idea again that I was working on with a double leg stretch and all so that you have the velcro feet working and the contrast of the knees coming into a v. Yeah. All right. So coming in. Good. Now I would like is that your feet actually do drop down, but I want your knees. Yeah. So the ropes don't bother you too much. Right? Is that okay?
Now drop your tail down a little more and now squeeze your heels together and your balls and you feel that activation. Yeah, it's very close to the pubic bomb and I like that. So push out and straighten your legs parallel so your legs are transitioning parallel into a rotation out without losing your feet. And then they roll into parallel. So you feel that spiral in your hip. That's it. Good. So you're spiraling out and there's a spiral in and you keep that activation of your feet pressing. Yes. Very nice. Good. And in short spine, this is how you start and you finish in the frog position.
So I'm just coaching you ahead of time. On those cues. Okay, very good. All right, now straight legs up and just do a few circles. There you go. Nice and easy. Worked pretty hard here. So we're just going to do five circles.
Now what I want you to do is relax your back and I want you to let the ropes pull your legs towards you. So go slow as I talk you through it. So let the ropes and let your back just relax. Let the ropes do the work. Now feel that point right about here where you feel like, okay, now I'm going to feel where I'm at the end of my hamstring length and my tail and my butt's gonna start to curl. So keep the ropes moving you, but start to curl your pelvis, but relax your back. There you go. Use your legs. That's it. Let your back hang. Keep curling. Keep curling onto your shoulders. Keep this tight. Tightness of the straps. There you go. Nice.
And then bend into the frog position without changing your position of your body. Okay? Now what I want you to do is have that little squeeze of your heel. You're going to keep your feet here. Drop your feet just a little more, actually. Yeah. Okay. Now keep them right here. As you slowly start to roll three through your back, your upper back, upper back is going. That's it. So you start to roll down. That's it. Can You keep moving? Are you stuck? Yeah, there you go. So when you get to the bottom of your shoulder blades, now pause.
You pull your heels towards your buttocks. At the same time, you continue relaxing your back and letting your spine drop and heels cause to hear you say that idea. So push out. It's that two moments that I love in short spine. One is this one right here where my back is relaxed. The ropes are actually giving me a nice stretch and and then I curl from the beautiful, keep it rolling, keep it rolling to your, on your shoulder blades, keep your straps taught and then you bend into the frog and then you freeze your feet and space and you let your chest relax as you start to roll. And then as your shoulder blades hits that break, now your feet move with your bodies. You're not straightening the legs, you move your feet as you continue to roll into the frog, into the frog and then push out. Okay.
And let's just flow with it and let it just relax and lift. Beautiful. Let your shoulders, you were asked, come into the frog. Take a breath in as you're exhaling. Go ahead and feed her, staying in space. You're letting your heart roll back the lower ribs of liver. And now pull your feet, let your Oregon's this, drop good heels to the buttocks, and then push out. Last one. Uh, enjoy this nice moment. Waking your spine up.
Nice. What's already awake? We're just letting it calm down actually, and down. Very nice. And heels to the buttocks and rest. Super good work. Thank you.
Mindful Movement: Full-Body Exploration
Mention
 |
Madeline Black (Teacher) |
 |
Robin S |
 |
Alex B |
 |
Lacey |
 |
Lori M |
 |
Kourtney C |
|
|
Linda S |
 |
Patricia K |
|
|
Diane G |
 |
Celeste E |
 |
Annie M |
|
|
KelE |
 |
Gia Calhoun |
 |
JaiFit |
|
|
Betsy W |
 |
Deborah K |
 |
Kristi Cooper |
|
|
Jody H |
|
|
Jennifer A |
|
|
Laurie H |
 |
Laura U |
 |
Jodie |
 |
Hannah M |
|
|
Paula M |
 |
Sarah D. Carrasco |
 |
Sarah N |
|
|
Holly P |
 |
Praveena C |
|
|
Robyn S |
 |
Sharon Spaziani, Lmt, NCPT |
 |
Heather M |
|
|
Yoly N |
|
|
Kerry |
 |
Lynn P |
 |
Yugonda D |
Comments


You need to be a subscriber to post a comment.
Please Log In or Create an Account to start your free trial.
