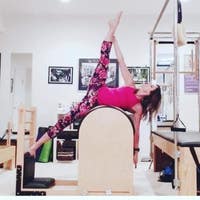
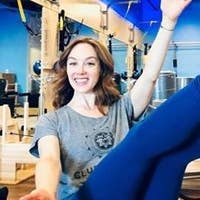
Description
About This Video
Transcript
Read Full Transcript
Hi, I'm Christie [inaudible]. I'm here from Miami, Florida from the Pollstar headquarters. And we're going to do a reformer class today that'll focus on getting us out of our hips and into our extensors and side body and really lengthening out the front of the body and hopefully giving you some insight on how to get away from the sticky, clicky, overused hip flexors that tend to happen sometimes in our everyday lives. And when we're on the pilates apparatus, it becomes very, uh, apparent. So, uh, if you guys can just go ahead and start lying down. We're starting with a heavy spring setting, um, to help give the leg some feedback. To get started. We'll place the heels on the bar at about hip with the part. And um, remember when we talk about the hips, we're talking about the hip sockets, so that is about as wide as your sits bones still.
And I'm just going to bring your heels in a tiny bit closer and well before we get started, just to allow your feet to relax for a moment and notice that you're using the least amount of effort in your legs to hold that body position. And we'll just take a deep inhale through the nose. And as we exhale, allowing the pelvis to settle in the mat, the ribs to start to soften the back of the jaw and throat to feel heavy. And just take a couple more breaths there. And with every exhalation, you want to allow everything to settle back into gravity and really feel the support from the reformer.
Let's take one more deep inhale, exhale and creating ease. And the intention for our class today will be to use the least amount of muscle effort possible, only what's necessary. And as you're ready, you'll start to send your second toes up towards the ceiling, bringing the feet into a little more of an active position. But again, be very mindful that we're not pulling the toes back as far as we can, but rather thinking about how the heel presses into the bar and on your following exhale, go ahead and press all the way out to straight legs and then stay there for just a moment while you're there, emphasize really reaching out through your heels so that it feels like it's your pelvis that wants to root out through the heels as opposed to feeling like you just want to push that bar away and then gently bend the knees to bring the carriage back home. We'll exhale as we press out and inhale as we return. If you find that a different breathing combination requires less effort, then by all means do what feels effortless for you. I'm just here to make suggestions, always more important to listen to your body and based on what you hear, choose what you find appropriate. So as we go through foot work, again, this idea of wanting to stand on the foot bar and really send the top of the back of your thigh down towards the floor so that we start thinking more about opening the back of the leg and the front of the hip as opposed to pushing the bar away. We'll just do that one more time.
Notice if you can continue to identify with that sensation of wanting to stay in contact with an imaginary arm, an imaginary bar, or as if there were a mat under here. Sometimes I'll even roll something under there so that I'm giving my hip extensors a little more feedback about where I want them to go because the front of my legs tend to get so short and I think a lot of ours do. Now. The next time we roll up onto the tippy toes, we're going to stay there and go into walking in place and as you straighten both legs, make sure you have that pause where both knees are straight before you switch. It's such a common movement pattern, it's really easy for us to get sloppy and just go into the stretch of the heel coming under. Notice that you're keeping about 50 50 weight in both of the feet as you go through the movement in your ankles. And while you're doing that, notice if you can relax your toes a little bit more so that again, we're promoting more mobility through the toe, metatarsal and ankle rather than gripping and holding on.
And we'll just do that two more times ladies and once more with each ankle. And then go ahead and bend both knees, bring the carriage all the way and let's bring the heels back up and onto the bar now. And take your heels as wide as the bar. As long as that feels comfortable. And for a moment, place your hands on your hip bones and find those two crests. And notice that the knees are rolling out more or less in line with them and that your second toes are also in line with your kneecap. And as you exhale, press all the way out to straight legs and then gently bend the knees to return. Keep moving this way and imagine there's a sandbag on your pubic bone and every time you glide back and forth, there's a little more sand in that bag.
And as you bend your knees to come home, your knee caps are reaching away from that very heavy sand bag. Let's do three more this way and start to slow them down just a little bit on the return. Nice. Pressing all the way out to more coming in, a little slower and one more coming in a little slower and now staying all the way back out, really pushing long. And as you exhale, keep your knees straight, pivot on the heels to turn your hips in and then pivot on your heels to turn your hips out. Do that a couple of times and notice the tendencies of the knees wanting to buckle. Does the do your feet start to slide? All that stuff will start to happen.
Make your movement just the little bit smaller and notice that you're turning the head of your thigh bone in your socket. So really what we need to do to get out of the hip flexors and into other areas is allowing that femoral head, that head of your thighbone to drop back into its socket and on the reformer. Both gravity and the springs are helping that happen. So the next time that you turn in, stay there and as you exhale, now bend your knees and allow your knees to find each other. Keep them turned in as you press back out.
Last two, we want to feel our muscles working. We don't want to feel sensation in our sockets and then press all the way out and stay there. Again, reach really long. Turn your hips out, bend your knees to bring it home and now turn your hips in. Pressing out with that Turnin and keep that circle going.
Visualize again that sandbag on your pelvis is just getting heavier and heavier and the head of your thigh bone is able to circle around and go deeper and deeper in its socket. Last time. Stay all the way out. Now Bend your knees with the turn in to bring the carriage home, turning out to press back out and keep that going. And if you do like to dance to Michael Jackson Movement, the music rather, this movement is really helpful, right? To help clean up that pattern and really just to keep a safe when we're hiking or doing activities where we're not, don't have a mirror, don't have a control over the body, but rather we're just kind of holding on, uh, and reacting to the stimulus last time. We'll bring the carriage in and give those feed arrests. Bring your heels a bit closer together now and we're going to bring the head rest down.
And so the flip side of getting out of the hip flexor is getting into the hip extensor and we're going to do that a little more intensely. Now we're going to bring the heels on top of the bar. I think of the heel like a book on a shelf. So all you can do now, ladies, is pressed down. We took away the ability to push out. Now again, use the least amount of effort in your feet to keep them in that kind of standing position. You know, you're using too much effort if you start to feel the burn on your shins. And if you do, it's not a big deal. Just soften the tops of the feet a little bit just like that.
If you were feeling that discomfort. Otherwise we're going to keep the feet looking like a book on a shelf and on the following exhalation start to roll the tailbone through the knees, peeling yourself up into a low bridge just to the point where your ribs stay on the mat and then gently roll out of that. Let everything release when you come down and then we'll repeat that again. Now while you're doing this, notice that you're leaving the ribs on the mat and also notice that if your pelvis is rolling up, the flip side of that is that your rib cage is rolling down and if you wanted to get really crazy on this, we could take some springs off so that you would have to emphasize pressing down and also pulling in. And when I do it, I like to think about my hamstrings. The muscles on the back of my thighs are tightening to help pull my pelvis off of my lower back.
So when you curl up in a low bridge and you keep your ribs down, you might feel that pleasant stretch in your lower back. If it does not feel pleasant, change your breath. Make it smaller. Okay? Always listen to your body and on the following one you guys will curl up a little bit higher, letting the ribs now leave the mat, but internally feeling like you want them to stay down. Take a breath at the top of the bridge and then gently curl all the way down. Once your body finds the mat, let release and if you're feeling energy in your shins, let your feet relax as well.
And then we'll start over again from zero going back into the foot flection, pulling that bar in, rolling the sitz bones through the knees. Keep curling up a little bit further. Let it feel like your knees really want to travel over your second toes. So we open up the front of the body and now keep your pelvis where it is and let your breastbone come down first. So pretend your pelvis. Yes, that was it.
Pretend your pelvis wants to keep reaching up towards the ceiling, you'll increase the articulation through your spine and you might also feel your hamstrings yelling at you a little bit. If the hamstrings cramp, move faster and breathe more. Okay, let's do that two more times. So we're pressing and pulling with the heels to generate that energy of the knees, reaching over the toes. Now Amy's going to keep her pelvis there energetically and start to curl down from here first. And I can help her by giving her spine just a little bit of feedback. And so that idea of increasing opposition throughout the movement is really helpful to get more bang for the time you put into practice.
Last one. And as you continue to move, notice if there's any tendencies of holding the breath. A lot of times when we start to really focus in on one part of the body and create a fatigue, we might start to hold the breath cause we don't want to feel the discomfort. Encourage yourself to keep breathing through it. That was great. You guys. Now this time, bring your feet a bit closer together in line. Um, almost touching, very close to center.
We're going to again exhale and curl back up into that bridge and then hold it there and breathe. And as you're breathing, allow the breath to move into the part of your body that's still touching that mat or the space between your shoulder blades. On your following exhalation, you're going to press down into your left teal and bring your right leg up into table top. Bring the right leg down. Now press down through the right heel to bring the left leg up. So rather than thinking about you guys can keep moving, rather than thinking about the leg that's moving, start to think more about the leg that has to press down in order to free up the moving leg. So what has to stay in order for something else to go last one on each side. And then we'll bring both feet down and gently roll the spine all the way back into gravity.
And once you've come down, let your feet relax, let everything go. Inhale your arms out into a t and then let your knees roll from side to side a couple of times. Just freeing that up. Do you guys feel those hamstrings? I bet you did. So that's the feedback you want to feel right? If we want to improve the hip flection, we really need to address the hip extensors.
Now the next time you come into center, go ahead and hug your knees into your chest. This is a really common movement that we do. If you feel anything at the front of your hip and your hip socket, put your hands behind your knees instead. And that's going to increase the angle at the front of the hip as well. Just to give yourself some ease.
Let's put the hands on the knee caps and as you exhale, move the knees away from you, circle them out and around and stir the contents of your hip sockets basically. So again, does the movement feel smooth and easy? If there's anything about it that's not smooth and easy, just leave that part of the range out of the equation. And it's okay if you find a pop or crack right? And it happens once or twice, not a big deal.
But if it's something that is part of your identity and it's part of who you are and it's always done it your entire life, but it doesn't hurt, that's the kind of stuff you want to notice, right? That's what we don't want to encourage over and over again. And then repeat that circle if you haven't already. And you can even just do this sometimes, um, to help create some freedom in those hip sockets. All right? And then when you're ready, you can bring your hands behind your knees and either roll up to sitting or turn onto your side and come up to sitting. Whatever's more comfortable.
And then we'll take it down to one blue spring or one light spring, just one light spring. And you're going to lie on the right side of your body. Now if you're comfortable and by comfortable, it really means what's the width of your shoulders. Um, you could bring the headrest up, um, and let your head rest on the, on the head rest. Or You could slide your bottom arm under and under your head. If neither one of those options is comfortable for you, just elevate your head with the yoga block or some towels or a pillow. Um, just so that you feel like your shoulders are still stacked and your head is sitting in the middle as opposed to your head kind of falling off to the side when you're sideline. And then you'll bring your knees up just a little bit more so that we look like we're at 90 90 lying on our side.
And that bottom leg is a little awkward when we lie on the side on the reformer. So really just find the place that feels the most comfortable for you so that you can get your hips stacked up, your rib sitting in between your shoulders are stacked up in the crown of the head is in line with the tailbone. Now we'll take the top leg and bring it to the back of the bar, sliding the toes there. So a big part of freeing up our hips and being able to work into other areas is also freeing up our feet. So I love this because the foot bar really requires the toes to have to flex already, which is what we need when we walk. Now as you guys exhale, start rolling the heel towards the bar first and let that activity start to create the movement of the carriage so that your heel finds the bar before your knee goes to straight.
And on a light spring it requires a lot of mental control rather than real muscle effort. And then bend the knee and again, wait for the movement to peel your ankle and your foot back into the start position. Well, exhale as we press out, trying to strike with the heel first and then create the length and then gently bend the knee and wait for the movement to peel your ankle back through space. Now again, if you feel any burning sensation through the front of your Shin, let that heal come off the bar sooner. So you also have to listen to the way your body feels to figure out what timing is appropriate. Because every day is a new day. Every day is a new body, a new experience. So make sure you're listening to your body to choose how soon or how long you'll keep that heel on the bar.
And you're not going to be using the muscles in your face or wrinkling your lips to breathe. Um, so if you go,
So we're going to bring it in line with the hip, which in of itself is a challenge because now the strap is allowing for a lot more movement. But imagine you still have the foot bar to push your heel through because the more you reach through the top leg, the more space we're going to have, um, underneath the side body that's against the mat. Now it's very important that this space is generated by reaching through the top leg rather than mechanically trying to move your rib cage around cause we want it to feel holistic and comprehensive. Let's put the top hand on the top hip to help you feel where it is in space. And as you inhale, go ahead and take your leg forward only to the extent that you can keep your hip in the same place. And as you exhale, brush the back of the leg back to the start position.
So we're inhaling to move that leg forward and exhaling to brush it back. So when you exhale and brush your leg back, think about the top of the back of your thighs, starting the movement and your leg. Your foot's reaching long so that the, the foot's always reaching long. And the reason that it moves through space is because the top of the back of the hip is closing and opening. So that again and again where it directing the movement of the extremities back into the breath, back into the big hip socket. Last one here. And now you'll keep your foot in line with your hip.
Just till there, we're going to turn that leg out and you can allow your leg to move slightly forward to encourage the turnout just cause it's gonna make it a little easier to keep your hips stacked. And now as you exhale, take your leg towards the ceiling and as you inhale, brush your leg back down again.
And we'll just do that two more times long. Exhalations and the next time that you reach that leg down will be the last one. Just one more while we're here. Again, bring that foot back down and in line with your hip. Hold it there so that again, it feels like you're standing on this top leg and really pushing long again so that we keep the length from the crown of the head out through this heel as if your foot were staying in the same place. Exhale. And now bend your top knee, bring it into a dead bug position if you will, and then press it right back out.
So what's really common here is that when the knee bends, the lower back might start to round. So if you inhale exactly, and Amy is demonstrating that for us. So if we can inhale when the knee bends, it might take away the tendency of the spine wanting to go into flection. It may help you stay long. You can also imagine that your breath creates a big balloon behind you, so your breath becomes an imaginary pillow that can support you. And if your legs are burning by this point, that might not really help. So we'll just do a couple more last time.
Beautiful you guys. And then bring that knee back out in front of you carefully. Take the strap off of your foot, park the carriage first, and then turn onto your back. For [inaudible]
That's always my favorite part, right? Is that weird, proper receptive feedback of like, oh my gosh, one leg just got longer. One hip is heavier, maybe you feel taller through one entire side of your body. Um, it's also really gratifying to see that we can experience the change in such little time. So now hug your knees into your chest. Separate the hands on the knees, pull the right knee in and then pull the left knee in and notice if it's easier to bring one knee versus the other. So does one hip socket feel different is you're drawing it in versus the other?
It does. Thank God. All right. And sometimes it won't and that's okay too, right? So I don't want you to think there's a right or wrong, right? We just want to increase our awareness. Now we'll turn onto the other side. We're going to do the same sequence on the other side.
We are on one light spring and a big part of this is just getting the body set up in the right position from the beginning. So you want to see if you had the bird's eye view kind of thing that the head, the shoulders, the ribs and the hips are all stacked up on the same plane. So go ahead and bring your top leg back up onto the bar now and again, you want to start in that position where you feel like the big toe, second and third toe are pretty much on the bar. And asking for a stretch. And as you exhale, direct the movement through the heel. I want the heel to strike. And then the leg to finish opening, really creating lots of length so you feel the space through the side body and then gently bend your knee and allow your foot to peel off of the bar.
Exactly. So the, what's really awesome about doing this is that as you're pressing out your toes, ankle, knee and hip are getting this likes walking backwards sensation, which is completely foreign to us. And it also allows you to start tuning in to what it feels like to really length thin and ask the flexors to work you essentially where they're getting longer. And then gently bending the knee to come in. Let's just do that three more times ladies. And again, as we exhale, we encourage, uh,
And last one, very nice. And then once you come back in, we'll take a moment, bring the knees back together again for just a moment. Go ahead and grab the strap and then you'll push yourself back out. Or you can pull with the strap, whatever feels more comfortable. Again, always looking for the easier way to do things. Place the foot in the strap and then lengthen your leg all the way out so that it feels like you're standing on one and now you've got that instant memory of what it felt like to have the bar to push against. So now go back to that sensation, like you're really pressing that bar away. And as you inhale, we'll glide the leg forward and as we exhale, we'll think about the top of the back of the thigh rolling back.
So again and again, encourage your mind to drop into the big wheel at your hip socket and notice that your foot is there to energetically make that grit longer. And the hip socket is what's creating the Movement for your foot to go around. There's very conditions to pushing off the feet and propelling ourselves forward. So when we're in our Palladio's environment, we can really drop in and start to change the way we think about where these movements come from, which may give you a different muscle experience, which is always exciting. Let's just do that once more and the next time that your leg is pressing back again, you'll hold it there and allow the hip to turn out now. And as you exhale, let your leg rise up and as you inhale again, reach it down.
And really you can take this idea into any of the exercises on all of the apparatus and the mat where we're going to identify more with the wheel of movement in that deep hip socket and less with the extremity so that it feels again and again, like the extremity. The movement is an extension of your breath, it's an extension of your center. Let's do three more here. So go ahead and press out just a little further. There we go. And now keep that feeling of wanting your foot to brush the corner of the room as it comes up. Okay.
And you know when the range gets really big, it's really hard to keep that feeling of reach through your foot. So if you find that if lessening the range of movement increases your ability to keep that feeling of reach, then make the movement smaller, it'll also become a little harder, right? It's takes more control to move in a smaller frame sometimes. So push me away even more. There we go. Keep that feeling through your hip on your leg comes up or only take your leg up until you can keep that feeling in your hip and then exhale and press it down last time. Now hold it there.
Turn your hip back into parallel. Bend the top knee. That was a great lengthening there. And then exhale, press it back out. So we're inhaling when we bring the knee in, exhaling as we're it out and again and again. Remember what it felt like when you started on the foot bar and try and get that feeling of the back of the thigh kicking back in order to open the front of the hip. Just do that two more times. You guys almost done. As the body gets heavier, we breathe more.
Make it more about the breath and less about the movement and the next time will be the last time you'll bring that knee all the way in and go ahead and take the strap off of your foot, park the carriage, and then carefully lie on your back for just a moment.
All right. And then we'll either roll up to sitting or turn onto our side. We're going to place all of the springs on now cause we'll bring the short box onto the carriage at this point.
We just started with the reform or we're going to continue working on the side body. So you guys go ahead and sit up in the center of your, um, box. We're going to turn to our left so that we hook the right foot on and I'll just take that down for you. Hook the right foot under the strap.
And now put your left hand on the head rest at first. So your left hand is like a, a peg on a bicycle and it's helping to support your trunk and just bring your right arm up and over your head. And as you inhale, Recall Mermaid, start to bend your left elbow just a little bit. Continue to reach the right arm up and over and start breathing into the top ribs. So your foot against the strap, you're really like hanging off of that leg almost. It might create a nice feeling of space in your hip and an opening through the right side of the body. And as you exhale, bring your right arm back up. Start to straighten out your left arm just to come into that diagonal.
We'll take a breath there and as we exhale we're going to take it back down again. So what we want to emphasize here is the use of this strap, helping to create some space in here as well as the use of gravity, helping to create some space in that side body. Let's just do that once more. Beautiful you guys and then coming right back up. Now this time we're going to take the top hand forward towards the carriage or rather towards the frame of the machine.
So you place your right hand on the frame. Yep. And your left hand's going to come back and just hold it there for a moment and breathe. So your left hand will come here. Your arms can stay straight. Gently push the carriage away so that as you inhale, it's creating a space in here. You can start to look down, Tuck your chin towards your belly button and as you exhale, roll the shoulders wide and reach your breastbone forward and up. So there's not going to be a whole lot of space.
You can recall like a baby swan here. Inhaling as we round and we go into more of a like a Cobra back and as we exhale we'll roll the shoulders wide, use the frame of the machine to pull towards the box and help protect your chest forward and up. And then again, we'll inhale and curl back up with that feeling of really spreading the back of the heart open. Exhaling the shoulder blades gliding down. The hands can pull back, reaching the rib cage forward and up. Just do that two more times and notice how nice of a job they're doing if keeping their neck long so you don't have to crunch the neck up to look forward. The feeling is more about that space between the shoulder blades and the heart.
Last one. And then we'll stay there. Bring the left hand back onto the headrest, turning back to the side and reaching the right arm back up and over your head. Go really long. And now as you exhale, reach the right hand towards the ceiling and come up just a little bit. Pretend there's an elastic holding you here cause you're going to hold it there. And now your left hands coming behind your head. As you inhale, you're going to lower yourself down towards the floor.
Continue to reach the right arm up in over the head. And as you exhale, use the arm first. Let the arm direct the movement to help the trunk come up a little easier in hail gravity takes you down, use your breath and your right arm to start bringing you up. And we've got some strong ladies here. Okay? If this is not feeling that great, stay here for just a little longer and let the arm come up first and then this arm can feel like it wants to grab your foot and you'll come up a little easier that way. Okay, so always look for ways to um, intelligently cheat.
We want to have the movement feel as easy as possible and over time we'll surprise ourselves. Last one. And then we'll come all the way back up to sitting.
And in my mind it's like we want to create the space and then load it so that we take it home with us. Now turn on, we'll do the other side. I want to take that space home. All right, so we'll start with the right hand on the headrest. And at first it's a mermaid esque movement where you're reaching the top arm up and over your head. Allow the bottom elbow to bend as he use gravity and the strap to open the side of the body up and then exhale and come back up into the start position. So at first really try and use the apparatus and your breath to get rid of any layers of effort.
The right hand will go back. We'll inhale like an angry cat that's in a twist. Spread the space between the shoulder blades. Exhale, roll the shoulder blades back, reaching your breastbone forward. And we'll do that a couple of times here. So it's really lovely because we're doing a very familiar movement with the spine that again, that sagittal beast in us, but we're doing it in rotation now in a very different relationship to gravity.
So it's going to give our body a lot of opportunities to learn something new, to create a new path in the spine for that movement to move through. And last one, inhaling, we round through the upper back, exhaling as we reach the breastbone forward and up. Then you'll find that space where there's not much effort. Place the right hand back onto the head. Rest. Bring the left arm back up. And now as we exhale, we're going to bring the left hand to the back of the head and come up just a little bit more as you're going to hold yourself in that position now.
And then we're going to start lowering it down. Right hand behind the head. Yep. Sorry. And then exhale and come back up. Beautiful you guys. So again, if this is new, right? If you're not doing a lot of lateral work at home, even if PyLadies isn't new to you but you're not doing a lot of lateral work, this might feel pretty new. You can let the top arm lead the way so you can let the arm come to your hip first and then use that to help glide you up.
It makes life so much easier and then use it less and less and less so that you are challenging yourself appropriately. And again,
This is the only type of pull up I can do. It must confess and now start to energize your legs towards the back wall. If you find that your glutes think that that's an invitation to come into activity, then maybe don't do that quite as much. Again, find that in between space where there's still energy through your legs without a whole lot of muscle activity. As you inhale, let your shoulder blades glide up towards your ears so that we're kind of saying, I don't know. You're just shrugging your shoulders. Exhale, keep the arms straight and glide the shoulder blades back away from the ears. Inhale that the shoulder blades glide up, creating lots of space. Thanks to the spring that's pulling your arms off and then exhale, gently glide those shoulder blades away from the ears.
And as you find that movement here, again, check in with your hands and notice that you're just using your fingertips. You're just kind of hanging off the fingertips. We don't want to grip because that might make the shoulder stay up right and my create more tension than we need and also energize the top of the head away from the feet as we continue. And we'll keep going there a couple more times and you might find that as you repeat it, it feels like your arms get longer and longer and longer, and your body is able to go out a little further. We're going to add on to this. So now on the next one, as the shoulder blades glide down away from the ears, start to bend the elbows, keeping the elbows drawn in towards one another, pulling your head gently through the risers, but stay on the horizon, keeping it low, and then start to straighten the arms back out.
Going really slow. Really go all the way out until your shoulders glide up to your ears. And then again, you'll exhale. Initiate with the shoulder blades gliding down. Notice how your collarbones go really wide and then pull with your fingertips, keeping the elbows drawn in and now ever so slow the Leong. Thin our votes.
Let it go all the way up on the inhale and exhale to repeats. Come back really slow. We want to come back really slow because life doesn't provide a lot of feedback to help us slow down, right? Our arms live out here. They're always open. So really take your time because all these tissues, going back to that side body idea, all these tissues here really have to learn how to lengthen out to decelerate. Bring in your arms overhead, which is a very foreign concept.
And when we think about the way we use our bodies in everyday life, we're going to add on one more layer here. Now,
So hopefully you start to find your triceps. And again, the more you use your fingertips and not a grip, the more you're going to feel the triceps communicating into the armpit. Right? In Miami we jokingly but not really jokingly talk about the armpit workout, right? Cause we live in tank tops so we want to be able to wave goodbye and use regular table salt and use a shaker at the table, right? A lot of times you use sea salts cause you just have to do that and don't have to shake your underarm. So this is a great armpit workout.
Careful cause you're on a light spring and just fold into a child's pose for a moment. If child's pose is not a break for you, cause I know for me it wasn't for years, you can just have a seat instead and fold forward and take a couple of breaths there. It's a wonderful place to breathe after having done some extensor work in this position. And again, if you can't do this, you can lie on your side and still bring your knees in because your belly can't expand when you're breathing deeply in this body position. So you might start to tune in to how the breathing moves or influences or speaks to the lower back. So if you really try and take a deep belly breath, the belly can't expand. So something else is going to have to expand. And even if it's not in your lower back, again, it might just help you have a little more awareness about breathing into other parts other than the belly. And before we continue, why don't you guys come up onto all fours for just a moment and we'll just move through the spine here on all fours and Quadra pad.
So scooch your knees back and as we inhale, we'll round the spine, pushing the box away and looking in towards the belly button. And as we exhale, we'll roll the shoulders back, lifting the top of the head and the tail. Oh, we'll just do that a couple of times. Inhaling, when we expand the spine again, think about breathing into the back and as you exhale, roll the shoulders back and really shine your heart forward. Just two more.
Inhale into center, and then you'll exhale and do the other side and the common tendency, and it's a smart one, is for your hips to want to move out of your way to let you move, but what you want to do instead is turn your hips in the same direction so that you do feel a healthy compression on one side and a lot of length on the other side. Yeah, it feels really good if you have cats and dogs, they're great teachers. Keep going. I'm just going to move with you. They do this often when they're wagging their tail. If you, they move so fast that it was hard to appreciate sometimes, but if you take the time to watch your four legged pets, you'll learn a lot of cool stuff you can do in [inaudible] last one and then we'll find our center and very carefully step off of the box. We'll put that box back where we found it. Thank you box. And now we'll come up onto our knees with a heavier spring.
So we'll use one full spring now and you guys can go ahead and come up onto your knees with the knees in line with this shoulder blocks. Pick up the straps and crisscross them holding on above the hardware.
So just remind your nervous system. The emergency exit is back towards your heels. So now with that being said, go ahead and stay up on your knees and for just a moment with the arms straight out in front of you, let it feel like the straps are asking the arms to again come out of their sockets. So go back to what you did when you had the box under you fingertips using the least amount of effort in your grip to hold on and rather let your shoulder blades come away from each other. As you inhale, the crown of your head is going to grow up tall through the sky in line with your knees. So for just a moment before we go anywhere, get that internal snapshot of yourself, the top of your head, your shoulders, your rib cage, your pelvis, and your knees. They're all pretty much on the same plane. Now from here, you're going to slide your right knee back, slide your right knee back a little bit more so that your knees are staggered and just a little bit, not too much because we still want to be able to keep the body over both of the knees. So go ahead and bring that in the head just a little further forward. Exactly. And everyone's going to be very different.
And as far as how much space is appropriate, which you want to notice is that staggering. Your knees doesn't change the relationship of your pelvis under your shoulders. So now as you exhale, you're going to start to imagine your right hip moving forward. As your right elbow bends and starts to pull back, your left arm will reach forward and it's a little wonky for your nervous system because all of a sudden your left arm lost tension. And then very gently go back to forward to where both arms come back to the same amount of tension. And inhale will exhale, elbow rolls back and you can look over your right shoulder.
If your balance is a little wobbly, then don't keep your eyes straight ahead. And at first just get the movement pattern through your trunk. As it starts to feel a little more familiar, let your head come around at the end of the movement. Beautiful. And what we want to really notice is that the pubic bone, and especially the right hip being that it's the knee that we pulled back our moving forward as the right side of the rib cage is coming back around so that she'll start to feel a relationship maybe from the front of the left hip, lengthening up and under that right arm pit.
Just do one more and then find your center. Scooch your right knee up, take your time to get there, wait for the carriage to stop moving before you move your knees around and then slide your left knee back just a smidge. And again, listen to your body cause one side, especially when it comes to the hips, is often quite different than the other. And again, as you exhale, visualize your pubic bone and your left tip moving forward as you bend your left elbow to spiral yourself up and around. And if you feel that the spring is so heavy, it doesn't really let you move and your spine, but you're just identified and the weight and your arm, then please drop it down to a lighter spring. Because really what we want to experience is the rotation of the rib cage above the pelvis. He used the exhale to ring the rib cage out.
Inhaling as you go forward, let's just do three more here. Bring a little more weight to your left side. There you go. Keep almost leaning into your left. That's it. And then shootings through the top of their head. We want to get rung out and taller for it.
Beautiful ladies. And then we'll bring it all the way back in. Scoot both knees back up to the same level, sit back on your heels and then place your straps down on the pegs. That'll bring your carriage to park. Once you're parked, you'll turn yourself around. One last thing, while we're here, we'll bring that foot bar, um, into its, um, position for front splits, so not too high and not too low. And again, if your balance wasn't the best on the kneeling, you're also welcome to use the frame of the reformer rather than putting your foot up on the bar for front splits. So go ahead and come up onto hands and knees. Now we're still on one heavy spring and you're going to bring a yourself up into an inverted V to start. So we'll lift the hips up, we'll get the heels in that high heel position against the bar, and now pulling the Kerogen, you can walk your right foot halfway up, bring your right foot halfway up on the carriage, and then bring it all the way up onto the bar. And again, if that bar's too high in too far, you can also use the bottom frame of the machine. Okay?
Or you can stay here and just keep your hands on the bar. There's always options. Now if you're comfortable, we're going to come up to standing in that position. The back leg is pulling back, so you really have to push down through the front foot and I'm going to move out of their way. It's really helpful to stare at something in front of you that's not moving. Now, hold it here for just a moment. The, it's really common that when we get into this high lunge, all of the weight drops down and starts to fall into the front hip.
As you exhale without moving your carriage, push the foot bar away with your front leg, just enough to feel like you get yourself up and off of that front hip, just a little bit. Awesome. Now start to push the carriage out a little bit. Straightening out the front leg, not all the way, but just starting to straighten the front leg out a bit and then hold it there. So you've really got to press down consistently through that front leg and as you exhale, it's the back knee that we're going to bend. The left knee is going to come in and then the left leg is going to open back up. And it's what we talked about from the very beginning, thinking about lengthening out through the front of the hip and opening up the back of the knee, reaching through that heel.
So all those little ideas of really pushing through your feet to keep the length in the side of the body just became really relevant because now there is no feedback. So recall what it felt like when you were pushing that bar away and keep that energy through the feet. Last time, once the carriage comes back in, bring both hands to the foot bar, let the back may come down or just bring both feet to the bar. Whatever your easy exit strategy is. Okay? Those are not easy at all. You guys made them look really easy. Thanks for that. You're so welcome.
We all thank you for that. Okay. Okay. It's very motivating. So easy for me to stand here and talk, right. Okay. So push down through that front leg and pull in with your back leg and again for just a second before we start moving. Notice are you falling into that front hip and we do it all the time. Even in Mat classes or you know, outside of Palladio's and other disciplines.
Really push through that front foot to feel like you get yourself up and out of the hip socket. Now exhale and start to straighten out your left knee just a bit so that we stretch out the spring. Keep it there and let your back knee bring the carriage home now. So again, it's very foreign for the front of the thigh to do this work for us.
Just one more you guys. And the next time that carriage comes in is the last time both hands to the bar. Both feet come down. We are grateful that one's over. Go ahead and have a break. Just sit back on your heels and thank you guys so much. Thank you for watching.
Stretch & Release: Stretch on the Apparatus


Comments


You need to be a subscriber to post a comment.
Please Log In or Create an Account to start your free trial.
