Description
If you are interested in purchasing a CORE Band™, you can find them on Kathy's website. You also have the option to use a Pilates Pole instead of the CORE Band™ for the same results.
About This Video
Transcript
Read Full Transcript
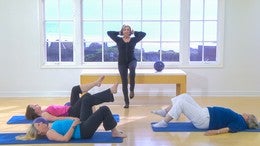
We are now ready to begin phase two of our exercise program. In this phase of the program, we are going to add more resistance training exercises as well as increasing range of motion. This program is really about giving you the tools that you need for personal responsibility so you're getting your own body's feedback in order to progress with your symmetry, with your alignment and your range of motion. So we have lots of fun tools going on here to help us, uh, really get that feedback that we need. We're going to use the big ball again. We're going to use the small tennis balls out.
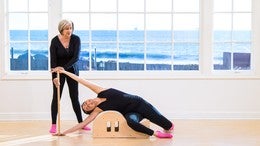
We're going to use pieces of colored tape, which is lots of fun. And then we're going to use the core band. Uh, the core band is something that I designed so that you could slide your hands easily in the band and press away to activate the muscles without having to grab onto anything. So just by pulling it in opposition, you're going to get more work through the deeper muscles in the chest. Now if you don't have a core band, you can use a pole because both the core band and the pole are going to do two things. And one again, is that personal responsibility? Are we lifting evenly?
Because sometimes we really feel that we are and our core band or our pole is going to say not so much. So it's going to help us to really find where we need more symmetry, where we need more strength and where we need more flexibility. So let's begin. The first thing we're going to do is we're going to sit and I'd like you at this point if you can, you're either going to sit at the soles of your feet together or with your knees bent and feet flat. And the reason I'd like to do this is right now we want to begin to work with the alignment that we just did in the last program, which was a bout that the, the alignment of the pelvis and neutral pelvis.
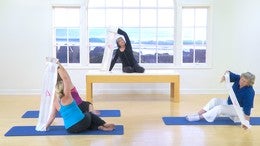
And if we're crossing one leg over the other, we tend to lean into one side of the hip and we're not fully into neutral. So I'd like to begin either in that position or knees bent and feet flat, whatever's more comfortable for you. And the first thing that we're going to do is we're going to take the ball and turn to the side and go to your affected side first place the hand down the other hand is going to support you on the mat. And I'm going to have you roll the ball away from you, rounding over on a diagonal and keep it under your hand if you can. Beautiful. Right there. Now what I'm going to do is place the tape there for you and can you go a little bit more to the front? So you're going to round inflection.
There you go. Beautiful. And there is your tape.
Okay. So we're all going to go to the side that needs more stretch. Inhale, exhale and stretch a little more on that. Good work. Inhale. Actually Alan, stretch just a bit more for me. One more time. Inhale, exhale, release, relax. Breathe into your stretch.
And again, inhale and exhale and stretch. Beautiful. And inhale. Exhale. Last time. Stretch injuries. Oh my goodness. And
You went increasing your range of motion, all of you by about two or three inches. Right? And it was simply the use of the breath in the stretch. So this is what we want to do and now we are much more symmetrical if we measured the line across. So again, this is one of the things that we want to do is to give you the feedback that you need. Because if I told you or if I do it on my own body and I say I'm doing a side stretch and I'm even on both sides, my proprioception, the way I think about it or the way I react to it is that I am the same on both sides. But even in the healthiest of bodies we are not. So this is just the idea of using the breath and the stretch to increase range of motion. So we are working the body more towards symmetry.
Now we're going to add those small balls and once again, either sitting with your knees bent and feet flat or with the soles of the feet together, we're going to take the balls to the sides of the body.
So look at where it is in the bite. Good. And circle reversed the circles utilizing the mobility through the shoulder girdle all the way through to create cemetery and those shoulders. Very nice and release. Yeah, we're going to work with the band.
In a one open on each end, and the first again is for that shoulder mobility. So we're going to sit comfortably. We're going to bring the band into the center at chest level and just down. Now this is a rotation within the shoulder girdle itself, so we don't want to have any movement of the shoulders. We're going to keep the shoulder in at our new truck position, which we learned in phase one, not up, down, forward or back, but right in that center and really rotate the arm inside the shoulder girdle.
Exhale up and inhale down and actual app and inhale down last time. Let's bring it right into the center. Now keeping the wrist stabilized, we're going to press as if the arms equally away from one another and release. So we pull it nice and taut, beautiful and feel how that engages under the shoulder girdle as well. And exhale, pull it taut. Inhale and release it.
Axial. Push away from one another and inhale, release. Let's work the effected arm only the other arm is your stabilizer, so you're going to push away with just one arm. Use Your exhale. Push it away. One more time only and both arms together. Pull and release to SEL.
Release last one and bring the arms down. Round the body over. Take a nice rest, the upper back and let the spine grow. How are you doing? Everybody good? Okay. The next we're going to do as we're going to bring Ben Todd again using your arm as a stabilizer, working the effected arm. We're just going to pull back now on this movement.
We once again want to make sure we have the shoulder stabilized so we're not gonna pull, allowing the shoulder to come forward or back or up or down. So just stabilize one arm and actually I'll take it back and in how to the front. Nice exhale, rotate it back. Jesse affected armed and actually hail on three who to go actual for Nice work and actually on five both arms are coming together. Slide them back and now really think about bringing the elbows behind you. Push it front and then reach it in long in front of you.
Pull back and open through the chest. Yo Voice. Go behind you and reach and stretch in front. And one more time. Take it back and very nice and front and take it down and round your back. Three deep breaths in this position. Inflection. Inhale, exhale and relax through the upper back. And inhale. Exhale and relax through the upper back. Last one.
Now roll the spine up and sit up nice and tall. Here we're going to take the band and one arm goes up, one arm goes down and rotation. Now once again, we're getting mobility and we're increasing the range of motion through that shoulder girdle all the way through. Keeping that Short, the shoulders down, the chest lifted, and using the breath through the movement. Very nice. All right, let's go a little faster. Up and down and up and down. Really rotating through. Good. Inhale. Inhale, exhale, exhale.
Remember how important that breathwork is all the way through the program and release and come down. We're going to lie down on the mats. Now you're still going to, you need your bands. However, knees bent, feet flat, very nice and holding the band. So we are in that same position, sliding in on one on each end and just relax the shoulders and arms. Let's have our knees banned and our feet flat on the Mat. Good. And we're going to do that small pelvic curl, but we're going to take it to the next level. The next phase, which is called the bridge.
And first we're just going to relax the arms and now do a small pelvic curl and then roll the spine up to a bridge position. Very nice. And just keep the band on the side and pull it lightly across the thighs. And now roll the spine down as you roll down which the band towards the knees and then up to the chest over your chest level. Beautiful Band goes across the thighs, pull it in opposition to stabilize the shoulder girdle. Make that small movement from the pelvis and 4s the body up from the tailbone.
Come up from your tailbone, lift up. Good as much as you can. Now bring the arms up and roll your spine back down. Very nice. Bring the band across last time. Pull it in opposition, curl the tailbone and roll up as much as you can comfortably. This is for spinal articulation. Now activating through the shoulder girdle.
Bring it over the thighs, up to the ceiling. Pull it hot and roll away from the band. Ruling down one vertebra at a time and
What we are going to add to that is we're going to lift one knee up and lift the other leg up. Try to maintain that alignment through the pelvis. One leg comes down and then the other leg comes down. Very nice. One leg lifts up, good other leg up. Keep that one up. There you go. One leg down, other leg down and both legs are on the mat. Now take the balls and we're going to roll the balls out.
Lifting the upper body. Very nice. And once again, we can use our tape to show us how we are doing symmetrically in this movement. Roll back down, roll back up, looking at where the tape is. When you're doing this at home, it's great to partner so that if you have um, some friends who can work out with, they can tape you and you can take them all the way through. And one more time. Come on up, roll the ball and can you lift the head, neck and shoulders as you come up. There you go. Very nice.
And so once again, what we're looking for here in this program is set the cemetery of the movement. Let's work with the affected arm. Come in, take an inhalation, exhale and roll up. Now stretch to the effected arm. Chest a little bit more, just a little bit more and then roll and roll down. Once again, take a breath. Very nice. Come up, use your affected arm a little bit more. There it is. Beautiful and come down. Very nice. And one more time. Lift up.
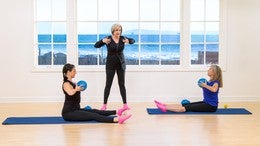
And the idea once again is to work both sides into symmetry so that as you're working for the body to get range of motion, you will continue to work the patterns for mobility and symmetry in the body to really regain the strength and flexibility we've always had before. Now let's go on to our core bands again. And this exercise is a very um, traditional bloodies exercise known as the a hundred. We've modified it for this program to really gain more mobility through the upper body. So we want to, as we learned in our phase one, maintain that neutral pelvis and we're not going to tuck the pelvis up or arch the back, but we're going to keep that alignment through our neutral pelvis. So that's the first thing I want you to do is to get a pelvic curl pass through the center and go through a slight lift of the back, come through the center, come up with a pelvic curl or tilt and center, inhale axial and let gravity hold you in that center position with the hands in the core band. Once again, sliding in in position too.
That is one end. From each end you're going to lift your upper body and we're going to use our breath. So we're going to do five inhales and five exhales in the movement. So go ahead and slide the band up over the knees. Lift the upper body lift they had neck and shoulders if you can.
Otherwise you can keep your head down. Keep your knees down, feet flat. Good. And you can do this with your head down if you want. Begin to reach over your knees. One, two, three, four, five. Exhale. One, two, three, four, five. Inhale, one, two, higher arms. Exhale to right and like, okay, that was nice. It was so nice. We'll do it again. Come back up and you can do this with your head down if you'd rather and reach over your knees. One, two, three, four, five.
Exhale. One, two, three, four, five. Inhale, one, two, three, four, five. Exhale, one, two, three, four, and come back down and relax. Take a nice deep breath and let's go ahead and lift one leg up. Lift the band over your leg, lift the upper body. Now extend the leg out and bring the arms as much as you can back over your head. Very nice. Pull back in. Inhale, exhale and reach it. Long inhale. Exhale.
Reach it long and bend it to come down your juice. Three repetitions, other leg. Lift the upper body. Inhale. Exhale, reach it. Long inhale, exhale and shake it. Long inhale. Exhale. Ever reach and come back down. So now we want to work with the arms taught. I'm going to keep the head down and just bring the band up over your chest.
Walk the arms back as much as you can. Maintaining the straightness of the arms, your movement and range of motion will be limited by the affected arm. We will stop there. So we reach one, two, three, four, five and come back down. Beautiful. Use your breath. Come up. One, two, three. Open that range of motion and five. We keep the band taught and come down last time.
Take it up. One, two, beautiful. Watch the rib cage four and five and come down and release the band down. Okay. Very nice band comes down and we're going to go into our side lying series. That was a very long train.
I'm sure you are all thinking you want it to be on it, so let's go into our sideline series. For the most part, what we want to do and especially in phase two is we're going to work lying on the unaffected side, so we'll be working the affected side of the body if you need to. The bottom arm of course is going to stay down, but you can also put a pillow on dear your torso or your head if that is more comfortable. So we're all going to, I'm going to have you face me and lie down on your mat. You may use the band on your head or a pillow if you'd like. Do you want, are you okay with that?
Whatever's going to be more comfortable for you. So we are in lying on our unaffected side and we're going to take the top arm and we're going to slide it down the side of the leg.
And if you want you can use your tape. See, see how long and how far you will reach with this arm up. Rotate and over and up. Rotate and down and up arose [inaudible] and over and up. Rotate and down. One more up. Rotate, analyzation, long and stretch over and come up. Now just bring the arm to the front and the leg to the back and bring the opposite leg and bend the knee so you have more support.
And we're going to just change coming front and back. Good. And once again, we want to stabilize the shoulder in this position. And the bottom leg is your support and bring it front and back. Very nice. So that as we're working through, we're working through that shoulder girdle. Nice, deep breathing, nice deep breathing and front and back.
Now bring the arm over the body and the leg up at hip level. Beautiful. And now the arm and the leg are going just circle. So we are going to be right here. Circle the leg and the arm together. So we know [inaudible] working both the hip and the arm, so through the shoulders you're sure. So as the, both of the circles come front and front and then they go to the back circle around and back, around and back. Around and back. And bend the knees in.
Come up as much as you can. Open them out to the sides, rotate in the shoulder girdle income down. Press the arms together, keeping the hands evenly coming up. Open them out to the sides, rotate in the shoulder and come down. One more time. Inhale, exhale

Breast Cancer Recovery: Early Stage Breast Cancer Recovery


Comments


You need to be a subscriber to post a comment.
Please Log In or Create an Account to start your free trial.
