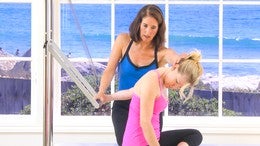
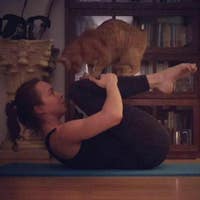
Description
This class starts with a detailed explanation of centering. The movement in this class begins at 3:54 minutes.
About This Video
Transcript
Read Full Transcript
Hi, I'm Madeline black and this movement class that we're going to do is going to be focused on centering the body, which happens to be the title of my new book called centered. And w what I wanted to read to you is a wonderful quote, um, about centering. And the quote is from, uh, an o Sensei, a master martial artist. And the quote is, it's not that I don't get off center, I correct so fast that no one sees me. So that's that adaptability of the body writing itself.
And that's really a lot of that is brain body feel and how you can adapt and always come back to your center, very martial art kind of concept. But our body's doing that all the time. And what's involved in centering is your nervous system, especially your appropriate reception. So the appropriate reception is how you feel your body, you can feel where your arm is in space with your arm, eyes closed, you can feel something in your back when like a little bugs crawling on you. So there's that proprio reception, which is what we use to bring ourselves back to center. There's also um, introception which is deeper. It's more of a felt sense.
A easy way to describe intraception is how you can feel in Oregon. Like all of a sudden your stomach is growling or there's movement in your bowels or there's an internal feelings. Um, some people can feel cranial rhythms in their body. You know, if you're tuned into it enough, if you have a deep enough sense of introception, you actually can feel a lot of motility's and movement in your body that's not muscular physical feelings. So that's a really interesting idea to think of how that interoception kind of affects our centering as well. And it has a lot to do of course with balancing right being centered. If you're off center, you can write yourself back to center, right?
Dancers do that all the time, right? Athletes do it all the time, right? They are getting hit and they were off center, but they're able to pull themselves back quickly and then can keep running or keep going with the ball. So that righting reflex that the brain does is, is what second reading is. And grounding is part of that as well as being able to do that. Um, and the centering in the physical body to me is really looking at how the segments of our body move freely all the way through. So an example is gait patterning. So in gait pattern and you have your hips doing flection extension, your pelvis is doing a little bit of side bending this way and then there's rotation happening at the TL junction.
And then you have a little rotation here at the maneuver IA Mary, that's your first two ribs and your sternum here, upper sternum and clavicles which helps with your arms swing and then your head is stable cause you're looking where you're going. We need our eyes in order to be centered in balance. But the rotations happening at c one and c two so the areas c one c two c seven t one that's the arm swing. The TL junction is that rotation. And then you have your sacrum and pelvis motion and all of those need to be in sync in terms of that rotation in order for your body to stay in the center. If one of those areas are not moving, like let's say my upper part's not moving and I'm walking, I could show you, you know what? Find I'm doing that and this isn't moving.
Then my body's having to adapt some way that's off center in order to move well. So this movement class, what we're going to do is explored all these areas of the body through movement and try to free it up and hopefully find that balance of equilibrium in terms of that movement. Okay, so we'll start. We're going to stand and use a wall. So as I would like you to stand close to the wall, but put your hands on the wall. Great. And then walk yourself back and I want your spine as horizontal to the floor as you can get. You can bend your knees to make that happen. That's fine. It's not about a big hamstring stretch.
And then what I want you to think about is your spine. What I want to look for and I want you to feel is that your spine is letting go to gravity. Now you can't have one part of your spine letting go. Can you show us? Haley does that really well? More than the rest is not letting go. So it's not that you have to hold yourself in this position.
But can you find the energy going out the top of your head and the same contrast of going back through your tail through the spot. There you go. So if you create that contrast, you're kind of like a little hammock being hung from two ends, your head and your tail and the spines just hanging good and just breathe good. And this kind of reaching back and as you let go, you're going to find yourself going towards the floor more and more. Finding that stuck spot. Wonderful. Okay, so now I want you to think about this mid rib range. The lower rib area here and I want you to do is just a side to side shifting.
So you're going to go side, just small inside. See if it could be like a old fashioned typewriter carriage or a printer. When they used to go back and forth. They don't even do that anymore. And so tried to, yes. And not so much up here, but try to get the mid part moving. Haley, that's it. Try to get the mid part. So you're very mobile in your shoulders, but we got to get this part moving right through. It's a hard area.
There you go. You move that way. Well a little bit. Yes. Good. Without dropping your shoulders. Very good. And now come back to the middle, which is the center. Now here's a tricky one. We're going to try to do a figure eight. It's a three dimensional figure eight. So the figure eight is going to be doing a rotation around. So you kind of go towards the floor is that this side comes back, this side comes back as this goes towards the floor. Right.
And you can think of the eight kind of from the floor to your chest or you can think of it as side to side cause it's actually both. Yeah. Without your shoulders off. So I want just that midbrain. So can you find that mobility? That's the place that in the spine I find that most people hold quite a bit. Excellent. I do this in the morning to help relief, uh, my lower back tension from sleeping through the night. So it's very nice.
It's like grab, you don't muscle it so much. It would just grab me, let it go. Yes, let it be free. Good. And now I'll come back to the center. Good. And keep reaching back now cause you got a little more length. Good. Keep reaching back. Push away from the wall. Get that length good. And now you're going to keep that part.
You were just moving stable and you're going to arch your tail. So RQ, tail right and left. Just really small. Good. Just the lumbar. And you might notice that one side's easier than the other. Go ahead and do it. Slow fuel. Your obliques are working to the obliques so you can use your left side a little more. That's it. Good and long, spine. Good. And then come back to center and now you're going to curl your tail and roll through your spine. Keep rolling up, round, round, round and then come into like a wall plank and just lengthen your spine.
You can move your hands if you need. Yeah, go ahead and just hold that for a moment. Feel your feet, feel your spine. Breathe good. And step forward and relax. Okay. So let's loosen up the shoulders a little more. So let's face this way. Okay. And what I'd like you to do is, this is the rotation we need for when we're walking. So you're going to bend the knees and just let your arms swing swing.
So I want more. There's rotation down here. So let's see if we can minimize the rotation here and try to find more rotation up here. So less swing, less swing in, less bounce, but more movement up here. So if I had a light beam on my sternum up here, it'd be shining in this diagonal, in that diagonal as my head. And you might notice you do one side more. I get to keep your head forward though. That's it.
Don't turn your head with your arms. You might notice that. Good. This is movement that we need to have as we walk. Good. Okay. And then let's take one right arm circle. Bend your knees and just rotate all the way back. Good. And then bend the knees and do it like a swing.
Let your arms swing now is just to keep that going. Good. And a little bounce, a little swing, little swing and can go a little faster now a little faster. Good. Stay on your center. You're just rotating your arm around. Good. And let's do the other side. Start slow at first and go back. Good and around. Good and around. Now start speeding up. Get a little momentum going. A little swing. Good your head.
Come back to the front so you know where you are. Good. And then rest. All right, and let's do a little test here. Now you might, you may have gotten a little dizzy off of that one. I don't know if I can focus on that. Okay, so we're going to stand on one leg and what I want you to do is just to swing your leg and just test to see how that feels with your arms swinging and your legs swinging. And if you feel real, grounded and centered, you should feel this should be pretty easy to do if you're falling a little bit, hopefully after the class. Let's do the other side. Uh, you'll notice a difference with just let the legs swing good. So just remember this feeling of that motion and the stability there. Okay. And Center. Okay, so now we're gonna get onto the mat. Hey, now we brought in mats and you need a blanket and if you'd like to sit up on something and in a block to have nearby for later. All right, so we'll start with the sit bones on the edge of the mat. Legs across, doesn't matter which leg on top, and just feel your sit bones grounded into the mat. Elongate through the spine.
We're going to take the right hand and reach across to the left knee and bring the left hand behind. And don't start cranking a twist, but just go up first through your spine, feel your sit bones down into the mat, and then start to turn your chest. So don't overturn your neck. We're trying to move that sternum that we were swinging around using. And then pause here and take a breath in and go up and exhale. Try to turn your chest a slight more, but don't over pull.
There is not a overpressure here. We're just going to go up again and breathe in and XL. Excellent. And then come back to your center and feel your sit bones down as your spine goes up, reach the left hand across, right hand behind you, and then slowly start turning your chest to the right. We're trying not to over crank the spine, but to keep it up right and turning the sternum, feeling that spine as you're centered.
Line in the twist and breathe again. And You keep spiraling back as you look back. Good. And then come back to the center. You can do it one more time. We're gonna use the arm a little bit more and twist. And now use the front hand and bend your elbows, your elbows actually reaching away from you.
So don't think of pushing the backhand, but the right elbows reaching away from you, which is actually widening your back. Feel your right shoulder blade moving away from your spine. Can you feel that? Good. And then bring it back and other sides. So go back into the twist we were, and now reach that elbow away. So the left Scapula is not elevating, but kind of moving away in the spine is going up. More extension. Haley. Yes, going up and around. Good. Excellent. And then come back.
So getting to feel that twist and now bring your hands behind your head. And I want you to interlace the fingers in place, the palm of your thumbs right at the base of the skull, and bring your elbows in kind of in and up. So you're feeling length from the elbow through the armpit, down into your waist, but your scapulas aren't elevated. So there's a scoop to the elbows reaching up and the occiput is lengthening. So I'm actually tractioning my neck getting good length here and I'm just reaching up. And then I'm just gonna look up and extend back a little bit.
So I'm just looking up very, very slightly, and then I'm bringing it back to what I think is my center pole. Of My spine and then I'm looking up again. So it's just upper sternum. Reached the elbows a little bit more so you can get more in length on the side of your body and then come back. And we're going to do it one more time. Reach the elbows up, lengthen the neck, keep pulling up, and then release. Keep that length you just discovered. Bring the arms down. Now stretch your legs straight out in front of you.
You're going to flex the feet and you can use your hands to kind of push down on the floor a little bit. So you feel your spine long. And then I want you to keep the spine long and use your hands to slide towards your feet. You don't have to touch your feet. The idea is to keep the length of the spine. And if you can, you can go for the toes. But what's more important is that you find the length of your spine. And then just lean back. And again, we're gonna lean forward finding that length and then come back.
And one more. I'm going to find that length and then come back. So see if you can keep the length that you have. We're going to take away the blankets, open the legs a little bit. So we're going to remove the blankets off to the side, right? And we're going to do the Pilati saw and we're going to add a little bit of a roll back with it. And so, uh, we're gonna rotate for find that rotation that we had and you're gonna flex the spine. Reach towards that little tail. Look back to your left hand now and now continue rolling back.
But stay rotated to the left. Let your left hand touch the floor. That's it. Now roll all the way back, all the way back to your lying down. Good. And then all the way flat, that's it. And then bring the left hand across your body and then you're going to roll up. That's it. Reaching for that left toe. Nice.
And you can drag that hand behind you. Good. And now go down on the right side and you're going to curl back. Excellent. Reach your right arm over the body and curling up. Great. Looking back to the left hand. Let's do that again. Should just surrender to the floor. Allow gravity to help you.
And then the Matt's very sticky. But go ahead and rotate and reach across. Try to keep the legs the same length. Excellent. Reached the left and we're going to do one more. Great. And now stay down there. Great. Okay, so now you're going to bend the knees and we're going to lie on your side. Great.
So you're gonna lie on your side and your knees can be s about 70 degrees, not totally 90 degrees with a comfortable knee bend. Correct. Good. And what I want you to do now is you're going to reach your top leg, which is your left leg forward. And then bring it back. So you're just going to, yeah, so it's pelvic rotation, not your ribs. So this goes back and this goes forward. So you feel the rotation of the pelvis at the Lumbar, lower lumbar spine. Can you feel that? Yes. So it's very small. Very nice. Haley. Good.
So that's good rotation and come back and one more and come back and last one and come back. Now fill your pelvis stacked, and now you're going to arch your tail to the floor. So you kind of press your tail down, which you'll feel length on that top part. Now you arch your tail to the ceiling, you're going to feel your ribs imprint into the mat. That's it. Tailed to the floor without rocking forward and back and tail up. Do you feel your obliques and then tailed down. That's it.
Don't over push and just feel what your spine is able to do without pushing it. Good, and they'll bring it back to center. Now here's a little bit different feeling. This rib area where we were doing the figure rates before, I want you to lift it up. This part lifts up and then this part kind of drops down and this part of the rib cage moves up towards the ceiling and then you feel your rib cage down into the floor. One more time, lifting the rib cage up and it helps to inhale there and dropping down as you exhale. Very good. And rest. All right, let's roll to the other side and we'll repeat.
I love this little sequence for getting the spine a little more supple. Okay, so we're going to start with the knee reaching forward. We get that pelvic rotation side of your knees a little more bent than they would. Yeah. So I really, you can feel that. Let the leg get longer than the other one could income back and reach. Nice and back. Nice and easy, no pushing, reach, whatever your spine can do. One more reach and come back. Great.
And now the tail arking to the floor and then lifting to the ceiling and arcane to the floor and lifting to the ceiling. Good. And to the floor. Do keep your ribs a little bit down. Don't try to lift them too much. So that's going to limit your arch. Yeah. Good. And then finish. Now the rib cage gets to go up to the ceilings. Good to inhale here and exhale down into the mat.
So we're doing a little side bending action here. Inhale up to the ceiling and exhale down. Good. And Inhale, go side bending sometime is a range that gets really stuck, especially in this part of the spine. Very good. And one more. And relax. All right, so now we're going to lie in our stomach. So let's move to the front end of the Mat.
I'm going to lie prone and you can start by stacking your hands and just placing your forehead on your hands. Great. Good. And bring your legs wide. Turn them in so your heels are out. Good. So that you can relax the front of your pelvis into the mat. So just kind of sink. Good. And let your rib cage sing. Good. And take a breath in. And again, just let your spine let go. Yeah, and you might have to creep your arms up as your spine starts to release into the mat. You actually need to move your arms a little bit. That's great. Good.
So you feel that full contact of the front of your body in the Mat. So then bring your legs in line with your hips. So your heels are gonna line up. Yup. Hip Width. Good. Still feeling that contact on the front of the pelvis into the mat and now come up onto your elbows and bring your elbows far out. So I don't want to high sphinx. I want to low spanx. Yeah, make it low.
So your lower ribs so that our elbows more in this kind of spink position. Separate your hands. Yeah. Bring your elbows in a little more for you back just a tiny bit. Good. Excellent. So your lower ribs, can you feel them on the mat? You can go forward a little more. And I want, it's quite something. Yeah.
So I'm going to be working with the upper part of the rib cage here. Great. So what I want you to do is you're going to try to do a little circling with your ribs, so you'll feel them on the mat. So do a little circle like we did at the wall. Excellent. So feel the floor, do a little circle and go the other way. Excellent. Now notice you've got your pelvis on the Mat.
Try not to let the pelvis move so much. It's really just in towards the man if he can. Excellent. Okay. Try your finger right here. It's a little bit different. So figure eight towards the mat and around. It's a three dimensional figure. So it's more isolated in this position than it was. Can you feel that Haley, than it was when we were on the wall? Exactly.
See if you can get a little more circling. Good. They're excellent without moving the pelvis could and then come back to the center. Now what you're gonna do is you're going to pull your left arm back a little bit. Don't actually move your hand, but just pull it back as you straighten your right arm. And what is your knowing? Keep your hands planted. Hands are planted. You're going to drag your left elbow back as you straighten the right arm.
And what do you need to do in your upper body? That's it. You have to twist to the left. Look to the left. Yeah, so it's not just neck. So if you're pulling this arm back, pushing this one away, it's going to rotate in the upper back. This part here. Can you feel it's hard to move there. Good. And now come back down on your elbows. So drag your elbow back.
You're not actually sliding it. That's it. You feel how that forces the rotation. Don't overturn your neck. It's really to rotate here. Good. And then come back and track your lower ribs and go again. Yeah. Your side bending. Yeah. This isn't ego slow. Good.
Separate your hands a little wider. All right, so start to straighten this arm and turn. That's better. Do you feel that in the shoulder you've got the rotation? That was good. And then come back and bend both and do it again. This isn't, there you go. Good. And try not to slide your hands so much. Okay. And then just lower it down. Stack your hands and restrooms in rest. Yeah, just trying to really isolate that rotation on the upper thorax here.
Rest. All right, so now stretch your arms out in front of you with your hands flat on the floor. And what I'd like you to do is to press your left hand and the whole arm into the floor and your right leg down into the floor. And I said, do as you do that, allow that to float your right hand and your left leg up and your head comes up to think of your whole spine coming with it, but be actively pushing into the floor. Feel your pelvis and come back down. Now the front of your pelvis has to stay on the floor. So do the other side. Push down with the other side. The front of the pelvis stays down. Hey, at least keep it down. That's it. You've got great range. But I want stability in the pelvis. That's it. Now switch. Use the floor. Push.
Yes. Feel a difference. Very good. And you get more gluteal this way and less lower back action. And go down in between. Haley, put your head down in between. Good. Try to get a full there. A nice good. And one more to finish. Nice.
Great. And down. All right. So now we're going to take the hands and you're going to um, make a, a diamond or a pyramid shape with your hands like this and you're going to place it underneath your pelvis and you're going to rest your pelvis. Yeah. So what I want you to feel is that your thumbs are at the top of the pelvis here and your fingers are down by your pubic bone. Can you feel that? Okay, so now feel the contact of the pelvic bones into your hands. And what you're going to do is slide your hands. Don't move your hands, but feel like you're sliding your hands long, like reaching your pelvis away from your ribs as you float your head up. So reach your pelvis away from your ribs. That's it. Good. Good.
Chin to throat. So you lift the upper back. Excellent. Now you have to hold down. I'd like you to lift both legs up. Excellent. No rocking. Yes. Can you feel the bones, the front of it. Now keep it there and start little kicks. Little kicks without rocking. No tipping. Good. That's very good. And keep the length in your whole spine.
You're still working your arms. You're still pulling. Very good. Now do small little circles. So go out and around with your legs. Out and around. Out and around. Good. No tipping. See if you can get a full circle. Go the other way. Excellent. Keeps circling good and lower back down. Good.
Now we're going to push back and sit on the knees and we're going to do a little bit of a mermaid, a progression. So let's have you turn and face this way. Okay. And we'll fold our legs in. Alright, so what we're gonna do is you're gonna reach over to your side, get a nice sized bus. You can use your hand here and give yourself a nice long stretch, especially after all that extension, use distance. Now reach your hands, hand out onto the floor, and you're just going to lift your pelvis up. Now in this position, your, your top leg is off the floor, so your knees are matched in your bodies long.
And then you're going to sit down again and then you're going to reach over again. Give yourself a little stretch here. I'm going to come back to this position. You're going to lift up. Now let's add the arm nice and long and then sit back and grab the leg side bend again. And we're going to go out again and come up. So I like it in pieces. I'm being choreographic here. So come back down. So side bend again. That's step one.
Step two is put your weight on your hand and just lift. No arm, no arm, just lift. Now arm now leg stretches out. Make sure your props not in your way. Good. And then sit back down. Yeah. And stretch arm placement is two. Lifting is three. Arm is four. That's all right. F five lift your leg now and holds and come back down.
Good. And once you move this way, a little bit and reach side bend. Good. And over to lift, three arm is four legs. Five lift, hold it and sidekick. Kick forward and back and forward. Good and back and forward and back. Good and forward. And stay back and stay back. Lift your chest a little more.
Push into the floor and fold. And let's do the other side. Awesome. All right, side stretch. So hold your Shin once you come forward a little bit if you can. If you not, yeah, still want her kicking you. Okay, so side bend, good arm down too. And weight shift and sit down and side bend. Good arm down. Shift the weight, arm up and sit and side bend and over. Shift the weight. It's okay.
Arm leg out and fold in and sigh. Bend and arm down. Shift the weight. Arm Up, leg out, leg up. And hold it for a moment. Feel your rib cage. Reach through your arm. Yes, lift the ribs to the ceiling. Good. And then fold in. All right, one more set.
And we just do the sidekick and over. Transfer your weight up. Arm Up, leg out. Lift and kick forward. Kick and point. Good and kicked out. Check your rib cage what it's doing and kick and point and kick and point and kick. It's hard to stabilize. Be Strong in your arm. One more. Reach back and come in Nice and rest.
Okay, so now we're going to lie on our back and we're going to do a little legs slide, leg circle. So let's start with the knee bent. Both knees bent, arms by your side. Great. So separate your feet a little bit. Feel the bottoms of your feet. Rock your pelvis a little bit so that you really feel your in your neutral position. So that pubic bone should not be higher than your top of your pelvis. So we want to just reach a little bit here. Get that length. Yeah.
Okay. Feel your legs in the socket. Very nice. Alright, so you want to maintain that feeling, right? And you're going to slide your right leg along the floor. Okay. And you're going to press your heel down into the floor. You're going to feel your hamstring and you're going to drag that heel back, drag it back. Good. And other signs. Slide it good. Push your foot down into the floor and you're going to bend the knee.
Keep pushing down like you're dragging. So you're going to feel that hamstring. Good. And slide. Push into the floor. Don't let me lift your, yeah, don't lift your pelvis. Just feel that now bend and keep pushing here. Push down. Feel yes. Do you feel that that's good and other side? Good.
Pressing your leg down so you feel the hamstring and drag your foot back down. Now you're gonna slide the right leg down. Pressing your leg down. Keep pushing the right leg down. You're going to bend the left knee to your chest and extend your leg up. You're going to keep pushing that right leg down though, and feel that hamstring. Let's do a leg circle and circle across.
Up and around. Across, up and around. Good. Very good. Keep pressing that right leg firmly into the floor. That's your stability. Good. And reverse it and feel your shoulder blades resting on the mat. Good. Keep breathing. Excellent you guys.
One more circle. Come up now. Flex your foot here. Reach out. As you go down, you're going to point the foot and push it into the mat and lift the other leg up. Keep pushing the other leg down into the mat. Good. And here we go. Cross circle and keep pushing that standing leg into the mat. Good. Keep going. Keep pushing down. We want minimal lift here. Good. You've got to keep pushing that down. Good. And make sure you reverse and around. So when your leg comes up, this just comes down. Yes. Get the back of that thigh down. That's better.
You're got to work that leg. It's a lot of work there. Could circle around and the last one up and come down. Great. So now we're going to need our yoga block and we're going to go into doing some bridges. So we'll turn around to the other end of your mat.
So you have to imagine you're doing a bridge with two feet and then you're going to have a standing. Yeah, and you have to make sure that the blocks in line with your sit bones. So you really feel like you're doing a normal bridge even though one foot up on the block. Excellent. All right. Now what is this going to do? This is going to challenge the centering of your pelvis, so you have to make sure that still both hipbones equally. So you may want to put your hands on top of your pelvic bones to make sure that they stay level, even though feet aren't level. So stand into your feet, reach your knee over your toes, both of them and lift the pelvis up and up. Press with the top of the pelvis. Reach, reach that leg. Stand on the block.
So one hip, you can see is it more extension than the other? Very good. Inhale there. Exhale, roll it down. We're going to do three all the way down. Good. And again, stand on the block. Reach your knees. Press the top of the ILIAC crest up into the ceiling there. Lift. Lift equally.
Not One more than the other. Yes. So you have to really push through. Nice and coming back down. All right, I can do one more. You get to stay up and we're going to reach again. Stand on your feet. Reach your knees over your toes. Pressing up. Hold it there. Now you're going to stand on the block and barely lift your right foot off.
Barely. It's close to the floor. Lower than the block. That's it. And now roll it down. What happened? Yeah. Yeah. So you have your hands to monitor. Very nice. And put your foot down and go up again. So now you know what you have to do. So your foot is barely off the floor. You're not higher than the block.
Lift the foot. Try to keep that pelvis level. That's the hard part. It's a lot of obliques here and roll it back down and when you roll down, don't let your leg get higher. See if you can keep it low. Last one and up. Stand on the block, barely lift and I'd keep your foot real close to the mat as you roll down. Go ahead. This leg is going. Yeah, very nice. And place your foot down. Now lift your right foot up. Not too high. It's still low.
Now you have to come bridge here with no weight on the right foot. Here you go. Stand on that block. Push down with that foot. What's your pelvis doing? Yes. And place your foot down now. Right foot down. Check your pelvis. Feel both sides of your hamstrings and gluteals and rolled down. Cut. So when that foot goes down, activate both hips. Yes. Foot up, barely.
And try to stand without lifting the right leg. That's it. Put your foot down now. Re-Engage both hips nice and roll down. We got one more to go and float the foot off the mat and come up standing on the block, press down into the block. Keep that right ILIAC crest up. Put your foot down and roll it down. Great. And now switch to the block. You can use your foot to move it if you can.
They're a little heavy. Great. Make sure you feel like you're secure on the block. Might want to, yeah, and a little more back. There you go. Alright, here we go. Three times on both feet. Hand Rolling up. Stand on the block. Good. And reach with that knee. Check your pelvis. Yeah, it's going to be harder to have that left one. Come up and roll it down. Good. And again, stand on your feet. Reach the knees over the toes, keep reaching. Stand on that block. Press down. Good. And Roll it back down.
And here's the one we were going to lift up on. Two feet up. Stand on the block, get a good balance. Lift your left foot, barely off the floor. Roll it down. Keep it low, keep it low, keep your foot low, keep it low. Have to use the core and down and go right into the next set. Go and reach that knee over the tone. Really reached Dan on the block. Lift the foot that said Hayley. Good. And Roll it down. Down, down, down, down.
Good. And place the foot down. Stand on the block. Last one, and go up. Stand. Press into the foot. Excellent. Lift and roll it down. Now you keep your foot off the floor low and stand on that block. There you go. Reach that right knee. Stand firmly. Good. Place your foot down.
Feel both hips and roll it down. You guys are doing great. And again, lift your foot slightly. Stand on the right foot. Reach that right knee over the block. Stand firmly. Good. Left foot down. Feel both hips and roll it down. Lasts one and foot off. Rolling up. Reached the knee. Stand on the block. Beautiful foot down. Presu both hips. Roll a town and rest.
Excellent work. Okay, so let's move the block out of the way and we're going to turn around, come to the end of the mat, and you're gonna lie on your back. Great. So we're going to take your hands and we're going to make that triangle again. But this time you're putting it on your sacrum. So you're [inaudible] actually sitting on that triangle, right? Good.
And that way you can monitor how much the top of your sacred is pushing into your hands. And for you, you want to think more towards your fingers, your little fingers, not your thumb. And you could probably think more thumb. We kind of have two different sacrums here. So this is good. All right, so you're going to bring your right knee to your chest and your left leg up and then straighten your legs up. So legs straight if he can, if they have to be slightly bent, that's good, right? Slightly Benz. Okay. Cause you really want your tail drop. That set the tail dropping down. Can you feel that? So now you want to maintain that and we're just going to float the head up a little bit. So just float up. Good. Bring your head up a little bit. Good, good. And we're going to hold that for a moment. You're just going to breathe, right?
So breathe in slowly through your nose to check your tailbone as it dropping and you breathing into the diaphragm. You're exhaling deeply. You can drop your tail a little bit, Hailey, so maybe don't be so curled up. There you go. And keep the length between your pubic bone in the, there you go. That's it. That's it. Good. And then bend the knees and lower down. I know it's not easy to hold that position.
So what I'm looking for is that from the position that you start and you float, your head up is between the bottom of your sternum and that pubic bone is not getting really short, that that length stays there and that you're able to lift. So the back ribs actually have to move in in a little bit up the mat. See if you can try that again. So let's bring the legs up again. So as you float your head up, your back ribs are going into the map, but also kind of sliding towards your head. That's better. Good. Now deepen. Breathe out. Breathe in and deepen here. Drop here more. Pull that down.
Right? Good. That's better. Length. You feel a difference? Yes. Good. Excellent. One more breath, just kind of working that exhale work and the abdominals there and bend the knees and come down. So that's your prep for. What we're going to do now is double legs. You just going to lower legs a little bit and come back up. And then we're going to alternate legs. So here we go again. So legs up, same position, tail dropping, scooping deeply, leg straight.
Take a breath in. As you exhale, lower the legs a little bit. Just do small amount at first and come back. See if you can do it without changing your pelvis. That's the problem here. So as your legs, can you feel how you're shifting on your hands? That's the point of the hands. Can you feel the weight shift?
It shouldn't shift. So you're, you're, you're a little, a triangle there should not change. So it's going to limit how far, like I feel like you're rocking towards your fingers and then you're rocking towards your thumbs. Don't do that. Yeah. Just keep it. So make it smaller, Haley. Be True to what your core can do. Yeah. And don't change the pelvis, but exhale, draw in through. That's better yet your body shouldn't change his positions. Not Easy. It does limit your range. Yeah. Very good. Okay, and put your head down and bend the knees so you understand that rocking. Yeah, you can feel it when, so when the bigger range we might have to rock. I'm not saying Rocky's bad, I'm just saying in this range. I want you to work your core where your pelvis is in that neutral position.
All right? Same idea, but we're just going to do a scissor legs. So here we go. Legs Up. Good. Find your tail dropped. Good. Float the head up with the scooped abdominals and that tail dropped. Go ahead now separate your legs. A little bit. Scissors. Just kick, kick, little kick, kick. Good. Exhale. Oh, I want to hear your breath. Good. Now what's your pelvis doing? Yeah, make it smaller.
Hayley, am I going to make you go smaller? Yeah. Don't rock your pelvis. Yes. We're trying to stabilize deep in the scoop more. Deepen your scoop more the ass. Keep it deeper. That's it. Good. All right. In both legs. Up and bend the knees and rest. That's really hard to maintain. I know. So the next three we're going to do it.
We'll help you find a deeper scoop. Okay. So we're gonna come up, uh, actually, if what? I know what I'm going to have you do from come down here. So stay here. Okay. So bring your arms a little bit out to the side. All right, with your palms down. All right. And Bend your knees. You can have them long, Ben. Now I want you to just bring your head up and then roll up a little bit. Slide your hands in so that you're here. Now they don't want a ton of weight on your arms. You have to lift your trunk up.
And I want you to sink down a little bit more now. So sink. So that pelvis is still in neutral. There you go. You feel the scoop. This is excellent. Ice, Haley. Really good. So now take a breath in. Hold that scoop, and then lift your legs up. Breathe out, breathe out, and bring your head back a little bit. Your neck is too far forward. Scoop deeper. Good. Now make a diamond shape with your legs. Good.
And what you can do is exhale, bring your knees towards your chest a little bit and scoop more. Scoop, but don't sink and then go away just a little bit. Exhale, scoop. Nice. Haley, that's the scoop. So when you're doing the straight leg lowers, right? You want to feel that kind of scoop. Very good. Nice without sinking. So you've got to keep that position. Got to keep the chest lifted and you've got up the ass. Very good. Alright, are you okay to hold this position? Straighten your legs up. And what?
I want you to just go side to side with your legs a little bit. Just a little to the right and a little to the left. Good. A little to the right. Good. A little two 11 exhaling and keep it deep. Good. Less range Halen. I'm ringing you in because you're doing a lot in your thoracic spine and I want more in your pelvis, a less rotation in your ribs here and more in your pelvis.
See if you can that you feel the work now. Okay. Take it into hip circle and side circle, whatever range. Make it small. I don't want to see too much rib rotation. I want more pelvis there and legs. Good. One more each side. Excellent work you guys. I know it's hard to hold this position.
Bring your legs up, bend the knees in and roll yourself down. Bravo. Excellent. Okay, we're almost there. The home stretch. So let's have you sit up and we're going to turn this way.
We'll come back and I'll let your legs float up. Okay. And try to hold that position good. And now exhale and start to lower yourself down. You don't have to go super slow, just Kinda, and they'll come back up whenever you can do very good. So do small range and again, exhale, just lower the ribs and come right back up.
Scoop to come back up. Watch the neck, keep the chest lifted, the neck is going back with your spine. One more, and they're going to come up and hold and then change your legs to one front and one to the back, the old Martha Graham position, whatever's comfortable. And then we're just going to stretch the hips. So try to just easy on the hip stretch and then switch your legs around to the other side and go ahead and just kind of do a little twist and strew whatever feels good to you here. And then swing your legs around and do it on the other side. You might want to press on your hips, you might want to twist a little bit.
Good. And then around last one, a little bit of a stretch. I'm good. Now transfer your weight forward onto your hands here and come up onto your knees. Tuck your toes under, come into a plank position. All right, come into plank. Good. And now think of elephant on the reformer or the pushup that we do in the mat work. So curl your pelvis instructor, roll up and walk your hands back towards your feet. Excellent. And then roll yourself to standing up. Good and finish. Good work. Thank you.
Comments


Thank you for this fantastic class.
Madeleine you are unique


You need to be a subscriber to post a comment.
Please Log In or Create an Account to start your free trial.
