Description
About This Video
Transcript
Read Full Transcript
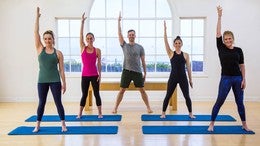
Hi everyone. I'm Benjamin and I'm back with Qaeda, Mandy and Dreya and Mary for part three of our mat exploration. We're working with blocks and some gymnastic ideas to make our map work a little bit more playful. If anything in this class goes right over your head, there's two classes that actually lead us up to where we are right now, but you'll be able to just follow along fine. I'm sure things will flow a little bit faster for this one. So are you guys ready? Yes. All right, let's do it. We're going to start by warming up our upper body like we have in the previous one. Stand with your legs together Nice and upright. Make fists with your hands.
Arm Circles
Really engage your arms, lower arm, upper arms, shoulders back. Bring your arms out to the side. We're going to take circles up and back, keeping the rest of the body nice and still this point, we're moving into a nice quick pace of the arms. Focusing on the circles we make inside the shoulder joint, keeping everything super controlled. Starting to notice how the center begins to tone and engage. Let's reverse the circles forward, forward, forward, and again, small in the movement.The hands make big in the movement that is happening inside your shoulder joint. Three, two, one. Circle the wrists. Make the biggest circles you can make without involving your elbow, shoulders, back, ribs, anything but your wrist. In fact, two and one and reverse it. It's going to be a good amount of being on our risk today, so there's a good way to warm up and start to explore our range of motion there. Let's do the same thing. Reverse with long fingers, reaching longer through your arms.
Wrist Mobilization
Become aware of how open your chest and upper back or on the backside of you reverse it. Five, four, three, two. We're going to interlock our fingers. Figure eight through the risks to mobilize. There is just a little bit more before we make our way down to the ground. It's reversed that movement or fought. Three, two, and one. Shake out your wrists. Take your hands behind your head.Open your toe slightly out to the side. A little bit of standing footwork here. Push the ground away. Lift yourself onto the balls of your feet. We're going fast right away. Sit yourself down any amount you can. Push the ground away. Lift back up. Do it again. Sit yourself down. Hips on heels. Lift back up. Five more. Take it down. Lift it up and forward.
Standing Footwork
Take a down lifted up. Don't be afraid to fall and three lower. Lift yourself back up and a to let those knees open. The hips come forward. Push the ground away. One more time. Lowering down. Lift yourself all the way back up. Four Times. Lower the heels down. Stretch your head up closer to the ceiling and pull yourself right back up and articulating through the foot. Lower, lower, lower.
Releve
Push the ground away and lift for three and up. All this time go ahead and push your head back into your hands so you can look right in front of you. Opening through the chest and feeling traction down the neck. Last one, lifting up, lowering down at your arms. Come down by your sides. Go ahead and have a seat on the mat. Feet flat in front of you.
Half Roll Back
Arms long towards each other for half. Roll back. Nice, heavy through the feed. Roll yourself back, tail under. It's an even Ben from head to tail. Pause for a second. At the point where your feet start to get lighter and lift yourself back up. Starting to warm up through the center a little bit.Going into our hollow body hold, which has a little bit of a surprise building. Don't say I didn't warn you. Lift yourself back up. Sit Up nice and tall at the end. Take one more. Just allow your spine to mobilize, knowing that we'll have to support that articulation a second. Roll yourself back up. Extend your legs on the Mat, press your legs into one another.
Hollow Body Hold
This time you roll yourself down onto your shoulder blade to tips only. They're going to skip our dead bugs and go right into our hollow body hold. Once you're on your shoulder blade tips, go ahead and reach your arms up and back by you ears. Stretch your legs across the room and pick them up from there. So that's the position that we refer to here as the hollow body. Hold.See if he can really press your legs into one another. Curl up. You had an a controllers, just a little more, and then lower the legs back down. Roll yourself all the way up. That's a price number one. Take your roll up from here. Release the head down and roll yourself back into that same position.
The legs stay long on the ground until you arrive at your shoulder by tips. Then you reach your arms by your ears. You stretch the legs away from you so much they lift. Press them into one another. Let your right leg hold the left and vice versa. Lower the legs. Roll yourself up against the reach of your legs.
Take a dive over your legs and come right back down. We'll do one more. Roll yourself back. Shorter way tips. I'm switched by your ears. Once you are there, stretch the legs across the room. Pick the weight of them up. We hold this position now and we're rocking it forward and back.
Keep the hollow body, hold position. Rock the body forward and back. Keep the arms reaching back by you. He has three and forward and two and a one and release. Roll over your legs, stretch forward, round your back evenly from ears to hips. Nice work. Roll yourself all the way down.
Hollow Body Rocks
I think it's fair to say that we don't need to do the a hundred at this point because we have that same exact position and I think we're warm aren't we? Yes, I thought so. Go ahead and get ready for your one leg circle. All this time we've been allowing ourselves to find a wider base of support through the arms. You can choose to do that here as well. If you're ready for it, bring your arms really close to you this time. Flex your bottom third and it's your left foot on this side, right leg lift and we go into our circles, big and bold across the middle. Swing it down around battle center two more times across, down, around and up.
Single Leg Circles
Allow your back to really twist and stretch. Reverse it for three. Open down, across and lift. Remember it's the opposite shoulder there has to stay down and it's that bottom leg that stays as engaged and still as possible. After three, switch it up. Left leg lifts. Take the hip up to bring the leg across the body. Left shoulder stays down. Swing the leg down, around and up to and down.Round up. One more time. Across, down, around, and up. Reverse Sig. Open it down across in lift. Think of that standing leg. We're going to need it in a second. We're going into our scales very soon. One more time down, across and up and lower the leg down. Reach your arms up by your ears.
Transition into your rolling like a ball rolling up, bending your knees, grabbing a hold of your shins. Roll back and forth three to five times. Just make sure you get what you need from this exercise. This is a bit of a dull moment and just allowing your spine to be nice and round and stretching it into the mat. Getting a massage back from the mat. Take one more. Roll yourself onto the tops of your shoulders.
Rolling Like A Ball
This time come into a supportive squad. Feed down. Hands down. Push yourself onto your feet. Stay there for a second. Can you get your feet flat on this one? Where would you have to put your hands to make that happen? I'm gonna play around with that a little bit in this final class.
Rolling to Squat
Now it's from there. Can you sit your hips back down into the floor? Roll yourself back. I'm right back to that spot. Rolling onto your flat feed. Hand support you. Where do you need to be? How can you play with the way that your arm support you? Here's what you can let your heels fold as close to the ground as possible, even if it's just a bit more of a stretch. Nice.And then sit yourself back down. Roll yourself onto the tops of your shoulders. Come up to standing. This time forward and up. You may or may not need to use your hands this time. Come all the way up. Stand up. That part is over. That's the good news.
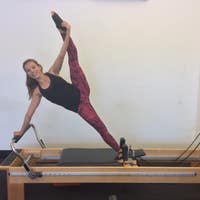
Front Scale
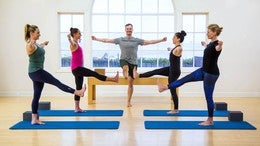
But now we're starting to put together everything we've done with our scales, right? It's a one leg of balance. It's a leg lift. Where again, trying to keep the leg as engaged as possible so that there's no bending at the knee. We're going to add on a little bit. Make sure you have space to either side of your arms. Go out to the side and preparation. Let's lift the right leg up first. Bring it out in front of you. It's a flexed third. It's a locked knee. Your standing leg is nice and lifted. Now from here first, make sure that your hips are square.Can you sink the right hip down next to your left and pull it back or forward next to your left so that you're nice and square now as if you're standing against a wall. Bend your standing leg. Keep the weight on your heel. Push the ground away. Lift back up. Keep the heel of your front leg lifted. Bend Parsh back to straight. One more time. Bend it down. Press back up. Lower everything back down. Checking with how your leg feels different from the other.
Let's take the arms back out to the side. Stretch the other leg out in front of you. Long through the heel, long through the knee, square through the hips, and then you bend your standing leg down any amount and back up four, two as you bend your knee, rather than thinking about coming down a lot, can you lift? You're working like up a lot and lifted back up and bring everything back down. Open your legs slightly. Arms come right back out to the side. We have to do it to the side too, I'm afraid. Is that okay with you guys?
Right leg out to the side. You don't really have an option. He reaching through the heels. Standing leg, nice and active. We're going to bend that knee. Now. Squares of the hips means something a little different. As we take the leg out to the side, you want to make sure the leg is in front of you slightly so that you don't pull that hip back, right? Third one, take it down any amount. Stretch the leg, pull everything back in together. Shake it loose. Oh, there's a second side.
Side Scale
Let's do that one, two arms outside. It's your left leg. Reach it out to the side. Shift the weight onto your standing heel and three times. Once you find your square hips sink down, push back up, keep your back active and lifted the entire time for two and lift up. You've got one more. Take it down, down, down, lifted up.Bring everything back to your center. We go back to finish up right leg goes back. Remember, it's the lift of the leg that drives your torso forward and down. It doesn't have to be flat to the ground. This is it. Keep your back engaged. Left leg Benz any amount. Three, push the ground away. Lift up as you come back up. Can you lift your chest high?
Back Scale
Can you lift your thigh higher? One more time. Bend and stretch. Pull yourself back onto two feet and last side. Finally, it's the left leg, I believe. Bring it back behind you against the leg lifting up that drives your torso forward. Keep one long line from the crown of your head into your back heel. Beautiful fold. I've left it in a little bit. Bend three, press up.Remind yourself with squareness of the hips means in this position. Two and one. Press up to standing. So strong ladies, bring the arms down by your side. Watch to the front of your Mat, Cross your feet or any way you'd like. Get onto your back.
Single Leg Stretch
We go into our series of five the nice and strong through the center, right into it, right leg in, left leg, long head, neck and shoulders lifted. Use the arms and switch and switch and switch and switch. Going into a quick pacing right away. At this point, we've done so many times. Allow yourself to sweat the details a little bit. Let's push right past them and go into a deeper fold at the hip with each one, allowing the movement to speak for itself.Finding a stretch into your back with each one and maybe a nice high lift of the upper body. Three, two, one, both knees and we're going to keep the head up. Double leg stretch three times. It's your hollow body. Hold arms and legs. Reach apart. Arms come around, knees come in and squeeze. Go for to inhale, reach arms, legs away from one another. Niece come in. Last one. Inhale, reach. Exhale, come back in. Right leg up, left leg down. It's your series is pull once pulled twice. Switch and pull once. Twice.
Double Leg Stretch
Switch Paul once, twice. Switching. Keep going. Remind to keep your hips evenly weighted on the mat at all times and each time you have a leg in your hand, maybe push it into your hands. A little swing lifts you up higher. Three switch three and a two, two and two. Two last set right and left. Hands behind the head. Both legs are going to take this low and low.
Single Straight Leg Stretch
Take the legs away from the body. Any amount you can. And then in one quick motion, pull the legs back up. We'll do two more of these. Lower. Lengthen, lower and lengthen to lift. One more time. Lower. We're going to hold the legs down to twist through the ride, right and he comes in. Hold for a second. Keep both hips evenly weighted on the ground. Switch over to the other side.
Double Straight Leg Stretch
Pull the elbows apart, switch over to the right. Hold it there. Keep that right. Hip heavy pulse. Elbow to knee. Four, five, four. Yes. Stretch your back. Open two and one switch over to the other side. I was nice and wide and give me the tiniest movement coming up into the higher, a little higher for the higher three. Little higher to the higher one. You're done. Bend your knees into your chest. Ah, give yourself a squeeze and a hug. Rock yourself up to a seated position.
Criss Cross
It's time for a spine stretch. Open the rocker transition again. Just like last time. Your legs are long in front of you. Arms are lifted parallel to the ground. We're compounding those two exercises into one. Start with your spine. Stretch round over your legs.
Open Leg Rocker Prep
Build a connection from the round of your spine and to the energy that you stretch into your arms and legs. They really do the same thing at the same time with the same effort. Keep that. Roll yourself back behind your hips. When it's time, pick up your legs. Grab Ahold. Beautiful, Nice. Lower the legs back down. Take a stretch forward over your legs. We'll do it twice more.Transitioning a little quicker. Roll yourself back. Pick the legs up. Grab a hold. Don't hold your breath, lower the legs round over your legs. Take your spine stretch. Last one. Make sure you have space behind you to open leg rock because we're going to do that next. Roll yourself behind your hips. Pick up the weight of your legs and off you go. Roll yourself back. Lift back up again. Roll yourself back.
Open Leg Rocker
Lifting up left. There's one really go again, just like you're rolling like a ball. Explore having fun with it and explore. Checking in with what your spine needs from the exercise. Two more times. Rolling back, lifting yourself up. Take your next bunch of standing. Using our crab transition. You Bend your knees, you rock over your knees onto ankles, knees, feet come apart. Some of you are already in standing where we're going to take our squat into standing again. All right, so you're in your thigh stitch position. To start, just a quick little recap. It's been awhile. Knees are under your hips.
Thigh Stretch to Stand
Hip distance apart, feet along behind you. Toes tucked under your arms along in front of you. We're going to thigh. Stretch our way back, so toes tucked under. [inaudible]. Sorry, I switch back and then think you aren't keep reaching forward. Your chest stays pretty much where it is. Your feet fall down flat, your hips go back and space. Exactly, and once you're on flat feet, you come up to standing. That's going to become its own exercise. Now we kind of come right back down. Sit your hips back, arms and chest.Reach forward. Your chest stays where it is. Your knees point forward and down. Your upper body goes back as a counterweight. You land gently on your knees, you come out of your thigh stretch, and we all live to do it again. If I switch back, heels down, hips back, chest forward. Yes, that's all right. Come up to standing. Let's come back down. Hips, back, chest forward, roll down. Let your knees come forward and down. If you're on the reformer, ever think of your semicircle here.
It's kind of what happens in the body and let's take it back one more time. If I switch back, he looks down, hips back, chest forward. God come all the way up to standing at your arms. Come down by your side, shake it loose. We're going to take a quarter turn to our right. It's time for the standing saw. Take your right arm up towards the ceiling. I'm going to start with that one right on up.
Standing Saw
Feet a little wider than hip distance apart. You're going to take that right arm across to the outside of your left ankle. Push those two into one another. Twist your spine open. Come back up, switch to the other side. Save your XL for the moment you connect head and foot. Use it to spiral your chest open. Opposite arm reaches.Lift back up and take it over to the left. Reaching down on this side. It's the far habits, the right hip that pushes back and space to square the hips. To get an extra stretch, lift yourself back up and take it across to your right. Up and over you go. Make sure you have even weight on both feet throughout. You've got one more round coming up, lifting up, rounding down, standing saw, even weight on the heels. Push the ground away. Square the hips.
Lift yourself back up. This is your last one. Take it down. Yeah. Nice Porsche hand and foot into one another. Really allow your shoulder to round in towards the leg you're stretching towards and then lift yourself all the way back up at both arms. Come down by your sides for a second that your feet turnouts lightly. Take your arms over your head, make a fist with your hands.
Side Bend
Interlock your hands here. [inaudible] and then bend your knees out to the side. Sinking down into like a mini squad. You can maybe bounce up and down a couple of times to really feel soft in your knees and hips. We're going to stretch the spine sideways from here. So stay low. Pull your torso over to the right side so you really using your right hand to pull the left side long. Once you're there, come back through center.Allow you have to sit even deeper and then stretch up and over to your left. Nice. Allow the hips to sink farther down, keeping the front and back of your pelvis align. Come back through center. Stretch up and over the right. One more time. This time, pull yourself forward so your hands reach forward, your spine rounds, Chin over, chest, your ribs, puff back in space until you arrive on your left side. Coming all the way around. This time straighten your legs, lift yourself back up. We're going to start the whole thing. One more time. The other way, going around the world. Bend the knee. Stretch over to the left.
Around the World
Rounding forward. Pole your fist away from your center until you arrive on your right side. Once you see the space in front of you again, straighten your legs. Come all the way up. Separate your hands. Remember our swing through you. Bounce your knees, open your hips, down, your swing, your torts, and through the legs. We're kind of three, two, one. Inhale, lift yourself back up. Repeat two more times.
Swing Through
Swing it through three and two and one. Inhale, lift. One more time. Rounding through and a two and a three. Inhale, lift your arms. Come down to the sides. Face the center of the room. Come to the middle of your mat. So to get back to the floor, we'll do our squad one more time. But before you do that, go ahead and grab one of your bricks or blocks or again, if you're doing this in a fully equipped studio, you may use a moon box for this as well. All right, we just want to have it handy for the next exercise, but we'll do our squat again.
Squat to Kneel
You can hold the brake between your hands since we have it. Press into it. Sit your hips back, find your squad again. Let your knees slowly arrive on the ground. Upper body leans back as a counterweight. You come out of your thigh stretch, lifting yourself up from here. We'll take that break or block behind us, pressing it into our parts. Now for most of us, that's probably really difficult to do with straight arms. So allow your elbows to bend any amount they must to really press the length of your palms into either side of the block.
Chest Expansion Variation
It should feel as though that action opens up your chest a little bit. Yeah, so once you have that, see how far you can reach the block down towards the backs of your knees going into a version of chest expansion. Here, so pressing your hands into the blog and keeping it as low to the ground as possible. Start to reach your arms back behind you. It's almost like you're trying to scrape it along the floor back behind you, and then slowly they'll come back towards you. Yeah, so don't expect a big movement again, it should feel like it's a big one, but there's probably not a lot of moving the break away from your body happening initially. Okay, so slowly come back in and through that again, press your palms into the brig movement as far away from your center as you can. Feel it. Immense opening in your chest that the break return. We're going to add the turn of the neck. Press into the break.Move it away from your center when you can move it any farther. Turn your head all the way to your right all the way to your left. Keep pressing your palms into the block. Head straight up head and at the block. Return one more time. Press your palms in. Move it away from you. Stretch it down and back behind you.
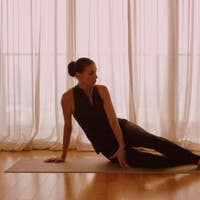
Turn your head all the way to the left, this time, all the way to the right, straight ahead and that the brick return. Sit back onto your heels. Get rid of the break for a second. I want to pick it up again in a moment. For now we'll go back into our swan preparation. So facing the same way, just come onto your stomachs. Hands next to your ribs, just like we prepared it previously during your support at half's one here. Remember I want your hands on your hips pressing down into the mat. Everything else lifts up your eyes, your chest, your thighs, your legs, everything. Lift your hands, help you by pushing down your hat.
Supported Half Swan
Hips help you by pushing down size. Lift up. So go ahead and lift. Think of lengthening your sternum away from your toes. Get longer in both directions. Take yourself back down. Do that one more time. Press your hands and hips down. Everything else lifts up. Stretch your right arm forward. Stretch your left arm forward.Lower everything back down. Good. If you need to adjust on your mat, feel free to do so. Make sure that you have space. We're going to keep those arms overhead. If that's not available to you, you can always return to where we did before. Hands by ribs. All right. If available, press your hips down, lift up your torso, your arms and your legs. Again, think it's less about lifting up into a high back bend and more about matching the height of fingers, head and toes behind you. So when are in the Lincoln lengthened Backman position? Come back down. Take it one more time. Remember that Hollow Body Rock we did early on your back?
Well, that's how swan dive really on our backs. Now we'll do it on a stomach, into our full swan dive. Hips down, legs up, arms up.
Swan Dive
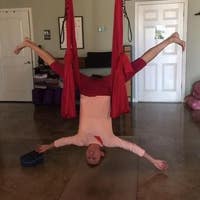
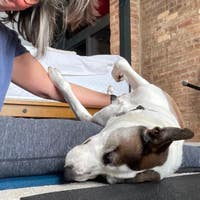
Fire it up at once. Lower everything down. Sit yourself back over your heels. Amazing work. You guys. Sit on your heels for a second. Let your arms help you. Stretch your back. In the meantime while you stretch, you can start to figure out where your blocks are because we're going to need them next. Go ahead and pick them up coming into the final push. So we've been starting to work on using these to bring the floor up a little bit underneath our hands to possibly give us some risk relief. Again, this is somewhat inspired by the work we would do with the parallel bars parallettes or pushup handles in the original work.
Child's Pose
These are really good place holder if you don't have those accessible. What we ultimately want to do with them is to go into more while gymnastic movements such as the El Sid, um, as well as some fancy tricep dips. So we'll try and play around with those ideas a little bit before linking it back into our familiar material. So if you use these breaks here, go ahead and place them sort of next to your hips, if not slightly behind them. All right? Depending on the type of break you work with, you have different options as to how high away from the floor comes. I would suggest that you want to a wide base of support for this first set of movements we're going to do here, which is really just the tricep press.
Tricep Press
So you have your hands flat down on the blocks by either side of you, you press your legs into one another, you can flex your feet, point your feet, whichever feels more supportive, but make sure that you hear that. We'll be pressing down into the floor for support and you just push your arms too straight. Think of your chest expansion from a second ago and how you tried to move that block away from your center. Feel like you're trying to push your arms back behind you and then bend the arms until your hips are just about to land on the mat and push back. Just straight. So again, it's a super small movement. Pull the elbows back, feel like you're pushing the blocks back behind you and push back to straight.Take five bend and push four so that it's less about the bend of the elbow and much more about the lift of the back, the softening of the elbow for an open chest so that all the muscles that hold your shoulders in place can start to kick in. One more time. Bent and stretch on this last one. Get your hips up in front of you. Remember last time we used our marches to lift into an inverted table chop. Now try to lift into an inverted plank from here, so lift your hips up. Keep your chin on your chest. You peeked down at your own toes.
Reverse Plank
We've got for right now, we're keeping the head supported and then let your hip sink back in between the arms. Bend the arms and take it back down. Nice work step to move the brake slightly farther forward. Next to your thighs in front of your hip creases. Take your hands flat down on top of them.
L-Sit
Lower it back down. Take your left leg up. Keep pushing into both brakes just as much and one more time. You just side right leg lifted lengthens away from the body. Think of your scales. Take it down. Left side, lift it up. Take it down. Now look straight ahead. Bend the arms and set yourself back down on the mat.
All right. [inaudible] gets increasingly more fun. Let's do it again. Press down into your hands. I bet you have an idea where this is going. Press into your brakes, straighten the arm, but round your back. Almost feel like you're trying to pull your ribs back behind the arms from here. Lift one leg at a time or try both. Looking straight ahead, pulling the legs up and away from the ground. Which is yes, just like teas are on your hands and then lower back down.
Two more times. Press into the arts. You have options here, right? You can lift one leg at a time. You can even just hold the position that just fine. But if you have an inkling that you could possibly try and lift both legs, see what comes up. Beautiful. A lot of the preparations that we've done, you can sit down for them. Before we go into our last one. A lot of the preparations we've done have led us here. Yeah. So one more time.
Hands on the bricks. Press your legs into one another. Push down into the arms, straighten them out, pull the ribs behind the arms. One leg, maybe two. Nice work. Lower the legs down. Third time is the jar, and then the elbows. Let it all go for a second. All right, so for the last part, we're going to reorganize the blocks one more time. We're going to need them sort of in the middle of our mat to get ready for our marches again, we've done them versions of those in both classes. So far. We're going to do yet another one where we traveled from playing to playing.
Marches
So make sure that your blocks are in the middle of your mat. At this point, you may know if you need them in a lower setting or maybe in a somewhat lifted setting, right? Going to repeat once more. What we've been doing so far, you're in a four legged position. Toast tact under hands on the block. Lift your knees up. Keep your center tight and your spine nice and straight from head to tail. We're going to take those little marching steps so they're very, very small. To the point where your spine has to round, you're passing, you're rolling like a bar position to walk your feet out in front of your breaks underneath your knees until you can lift your hips up.Think of your chest expansion here. You actually pushing your arms back behind you. You're using your legs the same way you would in a shoulder bridge. You let your hips sink back down to start walking or marching your feet back in between the blocks into your four legged position to then lower the knees back down, right? So that's step one. You can absolutely stay with that. We're going to walk it from a full plank into an inverter plank this time.
So take your hands back onto the brakes, load weight into your arms, extend your legs back behind your toes, tucked under unit plank.
We'll take one more wrapped walking through in, in smaller steps out better. Excellent. Walk your feet out in front of you. Press your heels down to lift your hips up. Let your hips sink down first and then begin to pull your heels back to start those steps walking in. Continue to push into your hands so that you give yourself enough space to walk in between the blocks into your plank. Stay right here. Take your right leg lifted up off the ground. Leg Paltz, you kick the leg to the ceiling once, twice. You pull it down, left side.
Leg Pull Front
Kick it up once, twice. Flex polar down. One more time each way up, up. Flex Pollard down, left side up, up. Take it down. Walk through and we take our leg. Pull back with our feet in front of us and our inverted plank. Take your legs out in front of you. Press the yields down. Hips lift up. Final push. Lift the right leg up. Kicking once or twice.
Leg Pull Back
Pull it down and left up, up hip. Stay up one more time. Each side, right side up, up. Take it down and left. Side up. Up. Take it down. Tiny steps walking into your plane, almost there. Almost there. One more thing to do. It's our elephant walks yet again. Find your plank. We organize your hands on your brakes. Push evenly into both. Lift your hip creases up.
Elephant Walk
Start to walk your straight legs, one in front of the other heel too. Big Toe. Follow it up with the other. Continue to push wade into your hands. Lift your hips away from the ground. Walk yourself as close to the blocks as you can and then walk your feet back into a playing. We have two more of these. Find you're playing even weight on hands, chest pulled open even here.Think of your chest expansion like you're dragging those blocks back behind you and lift the hips up a little quicker. Heel in front of toe. Walk, walk, walk strong through the legs. Allow you heels and feed to articulate as much as they must. Walk back into playing. One last time. Final one. Weight on hands. Chest open, hips lift up. Walk your feet in. One, two, three, four. Take as many steps as you need to land feed side by side that your hands come off the blocks. Soften your knees, slowly roll yourself all the way up to standing.
Open your chest nice and wireless. Take those hands together one more time and to lock your hands. May figure age, shape with your wrist, just to give them a little bit of release. After all that work, shake it loose. You guys are rock stars. Amazing work. Thank you so much for joining. Oh, have you had fun with that one? Thank you.
Comments


You need to be a subscriber to post a comment.
Please Log In or Create an Account to start your free trial.
