Description
About This Video
Transcript
Read Full Transcript
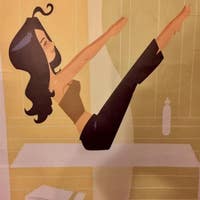
Hi. Thank you for joining me. I'm Julie driver. This is the beautiful Amy havens. And we're going to do a magic circle class. So we're going to start standing as you can see, and we're going to begin by just placing the ring just above your pubic bone. So we're going to just take a moment and just to get ourselves into our bodies. So I've got my heels together, toes part. If you prefer parallel, that's fine.
What I want you to think of doing is as you exhale, just press gently onto the ring and think of pulling the abdominal, the lower abdominals away from the pressure of the ring, and then breathe in. So as you exhale with thinking of lifting the arch of the foot, lifting up through the inside thigh and just gently putting those lower abdominals away from the circle. Breathe in and gently exhale and press into the ring. So now what I want you to do is keep all that work from the lower foot, from the arch of the foot up through the inside, five through the abdominals, and change the position of the ring. You're going to bring it now to the just underneath the ribcage. Bring the hands around the ring. Now think of the back of your ribs, mimicking the shape of the circle so that as we breathe in, you really expand the back of the ribs.
And then as you exhale again, we think of the lifting, the arch of the foot inside thighs, lower abdominal. So we're just working through the body, building these connections and preparing us for our class. As you exhale, use the in-breath. Imagine that the ribs expanding, and then exhale, relax the shoulders. Make sure the holding the rings and cause tension in your neck. And again, breathe in last time. Now simply slide the ring round to the right side of your ribcage. So we holding the circle with your right hand.
Your left hand is going to cup your left ribs. So now what we're doing is we're using the expansion of our ribs into the circle, and then as you exhale, really allow the ribs to drop and release. As we inhale, diaphragm moves down, the ribs expand, and then as you exhale, diaphragm moves up and the ribs relax.
There's a difference left to right in our breathing. We're just changing sides so I can feel as I'm an asthmatic, I can really feel the difference in the left side of my ribs to the right side of my ribs. This is a really good way of encouraging good breath pattern down into the back of the ribs. And again, still thinking of the arch of the foot, lifting the inside thighs, lower abdominals, and all the other places we've had the ring before to build that contact. Now bring the ring, and
We're going to place the ring on your forehead. Place the hands either side of the circle. So what we're doing, I'm not going to press into my Fort. I'm just going to think that as I exhale, I'm going to just bring my head back and away from the ring just to bring my head up and onto the end of my spine.
So make sure the circle is not actually on the bones of the neck, it's on the the actual skull. And I'm not pulling the ring, I'm not putting the ring forward. What I'm doing is simply holding the ring steady and bringing my head back again onto the spine. So if you're a chin poker like me, this is a great exercise. Breathing in, and then as you're exhaling, keeping all those connections, lifting the arch, the inside thighs, working the lower abdominals, and last one. So now the challenge is as we bring the ring forward and lower it, really think of keeping all those connections going. We're going to bring the pads into our hands.
I'm going to step forward to the end of my mat. I'm going to cross my left leg over my right leg, extend my arms forward. I'm going to take a little bit of squeeze into the ring as I bend my knees and we are going to gracefully uncontrolled. Sit down. Okay. Extend the arms and we are going to just roll down to the mat.
Now keep working. Remember all those places we had the ring to connect. You're gonna roll down. Take the ring over the head. Now as the brain goes back, don't let the rib cage off. Barring the ribs, the arms forward. Lift the head and the neck and the chest. Look through the circle.
Stay here and breathe in and I want you to squeeze the ring. Two, three, four, five out, two, three, four, five and in an out two more and out. Last time and out. Now hold it here. Lift the spine, roll forward and stretch over the feet. Lower the ring down as you part the legs and place the ring between the heels.
Roll the spine back up to vertical. Now place the hands on your inside. Fise so what I want you to feel is that when we connect into the ring, when the ring between the ankles, we're not just pushing from the foot. You want to really think of connecting into the ring by drawing the thighs
Reach the ring away as you roll down and you'd be pleased to know we're going to finish the 100 with the ring here. We're going to curl up. Hold it here, squeeze the ring and breathe in. Two, three, four, five and out. Two, three, four, five on it. [inaudible] out [inaudible] and keep that connection into the ring. Remember where the ring was before on your lower abdominals. Keep that connection. Last one an out. Now lower the spine down. Take the arms over the head.
We're going to bring the arms back up, not the head and roll up. Stretch forward over the legs. Take the circle again. Bring the legs together. So now we're going to roll back holding the ring. So I want you to find that little spot that you have that we all have where your body just wants to leap through it and just drop you to the ground. We're going to row slow, uncontrolled and we're going to find that little bit that your spine just doesn't want to roll through and you're going to stay there.
You're going to breathe in. Now squeeze the ring and really pass through that little bit of your back to continue down with control. Take the arms overhead, bring the arms back forward and again lift the head and the chest like we did for the 100 see your feet now again, squeeze the ring to support you through that tough little bit of spine, especially if you struggle with neck. Pull later. This is when you do the work. Now you're preparing for the rest of the class. And again, we start to roll down. Imagine you want to leave the ring in place. So as I roll down, I'm keeping reaching my arms and my legs forward in opposition as my spine moves back and I lengthen my spine to roll back. Good. Last one because we're going to finish seated now Roy really lift through the spine to come forward.
Make the spinal longer. Okay. Rollover. So you have a few options of places for rollover. It was between the Hills here like we had before at tends to get people, it falls on their face, which is not so good. So instead we're going to go between the ankles.
That's my advice. Okay, so we're gonna roll down. Are we going to bring the legs into the air? Okay, straighten the legs. Now find that squeeze that we had before into the circle when the legs were on the mat. Breathe in, bring the legs over you and then rollover. Now flex the feet. Continue to roll down, but keep reaching the circle and the crown of the heads of the will behind you. Bring the legs to vertical and again, fold the legs over.
View and rollover. Flex the feet rolling down.
Flex the feet roll down.
So we're going to roll down, unless you wrote down, just make sure your pelvis is square. So all I want you to do is place your hand around the back of your thigh.
Now slide your right leg in towards you. If you need to keep the leg bent for knee circles. Keep it bent. Otherwise we straighten it up into the air. So now we're working both legs really intently. Keep the compression into the circle as you circle your top leg. One, two, three, hold it still and reverse.
One, two, three. Now
Change legs. I mean it's the same thing. Good. So fine. That work. So again, think of checking that your pelvis is level, have a little look and then on the exhale, pool the leg down onto the circle and think of the front of the thigh being stretched and lengthened. If you don't want to roll up from this exercise after the leg circles, please don't. You can just simply roll to one side, but there is a penalty if the ring makes a big clatter sound on the floor.
Now the next time we're going to hold the circle down. Slide the leg in. Stay as stable as you can in the pelvis. This is my Tufts side. Ah, circle the like one, two, three, reverse. One, two, three. Bend the knee, slide it down. So make your choice. Now take the arms overhead, either roll to the side or roll up. Good. Okay. Now we're going to do my favorite version of running likable. We're going to take the circle, place it against the back of the thighs and hold it between the ankles.
So now we're gonna hold the ankles and think of pulling your heels back up an inch. As you inhale, we roll back. Exhale forward two more. Now to really challenge this, we're going to let go the legs. So you've got to really pull the heels back up and in and do three more. Hold it if it falls on your face.
Okay. Touch the toast and the floor. Remove through circle. Okay. So now series a five. So what we're gonna do is bring the heels together, reach the circle forward and roll back. Now keep a circle directly above the chest. Just bring the legs in towards you. And then knee fold the legs into the air. As we exhale, we're going to curl up and we're reaching a circle over the legs.
We're going to single leg stretch. One, two, three, four, five, six, six, five, four, three, two, one. The legs come together. Now reach the circle up a little bit more over the legs. Now as we inhale, reach the legs and the arms away from each other
Make sure it stays stable. Nabbing the right leg to the ring level. Only the left leg. One, two, three legs together. Now lower both legs. One, touch the circle, two and three. Now hold it here. Slide the circle up towards your ankles. To get a deeper curl up. Bend the knees in. Now we're going to turn to our right.
Pull the right leg in. Extend the left leg. Inhale to come center and twist some thinking of my arms sliding along my leg to kill me up a little bit more. So as I reached to the left, my right arm slides along my left leg. One more each side. Come to the center, unrest the head down.
Hold it up above your head, straighten the legs, and we're going to roll up again to come to sitting for spine. Stretch forward. So we're gonna do it two different ways. I get a place during, first of all, between the legs, have both hands, either side of the circle. So now all you gotta do, first of all is I want to think of just pressing down on the circle to lift your spine up really tall. And again, you get that sensation of as you press down onto the ring, you can decompress the spine and sit taller. One more, press through the heels. Now you're gonna not the head and just start to stretch forward. And the ring will just tip onto its front side edge.
Breathe in and come back up. So we're not going maybe as far as we would do normally. But what I want you to feel is that as you exhale, the compression of the ring as well lifts you up forwards and oversee. You got a very long length and spine stretch forward and breathe in. Sit tall. Last time as you exhale
So now we're going to change the position and place it where we had it before between the heels. So again, get that work into the inside, bring the arms up and press down just like you're doing with the arms before. On the circle, just press down and feel that lift through the spine. And as you exhale, think of your spine stretch forward, and then as you inhale right from underneath, restart the spine, bone by bone. As we exhale, think of the press down through the arms to think of lifting the spine up
Good. Now I'm going to take the ring and we're going to simply put the feet in. At this time we're just going to do a little bend, so round the spine and then lift and extend and again, round the spine
We're going to lift the chest now, bend the knees in and then straighten them. So in now, exactly where we were a moment ago with that posterior tilt and you're going to hold it. And now as you exhale, roll. Keep the tension in the circle, the same as you roll. Ooh. So really think posterior tilt and role, he got to really control it. So my left leg is a little bit lazy if I'm honest, and I can feel that as I row. It just is a bit of a passenger, so I've got to really keep working into the circle. Last one, keep that posture, your tilt, but the lifted the chest and come up. Now hold it here, control it. Bend the knees in. Remove the feet from the circle and stretch forward just to grab the ankles.
Have a little forward stretch. Good. And roll back up. Okay, so NAF saw, we're going to place the circle onto your right ankle. We're just going to do one side at a time. So what I'm going to do is I'm going to inhale, bring my arms up. Now I'm going to rotate towards the circle.
Now I'm going to place the heel of the hand and what I'm going to think is I'm not going to press down on the ring by pushing. I'm going to press down because I lift my back rib cage up forwards.
We're going to Neil. Neil. Yeah. So we're going to place the ring between your heels and your bump. Okay. Now if you need to have your knees slightly parted, that's fine. Otherwise happen together. I fulfill my slightly part because of my knee. Now we have a straight line knee, hip, shoulder.
So what we're going to do with a little Feis stretch before we do our single leg double leg kick. So bring the arms up. Now keep that straight line knee, hip, shoulder, and lean back. So what I want you to feel and come forward is as your heels and your bum get closer together, it opens the front of your hip,
Can you come to the mat without losing the circle?
We're going to do single leg kick first. So you're not, there we go. So you're going to have the ring between the heel and the edge of your buttock. So now one leg at a time, all I want you to do is place your hand at the front of the hips and that as you bring your heel into the circle, you can lengthen your knee and open the front of the hip and release. So that's your focus here. Stretch the front of the hip by bringing the heel to the bottom and release one more and then you changed sides.
This is the challenging part. Are you ready? I am ready. I think I am. Okay. Maybe no, there we go. Okay. Same thing and be aware of the difference between left and right. I can feel that this side is much more challenging. So again, I'm going to brewing the heel into the circle and stretch the front of my thigh and release two more. Okay, so then we're going to move the circle and bring it round to the hands at the front and extend the spine.
So take a little bit of pressure into the circle and you use this pressure to really lift your spine away from the mat. So lift the breastbone, lift the sternum away and cover connections to circle. So now we're going to do all single leg kicks. We'll do three on each leg. And I want you to feel that you do the same quality of movement as you just did when the circle was that it's the lengthening of the front of the hip away from the sternum. So slips sternum away from hip, knee away from hip. One more each side. Straighten the legs and not place a circle back between both legs. When we've done one leg, we do two.
So the, as you bring them heels towards your bottom, there's no tension in the lower back. It really is about opening the front of the hip. Now remove the circle and bring it between your hands and reach the arms down the back. So now we're going to bring the heels in towards the bottom again. One, two, three. Reach the arms back, lift the circle up, and then lower one, two, three and reach. Extend the spine and down one, two, three. And reach and lift. Lift the arms as high as you can.
Lift the chest and place the ring by your side. Place the hands onto the chest, just having a rest position just to make sure that you stretch the back in the opposite direction. And then we can roll up. Okay. Neck Paul. Okay. Okay, so we're going to put together all the things we've done so far. So take the circle and place it back behind your head where we had it at the beginning of the class. So remember we're not pulling the head forward. I want you to think simply of pulling the head back away from you.
We're going to flex the feet now keep the connection into the circle with the head and just lean. That's all we're going to do to start with. Just lean and then come forward. And again, lean and forward. One more and lean. Think of pivoting on the hipbones.
Then bring circle forward and place it between the heels. Find the connection to the legs again and now bring the hands behind the head exactly where the circle was a moment ago. So now we have all these connections. We're going to take a little squeeze into the circle and you're going to simply lean, keep squeezing the circle and then up. So if this is enough for you today, stay with this.
So remember it's always looking for progression, but we don't have to force ourselves to anything that we know today is not right for us. If you want to go into the full neck pool, we're going to lean as far as we can and then take a posterior tilt of the pelvis and roll back. Now if you need to release the arms forward, that's fine. Otherwise we keep the hands behind the head as we roll back up. So remember, keeping the hands behind the head adds load to the spine. We're going to stretch forward towards the feet. Now think of that lift we had before with the circle for spine. Stretch forward, left into the spine as you stretch forward and then roll back up.
Lean back again. Posture, really tilt, but keep a stretch. Keep leaning with the spine to that big space behind you.
Roll with control and now really work through the bit of you that just doesn't want to cooperate. Make it work for you and left and stretch up and then sit tall. Okay, see
I'm going to straighten the legs if you don't want to add the leg pumping. And then don't. If you want to just do a straight forward rollover, we're going to go up into our jackknife Kiba lift bend one
So what I'm going to do is I'm going to lift my spine up and then I'm going to hold a circle underneath me. So now what I'm doing is I'm squeezing into the circle, redrawing the shoulder blades down, and finding the length through my neck. And opposition. Now when I want to lift my left leg, I'm going to squeeze my left arm into the circle and think of my right inside Phi, pressing towards my left hand. And then I'm going to pick my leg up and that keeps me stable and I'm going to lower my leg. One, two. I've got to keep working that left arm and that right leg up.
Bend the knee, lower the leg. So to change sides, I'm going to press more with my right arm and use my left leg. Bring my leg up and one, two Oh one more. Come on left leg. You can do it. Bend the knee, place it down and roll down. Remove the circle, straighten the legs, give them a little shake, bring the arms over the head and roll up. How was that? Awesome.
Yep. Okay. Spine twist. Place the ring around the legs again. Now hold with the right hand. Yep. And then we're going to release this arm out and twist. Reach back. Pardon? I'm in comeback. Swap hands and twist.
So use the circle to keep you as vertical as you can. As you open your arm out, up and twist. And one more reach side.
So we're going to turn, so place your circle across the front corner of your mat and then place the underneath like inside the circle. Okay. And then your top leg is going to go on top. Now rest your arm down. If you want to be up on your hand, that's absolutely fine. But what I want you to make sure is that you're not leaning into your arm. I want you to think of pressing down into that circle in order to pick your waistband up. So again, the more I pressed down into the circle, the more I can pick my underneath side up.
I'm going to keep it lifted as I lift my underneath like one,
It's now this time we push up six times and we go, one,
Lift the leg up and over and tap behind the circle.
Last one, lift both legs and lower. Now lift both legs, bend the knees in, straighten them and lower them. So from here we're just going to bend the knees and come up unchanged sites. So find your positioning. Again, top leg on top, rest yourself down. So take your time just to find where you need to be. And again, to get that sense of as I press down onto the circle, I can lift my underneath side. So I'm going to press down, keep the tension in the circle, and I'm going to lift my underneath leg. One,
And now we're going to press up against the ring six times. So we can press up one,
If you want, you can lift the head off the mat and lower last time and lift.
So the important thing with this is you find where you need to be. So it will vary person to person depending on body length. So I'm going to take my leg out to the side. I'm just gonna find worms, the best places for me to really as I think pressing down on the circle to lift up through the side. Now if being in this position enough is enough, then just stay here and hold the position. We're going to bring the hand behind the head and I'm going to lift my leg off the floor and I'm going to lift it and I'm going to lower it and lift and lower and lift and lower. Keep the toe there and I press down into the circle to really lift up through the spine. Lift the leg up one last time, hold it and lower it.
Bend the knee and change sides. So again, play around with the best positioning for you in your body. Just find where you feel you're going to be stable. Then make sure you're not leaning into the circle, you're lifting off it. Bring the hand behind the head, find the work.
I need to be a little bit further out and we're going to lift and lower and lift and lower. The more you left off the ring, as you press it down, the ease, you will actually be on lower. Now this time we're going to do the lift and hold. So find the positioning, lift up through your top elbow, lift the leg, and whew, hold it. Hold it Julie. Hold it. Two, three, and bend the knee. Woo. Let's have a little bit of boomerang. Woo. So, so the way we're going to do boomerang is we're going to have one leg on top, one leg inside. So the pelvis should be relatively square.
And we're just going to bring the arms in front. So we're just going to do a half a boomerang to start with. We're just going to simply roll back, keep reaching the legs forward, pressing down on the circle, that circle, breathe in, exhale, come forward. Good. And again, roll really positively till you can see if your pelvis is moving or if you're just leaning and come back forward.
Organize yourself, get a square as you can. And again, so I'm not just pressing down with my top leg. I'm also thinking of reaching up with my underneath leg as I go back up. And again, I'm going to row.
Now take the circle and normally with boomerang we would have our legs crossed, but today we're just going to do it with the legs parallel holding the circle. So the way we're going to do is we're going to roll over. We're going to do, when we get into our inverter position, we're just going to do a twist and a twist center and come back. Okay, we got it. So we're going to roll down some that bring it over. You said we're going to take right leg up, left leg up, back to the center. Now roll down and catch your teaser. Bring the arms up, circled and round. And now this is the dangerous moment when you've got a lower, lower, lower reach the arms up circle.
Take hold of your ring before it drops and just stretch forward. Need to do another one. Okay, between the ankles. Okay, roll down, roll over. And we twist one to centralize it. As you rolled down, you're going to come up into your teaser.
Lift the arms up now lower with control. Lower
Okay, so we're going to from the inside thighs and not from your ankles. From here you're going to squeeze one, two, three, row up inside thighs. Come together. One, two, three and roll on up inside thighs. One, two, three and row up. Find squeeze. Then take the circle out.
Okay, push up. So again, two options for the position for the circle. Four push up. The first one is where we had it at the beginning of the class here or between the chest. Okay. Some people don't particularly like this here, but play around with a position that suits you the best. So from here, we're just going to come down onto all fours. I'm going to go to this position cause I personally prefer it. Now from here, take the legs out behind you into your plank position. Now from here, what are you going to do is actually bend the circle, will support you and bring you back up. So you bend your arms and back up. And again, bend up, bend the knee, sit back on the heels.
Yeah, I find it. It's nice and springy and bouncy. Okay, let's stand up. So we're going to finish with a little asymmetrical work and some symmetry. So we're going to place a circle down now. Place the foot and stand up.
So if you think of drawing the inside thighs together, it should help you balance. So do whatever you need to do with the hands if it feels safer to have them out to the side. Now think of as you press down onto the leg on the circle, you're going to lift up through the supporting leg. And again, press down to lift up. Now really focus on the arch of your standing leg so I can feel the minute my arch falls, I start to wobble. So I've got to lift up through the arch of my foot up through the inside thighs as I press down, and that helps to bring me to stable.
We're going to do one more as we press down, we think of going up and growing taller. Now to come out of it safely, take the ring away. Other leg, this is my hardest side because this is my injured leg, so I've got to work so hard even to just be here in this position. So I'm gonna take my arms out to the side and I'm just going to focus on staying still. So I'm really lifting up through the arch of my foot through the inside fight. And the more I work the circle and press my left hip open, the more stable I am and I'm just going to hold it. Yes I am.
Woo. One more breath on. Come out of it. So this is where it's not about the work being perfect. It's about it being a change in making something happen. So we're going to finish with a roll. Okay. We're going to bring the circle up. Inhale. Exhale. Roll down. Place a circle on the floor in front of you.
Bring the hands to either side. And as you exhale, just pour us the circle down and lift the spine up into the space. Inhale, lift the ring. Exhale, press down. So it's like a little standing. Press down with the chair, then wrap the fingers around the circle. Roll back up, lift the circle up and again, roll. Keep the arms with the ears as we roll down.
I'm compressing the circle by moving my spine forward.
Lower the circle. Hold a circle, bring it in front. Breathe in. Squeeze the circle. One, two, three. Now think of all those positions we held at the beginning. Lift the arch. Bring the insight thighs together, lower abdominals, and what those are the last time. We're just going to lift onto the board of the foot.
Intermediate Mat Workouts: +50-Minute Classes


Comments


You need to be a subscriber to post a comment.
Please Log In or Create an Account to start your free trial.
