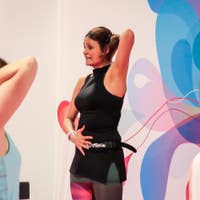
Description
About This Video
Transcript
Read Full Transcript
Hi everyone. I'm Claire Sparrow. Welcome to class today. All you need is a cushion or a towel for underneath your head. We're gonna start with some seated breathing.
Sit with the soles of your feet together, so you're making a diamond position. If you need to sit on your towel here, please do so if you need a little boost so that it makes it a more comfortable position, then please do. And then close your eyes, bringing your attention and your awareness to your breath. And you're inviting it and your breath is there to receive. You're just inviting it in.
And as you're inviting it in, invite it everywhere in your body. Let your breath fill your feet, fill your fingers, fill your head, let it go everywhere. Expand yourself with your breath. And before you breathe out, take a moments pause. And then just allowing your breath to fall out of you, let it go.
And again, after your inhale, take a pause. And then we're gonna slowly let the light in through our eyelids. Blink our eyes open, ready to begin. Go ahead and bring yourself onto all fours. Hands under your shoulders, knees under your hips.
So that means your knees are narrower than your hands are. Spread your hands, and we're gonna make a cat stretch and hold it. So we've done cat stretch before. You start with your tail, get that invisible movement and your sacrum follows, and your spine follows, and your head is last. Be here in that cat stretch, and hold it.
Find some ease in it, and breathe here. Letting your inhale expand and open your ribs up and out towards the ceiling and the sides of the room. One more deep expansive breath into the back of your ribs. And then let your spine uncurl. And go ahead and lay on your back.
You're using your towel as a little cushion under your head. Place your hands on the top of your pelvis. So the heel of your hands are on your hip bones, fingertips towards your pubic bone. Make sure your feet aren't squished up to your bottom. That puts a lot of tension around your pelvis, hips and lower back.
So find a comfortable spot where you feel free there. When you found that, we're gonna start to rock your pelvis side to side, one hip bone rising, one falling, and you're rolling across your sacrum. So you're finding your sacrum which is really a little bit of what we are working on today. So you're rolling across that dish-like bone toward the end of your spine. And you going straight across it so you're not tipping towards you.
You're freely rocking across. Then we're gonna go from side to side into a helix movement. Well, like a helix because it's helping to stimulate the sort of movements that we lose through our pelvis, and that we very much need for walking and our everyday activities. And then reverse your helix. I know you just get it one way and I made you reverse.
It's important we do coordinate ourselves in both directions to help us bring balance back to our pelvis, because that's how our pelvic diaphragm is going to come back to us and function brilliantly for us. Make this your last one and then settle there. So letting your pelvis balance. Clasp your hands behind your head. Interlace your fingers to the roots of your fingers.
Elbows are gonna reach up towards the ceiling, and then stretch out and wide to the floor, up towards the ceiling, and out wide to the floor. You're gonna inhale as you go up, and exhale as you go down. Inhale up, and exhale down. Once more like that. Inhale up, and exhale down.
And then we're gonna reverse it. So pause here. Exhale up, and inhale down. Feel the motion of your shoulder blades moving around your ribs like wet levity bars of soap, and the more you move, the more levity and mobile they get. And your ribs are moving freely beneath your spine, all responding to this butterfly movement.
Last one. Exhale up, inhale down. Release your hands, bring them back to your pelvis. Feel how open and free you are. Much more breath capacity in there now too.
Okay. Hands are on your pelvis. You're gonna fold your left leg up to about a right angle, and then let your heel just hang free. Bring your right foot a little bit further forward and let it flop out a little bit to counterbalance this leg being lifted in the air. If you felt like, oh, you were fine like that, put it back there.
I need a bit of counterbalance today. So I'm letting it just go here. Bring your left hands onto your knee, and you're gonna start to gently rock your thigh bone in the hip socket forwards and back. Forwards and back just to get used to it. And then you're gonna start to stir it.
You're gonna stir your thigh bone in the socket. All the while, your sacrum is balancing in the middle perfectly. So you're stirring as if you're stirring your thigh bone in a bowl of melting chocolate. It's like a spoon stirring. And then change direction.
As you're circling, be sure to relax your bottom. Think about your sit bone at the base of your pelvis just opening a little bit away from the other sit bone as you're opening you're like around. And be sure to cross. You know, if you were circling, if you were stirring a bowl of melting chocolate you'd be sure to get the edges. So make sure you make your thigh bone move all the way around the circle.
And then you're gonna come settle it, and place it down. And then flow it back up, and place it down. Keep doing that movement, floating it up and down, focusing on your sacrum sinking, and your thigh bone dropping back into the chocolate. It's like a vacuum. It just sucks it back in, and your float foot, foot floats up in the air.
We keep moving freely and fluidly. One more time, arching your thigh bone and down. And then we're gonna switch to the other leg. So you take your left foot forward a bit and let it drop out to counter balance. You bring your right leg up, drop your heel, right hand on.
Feel the weight of your sacrum. That's where your center of gravity is. So it is dropping down. And then we go forwards and back rocking, just wakening up that thigh bone in that hip socket, noticing what the difference is. And be happy that you notice a difference.
You know, sometimes you go, oh my goodness, there's awful difference from one side to the other. That's normal as can be and such a good thing that you have such keen body awareness. Start circling. That you can actually notice. So then when you can notice something, you've got the power to move from there, to make change.
Sinking your thigh bone deep into your socket, stirring the melting chocolate, and making sure you cover all of the socket, all of the bowel. And again, on the other side, we did talk about your sit bone opening, and that might be particularly relevant for you on this side. And then change direction. If you find your shoulder is straining, you can just fold your towel over an extra notch to boost your head up. And then we're gonna drop your foot back down.
Have your hand on the front of your pelvis. Your left leg is still counterbalancing, and then arching your thigh bone back again. So the drop, it comes into the socket first, and then your foot floats up like a seesaw, it drops in to the socket and up. And it can drop in because it's fluid filled and free and mobile from doing the circles. We're gonna do this one more time, and this arching movement is gonna come back later.
So keep it in mind for later. Great. Okay. Take your towel out, put it to one side. We're ready for some bridging.
You'll be ready for that opening. So for bridging, feet a little bit closer to your bottom. Find all 10 toes on the mat, arms long by your side as well. So your feet and your arms become that platform. As you bridge, you're standing into your feet, find your tailbone.
It comes in invisibly. Your sacrum, the inside closest to your organs, moves up through you like it's moving towards your pubic bone. So your bottom doesn't need to be clenching. I know I say that all the time. And then you let your tailbone go, and the weight of your pelvis brings you down.
You will naturally articulate down. Let it completely go. Sometimes we're still holding. Let it go. And again, stand into your feet.
Find your tailbone, inside of your sacrum moves towards your pubic bone. And then we come up. Yawn open the front of your hips here, balancing on your shoulder blades, breathing in, and then you let your tail bone uncurl, and your spine will lengthen back down. Next time, we're gonna pause at the top. We're gonna do a little movement with our sacrum.
So tailbone, sacrum to pubic bone, and then letting your tailbone go. And you're gonna imagine your tailing your sacrum like a snake weaving through the sand, moving forward, bringing your spine down. It's like magic. You're just down at the bottom before you know it. And again, stand into all 10 toes, tailbone sacrum up we go.
Yawning open your hips, and then you're letting it go. And it's not your whole, it's not whole pelvis jiggle. It really is very specifically your tailbone, and it taps in to your pelvic diaphragm in a very different way when you can communicate with your tail and your sacrum. So we're gonna do it one more time. And I know you'll do the class lots of times so you will become professionals at it.
So letting it go and you're sneaking down, leading with your tail, and your sacrum weaving through the side. That's it, weaving through the sand. Lay on your side now. Support your head with your underneath arm. Interlace your fingers with your top arm.
And we're gonna do some thoracic rotation. So you are gonna melt back across the back of your shoulders, heavy through your legs, and then sink your top leg down to create a spiral effect to bring you back. So your upper body melts across. You're melting like butter on hot toast across your mat. And then your top leg sends you back in a spiral, and again, melting.
And then your top leg sinks down, bringing you back. Go ahead, do one more. Melting. Think about butter melting on toast. And then top knee spirals you back again.
Great. Take your hand onto your top hip. Check that everything's in line. Use the edge of your mat here, and we're gonna do the fire hydrant. Flex your feet toes to shins, send your bottom leg down and your top leg will just levitate like magic, and then bring it down.
In fact, think of the whole of the underneath side of your body sinking so that your top leg can come up. Now, bringing your attention and awareness to your anatomy here. Know where your sit bones are at the base of your pelvis. We're gonna imagine they're like sliding doors opening, and then closing. Opening and closing.
So we get opening through your pelvic diaphragm and closing because sometimes as we're moving our legs around, we're still held on and we need to find the length that is designed to be there. So lift and hold this time, and as promise that femur arch is back. Point your toes now, and you're gonna roll that thigh bone back in your socket. And then we get to go further, 'cause we're on our side, we've got space, we can yawn open like our bridging. So we do femur arching and yawning open like bridging.
Put your hand on your sacrum at the back here. And that's where I noticed I'd lost mine. So we were holding on just gently between your cheeks to feel that this movement is happening at your leg without any twisting and funky things happening there with your pelvis, or with your sacrum I should say. We're going forwards and back. Keep breathing all of the time.
And then we'll do one more forward and back, all of the things, and then rest there. Okay team. Let's do the other side. So spinning round or rolling over to your other side, clasp your hands behind your head, interlace your fingers, check your alignment, and you're looking forward. And then we let go, we melt.
Spread across the underneath arm and shoulder. Look at your elbow behind you. And then your top knee sinks down and creates that spiral response to bring you back again, and again, gently back and spiral. Remember the image. Think about melting butter on hot toast.
It just oozes and spreads. And then your top knee creates the spiral. One more time. This is such a great way to rehydrate your spine and undo the desk posture that we can so often find ourselves in. Okay.
Taking your hand to your hip, check everything's stacked and organized. Flex your feet. Stand into the bottom leg to float your top leg, and then float it down. Feel heaviness into all of the surfaces making contact with the mat as you lift, because then what happens is the leg will lift more easily, but also your waist that doesn't need to be drooping will just generally lift away from the mat also, just in response to you being aware of the weight through those contact points. Then we bring our attention to our anatomy sit bones, opening and closing like sliding doors.
So open those sliding doors, and you might feel like, oh yeah, this is sticky, tricky. Something's happening in my lower back. So maybe you're trying to move your leg from your lower back because your pelvic diaphragm doesn't readily lengthen, because your sliding doors don't readily open. So then we lift and we stay lifted, point, and we're doing the arching. Now on this side, you can take your hand onto your bottom, and maybe think about inflating like we've done.
We talked about that in the bowel class, inflating your bottom into your hand. Or if you prefer, bring it back to your sacrum where you had it on the other side. Your hand becomes such a useful tool and guide to know where you are moving to give you something to move towards or away from. Thigh bone, really remember we talked about, like it had vacuums into the socket. That's it, and breathing all the time, and definitely think about the yawning open.
So as you go back, yawn open the front of your hip as well, like bridging. We'll go with two more. And then after that last one, you can rest, and come into quadraped. So for a quadraped, you come onto all fours, hands underneath your armpit, spread your hands with your first finger pointing forward, thumbs pointing in, knees underneath your hip sockets, but then you're gonna take your feet out. So your knees now are pointing inwards, and your feet are out.
We're gonna do the quadraped rocks. So for quadraped rocks, we take our bottom back and forward. So you are literally just doing a rock, rocking back and forth. Now often what happens is, we do it from here. I want you to imagine you're balancing a glass of champagne, or your best tea-set on your lower back.
So we don't want to drop it, break it, spill it, whatever image works for you. So to do that, we again need to think of our sit bone sliding doors opening as we go back. And you can do this as quickly, or as slowly as you need to. Last one, and then we switch. Feet together, knees apart now.
Same thing. You're rocking, widening your bottom as you go back. So your sit bones, pubic bone, tailbone, all opening away from each other. So that diamond of your pelvic diaphragm is widening as you go back. We are finding the natural elasticity and flexibility and dynamism that should be present through the pelvic diaphragm.
Okay. Last time, and rest there. We're gonna do a child's pose. So you take your knees a little bit apart, and your arms are coming forwards to start with and you're head to the mat. And you're breathing here.
If you're comfortable with your arms forward you can keep them there. If you're not so sure about your head being just as low as that, just fold them in and rest your head on your arms, bringing your attention and your awareness to the base of your pelvis. Breathing into the base of your pelvis. Feel your pubic bone, tailbone, and each of your sitting bones widening and narrowing. And then bring yourself back up onto all fours.
We're gonna go into some cat stretches, and we're gonna do our rocking cat. So we will go straight into the curve of the cat stretch, 'cause we've done it before. We know how to do it. Your tailbone, sacrum and everything follows to make the cat stretch. This time, tuck your toes under as much as you can.
Bring your hands an inch or so closer to your knees, so you're in a kinda tighter cat. Maybe it's an angrier cat, I'm not sure. And then you're gonna rock forwards and back really working on your pubic bone. Staying lifted up towards your belly button, and your tailbone and your sacrum are in all the time you're in that curve. Use your hands and your feet to push and pull, push and pull, push and pull.
If your glute start to over recruit, if you feel like it's all kinds of clenchy, just rest for a second, reset. Keep breathing, go a bit quicker if you can, pubic bone to belly button, pubic bone to belly button, like there's a little zip there that keeps lifting it up. Rocking, rocking, rocking, rocking, rocking. Oh, and then release. That's warming.
Anytime you put your head down, it definitely is a bit warming. Okay. We're gonna come up to standing now. You will be ready for this I'm sure. So standing up, feet just slightly apart now.
Hands on your pelvis. You can wrap them. You can put them on the front, whatever suits you. And we're gonna do a little bit of a squat. So the small squat where you keep your back upright, and then come back up.
We're gonna do this just to bring your pelvic down from awareness to standing. So you breathe in as you go down, breathe out as you come up. Breathe in as you go down, breathe out as you come up. Move your hands, front and back, breathing in as you go down, out, as you come up. Feel your pubic bone fill around your sacrum and towards your tailbone if you can.
So you can feel the widening and narrowing, widening and narrowing. This is so important that we understand this gentle undulation of our pelvic diaphragm as we're moving, so dynamic and so flexible and so responsive. And we've done lots of things to help that. One last one like this, and then put your hands on your hips. We're gonna do a drop drop squat.
So this looks like drop, drop and up. So we go down, down, up, down, down, up, down, down, up, down, down up. It's a little bit like when somebody knocks your knees out from behind you, drop, drop, up, drop, drop, up, drop, drop, up. So we're getting a little bit more dynamic, little bit more of that responsiveness, drop, drop, up, and it can be small. Doesn't have to be very big.
Two more. One more. I can't count at all, but that's okay. You're gonna stand with your arms free by the side of your body. You're gonna close your eyes for a moment, as is so important at the end of each class.
We take a moment to check in with ourselves. How do we feel in mind, body, and breath? What have we learned about ourselves? And then slowly opening your eyes, ready to take on the world. Thank you for joining me to class again today.
I hope you enjoyed it, and I hope you will do it lots of times again. Thanks everyone. Bye.
Pelvic Health: Pre-Pilates for Whole Body Pelvic Health


Comments


You need to be a subscriber to post a comment.
Please Log In or Create an Account to start your free trial.
