Description
About This Video
Transcript
Read Full Transcript
Today, we're going to be exploring the concepts of pushing versus pulling, and we'll be using some band and some hand weights here just to help connect to the body and find those concepts a little bit more closely, as we're doing the movements. I've got some two pound weights here. You can go a little, heavier or a little lighter if, you know, you have some special considerations. We're gonna start on the mat with the band, and it's gonna be around one foot. So you can go ahead and place that underneath the sole of your foot.
I prefer to have it kinda closer up to the forefoot, closer to the toes, and we're going to have the band crossed over. And we'd like I'd like to have a little bit of slack in the band, so don't start too tight. So from here, we're just gonna pull the band out and really find that connection between the shoulder blades. The legs at a nice 45 ish degree angle and then straightening out. And then again, pull And this time, we're gonna keep the tension on the band as we lower and raise. So we've got a pulling energy and then push, drawing the back of the thigh down, allow the leg to return and then straighten the arms. Do one more like this, lower raise, really trying to maintain that connection through the back body.
And then once the leg is up, I'm just gonna place the other leg in a bent position. Take the leg a little higher Jo it's more of a vertical line, and we're gonna roll up into like a single leg bridge here. And then float the hips down, thinking about the way the thigh bone sinks into the pelvis as you return to the mat. So I'm pressing up into the band, pulling out into the band, and finding that connection through the back of the body between the shoulder blades. So we'll do another three, pressing up, feel that reach through the left. Well, what is my left knee? Your standing leg.
So you're getting that openness through the front of the hip. On one side, and then that connection deep into the back of the hip on the other side. And then lowering down, we're gonna go up once more and then hold that position as we lower and raise that other leg. And just adjust the band to make sure that you're happy with where it's tracking and not disturbing your position with the other leg. We'll do two more. Working quite hard on my stabilizing side pressing down into the ground, creating that push energy, and then keeping that connection up into the band as we return back to the floor. And then we'll change sides cross the band, and starting with the leg in that 45 degree ish angle.
So from here, we're gonna pull and release. Adjust your band if you need any additional tension. And then from here, we explore that connection from the band being on tension, adding a little more, floating the leg back up, releasing the band. And again, one two, three, and four. Let's do another three, and just finding how you can work with the band. So you're working in relationship with the prop rather than just kinda having it there.
As a gimmick. And once more here, and then we'll do an additional one just to set up for, our single leg bridge. So from here, if you can, try not to let your elbows rest on the floor. Create that down energy through the foot and that up energy with the band, and then lowering the pelvis back down. So we'll do a few of these just to get us started finding that opposition pressing down with the foot reaching forward with the knee, thinking about how the upper body is contributing to your stability.
And on this one, we'll stay up. And we're gonna lower and raise. So this might be kind of nice prep for you if you're working on your shoulder bridge as well just to find ways that you can use your upper body to support what is going on through the lower body, which can sometimes take all of our attention. And then we'll lower the pelvis down and release the arm connection. From here, let's place both feet into the band and just make sure that the band is pretty even in terms of the length that you have hanging.
And again, we're gonna cross the band. We want a good amount of slack, taking a breath in. And then as we exhale curling up into our chest lift, really working through the outside borders of your feet to create tension in the band and then from here reaching out with the legs and reaching up with the arms. So it's a variation on our double leg stretch. Breathe out.
And in and really thinking about how you can get the breath into the back of the body as the knees are bending. If you prefer a reverse breath pattern, that's okay with me. And thinking about how you can zip up through the midline and wrap through the backs of the legs as you're creating this energy with the band. We'll do two more. And final one.
And then come on down to the mat, letting go of the band, placing it to the side. We'll use that again later, and let's grab our weights. So from here, we're just gonna have the hands facing the thighs. So that the circular part of the weights can touch each other a little bit. And then let's just reach up to the ceiling and settle the arms back down into the sockets.
We'll just do another two of these inhale finding that glide of the shoulder blades and sinking down. One more. And then from here, rotate the palms to face in nice straight arms I'm gonna breathe in to open the arms out to the sides, hold that position as you rotate the palms to face the floor and then closing the arms so that the inside parts of the weights come towards one another again. Turn the arms in the socket open, and then keeping the chest open spirally upper arms so that the weights are pointing up to the ceiling, and they're gonna make their way towards one another. Let's do another two here.
So really feel the way the arm is spinning. And notice if you're including your rib cage when you do this or if you're actually able to disassociate the arms from what the rest of the body is doing. So it's a simple movement, but hopefully you're really tapping in to your, to your sensory part of your body and just figuring out where you are in space. So we're gonna do this once more But then once your arms are out to the side, you've done the rotation. You're happy with where your upper body is positioned.
You've got that connection. I want you to really straighten your arms and create a strong pressing down energy pushing energy into the floor. Floating both legs into tabletop, press the head gently into the ground, and we're going into a single leg stretch here. So pressing the legs forward, moving through space. I like to pretend that I've still got the thera band connected.
To my feet, and I'm having to work into the band to get my legs out there at the same time really generating some force between the arms and the ground. Quite tempting for me to bend my elbows. I want them working really hard to keep them nice and straight without rolling my shoulders forward. Final two. And then from here, once you've got both legs, Back into tabletop, you can take both arms into the air, and we'll take them into a palms facing in position.
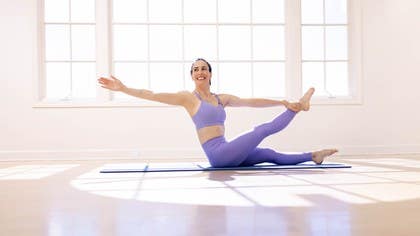
We'll lower one leg down to the ground and straighten the other leg into the air for leg circles. Jo the circles might be a little smaller here, but we're taking some inspiration from those weights to help us create stability through the shoulders while our leg is moving in the air. So that's three. We'll do another two, and one. Regroup here in the center, feel all three limbs sinking down into the ground with gravity's health, and we'll go the other way.
And without the hands connected to the floor, you're really having to work through your trunk to stabilize while that lever is trying to pull you around off the ground. Hard work and then changing sides. So we'll take the left leg up, make sure you're happy with where the right leg is positioned on the floor. We'll go across the body first, around and up. As you continue and you've got a little more space to focus on your whole body, think about your head and how it's relating to the ground.
It's almost like a little weight in itself. And we'll do one more here. Once you've completed, that just pause, let the weight of each limb drop into the socket and then opening up the other way. It's really nice using the weights in this way just to give you a little bit more awareness of how the other parts of the body are behaving while we're doing these leg circles. This is our last one.
And then we'll bring both legs into the chest and you can hug them in for a little rest. Let's get back to some ab work. So we're going to have both elbows bent. You can decide which way you face the palms, just what's what's comfortable with the weights. We're curling up into a chest lift and we're going to press the limbs out straight.
We're going to do a quick open close with the legs and I'm still pushing my weights forward as I pull my legs in and then bend my elbows. So we'll go inhale. Open, close, exhale draw the legs in, draw the arms in, and three. And four. And five, one more after this, and final one six.
Pull it in. Stay connected, even though we're gonna let the head rest, straighten the arms out in front of you, keep the legs bent for this first one, and we're gonna roll forward and up into our teaser position. Hold that position and see if you can lift the weights up, lower them back down And this time, we're gonna roll the body so that the legs return to the floor nice and long. If you prefer to keep the knees bent, absolutely fine. Take that breath in, exhale as you roll forward, find that scoop, create that lift and really work with the weights, push forward into them. And even as you're rolling down, you want to find that feeling of moving the arms and the weights away from you.
Two more. Push into that resistance, up, down, and lower. What would happen if you had some theraband still connecting your hands and your feet How could you push into that band to help give you that support as you lower your body back down to the floor? Let's do a little fancy transition. We'll roll up once more.
And then just lower the legs and bring the body to upright, separate the legs, and we'll go into our spine stretch here. So quite a bit of work to stabilize the shoulders as we curl up and forward, don't let the arms drop. And then returning to upright, finding that stability through the shoulders, inhale, and exhale rolling forward. Take that breath into the back and then exhale, push the heels forward, push the hands forward, squeeze those weight, get those grip muscles supporting you. And rolling up two more. Take that breath in and exhale roll. Feel that work through the upper body.
We're often chasing the stretch in this exercise Jo it's nice to feel that challenge, holding the arms, building that endurance in this position. Good. Bringing the legs a little closer arms facing forward. We're gonna rotate and open the arms and then return to center with the arms in front. Again, open and close. And feel that ringing out sensation and pushing with the outer part of the hand, the knuckles, as though you're moving through a thick substance, like your underwater, and it's hard to move quickly Jo matter how hard you're trying. Press, press, press, press, press, and center. Let's do an extra set, so it feels good.
And last one to even out, and rest. We're gonna place the weights down, grab hold of our band once more, keep the legs in this same position. And wrap the band around both feet. And again, we'll cross the band. Start off with a little less tension than you might normally as we pull because then from here, once we've got our nice stable shoulder position, We're actually gonna reach the arms out to the side. And that I find really helps me get that additional lift through my trunk. Bend the elbows and allow them to straighten to wherever you can.
If you're losing too much tension, that's fine. Bend and press and then pull back in and straighten to wherever you can. I find if I straighten a little wider, that helps me. So I'm stabilizing my upper arm in the socket. I'm drawing out, finding that openness through the chest. Bend and stretch.
Let's do two more. Pull and push. Bend and reach final one. Pull and push, bend, and reach. We're going to take the hands Jo that the knuckles are facing into one another. Use that work that we've just found to lift through the trunk, and we'll roll the pelvis thinking about those sitting bones moving towards the heels, hold that long scoop and take the arms out and dive forward reaching the arms behind you.
Use that push through the band to help give you a little bit further spine stretch position. Circle the arms as best as you can keeping tension on the band and then roll yourself back to upright connecting both into the band and towards the opposite knuckle. So we'll roll the body. And then reach out and then dive forward. Use the band to give you space, float the arms up and over, keep them wide if you feel like you'll lose tension and then pull in and up. To give you that feeling of support.
Roll and push and dive, get that real pull action. Open the arms up and over and then drawing in and up. One more, roll under and reach and dive and circle and drawing in and up. So we can take the band away for a little while. Keep it close. We'll be using it again shortly. I'm gonna take the legs together.
So we're gonna take the arms up into the air. Imagine that you're still holding that band and you're creating some energy to push up into. We're often thinking about the legs here, but it's really nice to think about how we can use the arms in that way. And as we place the hands down onto the floor, of course, you can choose to position your fingertips, as you wish, but really take this opportunity to stretch out the palm of your hand as well. It's a nice break after using the props So we're going to get ourselves ready, create that downwards push so that we get that uplift through the body.
And then as we reach down through our heels, feel that connection through the back of the legs that's going to support the pelvis. And we lower the pelvis down keep that energy through the upper body, scooping up, find that pull down with the toes and the push down with the heels, find that expansion through the chest, and then lowering down. This time we'll stay up and do our leg kicks, if possible, for you. So reaching up, choose your leg to keep on the floor. I'm gonna do my left, and we're gonna float that right leg up three times.
Two and three still using those arms changing legs, press down to give you that access to movement in your floating leg, and then lowering yourself back down to the ground floating yourself back up to upright, reach, reach, reach, and pull the legs in placing your hands on the shins. So this is going to be a nice place to sort of play with this push pull energy. As I roll back, I'm gonna push my shins forward. And as I return to upright, I'm gonna pull my heels in. So taking that inhale will roll back and exhale to find that lift.
Inhale back and exhale forward. Let's do another three or four. I learned this trick as a child at the playground on the swings. You get much more height if you use your legs. So let's play with this here too.
And on this next one, we'll keep the feet closer to the bottom the whole time with but still using that same energy. Do one more. Just for luck. And finishing up. So let's now just come out of this position going to be into our all fours or quadruped position, but let's get the band ready for the next exercise. So we're just gonna take it across the mat like Jo, and we'll have the hands in front of the band and the legs behind.
So just a simple cat towel here rounding the body and holding this position as we generate that pushing energy. So it's quite tempting to only do this with the arms, which can result in a lot of this rounding down low. But I'd like you to think about also creating that push with your legs to get your pelvis involved and make sure that your head is nice and heavy. I'm gonna lengthen the body out and then think about creating a pulling energy spiraling the arms to draw the chest forward and create that sense of lift, freeing up the pelvis, reaching the pubic bone back. So exhale rounding the spine, creating that pushing energy with the limbs, and then inhale lengthen it out and create that pulling energy, drawing the body forward through the arms. Let's continue for three more exhale, and in.
And rounding, pressing or pushing down into the ground. Being specific with the way you push, so really using the lateral part of your hand, the pinky side, So create that space through your chest despite this pushing energy and then lengthening out and finding that pull and spiral through the upper arms to really bring that breastbone forward. From here, we're just gonna place ourselves onto the mat and you'll need to be quite specific with where you place the band. You wanna pin the band down with your lower ribs. We're gonna take hold of the band quite close to the body but you might just need to adjust how much tension you generate, initially.
So let's reach the arms out and draw them back in and then just position your hands Jo that's going to work for you. So as we reach out, we're gonna maintain this energy and float the chest up, keeping the weight in the ribs and on the band. You'll see that my hands have lifted up off the ground, we're then gonna lower the hands, lower the body, and allow the arms to return. So we'll go again, reach out, float, find a spiral, Come on down and bring it in. Let's do another three.
So reach and float and lower and down. And really working the back of the arms here, really challenging yourself to straighten the elbows fully. Up keeping that position now float the thighs up and see how you go reaching the arms forward, out to the side and down, and out, around. So we wanna look for that space in the back body, even though we're working hard, there's movement of our gaps, one more, holding it here, and just going for a little leg beat while the arms are reaching long. Two more breaths, keeping the arms active and energized.
Last one, and then bringing the arms back out, legs down, hands down, and let's go into a little child's pose to rest here. Rolling up from our child's pose, we can put this band over to the side, and we're going to come back down to the ground bow leg, single leg kick. But we're gonna play with this idea of push pull here in this position as well. So before we get started with the legs, let's create a downwards energy with the elbows. I'm also pushing my elbows forward on the mat and slightly apart. And that's creating a nice deep scoop.
I'm just gonna focus on zipping up through my low belly and drawing that pubic bone forward and up. And then as we move through neutral, We're then going to create a pulling energy. So I'm still pushing down with my elbows, but at the same time, I'm drawing my elbows in both to my hips and towards each other. Just slightly. So as we go into our flexion, I'm creating downwards energy, forwards energy, and outwards energy, and then moving through, I'm creating downwards energy pulling energy into my waist as well as in towards the midline.
So let's go for another two or three just finding that movement in your own body. And my hands might not look like they're doing so much, but I'm really trying to keep my finger, pads into the mat and active. It would be quite tempting just to sort of let them float up and disconnect. So next time we're in our flexion position, we're going to hold that. So working on some endurance here, and then maintaining that connection as we pull our right heel towards the buttock kick, kick, push both the shin down and reconnects through the arms.
Pulling in with the left, pull, pull, push through to create that connection into the belly. Let's go for another three each side. With a little flow, pull, pull, and push, pull, pull, and push. Two more. One, and rest.
Two, and rest, final one, and left, lengthening through neutral, thinking of our pulling connections now, so pulling into the midline, pulling into the waist, and pushing the ground away as we do four single leg kicks in this position. So you'll probably feel this is a little more familiar and probably a little more accessible But it's nice to mess with what we know and just see what impact it has on our body. Last one, I really like that feeling of pulling the elbows into each other. And let's come back into our quadruped position. Let's just reach the left hand and the right leg out and just get a nice sense of stretch, bring it in.
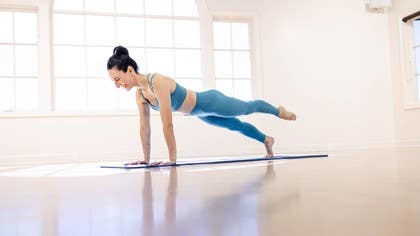
Again, nice to free the hands, really stretch the fingertips away from one another. Makes a nice change. And one more on the other side. Think about that length that we just created as you find yourself in a plank position. And we're gonna really create that energy through the feet. We're gonna go into a pike, so pressing the hands forward, but feel as though you're pushing the feet back.
And then as you come into the plank, pull your hands into one another and also your feet towards your hands. So the feet and the hands are moving away from each other here, and then the feet and the hands are moving towards each other here. Two more. And pull, one more time to push. Don't forget the feet and pull.
Holding this position as we float the right foot off the ground and down and left. Keeping that nice sense of support and stability through the upper body. This time with the right leg in the air, we're going to float the body up into an arabesque and then back down. Toes tucked under left side. Reach and press. Think about how the leg on the ground is pushing away from the hands.
And through and left, and through one more time with the right, and last time now with the left, And then from here, piking up one more time and walking the hands in towards the feet. Adjusting your feet if yours have snuck a little closer to each other like mine have, energizing through that outside edge of the feet, pressing the big toe down, pulling up through your midline, pushing down through the outer edges, take both thumbs up into the air. Let's spin the hands around spiral them a little, and circle them out and down to the side. We'll do one more up. Find that openness out to the side, spiraling the hands around.
And rest. Thank you so much for joining me in the class. I hope you feel the heat that I'm feeling right now, and you've got that sense of strength through your limbs to support your trunk. See you next time.
Go Beyond Pilates Mat Challenge: with Jo Bezzina
Comments
You need to be a subscriber to post a comment.
Please Log In or Create an Account to start your free trial.
