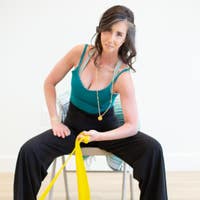
Description
Looking for more information and in depth work on Scoliosis? Check out Madeline's Pilates for Scoliosis Workshop.
About This Video
Transcript
Read Full Transcript
Hello. I'm Madeline Black, and this is Jess, who's going to work with me on a tutorial on about the reformer class that we did first for asymmetries of the body. Now all humans are asymmetrical. We're trying not to achieve symmetry because virtually it's impossible. So if you think about the human body, our organs are asymmetrical, we have right hand, left handedness, even though they're kind of mirrors of each other, you know, and we all present in some way with one shoulder slightly higher than the other that can be pelvic rotations. You might notice, you know, some in the back, some kind of prominent bone or or activity in the muscles in the back.
And we all have that. And it's really our nervous system that has its own program in a way, which is to write ourself to center. So your your body's always trying to prevent it from falling down, which is a good thing. So if my, pelvis is shifted over to one side, if my body didn't know how to write itself, which is what I just did, by shifting that way, I would fall to the floor. So there's that mechanism that it's like a nervous system response. So your body's always adjusting and your eyes are trying to always balance to the horizon.
So, ever how your body adapts is what's really creating these asymmetries. But over time, maybe also your work, your hobby, your sport, you know, if you do repetitive, think of a tennis player or golf, their your patterning and your body will start to set up more of asymmetrical. And to keep yourself well and to keep yourself strong and out of pain, perhaps, is to notice that if I can shift my ribs to the right, very easily. And then if I try to go left, it's like, like, there's no movement there. This is what we have to work on. So I'm using the reformer as a kind of a force, producer that's inducing, force into the body, which will then shift the whole system orientating a little bit more towards midline, but more importantly giving a little bit more ease.
Into the body for movement. So we started with an assessment. So I'm gonna have Jess turn around. And so the sensation I was going by sensation that you can feel the weight on your sit bones. And as she's presenting here, I'm not sure if you can see it real clearly, but her left sit bone is higher.
I mean, heavier on the carriage than her right. So there's a little bit of a kinda arcing of her tailbone this way and the pelvis is left here. Okay. And then you can see that the ribs are adapting, you know, by being over here some more. Now, I'm not gonna ask her to change that so much. But now I want her to do the rib shift that we did. So place your hands low on your ribs.
And then just very small, just shift from side to side. So that's nice. Good. Now, so we're watching her. Actually, she did the class, so she's a little freer now. But you can see that she does have a lot more range to the left than the right.
So if how does that feel to you, Jeff? Does that feel easier? Yeah. She agreed. It feels like there's more ease. So as we progress up and you can do it a little higher up, sometimes you might see an opposite direction. So you might feel more ease down here to the right, but then up here, you're like, oh my gosh, I have more ease to left up here. So sometimes our ribs actually have its own pattern.
Scoliosis is a asymmetrical posture or condition, if you wanna call it a condition, which it can be if it's very severe. So they appear with that lateral shifting and there's rotation. Now, a scoliosis is is medically defined through x rays and doctors measuring and or medical professionals who do that. And so the lateral curve just a sideways, you know, sideways curve. It has to be, 10 degrees or more to be deemed and labeled scoliosis.
And I'm emphasizing that because A lot of times we can appear to have a scoliosis. But then, actually, if you have an x-ray, and it's like, no, you don't. But why does my body appear that way? Well, there's a lot of connective tissue and things that can create a torque in your body. It's not necessarily a structural scoliosis, but maybe more occupational or just the factor where human beings moving around and adapting to the world and having fun with our sports. So But that's it for that. So I wanna break down how, three of the exercises in the reformer class can really promote how we can shift and change the force and the weight, which will organize body more towards the midline, which will then give them better movement in that restricted area. So let's do the first one, the squatting.
So I use the bar so that you can press into it to create a force that moves through the arms into the trunk, right, into the torso. So just squat and hold here. Now, she's here. She feels even. I mean, everybody has their own perception of what? Oh, am I even? A person with a lot of asymmetry, you can see them from the outside. They look more even and they feel really crooked. But that's the brain's proprioception.
So she thinks she feels straight. She kinda looks straight to me. I see a little bit of things. Okay. So when she pushes so pushing the arms into the carriage actually activate and pushing into the feet activates, and you can kinda feel how everything is connected here. So I'm gonna ask her to push with the right hand and shift her weight onto her left, right foot and push her right foot down. Okay? So then there's a shift.
And she seems pretty solid to me. So come back to the middle again. Alright. And do that again. So when she's pressing, you're not seeing a whole lot of change. Right? She's not, like, deviating or anything like that. She's pre pretty solid.
Now she's gonna do the other hand. She's gonna push her left and look what happened. Her pelvis kind of swayed a little bit to her right, almost bright. What we saw sitting on the carriage, that right hip came up. She swung her tail that way, Right? And the ribs shifted in the opposite direction. So so come on back.
So I'm gonna cue her, come back to the middle, and then as she so it's her left hand that she's gotta put a little more pressure on, but her left foot So if she pushes on the outside of her left foot, which is the opposite sway. So if she's pushing here, it's gonna move her towards the hip over her left foot. So she's gonna push there and push the arm and it removes that sway. So she's more stable and really activating where she needs to create the strength. So that's where we can if you're doing a private session, you could really fine tune that as well.
But that's what you were feeling with that. Okay. The next one where we sat on the bar, a la tendon stretch, and pushing the carriage out. But I wanna talk about the rotation. Alright. So we're gonna get on the cuboid bone. That's the front of the heel and push out Good.
Alright. So I'm gonna come around here and see you from behind, I think. So so I'm gonna have her put her hands on her pelvis. So right here, you can notice the same as sitting the sit bone weight. So she's a little heavier on the left sit bone.
Right. So and she's got that little hip hike. So I can just ask her just, you know, feel a little more weight on your right one. Okay. Just a tiny bit. It may not happen. Some people can't.
You don't want them to deviate too much. Now if she puts her left foot on the on the carriage here on the platform, like we did, you just tuck it under. Okay. So now I have her force that I could use to press and rotate. So we're gonna go away from the straight leg first. So she's gonna push and the the pelvis is rotating, and I want her ribs to stay in line.
And now the Carriage is forcing her hip in the joint, bringing her pelvis back. Great. And then come back. Good. So just try that. The whole torso's moving in that direction. So her temptation's gonna be to probably twist more in the rib cage than in the pelvis.
So this is creating a pelvis on femur movement. Okay. And come back. Let's try the other side. It just, a bit of switch leg, so bring the other leg up. I just wanna do the rotation in that direction.
There we go. Okay. So straight leg. Alright. Now let's see what happens here. So she's gonna push the left and she's gonna turn. Good and come back.
They're actually pretty good. And again, the ribs. Now, you're leaning. Can you feel how you're kind of going a little bit forward there? Okay. So let's ground your right one, okay, just a little bit, and then reach your left.
Try there it is. That's the work. You see, That's more true to your rotation there. Meaning that when I cue her to keep her weight on the right one, which is the one that she doesn't like to wait, and she rotates, it's a little bit more effort here for her to do that. And as you can see, it's a smaller range. But the good news is she's got the range in it.
So we can certainly work to detail with that. But this is what the most important if you're doing a class is that the person keeps the shoulders over the hip and you're rotating the pelvis around the femurs. Okay. That's so much better. Okay. So come back. And now we're gonna look at the side splits because lateral movement is really important for the asymmetries because you'll feel where the hips are, asymmetrical, and you can make that adjustment. And then you can think about your rib shift two at the same time. So we need the black pads because the shin is, on the metal bar. If you have a standing platform, you certainly can use that, but the the bar is still on the shin and could be uncomfortable.
So, actually, I'm gonna have you turn face the other way. I just decided. So we can see you from the back. Excellent. Okay. Alright. I'm gonna bring this pad really to the edge because this is kinda wide since we don't have a standing platform. So this is kind of a width.
There we go. So this setup, I really emphasize most people when they kneel, there'll be a little bit of a crease here, and they're and it's hard to get that sacrum forward because we can't achieve that full hip extension. So and then I would really like that pelvis to be pressing forward without the counterbalance, which is what's the normal writing reflex of the brain to do, and we wanna keep the ribs over that. And she has to work by really keeping that forward. Excellent. Good. Alright. And if we can turn that in just a tiny bit, your foot's fine. Okay.
So now we're looking at the crease. She's working here to keep this position. It's a lot of stabilizing. Alright. So now she's gonna push out. Very nice.
And coming back in, now I can see that this is still a little bit up compared to this one. So put your hand at your greater trochanter here on this side. Great. Alright. And you can put this hand here. It's fine. Alright. And what I want you to do is think of the inner thigh reaching out and press in with this hand.
So go with your knee. There you go. Now push in here a little bit. There you go. Keep going now. And let that get deeper, deeper, deeper, deeper. Do you feel how that This is coming down.
There you go. Alright. And then control it back in. Take them forward. Now reach from the inner thigh, press that femur into the socket. Yep. Right there, you're starting to height.
Can you feel that? Kind of lengthen the inside of your leg and push that in. That's far enough. Don't go so far. We're not doing the side splits completely. Yeah. And the hip joint only has a certain range in that abduction, which is what we're doing.
There you go. And push it in. Excellent. Now notice her ribs are starting to come over here a little bit. Okay. So now come back up. Alright. So you got that. Right? So let's put your right hand behind your head. So that way, we're gonna open up these ribs a little bit. You're gonna breathe into this side and That's it. See, that puts your weight on the right leg. And now push and think about that bone right here.
Just know very nice and keep breathing into very nice. Very good. So now I've just When you open the ribs, the ribs are gonna translate towards that direction that she doesn't like to move. So here we have, and I always look at t 12. This is for the teachers over s two. That's a really good eye to see.
Can you show us, let's show an exaggeration. So, put your hands back to your pelvis. Okay. Now as you push out and shift to that side, yeah, go ahead. Push out and shift to the left there. You see how you might see that? She can do that very well and come back. But you see, she's intentionally training herself to reorganize herself. So when she does movement, she doesn't fall into that habit. So now the hand's gonna come up.
So that we're creating openness of the rib cage, which is bringing this towards the midline. Right? And then she can reach for this leg, and we need to get into that. That's very good. Did you feel how that kinda went in the socket Good. And let's not overreach and remember you're trying to keep your ribs over. No.
That's too much. She's over emphasizing like a typical teacher. Okay. Keep that forward. And there you go. Now just go. You're just breathing into that side.
Excellent. Really nice. Great. Okay. And come up. Very good. And come sit down again. Very good. So queuing very specifically is really helpful, to to translate or to press here and, feel the the forces into the body to direct the person, and they feel it. So it's it's like once they get the sensation, I remind them to Did you feel that and you see how and that you could feel a difference. Right? Great.
So I hope that was helpful information about the reformer class, and I would love for you to go through each of the exercises and play with the force and see how it changes and shifts your body, and you might find that sweet spot where you find that ease of movement. So thank you very much, and I want to offer you that I have a Pilates for scoliosis workshop on Pilates anytime. So if you want more information and in-depth work, that's your place to go. Thank you so much.
Tips for Teachers: Working with Contraindications


Comments


You need to be a subscriber to post a comment.
Please Log In or Create an Account to start your free trial.
