Description
About This Video
Transcript
Read Full Transcript
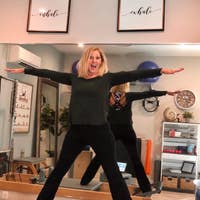
Hi, my name is Courtney Miller, and today, I'll be teaching a group of exercises that I have chosen to help elongate your body, open up tight hip flexors, mobilize the spine, and open up tight shoulders. I'll be using the Reformer today, the Balance Body Reformer, starting on one blue spring with the foot bar in the down position. I'll also be using a set of two-pound weights. You can use these, as well, or you can exclude them, and you can also feel free to use one pound instead of two if you feel like it's starting to get a little too heavy for you. I'll use those in a little while, though.
To begin, I'll start with some breathing and mobilization of my spine. Standing, facing towards the Reformer, my knees are a few inches back away from the foot bar, feet hip distance apart and parallel. I'll take an expansive breath in through my nose as I lift my arms up overhead. As I exhale, I draw my abdominal muscles in, folding forward, taking the heels of my hands onto the carriage. I press my weight into my heels and fan my toes, and on and inhale, I press the carriage out, starting to lengthen through my spine, tilt my pelvis up anteriorly and start to feel that stretch through my hip flexors.
Breathing in to hold the position, I'll exhale, scoop up from my belly, rounding the spine, and returning the carriage back in. Three times here. So pressing out, pressing my chest down towards the wooden platform, lifting my tailbone up, lengthening through my cervical spine, and then scooping the abdominals in. I ensure to keep my pelvis directly above my feet here, so the idea is not to shift my weight to the toes to push the carriage out but, instead, create more length and expansion through each vertebra on my spine. Last time here as I roll back up.
Now on the next one, I'll be pressing the carriage out to my length, tailbone lifted, ribs connected, holding the position. I bend my elbows slightly wide and out to the sides, and as I press the carriage out, I feel my shoulder blades glide downwards in opposition to the carriage. So inhale to bend, my neck gets longer as I press all the way out. One more time here, bending in, and exhale, pressing all the way out. Finish with long arms.
Scoop from the abdominal muscles and roll back up. With soft knees, I rebuild my spine, and my head is the very last thing to come up. I already feel taller. Grabbing a hold of the weights, and again, you can opt to use these or not. So standing side to the Reformer, I'm gonna start an external rotation, my natural turnout.
I'll go ahead and take my left foot onto the carriage, toes on, squaring my hips, lifting my arms out through first position and then out through a second position. Staying balanced over my standing leg, I'll breathe in to press the carriage all the way out, drawing up through the front of my thighs and feeling balanced in this position, as I draw the carriage and I draw my arms back into center, really feeling that sense of balance in my body. So pressing out, finding length, (inhaling) and exhale, drawing in. (exhaling) Pressing out, (inhaling) drawing out through the front of my thighs, being conscious of my standing leg coming all the way in, and pressing all the way out. From here, I hold the carriage out, windmill my arms, lift up and out of my spine, and use the weight of the balls to act almost like an anchor to pull me a little deeper into lateral flexion. Lengthen all the way back up.
Two more times here. Lengthen all the way up and over. Standing leg is strong, neck in line with the rest of the spine, and lengthen all the way up, and last time windmilling the arms, growing taller. Lengthen up and out of my side as I reach and coming all the way back up, bending the knee, and returning the carriage in. Facing front, feet are parallel.
I take the same leg onto the carriage, toes on, heel lifted high, standing leg activated, arms out in front of me, palms turned up. Repeating the same series facing front, I can really start to feel the front of my thigh start to activate. I pull my femur back into the hip socket, ensuring that my pelvis is in neutral position, bringing the carriage in and pressing out. I'll practice a few reps here without adding the movement of the arms, thinking about my standing leg, and then I can add the upper body movement as the carriage comes in, lifting, reaching overhead, and then pressing and finding that space and length, coming all the way in and pressing. So there's a real challenge here to stay balanced over my standing leg.
Press and reach. I'll do one more like this, and press and reach, bringing the carriage in and releasing the arms down. The same thing on the other side, although it might not feel exactly the same when I execute it. Standing tall, abdominals in, arms out long. So I press the carriage all the way out, taking that time to feel the femur retract back into the hip socket, lifting up and out of my pelvis.
I'll practice the lower body movement first, drawing all the way up through my vastis and in. I'm also focusing a lot on the stability of my ankle, feeling all those deep intrinsic muscles working, not just holding me up on my standing leg, but keeping my ankle in position on my working leg. Adding the upper body, lift, lengthen, and press and reach all the way out long. Lift, lengthen, and press, and it's quite challenging to keep the ribs connected and the shoulders right over the pelvis as I move my arms and legs in this position. Inhale to lift, and then exhale.
Press all the way out. Bringing the arms down and the carriage in, I'll turn to the other side to repeat the exercise and turnout. So I'm standing in my natural turnout. Again, I take the leg up and on, heel lifted. My arms lift up and open through to a second position.
As I press the carriage out, the arms come back into center, and my focus again is staying strong and balanced on my standing leg as I lengthen and press through my working leg. All the way out. Neck is long, and come back in and press, ribs closing as I draw my arms through center. Last time like this. Press out, open, reach, lengthen up an inch, and I can bring the arms and the legs down.
I'll come back to these in a moment. So now that I'm starting to feel a little more life and circulation in the ligaments around my knees and hips, I'm gonna bring a little bit more attention to what's happening in the center of my body, my abdominals and my spine. From the back of the carriage, I stand onto the gray platform using the wooden rails for support. I take my toes onto the gray platform and my heels together onto the foot bar so I'm sitting in a frog position. I spread my fingers so my middle finger points straight ahead, making sure I'm pressing into the pads of my fingertips.
The closer my hands are to me, the bigger the stretch required in your hamstrings, so I'm gonna go right about here, setting my shoulders, pressing down through my heels, lifting my pelvis up and dropping the head down. Already, I feel a tremendous amount of stretch through my hamstrings. On an inhale, I squeeze my inner thighs to facilitate the movement, pressing out to a plank. Little bit of a posterior tilt in the pelvis here. Soft elbows so the eyes of the elbows point inwards and making sure to keep my cervical spine in line with the rest of my spine.
I facilitate the return by nodding my chin, scooping through my upper abdominals and using spinal flexion to bring the carriage in. Inhale as I press out, finding the plank, soft elbows, shoulders down, and then exhale again. The sequence is what's important here, so the chin nod. The ribs lift, the navel in, and I pull back in. Be mindful not to dominate this exercise with the hip flexors so it's not a pike, but instead, it's a coil.
Scoop and a lift. To make this series more challenging, I can add a pushup. Inhale to press out. Take the whole shape down as low as my shoulders can stay stable. Lift the whole shape up, and again, take the time (exhaling) to exhale and scoop back in.
Inhale, press out. Inner thighs connected, shoulders right over the wrists, whole shape down, whole shape up, and a scoop to come in. Last time, inhale as I press out, take it down and up and then exhale, deepening my abdominal connection to come in. From here, it's quite easy to lower my knees, and sitting back into either a shell stretch or a child's pose. A few deep breaths here.
Pulling back on the shoulder blocks is a great way to decompress the wrist joints. I feel the stretch in the opening through my wrists, my elbows, and the pulling of my rhomboids and shoulder girdle behind me. Great, from here, we're gonna leave the blue spring on, put the headrest down and start to wake up my upper body muscles. I'm kneeling in a quadruped position on the Reformer. My knees are underneath my pelvis, hip width apart.
My left hand goes on to the headrest so that the heel of my hand is on and my fingers are under. My right hand goes onto the strap, holding onto the taped part. I draw the elbow up by my side, finding neutral spine, especially in the cervical spine, and from here, I exhale, extend the arm back behind me. On and inhale, I resist, and I bend. So my emphasis here is much more so on the control of the eccentric, the lengthening of my triceps, and control in, soft elbow on the stabilizing arm, pressing out and in.
Now to increase the level of difficulty here, I can extend my opposite arm to leg. I can leave the leg long, find my abdominal connection, and repeat the upper body exercise. Sequencing here is so important, so stabilizing before we mobilize, and if this feels like it's too challenging for you, just take the knee right back down again and continue the series. To add on to make the exercise just a little more challenging for your neuromuscular system, you can flex and extend. So I'm working the hamstring muscle as I lengthen my tricep and back in, and last time here, press out and back in, hold.
Really focus on that length, and then I can take the whole thing down again. Balancing it out on the other side. So I take my opposite hand on. Again, my fingers are wrapped under, so I'm using the intrinsic muscles in my hand so that I'm not just activating through my upper traps and holding myself up with my neck. Set the shoulder.
Eye of the elbow points forward. Once you have that strong foundation, that's your cue to start to move through the upper body. Pressing the arm back and controlling the in. Remember, emphasis is controlling the eccentric, focusing on that elongation of the tricep behind you. After three, I'll go ahead and add that single leg option.
You can, as well. Just note that it's gonna really increase the level of difficulty, not by a little, by a lot, and if that's not enough for you and you're really feeling like a challenge, you can add a hamstring curl and release. A little pause, make sure you got it, and release, and last time for me, press and release. See if you can lengthen out the hip a little bit more and then taking the whole thing down. Nice break after that.
Again, child's pose or shell stretch will really open up through the shoulder girdle, scooping the abdominals, backing in.
Taking the heels of my hands onto the wooden platform and my knees to the edges of the carriage, I'll press the carriage out so that there's approximately three stopper spaces showing. Bring it in, and then find a balance between my upper body and my lower body in that quadruped kneeling position. The challenge will be to keep the carriage still while I facilitate the whole series of movements here. Sliding the shoulders down the back, I'll reach one leg out and back behind me, keeping my pelvis square and level, activating through my seat, and the opposite arm to leg extends out long. Now before I even begin, I focus on length, setting my shoulders, drawing up and in through my pelvic floor and abdominals.
Without leaving the carriage, on an inhale, I'll draw the knee and elbow under and exhale, extend, and lengthen. So as I draw my knee and elbow under, I am coming into a bit of a C curve, but as my arm and leg extend, I'm trying not dump my ribs, so I'm really working to stay lifted through my middle. Inhale to come in and exhale to press. I'll do one more here, drawing the knee and elbow in, keeping my pelvis as level as I can and the carriage still, exhale to press. Maintaining the height of the arms and the legs, I windmill the arms and legs out to the sides and then reach, length, draw it in.
So I'll inhale, open, and exhale, close. This is harder than it looks. (laughing) Inhale, open and exhale, reach. Last time here, again staying lifted through the middle of my body, reach. Maybe I can just lengthen a little bit more, and bring the whole shape back. Keeping that carriage where it was when I started, I'll extend the opposite leg back.
Again, level pelvis, abdominals in neutral spine. Opposite arm to leg reaches long. Set the shoulders and start by drawing the knee and elbow together under the body. I'll do about four here and exhale, lengthen. So you will feel that contracting of the abdominal wall as the knee and elbow come under you, and you will feel a sense of length as the arm and leg draw away.
Just remember to stay in that neutral and avoid that extension through the thoracic spine. In and out. Here's the challenge. Keeping the height of the arm and leg, I windmill out to the side and pull back behind. Inhale, out and to the side and pull.
I think of a turtle peaking its head out of its shell here, really trying to stay long through my cervical spine. Last time, all the way out to the side and reach. Before I finish, I lengthen. Ribs up, abs in. Then I bring it down, and that's my cue to come in and take a well-deserved break.
From here, I'll be moving the foot bar mid position and ensuring that it's locked in and changing the springs so I have one red spring on. Walking my feet back against the shoulder blocks, taking my right foot forward onto the gray platform. My shin is against the foot bar. I lengthen my spine out. Taking my left hand to my low belly, my right hand to my low back, I angle my fingers down, and it really creates a sense of this is my sacrum and what direction it's pointing.
From here, I encourage my pelvis to tilt posteriorly, feel the front of my hips open, feel my glutes activate, feel a sense of lift as I do that, and my goal will be to maintain that lift throughout the rest of the series. Taking my arms into a genie position, strong with the shoulders set, I'll inhale, press back, opening through the front of my hip further, maintaining that sense of posterior tilt but lift, not compression, and then control back all the way in, inhaling to press back and exhaling. Feels amazing. Inhaling to press back, open, open, open, open and exhale. Of course, if you'd like to use something underneath your knee to pad it, definitely listen to your body, and come all the way in.
Pressing back through the front of the thigh, opening the arms out, and setting the shoulders, I add a length through the hamstring here. As I press and extend through my front leg, I'm working to keep my hips level, posterior tilt and abdominals lifted, bending in through the front knee. So the whole time, I have this stretch, and I've just added on this, like a little bonus stretch. Inhale to come in and press and come in. Pressing the carriage out, lifting the arms up overhead, sinking down in my hips as I lengthen up through the rest of my spine.
I can lead with my heart as I fold forward, taking the hands onto the wooden platform, dropping the head and holding for three breaths. I really feel like I'm pressing in through my front foot. It's giving me a lot more sense of length. I'm not just pushing back with my back leg. Although my pelvis is dropping down, it doesn't feel heavy.
It's supported by my abdominal muscles, walking my hands back to the foot bar, bending into my front knee, and now lifting the back leg up, a lot of length and strength through the back leg. I can do one of two things with my hands here. I can either walk my hands onto my thigh if I need a little bit more support, or to challenge my balance, I can take those arms overhead, set them down the back, and again hold the position. I'm thinking of sinking in my lower body, lifting through my upper body, setting my shoulders, closing my ribs, holding and breathing, letting the front of the hips open up, taking the hands down. There's one more part to this series.
My front leg straightens. I square the hips by drawing my right leg back in space. My neck and spine is long here, and I press back and draw up. So a lot of inner thighs now, pressing back. I think of my scissor exercise on the mat, lifting through my hips.
I'm absolutely pressing in with my arms. I find a lot of support there, and it's helping me deepen and facilitate that stretch, especially through my hamstring on my back leg. This will be the last one for me on this series. Bringing the carriage in, lowering the knee, and switching to the other side So as I get into position, my shin is against the foot bar. I rise up, take my hand onto my sacrum, and encourage that posterior tilt.
You can see how it brings my femur forward. It opens through the front of my hip, and I instantly get this connection through my low abdominals and pelvic floor. Finding a strong genie position, I'll focus just on opening up and bringing it back in. It's amazing how different the left and the right leg feel right now. You can instantly feel the benefit and work.
Pressing out and controlling in. Pressing the carriage out, keeping it out, so using my glutes, my hip extensors to hold that shape, I begin to facilitate the movement with the front leg. Find a focal spot to look at. It'll help with your balance. Press all the way out and control in, and remembering back to some of the first exercises we did in this class, the drawing up through the front of the thigh, the retracting of the femur into the hip socket, and in and pressing out.
Extending the arms, lifting, finding the length. Lead with your heart as you fold forward, and then feel free to use those wooden rails as a little bit of support as you press back. Squaring the hips, walking the hands forward and bending into the front knee. My back leg will lift off, and in order to keep it strong and stable, I feel a lot of lift through my femur and through my glutes, taking either a balance supported position or arms up overhead. If you choose to lift the arms, feel the scapula glide down the back.
It's a sense of sinking through the hips, square through the pelvis and shoulder, but length through the rest of the spine. See if you can hold and breathe just for two more counts. (inhaling) That tremor of truth as I pull up through my back leg, finish by bringing the carriage in and releasing down. Feels great. Moving the foot bar up to high bar position and locking it in.
So I'm gonna go ahead and leave a single red spring on. If you feel that this exercise is too challenging for you or perhaps it's a little intimidating, I want you to add a little bit more weight, either adding a blue to that red. If you have a green spring, you can add that, or you can even add a yellow to the red just for a little bit more support. Coming to a standing position, locking my heels all the way back against the shoulder blocks, I'll begin by rotating my feet to the left, taking my right hand to the center of the bar and my left hand under my body. So before I even begin, I'm going into this thread the needle, this deep stretch, and I could stay here for days.
So the level of difficulty here is very low. My focus is just rotating and flexing from my torso. On an inhale, I press the carriage out, sweep the arm out, and hold the position. So my shoulder and arm has barely moved in space, and now I stack my body on top of it. I can deepen the flexion by lifting my hips, reaching overhead.
Feels great. Come back through, and then facilitate the arm and the head first, and then deeper into the exhale to get the carriage to come back in. So inhale, press out, exhale. I can lift the hips. Reach overhead, come back through the side position, and on an exhale, really scooping and flexing, it's not just from here.
It's from the middle of the body. Two more, press, lengthen. Reach, lift. Staying lifted up and out of the shoulder on that stabilizing arm, arm and head and ribs connect. Last time here, pressing out, and to challenge a little bit more, lift, reach, come all the way up and exhale (exhaling) to bring it all the way in.
Before I go into the other side, I'll keep my feet pointing straight ahead, parallel position, heels with the hands on, releve up, pressing the carriage out to my long stretch position, fingers squeezing, shoulders drop back. Little bit of that posterior tilt that we saw earlier in our plank, head lifted. Careful of that sternum sinking. Inhale, press back as far as I can stabilize. Exhale as I pull forward, Little chaturanga pushup, and all the way up.
So again, I'm mimicking that same series that we learned when we were facing towards the back of the Reformer. The heavier the tension, the more support you'll have in the series, so listen to your body. Longest stretch. Really resist as you pull with your lats here and get low and push up. Two more.
Press back and again resist as you pull your shape through space, chest over the bar, elbows hugging into the sides, press, lift. You could always omit the pushups here, or you could do more, two pushups per one long stretch. Just listen to your body. For me, one is good. Bringing the carriage in, finding that rotation again.
Taking the hand to the center of the bar, and the arm sweeps under. So before I even begin, I get deeper into my flexion, deeper into my rotation. Then, once I've set my shoulder, the biomechanics here is my shoulder will stay still in space. The rest of the body will move. The hips can lift as I stretch overhead, coming back through the plank, then my arm, head and then spine come all the way back and through, reaching for it.
Inhale, press. Square the hips. Hug inner thighs, exhale, life up and out of the shoulder. Come back up and through, then the arm as you come in, inhale, lengthen and lift and stretch and scoop. Last time.
Last time should be your best one 'cause you've had all those other ones to practice, right, not poor form 'cause you're tired but perfect form 'cause you've perfected it. Arms can come on, lean back, and again a great time to just open up the wrists. You can do single arm and coming off, very good. I'm gonna leave the red spring on, put the foot bar down and grab our box, putting the box on in long box position, coming into some extension. So I come onto the box one hip at a time, sliding my femur on, coming to a comfortable position with my chest off the box.
I'm gonna leave my legs separated, externally rotated. I'm focusing more on length than lift. My glutes aren't relaxed, but they're not clenched either, and my pelvis is pressing down evenly into the box, and this is very important to keep the length through your lumbar spine, so like a triangle. The pubic bone and the hipbones press down evenly throughout the exercise. Grabbing a hold of the straps and allowing my spine to flex forward, setting the shoulders.
On an exhale, I'll lift my chest and lift my arms up. On an inhale, lower the arms and lower the chest. Two more like this, and then we'll add on. So feel the scapula glide down the back, lengthen, lift and release. Back to that image of the turtle peaking its head out of its shell, we're going for length here, long, long, long, long, long and release.
Adding a circle to the motion, so we set the shoulders, lift up, allow the shoulder to move and the spine to drop down, so uniting the extension of the spine and the circular motion of the shoulder. Press, lengthen, lift and release. Last time this direction. Release out those shoulders and release, good. The reverse.
Lengthen to the T. Draw the arms into the sides. Now resist the chest down. Don't let gravity pull you. Remember, there's always two exercises hidden within every exercise.
We've got the concentric, the lift, the shortening, the tightening, and then we have the eccentric, the control, the release, the lengthening, and they both have the equal intention. Two more. Lift up and release down. Last time. Little hold and release, hooking the straps up.
I love to do child's pose after extension. So sitting the hips back onto the heels and just allowing my spine to release. One of my favorite exercise is single leg pulling strap. So I come from a quadruped kneeling position into a tripod. So the first thing that I want to do is draw my stabilizing knee so it's right under the center of my pelvis.
I can rest my foot onto the wooden rail and then go ahead and place my foot into the strap so that it's closer to my heel than to my toes. If I need to adjust, I can do so. The foot points straight down towards the ground, again with that sense of staying connected with the femur and the hip socket. So it's not a reach through my toes that way. Level, square, set the shoulders.
Once I feel that retraction of the femur into the hip socket, that's my cue to go for the lift and length. Resist as the leg comes down. I want you to go to the place where you feel the stretch but not where you've given into it. So maintain that strong neutral throw. Lift up.
We'll do about eight here. Resist down. So two big things happening here. As I use my hip extensors and I feel the work in the back of my body, I'm opening my hip flexors and feeling that length through the front of my body. Pull, lift, and back.
Two more, I think. Lots of obliques. Little bit of upper body stabilizing. Lift and hold. Reach and resist.
Same thing on the other side. Again, as we do these one-sided exercises, it's not abnormal for one side to be stronger, tighter or smarter than the other side. We usually have one side that's far more coordinated. That's the side that we're dominant on usually, the side that we sign our name or unlock a door with. It's usually our more coordinated side.
Squaring the hips, lengthening the spine, lifting the leg. So I'm gonna lift the leg as high as I can stay square through my hips, remembering that every time I pull back and use the muscles in the back of my body the counter to that is the opening that I feel through the front of the hip. Lift up and lengthen. I'm exhaling to scoop deep, lengthen, lift and release, maintaining that awareness through the middle of my body, not allowing my thorax to sink as I sweep my leg up and resist. I believe one more should make eight.
Lift, hold, stretch and allow the shape to come down. Hooking that up and coming off short box. So for this particular one, I'll leave the box in front of the shoulder blocks, add a few more springs so the carriage has stability. So I'm adding all three red springs on here. Grabbing a hold of the foot strap and taking a seat for some mermaid exercises.
Place my right foot in first. So lots of different options for seating position. I prefer either the mermaid legs or, to advance the series, the leg crossed underneath, but allowing your leg to hang off not only gives you a little bit more freedom if your knee feels tight, but if the exercise creates a little fear for you to go over and literally have your life supported by a thread, you can feel more supported through the leg. I'll take this one for today. So starting in upright position, shoulders right over hips, ribs connected, taking my arms out to a T, I lift up through my side as I go into the lean.
I'm trying to find the space where my arms are perpendicular to the earth. On an exhale, I begin to flex and rotate my spine. My head should be in line with the headrest here, so note if you're leaving off to one side, and I allow my body to flex forward. From here, I come back through my starting position, and I allow my arm to come in front of my body as I stretch and reach all the way over to the side. Back to the T and closing the ribs.
So it's a lift up and over a rainbow as I take the side bend without collapsing. Then I initiate from the center of my body flex, rotate, come back through the side position, and then windmilling my arms as I come up and over all the way to the other side and then back through. One more like this. It feels great. I really lift up and out of my body here to begin, and then exhale (exhaling), drawing my navel up and away from my femur here, creating as much space as I can, coming back through and all the way up and over.
Adding on, coming back to the T, setting the shoulders, lift and tilt into the rotation, and from here, as I come through, I'll wrap my hand around the front of my abdomen, lengthen to the long line and down and out for eight times if you can, so this is two and three, gliding the ribs towards the pelvis, lengthen, lift up four. Notice my foot is staying lifted. My hip is staying lifted. This is five. As I come up, instead of thinking up, I'm thinking out and reach.
Two more. Shoulders opening on that top side, and I can take the whole thing all the way up and over, and I can even deepen that stretch a little, scoop it forward and lengthen up for the same series on the other side. Opposite foot goes in. Choose the seated position that works best for you. So from this angle, you can see my shoulders over my hips.
You'll see that my hip will lift, so will my foot, and once I get into that position, my foot stays up. As I exhale and I rotate, again, I'm aligning my head right over the headrest. Notice if you're tighter on one side and allow the body to flex forward. Come back to the side position and exhale as you come all the way up and over, back to the T. So I tilt, flex, drawing the navel up and away from the thighs.
Come back through and all the way up. One more, and then we'll add on, just the bow and arrow, taking it down through the side, exhale (exhaling), drawing the navel away from the femur here. That's so important. It's not a collapse. It's a lift.
Think of that eagle catching the wind in its wings, soaring. Come all the way through and up, and here we go. We take the side, rotation, back just to the lateral flexion, windmill the arms, cinch and lengthen to lower. The great thing about this arm position is as I go down I can feel that I'm lifting up and away from my fingertips. I can think about keeping this right arm in line with my ear.
Gives me an awareness of where my cervical spine is in space. Lengthen, reach. More of a lift and stretch and up, and then on this one, I can come all the way up, all the way over, and I can even give myself a little bit of a deeper stretch, scooping the belly back and lengthening all the way up and over. Feels great. The box is gonna come off, and I feel like doing some hip rolls, opening up through my hip flexors.
So the headrest will remain down for hip rolls. Moving the foot bar to mid position, lock it in. I'm gonna do my hip rolls on one red and one blue spring, remembering that the lighter the tension, the more challenging the series is. So if you tend to cramp easily, you might want to try this with two red springs on instead of one red and one blue. So lying down onto my back, headrest is down, shoulders away from the blocks here.
Hands are down. I like to be able to feel like I'm wrapping the tips of my fingers around the carriage. This gives me a sense of depressing my scapula so I can stay long through my neck. Heels are about four inches apart, three inches apart, and legs are in parallel. On an exhale, rock from your neutral pelvis into your imprint, and then begin to articulate through the spine, rolling into your bridge, inhaling to stay at the top, and let's stay here for a few breaths as we feel our body.
So we're back to that same posterior tilt that we were in during our lunge series. We feel the sacrum drawing under us and the pelvic floor and deep abdominals drawing in. Here more than ever, there's a sense of close connection, drawing down through the rib cage. The idea is not to bridge the spine up but, instead, keep that alignment. Begin to roll down, as if you were counting your vertebra one at a time without missing one, and then releasing to that pelvis neutral.
One more time just like this. So in printing, rolling through the imprint, feeling equal weight on each leg. We'll go into a single leg variation in a second and then exhaling (exhaling), hollowing out the abdominals and then releasing down and in. So adding on to this, inhale to prepare, keeping the carriage in the in position, exhale as you roll up (exhaling). Chin is away from the chest here, so the curve in the cervical spine is still present.
Let's draw left leg into a tabletop position, keeping the pelvis square and level. As I press out with my right, I'll extend my left in a devlapay position. Press out and extend and then come back in. Press out and extend and come back in. Place the foot down.
Careful of that load transfer, keeping the pelvis level as you do so, repeating on the other side. Press and lengthen and come in and bend. Let's really focus on keeping that femur still in space and activating the vastis and the muscles around the knee as we go into extension and then come in. Placing the foot down, inhale and exhale, roll. (exhaling) Articulate down. So you can continue with that series.
If you'd like to make the exercise more challenging, follow me. Inhale to prepare. Exhale as you roll up. I'll draw my left leg back to tabletop. As I press the carriage out, I'll extend the leg.
Then I'll flex the foot, bringing the carriage in, lifting my hips up but staying level. So again, point and press, flex to come in. Point and press, flex to come in. Two more, point and press, flex to come in, point and press and coming in, placing the foot on, drawing the other leg up, pressing the carriage out, articulating through that foot. So think about fanning your toes and point and reach.
In and out, keeping the pelvis up and level. Reach and reach, bringing it in, lift an inch. Place the foot on, inhale and then exhale, releasing the spine down. Rock the knees from side to side, ensuring a sense of mobility in the pelvis, remembering that even though we're creating strength and stability our goal is not rigid muscles but flexible ones. Let's finish with a rollover.
So I'll take my hands back onto the silver pegs, making sure that my shoulders are away from the blocks, pelvis neutral to begin, drawing my legs up into tabletop one at a time, connecting through my adductors. My legs extend long. Inhale up, (deep breathing) exhaling into the inversion, my legs parallel to the floor and chin away from chest here. Separate the feet, flex the feet, and then exhale. I get to lengthen through my hamstrings as I articulate my spine down.
I'm gonna limit how low I go, just really focusing on my core staying connected. Lift, inhale. (deep breathing) This time, if I'm able to drop my legs a little bit lower, I'll allow that to happen, but again, I'm not coming anymore onto my shoulders or neck. I'm keeping my balance on my mid back. Separate, flex, and exhale, roll down. Legs are just a little wider than the hips.
Take a peek at your feet here and notice if you're externally rotating. One more time here. (deep breathing) Separate, flex, and resist. Push through the heels in one direction as the rest of the spine goes down. Keep the legs apart and the feet flexed. The reverse, a little harder to get up with the legs apart, and then we get to draw them together.
Find your external rotation. Point your toes and minimize the light, the space between the inner thighs as you go down, straight down. Separate, flex. (deep breathing) Drawing the heels together, point the toes. Maybe you can hinge the legs a little bit lower down. Chin stays away from the chest here, keeping the pecks open.
Last time. It's an inhale to lift the legs but an exhale to lift the body. Heels together. Activate those inner thighs as you roll down. Pelvic floor comes up, up, up.
Allow the legs to lower, and bend them in. Circle the arms around, forehead towards the knees. Three deep breaths, (deep breathing) letting those shoulders release, (deep breathing) and finishing by coming up. So I hope you feel lengthened, balanced. I do.
Thank you so much for taking the class with me, and I hope to see you again soon.
Comments


Hoping you will do a session on the Cadillac or Tower.
Its a joy having you here. I always know its going to be good!
Jamie


I absolutely LOVE your classes and cues! I've been watching all of your classes every week, so PLEASE keep posting!! I teach at a studio in Tustin, Ca..but would LOVE to take a class from you!! Where do u mainly teach at if u dont mind me asking??
Amazing as always!! :)

You need to be a subscriber to post a comment.
Please Log In or Create an Account to start your free trial.
