Description
About This Video
Transcript
Read Full Transcript
Hi everyone. I am here for a beginning basic math class. So for those of you who are new to place any time, this is a great class for you. Or if you're a veteran PyLadies mover and you want just a basics class just to kind of get in, get back into your body and some fundamentals. This is nice. Uh, nothing fast paced, focus on your breath and I'll be showing some layering of kind of a basic form of a certain exercises and adding um, stepping blocks or building blocks for progressions and maybe 15 or 20 minutes. So it's not a long class, but a good kind of refresher course. Or like I said, for the beginners, a great place to start and hopefully you can learn some fundamentals that embody some of the depth of [inaudible] that you'll build on. So we'll start with sitting tall, knees are bent and your would you want your knees about your shoulder with the part. And I realized for a beginner, if you've not done this before, this is also quite a bit of work just to sit upright.
So we're going to use our hands underneath your knees and use your arms to really help you sit tall. And we really are trying to stay upright on our sit bones as opposed to starting back here because that's where we were. We'll be moving to, but initially beginning right up top. Okay. Inhaling, big through your nose. We want a lot of expansion of the chest, this ribs to the side and the ribs to the back as much as you can. And as you exhale you can think of just bringing your abdominals into your spine and possibly your spine into your abdominals. So front to back, back to front again. Inhaling and squeezing the air out out, out without getting shorter in your spine.
Let's do three more together. Deep breath in and exhale. Think of front to back, back to front. That should awaken your abdominal muscles right away. And two more could start to open up your collar bone with a bit. Exhale, stay tall. One more time. Inhaling, try to reach the ribs back a little bit to expand your back body. Exhale. Now next exhale.
We're gonna move the pelvis and we like to think of it almost like a wheel that can begin moving back a rolling. I think about reaching my rib cage back. I want us to go back so that your arms straighten, but the feet don't come off of your mat if you can. It's not always accessible right away. If you add home and you feel like your feet are doing this, that is fine.
Hold on with your arms, keeping those knees parallel. Now hold this position and see if you can bring your belly in a little bit more. That's an inhale. It's hard to breathe. Exhale, use the arms as start to pull ourselves forward. We'll do five of these with each one. Let's lose our arms a little bit less. Here we go. A little more flow. Inhale and exhale so the initiation is right off. Those sit bones.
Look straight ahead. You want to go evenly across your pelvis until your arms are straight. You'll hear Palladio's cues a lot of lower your shoulder blades. What we mean is bring them down away from your ears. Inhale, use your arms a little less, more stomach to spine and round four. Inhale. Let's build a tall spine and again, a role.
Knees staying parallel, looking straight ahead. Hold as you take an inhale. Breath. Exhale, front ribs to back ribs. We're endeavoring to open up and build more flexibility in our back.
Inhale, build a tall spine. Transitioning down to our back. So I think best is to bring your hands by your hips. Lift your hips towards your heels and just guide yourself down. Or those of you who know a bigger roll down your you can. You can do that. So where I want us to go next is addressing our shoulders easy.
Does it press your shoulders back so that the collarbone gets a little bit broader from left to right. Your pelvis is in a level position. Your low back kind of falling toward the the mat surface. So I want you to take your leg. I'm using my right leg, but you can use the either one. Your knees are touching, your inner thighs are squeezed together and you can slightly angle your thigh bone outward. A little, just a little bit of it's like turnout sensation, and then just lower the leg down. Let's do the other side. What I want us to note here is the knees are still together. I'm activating the muscles in between the in the inner thighs as well as underneath my seat, so you'll hear kind of some cues of rapping or squeezing.
It's also called ad duction. You're strengthening the midline connection. It goes right up into the abdomen and quite frankly in your spine. Set the foot down. Let's do the first leg again, adding on so the leg will extend. Now we get to move leg lifted a little higher above you and flex your foot. I want to present my heel to the ceiling.
My leg is turned out so I can let the hip fall easily to the mat so when our leg is up, you'll see this in a few other exercises. It's really easy to hike the hip up toward the waistline world. Try not to do that. So you see that your hip bones are the same level across, right to left, lower the leg to the floor as much as you can without arching your spine. Lift your leg back up, bend the knee and step down other sides. So first we did knee to knee connecting.
Flex the ankle and raise your leg. Take that moment of feel the back of your hip. Meet the mat. Your ribs are anchored, your tummy is still pressing to spine. How low can you take your leg without losing your, your body connection on the mass? So what I mean, if you lowered your leg and your ribs begin to lift up, that's too low with your leg, you may not be ready. So you're challenging yourself. How low can you take that?
But keeping this taut and flat, lift the leg and lower. Okay, that's enough there. Bring your knees to your chest, hands on the knees or the shins. And I want you to open your knees, the width of your shoulders, and press your knees down. Take a deep breath through your nose and exhale. Moving on, knees together. I want you to take your knees and put them right above your hips. It's okay with me if you lift your shins up slightly.
You can also keep them way down here. It's mainly this angle of where your knees to your hips are your leg to your hip. Long arms. Now and we begin a movement called the pumping. What you want to do is maintain that broad collar bone for today and those of you who know your [inaudible] five pumps, inhale five pumps XL. You can do that newbies, please just breathe
Keep the pumping going. I want you to squeeze your legs together and let's just do a slight variation of length, position, turning your legs out. Okay, all going well. Next for aggression, lift your head, keep the pumping going. If all is going well, you can begin to reach your legs forward away from your head. You're trying to keep your back in one position and with your shoulder blades in the back of your body up a little higher, suggest that base of your shoulder blades touching the mat beneath you.
Keep the pumping. You can look up to your feet. If you've completed a hundred I've probably done more. Let's go ahead and pause so you just fold yourself back and pull on those legs and give it a little rest. Okay, moving on. I'm going to put my hands behind my knees and he was a little bit of play, a little bit of momentum to come up. Separate the feet again. This time arms will reach the long and forward. Palms face down, a little mini roll back. We're back to this beginning position. Taken. Inhale, that same pelvic movement. See, it's different than we warmed up because you have the first one.
You have got to hold on. This time you're not holding on, so it's a little more load in your tummy. Inhale, exhale, reach with your arms, round your spine, sit tall five times.
Inhale, exhale, come forward. And one more time. Arms have energy. And so even though I'm rolling backward, I'm still energizing something this way, my eyes, my arms. Now from here, let's keep going down. If you fall, that's okay. Hold on. If you feel like you're going to fall, as we get stronger and more flexible in our back, this becomes easier, but it can take you awhile. Please don't get discouraged. So bending the knees again. This next exercise is called single leg circle. To start with, let's just extend that one leg again. We just warmed up with it, but I will have your raise your leg all the way up. Remember, no hiking place your hips.
You want both cheeks pointing that way and both hips even from your ribs. This upward leg is going to move toward the other thigh and brush it. Let's make a small counterclockwise circle in, out inward circle. It moves slightly out. Really not much wider than your own hip. Okay? If all is going well, lower the bottom leg and do another circle.
Technically, there should just be five. Let's go the other way. Open down around. Once again, focus on the stability of your torso, your rib cage, your belly meets your spine.
Cross and touch the inner thigh, a small circle out and around, so now it's going clockwise to start inner thighs. Just like we warmed up with the next two. Let's go with a bottom straight leg in, out, cross in and out. Let's reverse or circle. Small out, small n open. How still can you keep your torso? How level can you keep your pelvis?
One more open around and center. Bend your knee, pull it into your chest. All right. Once again, transitioning to a seated position so you'll see this again and roll yourself up. Okay, I'm going to move back on my mat just lightly. We're working on something now called the rolling like a ball. We can also just get a ball position of your body. So here's how it all started. I will have my knees open one hand on each ankle and I want to get a small of a shape as I possibly can. And first try this everybody with your feet on the mat, okay. And rounding your, your body towards your legs, your tummy to your spine, shoulders low away from ears.
And there's a, there's an exercise right there and hopefully you, some of you feel your stomach muscles, uh, active. Okay? Like you're putting a really tight seatbelt to add on to that. Let's try to lift our feet up without rocking back too much. I'll show you what too much may look like so you can peek and look real quick. Lifting the feet and not like that.
That might already send you the feeling of going backward. We are headed there, but let's see if we can challenge yourself by simply picking up the feet, putting them down, maybe an exhale, not leaning back too much and back. He'll sting quite close to the Tishi and down and one more in Wallowa balance for a moment. So it's sacred. This could also be where you are today if you're learning the ball for the first time. This is could be a lot, but as we learn in progress, we're looking for mobilization of the spine. So we're gonna roll backward to the mid back. Come back up and try to find that same balance.
Roll back. I'm looking at my, um, my belly. If you need to put your feet down in between, please do. I did for a long, quite a long time. Roll back. Keep your eyes at your belly. So we want to complete a circle, somewhat circle shape of our spine. Okay. I know it's tempting to look up here. Don't roll back and look at your belly. Come on up.
Let's go for two more. Are Your shoulders low away from your ears? You may notice that I'm not rolling completely square on my mat and you can see them kind of traveling this way. That's another lesson and don't worry, I'll talk about it some other day. Okay. Place your feet down. We're moving down on the mat again, so I want you to roll yourself down. Okay? Moving on.
The next series is called the series of five belly busters ad blasters. There's lots of different names. It begins this way. Head is down the first in this exercise ne, the name of it is single leg stretch, sometimes this called single leg pole. So let's do this single leg for right now. In this quick demonstration, I'm gonna move one leg out of the way. Place your hands on the right shin, or if you're doing your left Shin, that's fine. Here's the, the game though is whichever leg is in. I'm using my right, right hand goes down by the ankle. The opposite hand is inside by the knee and you're using those hands.
Two ways to kind of help straighten your leg and keep it straight. But also those arms, again, are helping to pull the leg toward the body at to build some flexibility in your hip joint. Lastly, the hip itself needs to be like we warmed up with not hiking upward by the ribs. That's gonna bulk you up on that waistline and not have your hips work effectively. Hips are level. So once again, my cheek should be leveled down here and my hips across this liner. Even now that might mean that you can't take your leg in all the way. That's fine. What if it's out here? Okay. For the purpose of moving on, this leg will be tall hands. Here we do a pole and a pull.
We change legs and pull. Take that time to square. You'll hear me say square. The hip pull, pull, change.
Look at your belly legs. Stay straight up. That's fine. Just like we warmed up with, let's try now. Pause here and reach this leg a little lower. Find your place where you can challenge how low you go, but your back stays in one place. If you're a rib, start to dome up. If you start to drop your head back, your leg may be too low.
I'm going to go for right here. Now pull, pull and pull. Pull. We want our leg to shoot straight out from the hip. Not out here, not too close in, straight out for more everyone. One and two and three and four. Let's rest everything down in between. Okay. That's single leg stretch and double leg stretch.
Both legs go to ceiling. Both arms come to the ceiling, arms go out to the sides and we fall back into that little small ball position. Feel free to park the knees if you'd like. Reach to the sky again, your spine is in one place on the mat. It hasn't gotten lighter by arching arms and legs open. Close. It's add the head lift or the lifting of the chest, the bending of the spine forward. Same thing. Arms and legs.
Arms go out in a squeeze your belly to your spine. I'm not coming much higher off the tips of my shoulder blades.
Spine is happy, safe, very nice and stable on the mat. That's our double leg. Stretch, scissors, hands behind one thigh. The other thigh is reaching away. Where are your pelvis? Bones. Hopefully no one's hiking addressed. That may mean the leg turns out slightly. We do that little double pool pool pool.
Now when you swap legs as the chance to possibly to do stabilize your spine, don't let yourself do that. Stomach stays, spine pull, pool change pool, pool change, pool pool. All right, a progression. No head yet. Could your hands go higher on your calf so that you split a big split, a little bit bigger split happening.
The leg comes up to those hands, meaning I'm not reaching way down here with my hands. The hands are here. You have to use your body to bring the leg to the hands. Stomach brings the leg to the hands and then progressed to just one split, one split, one split won and won and won and won our last one. Everybody take a rest. Moving on. Double straight leg, lower left. So I want you to take your index finger and your thumb and put them together and put that underneath your pelvis. Okay, so you're sitting right on that platform that's going to kind of give you some support. Okay. Both legs up. We're in our Palati stance.
Heels are squeezed, shoulders are back. Same challenge as we've been working on. How low can you reach your legs without your spine leaving the mat? That's really the, for some fundamentals it might be here. Bring him up, reach stomach to spine and lift and reach.
Progress to go a little lower. If you can, don't rush your technique, don't rush your practice. It's more important to keep that spine in the same place on the mat than it is to rush through. You'll have plenty of time [inaudible] okay. Now adding on, challenging yourself by taking your hands away from your hips and place them behind your head so you support your head weight and do the same thing down with the legs. Ah, what the legs. They reach away from the head. You pull them back toward the head. Try to keep the stomach to the spine. I'm going to take two more. Everybody.
I'm going to try going a little bit lower to see if I can keep my spine in one place.
The other knee stays bend and you're going to turn toward that lake. Turn with your chest, take the opposite elbow and reach it back, but you don't want to lay back on it. That's what we want to avoid. Stay up there. That's the stomach work and stretch and change. So I'm trying to, my eyes are also going to follow me and I'm trying to stretch this line so I'm thinking ribs to elbow on that diagonal. Okay.
You could also start to take your leg a little lower. Same thing as you've been seeing in all the progressions. Reach. My legs are staying quite parallel in my mid line. Perhaps a little turnout in my thighs. No hiking hips.
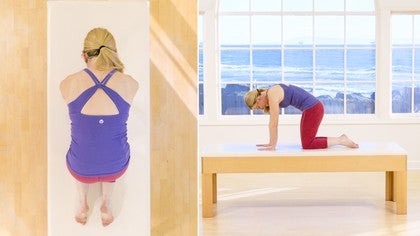
Wants you to move yourself back. We're going to go into something called the all fours, so you'll be on your hands and your knees and just cross the ankles and come onto your hands. Where do you put the hands? Well, the hands, wrist really is right straight down from your underarm. I want you to start with this position today with your knees touching and if you can see that your knees are right below your hip joints. That's where we, we go for there. Okay, so you're on all fours. A few key points in this position is the sh are the shoulder blades so they could drop together. That's an whole other exercise. We'll do another day or you could push him too wide.
That's not where I want them to go. Either is a steady place. Even on the back of the ribs. We have a nice placement to begin the wag the tail. Watch the left hip. I'm going to move that one first. I want to lift or hike the side of my left hip up toward my left ribs or left arm.
You'll feel contraction like crazy hopefully on this side of you, the opposite hip is stretching away from the shoulders and ribs and then bring yourself to center. Let's do the other side so I'm lengthening the left, but pulling the right hip up toward my right ribs, contracting that right side body and find center again. Hike the left hip to sh ribs. Reach together side long and find center. Hike the right hip and center. Now for a moment I want to give you a thought to play with.
If you ha as you have your mat, pretend you have a piece of tape. She could have done that and just divided exactly down the center. That's where our nose lines up. Our chest, our belly are growing. The center of us, our spine. So when we do this side bend here with the pelvis or this wag, the tail, aim for staying on that center line versus hiking over here.
So I've taken myself out of my center. That's not a great thing to do. It could happen. I'm going to try my other side. So you get a kind of, pretend that there might be a line on your mat and you're wagging. Let's pick up the pace your tail without coming off of that line so you'll feel might your low back muscles and the muffin top muscles contracting. Never a bad thing to work. One more and pause. Okay, I'm going to stretch your leg out. Choosing my left. You can choose whichever lane and once again, let's try not to hike.
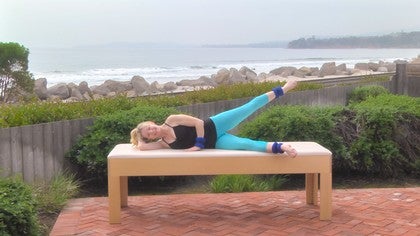
So back to level. Okay, so you have an evenness across hip to hip. I want to take my other hand and just walk my fingers forward slightly and slightly. Hover the hand and foot. Now I'm saying slightly because if I lifted too high, perhaps the leg goes wonky and the shoulder goes wonky. We're trying to get precise alignment. You can flex your foot, you can point and let's bring things home. Other sites. So begin by extending the leg first on hiking both hips, walking the fingers out, the shoulder stays away from the ear.
That may be enough. That's a lot. If you're brand new to pull out his, tell me that's a lot. It could be and now lift, you should still still be able to see a neck and a waistline. Once again, each side, leg, fingers, lift in and leg. I'm rushing fingers and lift. Okay, let's rest the low back by doing a very often taught exercises called the cat back. Again, I want to start at my low back and not push up into the upper but work down there as if I had a long tail and it was bringing it toward my head. It's a great way to stretch the spine. Let's move our body down low. We're getting near the end of this lesson and I want you to do this.
It's called the flight. I learned this as flight forehead. His down arms are long by your sides and for this, this lesson, put your hands, poems against your side legs feed together if you can, slightly apart is maybe a little bit better and let's think about our body weight and where is it? Put more of your body weight on your pubic bone and less on your hip bones if possible, address the shoulders. Let's go upstairs in the shoulders and open that collarbone long neck. That's a lot of work here. Moving into lifting the weight of the head or face off of the mat. Holding on weight is on the pubic bone, possibly more than the hips and hold on.
That's a lot of work for the back muscles in the inside. Shoulders and lower down for more. I'm going to have a breath first and I'm lifting. Keeping those shoulders long away from my ears. Hands holding the thighs weighed on the pubic bone and lower three more.
Again, if I had that piece of tape on my mat, my nose would be lining up with it each time. Wouldn't be drifting. Not yet anyway, unless it's intentional. And two more hands. Stay against the size. Alien weighed on the pubic bone and lower once more and we're adding onto it this time and lift time to free up the arms. Let go, rotate your shoulders back even more so your palms face the mat. Open your arms wide.
I'm trying to touch you and this window with my arms and my shoulder blades. So if your shoulder blades are congested and pulling into your spine, you're going to feel a tension. I want you to feel freedom and open up your wings. Bring your arms back in touch and down. Just two more weight on the pubic bone. Lift, rotate. Collarbone goes wide. Hands face down, opening those wings. Shoulderblades widen.
Bring them back in. Everything comes down one. Exhale, weight on the pubic bone. Cold or bone wide. Here go the arms. You'll be fine if you're not already really feeling the back muscles. We did so much ab work. We needed some back close and rest. Okay, let's finish with one more up. Somewhat rolling like a ball type of exercise. It's called the seal. Okay, so seal your starting up again. Clap your hands, put them underneath your heels, and then one hand holds each ankle top. Okay?
Once again, starting with your feet on the mat round your spine. Knees are somewhat pressing in, believe it or not, but I also want you to press your elbows out. You'll feel some connection between your limbs. Okay, so let's try and do what we did earlier. Can I lift my feet without rolling back too much? Well, by the way, I will have to probably move home a little bit. Find a place to balance. This might be your seal today.
Roll back and the forth
Pilates with Amy Havens: Beginner Mat Workouts
Mention
 |
Amy Havens (Teacher) |
 |
Martine B |
|
|
Megan Y |
|
|
Cigdem A |
|
|
Wendy K |
 |
Ira R |
|
|
Danielle |
|
|
John N |
|
|
Lori |
|
|
Charles C |
|
|
Angelynn S |
 |
Brighid M |
|
|
Sharon B |
 |
Judit K |
 |
Belinda P |
|
|
Sarah Louise |
 |
Vicky |
 |
Mercedes G |
|
|
Marjorie G. |
Comments


You need to be a subscriber to post a comment.
Please Log In or Create an Account to start your free trial.
