Description
About This Video
Transcript
Read Full Transcript
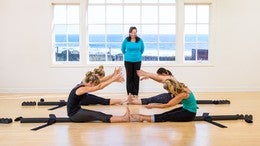
Welcome to my first mini class. This is a basic class that we start everyone with. Um, as an introduction. These are made of the same material as the Paris center and they were designed to be just barely under your feet so that your toes are off in a little bit of your heel is off because I would like people to understand how to balance without using their toes. Using the toes causes you to grip all the tendons to the toes and causes problems that you don't need and then doesn't really let you balance. Okay, so we're going to start with the minis with N.
We're going to start by learning how we use it to gently, um, elongate the calf muscle. So if you put your right foot, the ball of your right foot on the first curve, and allow your toes to just relax and keep the left foot off and just soften the knees of the right foot, soften and straighten a few times just so that you feel how the upper and lower calf feels. And then keeping the knee soft. Put the other foot on again, the ball of the foot goes on the curve, the toes just relax and stay with your knees nice and soft and then slowly straighten the knees and as you straighten the knees, pay attention that your pelvis doesn't move backwards so as you straight and think about lifting up on the pubic bone but not shifting back onto your heels. The weight of the upper body is on both the heel and the ball and nice and slow. Softening and extending of the knees will help to give the Fascia, the connective tissues a nice length and this is a nice way to start because our calves are usually a little tight, especially if we wear heels throughout the day and the connective tissues tighten up and shorten and as you extend your knees, also be aware that you're not allowing the hip to internally rotate. As you straighten your knees, you want to really think about externally rotating at your hips so that your legs stay in a nice neutral parallel position and they don't turn in good. Lift up a little more in tracker too. Perfect. Very nice.
And now you can lift your right heel up and step forward and put the heel onto the front so that the heel sits inside the channel and then move your other foot. And the, the reason for this is that I want you to feel the weight bearing surface in the front of your cal canus. So your heel, the front of your cal Kaneez is right about there, and that's where you're feeling the top of the roll. The convexity should really support the front of your cal Caney is by your cal Kaneohe cuboid joint and soften your knees again and straightened and soften and straightened. Nice. And now think about lifting your metatarsal or moving your heel towards your toe. And that will allow an ice doming to occur and keep your knee straight as you do this. So you'll get a little bit of doming and strengthening of the intrinsic muscles of your feet. Good. Try and do it now.
Keeping your knees straight right. Do you want to think about lifting your metatarsus heads? You can also think about moving the heel toward the ball. No, just keep your knees straight. Don't bend them anymore and see if you can sense the arch lifting your pelvic floor muscles, lifting all the way up and then relax and just keep doing that.
Remembering all the work we did with breathing into the posterior ribcage on the inhale. That's nice. Good. And now relax your feet, relax everything. And just lift your toes and see if you can lift your toes without rocking backwards. See if you can just lift your toes. But maintaining the weight on the ball and the anterior heel, that's it. And in particular for dancers, I encourage them to lift their pinky toes because lifting the pinkie toe rather than pushing it out to the side like that will help protect the lateral ankle and the fifth metatarsal. If, for example, if you came down and your pinky toe was, was not up here, but out there, the chances are you could easily rollover. So you really always want to lift the fifth toe up.
You want to be able to get it up and hold it up there.
Now do a little plea a as you tap your forefoot. So now we're activating all those muscles on the anterior part of the Shin that barely ever get any work and rest. And so I'm going to just tell you this, that one of the things you have to realize is that we almost never use our anterior tibial muscles. So if you do too much of this, you may very well get sore. So that's why I stopped. You do about 10 repetitions once you've done it, after a while it's okay to do more. Okay, good. So now you can step up and step off. Good.
And now turn your minis over.
It looks easy, but it's not okay. And you want to be in a place where you feel yourself vibrating and that those little micro movements are wonderful and normal as your body tries to find where it is in space. And that's the appropriate receptive challenge of the muscle spindle, which is what sending these messages up to your moraine. Because anytime we're in a position where we're standing against gravity and we're basically in a neutral position, our joints and our ligaments and our capsules, I'm feeling really good about themselves. They don't need to send messages to the brain, but the muscles need to send messages to the brain.
So the spindles are firing like crazy and that's why you'll feel the little micro movement occurring. And that's a good thing. That's a really good thing. And you're learning more or less where the center of your body weight is. We'll do a little bit more once we turn it over and put the wedges in. But now let's change where our center of gravity is by elevating the arms over your head for a challenge. So as your arms move up, the center of gravity of your body moves up as well.
So it becomes a little bit more of a challenge in your try and continue to into your back ribs. This is a wonderful way to get the appropriate receptors working and hopefully prevent ankle sprains and nap. Bring your arms out to second. Good. And so let's see if we can do our dissociative rib on pelvis challenge. So we're gonna turn to the right with the rib cage.
Leave the pelvis and knee facing front. Come back to the center and turn to the left.
Now let's do a baby please. So now we're bringing our center of gravity down a little bit and return to the center and again, bring it down and returned to the center. And again, bring it down. Let your tail go straight down. That's it. And return to the center. Good. Stay there. And now just a half that amount of PA that you just did and now stay with your pelvis and knees facing front. Turn to the right as you turn to the right. Don't let that left pelvis come forward, keep it back, and then turn to the left. Good, beautiful, and return. Good straight knees, arms down. Step off one leg, and then step off the other leg.
And now we're going to do it in stride stance. So if you move your right forward of the left as if you are taking a step and then return, and now you'll work the same. We'll pretty much do the same thing and stride,
And now come back to the center and find the weight in between the two sides. Arms out to the side and let's add a little rotation to the right and come back to the center and to the left and come back to the center. Very nice baby. Play a again, keep the knees and pelvis front. Rotate. Nice. Get the ribs around but keep the pelvis level very nice.
So you feel how your pelvis takes weight and how you are reacting to the weight shift. Very nice. Good. And now see if you can find that center in between the two. So your pelvis is in a nice neutral center. One hip is an extension, one hip is inflection.
Let's take the arms out to the side and rotate to the right. Good and returned to the center. Keep that center line going all the way up. Rotate to the left and come back to this center baby please. [inaudible] and rotate. Come back to the center. Keep breathing.
Good. Very nice. And straighten your knees. Arms down and step back. One foot at a time. Yeah, very good. Now you can turn your minis over and you'll put them so that
So if we dropped a plumb line, that center of gravity usually comes down by the talen vicular joint. So that's where you want to stand. So let me just fix this. This is a little too far back, I think. I know this is a little, yeah, you have to play with these, but pretty much depending on the size of your foot. Very nice. So step one foot first, roll through slowly. Very nice. And now this gives you a little more feedback.
Is that correct? You really are feeling the bottom of your foot. And let's see if we can do that. Nice deep breathing into the back ribs here.
So you want to feel your feet, especially that spot because that spot makes the connection to the brain. And now there's no way that that brain is gonna forget where the center and the plum line is of your foot.
And let's do a baby please. [inaudible] keep the knees and pelvis moving for and straighten. And again a baby please. [inaudible] and straighten once more baby please. [inaudible] and straight and very nice. And now turned to the right trying to keep your hips and knees forward, rotating the rib cage.
And come back to the center and then turn to the left. Come back to the center baby, please. [inaudible] turn to the right. Come back to the center and to the left. Back to the center. Good.
Straighten your knees and step back one foot at a time. And now take one of the wedges up and put it right in front of the other one. Cause now we'll stand on one leg. So are you going to put your foot in the same place?
Feel the inner arch going up the inner thigh, pelvic floor all the way out. Feel free to put your arms out for balance. See if you can keep the breath going. That's nice. Caroline, move your, move your feet if you need to. It's fine. Very nice. Very nice. Yeah, we try and stay in these positions for a good minute if we can.
Nice breathing can put your arms out to the side for balance. Very nice. Step back, slowly. Good. And now, whichever foot you felt needed most work. Let's back on that one
That's it. And put your foot down. Good. Wow. So it's a challenge, isn't it? It's a little bit of a challenge because first of all, think about, we're always in shoes with heels. We're never really on the center of our foot. This is an unknown territory. But now that you're standing on it, don't you feel, or I don't want to put words into your mouth, but you're so much more grounded.
Right? And now it's like pancake. It's like you really feel the floor. So it's a wonderful experience for your whole body, even though the work is being done lower, but it's a whole body experience.

Mention
 |
Marika M (Teacher) |
 |
Ivan Z |
 |
Candace |
|
|
Sarah J |
 |
Noelle |
|
|
Cynthia G |
|
|
Kimberly R |
 |
Joan Breibart |
 |
Hilary F |
|
|
Justine DiCistanzo |
 |
Patti Eppolito Kreiner |
 |
Penny M |
|
|
Sarah P |
 |
Gia Calhoun |
|
|
Robyn L |
 |
Madeline Black |
|
|
Joel F |
|
|
Hydie |
 |
Susanna H |
 |
LOUET I |
Comments


FYI I have the Parasetter too. I use it all most everyday. I have some clients who come early just to warm up on it. Thank you for making these very useful tools. I hope to take one of your workshops one day.


Having been through foot surgery these exercises can help me greatly. Namely protect knees and ankles.

Can you get the mini's in Australia? The cost of shipping from US is twice the price of the product.


You need to be a subscriber to post a comment.
Please Log In or Create an Account to start your free trial.
