Description
About This Video
Transcript
Read Full Transcript
Hi everybody. I'm Kara Reeser and we're going to do a beginning map class together. And here's what you need. You need a theraband. It could be a, this is a green one, just a medium weight is what you're looking for, a hand towel. And um, in most cases you might as well just prepped as good and fold your hand towel into a long strip and just set it aside. We're going to use that mostly to support our neck. Then we want something that you can sit up on. I like to use a blanket, um, and you just want to fold that blanket so that it supports your, um, seated position in a way where you're comfortable.
So I'm folding mine three times. That just gets my bum a little higher than my legs to get started. So I don't feel too snug in my hip flexors. So you're going to start seated and um, this class is attached to two other classes I'm teaching in the beginner level and each will have a theme. Today's class theme is finding center or coming back to center.
So center being both a place within our body where we have a sense of our central axis of support, our upright posture we could call it, and also a centerdness of mind, meaning that we're using the breath and we're using the imagery to continually bring ourselves back to the practice. Back to the idea of staying in the center, staying in the practice. So that's where we're headed. So we're going to start seated upright and I like to start with just visualizing centers. So go ahead and close your eyes and I'm going to close my eyes with you and just start to breathe. Just naturally breathe and see if you can imagine a vertical line dropping down from the center of your head through the center of your neck, through the center of your trunk, all the way down through the center of your pelvis. And just let your body rest in the position of that center line, that postural support. Take a couple deep breaths, inhaling and exhaling.
And one more. Inhaling and exhaling. We're going to keep this visualization of the central access or the central line of support. So I want you to bring your hands to your navel center. And what we're gonna do here is just gently pull the naval center away from our hands, right? Just pull it away so you feel it slip back towards your central line and then just let it go. And now you'll feel it. Come back into your hands. And again, pulling that naval center just back tugging it back. But make sure you can still breathe and you're still comfortable.
And then let the belly center come back into your hands. So this time you're going to inhale as you pull the belly center back. And then on the exhale, I want you to bring your hands up to your ribs and feel the ribs come towards center, keeping your belly center tack back. We're going to now inhale into your rib cage, feeling the walls of your ribs widen, and then exhale. Let the walls of your ribs come back towards that center line again.
Inhale wide ribs so you can have your hands along the side of your ribs to help you feel that. And exhale, let the ribs come back into center. Now, the tricky part is keeping that naval center tacked back. So let's do that as well. Inhale and exhale. Now we're going to start to move our ribcage to bring your hands down by your side here and go. Inhale, move the ribs over to the right side. Exhale, bring yourself back to that center line.
I actually usually close my eyes on this one too because I can feel center better. Inhale over. Exhale, finding center. Inhale, exhale, bringing yourself back to that center line. Inhale over to the left. Exhale back to center. Okay, so now we're going to move our blankets and we're going to start the practice. I'm going to bring the bank blanket to the top edge of my mat and we're going to stretch our legs out. We're going to go back to finding center, so that's the theme, so go ahead and find that sense of the center line, the relaxed upright posture. Take a deep breath in. Exhale, drop your head and we're going to roll the spine down over our legs, reaching our fingers towards the backs of her legs.
It does not matter how far you go. And inhale, exhale, find that central lines. So you're just stacking herself up. Upright posture, not too much tension. Again, inhale, exhale, drop your head and let your spine start to articulate. This articulation is really prime in Pilati, so we want to get that spine moving. We're going to roll back up, finding the upright posture center line more time. Inhale, exhale. Drop the head first and feel your whole spine start to articulate down feeling. I'm sure a stretch in the back of your legs as well, which is fine.
And then just bringing from your lower spine through your middle spine, upper spine, shoulders, neck, and head, back up. Let's do that one more time. That sequence so you can really feel that. So it goes head, neck, up or spine. Middle Spine lowers fine, and then lower spine comes back, middle spine, up or spine, neck and head. And that brings us back into that vertical posture. So now take your blanket to the side and bring your hands to your knees. We're going to keep working with that spinal movement. So in this one, we're going to have our feet planted. Our arms can be, they're going to go to straight.
You're going to roll into a rounded back position, dropping your head on your inhale and on the exhale, bend your elbows in. Come up into an arch back position. And again, inhale, roll the tail. The pelvis end had crawled towards each other. Exhale up and stretch into an arc. Again, inhale down.
Really feel that spine articulating into flection. Exhale, pull with the elbows and lift your spine up into an arch. Last time, just coming under, dropping the head towards the pelvis and now just stack yourself back to that center line. You're going to bring your arms cross. I'm just going to scoop my boot a little bit forward here so I end up on my mat and we're going to take a deep breath in and you're going to slowly roll down to your back. Now you could hold the sides of your legs here or you could, if you can manage it, keep your arms like this and roll all the way back down. Reach your arms up over your head. Take your hands to the sides of your legs, lift your head, neck and shoulders, and use your hands to help you roll back up.
So now we're doing that same rolling, moving back and forth, but it starts to challenge our abdominal muscles. So I'm going to roll back. I'm going through my lower middle spine, upper spine, shoulder girdle head. And then of course the coming up is harder. So I'm going to go ahead and help myself out by crawling up my legs here, right? And it's okay if your shoulders go forward a little bit. Right now we're just really trying to get that spine to move that articulation of the spine, which is so common in the plebes practice when they start to master that early on.
So we'd come all the way back and we'll take the arms out for a stretch. And then last time we're going to reach for the legs and just walk up, right? And if you need a little momentum, that's okay. This is about getting started with these types of movements. Last time we're going to roll back.
I'm going to stretch my arms out and see if I can handle that this time. So each time I can challenge myself and lie all the way back on your back. So now I want you to bring your feet hip distance apart and your heels pretty close to your sits bones. For this next activity, right, we're going to take our hands up to our thighs and we're going to start to do that same movement right from the lower spine. That curling action and you're going to curl up and you're going to bring your thighs up into your hands. You're going to press them really firmly into your hands.
Press your hands firmly into your thighs and take a deep breath in and exhale with that exa you can enroll down upper spine, middle spine, lower spine center, feeling again that central line and rolling up from the pelvis, low spine, middle spine, upper spine, and just a little pressing here. Press your feet into the mat as well. That's going to help you lift up from the underside of your legs and your Tush. Really pushing right? You're going to feel all this heating up back here. Right? And that's the goal. And rolling back down, articulating through your spine. We have one more of these. You're going to go yeah. And reaching all the way up into your thighs, thighs into hands, hands into thighs, feet pressing, big breath in an exhale. Rolling back down.
Relating again to that sense of your center line in this position. Now we're going to reach for our hand towel and you're going to take your handheld and you're going to bring it to the back of your neck. So my right between the back of your skull and your where your neck starts. So we're using the towel here to help us lift our heads. Cause as we get started in some of the abdominal exercises, uh, lifting the head is often a difficult task.
So we're going to just use a tells a helper for awhile to get used to the feeling of the neck working. You're gonna straighten your legs out to the Mat. I like to flex feet here so I can look for my toes as I come up. And we're going to take a deep breath in visualizing that central line. You're going to float the head up off the floor a little bit, and then you're going to bring your chin towards your chest. You're going to look at your toenails and you're going to hold this position.
You're going to breathe in, tacking the navel center back. You're going to breathe out and you're going to roll back down in sequence. Shoulders before head, and again, you're going to lift the head, right? You're going to curl the head in and you're going to bring up your upper trunk. This is what we call an upper abdominal curl in plots, and this also comes up a lot, so you're going to stay here and breathe, tacking the memos back, doing the lateral breath, and you might be shaking like I am, which would be really normal because it's a real effort in my abdominal muscles to hold this position and you're going to roll back down, right?
So that shaking is really normal. Inhale, and we're going to come up. Exhale one more time. One More upper abdominal crows. You're going to stay curled up for one full breath. Exhale, coming down, back down. Keep the Teles is bend your knees. We're going to go back to that, um, pelvic tilt position we just did and we're going to put these two movements together.
So you're going to start with that pelvic lift as if your hands were pushing into your thighs. You're going to lift the pelvis up and then you're going to start lifting your head up to that upper abdominal curl and let the movement of your head lower your pelvis. And now we're getting that full sequence of the spine. Lift the tail, lift the pelvis, and let that bring your head head back, right? We're going to keep doing this little seesaw movement to really get [inaudible] that spline articulating from both ends. I'm stealing this exercise from a filled in Christ's series. I want to learn.
So I want to just shout out to Feldon Christ here and a all movement is good movement. That's how we like to think of it. So now we're going to stay right up here, breath pelvises down and lie the head down. Good. You might just want to like shake out your arms for a second cause that made my arms really tired and we're going to come up into the plot is 100 so we have a few options here. You're going to come up to that upper ab curl that is essential in this exercise. Bring your right leg in, bring your left leg in. Now option one, just stay in this position and take five deep breaths. Option two, if you feel like you can hold your head up alone, you're going to pump your arms gently. Inhaling, exhaling.
I'm trying to attack my navel back still in the hail
Just releasing the low back, right? Awesome. That's our first like professional Plata is a protocol here. So now you're going to stretch your right leg along the mat, holding the left. We're going to lift your head, neck and shoulders up and we're going to roll up to seated. So this is our, our, our preparation for what's called roll up employees. So you're going to use whatever help you need from the connection between your leg and your hands to find this rolling motion through your spine, back to center. Exhale, roll it up.
Just you can use momentum. That is absolutely fine. Right? Again, we're just trying to get this movement in our spine, right? This is not something we do every day. So we've got to sort of learn how to do it. We've got to get used to the sensation, right? And switching to the other leg, bringing that knee into your chest, right. Rolling back.
You might find yourself like kind of clunking a little bit like that. That is fine. Just do your best. Push in and work through that lumbar spine. That's where a lot of us are tight. So we're going gonna really just use that leg and that connection to find that movement all the way back and head up all the way up.
Right? So now just leave both legs out. Reach your arms and we're going to roll back.
You might not feel a whole lot of movement here. Just press your arms down into the mat a little bit, bring your thighs a little close to your chest, and then just try to lift your bum off the bat just a little bit and back down. So we're going to do that. Inhaling. Exhale one more time and switch the cross your legs. And let's try it on the exhale. This time actually. So let's go. Inhale. Exhale.
I feel mine rolling up. That's okay. That's just us trying to help out. But we're just trying to get that lower abdominal cavity. You know, working towards lifting our pelvis up. You're going to uncross our legs and set our left leg down. Cross the right leg over. You're going to inhale and twist over to the left side.
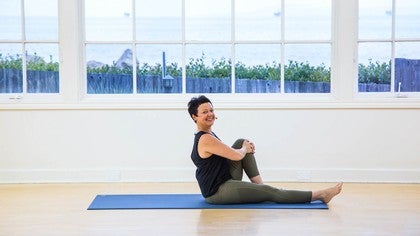
Inhaling, you might try to go a little further each time. I am trying to keep my shoulders on the mat. Exhale and last one over to the outside of the foot. In inhale, exhale, Navel Center back and bring your left knee into your chest. Bring your right leg up to the ceiling. We're going to do a version of single leg circles here. You're going to open the leg out to the side, swing it down and pick it up. Inhale, exhale.
You're going to pick your legs up and I want you to just to rock back the backside of your pelvis again. Pick your feet up and rock back, right? So we did that rocking movement earlier. So now you know where the backside of your, by your sacred, by the back of your pants. And now next time your legs are up, just drop your head and see if you can get your butt to come up and your as you go backwards, right? So you're gonna roll like a ball. Inhale up. Exhale, home. Inhale, exhale and use momentum. Have Fun with this. Let yourself do what you need to do to make this movement move through your spine, right? Goal being, getting that movement through the spine. Freedom, right play going from center and back to center.
Last time.
Now I'm going to come back into that upper abdominal curl, right? We've been here before. We know we're tacking the naval center back. Stretch your left leg out, right my rate legs at about a 90 degree angle and then we're just going to bring that left leg in. Inhale, right leg like you're pushing a gas pedal away, right? You're really pushing a wall or something away and come back in. Inhale, exhale. Keep your eyes down towards your navel. Tack the naval back.
Exhale. Inhale. Exhale. One more. If you need to rest and put your head down, feel free to do so. We're going to just finish up with a one more here before we rest and then head down. Whew. So you really feel that true that there's tummy muscles starting to like heat up working hard for you to keep this position. We're gonna come up for one more. Your knees are going to be together.
Now you're going to lower both legs away from your navel center a little bit. Inhale and exhale. This one's super hard. So your legs may not move that much. Naval Center tipping, Tucking back. You want to avoid arching your back here. Good. And lie back. So one thing I want to say about that is if when you're doing this ab series and you feel like it's creating an arching in your lumbar spine, what I'm going to say to you is take that blanket back out and get it underneath your pelvis and let it support your pelvis so that it keeps your pelvis tilted this way, right?
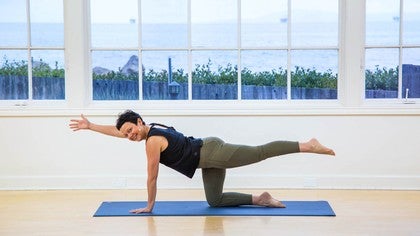
So there's always a way to avoid something like getting crunchy and the low back like that. So I always keep a blanket handy in case I want to prop that pelvis up. So if that series a little iffy in your lumbar spine, I want you to do it again and I want you to do it with your pelvis propped up and you're going to see the world of difference. Okay? We're going to keep going on. It's time for us to move to our hands and knees. So you're going to come into what we call a quad rapid position in the movement world.
All fours is just fine and you're going to find your way back to visualizing that central line. So let's take a couple of breaths. Visualizing that line. Moving through my trunk centered lined, reaching my head forward and my sits bones backwards. And now we're going to do a little cat and cow. You're going to inhale, curl in to your cap position and exhale, arch up. Lifting the eyes into your cow. Inhale, rounding the Chin Zoo. Here we are again articulating the spine, right?
So much of what we do in our plots practices, find ways to articulate our spine and support it with our trunk muscles up. So now I want you to do a little fun movement with your pelvis where you're going to move your pelvis over to the side, you're going to curl it under and sweep it back, right? So now we're just getting a little bit more kind of rotational side bending movement in our low spine over to the right, under and back. Yeah. So you can go for it, right? You're at home alone. You don't have to worry about anybody judging you for this movement. So I say like, let's do this thing. Let it move.
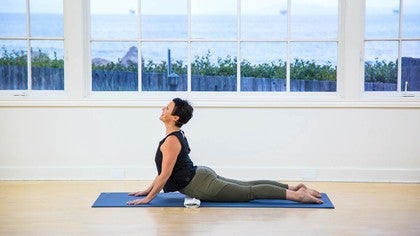
Let the pelvis really swing around. Yeah, you can even add your trunk to it a little if that feels good. Right? But again, working with moving that spine good. And back to center. So now we're headed to our bellies. I want you to take your towel back, folded, folded towel, lave on the mat. And I want you to put your hip creases right where your hips crease.
Like if you're seated in a chair right underneath that towel, right? We're going to be using that as a little feedback. So we're going to start, you're gonna put your hands under your, your forehead on your hands, sorry. And you're just going to, um, first you're going to feel that towel under your hip creases. You want to make sure it's in the right place, that's important. And then I want you to pick your pelvis up off the towel, the hip creases off the towel. Inhale. And then exhale.
Push your hip creases back into the town nice and firmly. You're gonna feel your tush muscles start to tighten up here. Maybe the backs of your legs again. Inhale up and exhale.
You're gonna put your hands under your forehead. Again, I'm going to do that same movement where I push my hip creases into the towel, and then I want you guys to just lift your legs a teeny bit off the mat. Just lift and hold and
Really feel your tush back, your legs. This is good news. We're going to come on back into child's pose. Take a couple breaths. Who just rest. Inhale and exhale. [inaudible] and XCL.
So we're going to come back up to seated and we're going to turn around and we're going to finish with a little bit of forward bending again, like we did earlier. This is actually a plot is exercise called spine stretch forward. So you're going to be sitting with your legs out. Whoo, right? That's already going to give you a stretch and just find your seat again. Let's go back to center line.
So let's close our eyes and let's go back to the place where we feel that sense of centeredness, right? It might actually feel easier to be there now. I hope so. And reach the arms out. Inhale, exhale. Drop your head, let your spine bend forward, reaching your arms to the top of your mat and then roll yourself back up from the lower spine. Here we go. Back to center, line, back to upright posture again, drop your head and to go forward. I'm usually exhaling on this gesture, but inhaling is also fine. And then stacking yourself back up, keeping the tension out of the shoulder area and keeping the movement fluid almost like I was a dolphin or something.
I sometimes imagine swimming in the water, right? So the movement all comes from my trunk last one head down.
Begin Pilates: Beginner Mat Series
Mention
 |
Cara Reeser (Teacher) |
 |
Julie Lloyd |
 |
Angie M |
|
|
Barbara B |
|
|
Maxine J |
|
|
Natalia G |
|
|
Gina L |
|
|
Amanda O |
|
|
Patty C |
 |
Gia Calhoun |
 |
Hendrina V |
 |
Jacqueline M |
|
|
Sarah B |
 |
Tess |
|
|
Cat M |
 |
Adrian D |
|
|
Jessica P |
|
|
Sarah J |
|
|
Tanya S |
|
|
Maureen H |
|
|
Laura L |
 |
Margaret L |
 |
Elise R |
 |
Skridge |
|
|
Jeannette H |
 |
Laura T |
 |
Pauline T |
 |
Bruna H |
 |
Patrick L |
|
|
Suzanne S |
|
|
Stacy W |
 |
Bibi |
|
|
Karen D |
 |
Rachel |
 |
Connie M |
 |
Sarah Edwards at Positive Pilates Solihull |
 |
Jenny N |
|
|
Christine T |
|
|
Cigdem A |
 |
Adriana K |
|
|
Lisa S |
Comments


 and I’m always searching for gentle ways to improve—thanks for a great class!
You need to be a subscriber to post a comment.
Please Log In or Create an Account to start your free trial.
