Premium Continuing Education workshop

You can view a 2 minute preview. For details, scroll down below the video.

Workshop #3344

Biotensegrity of Movement

100 min - Workshop
65 likes

Description

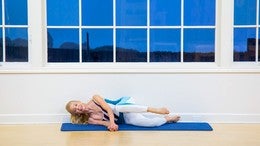
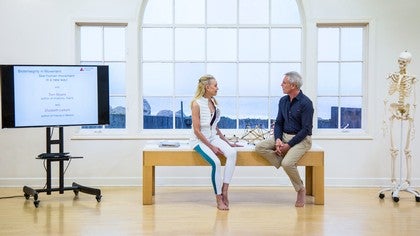
Join Elizabeth Larkam and Tom Myers in their workshop where they demonstrate how to effectively incorporate the principles of biotensegrity into the Pilates environment. They first define these concepts so you have a basic understanding, they then put them into practice with movement. Learning about fascia and tensegrity will help with training yourself and your clients, preventing injury, and recovering from injury more efficiently.

Objectives

- Learn about biomechanics and how everything in the body is connected

- Learn about the relationship between tension and compression and how we use both of them in each movement

- Learn how we can use tensegrity to keep the elongation in our bodies so that we can move efficiently and with ease

What You'll Need: Wunda Chair, Reformer w/Tower, Mat, Wunda Chair Handles, Wall, Magic Circle

About This Video

(Pace N/A)
Mar 23, 2018
(Log In to track)

Transcript

Read Full Transcript

Intro/Chapter 1

Principles of Biotensegrity

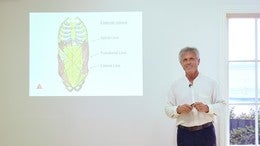
Welcome to Palladio's anytime. I'm Elizabeth Larkam and I'm Tom Myers. We are delighted to be back with you. Our first workshop was Fascia focused Palase and today we're here to explore bio tensegrity in movement. Tom, ever since 2001 when I came across the first edition of your book, Anatomy Trains, I've been fascinated with how to put fascia into the Palazzos environment. I mean it's there all the time, but I never knew. So in preparing to address that question, I came upon some references about bio tensegrity about which I knew nothing. So there was, there's Graham scars book, Bio Tensegrity, there's the book by Zhang, Claude Gam bear toe in which you have a section, a commentary called architecture of Human Living Fascia.

And more recently in 2016, I believe, uh, Danielle Claude Martense book, living Bioteine Segretti. So as a result of exploring these references and always returning to yours, finally 16 years later, I came out with my own book, Fascia in motion, Fascia focus. Oh, very happy to see after all the work did you put in? Yes. And thank you for your forward. So I still really don't understand how it is to effectively incorporate the principles of bio tensegrity into the [inaudible] environment. So what better place than to meet at PyLadies anytime and figure it out?

Let's do it. I think that first it would be easier for people if we made a little definition of 10 Segretti and Bioteine Segretti and how it works in the body because you are really among the pioneers who are bringing this into motion. People have thought about it, but people haven't practiced it yet. So if we have some idea of how it works, then we can put it into practice. Fabulous.

If there's one thing, everybody in the [inaudible] world and the movement world knows it's how we move, right? You have a skeletal frame in there. That's the framework. There is the skeleton. You've seen it in the classroom for a hundred time and what happens? Well, there are muscles that are going over those volumes from joint to joint and the muscles pull on the bones and the motion is determined by the shape of the joints and the ligaments that are on the joints. So we study the muscles from origin to insertion and that's what the muscles do. Everybody knows that.

Be careful of what everybody knows. I want to give you an idea that's different from that. And I want to tell you first how I came across this idea. Listen, we just talked about um, other people. I'll talk about some other people in here that helped with this idea. This isn't just my idea, but listen, biomechanics has to work on every level of not just this one.

You didn't come fully formed into the world like Athena, springing from the forehead of Zeus. You formed from a single cell, a single seed, a fertilized ovum, and you got more cells and more cells and more thousand Marcel. And it had to work biomechanically in the womb as soon as you came out of the womb when you were three years old when you were a teenager and you were growing like crazy. It has to work through all of those things. And the description of biomechanics that I gave of muscles working over joints is a limited description and it doesn't actually describe our biomechanics because it has to work on every level of organization. So you are, you may think you are yourself, you may think you are the polarities teacher that goes out there every day and collects money and puts it in the bank. But you're a collection of 70 trillion cells. We don't even know how many cells are in your body. More or less, we think about 70 trillion and you'd add 30 or 40 trillion more if you include all those bacteria in your gut, but they're kind of inside the tube.

So if we don't include those, your about 70 trillion cells, how does your 70 trillion cells hold themselves together in a community? How do we keep this as a design question? My actual degree is not in anatomy and I have been a body worker for 45 years, but my degree is in design and I just think the human body is such a great design problem and the problem that we're going to address with Bioteine Segretti is how do you keep all those cells in relationship to each other? They're mostly water. You're mostly water. How do you keep 20 liters of water up in the air? Oh, it's all held in by the skin and held up by the bond. Nope, it doesn't work that way. What you have to do, if you're going to have a bunch of cells, you either have to glue them together or weave them together and evolutions. Answer fashion's answer your mom's answer. Charles Darwin's answer.

Whoever you think is doing these things. The answer was both. We, we've done together with the fashional network, all of yourselves or are woven together in the fashional network. Of course, the ones that are sliding around in the blood, they're not so woven. The ones that are in your bones, they're very well the ones that are in very, very dense Fascia, they are very woven but they're also all glued together. The glue is kind of mucousy a few, um, Elizabeth mentioned this book yesterday. There's also films from Gannon Barto if you have a look, we don't have permission so we can't use them right here. But I would definitely get on the Internet and get to the films of Gamba Toe because that's the only film of Living Fasha inside the body that we have so far. And he actually is a surgeon and he put a camera up inside and he showed us pictures of this amazing dewy spider web thing that both weaves and glues us together. So we have both of these things going on, weaving and gluing in the extra cellular matrix, which like the name says is extra cellular matrix.

What's around all those cells? It's a clear, mostly clear, maybe slightly whitish mucusy glue woven together with what you thought of as the Fascia, which is all of that white sinewy stuff that holds us together. So we have fabric, we have glue, and both of them come together to form our metta membrane. You have a membrane around the cells. Well, what's the Metta membrane that goes all the way around the organism. The fascia is the metal membrane around the whole organism. How does that work in an engineering way? Oh, here's some more pictures of Fascia to get you into the idea.

The one on the left is endomysium. That's the very smallest. You need a microscope to see that that's going around each individual muscle cell. The Middle One, maybe you've even seen that as a very famous picture of Fascia from a Rafer Ron Thompson, and that's official. A picture of the paramecium that goes around groups of muscle cells and then in the lower right is one that I took, which is the epimysium museum, which is the Saran wrap or plastic wrap that goes around the whole muscle, but it's not just around the muscle, it's in the muscle. It forms the tendons that forms the ligaments. It's the leather inside your bones. It's the leather inside your cartilage.

It makes the cornea of your eye. It makes your heart valves, it makes the Denton into your teeth. You have all kinds of stuff made out of this Fascia. Now, Elizabeth was saying in the introduction, uh, I didn't know about Fascia until I saw your book in 2002 that's not true because she was moving since she was a little girl. And when you move, you're moving through your fashion. We're all moving through the Fascia. The only question here and what value you can get out of this program is if you know more about Bioteine Segretti. If you know more about the Fascia, can you do a better job at training yourself, training other people, preventing injuries coming back from injuries recovering more simply? Yes, you can. I do believe that's true. I have a number of a webinars on my website. Maybe we'll do more here at the holidays.

Anytime for how the Fascia works in training. That is a worthy thing to study. What we're going to study today is how does this overall thing work together? And the model that we have had is, well, it's very like a crane, but that's not what we're actually seeing. What we're actually seeing is 10 Segretti. Let's define that word first.

It's just a Portmanteau of tension and integrity. Put it together. It's 10 Segretti and the engineering principle is islands of compression in a sea of tension. I'll explain that, but that is the definition. I'm the person who developed 10 Segretti is the fellow on the right. He's kind of Snelson. Um, I got this picture off the Internet. He's an artist. He developed the principles and he'd developed that expression of tensegrity as an artistic sculptural medium. He's working on one in that picture, but the fellow who really put the engineering together and did the mathematics and explored 10 Segretti as an engineering concept was our Buckminster fuller.

And um, I took stuff from that and there's Bucky fuller again and a 10 Segretti mast, which uh, looks like a spine there on the left. And um, okay. It's [inaudible] very fortunate to study with Bucky Fuller. I always wanted Bucky students in the 70s. And when I then came to study with either off, uh, in the late seventies, uh, I put those two together to have this idea of 10 Segretti in the body. And um, I'm very, uh, I need to give credit where credit is due because my ideas followed that of Steve Levin. Steve Levin had these ideas before I did, even though I didn't meet him until after I had published my book.

I have to acknowledge that he is the one that really took this into living structures because Bucky fuller was making geodesic domes and other types of tensegrity structures can, a Snelson was making king sculptures. But all of a sudden we realize these mathematical principles, the way this thing is working applies to how the body does more then the Newtonian laws of force and motion that if I have this fulcrum year and then I apply this vector here, that's what we keep thinking of when we're talking about bodybuilding and kids don't move that way. Life doesn't move that way. How does life move? We first have to know that if we're talking about the dance between tension and compression, that tension and compression always and only coexist. You can't have tension without compression.

You can't have compression without tension. So if we look at this wall here and we see the bricks stacked up, this is a continuous compression structure with one brick sitting on top of another brick sitting on top of another wreck. What's invisible in that wall is that it's trying to spread apart this way, intention so that the more I increase the attention of them, sorry, the more I increase the compression on the top of the wall, the more there is tension in the middle of the wall. You just don't see it. If we have a crane here and we have a cable and I've got a great big weight here on the end of the cable, that cable is slowly, if I add to the weight, that cable will slowly get narrower. In other words, as I put more tension on the cable, it will actually go into compression. So tension and compression always and only coexist.

You can't have compression without tension. Kat have tension without compression and they're always at 90 degrees to each other. So if the compression is going this way, that tension is going that way. If that tension is going this way, the compression's going that way. If they are always at 90 degrees to each other. This dance of tension and compression is how we get from one place to the other. How we keep ourselves together.

If we look at this wall, we have assumed that our body is like the wall, so if you'll come over here with me until the skeleton, we have this idea and that's in the picture there that the head is sitting on top of the atlas. The atlas is sitting on top of the access and the head and the atlas and axis sit on C3. I've got to adjust this guy. He needs a little bit of adjustment. There we go and that all sits down onto the shoulders. Then the weight of the shoulders and the chest sits down on to l five, and then l five in the pelvis sit down onto the feet. And we presume that we have something like this in the, in us. We don't, if you took all the soft tissue off your body, your bones would clatter to the floor, no problem.

Because they float within the tissue. It is not a continuous compression structure like this, but all the physiotherapy books, all the biomechanics, all the orthopedics presume that we are a continuous compression structure. So if we go a little bit into the idea of tension, we could look at a sailboat. I happen to love sailboats. I'm a sailor. And uh, if you look at this, this was done in the 30s by the, uh, ananymous Malia and you can see that the set of the spine and the ribcage and the neck on top of that is similar to a sailboat. So the sailboat mast doesn't have to be as strong, as big, as thick, as heavy as it otherwise would be because the tension members take some of the strain.

So molliere did this by looking at the skeleton and calculating, well, if the head sits on top of the atlas and head an atlas sits on top of the access all the way down to l five l five would have to be twice as big as it is somewhere between one and a half and two times the size that it is now. So something is going on. So this was in the 30s in Germany. He thought, well, must be that the muscles and the Fascia together act like the guy wires like the stays and shrouds on a sailing boat. But what's the difference between you and the sailing boat? Well, I hope your spine isn't as stiff as I, oh, well it's fast. Unless you're English then perhaps your spine is that stiff. But I say this as somebody who lived in England for 10 years.

I love the English, but uh, I did work on a lot of stuff, spines. But we want our spine to be more flexible. So let's go another few years into the future. And another German, this is fry auto. The fellow who did the Munich stadium and he made the mass on the left and that mask on the left has a flexible core, just like your spine. It's flexible in the middle, but all those wires are going through the plexiglass triangles to hold that thing and by playing with the wires down at the, he could make that mass do anything.

He had a tent and he wanted to be able to change the tent depending on which way the wind was going. And he was looking inside sunflowers. He said, well, how does a sunflower face the sun? How does the sunflower keep facing the sun when there's no muscles in the sunflower? But a sunflower will do that. It will follow the sun through the sky. And it was, he came up with this structure and made it a 10 out of it. And if you look in your spine, your illiocostalis muscle is constructed exactly like that. Exactly like that in the spine.

So can you see that if we cut the wires on that mast, it would fall down. If we cut them wires on the sailboat, it wouldn't fall down. It would fall down if the wind got strong, but it will stay there if the wind isn't there. But if we take one more step towards dependence on the tension members, do you see we're getting tension dependent, we're getting more dependent on the tension members now and you have a structure just like this mass. It's what allows you to get, Oh, I'm going in under the sink and then I have to get over here so I can see the trap and then I have to get my arms in there and then I have to have it solid on us so that I can apply the wrench to the bottom of the trap. That is the device that you have in your body to do exactly that. We can go one more step. The one more step we can go is to take away having the compression members, the things that are carrying the body, the compression to the ground, not even touch each other.

They can be suspended within the tension members of the body. Now, here's a simple model. I showed you that spine like thing earlier before that Bucky fuller made. That's probably 30 feet high. This has just a little wooden model on the right. And if you look at it, the compression members aren't touching each other at all. And I submit to you, I brought some models with me here. I submit to you that that's the kind of thing that's happening in your spine.

Now your spine is not a column. It is a bouncy shock absorbing device. It's an absorption device. It's a distribution device is not a column. So, um, well it can act like a column.

If I walk around like this, yes, it starts acting like a column and I ended up with this problem. But if I stay balanced in my soft tissue, my spine is a spacer is an armature in the middle of my body but not a column. So if we start exploring these 10 segregate structures, these are 10 security models by Tom Flemings who is with intention designs. And uh, he does a wonderful job with these models. You can find him on the Internet and I thank him for letting me use these.

And he showed me that you can use membranes just as well as strings. And the body uses membranes all the time. You got membranes around your heart, your lungs, your guts, your muscles, your brain. Um, the body uses membranes in its 10 Segretti. Even the head itself, according to this guy, according to Graham Scar, if you look inside that your skull is, the bones are floating inside the soft tissue of the skull. I'm not even sure I believe that, but it is a wonderful theory to think, not that I am a solid structure, but that we are floating structures. And here's a model of the whole body. And I happen to be arrogant enough to think that I have discovered the strings that go around all of the dowels to form this.

I've called them the anatomy trains and I wrote a book about it. Um, you're welcome to look at it, but if you understand that you stop thinking in terms of individual muscles doing, moving the skeleton. Oh, the biceps is an elbow flexor and a radio owner supinate or in a week diagonal flexor of the shoulder. And you start thinking, oh, it's actually part of the whole net, but it's certainly part of the net that goes from the third, fourth and fifth ribs with the vector Ella's mine and all the way out to your thumb. Your biceps is part of that and if you're doing Shiatsu work or you're doing work, particularly with your thumbs, that's a good thing to know. You don't want to just isolate the biceps out. What can we do by putting things back together again? Okay. The spine, as I've already mentioned, the spine is very like a 10 segregated structure. This is a 10 segregate spine that was built by Tom Flemmings.

This is another one built by a German fellow. Here is a model of the pelvis. I don't know, I'm just going to move this around in hopes that you can see it. Um, that the doll in the middle is much like the sacrum. The dowels that I'm moving are very much like the femurs and the other dials in here are like the pelvis and it really does, I use this all the time in my classes because this is what has to happen at the sacred Iliac joints for you to have really healthy movement between your legs and your spine. So I'm very grateful for that model too. And um, it is important we're almost done here, but I, I want to have one thing of, of a fashion strategy or a muscular strategy. It depends on what you're doing. We're going to see a variety of these things, uh, with Elizabeth in a few minutes. But um, Stuart McGill says he's looking for Stu McGill as a professor, uh, in Canada, in Montreal and um, has done a lot of work with this and a lot of work with the Thoracolumbar Fascia. And I love his quote, whether you know it or not, you're looking for a coordinated fashional 10 Segretti.

But how you use that depends on the, what you're doing. So let me explain this chart. If your predictability is high, this is high, this is low. If the predictability of your movement is high, then you want a fashion stiffness strategy. Now stiffness doesn't sound like a nice thing to have. I don't want to be stiff. Yes you do. You want to be stiff at the moment that you land on the ground.

You want to be stiff at the moment that you are power lifting 500 pounds, you'd better be safe. You'd better not be depending totally on your muscles. So if you're moving a piano, the predictability is very high. It's going to be followed as high and the predictability is high. The only thing that's going to be acting on that piano is gravity and you're going to go, but if you're jumping across a stream to the other side and the other side of the Stream is covered with leaves, then your predictability is low.

I might land on a route. I might land on a rock, I might land in mud. I don't know cause I'm jumping over a stream. I'm running, I'm doing park or through the woods and so my predictability is low and my load is low. If my predictability is low and my load is low, if I'm at this end of the scale, I want muscular control over myself. That's what you're getting with the Pilati days. If my predictability is high and my load is high, if you're a power lifter, you'd better have your ligaments in line and your fascia lined up because and everything kind of spanning in the proper way so that the 10 Segretti really works as a 10 segregate and doesn't buckle.

Let me show you just a few of these things. In the 10 segregate, we're going to load this 10 Segretti and I invite you to see what happens. Where is this going to break? Where is this going to break? Quick before somebody gets there, I put out, tell me where it's gonna break. You can't tell me where it's going to break because whether I'm pulling, whether I'm putting tension on it or whether I'm putting compression on it, it doesn't matter. It's going to break at the weakest place because this system is designed to distribute the strain. This was the punchline.

This is what you were waiting for. Why is bio 10 segregated important? Because your body is a strain distribution device, not a strain focusing device. This kind of training focuses the strain. The kind of training that we're going to be looking at here is in general, but Elizabeth in particular, I really enjoy watching her move because the whole body is going to take the strain. You want the whole body to take the strain. I don't want my ankle joint taking the whole strain.

When I land a from up above, I want that strain distributed throughout my body. That's the most efficient use of the materials. I, let's see, we'll have this one too because this one more approaches what a human being is like because I put the sticks closer together. It still has that same property of resilience, but you can see that the muscles, if we call the rubber bands, the muscles and the bones are more paralleling each other and that's the structure of a human being. Your muscles generally run parallel to your bones. Not all of them, but some of them. So you can see that if I shocked this structure, ligaments are what's going to really take the strain and ligament is damaged, is what we get when we have shocking things like driving our motorcycle into a wall or anything like that. So the last thing I have to say about this, I just the one or two more slides, but the last thing I have to say to this is the more tight the strings, the totter, the whole thing is. So if I tighten my muscles, I can really get a lot of resilience out of my body, but the next second I can loosen my muscles and get lots of flow within these 10 secretaries.

So it works on the big scale from just individual cells up to the organismic level. It is a strain distribution machine with our body. We can either tighten or loosen the strings in the matter of a fraction of a second to make this a really malleable tensegrity or to make it a very strong, resilient 10 segregated. It is a wonderful piece of work to get into the whole engineering of it. I'm not recommending that you get into that. It is very complicated mathematics. Um, but to understand how this thing works for us as humans is really important because animals don't work the same way that we do in terms of tensegrity.

They have four bases of support. The spine is a segmented Ridge Pole, but not for us. For us, our spine is a segmented tent pole. We're poised on top of two little tripods with very slippery joints going in between those. For human beings, the balance of the muscles and the Fascia are more important than for any other animal on earth. Uh, it's important for all animals, but we particular are prone to losing height, losing integrity, leaning into the Fascia and not being able to use the muscles properly as a whole unit. So have you learned all 600 muscles in the body? Good. Because there aren't 600 muscles in the body. There's only one. There's one muscle operating within the fashion net, one fashional net, one muscle, one mind. It's our analysis that broke it up into 208 bones and 632 muscles.

It is not God. You didn't get built bone by bone and muscle by muscle. You burgeoned out like a plant growing. You're much more like a plant than you are like a machine. But we tend to describe our anatomy in terms of the machine that 10 segregate engineering is different from Newtonian engineering and all the anatomy you learned is based on the Newtonian stuff.

I recommend trying to get your mind around as Elizabeth has since she read my book and as I have since about 10 years before I wrote the book to figure out how does the body work in this way and how can we help our children and our clients and our students work more in this way. So if you see this, this is a young man, before he had not, this wasn't police work, this was rolfing work, but I don't really care about the work. I think you can do all of these things with yoga, with [inaudible], with physical training, with Rolfing, with anything that works with the body. The method is not so important how you apply the method really is so here's a kid before he had work. You can see a number of things. We won't go through his whole posture. He clearly, after the work has better posture, but can you see that that middle picture does not look comfortable?

Just because you had good work doesn't mean that you will look better or feel better. Right after you have that work, have you had a Palati session where you felt worse afterwards but in point of fact you were going in a good direction? It isn't always a straight line from one place to the other. What I want to point out to you is, the last thing is one year later, look at that kid. I will say to you, I will posit to you that this kid wouldn't have turned into this kid in a year, but this kid did turn into this kid in a year because he had this intervention in between. Here are the rib cages leaning a backward. The pelvis is going forward, he's hyper extended in his knees, he has tension in his ankles here. He's really lined up very much better after the work that's been done, but he doesn't look comfortable. He hasn't grown into it yet.

He hasn't lived into it yet. So if you want your students to, can you carry your students through the difficult part of the bodies I think is a really good thing because they'll come out here after they've lived it for awhile. So there's some of the basic concepts of biotech integrity. We hope that, uh, that helps you. There are the references that we will include in here if you want to expand your knowledge of it. And I don't really think that you need to know all the engineering details to make this useful in the body. And that's what we're going to set out to do.

And the next eight chapters, okay.

Chapter 2

Standing Side Kick

In Tom's fascinating lecture, he mentioned that the body is a forced distribution system. And I found this quote from John Claude Gam Barto that I've, um, tried to embody in some kneeling side, leg kicks and standing sidelight kicks. The quote goes like, so at 10, Segretti structure provides a global response to a local mechanical stress. The result is a degree of independence from the force of gravity. Without a 10 Segretti model, our fibrillar structure would collapse under gravitational force.

With the 10 Segretti model, our structure absorbs and disperses the compression by spreading load throughout the entire network, including the structures at the periphery. Let's feel if you can sense those distributions in the following exercises. In this version of that kneeling side, leg kick, we'll take a fascia focused approach. Measure your distance from your wall, say one arm and one hand width. Then you cartwheel your pelvis over the head of your Femur, pressing your lower hand into the wall and then sweeping your upper arm over towards the wall.

Adjusting the spaces between your palms, between your hands so the floor, fingers point down the ceiling. Fingers point up. As you inhale, turn to see the ground below. As you exhale, points your foot. Press into the wall and turn to see the ceiling above. Inhale to come forward. As you exhale, push into the wall to move back. Reverse the direction. Inhale to see the ceiling above.

Exhale, turn your chest bone to see the ground below. Inhale, chest foam turns into extension. Exhale down in deflection. Push off the wall. Come right on up and take the other side. Measure your distance.

One arm one hand with the hand closest to the ground. The fingers point down the hand closest to the ceiling. They go up. Balance on the head of your femur. Inhale to see the ground below. Exhale, chest bone turns to the ceiling. Keeping your lower ribs in. Inhale below.

Exhale above reverse direction. Rotate in the direction of extension. Rotate in the direction of flection in the hale. Exhale, push into the wall. Push off the wall.

The next we'll be ready for standing for the standing side leg kick. Measure your distance from the wall, one arm and one hand length. Then the floor fingers. Aim down cartwheel over the head of your femur and balanced your palms forces into the wall. Now distributing through your ground forces. The sole of one foot is on the ground, especially the sole of your big toe, the palms of your hands into the wall, particularly the pads of your fingers. As you inhale, send your heel forward of your hip joint turn so your gaze, your sternum is towards the floor. As you exhale, plant or flex your foot and pressing into the wall in order to bring your leg higher and further back.

Inhaling, balancing the forces, the ground forces with the distribution of force from your center outward and informing the forces from outward into the center. Also, reverse the direction of the rotation. Inhale forward. Exhale, reach your toes a long way from your fingers. Inhale to come forward. Exhale to reach back. While you're here, press into the wall, into the ground and rise to your toes.

Inhale to come forward. As you exhale, stay high with your heel. She said, shaking and push back behind. Come up from here. Now the new side of weights. Measure your distance from the wall, turning your palm downward, cartwheel over the head of your Femur, one palm down and one forward. Inhale to see the ground below. As you exhale, oh, limbs course out from center.

Inhale to come forward. Exhale to reach back, reverse direction. Inhale, see the ceiling above. Exhaling. See the floor below. Inhale to come forward and up. Exhale back and down.

Hover your heel up off the ground, distribute your forces forward, end back in and for down and back. Push off the wall and then be grateful that that experiments done. One of the most amazing things about 10 is that just isn't true of any other structure. Uh, I hope that we can get in. Maybe I should go this way a little bit. Can you see the other dolls? I'm pulling two dolls apart.

You would think that the rest of dolls would come together. But if you look at the two that are parallel to you, whichever camera is on this, you will see that they're going apart from each other. As you open up the body in one direction, as it is a tensegrity, it opens up in all directions. That's not true of other types of structures. This exercise is just a perfect example of that. So in your world, what were you trying to feel or get out of this move? The, the interplay or the relationship between, um, between compression intention.

Don't you always look for that in your Pilati sessions? No, seriously, but I am looking for that. You and I are weird. We do things like that. Yes, exactly. So that the, the, the greater the range of motion from my leg. Yes. The more I have to press into the wall. Okay. Let's not wait. Let's have a play with that. Yup. So, oh, this way, this way, this way.

Okay. We'll start off fairly mild now. Just as this leg goes back into hip extension, I have to push further into the wall in order to reach further back with these toes. Yup. Stretching. You're superficial frontline. I would say just as you said [inaudible]. Hmm.

Then pushing further into the wall. Then I can get more abduction. What line do you call that, Tom? I call that the lateral line. It isn't it? Yes. I could use some work on that left lateral one. Okay. Well you're working at right now because look at how long this has to be.

So you could almost think of her as a starfish, a going out in six directions because the head is a direction and the tail is the direction as well as the four limbs. So this idea of 10 segregated and the idea of expansion, expansion with the breath, expansion in the joints, expansion through all the tissues of the body, expansion in the joints as really, really important. If you work in such a way that you're compressing the joints, then you squeeze all the fluid out of them. So this kind of thing where we open up now you were squeezing on this hip where you are on it, right? So if we do this on the other side, shall we? Yes. Then you get the opportunity to open up that joint and I don't want to hurry you through the exercise, but I noticed at the end while I just noticed at the end that you got up on the ball of your foot. Yes. Talking, speaking of expansion, right? Yeah.

Speaking of expansion, when you come up on the ball of your foot, you're really inviting all of those joints stope on and the tissues of the standing leg to open. Yep. Can I help you? Because it's right in this little area here. You're not going to get, you're going to get a feeling of expansion, but the where the expansion is going to happen is right here in the pelvis, hip, low back area. Beautiful. I'm never going to do it that slow again. Promise.

It's hard work. It's hard work

Chapter 3

Kneeling Beside Chair in Side Bending

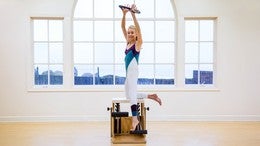
in order to feel the interplay of tension and compression. Let's take on this chair exercise. I have a white spring on the bottom. It's the lighter spring that works for me. Feel free to increase the spring tension for you, Neil, so that you're supporting the, your inside knee is even with the, uh, middle of the pedal or the space between the pedals.

Then your inside hand is on the front pedal and you reach up and over into side bending, lunging forward. Inhale to turn in the direct spiral in the direction of extension. Rotation towards extension. Exhale to come back. Inhale to lunge forward. Exhale to come back. Take your heel directly out to the side of your knee and take a side lunge and then take your leg back out about at an angle.

So your leg is in external rotation from the hip joint and now back from your hip joint into hip extension. Rocking back through your heel and coming up. Same three, four leg positions with your hand on the back pedal with one hand on the back pedal and the other hand on the back. Handball. Inhale to spiral forward in the direction of extension. Exhale to rock back.

Inhale forward and back aside. Lunge. Pushing the top handle away will increase your range of motion and then back in the direction of hip extension. The third variation on this side will be to change your supporting knee. So you have your outside knee is now your supporting leg and you take the inside leg forward to the lunge. Take the forward pedal, rotating in the direction of extension as you lunge forward, and then take your inside leg to the back to hip extension.

Rotating away from the chair. Change now and do all those moves on the other side. And one thing we know for sure is that the second, the other side is always different. Take your forward handle, inhale into rotation in the direction of extension, a sideline. Okay. Back on the diagonal and further back into hip extension.

Same low positions. Now with your hands on the back pedal and the back handle, inhale to rotate the side lunch, the back, diagonal in external rotation. And then okay, back for hip extension change now so that the inside leg is forward. Inhale to rotate [inaudible] and sweep your front leg to the back. Okay, so I'm eager to listen to Tom to see what he has to say about this interplay of tension and compression.

This is such a great interplay of tension and compression. And of course every movement is, and the support is where the compression is going to tend to happen. And then you reach out into the tension, reach out into the extension. The trouble is that our minds get a hold of our bodies. So go ahead and set it up as you did at first. That's great.

So we see the same kind of expansion out into all the limbs as the sheet goes into and comes back from this motion, but we've added the twist. Anytime you take a piece of fabric and twist it, it's going to get shorter. That's the nature of fabric, so when you're doing these kinds of twists, it's really important to stay long and to have that idea of the tensegrity spine happening in, and I hope you can see it in the video because Elizabeth is so beautiful. It's subtly moving her body so that each one of those, that the distance between the ribs and the hips in between the hips and the leg is always expanding out. You can do that. You can come up off the leg that's supporting, but you're still going to be supporting your weight on that leg.

It's these other limbs that are reaching out. Now there's another thing about support, just before we leave this one, which is you're getting support from tension. There are two ways to get support in the world. Tension and compression. We tend to think in the polarities world, in the bodybuilding world about compressive support, but notice this tensional support here and how you can use that to expand the tensegrity of your breath to expand the tensegrity of your ventral cavity so that the whole body, the middle of the body is opening up using the limbs after you finish kneeling beside the chair and side bending, then moved to the end of the reformer so you can practice your squats to feel how the chair exercise of interplay of compression and tension informs your squats. Here we go. I've got a yellow spring and the cords are lengthened.

As you inhale, bend both elbows, bend both knees, aim your sitting bones wide and back and then stay low. As you take your rose lifting your chest bone and your gaze, let's say above the shoulder rests. As you come forward, turn your palms outwards, thumbs down and balance the force of the carriage moving forward and you moving back. During his lecture,

Chapter 4

Kneeling Extension on Tower

Tom made a number of comments regarding the spine and how the spine is organized according to the 10 Segretti model. Let's take a look and let's feel 'em these exercises, these variations, uh, to appreciate the resilient spine rather than the rigid a spine. I have a yellow spring attaching the carriage to the frame and a one blue spring on a diagonal, on the push through bar.

Unlike the exercise of the cat that you may be accustomed to from this orientation. I'll start this one in spine extension. So moving with the pelvis, the Lumbar, the thoracic, and the cervical spine. Tongue up, eyes up, gaze up, and then start with spine flection from the Lumbar, the thoracic, and the cervical spine. Turning your palms up as your elbows bend. Move from lower middle upper thoracic into cervical extension, pressing your hip joints forward and it could be tip of the tongue to the roof of your mouth, behind your upper teeth. Eyes up underneath your eyebrows.

Come to vertical and take that project again. Inhaling with spine extension, plantar flection of the feet, fingers wide and hand spread as you exhale. Hands wrap around the bar. Lower middle, upper spine. Now one palm turns up and the opposite hand comes to your heel. So now you have extension with rotation and you can guide this rotation with your gaze. You can also guide it with your tongue, aiming your tongue in the direction to the heel that you're holding.

But when you're doing that, you can't articulate your tongue so much and talk about it change to the new side and you might ask yourself, where does this rotation initiate? And no doubt the answer is well from a different place on each side. Crossing your arm over the midline, Palmer, that prepares for a greater rotation, Tang and eyes leading the way towards the foot that you're holding, except it's not very photogenic, so don't do that with your tongue. Other side. Now Crossover [inaudible], those same three variations are done on the diagonal. Orientations in Heyo spine extension, sitting bones leading up and back behind you tang up.

Gaze up, eyes up as you exhale. Pelvis comes into a posterior pelvic tilt spine fluxion unfurl up and back. Then you can change to your, sorry, I need the palm up still. You can change to your hand, to your opposite, your same side heel and your hand to your opposite heel turning. In my case, the left lung in the front and the right lung to the back, change to the next diagonal, which is going to change the balance of forces throughout your whole structure. Since in this case, the left arm is pulling towards the right arm, pushing away, left arm pulls towards right arm, pushes away, amplifying the differences of tension and compression.

Now the right arm pulse towards the left arm away. Okay. Open back, leaning forward with your hip joints. Tongue up, eyes up, gaze up. Can Change. Adding rotation, crossing the midline and rotating further.

Cool. There's a lot of material here for, um, feeling and for analyzing. So let's bring back the magic commentator. See what Tom has to say. The thing that's so much fun about watching Elizabeth move is that she's not doing it. She's being it. When I get to be in plots classes, which I sometimes do not very well, but I do.

Uh, there are a lot of people doing it and it doesn't really come into that tensegrity expansion from the middle unless you're being the movement instead of doing the movement. So I'm really all I want to put the commentary on here is really be attentive to the difference when you're turning one way or on the other. We all have a dominant hand, so we all have a preference in the spine for turning one way or the other. You're likely to turn to the right at one part in your spine and you're likely to do more. Turning to the left at another part in your spine. I really, really urge you to get your teachers to look at you and to make commentary and to pay attention to yourself so that you are inside this movement to really make it a full movement of your spine. Otherwise, you're just reinforcing your prejudices, preferences by doing these as exercises. Be it after you finish the kneeling extension on the tower, the kneeling with rotation on the tower. Then resume your squats this time on a diagonal orientation with respect to the springs to feel how extension and rotation has made it easier for you to differentiate between um, the sides of yourself in relationship to the springs and the courts.

As you balance the tension and compression, you'll note that one side of yourself has to keep more tension. The other side, a little bit more compression change. Just notice for yourself that when you come down in to this, as she said before, one site's going to have more compression, one site's going to have more attention. Can you sense that first and then can you play with it? Can you balance out the two sides or can you allow yourself to go into the compression? On one side, this idea of expansion and that expansion into the tension and the compression into the support. Come on both sides. In this, your breathing is expansive.

This coming up on your toes is expansive. The coming down into the squat is expansive with your tailbone going back and your head going up, but it gets compressive down there around the hips, doesn't it? Can you go in and do the squat without it becoming so compressive and hip? Can you let that expansion distribute that strain throughout your body so you're not really putting your hips through too much when you go down into those squats?

Chapter 5

Kneeling on Chair with Trunk Rotation

Let's kneel on top of the chair now with one foot on the chair pedal, the back chair pedal. I have a black spring, a heavy spring at the top setting, and a white spring at the lightest setting, the light spring at the lightest setting.

Feel free to increase the spring tension, uh, for you. I'm doing a better job of balancing tension and compression when I'm using this amount of spring. Place your hands over the corners of the chair and place your central axis in line with the front edge of the chair. Now initially your pelvis turns around the head of your femur and your knee doesn't bend. So this is a motion of the pelvis and the lumbar spine rotating so that the front of the sacrum faces the right and then the front of the sacrum faces the left, the pelvis turns to face the inner thigh of the leg on the pedal and then it turns to face the inner thigh of the supporting.

Like now you add plantar flection and knee flection continuing with the rotation of the pelvis and the lumbar spine taking care to keep the left side of your waist long. Actually keep both sides of your waist long, not hip hiking. If all is going reasonably well, take off the hand that's closest to the pedal. Now this is a bit counter intuitive because you're accustomed to using the opposite hand from a knee, but because of the dynamics of the chair pedal you'll be safer I think more successful I think to keep the same side hand and knee down change now to the opposite hand which will require you shifting your weight, your central axis more towards the moving pedal. If all is going reasonably well, then you add thoracic rotation in the direction of the pedal and away from it. Inhale to push the pedal down with your pelvis and your leg and your foot.

Exhale to bring it up. Okay, turning towards the pedal. When it pushes down. Now you turn away from the pedal when it pushes down and towards when it comes up. So you have a different, um, okay. Variation here requiring timing of your movement in different planes of motion. Finally, lift the opposite hand.

Lift the new hand turning away from the pedal as it pushes down and turning towards the pedal as it pushes down. Now let's just say that no one's bored, so just-in-case your neural circuits are about to Fritz. No problem. Just challenge your balance and don't turn anywhere. Keep Your Pelvis Steady and stand upright on your femur. This time the pelvis doesn't rotate. The thoracic spine doesn't rotate.

You just gear up around one axis. Now for the new side, let's hear from Tom. Who are you going to give this exercise to? Who would you, no, no, I'm in on that. I now I'm coming in as a therapist. Don't underestimate what's happening to the shoulders of the person who is pushing that down. It's happening subtly now before she starts the rotation.

When the rotation gets more and more, her shoulders are traveling on her rib cage. This is great for people with stuck rom boards, stuck Serrati anterior or whatever. The plural would be a Sareda Santeria because you are moving the ribcage under the shoulder, which is stabilized against the top of the chair. So you are w where you think it is at ain't. You may think that you're working leg and yes you are working in the leg and we're getting all of that opening. But once you, you're starting to work the shoulders and now you're requiring much more work and of course coordination of the shoulders and doing this.

And then when you get to the, I don't know if you want to do the whole sequence, but when you get to the part where you're in, yeah, go ahead. And when you get to the part where you're there, if you look at what's going on here, this is where I just get so miraculous about the body. How does it, how does it, we don't know yet, and talking about it as individual muscles, it's not going to work. She's not working individual muscles. How do you keep steadiness globally in the body and have that ability to move locally? It's not something that scientists have solved yet. It is something that we practice that you can see in any two year old negotiating, getting down, you know, from a tree into a root [inaudible] from a root of a tree on the ground or something. But we've really don't know how it works, but we do know that it's necessary for human movement or it's a really great one. And this is probably you.

She said that as a relaxation from boredom, but it's actually probably the hardest bit of it is to keep that body completely steady while the motion takes place on the pedal. When you finish, you're kneeling on the chair, top kneeling with trunk rotation, then resume your squats. This time adding um, thoracic rotation. There'll be some rotation of the pelvis and lumbar spine, but not so much. Taking both straps to one side. Your knees steer forward over your toes. And I think turn your pelvis, ribs, shoulders, neck, head and eyes. Aiming your gaze up and to the corner of your eyes.

Come up to vertical. Alternate sides in Heyo, aiming your pelvis, ribs, shoulders, neck, head and eyes. Okay, one more. Each side. Steer your knees forward over your second toes. Turn the front of your Sacrum, turn your pelvis, turn your spawn. Turn your gaze.

We've already talked about tension and compression. We've already talked about how twisting tends to shorten things and would therefore, um, bring the spine in as you rotate. But you notice that she was keeping very long as she rotated. But the only thing that I want to add in here is what she said. Your body doesn't stop at your neck.

You're not exercising everything from the neck down. So did you hear her say the gaze? Let your gaze guide you, that will bring your body into it natural tensegrity into its natural balance, into a natural movement. Your movement doesn't stop here in your neck. You're not just exercising the body below the neck. The integration with the eyes and the ears and the sensory data that's coming in is so important. It's important for you as a [inaudible] teacher. It's important for your kids.

Chapter 6

Kneeling on Chair with Torso Upright

Let's add some rotation to the kneeling on the chair top. Then you'll be integrating a motion in a number of different planes. So climate board with your supporting knee at the center of the chair top and your foot on the back chair pedal. I'm still using one black spring, one heavy spring on the top of cactus setting, and one light spring on the bottom. Feel free to increase the spring as you prefer.

Come to kneeling Torso Upright and put the ring on your Zayf void process. Sure, I'll get right on it anyway. The bottom of your lower ribs will be just fine. And initially you accustom yourself to keeping your pelvis and torso steady while you go through knee extension inflection and Plantar endorsee flection of your ankle. Now as you push the pedal down, rotate away from, and as you bring the pedal up, rotate towards it. Probably exhale to push down and inhale to come up.

Change the relationship turning towards the pedal that pushes down and away from the pedal that comes up towards and away. Now take your thumbs on the inside of the ring and take the ring high above your head. Actually take the ring high above the back of your head. Thumbs pulling outwards, little finger side of your hand and shoulder blade pulling downwards. As you push the pedal down, you turn away from it and as the pedal comes up, you turn towards it. A different relationship.

Now turning towards the pedal that pushes down and away from the pedal that comes up. Now you can change up the relationship of your palms to the ring. So now your palms are pressing outward. And for some, this will have an effect of helping to bring the shoulder blades down. Okay.

Scapular depression, pushing outwards with the palms. As you turn towards the pedal. Tom has given us some pointers regarding the organization of the shoulder girdle. Let's hear about this one too. It's so fascinating that she makes these things look so easy. Go ahead. Try It yourself. See, I was trying to, the breaks between the in between takes no, so easy. However, what I wanted to find out is that my friend Elizabeth is really taking what I studied a long, long time ago. I studied with Moshay Feldman Christ and she is taking Feldman Christ and attaching it to [inaudible]. If I'm a make from the outside, just a slight critique of what I see in is when it is done is everybody's wanting to do it right to do it correctly.

What I love about Elizabeth's work is, well, the opposite thing that you just did is probably also valuable. It's not a question of whether it's right or not. This question of whether it's valuable, are you turning, is it right to put your palms in and therefore to get your rally moving or is it right to go out and then get your lats moving? No, they're both equally valuable. Is it admirable to turn away from the extending leg or is it valuable to turn towards the, Yup, they're right. They're both valuable.

If you are going into the movement and drawing out what you can so don't worry so much about whether it's correct or whether Joseph would've done it that way, Joseph would probably have changed a great deal by the time he reached 2020 if he had reached that age, I'd are off. I am sure it would not be working as she taught me in the 1970s by now. What I love here is you get the variations and the variations can be opposite of what you were taught and still be valuable. Notice that please. When you finish kneeling on the chair, top kneeling with your torso upright and engaged in trunk rotation, you'll really notice she said leading the witness. You'll really notice that your standing balance is so improved.

Consequently, um, we'll be safe now to stand on top of the carriage and for this, um, you can change from perhaps a yellow spring to a blue spring or if you have been using a blue spring, um, add a yellow as you like. Here. I've crossed the cords, the cords are still lengthened, but I'm not using the extension extend or straps on the cords, taking your sitting bones and your heels. Why behind you? You come down into a squat and you can take a, a bit of a circumduction from your shoulders as you get accustomed to the motion of the carriage. In this case, you can have the idea that each finger leads the circle of your arm so the little fingers leads around the fourth finger leads around the third finger and appreciate how this interplay of tension and compression. Now the thumb leads around in forms your balance, the thumb leads.

Okay, the second finger leads, et cetera. The third, the fourth and the fifth. Appreciating the earlier quote from Sean Claude Gam Berto about the importance of distributing the forces throughout the structure from the center to the periphery. This squad, if you go ahead and do it, it's mostly sagittal. I know the strings are crossed, but she's not doing lots of rotations. Sagittal movements are the times when you can get compressed.

It's a good time to really pay attention to that kind of expansion. Otherwise, sagittal movements tend to get you more compressed and then notice that strain distribution of one finger after another. This used to be called what you have heard of his foot reflexology used to be called zone therapy with the idea that your thumb goes up the inside of the arm, the second finger, the third finger, the fourth finger, the fifth finger. It's the same with the toes. By the way, little toe goes up the outside edge of the body. The big toe line goes up the middle of the body, so by opening your fingers, that's our really good way to keep yourself expensive. Even when you're doing these agile motions that I walk into the gym and see somebody doing squats. You'll will see them contracting into themselves, not distributing the forces, focusing the forces and where the forces focus.

That's where you're going to get an injury.

Chapter 7

Kneeling Hip Extension on Reformer

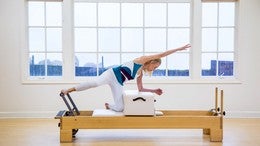
We're so accustomed to doing supine footwork and sideline footwork, but once when I had a client who had been on crutches for 12 weeks, I'm knitting a tibial stress fracture from the finishing the New York marathon. Um, I asked myself how is it possible to balance the forces of tension and compression? I did not ask myself that, I'm sorry to say, but I said, how is it possible to create a movement sequence which will require, which will demand that she keeps her central axis central so that the weight bearing, the forces of tension and compression through her structure will help to get over the compensations resulting from 12 weeks on crutches. Okay, there's an intro. Here's the move. You have one blue spring on the carriage and you can choose the height of the foot bar. I recommend starting low and then working up higher. You're supporting femur. You're supporting thigh is parallel to the ground, perpendicular to the ground and the sole of your toes, the ball of your foot on the foot bar. As you exhale, you drive out Dorsi flection. Plant reflection, Dorsey flection.

The light from your chest bone is shining directly between your thumbs, whichever knee is on the carriage. Lift that same side arm so you have the front support of one knee and the opposite arm caution move your entire central axis so that the light from your chest bone is shining over your left arm, left hand, you're supporting hand and the light from the pubic bone over your knee. Now both hands are over the same size, the shoulder rest, both hands are touching the shoulder rest, not one hand on top of the other and lift the outside arm off. The plot has thickened in terms of your organization because although you have both hands down with the same side knee, when you lift the opposite arm up the right hand, which is usually on the right shoulder rest is now on the left shoulder rest. So if you're confused, it's for really good reason.

Change to the other side. I should just mention that it would be a good idea to try out this exercise initially with just your heel on the bar, just the front of your heel on the bar. Then you won't have to be resolved responsible for your ankle alignment, but in this workshop we're going right for the interesting balance of tension and compression. Exhale to drive through your heel. Inhale to rise. The light from your chest bone is between your thumbs, whichever knee is on the carriage.

Keep the opposite hand down and lift up the same sidebar. Shift your entire central axis shifted in lateral translation so that you can balance over the same side. Hand and knee. Put both hands on the shoulder. Rest opposite. You're supporting the lift up the outside arm and then change both hands to the new shoulder. Rest the shoulder rest that corresponds to the knee that's on the carriage and lift the opposite. The outside arm.

By the time you finish this, you can be confident that you have activated, integrated all the mile fashional continuity's in hip extension. Any exercise can strengthen your muscles. Full exercise strengthens your body for exercise with your presence, strengthens you. So as you look at this, as she goes in to this stretch, are we working the quadriceps? Sure. But in the tensegrity of this, the whole front of the body is he long gating.

What part of the body isn't participating with that? You get to play with how much dorsiflexion or plantar reflection of your ankle, how much extension or flection of the hip that you work with, how much extension with the shoulder, with the arm that's moving out, when that's the part of the exercise, but mostly it's still in here. In your back. I know I'm sounding like a broken record, but it's this opening of the back that's really going to expand this bio tensegrity out into your limbs. Every cell in your body needs to be hydrated. It's not a matter of how much water you drink.

It's a matter of how that water gets out to all the places that need it, all the cells that need it, these kinds of movements in shore hydration all over the body, not just in one muscle, not just in one place. After you finished the kneeling hip extension on the reformer, challenging your balance ability with seven arm variations, climate board, the carriage, and let's take a diagonal orientation with respect to the springs with respect to the movement of the carriage. The chords are not crossed this time, steer your knees forward over your toes, which your toes are now on the diagonal and draw your arms back. Probably inhale as you pull your arms back this time instead of your finger, individual fingers leading the way you could imagine, you could visualize that each of your rib rings is informing the motion of your arms. It's as if the lowest rib ring expands than the one above it, et cetera. The one higher and higher changed now to the new side.

Okay. Inhale to come forward into your squat. Okay. Get oriented on this side and then start the rib ring visualization. I'm connecting the lowest rib ring with the thumb, the one above it with the index finger, et cetera. All the way through the rib rings.

Each one gets a turn. I can't believe I'm going to do this. I'm going to correct Elizabeth Larkam on of these exercise, but let's just see you do that squats to one more time. Either one, any, any way of going down and I you to notice. But I also want those folks out there to notice. Do you keep your head oriented to the room, which would mean the head would say there or do you keep your head oriented to your next [inaudible] on this last one, maybe I'm doing the wrong thing, but I would say keep your head oriented to your neck.

Don't worry about the room or the audience out there that's looking at you in the millions. Um, so that, that, that idea of elongating the neck, the head off the neck stays present for you when you're doing this. I love the idea of connecting the hands to the ribs. You have floating ribs down here, they're associated with your kidneys. As you get in to the outer part of the hand, you will be reaching down into here. Then next ribs up societally with the more middle fingers are associated with your liver and your stomach and how you assimilate things.

Then next ribs up, getting closer to here in Dex finger are associated with the heart and these very top upper ribs here are associated with the voicebox and with the neck. So connecting your hands to the rib cages. Such a sweet thing to do to open up the inside of the body and I'm very subtle way

Chapter 8

Kneeling Side Leg Press

in your kneeling side, leg press place. You're supporting me in the center of the carriage, your hand on the back, shoulder rest and your foot on the foot bar. When you first start this exercise, start with the foot bar low and then gradually bring it up.

Here you have a diagonal support from your hand on the shoulder, wrist, all the way forward to your toes that are forward on the foot bar in hip flection. So this will be a sideline leg press with which you are accustomed together with a demanding series of rotations for your spine. Now the light from your chest bone is facing the carriage between your thumbs and whichever is your back arm. That's the left arm in my case is lifting off. Now both hands go on the back shoulder rest.

So this is rotation of the thoracic spine, a little bit higher in the spine and whichever is the back arm, that arm comes off. Now it's useful to note that your pelvis is winding around the supporting femur. So when you start your femur is a bit abducted and then your pelvis turns towards the supporting femur and it continues rotating to toward the supporting femur so that the supporting thought the supporting femur is relatively speaking, is internally rotating. So this is if you're looking for muscle work, um, this will be a superb gluteus medius move for you. And if you're looking for fashion connections while you get the best of both glute training and Fascia training, now turn to the other side and we'll take this hip flection.

Okay. Keeping your heel firmly on the foot bar, rotating the thoracic spine, turning your sacrum just a little bit to the right, whichever is your back arm. That's my right arm is lifting off both hands. Go to the back shoulder rest the light from your sternum illuminates your thumbs so there's more rotation to the right. And then the back arm lifts off.

Now the second variation of this side leg press is done in hip extension. So you have your hand on the forward shoulder rest and your foot with your heel back on the foot bar. Now with hip extension, you have room for Dorsi flection and Plantar flection. Change your hands so that you rotate to face the carriage, whichever is the back arm left arm in my case that lifts off. Okay. And then both hands are on the back. Shoulder rest.

Okay, good luck to me because this demands so much internal rotation of the supporting hip and if I practice this more frequently, I would be a better person. Other side, hip extension, lift up your ribs and lift up your waist just as you would in the side. Leg kick. Pressing the heel of your right hand into the shoulder rest will help to support your right side. Okay? Keep that support through your right side.

Even though your open chain with the right arm and the high thoracic rotation, upper thoracic rotation to aluminate your thumbs. Hm? She said to yourself, why don't you think about the tracking of your left knee steering over the third toe. This one is not easy for me. I hope that Tom's comments will give me some new inspiration. This is going to be a hard exercise for anyone, I think.

Do you have people for whom this is easy? I don't think so. Excuse me for this. But the PSOAS is going from the inside of your leg to the base of your diaphragm. So as you go ahead and do the move, the carriage, you're moving that so as open as the leg moves away from the spine and the spine moves away from the leg. So this becomes very important with how you treat your breathing in this particular exercise, especially when the knee, when you come back towards the foot part here. That, so as is shortening and it can affect the breathing. And then when it gets to super long, you can pull on the diaphragm and affect the breathing.

You don't see that with this very accomplished mover here because she's a very accomplished mover. But look around, if other people are doing this exercise near you, you won't see such a steady holding of the trunk. There's a difficulty in doing these things. We only have time to do it right on these short programs. But you can learn a lot from doing it wrong. And one of the things that you will learn from doing it wrong is it will stop your breathing if you're doing it wrong, because of the connection from the leg to the breath through the psoas muscle and the muscles that go along with the saw as the QL and the Iliac us that are opening that up between the breath and the leg.

So if we want to have something extend here, it's between the breath and the leg to open that up. After you finish the kneeling side, leg kicks on the reformer, you'll be well prepared for thoracic rotation. Stand on a diagonal with respect to the uh, line of the carriage and the springs. Take both loops across your palms and keeping your head in line with your neck. Move forward. Move from your hip joints.

This will be as your knees steer forward. You turn the long closest to the tower, turn that long in front of you towards the foot bar and turn long closest to the foot bar behind you towards the tower so that you organize your thoracic rotation from very close to the spine. Other side, take your different diagonal. Take the new hand in front as you inhale, turn your pelvis, rib, shoulders, neck, head and eyes. Okay.

You could have the idea that your eyes are the advanced team of the spine. Your gaze leads, your head leads your neck, lead, your thorax or your lungs lead your thorax, lead, your shoulder girdle, your neck, your neck, and your head.

Chapter 9

Synergy of Tensegrity

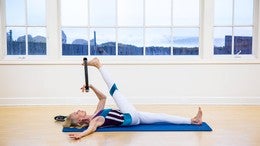
This next exercise is my most favorite conversation between tension and compression. As a matter of fact, I made this exercise up on the reformer tower in order to embody, um, a synergy of all the mile fashional. Continuity's so it better be good, right? If I gave it such a such a drum roll, okay, you've got one long yellow spring on the tower with a foot strap and one yellow spring attaching the carriage to the frame.

Now you can do this by yourself if you don't have an instructor. Here's how to get into the loop. Put the loop around the sole of your foot, put your foot on the ground back up, put your supporting foot over the edge of the carriage, and then neo either on the carriage or on a mat, on a pad. Now reformers come in all different heights and so to people. So you'll choose a, a pad or a box such that you can drive your heel directly towards the ground from your hip joint. If I didn't have this pad here, I would have to go into circumduction and then get off, veer off the central axis and there goes the neighborhood.

So here I have a, uh, pad, a mat inhale to come forward in spine flection and hip flection. As you exhale, you expand in the direction of extension, lumbar, thoracic, and cervical extension. And do that a couple of times. Keeping East center control so the carriage doesn't bang. Have the idea that your chest bone illuminates, in this case the right hand.

Now the third time that you do this or some other numbers of times, the third time, next time that you do this, you'll stay up in hip extension and add knee extension. Have the idea that the sole of your foot, your heel lifts up and back to aim up to where the ceiling meets the wall behind you. All the while aiming your right Asi es toward your inner left knee and then the third variation starts the same. Okay, exhale to drive back. Now here comes a different balance of forces.

Press with your left hand very strongly. Shift your whole central axis towards the right as you circumduct from new hip joint. Where else would you circumduct from? Well, we won't discuss that aiming. You're right. A S I s toward your inner left knee. The idea is that the pelvis, the front of the sacred continues to face the floor as your leg circles through abduction. Putting more weight into the right hand as the right leg goes this opposite direction.

I think I've been so fascinated with the transfer of forces. I have completely omitted the spine articulation. Let's give her one more round here. A flection and extension. Now to get out caution, put the sole of your foot on the floor, bring the carriage home and take the loop off your foot. Huh?

For the new side. Let's bring in Tom and hear what he has to say, um, of a different generation. And I really don't often use the word awesome. This is an awesome movement. It deserves the word. As you go through this, it's, oh, go ahead and, and go through on this side. The fact that the foot doesn't touch the floor allows you to be in that extension all the way up the body.

I would be talking about the back line as well as the lateral line as well as the spiral line. This, this really engaging so many of the fashional continuity's as you go through. And it really is a movement that deserves a reformer that absolutely works with the carriage and the springs in this. So as she said, halfway through the exercise on the other side, it's easy to forget the spine. Don't forget the spine. The spine is an essential part of this exercise and flexing and opening the little spinal joints in the spine as you go into the flection and as you take the leg into extension, the knees in extension, the hips and extension, and then all of these spinal foot sets come closer together. As the spine comes into that, it's really important that you get both of those.

What a great movement.

Final/Chapter 10

Final Thoughts

This is the 10 Segretti model and 10 Tegrity applies to whatever kind of engineering. This is dowels and pieces of rubber band. And if I try to imitate some of the movement, uh, say that Elizabeth was doing by putting her leg out to the side. If we thought of this as a pelvis, what I'd like you to notice, maybe I'll change the angle a little bit so that you can see that the whole structure is giving into the movement. It is not this one bone moving over here.

The whole thing moves in response and that's what we wanted to bring across to you with this. There is no place that is invalid to pay attention to when you're doing these exercises. Sure you're exercising muscles that like the gluten I to put your hip out if that's what you're doing, but you're also exercising the standing foot. The bond's in the standing foot are adjusting the bones all through the pelvis are adjusting the bones off the ribs. Wait, went through those ribs. That was so nice.

They all have to give a little bit for any of the these motions to happen. Emotion of your body is a motion of your body, not emotion of your toe or emotion of your hip or emotional of your shoulder. Um, that's what I hope has come across here. It's such a joy to watch you move and um, to, to work with you. Um, these models are great. Tensegrity is great thing to look at.

Bio 10 Segretti is what this thing is not is to two things that Bioteine Segretti is that this is not one is it's wet and you are mostly water and so that makes your 10 Segretti inside a bit different from this tensegrity. And the second thing I mentioned in the lecture, which is this is membranes mostly not strings. So you just shifting your leg ever so slightly as you go out to the side, you may be pulling on the membranes in different ways and find different parts of your body and you may be attention paying attention to they hip that's supposedly not moving because it's still is moving internally. And that's why it's such a joy to have once you move. Thank you. Yeah.

Thank you so much Tom and thank you Paul anytime for bringing us together. This is, I never dreamed that I would learn so much in such a short time cause these, these moves are what I inhabit. You know, inspired by the mile fashional continuity's and the nervous system but to have to have the principles about integrity explained and have them applied in commentary on the movement. I'm a happy girl. Thank you so much. [inaudible] at the ideas [inaudible] wonder what you move, which I can't do as well.

Continuing Education Credits

If you complete this workshop, you will earn:

2.0 credits from Pilates Association Australia (PAA)

The Pilates Association Australia (PAA) is an independent and not-for-profit organization established by the Pilates industry as a regulatory body for control of quality instruction, member support, and integrity within all legitimate approaches to the Pilates Method.

3.0 credits from National Pilates Certification Program (NPCP)

The National Pilates Certification Program is accredited by the National Commission for Certifying Agencies (NCCA)

Related Content

Comments

2 people like this.
So much learning. As Elizabeth said, it is so useful to have both herself and Tom together, to help us all understand our movement. Loved Tom's intro and really found it useful to be shown all the tensegrity models.
Definitely my new go to so I can try to explain to my clients. Thank you Tom & Elizabeth. I hope there is more to come.
Ana S
Thanks so much for this workshop. I am amazed, inspired and also with a lot of questions... For now I would like to ask Elizabeth and Tom about the psoas being affected on the kneeling side leg presses, Tom mentions you gotta be careful with the breathing on this exercise... the question is how we can take care of it? when in the movement would be better to exhale and when to inhale and why?
Ana, thank you very much for appreciating our workshop and for your question. During the kneeling side leg presses I recommend that exhalation accompany knee extension followed by inhalation during ankle plantar flexion. Exhale as you push the pedal down, inhale as you continue pushing the pedal down with your forefoot, exhale as you lower your heel to the pedal beginning the arc of the pedal rising, inhale as you bend your knee, continuing the rise of the pedal. In order to facilitate the role of the psoas as a stabilizer of the lumbar spine, sustain a neutral pelvis and neutral lumbar spine throughout the exercise.
Debbie D
Does this workshop accompany your book -fascia in motion. Is it included as a workshop I can have access to?
Debbie thank you for your inquiry. This workshop, Biotensegrity of Movement, cotaught by Tom Myers and me is separate from the Fascia in Motion workshop created to accompany my book. Tom’s lecture and commentary as well as my movement sequences were created after my book was published. Our Biotensegrity workshop, like all workshops on PilatesAnytime is separate from the monthly fee for the workout classes.
Debbie D
Thank you Elizabeth, I have downloaded it and am loving the collaboration between yourself & Tom Myers.
Thank you Debbie, So good to hear Debbie And I’m glad to know that you are accessing the Fascia in Motion Book workshop🙏
Ana S
I am very grateful Elizabeth Larkam for your recomendation and explanation about the psoas, thanks so much! I am also following the videos from your book,let me tell you it is fantastic!!!
Move U
Admin, please help. For some reason this video continues to stop at 7:03. I've replayed it twice and it stopped in the same place both times.
1-10 of 16

You need to be a subscriber to post a comment.

Please Log In or Create an Account to start your free trial.

Footer Pilates Anytime Logo

Move With Us

Experience Pilates. Experience life.

Let's Begin