Description
About This Video
Transcript
Read Full Transcript
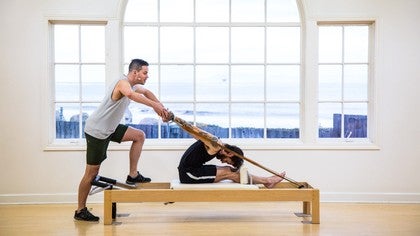
Hi everybody. This is Benjamin. I am back with my friend Frank. To take a look at the rowing sequence on the reformer. It is considered an advanced exercise, but just like in my previous tutorials, I want to show that there are steps that can lead you to better understanding the exercise without having to do the entire choreography because each of the six different steps contains a lot of different choreography. Generally speaking, the purpose of rowing after we've done what in the original order would be footwork hundred overhead and coordination is to start going into the upper body a little bit more and start to build some mobility in the shoulder girdle still. However, in a full body movement, right, so we've come from the overhead in the previous exercise where we've already monitored whether our body can create a nice 90 degree angle at the hips so that we know if the body is fit to sit up with straight legs, which is your entrance requirement. For this exercise, we are honor grads, reformer.
We're set up on one spring and we're going to start in the seated position, grabbing the handles and lifting the arms out in front of us. So this is the first exercise in the rowing sequence and I want to show you the first step that I like to teach. Of course, the position that we're in is nice and active. So the legs press into one another in the body lifts out of the way. So sit in nice and tall. We're compounding a half roll back towards the foot bar with pulling the straps towards our chest, the elbows going out to the side. You can go for it.
Hands pull in the body curls back. And I going to hold the tension on the straps with our arms so that our back can fully express itself. Perhaps even find some space in the lower back. From here, just reverse right back out. And you have your first step, the initiation of the first rowing sequence. Um, the first rowing exercise right there. We'll do that one more time. The hands pull in, but it's the spine that really interacts with the spring the most. Holding the spring tension allows your spine to fully unfold itself into a nice round shape.
Maybe taking some tension out of the upper back and taking it down into that curl of the lower back. Go ahead and come back out of it, extending the arms forward. Lifting backups so that in and off itself can count as an exercise. We'll take. The second step starts the same way. The spine rolls back. The hands pull the straps through the chest while holding the shape of the spine that he's now in. He's going to bring his arms out to the side, palms facing back. It's almost as if he's wanting to push the arms back behind him to open farther through the chest. From here, go ahead and lift yourself all the way back up.
Let the arms come forward and find the end of that repetition right here. We'll do that one more time, so that's step one and two. Curl yourself back. Pull the straps towards your chest. Now the shape of the spine stays the same. The arms open wide to the sides, staying wide across the collarbones and chest. From here, go ahead and lift yourself back up.
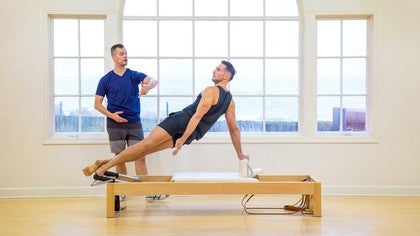
Arms come forward sitting up tall. We're going to add up, curl yourself back. Hands come towards the chest. Arms Open wide, no staying wide across the chest. It's really a spine stretch forward that takes the head towards the knees and the arms. Keep pushing into the straps so that it looks as if we're pushing the arms back but it's really the spine moving forward that makes this happen. From here, this is the final step. The Rib cage lifts towards the ceiling to pick the arms up and then we'll finish the whole thing with a big circle during which you are going to lose strap and spring tension.
You can pull yourself in for a nice stretch as a treat and that is the full expression of this will flow through it one more time. Hips, crow, back, hands come towards the chest, arms open wide spreading the collarbones far apart. Arms press back as the spine stretches forward. Ribs puff up towards the ceiling to pick the arms up and take them around in a big circle. Pull yourself in on your feet for a nice little stretch at the end, and that is the first rowing exercise, the first of many. We're going right into our second one, which again has many different building blocks. Arms are in front of us and they are straight out. Again, this time the palms face up. A little tidbit.
Originally this exercise was called biceps, slash. Triceps, which I think means that those are the muscles we're going to work here and so it starts with a bicep curl. The arms curl to 90 degrees while the spine does the same exact action from earlier, the tail end curled slightly under. In fact, as the arms pull, the elbows are lifted right in line with the shoulders. From here, just unfold the arms and sit back up. Coming back out, reversing your steps will do the same thing again. So compounding the spinal movement like a roll back with the bicep curl of the arms. By pushing the elbows up a little bit, you might unlock a little bit more space in your chest and making sure we're not slouching into that position. From here, go ahead and reverse back out. We're going to add on. This step is interpreted in many different ways including stretching beyonds back by the years. We want to show you the more original variation on this.
It starts the same way as before, so lifting out of the waist to start Bicep, curl your arms, take the body back. We're now aiming on a high diagonal. The arms unfold while the spine comes back up. The spring tension increases until the arms are straight and be finished with the spine almost slightly pitched forward from the waist. We'll do the same thing again. Arms pull into the BICEP, curl from here and fold the arms on a high diagonal. Lift the spine back up, activating the back of the arm all the way into the upper back when to add on because there is more to this final and pulling back into the bicep curl.
Take the arms forward, send your hip creases back in. Once the carriage comes to a standstill, turn the palms down, dive forward, head to knees and finished with that same circle we had in the previous one. That reds lift the arms and they circle all the way around. Gorgeous. We'll do one more like that. Palms face up, arms are straight. Bicep curl back. As you round the spine back, send the hip creases back, switch to the forward.
Lengthen the spine out. And once the carriage comes to a standstill, take the arms down and up. Give him a little help here cause he's working very hard and the arms come all the way around for that yummy stretch at the end. So that's two out of six. Go ahead and roll yourself up. We'll now phase the other direction. The exercise requirements stays exactly the same, which is to sit strong and tall out of two straight legs while moving the spine while accepting load through the upper body through the arms.
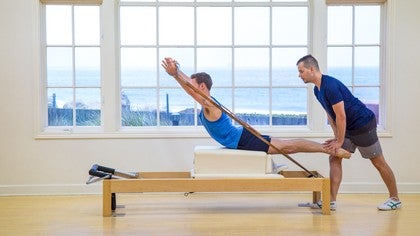
We'll hook our hands into the handles from above so the thumbs wrapped to the underside of the handle and the strap passes underneath our forearms. Go ahead and pull the arms back to start again. The toughest part is to sit on straight legs the entire time. When you agree, go ahead and lift yourself out of your ways. This is from the chest. He's going to extend his arms out on a high diagonal. Just start building the tension.
This is the most important part because this is where I want him to really lift almost away from the shoulder blocks a little bit. The arms come forward and down, bringing the carriage to slightly move the arms, go all the way forward and up, and at this point he draws the biggest circle that's available to his shoulders without changing the position and configuration of his spine. Elvis, go back. We'll start the whole thing again. I'm skull forward up on a high diagonal arm score down. He maintains the lift, which is easy to lose as the arms lift up. So continue to lift up arm, circle out to the side and down, and we'll do one more for a total of three arms. Stretch forward. Strong legs. Start to finish, arms go down, arms go up. Arm Circle around.
Biggest radius possible to go from the hips, just part four. He goes ahead and flexes his feedbacks where we're really pushing energy out the heels on this one which changes the effort in the legs slightly from here. Go ahead and roll your head down towards the knees. Press your handles past and below the heels if available to you. That's the direction you're going from here is rebuilding his spine while holding tension on the handles.
Lifting the arms all the way up and taking the arms back behind him and around. We'll do that two more times. Rolling down, pressing apt, rebuild your spines. You almost want to think of rolling back rather than just lifting up the arms. Come out to the side and down. Take your last one, Shin over, chest rolling down and like my arm is a back board. We apply yourself beautiful and the arm circle all the way around to open the chest into that big circle.
We have one more here with the leg straight and then I'll show you some variations where the legs are crossed. This is what Joseph applied is called the lifting. The legs are straight, the feet are pointed. We're changing the grip of our handles again. So now the handle sits in our palm hands. Go next to the ears, elbows wide. I want to find almost a hint of a spine stretch forward, a containment of the ribs, the puffing out of the back ribs. And then from here as if you're holding onto 300 pound barbells, you take your arms straight towards the ceiling and straight back down while maintaining the lift of the spine and the energy out the legs. And again, lifting up. Beautiful. Come back just a little bit and arms come down. Just one more time. Stretch it straight up.
It's almost a hybrid of what later became the shave and the hub, which we're going to do next. Let's have one last time to come out of it. It's going to circle his arms out to the side and down again, and then I'll allow him to shake it out for a second because that is crazy hard work. So these are the five original rowing sequences as a six step to this, especially if sitting on your straight legs with a tall spine is unavailable to you cause it's a lot of work. We have the option to cross the legs. So go ahead and do that. Bend your knees. So in this position it's very common to put a lot of pressure into the feet, pushing down into them to try and lift out of the hips because they tend to get tight in this position. Instead, I want you to think of pushing your sits bones, the bony part of your c down and back into the shoulder blocks, pitching the spine slightly forward to start, we're just going to circle straight arms up overhead to initiate our shave. So he has a nice long diagonal line that he's aiming his hands in as he extends back up nights. It's like you're giving somebody a high five, right?
You take the hands behind the neighbor of the neck and then back up from there. So I mentioned the spine stretch forward earlier, something that's related to this, right? We're not just moving arms, we're not just lifting weights. We're actually moving the spine here as well. So as frank extends his arms up wanting to find his back ribs right at my other hand, you're pulling back against that to find that opposition. Gorgeous. And then take it down. We'll take one more like that. You could do this exercise with straight legs as well. Last one, and bend down.
We want to be all fancy or transition into our hug by switching the legs, opening the arms out to the side. We're finally upright again. This time we're not pitching forward, we're just going into straight arm hug, arms are to the side. We take them forward from here, widening the space and the upper back and then opening the arms, widening the space across the chest. Good as you can. Try to maintain both as you go to going in and pulling in and opening. So throughout the whole rowing sequence, we've moved our arms pretty much in any direction available, but always linking it to spinal movement, making it full bodied movement, which is of course at the heart of what plot is is. Let's take one more here and nice little hug to finish sitting up super tall at the arms open, carriage slowly pulled in underneath you and that is your rowing sequence.
Exercise Breakdowns & Tips: Exercise Breakdown Tutorials
Comments
You need to be a subscriber to post a comment.
Please Log In or Create an Account to start your free trial.
