Description
Note: You can find the MELT Soft Half Roller and Performance Roller that are used in this class here.
About This Video
Transcript
Read Full Transcript
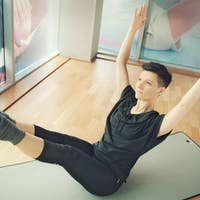
Hi, my name is Holly Altman. I am, I am co-creator of melted [inaudible]. When sue hitmen, the creator of the melt method, and I got together to try and blend these two amazing modalities, we set out to not just put Polonius on top of a roller and create a unstable object for people to be more challenged. What we really wanted to do was create more stability in the body to make the work of the [inaudible] more efficient and more back to the integrity of the motion. So when we really got into it and broke it down, we realized that pelvic stability is one of the major ways that you can create more change in your body and create more efficient place for yourself. So I'm going to give you a quick tutorial on how to improve pelvic stability by way of the sidekicks series. So we're going to start with sidekicks as an assessment so we can see how they feel. Do a little melting, and then use the half roller actually as a prop to enhance our sidekicks, to really make sure that we're working.
So I invite you to join me to lie down on the Mat.
Noticing if the bottom leg wants to go with you as you go back. And where are you feeling the work? Good. Moving on. Let's create a parallel lag. Flexing the leg up and then scooping and pointing the leg down, flexing up, finding links in the back of the neck. Two more times. Remember, this is just our assessment. We're trying to figure out what the exercise feels like.
Then keep that leg up externally rotated with a little micro bend in the knee and then just quick little circles. Are you able to keep that frame of your body still with the circling leg and exhale and relax. So let's use just those three head on over to the other side so we feel even, and same thing again, finding that position, finding the length. There's always one side that behaves a little bit better than the other. So see what's figuring out on this side. This is my wobbly hip side.
We're going to start with our inner thigh gliden sheer. With the performance roller, it's one of my favorite melt moves. I find that it makes a huge change in the body. What we're going to be doing is rehydrating what we call the rooted core line in the body. So you're going to lie down long on your arm. You could even use your half roller. Since we have it as a prop, as a little pillow, the bottom leg is relaxed.
I'm going to palm my roller in the center and then angle it away from me slightly. Then I'm going to take my top leg and put the side of my knee right on that roller. My top hand is going to come in front of my chest and I'm going to use that to try and keep my shoulders and hips stable and we start with a glider, which is an investigative move in mouth. Just gonna lean forward and then restack my shoulders and hips. My top leg is relaxed and I'm just noticing what the sensation is in the small one to two inch range of motion at the lowest part of my inner thigh.
So now I'm more towards the middle of my inner thigh and I'm going to repeat the same pattern leaning forward. Restacking my shoulders and hips. And then just notice for yourself whether this area feels more tender or the same, less tender as that first area. We're trying not to go too deep, too fast. We want to investigate to see what there, where that tissue is and see if there are any barriers. And if you do feel a barrier, if you do feel a lumpy, tender spot, we don't want to go digging.
I actually want you to ease back from that barrier and sheer there. So again, bending and straightening the knee.
Trying to pin that tissue on the roller and give it a little rub from side to side and then pause. Focused breath.
You can see it's behind my natural waist and then I'm just going to take my hands around my bottom to measure my range of motion. Inhale on my exhale, I'm going to use my focus breath, shh to find a little core engagement and slowly move my knees away from my chest, but going just shy of perpendicular to the floor, my knees are still angled back towards my head. I'm going to relax here and remind myself not to grip or Tuck my pelvis, but just to be heavy on that roller and then slightly angle my knees off to the right until I run into that right hand. Right now I'm compressing the area at my right sigh joint. I'm going to pass back through the center and angle left running into my left hand. Again, just noticing one side different from the other.
It helps us pick up patterns about our movement. My left side is always that Tinder one and then I'm going to add a shear, so just two knees circling, staying angled towards me so it doesn't become an abdominal exercise, but just a passive shear with my pelvis on top of the roller. Changing that into gentle front back marching steps and then keeping my right size still as I create small circles and then slightly increase my range with my left by so that my spine stays stable and secure. But I can add a little more range of motion and sensation on the back of that left and then pause, take a focus breath, transition the knees back through the center, angle them off to the right and then once again are three ways to share the tissue. Small circles with both knees, changing that into front back marching steps, and then keeping my left thigh still as I start with small circles on my right and then slowly increase my range. Join your knees together, take an inhale, exhale, stay there and bring the knees back to center. We're going to add bent knee press, so you're going to lower your right thigh down until your foot meets the mat.
Interlace your hands on top of that left Shin. Take an inhale on your exhale. Start with a top of the pelvis and then draw that left Shin in and have what I feel and what I'm looking for you to feel is a tugging, lengthening sensation across the top of that right. Ease back and take an inhale and then one more time initiate from the Tuck of the pelvis and then draw that left Shin in. I'm thinking of my right knee long and forward as I feel my left foot into the mat. And then exhale, relax. Let's change sides. So the left leg is now down in inline with my hip.
I'm going to pick up my right. Interlace my hands either on top or underneath the thigh. Your choice taken. Inhale on your exhale. Actively tuck that pelvis to start. Then draw that ration in. Find that length on top of the left thigh.
Extend that top leg up. Bottom leg is angled forward just as it was before, a little external rotation and then a little movement to the front internally rotate and a big movement to the back and now all of a sudden my wobbly side has much more stability. If you can see and all of a sudden from the moment I move my leg, I am working and now counting down until these repetitions are finished because it just got a lot harder. Let's do one more.
Relax the flex externally rotate and once again our scissors all of a sudden much more challenging with a stable pelvis and reverse and no tension in my neck this time either, which I love.
So see if you can get that half roller in the space between your ribs and your hips. Stretch that bottom arm so you're not compressing your shoulder in any way. And then out stretch those legs. I'm going to use my top arm again, right in front of me with a little pressure to keep my stability. My heads are relaxed, my hips are stacked in stable. Lengthen that top leg up, a slight external rotation and a little kick forward with control internally.
Rotate in a big extension back at front and back. Good. And so now what I hope is that you can find the intention of the sidekicks, which is to lengthen and strengthen but not lose the control. So instead of the kick your nose kick the back of the head, which we were sometimes queued for range, you really get the stability and it's one of the exercises that Ramana love to give because it was an opportunity for everyone, whether you were tight and needed flexibility or more flexible and needed strength and control to really find their way in class and bring it home. Let's lower lift, lift and lower press up scoop and point down, flex up, scoop and point down to more because it just got really hard.
Last one.
Tutorial on pelvic stability.
Mindful Movement: MELT Method®


Comments


You need to be a subscriber to post a comment.
Please Log In or Create an Account to start your free trial.
