Premium workshop

You can view a 2 minute preview. For details, scroll down below the video.

Workshop #4706

Centered - 2nd Edition

3 hr 10 min - Workshop
53 likes

Description

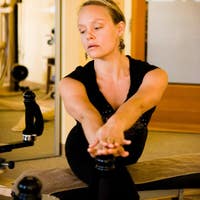
Join Madeline Black in her workshop designed to give teachers an in-depth look at techniques that facilitate structural and functional change. The theory and techniques she presents are part of the second edition of her book, Centered. Centered sets out to define a scope of practice – the integrative movement practitioner. The practice encompasses:

Objectives

- An understanding of the body’s movement potential

- Analysis of the available movement in the body by identifying holding patterns caused by dysfunctional movement in the individual

- Changing restrictions through techniques such as muscle energy, innovative Pilates set-ups on the apparatus and hands-on work

- Developing a whole body approach for strengthening and brain imprinting exercises to reinforce a new way of moving

- Self practice and continued education

What You'll Need: Mixed Equipment

About This Video

(Pace N/A)
Dec 21, 2021
(Log In to track)

Transcript

Read Full Transcript

v.1.1

So let's take a look at her Achilles tendon and the shape of the Achilles. So we're gonna notice whether it's a vertical line or if there's a slight bow. Some people bow this way and can you exaggerate and go the other way, go to arches out. Some people bow this way. So what we're looking for is we're just gonna see how is the person standing on their whole foot.

And at times we'll find one Achilles tendon more bow than the other. And that has to do with the function of how the person stands on their foot and the relationship of the bones of the foot. So here's a skeleton of the foot so we can see the relationship of the bones and how they move with one another. So here we have the calcaneus which is your heel. We have the talus just sits on top like a little turtle shell with its little head sticking out of the turtle shell.

And connected to that as the navicular. And for me, it's like the turtle's wearing a hat. That's how I remember the navicular, right? And on the lateral side of the foot, we have the cuboid bone which is a keystone of this arch and meets the floor. So there's articulations that happen and micromovement that needs to happen so that the whole functional foot can actually do its twisting and untwisting as we're walking and moving.

Right and the most important one for me I think is the subtalar joint. So if I turn this upside down and open out the bones here, you can see that there are three facet joints here between the calcaneus and the talus. And what needs to happen as we're moving with the heel lifting up and down even as we're walking is a slight little rotation. You could see it looks like a fishtail or a doorknob if I'm turning a doorknob, a little doorknob fishtail actions. very small movement.

And then the heel needs to spiral up towards the medial side of the foot. So it twists up like a doorknob and comes back down. So that's the subtalar joint motion that we need to have. Now, if the heel's weighted and you're standing on the foot, then the talus will either fall towards the outside or the inside and I call this arches out and arches in. This is a normal motion kind of a riding motion when we try to balance our leg.

The tibia comes down onto the talus. So if the talus is tipped outward the tibia is gonna be tipped. If the talus is tipped inward, it's also gonna be out of alignment. So we wanna stand with that talus as best a neutral position as possible. And as that talus is moving, you see it moves the rest of the bones of the forefoot.

So we're gonna do two hands on to find this one is gonna be, we're gonna place our hand on either side of the talus and we're just gonna see if we can move it arches in and arches out. This is a good teaching skill to teach a person when they're standing in arches out or arches in so they can feel it. The second one that leg is gonna be dangling and we're gonna take the hand and we're gonna wrap it around the talus so that we can stabilize it. And then we're gonna hold that heel and we're gonna turn it like a doorknob fishtail and see if we can feel for any micromovement here. And if you don't feel micromovement here, then the technique the calcaneal spiral would be appropriate to do.

So if she lifts her toes up, we're gonna notice that we have some strong tendons here. There's one tendon that runs this way from the anterior tibialis here, comes around and wraps under. And then we have extensor digitorum longus here and this tendon is out here. And if you find those two tendons on the foot, you will find in the center of those two tendons is where the talus sits. So relax the toes and I'd like you to place your hand on the outside of this tendon and on the outside of this tendon here right at the joint.

And when your hands go in gently, you'll be able to feel that you're on either side of the talus. So if the talus is on the outside, arches out, it's gonna be pressing out into your hand here and come back to center, and then you can move the talus inward and you'll feel the bone more prominent on this side. So we need to have a little motion here, have this kind of rocking motion. But in standing we wanna see and feel that that talus is in a neutral position, not arches out or arches in which helps set up the Achilles tendon in a nice straight line which then sets up the tibia sitting on top of the talus in a nice alignment. So let's check the heel now.

So come sit and slide back. So to test the heel and the subtalar joint, you can grab the heel this way and we're gonna take the webspace of the hand right where the ankle bends this way, right at the talus. And I'm gonna wrap my hand around and securely hold the midfoot and the talus. I've got my thumb on the inside, this finger under the ankle here, these three fingers underneath the foot. And I'm gonna stabilize here and I'm gonna hold the heel.

I'm gonna bring the foot up with these fingers so that the foot's in a gentle ease not active dorsiflexion, not fully flexed at the end joint, just somewhere in the middle. And the person's relaxed and then turn the heel, and with the heel I'm going to try to feel like I'm doing a fishtail doorknob motion. And as I'm trying to move her heel is actually there isn't any motion here. It's very, very tight, very stuck. No gliding at all.

So this foot needs to have the calcaneal spiral technique that we're gonna do on the Cadillac. Okay, so come stand up and let's look at your Achilles again. Good. Great, so we haven't done any techniques yet but I can cue her to feel where the talus is and go slightly to arches out here so I get that talus in a more neutral position. And that kind of straightens this up a little bit more but what then it does is it changes her forefoot.

So her big toe tends to lose contact. So there's a little work we have to do on this side to bring the talus into neutral to help her forefoot be in a better position and some forefoot exercises as well.

v.1.2

We're gonna consider the forefoot varus and valgus when we place the feet on the bar on the reformer. And what that is is when the talus is in a more neutral position, meaning it's not rolled in which I call arches in or rolled out, arches out, it's in more of that middle place which aligns the leg bones in a very good alignment for the training effect of using the reformer with the resistance. So a forefoot varus will be when the talus is in that neutral position and you see naturally as they're at rest that there's an angle of the metatarsal.

So the big toe ball is higher than the little toe ball. The valgus angle which Amy doesn't do so she's gonna have to roll in a little bit to create that angle. But you might see that the little toe side of the metatarsal arch, the transverse arch here is higher than the big toe ball. And most of us it's a higher population where we have this varus angle here. And that sets up the talus in a more externally rotated position which then changes where the tibia is and then changes what the femur is.

So when we place the metatarsals on the bar, if Amy's gonna meet the ground through this varus position like this, then everything's gonna roll in. And then she'll be in that position as she's doing her foot and leg work. So we're gonna prop her feet. So this is a cat ball, it's just a little foam cat ball that I sliced in half. You can use a cat ball or you can just take a little pad and fold it up.

It doesn't matter as long as it's about this size. And what I'm gonna do is place it under her big toe ball, the metatarsal joint and then I'm gonna notice how her heel and her rear foot are set with a nice dorsiflexion in a nice neutral position. And you'll also notice a little buoyancy here as I push on her. So for her feet, I would set her up in this position so that we can then see that her dorsiflexion doesn't have the extra tension in the front. Her bones are at rest and she can wrap her toes in the prehensile position.

And from this position begin training her foot and leg work.

v.1.3

Prone heel lowers is a wonderful exercise and also assessment where you can observe the metatarsal arch here. So we will see the valgus or varus angle of the transverse arch with the contact of the bar. So, first off you wanna make sure that that fifth metatarsal is in contact. People's bones have a bit of an arc to it.

So sometimes that fifth metatarsal will be hanging off the bar but we wanna have that bone contact with the bar so always just check that. And then we're looking for that nice contact points through the whole metatarsal arch. And in Amy's foot here, you can see there's a space where the first metatarsal, it's not really meeting the bar. So as she would be doing this exercise, she would have to compensate through the midfoot, dropping the midfoot to have that contact point. And then by rolling the talus in to create that contact point of the first metatarsal, then the tibia will roll in and the femur will roll in, and then the pelvis will start to rotate, and then her spine is gonna adapt and it sets up this whole pattern throughout the leg.

So what I'm gonna do is I have two choices. I'm gonna use my little pads here and I can either prop the fifth metatarsal here which would then put her weight towards the big toe ball and the second toe ball making her arch a little bit, the transverse arch a little bit more in line. So we'll do that on both so we can see that. So she has a good contact there. You also wanna check that the tibia is not in an externally rotated position here.

It's in a more neutral position, that's it, so she can feel that contact point. And that kinda puts her weight. Now drop your heels a little bit, Amy, there you go. So that puts more weight towards that inner part of her foot which would then activate through the inner part of the leg into the pelvic floor and up through the spine. So I think this arrangement is good but the other choice you have is to fill the space.

So you could take the prop and put it under the big toe ball to fill the space here, like that. But for her, it's not stable enough in her forefoot. She doesn't feel like she's got a solid contact with the bar. So I'm gonna prefer to choose for her foot that little toe ball prop and dropping down. Now, as she's doing her heel raises here, what we wanna watch for is how the calcaneus spirals and turns.

And then as she comes down it unspirals and just comes to that neutral, nice long Achilles position. So watch for the inner ankle, inner heel going up to the inner ankle point. And then as she's coming down it's equally lengthening here. On her left leg she tends to wanna externally rotate from the tibia. So I'm just gonna hold the tibia gently and watch her and see if I can get her rear foot to rotate.

There we go. So now, and I'll cue her to say, imagine the inner heel coming up towards your inner ankle bone and then lower the heel down. So this would be to me as an assessment a sign that doing the calcaneal spiral technique on the Cadillac would benefit. I would do that and then come back and do the heel raises here. Okay, so she's gonna continue doing this and I wanna point out, so Amy bring your head up and extend the spine in a nice neutral position, exactly.

And as you're doing the exercise, so it's not just about the foot but she's activating the entire back body in addition to her front that to have to maintain that position. So now she's in a good position to do this as an exercise and then we can do a variation. There's a little more advanced variation. I'll take this ball away so you can extend that leg. And then she can drop down and up on one leg.

And the spring can vary. You could use a one red spring. If you start getting heavier what tends to happen is the box is slippery and the person because of the weight might slide forward on the box. So you'll need to put a sticky mat on top of the box to prevent the, here let me give you that so you get to do your other leg, to prevent the person from sliding on the box. So one red spring or one red blue spring.

And I wouldn't add more weight until you're confident that the person's foot is functioning with this calcaneal spiral and that internal rotation and I say internal rotation because she keeps externally rotating. So I just want her to bring it back to a more neutral position. Okay, let's flex this foot, come back onto the bar and finish.

v.1.4

The calcaneal spiral is a technique to restore the micromovement of that calcaneal subtalar joint that we described already. So we do the hands-on and I felt that Amy's right heel and subtalar joint didn't have that micromovement.

So we're gonna do the technique on her right foot, so she can bring the bar up onto the ball of your foot and press up. So I have a bottom loaded with just a blue spring, so not too much resistance. Now I'm holding the bar a little bit so it's not a lot of weight going into her body because I wanna show you how to position the leg properly. So just relax your foot, yeah. And notice what I wanna see is if I put a little pressure by pulling the bar down this way, I'm creating some ankle movement.

The pressure of the force is going into her knee and it's traveling through into the hip. It's actually a very good position. Now move back this way, so let's show it. So let's say she lies down here and I'm gonna test to see if where she's lying down is a good position. I wanna see the force vector from the bar transfer through the knee into the posterior part of her hip.

So as I pull down you'll notice it's coming out her knee. There's no motion, no weight of transfer going into her hip so she's too far away. So coming in. So most likely when people lie down to do this technique they're not gonna necessarily be in the proper alignment to get this feeling. So when you, you feel a difference?

It moves, bypasses the knee, goes right into the hips so now I know she's in the right position and I'm gonna move around here. Now the technique is that you're gonna clasp the hands this way and you're gonna cup the heel with the hands. It's gonna take a lot of pec work to stabilize the heel. I'm gonna ask the client and I don't give them which direction in or out, I just let them choose. I'll say I'd like you to rotate your thigh bone in and out and just keep moving.

And when you hit the end reverse your direction. Yeah, go slow. Yeah. And when you hit the end, reverse. So tiny movement, there you go. So it's a mid range of rotation.

I shouldn't feel that she's gonna knock me over. She hits the end and then begins to reverse the direction. And try to focus on the head of the femur and the socket rotating. So less pelvic, there you go. It's gonna be very small at first.

I'm not allowing your heel to move. So what's happening is her femur's spiraling out, it's trying to and spiraling in which translates down into the tibia also moving in and out onto the talus. So now I'm holding the heels still and the motion's happening at the subtalar joint. It's starting to move a little more now. So keep rotating. Good.

And what I'm doing is when she rotates in I have pressure on my outer hand, when she rotates out I have pressure on my inner hand. So she's gonna continue to move in and out. There we go. I'm starting to feel a little more move, there, good. So what I start to feel is that there's resistance, it lightens up, and the heel and the talus are moving a little bit better now.

Good and stop and rest. And bring your foot down. And then we could just retest the heel to feel that that motion has been restored.

v.1.5

This exercise is to work the forefoot varus or valgus and we're going to use a three inch yoga block. Most yoga blocks are a little bit higher.

I don't know how many inches but this half roller matches the height of the block here. So we wanna make sure if you have a yoga block that's the traditional yoga block which is about five inches or six inches, then all you would wanna do is prop the roller up somehow so it matches the top of the block. So I'm gonna have Amy stand. We're gonna work on her forefoot first. And I have another block for her to stand on slightly a few degrees behind so she's not in a hip flexion.

So we're gonna look for that she has her metatarsal, the fifth metatarsal ends about here. So Amy come a little bit more just a tiny bit forward. There you go. Perfect. Excellent. All right. Now the challenge here because she has this forefoot varus what she does to adapt to the ground is she will roll her arches in and lose contact with the heel out here on the outside, the lateral part of the calcaneus.

So she wants to anchor here. This is gonna be the challenge, it's like standing on the pencils. And from here, she's gonna keep her upright position and simply use the forefoot to spiral downward and tip the half roller basically bringing her metatarsals more level and then she'll return. And so she's anchoring here a little more anchor here. It's a challenge.

Exactly. That's enough and come back. Good. At first it takes a little bit for the tissues to get a little bit more hydrated and able to move. So it will be small at first. There it is. Mm-hmm.

And then the other thing we wanna watch for is grippy toes. (chuckles) So we wanna try to anchor here and tip the arch. That's it. And then you just repeat. It's getting better. Keep the big toe, little toe, sorry, down here but try to do it through the metatarsal arch.

So tipping through here, there you go, and back and just rock it a little bit like oscillate. And keeping that anchor. And by keeping the lateral heel anchor you're gonna start to feel the activation up into the hip here. Excellent. Okay, let's try the other foot.

So we'll move this here and this back a little bit. We'll give equal time to your feet. (chuckles) Okay. Great. And let's just start to tip. Very good.

Now, if the client has a balance issue 'cause it requires the whole body to engage, to do this standing up without holding on, you certainly can hold onto a wall or the wall or a Cadillac pole or something like that if necessary. But can you feel Amy as you're going into the levelness of the metatarsal how much your lateral hip is working? Exactly. Now we can do the same for the rear foot. So we're gonna do a little shift here and let's see.

I think we'll have you turn around, okay? Right. So, if we need to work the spiral of the rear foot. Oh boy. Yeah.

So now we want the metatarsal and a little more of the, you have to come forward. I want the midfoot on the block, that's it. So the half roller is the area you wanna mobilize. So rear foot, not the midfoot. The midfoot is where the foot really will adapt to a rear foot that's not mobile enough and and I'm talking about micromovement, it's very small.

So now she has to do the opposite. She has to keep and I could use the little prop, but keep the big toe ball down and then rock the heel. That's it. So we're working more, I want more of the inversion, Amy. I want you to go lateral heel, exactly, and then come back.

But your forefoot think of it spiraling in the opposite direction, the forefoot goes downward this way, that's it, in opposition of the block tipping. So again, it's a very small movement. Yeah, midfoot. No, not much and midfoot. Okay.

Because you have so much midfoot motion I'm gonna add a TheraBand to help block the midfoot. So now we have the TheraBand and we're gonna place it under the midfoot here. So move your foot a little bit more forward so you're on the block. Only the heel is on the half roller. There we go.

Let me move this in. Okay. And let me move this back. Perfect. And you're gonna hold on to it. Great. Now, what I'd like you to do is to pull a little bit more with the inner, yeah so to your right hand and actually bringing it towards your leg would be great.

'Cause what we're trying to do is create a block for you not to go into arches in, okay? But at the same time, you're trying to keep the contact of the big toe ball into the ball. There you go. And now rock the rear foot. There it is. You feel it? Yeah, rock the rear foot. It's small.

Good. And keep going. And again, there's a direct connection with the rear foot connection with the lateral hip engagement. So you get a good deep hip activity going on as you're working with that rear foot. Yeah.

Very good. Feel the difference by blocking the midfoot. Okay, good. Let's try the other foot. And that was your left foot so if I recall from the prone heel lowers, that was the rear foot that actually was a little more stuck.

Didn't have as much movement to it. Yeah, this is just a stamp. Okay. Well actually let's see you first without the band. We didn't do that foot. Okay.

Okay. Move your foot a little more forward. I want just the rear foot. So the cuboid bone needs to be on the block. Okay. So here we go.

So just see what your foot does here. See if you can tip. So it's more, I'm looking for the E, inversion, I-N, inversion of her rear foot and that's a little bit more difficult in keeping that. Good. Yeah, you still love to move that midfoot.

(laughs) So let's go ahead and put this under and this time you're gonna use your left hand 'cause we wanna kinda block the arch from dropping. It's not that it's not moving, it's just we're minimizing the movement there. So as she tips the half block, she's gonna try to keep the contact of the big toe ball here. It's a very small movement but it really activates through the whole lateral part of the leg. You can feel that through the peroneals and up in through the hip here, through there.

Yeah, we just do a couple more and then we'll finish. Excellent. Good.

v.1.6

The proprio half balls. We're gonna use these half balls, there's four of them, to articulate through the feet in all planes of motion and then notice how the motion translates and moves through the legs in, into the body. So this is a wonderful way to improve proprioreception which is why they're called proprio balls.

But also it gets to articulate not only through the feet but then you're articulating through the ankle joint, the knee, the hip, you get into the sacrum, and then all the little facets of the spine. So it's a wonderful way to kinda get some oscillation and articulation moving through the body. So we're going to, there's four, two for the rear foot and two for the forefoot. So for the heel, for the rear foot, we wanna place the ball so that the cuboid bone which is right about here, it has some contact on the ball. So it might be depending on how long your feet are, the heel will be slightly, slightly off the back.

And the other side, wanna make sure that that's set. We move it back just a tiny bit. There we go. There's a little bit of adjusting. Okay. So here I'll hold on to you in case. So you wanna lift the forefoot. There we go.

And we want the metatarsal arch having contact. Let me move it just a little bit with the ball and we don't want the toes to curl around it but you wanna make sure that that transverse arch and you're good for lifting your foot. You can always put your hand on my head if you want. (chuckles) Okay. Let me move it forward just a little bit.

Okay. Now you have to tell me, do they feel equal? Maybe this one's too far forward. Yeah, a little bit. Yeah.

Yeah. Yeah. Let me move this one too. Okay. It's a felt sense.

So you wanna ask your client to make sure that they feel that they've got good contact and it feels pretty level for both feet. Okay, so at first it's just balancing on the balls itself and the body has a natural sway to it. So you'll notice that the person will start to, the brain is starting to right itself in a more balanced place. Right and it's a great tool to teach a person where their weight, how their weight shifts and moves through the foot. So Amy and I want you to tip the balls back towards your heels so you're gonna feel the body kinda lean back a little bit and then tip the balls towards your toes.

So you imagine all four balls tipping forward and all four balls tipping backward, yeah. And you wanna do it and notice how your sacrum, where the center of mass is, is shifting with the weight shift on the feet. That's it. And shift. This is good.

So when we're doing a gait pattern and we're walking, right, we're rolling through the feet. So you move from the rear foot along the whole foot towards the forefoot before you push off. So this is a wonderful way to kinda get articulation also through the foot. Okay, now find what you think is level. Perfect.

So now we're gonna do arches out, so she's gonna roll outward and then she's gonna do arches in. And then you can observe as you're watching them do the movement how the arches out creates that external rotation and the arches in creates that internal rotation of the hip. All of these motions are important to have in our body. So even though we're trying to talk about being in a center where actually there's a center line that's always there but our bodies are moving around it and through it. So this gives you that articulation through the joints to be able to do that.

Okay, now find level. Now we're gonna do opposing circles. So you're gonna shift your weight towards your toes and then around to the side arches out and then back through the heel and arches in. That's it and minimize your toe lift if you could but it's okay. Try to find the rear foot here. That's it.

And feel how your sacrum, this is great. So the weight is shifting forward and back 'cause her center of mass will shift as the weight shifts on the feet. Let's go the other way, around, that's it. And you can see we're getting that whole articulation especially in the hip joint, right? So we're getting that femur to spiral in and posterior, spiral out, and lateral and kinda get that whole motion.

Okay and now find what you think is level. Okay. So here's a challenging one. This is gonna be circles in the same direction and what you're gonna notice is the pelvis. So let's cross your hands maybe just so we can see, good. So start with your feet going forward and then both are gonna go to your right and then around to your left, uh-huh.

And you wanna see her pelvis wants to go to the right. So if you imagine you have little head lights on the front of your pelvis, you wanna keep those lights shining forward and try to articulate through that, okay? And then come back. Let's move your left foot a little bit. That's okay.

That's, you know, it's cause you're trying to move through that midfoot on that left foot again. (chuckles) Okay, we have to go the other way to the left, your left. That's it. And make it small, it doesn't have to be big. You're just feeling how your weight is being transferred onto the bottoms of your feet, right, and onto the ball. So if you put your intention on how the balls are moving, there you go.

And again, your pelvis really likes to go to the right. So we wanna try to think of that especially when you're coming around with your feet to the right that you almost think about a counter rotation to the left. That's it. Great work. Very good, now come back to the middle and just pause here, bring your arms down. Do you feel like less wobbly?

Mm-hmm. Right, now step off. They do stick to your feet. Okay. And just walk a little bit. Notice how free your hips feel as you're doing that.

Yeah. Awesome, perfect.

v.1.7

So we're gonna work the calcaneal spiral with the lower leg press on the Wunda Chair which is a soleus emphasis to it. However, it's also working the deep posterior, posterior tibialis, the peroneus longus, the anterior tibialis. So we have that spiral happening of the foot and her metatarsal heads are on the bar. And everyone's foot shape is slightly different.

Some people have very even toes, some people have short big toes and long second and third toes. So look at the metatarsal line and you'll see, is it a straight line across? Does it make an arch? And the little toe is much lower than the rest of the other toes. And when you're looking at the bar here, you look at the metatarsal arch here.

You wanna see that the weight of the foot, the center of the spiral, the washrag foot, comes between the second and third metatarsals here. So we don't wanna emphasize too much on the lateral part of the foot because that changes the whole organization of the heel and it will not allow for that spiral twist of the foot that should happen. So let's start in a relaxed view. Now in standing, she had an Achilles that bowed with a concavity on the right side here. So there's tightness through here and a weakness through this side of her leg.

So we're gonna be working not only on the positioning of the ball of the foot on the bar, but we're also gonna be watching how her heels spirals. And I'm gonna be looking that she's actually contracting a little more on this side. And I'm going to give her a fascial release stroke up through this lateral concave side of her Achilles to create a lengthening here so she contract a little bit more evenly through the lower leg. So we have metatarsal arches here. So for her, the little toe is slightly off the bar.

Not a lot but it's not a full contact, that's not that important. The most important thing is that second and third toe. Now I'm gonna ask her to slowly push the bar down and I'm gonna watch to see that this inner edge of her heel moves towards that medial malleolus. So there should be that spiral of her heel and then it should come back as she comes down and that Achilles straightens out. So don't allow the bar to go up so high that the person ends up bowing in the Achilles.

So here we go. This corner, so I cue it, try to bring this corner, inner corner of your heel towards the inner ankle keeping your weight on that second toe. There you go. So there should be a turning. Remember the doorknob and fishtail and then coming back down.

So now I'm gonna take a little bit of lotion 'cause she needs a little bit of help and I'm going to give her as she's, now we're gonna do it as a stretch. So she's going to first point her foot this way. Good, now, as she's coming into dorsiflexion is when I'm gonna lengthen with her. So as she stretching through there, I'm giving her a sense of length the tissue through here. And then she's gonna do again plantar flex.

I'm gonna help her encourage that rotation. There you go. Can you feel that? So contract a little more on that side and now start to let the bar come up, feel the Achilles long, there you go. There, right there. It feels very tight through there.

And again, point and it should try to spin, turn that doorknob, keep your weight on that second toe. The other thing is people and she's not doing it but some people tend to cheat when I try to get them to be a little bit more in that spiraling action of the heel by externally rotating the tibia. You gotta be very careful that that is not happening and we wanna get the heel to do that. So with micromove, there you go, that's gotten better. And then coming back down and the Achilles is actually starting to lengthen out here.

We'll do one more. Watch the spiral of the heel, keeping the weight in the center, very good. And now start to flex dropping the heel, give her a nice stretch, oh, that already feels better. Through here and rest. Okay and come standing down and finish.

v.1.8

We're going to work the foot in the eccentric way using a half roller. Bottom-loaded, I have one red spring on the Cadillac. And depending on the height of your client, you wanna make sure that their knee is just slightly below the greater trochanter. So for a taller person than Amy you need a little bit of a bigger box to sit up on. You don't want the person in 90 degree hip flexion or even greater because we're gonna be lifting the knee up against the bar which increases the hip flexion.

Right so this is the setup with the forefoot on a half roller. And as we've seen in the other videos, Amy has that four-foot varus so I'm gonna actually add that ball in this exercise. So I'm gonna place it under her little toe ball then just slid forward a little bit, there we go. And like the reformer bar, we wanna make sure that the little toe, the fifth metatarsal is in contact with the roller and the big toe ball. Okay and the weight should begin on the outer part of the heel here.

And it's a very simple exercise, she's just gonna lift her heel against the resistance onto the metatarsal feeling that calcaneal spiral. Now that's the concentric work. Now Amy do twice as long down. So four, three, two, one, and then press up like two counts up two, hold for a second. Slowly come down, two, three, four.

So the eccentric, keep going, the eccentric we wanna do it as longer and slower on the descent. So this is working the deep compartment of the lower leg but in addition, she's working through the foot, she's also getting hip flexors and she's maintaining her posture on the box. So you can repeat this watch for the calcaneal spiral and in Amy's case, I'd be watching for her over movement of the midfoot, right? So that we keep the heel spiraling in towards the medial malleolus, that was a little better. You feel the difference?

Yeah, so you were starting to over move in the midfoot. So be conscious of the metatarsal here, plant them down, feel the heel, but don't over move, that's it. So you can do repetitions maybe 10 to 15 and we can do the other side. Okay. Let's give a switch. We'll do the same arrangement on this foot.

Excellent. Okay. So again, now this is her right foot which behaved a little bit better in her rear foot. So it's a little bit easier for her to find that spiral without over moving her midfoot. So again, she'll do 10 to 15 repetitions and then rest.

v.2.1

So we're gonna work with the patella tracking. So when we straighten and bend our knee or even with a straight leg lift, the patella needs to track in a certain direction. It's not straight up and straight down. It actually moves a little medial then through the center and then a little more laterally. But because of some tissue restrictions and motor control, sometimes the patella doesn't track along its little track that it is the groove of the bone as it's moving.

And so first off people don't realize that their patella should in a relaxed way, and actually yeah, Amy, if you sit back and just slouching is good because we don't want the quadriceps engage. And so if you're sitting upright you'll be in too much hip flexion and there'll be tension in the tissue. So we wanna have completely relaxed here. And then the four corners of the patella, so we have the lateral superior lateral corner, the medial, superior medial corner. We have the inferior lateral corner and we have the inferior medial.

So it's like a little clock, think of it as a knee clock, okay? And we're just gonna work on these diagonal. So first off you can take your fingers gently and I teach the client to do this themselves. And that you just wiggle the bone around. Now for some people they don't realize that it has this much mobility.

It's a sesamoid bone. So a sesamoid bone is just a bone embedded in tissue, connective tissue. So it has a lot of floating abilities here. So you can see how much I'm kind of moving her patella around. Now, the tracking that we wanna see and this is where that medial line of the leg tends to get a little bit lazy.

So in this corner when I'm gonna ask Amy to slowly pull up her patella and what I wanna observe, that's pretty good, that it comes up from the medial, center, and then the lateral line. Is there any way you can kind of fake it, Amy, and like pull a little more lateral for me, there you go. So you'll see the tension. If you look at the tissue, you'll see the tension pulling on the lateral position and then the patella starts to tip. It goes out of the groove.

So we need to reset the patella so it's sitting in the groove and tracking along the track where it should. So the exercise is for the client is go ahead and wiggle your patella and then placing the finger on the superior medial corner on the bone here, just touching the bone, and then asking the client to press my finger away. Oh, very nice and then relax. Relax. And again, feel this right here and pulling it up, very good.

And as they repeat that continually, so literally for motor control you could do this 50 times. I'm not exaggerating, so the more you can do that. And sometimes the person needs to have a little stimulus here. So you can do what I call meat tenderizing here through here. So try that again.

First that's it and as you repeat it, you'll start to notice the quadricep muscle really kinda mounding up. The whole muscle should round through here, not flatten out. So there you go. And the more you do it you can feel how more of the musculature comes in. So for the client, they can do it themselves.

So Amy, you can take your fingers on either side and just wiggle. And I try to tell the client try not to wiggle their whole leg and see if they can just get the sesamoid bone to move. And then take their own finger. It's a little harder and so relax your patella, she's already anticipating. Feel that corner and then as the bone is pushing into the finger, you have to move, the finger's gonna be moved by the bone.

So it's a good home program to teach your client to do and if you're just sitting and watching television or listening to music, it's a great thing to do to kinda just play with that to work 'cause it is an exercise you need to repeat a lot to get that motor control. Great.

v.2.2

So we're gonna take a look at knee motion and also fibula and tibia motion. So we have here a dot on the center of the patella here and then the tibial tubercle, that's the bony prominence that you find on the tibia here. And you'll notice that on her left leg, this is already starting lateral to the center of the patella, which means that her lower leg is kinda hanging in a more lateral what I would call a pendulum swing, which is coming from a lateral tightness through the hip and the back through here.

So she's already starting lateral to the knee. So as she straightens the left knee here, you'll notice that the dot and the tibial tubercle does move a little bit more externally but it's starting already in the external rotation. If you notice on the right leg before you straighten, these are lined up. So when she rotates and lifts her foot and externally rotates the tibia, you'll notice that the dot will move in an external rotation. It will move lateral and then it will come back towards the medial.

So it goes lateral and medial. This is what we wanna see. And on this leg she's already in an externally rotated position, so when she bends her knee we're not getting that internal rotation which we did notice in the previous exercises. So from this case, we can use some of our internal rotation exercises on the disc to help facilitate resetting this tibia rotation. So now we're going to look at the fibula motion.

So now we're gonna stand up and use the Cadillac for a little bit of balance. So we're gonna place our hand on the fibula. So the top of the fibula where the fibula head is is sometimes difficult to find so she can bend her knees slightly. And then you'll feel the prominent bone on the top here. So you will take your finger, place it on top of the fibula head and push down on top of it so that you're resting on top of the fibula head and then the other finger at the bottom of the fibula underneath the malleolus here.

So now straighten your leg. And you're simply gonna feel as she bends both knees, do you feel that the fibula is moving up into your finger up here, that's good, and this moves back towards yourself. And it does move a little bit away from the ankle. So you might feel the pressure into your finger and then straighten your leg, and it goes back down. So as she bends her knees, I feel the fibula coming up into my finger and feeling this one, moving back posteriorly.

Excellent. Good, now it does the opposite when you lift your heels. So she's gonna relevate up lifting the heels. Very good, I feel that fibula moving downward. So it's moving away from my hand and pressing into my finger down here and moving a little bit forward.

And then as she brings her heels down, the fibula resets itself by going back up. So one more time, she's gonna lift the heels up. The fibula is coming up into my finger and it's moving forward here. And then as she comes back down, it's resetting itself. So just to review, you bend the knee, the whole fibula is moving downward a little bit out here.

And then as it straightens, it starts to go up. The fibula goes down as her heels go up, the fibula is moving down and a little bit forward. And come back. So that's how you can test the motion of the fibula and if you don't feel that very subtle motion of the fibula, then there's work to be done around the lateral hip and the fascia around the knee here and back to our foot work and our ankle work to free up that motion.

v.2.3

Okay, we're gonna do a iliotibial band lateral leg to waist release using muscle energy technique.

So I want to point out on this right side if you notice her leg is a little bit more of a curvature right in here. And my hand, I'm feeling her a lot of tension and tightness through this groove right through here. So we're gonna see a change once we do the MET for this side of her leg. So she's gonna come up onto the barrel with the hip on the top of the apex of the barrel, elbow on the table to support her head. So once the client lies on the barrel, we wanna make sure that the rib cage is not collapsed down creating a side bending of the spine here.

So there's a little lift of the rims that should happen, a little stability here. If that's not possible for a client you could certainly put a bolster in this space here to give them some support and then supporting the head and neck. So we're gonna take the arm. Now, we wanna bring the pelvis into a neutral position. So I'm gonna use the fleshy part of my arm and with the weight of her legs dropping downward, the hip tends to move down with it.

So I'm gonna bring the pelvis up so it's in a neutral position here. She's gonna bend this knee and put the heel right on the ankle so she's supporting herself here. Now, if you notice with the hip here in a neutral position, the true length of the lateral side of her leg is at this angle. It's not too bad but it should be actually a little bit lower. So as we do the technique we should see a change in the angle of her leg as it's dropping down towards the floor.

So we're gonna introduce an isometric contractions. I'm gonna ask her to push up and resist with her top foot and I'm gonna give a resistance with my hands. So she's pushing up right now. I'm gonna count to five, four, three, two, one. And then she's gonna stop contracting and I'm gonna lower her down a little bit gently.

She's doing it herself, she can pull with her own foot. Great and I'm making sure that's the end 'cause I can feel that her pelvis is starting to move. See that. So don't let them pull so much that that pelvis loses its position. There we go.

And again, push up. Two, three, four, five. And then relax and we're gonna let it go down and letting gravity take it and she's pushing a little bit with her own leg. And again, pushing up two, three, there you go, four, five, and then she releases it downward. So you notice the angle starting to get longer here through the side of the leg as the feet get lower to the floor.

Now she's doing really well is keeping her leg in a more neutral position. Most clients when they start to pull down will start to roll the leg forward and inward. If that starts to happen, then you can take your hand at the lower leg below the knee, not on the knee, and turn it a little bit outward to keep that alignment as they're lengthening down because they're gonna wanna go into the shortness of the band towards the quadriceps. So we have to keep that alignment here as she's coming down. And once we've got a good line then we can add kind of a rotation in and outward of the leg and this way we're kind of stretching and moving all of these fibers that's like a fan here.

And the iliotibial bands attached into the quadricep septa and then also the hamstring septa. So we wanna get that lengthening of both ends towards the quad and the hamstring. So this kind of motion really enhances that and then we can come back to a neutral. And if it's really tight, the iliotibial band will tend to stick towards the front near the quadriceps more so you can take your other arm, the fleshy part of the arm and I'm gonna go to that lateral edge here near the quadricep of where her band is. And I'm gonna glue my hand on that tissue and then I'm gonna draw it back and then I'm gonna change down about an inch.

I'm gonna glue the tissue under my arm and I'm gonna pull it back and then glue the tissue here and I'm pulling it back. And I'm gonna work my way down the whole lateral line of the leg. This is more user-friendly than killing yourself on a foam roller plus it's more functional because we're actually realigning the tissue here all the way down to the knee but we don't wanna press on the knee. And what a nice angle we have here. So we're gonna have her stand up to see if we notice a difference in the change of her leg.

So come sliding up. So now we can notice if you go back to the first image of her leg how this tissue has changed. First of all, by touching it it's much softer here, it's not as rigid. It has more of a sense of a whole side of a leg instead of parts of a leg and tension. And you can see that the line has really actually straightened out this alignment and that's the effect we wanna have.

I recommend that you do both sides because the iliotibial band is part of that fascial connection into the glutes into the back and somebody will be really off balance if you don't do both sides.

v.2.4

So we're going to use a rotation disc or you can use a Functional Footprint for this movement. And we're going to emphasize the rotation of the knee that's necessary for normal functioning knee motion. So as we notice as she's sitting here relaxed, the foot is tending to be a little bit in a turned out position and the tibial tubercle is a little bit off in alignment to her knee. So her leg likes to kind of sit in this external rotation.

So we're gonna observe her move without the thigh moving towards internal rotation and see what happens. That's about it there. So not much motion and she's working quite hard and come back to the neutral. So we're gonna help that by introducing a muscle energy technique for here. So I'm going to take the foot and she's gonna move into a range that's up to a barrier, which means she's not gonna supinate her foot and she's not gonna move her thigh in.

So it's a true rotation happening at the knee. And from that point, I'm gonna say, I'm gonna push you further into internal rotation, don't let me do that. And she's gonna try to turn the disc out. So her toes are going out, her foot's trying to turn the disc out and I'm not allowing that to happen. So we have an isometric contraction happening in the muscles and tissue that externally rotate the tibia.

We hold for five seconds, she relaxes that and now I let her move into a little more internal rotation. It's very small. That's enough. I watch for the forefoot so that her toe doesn't come off the disc and we do it again. I'm gonna push her into internal rotation.

She's resisting by trying to turn the disc outward. Try to relax the toes, do it from the knee. Go ahead and turn out. Hold, it's hard. That's it. Keep on hold. That's it.

Hold, hold, and then relax. And then turn it in. Oh, that's good. Okay, stay there and we're gonna do it again. I'm gonna push in, you push out.

Try to turn the disc outward. There. Did you feel that up here? Yeah. Very good. Now she found the muscles that actually do that and then relax and we're gonna turn in again. Very nice.

And one last time she's turning the disc out, I'm pushing the disc in which creates no movement but an isometric contraction in her whole leg. And then she relaxes and turns the disc inward. Oh, there's the freedom. Usually it takes three to four times. Now she's gonna come back and relax here.

Okay and then turn the disc in, much better rate. There, good. That's enough. Good. Now see if you can find a neutral position. So turn in and then come back.

A neutral position would be lining up through the second toe, second and third toe and the knee.

v.2.5

We're gonna work on the reformer with the Functional Footprint. This is a rotational device that was created and invented by Jean-Claude West. And there are many uses for this other movements to do but what we're gonna do is work on the internal rotation of the tibia with knee flexion. So that we'll be activating more of the medial side of the leg, the medial hamstring and popliteus, but of course we're not isolating muscles per se but we're trying to balance the recruitment of the knee flexors and also improve the strength and mobility of internal rotation on the tibia.

And this is for people who are really more dominant in the external rotation of the tibia. So we're gonna place this down here and the foot is placed on top. The heel is on the center line and there's a center line for the second toe. The knee is in a slightly extended position but not fully extended. And the motion is gonna be that she's gonna rotate the foot plate inward a little bit, that's it the print, the Functional Footprint.

And I need for you to get your weight on the inner heel here so that the talus is in that neutral position. So the rotation is not happening from the foot doing supination but it's happening from the actual motion of the tibia spiraling in and then the femur is gonna maintain a relative external rotation. So we have a spiral outward with a spiral inward. We're matching up the tibial tubercle with the center of the knee and the weight's grounded through the foot, especially the inner heel. We have one blue spring on the reformer and Amy's gonna pull the carriage, flexing her knee and drag it towards, and just to a vertical position.

And then slowly extend. Again a little bit longer on the eccentric contraction there. So a little bit more adduction with your legs especially as you extend your knee. So we want that relative spiral out of the femur, trying to maintain that internal rotation. This is actually very difficult state, that's far enough.

Ground your inner heel, keep the spiral out especially when you straighten the knee. Yeah, so when the knee is extending we wanna just emphasize that spiraling out. Excellent. So you can do 10 to 15 repetitions of this. Excellent. Very good, Amy.

v.2.6

So we're gonna activate the medial side of the leg through this little mat hands-on exercise, and then get on the Wunda Chair and load it a little bit more for the strengthening. So the client lies on their side. The top leg can be supported on a box or a roller, something to have the knee and the hip fairly level. And the heel, what's important is that the heel be in line with the sit bone here. And the knee is just slightly bent.

And I'm gonna place my hand on the center of the calcaneus so that the center of the tibia, the weight is gonna come through the heel through here. And then what I'm gonna cue her to do is to press her foot into my hand and slide my hand away. So she's got to keep sliding and then what you're gonna feel is that this starts to activate here. Now keep the resisting. So I'm pushing in and slowly bend the knee and keep resisting.

And we're just gonna repeat this. So pressing my hand away, keep the resistance as the knee bends slightly and the whole time as she's going back and forth, just keep moving, you wanna watch that the heel stays in line with the sit bone. There's an action of the hip, the knee, sorry, extending by hip extension. So we want both hip extension, knee extension through this activity. What most people will do, let's pause for a second, is what I call kicking the ball.

So they'll do it from their knee. So bring your foot forward as you straighten your knee. So that's to me like you're kicking a ball. So this is not how we want the knee to straighten. We want the knee to straighten from using the posterior hip through the heel.

So we can repeat this until it really starts to come up and you start to feel that activation. And then after about 15 repetitions, we can take it onto the Wunda Chair. So let's stand up. And you're gonna sit. We need the box so we'll put the box over here.

Excellent. And you're gonna sit on the corner of the chair. Your right foot's on the box and the left leg on the chair. So we're gonna start in the down position, so we're gonna push down. Excellent. Okay.

You feel equally weighted on your sit bones? Great. Now what we're gonna do here is similar action that we did on the reformer. So we want to encourage is a little internal rotation of the tibia. So go ahead and turn in.

Bring your heel outward, heel, just a little bit without supination. And now hold your own thigh like we did on the reformer. You wanna keep the femur in that externally rotated position. The tibia slightly internally rotated can be five to 10 degrees, okay. And let's scoot you this way so you're to use right over your talus, that's it.

So we want the force to go through the tibia into the foot onto the pedal. You got it? Yeah and just don't lean forward though you're looking, yeah. So I'm gonna let go of the pedal, you keep pressing down and you're gonna find that same activation of the medial leg. And then like you did with my hand, keep pushing down on the pedal but let the pedal come up.

Correct and then press it down. That's it. And kind of squish, I always say squish it at the bottom. So you wanna really push at the bottom. And when you do that you'll start to feel this activation more on the medial side of the leg.

Good and you can resist and bring it up a little bit more, get a little more range and press down. And this is the strengthening loading exercise here for the inner, well it's the whole leg really, right? You feel your whole leg working, the quadriceps through but primarily also trying to get that traction through here working. Okay. Good.

v.2.7

So I'm gonna show you some very specific cuing on foot and legwork on the reformer so that we are recruiting the patterning that is appropriate for the function of full leg work.

So we're gonna show you in a neutral position which I consider right where the heel meets the cuboid bone right at here. So the foot is placed on the bar so there's heel contact but also at the area where the cuboid bone is. So both feet here. Now, one way to test to see whether or not the foot is placed well, if we transfer weight, if I put pressure on the top of her thigh, the weight should move through the tibia onto that talus and then through the heel. And it's too high, let's say it's too high on the heel, when I push the foot's gonna point around the bar.

If I'm too low on the heel and I push she's gonna be moving into dorsiflexion bouncing here. So I wanna find the spot where she really can feel solid and as she transfers the weight through the foot, relax and I move it just a little bit. So stay on this part of the foot and then there we are nice and solid. This is what I'm looking for. So as I press, she has that contact.

It's a good tactile cue to also teach the client where to feel their body weight into the bar with their feet. So as they initiate, they're pushing out, there's a sensation that they're gonna be pressing into the feet. Okay. Then we want to initiate the actual, it's like standing up out of a chair. So the first action is gonna be hip extension.

So what I say to a client is this, I say, "I'm gonna move your leg in this direction." And then I placed their foot back on making sure they're in a good position again. And I'll say, "Okay, I'm gonna do that again but don't lift your foot off the bar." So as I start to push, she's resisting and can feel strongly that hamstring engagement there. And then I repeat it on this side, it takes them one time to feel it. So that's the action. So when they're pushing out, the first thing they should do is to feel the feet and push through the back of the leg and then slide the carriage out completely until the legs are straight.

And when the legs get straight there should be a pull of the patella up through here. If there's a co-engagement with the hamstring and the quadricep, the tibia doesn't drop into a hyperextension. Now from this place what I wanna see is a different motion coming back in. The first thing should be is that the knees unlock, they unrotate from that screw hold mechanism. They unlock and you can feel how that's coming from the back of the knee.

So it's popliteus and the hamstrings start that action and then the femur sinks into the socket, into that posterior glide. The tibia is and to line up the knees, you notice some people's knees go in when they're coming in and that's because they're not connecting the feet through the hip and they're missing the rotation at the knee. So a good cue to bring the rotation back into the knee I'll show you. So first she's got to push out. She initiated from the back of the leg, pulls up her patella.

Now I'm gonna place my hands on the shins here and I'm gonna ask her first to start the knee bending, not the hip, now pause. Now feel the weight of your shins moving away from my hands as you're coming in. So pull the shins back, pull the shins back. Great, so the action is coming through here. And then I get this rotation that's happening at the tibia.

So I'll go over the cues again. It would be press here. Pull up the kneecaps. Release the knees slightly, start to bend and pull your shins away from my hands. Now in a class situation or if a person's working by themselves, or if you don't wanna be touching and pushing here on the legs, you can take a band, a very strong TheraBand works nicely.

And take it mid thigh and I'm gonna give it some resistance. Hold on. Wait. Okay. So what I want the client to feel is I want them to feel the thigh moving in the direction of the band. So I'm cuing the bones to move that way so she's gonna press her thighs towards the band and slide the carriage out.

And then she's gonna release the knees first, it's like unscrewing them and still keep pressure on the band. And that helps the head of the femur sink. Very good, pressing on the band fully elongating, pulling up the patellas, nice. Now keep pressure on the band as the knees unscrew and the femur sit in the socket. Very good.

And rest.

v.3.1

The hip sway assessment is to feel for the ease of motion in a swaying lateral and medial direction. So hold your elbows here and place your hands at the greater trochanter on the side of the hip. And you just do a passive movement. So Amy, I'm just gonna move you from side to side, you don't have to do anything.

Just allow me to push you over. It's a very small movement but I'm feeling for ease. Does she go easily to the right as she does to the left? So when she goes to the right I feel a little bit of resistance in her body compared to the left. The left is very sinewy, like she could keep going over and over.

So that's the first thing. So her preferred way of swaying is to the left. When I sway her to the right, the other sensation that I'm listening for is how her greater trochanters are moving. So the head of the femur when she goes to the right she'd go lateral on the right hip and medial on the left. And I feel that the left femur doesn't sink into the socket as well as when she comes towards the left.

I really feel that greater trochanter going deep into the socket on this side and she comes out on this side and that's also can be reflected in if you watch her feet as well in the sense of the supination and pronation of the feet. Okay, so let's turn around because I also want you to notice how the ribs and the pelvis work with the sway. So if I come in this way and she sways to the right, what we should see is a five degree drop of the left ilium and then her ribs should shift to the right as she does that. And then come back. And when she goes to the left, remember that's her preferred side see it's very easy for this ileum to come down just a few degrees and her ribs move over to her left.

And come back. So we'll do that again, dropping. Yeah. So it's not something you can make happen. You just wanna notice that this is confirming her ease to the left.

So we get that medial glide, lateral glide, the five-degree of hip drop on this side, and a rib translation to her left. And these are the things we wanna observe. So we would be working with her on a combination of movements to help her enable her to drop this hip a little bit more with a rib translation to the left.

v.3.2

So we're gonna teach a client how to feel the deep hip and the motion of the head of the femur drawing deeply into the socket posteriorly which happens as you go into hip flexion. So one could say that it's a initiation of the iliopsoas that draws the head of the femur posteriorly into the socket.

Now imagery is the most powerful tool here because it's not a large movement. It is an intention in the body and this is where the imagery helps with the client. So straighten your legs out and I'm gonna give you a visual. So, just gonna hold the pelvis and here's the femur. So what I'm gonna be doing is holding the femur and I'm gonna very gently kind of traction it out, that's my intention.

So I'm showing you on the skeleton it won't actually move that much because this is a model but you can get the idea that I'm drawing the femur out of the socket. And then the image is the client just thinks of the bone drawing deep into the socket. So it's a feeling as if the leg is getting shorter in some ways but there is minimal activation on all the superficial tissues. And it really is more of imagining a bony movement of the femur deep into the socket. So let's bend the knees again.

All right and you can actually straighten this leg. Let me put this down. Okay. So you sit next to your client at their feet and we want the knee at more like more than 45 degrees, just wherever it's comfortable, but the knee needs to be at 30 degrees in abduction, but you can play with the angle. So everybody's hip surface has a slightly different shape to it.

So for the client to actually find what I think of as the line of the femur drawing deep into the socket will vary depending on the shape of their bones. But in general, you want about a 30 degree abduction of the femur and then we'll play for it with there. So first I've given the imagery to the client and then I'm gonna draw it out. You wanna make sure you're really holding the femur, not the knee. So you wanna hold the femur and I'm gonna pull the femur out.

I'm intentioning that. And then what I might do is just say the client just relax and I'm gonna let go. And then I let go. And they can kind of feel how it recoils back into the socket. So I can pull it out.

And I'll say can you feel how I'm lengthening the femur out of the socket? And then when I let go, how it kinda falls back in, it's like a natural recoil. And they will say, yes, I can feel that. So now we're gonna be imagining, I'm gonna draw it out. So imagine now that you are drawing the femur deep into the socket and I'm giving a little bit of resistance.

So she has to drag me along. That's excellent and the leg feels like it's sitting in the socket better and then relax and I'm gonna do it again. And what you'll start to notice as we repeat this, go ahead and draw it in. Correct. You're gonna notice a toning that starts to happen deep in the core.

And you wanna also notice that there's no tensor fasciae, a lot of tension here, no hip flexor tension. It's happening deep within the hip joint. So as she's doing that, she's drawing it in which as you can see, if this is an activation of iliopsoas the combination or synergistic activation is also a transverse abdominis and internal oblique, and all of that comes in. The myofascial core gets engaged and we're also working with that glide of the femoral head helping the femoral head sit a little bit better in the socket. And it gives the person a wonderful felt sense on how to initiate their hip flexion.

v.3.3

Okay, so to help find the psoas and to cue the client how to feel it and engage it, have the client lie down. Now in practice, I have this knee bent so we're usually in a home position normally in our practice. But for the sake of seeing it we're gonna straighten the leg down so you have a better view. So you place your hand on the soft tissue in front of the groin right here, just very gently. We're not pressing or digging.

It's just resting your hand on the pelvis. I have this part of my finger here on the ASIS and then the fingers are just resting on her tissue. And then you hold the knee and you give a sensation of a posterior glide of the hip. So I'm giving a little bit of weight into it as I lean my body and move with her and her leg is relaxed. And then rest the leg on your chest this way.

So I'm comfortably holding her legs so she can really relax and let go. And then I will ask the client to simply draw the knee and I tap my fingers. Draw your knee up into my hand pulling the knee towards your chest. And then I get them to feel a little sensation with my fingers here and say, "Can you feel right under my fingertips an engagement?" And usually they say yes and then relax. And then your hand can also feel to see if any of the muscles on the lateral side of the leg, like the TFL is contracting.

And if it is, do a little bit of a circle to set the femur in the socket. Just nice and easy to go in any direction. And then you come back to a more neutral position and you can guide with your hand a little cuing and again, bring the knee towards your chest and draw up from here, much better and hold it. And relax.

v3.4

We're going to do the lean back with hip eccentric contraction.

And the point of this is to train the eccentric contraction strength of the hip which is necessary to have in the gait patterning. So we're going to lean forward and it's a passive action. So grab your right leg and lift your leg up. So the leg is relaxed and then come to an upright position. And now the femur's gonna stay right here and you start to lean back.

So we're doing pelvis on femur hip extension. And then let go, hold it, and lower down four counts. Four, three, two, one. Use your hands and push yourself up. I don't want her to sit up on her own accord because that would create hip flexion concentric contraction.

So it's important to have the hands to push yourself up. So here we go. Lean forward, hold the leg. Lift the leg. Good. Come upright, lean back.

Let go. Hold it. And slowly down, four, three, two, one. Use your hands and push back up. For a training effect we wanna repeat the same side several times. So let's do the left leg and lift up and lean back.

So we got pelvis on femur. So we do wanna see a bit of the ASIS moving away from the femur. Let go. Good. Four, three, two, one. Hands push up and repeat.

Lean forward. Lift the leg. Leg is heavy. Good. And now leaning back creating that eccentric contraction in the trunk. Lowering the leg, increasing the length can think of it as an eccentric psoas work if you wanna name one muscle.

Good and one more time. Lean forward, up. This is a wonderful home program to give clients who have hip issues. And good. Use your hands and come right back up.

Excellent. Perfect.

v.3.5

So this technique is a muscle energy technique to help release the adductors, specifically the adductor magnus, but also will improve a medial glide of the hip joint. So we have the trapeze set up with the long purple springs and I put a fuzzy around the loop just for comfort. And the person lies on their side in good alignment and good form and I've got the foot on my hip so I can support the leg at this angle and I've got the support of the knee here.

So the person can relax here so that I can hold. And then you can play with the angle of the hip either back or forward. See I'm moving my pelvis so that I can make a decision. I'm gonna start her like here. Here feels like there's too much of a stretch going on.

I want our nervous system to be in a more released position and state. Okay, so what she's gonna do now I want you to press down on that fluffy under your leg and I'm supporting her knee. It's gonna move down a little bit but I want her to feel a contraction. She's gonna hold it. Perfect. We count for five, four, three, two, one and then she stops contracting and relax, and reach out of your knee a little bit.

And we're gonna go up increasing the length of the adductor and improving a medial glide. Now, we're gonna stay at this level and she's gonna press again and press down and I'm gonna hold it there. One, two, three, four, five, and then relax. Great. And I'm gonna reach out the knee just a little bit and it's gonna make a little curve path upward.

So I feel she's deepening a little medial glide in the hip which is good for the deep hip abductors contracting. I'm gonna hold this level. She's gonna push down on it again. It's the inner thigh pushing onto it. It's great. Hold.

Two, three, four, five, and then release. And we're gonna lift up and allow the hip to glide and open and lengthen the adductor there. Now, if we straighten the leg, come back down. If she holds the leg straight now we're getting a little bit more of the other adductors and again, you can play with the angle of the leg depending on which part of the inner thigh you're looking to release a little bit. So we're gonna go here a little bit more forward thinking a little more pectineus and adductor longus kinda feel.

So go ahead and push down on the fluffy here and hold. Two, three, four, five, release. And I'm gonna allow her leg to go up again and I'm gonna take it back a little bit to get a little more length in there, beautiful. And again, push down two, three, four five and then relax. And we're gonna lengthen up.

So she's moving with me but very slightly. Not a lot of effort but a little effort. And one more time pushing down two, three, four, five, and release, and lifting the leg up and bend the knee. Great. It's a good release to do prior to doing any kind of side leg lifts or side work on the reformer or on the Cadillac.

It frees up the motion of the hip and allows for lengthening of the adductors.

v.3.6

So this is the lunge with a hip drop and the hip drop action actually will create elongation on the one side which will be her left side because her left knee is on the carriage. So we're creating space between the ilium and the lower rib. So that means that we're encouraging length of the QL and the psoas area, the erectors on this side, the obliques on this side. We're also encouraging an anterior hip glide.

So we're improving the motion opening the front of the hip. So we start kneeling with a high bar. She's got a light spring, just a blue spring. You wanna start in a level position here. The foot is very close to the reformer so that when we line up the foot on the shoulder rest, the alignment of this leg isn't aligned.

And we wanna start with the PSIS is in the level position here. So you can see the dots here. We want them level. So for some people they have long legs or short legs. You might have to put a bolster under the knee to lift the leg up.

They may have to bend a little deeper in this hip, the standing like we want it so that we can find that this is level on your person you're working with. So now 75% of your weight is gonna be on the left knee. There we go. And what's that doing by putting that much weight on the knee is it's fixing the femur into the socket here. And then she's gonna start to slide back by flexing in the standing hip, so she's going down this way.

The pelvis just stays level here. Good. You only go as far as before the dots or her PSIS is actually changed. So let's do that again. So for some people they're very tight on the side, it's not gonna be a very large movement. So here she goes, she's gonna put her weight on her knee, and she's gonna sink into hip flexion on the right leg and right there stop because I start to feel that the pelvis is starting to change.

Now, she's not gonna shift in the ribs. In fact, I'm gonna hold here to make sure there's no translation in the ribs, and she's gonna continue sliding the carriage back, dropping this hip. So you will see that the hip drops on the left. Good without translating the ribs and then come back up. Come all the way in, just coming normal, yeah.

No big deal about coming in. Nothing special. All right. So let's do it again. It takes about three times to really get it. So let's give her a break. So come sink into the hip. Good.

And when there is tightness in this area the ribs will translate instead of the hip dropping. So go ahead and I'll reach the carriage back through your, there it goes. See, you just did it. Beautiful. Nice. See, now the hip dropped. Good. That's enough.

I don't want you to going too far and bring it back in. What I was seeing is she started to shorten too much on the right side of her waist. That's not what I'm looking for. So last time going back. It starts to feel easier every time you do it and you only need to do this about three times.

And there she goes, she's easily dropping the hip. Excellent. Beautiful and that's enough. And come back in and come stand up. Feel your long left side now.

Good.

v.3.7

Okay, so here's a movement cuing to line up the legs so that we have activation of the pelvic floor and deep hip rotators without changing the sacrum or pelvic position and giving the client a felt sense of how to engage from the foot all the way through to the pelvis. So what I like to do is have a client start with the internal rotation, feel the sit bones wide in this position. And I'll use a yoga block because it's firm in between the upper thighs for the moment, good. And so they can really feel this kinda opening out and their pelvis on the mat.

Then you bring the femurs in to alignment. You can still be turned in. There we go so it's not splayed out. So we'd have femurs in line but the feet are turned out this way. So what I'm gonna cue the client to do is I'll take my fingers, you place them on the inside of the heel like this and you slowly ask the client to slowly press and rotate the heels inward, putting pressure but not going past the heel going vertical.

So let's do that again. So just very, the whole leg is gonna roll. So press into my hands with both legs. There you go. Now find the block but don't squeeze it.

It's just there for you to feel, so go ahead and again a little more pressure through the heel. Good. Now, pause here. So what I'm looking for is that we keep the little toe on the mat and the big toe on the mat and that heel straight up to the ceiling. And then the engagement come on and put a little pressure without turning, feel the block. Don't turn your heels so much.

It's less pressure than that. I'm trying to find a place of engagement. Here we go. A little more through the block. There you go. Can you feel it from the inner heel all the way up.

It takes about three times for the client to find that engagement that goes all the way up into the sit bones with the sit bone staying wide but the legs engaged. So now we remove the block. Go ahead and turn your legs again. So find the sit bones wide. Now imagine the block is there and start to roll the legs and the heel into my hand, feeling that pressure, keeping the sit bones wide but feeling the engagement of the muscles around that area.

Perfect. A little bit more on this side is a little weaker. There you go. Now, hold that. Excellent. So what we're looking for tone is we're looking for nice overall tone here, not a squeezing tone.

v.3.8

The prone hip extension is facilitating the activity of the foot through the whole posterior leg into the spine which is important for that moment in gait when you're pushing off to propel yourself forward in a step. So we're gonna dorsiflex the foot and as best the client can, the toes are underneath and the metatarsal resting on the floor or the mat and let your knee relaxed and be down. So here you're gonna see some variations of that tibial rotation again and then with the stiffness of the toes, you have to be gentle. We don't wanna create a crunching of the toe joints, so whatever best they can do. And then the pelvis will be anchored into the mat as well.

So place your hand on the back of the heel in the center. And the cue is to Amy, you're gonna think of lengthening through your heel and push my finger away. And because of that action your knee is going to straighten. So that will increase the dorsiflexion here. Now the kneecap should be pulled up and you're gonna keep the femur right here and slide your toes and point the foot.

Great. So the activity's happening through and you'll see it all the way up and through the spine. Now think of reaching your heel behind you as the toes come under, keep that patella pulled up. And then put the toes down and then release the knee. Great, so that's the system here in order.

So you press the heel away, make sure it's pressing, bend the knee again. So show us what you just did. Don't press your heel. Yes, exactly. So what we want is that really it needs to come from the Achilles, getting longer. And the increase in one of the restrictions is the dorsiflexion, right?

And then the leg is engaged including the patella in the front and you're gonna slide the toes. Excellent. Think of that rear foot, heel reaches back as you dorsiflex again and then release the knee. And now we can repeat it now that you have it. So you reach, nice, point holding the leg.

Dorsiflex, reach the heel and bend the knee. Okay and again, reach back, point. Now in your dorsiflexion keep your patella pulled up. There you go. Down and bend.

Let's do one more time. Take your time, reach. Point, excellent. Reach the heel back and bend the knee and rest. Let's do the other side.

So this is a good home program. Once the client can feel the patterning, so we're setting up a muscle patterning here and a movement patterning through the dorsiflexion, the engagement of the femur. And the dorsiflexion, plantar flexion, and releasing. Reaching back. So we get that toe in terms of the push off and the propulsion phase of gait.

So you can do 10 to 15 on each side. Excellent. And rest. Good.

v.4.1

Observing taking one step can give us a lot of information on a person's movement pattern. So I placed a dot again at the TL junction and S2 for a reference point in terms of the spiral of the thoracic rotation with the pelvic motion with one step.

So just take one step forward on your right foot. Good and then just step back and we'll do it again. Take a step forward on the right. Good. And step back.

Let's do the left side. And step forward. Very good and come back. And so those two dots for her are staying really relatively stacked over one another. So some of the findings that we would be observing, go ahead and step one more time on the right and just pause for me.

Okay, so there is a limit compared to her other side of this thoracic rotation. It's the manubrium, the upper ribs, the manubrium rotation which affects the arm swing of the gait pattern. That's it, she's just having to make that happen. Yeah and then when you do that, we start to see that so it's, again, it would be that translation to your left a little breathe into that side. Not too much. Yeah.

And then push through that big toe on that left side so that hip can drop. There you go. You see? And now come back. So see if you can find that movement as you step forward on the right and feel your manubrium moving to the right. There. Very nice.

That feel a little different? Yeah. And come back. So one more time. So I was just cuing her through the pattern that I've discovered over the time of working with her and your glutes really come in nicely there. Let's go on the other side. Yeah, that seems more natural to you in terms of the preferred movement and that's her thoracic rotation to the left.

Yes. Very good. And come back. Good. Last time And come back. So observing that one step, you can determine, you can see the thoracic rotation. You can see if there's a deviation of the ribs in some direction laterally side to side.

And also you can notice through the pelvis how the foot is pushing off, how that hip extension is, and how the function of the posterior hip is engaging there.

v.4.2

The hip drop assessment is to look at how the unleveling of the pelvis occurs and how the spine responds and the hip joint. Pelvis on the femur action and rocking and how the spine will create its adaptation. So in gait patterning, as we're walking your pelvis is doing a little bit of a hip drop and a hip hike, does this figure eight motion as you're walking. So our pelvises need to have some ability to let the ilium go down and to go up.

So when we have a restriction there, then the spine will change how it adapts. And it will then perhaps cause some discomfort somewhere in the body or put stress on a joint somewhere in the body. And that's part of our lesson here is to learn how to identify that. So let's turn around. Now I've placed a dot at the TL junction, that's T12 and also at the S2 of the sacrum.

And these two dots in general, unless you have a scoliosis, will be right on top of one another. Let me pull this up a little bit. There we go. Okay. So what you'll observe when she bends the right knee slowly. Okay. Pause right there.

That's very good. The two dots are pretty much staying over one another. So what that means is that her lumbar spine has moved in this direction and then the thorax has moved in this direction maintaining these two joints in the center. So straighten. So the curvature happens balanced in the thorax and the lumbar.

So let's do the left side. So as she bends that one, okay, she's doing pretty well. I think go a little bit further. And then she goes into a rotation forward and the dot, you can see the turning, right? So come back up.

So the left side, she starting already with a more elevated left side so it's a little bit more difficult for her when she bends her left knee. Let's do left knee slowly. It comes down, so pause. It's almost coming down to level, okay? So it's not coming down below.

We only want like five degrees. And we can see that what she's doing, this is remaining pretty well which means she's not over moving in the thorax, but what's happening which might be difficult to see is that she's doing a rotation in this area here and come back up. So her non-preferred side is this left side but part of it is her structure, the fact that it already starts in a position. So we would be doing our movement patterning designing her movement class around trying to get the hip to lower, to get the lumbar spine to move towards that side and her thorax to move slightly to the right here. Okay, that would be our approach.

v.4.3

The pelvic clocks are traditional exercise for mobility of the pelvis and all planes of movement. So a pelvic clock you imagine wearing a clock and the top of the clock normally is up around the navel. And then we have the pubic bones, that's 12 and 6:00. So go ahead and do 12:00, Amy and that brings you into a posterior tilt. And then as you rolled towards 6:00, it will bring the pelvis into an anterior tilt.

So one more time, 12:00 also gives you hip extension and 6:00 will also give you hip flexion and then you can just level your clock out. Then we have a three and 9:00 across. So it's just from one pelvis side to the other side. And so this rolling back and forth action. So you'll notice that when a person's doing a clock, how much easier it is like for Amy is to go to the right than it is to the left.

So she over moves, don't push it too much, but it's a little more difficult for her to go to the left. And that has to do with how her hip joints are imbalanced a bit. And also the lumbar spine side bending with the thorax that we saw in the hip drop. So we're doing that. Now, what I wanna do is put the intention more not on the pelvic clock, which is a lumbopelvic hip complex motion, I'm interested in is the intrapelvic torsion which becomes more of a sacral motion.

And the sacrum moves in a coupled movement of rotation and oppositional side bending in the motion of flexion and extension. So what we have here is the clock. Okay, I have diagonals on the clock. So if this is 12 and this is six so we're thinking more of the size of the sacrum. The sacrum lies right about here.

So we have 12 and six, three and nine. So I'm interested in more of like 1:30 and the 7:30 and this is more like 11:30 or 10:30, and I don't have to be that specific but, and this diagonal here is more like 4:30. So we follow the clock would go 12, 1, 1:30, 2, 3, 4, 4:30, 5, 6, right, 7:30, 8, 9, 10:30, 11, 12. So it kind of this kind of circular, do you understand that? So we're looking at this diagonal and this diagonal.

So we can give up all the numbers and just think of this diagonal. So let's just start with a little sacral at 12. So you feel the posterior rotation 12:00, yup, and then to 6:00. So it's a much smaller, that's perfect, much smaller motion than when we did the whole pelvic clock from the lumbopelvic hip joint motion. There is still the lumbar spine and hip joint motion but it's smaller and you can kind of feel, it becomes more like SI joint-ish kind of motion.

Okay, great. So that's the 12 and six. Now let's take it on a diagonal. So let's go to this diagonal which would be rotation left and posterior rotation, okay? Now, if you follow the diagonal to this corner, Amy, you're going into extension rotation right.

So follow the diagonal back. This is posterior rotation to the left, anterior rotation pelvis facing right. So you can see that motion. And this is the motion that the sacrum is making while you're walking if everything's moving well. And then as you're watching someone do this, you can determine which is easier.

Amy really likes to go anterior and rotation right. That's her pattern, that's her more preferred way of moving. It's a little bit more difficult for her to rotate left and go posterior. So in an exercise, I'd say, come back to what you think is neutral and just repeat rotation left posterior rotation. So we're getting this to go this way.

So it's a more of oblique action. And then just come to neutral and repeat that. So come to this diagonal, kinda rotate your pelvis to the left so we can repeat that. Let's see how you look on this diagonal. So this is flexion though, let's go back to neutral.

So posterior rotation here and now you posteriorly rotate and pelvis facing to the right. That's also pretty good for you. Now come down, let's see extension. Rotation left, a little more difficult. So both rotations to the left are a little more difficult.

Exactly. Now she's doing a great job keeping her femurs pretty steady here so let's go through the diagonals again. So let's start over here. So we're gonna go rotation left in that direction. Now what needs to happen on the feet here is if she can think of just planting the outside of this foot and the inside of this foot as you rotate to the left, there you go.

So now we're getting a little bit more pelvic rotation in the hip joint there and then come back. Now, when you go to the other diagonal, switch your feet outside and inside, does that help with the motion? Yeah. Now switch outside inside as you rotate to the left. Uh-huh and then switch outside inside as you, that's great, Amy.

That could help facilitate improving more of the motion. Now come back to the neutral and we'll go to the other diagonal now. So we'll go rotation right with the posterior rotation. So what do you have to think about the inside of this foot and the outside of this foot. 'Cause we're doing internal rotation here and external rotation here relative to the pelvis and then come back and now you're going into extension, right, rotation left.

Uh-huh so inside of the foot and outside of the foot here and then come back. So she's not really moving her feet so much but she's planting the weight on the feet which helps you facilitate a better motion through your pelvis, correct. Great and come back to neutral. Very good.

v.4.4

The combination of leg reaching and the rotating hips is stimulating and activating the whole lumbopelvic hip joint complex especially for gait patterning.

And we'll be able to assess as we're observing the movement. So I'm gonna use a ball and Amy's gonna bring her foot up onto this ball, all right. Now, the reason we're on a ball is we're gonna get to roll the ball and do like a leg reach. So if you think back to the hip drop assessment, we're basically doing that movement lying down here but being very active. So she's gonna flex the foot.

And as she presses down on the ball, it's not about tensing. The knee is gonna be engaged but the idea is to bring the femur closer to the table. So it's a hamstring posterior hip activation, that's great. And then like I did pulling the leg, you wanna roll the ball away, no don't point yet. Roll the ball away. There we go.

So we're creating that hip drop here and with the right hip dropping, she can be thinking about the left side of her rib cage here. And then point the foot. And we're gonna keep the activity of the femur reaching down and then the femur will like draw into the socket and then the hip is gonna come level again. So that's the movement, she pushes down. I wanna see that she's activating here creating that little bit of hip drop with the translation of the ribs to the left, maintaining that length as she points the foot, keeping the activity and drawing the femur first into the socket with a little bit of delay before the pelvis becomes level.

So flex and root down and reach, point. Now find that feeling of the femur moving first. The femur goes into the socket and then the pelvis levels. Okay, one more time. Flex. Reach.

Good, point. Find the femur first, there's a little delay. Femur moves. It's like your leg's getting shorter, pelvis level. Let's do it one more time.

Activate the hamstring, reach. Ribs to the left. There you go. Point. Draw the femur first. You're gonna feel activity in this medial side of your leg. Very good and rest.

Let's do the other side. So flex your foot, there we go. Now this is your left side and if you remember from the hip drop test, it was a little bit more difficult for you to drop that hip. So you're gonna wanna focus on breathing into your right side. So first activate the back of your leg by pushing down on the ball.

Good, now roll the ball away. Create that length. That's it, good. Point the foot. Now stay active underneath and just draw the femur in first and then level the pelvis.

Excellent, flexed. Press down. Engage here. Draw the femur out, ribs to the right, point. Activate the back of the leg as you draw the femur in, that looks great, and try to come level, don't hike. Flex, reach.

Very good. Point. Activate the leg. Draw the femur in. Perfect right there. One more time. Flex, activate, reach, point, draw in.

Nice, very nice, Amy. Okay. Now we're gonna follow this exercise with rotating hips. So you bend the knee, right? And the action again we're doing a pelvic rotation. You're gonna go pelvic rotation to your left, but to do it, hold on.

To do it I really want you to start at your ankle. So I want your knee to reach, so you're doing dorsiflexion, right? So you reach the knee and then the leg pulls out and then the pelvis follows and you roll onto your left side. And you wanna keep the knee over your third toe. That's it and then roll your pelvis back.

So the ribs come back, pelvis comes back, hip joint here. So start from the ankle, reach your knee over the third toe, very nice. And then you roll onto your left side. Good and then start from the ribs, just let the ribs fall, pelvis fall. Great. So this is pelvis on femur again.

So start from the foot. And now we see the pelvis rotating around the femur and you're resting on the left side so there's not a lot of pushing from the back. And then you let the ribs come back and the pelvis come back and good. One more time. So reach the knee, rotate.

Excellent. And coming back. I will say one thing, you can add a rotation of the cervical spine in the opposite direction for gait patterning. So do it again, so reach the knee pelvis rotation and then turn. That's it and come back.

So do that one more time. So we could choose to do it without the head rotating or it's nice to add the full spiral of the spine. Excellent. Let's switch sides. Right. All right. So start at the ankle, feel your foot, reach the knee, rotate your pelvis to the right, rest on the right side.

Good and then start from the ribs back, pelvis, reach. Yeah, so this is your easier side in terms of your rotation of your pelvis, good. And come back down. As a teacher I like to do the hands-on where I give them a little bit of a pull here. Yeah.

And then down now let's add the cervical spine. So you look over your left shoulders, nice and easy. Great and she's doing a great job keeping the knee over the third toe. And one more, reach. And come back.

Good, now straighten both legs out. I'm just gonna do a little bit, just do a leg reach on your right side. And then come back and do your left. Good. Do you feel a difference? Yeah.

And one more time on the right. So this was your preferred side. Okay. Now the left. Very nice and your ribs are naturally coming over. So the combination of the two exercises really frees up the lumbopelvic hip complex.

v.4.5

So I'm gonna work on some pelvic mobility on the reformer using it as a guide to swing the sit bones back and forth to encourage pelvis and sacral motion. So you're sitting upright. There are no springs on the carriage. The knees are over the ankle so we're not in a deep knee forward dorsiflex position. And there'll be no movement of the knee forward and back, it's all done in the pelvis.

So we do the elongation and she's gonna exhale and she's gonna roll the sit bones under. Good and the whole time what I'm looking for is that her shoulders stay right over the hips. And then the sit bones are gonna lead and I'm gonna reach back and I'm gonna see that the pelvis just slightly goes forward. That's it. And sit bones engaging as she curls, rolling the carriage back, feeling the neutral, and then just a little more nutation of the sacrum here.

And then curling back. So you can isolate the lumbar area for its motion and flexion and extension. So keep moving. Here's the extension. With extension there needs to be a little lift of the sternum so it's a full arch.

Good and curling back. Keep curling under, good, and reaching back to neutral. And she did that very well, she kept the elongation, she kept the shoulders over the hips. Most people when they try to go into a roll back or start to curl, they'll tend to start to curl and they'll tend to collapse and start the curl in the thorax. So what we're trying to teach people is to feel that the tailbone is curling under with the pelvic motion as it's coming backward onto the sit bones.

And then rocking through the hip joint, this is also a hip flexion and extension. And so if the hip joint is not moving with the back then we don't get a nice evenly bowed spine. So I'm interested in looking at the hip extension and flexion in balance with the nutation and counter-nutation of the sacrum, and the balance of the response of the thorax as she's curling and arching, and come back to neutral. So now we're gonna change to the coronal plane or side bending of the pelvis which also includes ab and abduction of the hip. So if you notice we have dots on her PSIS.

So what I'm gonna cue her to do is drop the weight of her right sit bone down into the carriage to slide it away. Good, which should bring up this hip, not too high, and then come back down. And what I'm looking for is how much her rib cage is turning or translating and you can see it's doing that a little bit on that side. So let's see what the other side looks like. She's gonna drop her weight down and move the carriage to the right.

Notice how the spine stays, I'm gonna show you with my fingers so you can see. So go towards the right there. So there's a nice side bending happening and the fingers are staying stacked over one another. And when she goes to the other direction, the TL junction tends to move and rotate off of the center point and come back. So I'm gonna have to cue her to try to find that range of motion to begin with.

Wait, wait. Okay, so I want you to inhale into this left side for me as you drop your right sit bone down and try, that's far enough, and then come back to neutral. So we're gonna start in that range that she actually can do. So she's gonna inhale first into this left side as she's moving the carriage to the left, very good. And come back down.

Do you feel the difference in that? Good. What the inhalations doing is putting her attention at the tail junction trying to stabilize it as she's moving. It's like a tail wag motion. And one more time, inhale into the left and roll it. Very good.

And then come back exhale, and let's go to the right, you can inhale as you go and into the right side and come back to center, and go in the other side left, inhaling. try to find, that's it and come back. So I would keep repeating this to imprint this new recruiting pattern that she has, so this movement here. Very good and come back. Now, when I see something like this I would move on to working with the rotation first to see how the rotation motion is and improving that with a little MET and then come back to this to see if this is improved in its side bending motion.

So now we're gonna do the rotation. So I have the carriage loaded so I don't want it to slide. And she's sitting on a back disc and I have the two dots again so we can see what the rotation is. Now, I have two poles too at her tail junction so she can track whether or not she's rotating from the thorax or truly rotating from her pelvis. So it's hip joint ab and adduction again and along with some rotation of the pelvis and lower spine.

So I'm gonna hold the sticks at first. So just simply go ahead and reach your right knee forward and that should bring the right ilium forward and the left one back and then come back to center. And reach your left knee forward which should bring the left ilium forward and the right hip back and then come center. And then the only thing I observe is is she's starting to extend and hinge from the stick. So keep your lower ribs really in contact with the stick in the back, there you go.

All right, so reaching forward of the right knee. Good and come back. Forward with the left knee and come back. I'm gonna feel for the motion. Okay and come back and forward with the left knee.

So it feels like she has more range going this way with her left knee going forward then the right. You seem to be efforting a little bit as you're pushing. The left seems to slide a little easier. So come back. So I'm gonna introduce a little muscle energy technique here with the disc.

So I wanna improve her right knee reaching forward so the hip joint through here. So what I'm gonna ask her to do is I'm going to take the disc and I'm gonna say, I'm gonna rotate you backward this way and I don't want you to let me do that. So I start to turn the disc, she's resisting. We have the isometric contraction happening. Count to five, four, three, two, one and then stop but don't rewind, yeah.

And now reach your right knee forward a little bit more. That's enough. Good. And now I'm gonna pull back on the disc and you resist me. Hold two, three, four, five and then stop but stay there and reach a little bit more. Great, now how are our sticks doing?

Are you rotating? Good. One more time. I'm pulling the disc back, you're going forward. So it's a sit bone action. She's really engaging in the sit bone area to do that along with the spine and the pelvis and relax and come back to center.

Okay, good. Now stay against the stick with your lower ribs. Okay and now go forward with the right. Much better, forward with the left. We almost seem to need to do left now, forward with the right, that's very good.

Forward with the left. I'd like to see it a little more even so I'm gonna actually add a little bit on the left side. So let's come back to center and I'm gonna pull your left side back on the disc and you go forward with your left knee. There we go and hold two, three, four, five and then relax and go forward a little bit. There, watch the stick. Good.

And resist as I pull back, two, three, four, five and relax, and go a little more forward. Watch the stick. We don't wanna twist. Ah, good. And last time pull, two, very nice, four, five and relax and then come back to center. Great and now move your knees forward and forward and forward.

Very good. Forward. Excellent. And come back to center. Usually find that most of the time I do it on one side and it seems to balance out but if you watch them move and the other side seems restricted, go ahead and do the other side. So let's take this away and see if your side bending improves at all.

So here she goes. She's gonna side bend and come back. Now, breathe into that side as you do it. Inhale into the side, there you go and come down. And other side inhaling into the left side and come back.

Okay, see the rotations has improved, that you're not rotating as much but now you seem to be translating a little too much through here for me. So it's more of a side bending issue now rather than a rotational issue. So breathe into the side for me. So come back to center, feel my hand here. So you're gonna stay over here, inhale here, and move away from the foot bosh and move to the left.

That's it. That's all it is. Can you feel that? And come back down. So this is a strong oblique action and not only in the back but the front. So do that again and I want her to move from the sit bone dropping the right sit bone.

There you go. So now you've got the obliques working in the front. So she's working through here as opposed to just shifting, it's so much different. There you go. So now you're recruiting the obliques on that side to work.

Yeah. So this is a training technique to get people to feel that engagement of the side that's weaker in the obliques. That's good and come back and rest. Go to the right just so you can balance. You can feel, see it's so much easier for you to engage in this part than the left side.

Much better and relax. Very good work.

v.5.1

So this is a muscle energy technique to release the pectoralis and latissimus fascial connection in the body here. And the client will sit on the barrel on the lip and not in the well because I don't want an arch of the back. The feet will come under the strap so that we're anchoring the feet.

She cuts the slide the sit bones towards the edge to lie back and we need a head support to support the head here, great. Now I always check to make sure that the pelvis is in a more neutral position and not having an arch is normal, yeah, in the back. Okay. Now the bar here, this is a very dangerous position for the bar. So it's top loaded on the outside.

This is the most dangerous spot for this bar so you have to be very clear that you don't let go of the bar. And when the client lets go you still have a handle on the bar. So you're gonna stand here and we're gonna reach behind this way. And I'm gonna bring the arms to the bar. Great.

Now, she has good flexibility in the shoulders here. So for clients who don't have this range over their head, you can move the bar up higher. You can have a lower barrel or a bolster. So be mindful about the range of motion of the shoulder joint that's appropriate to the client. Now the upper arm bones are kind of spiraling inward this way which is actually an external rotation of the shoulder.

So you wanna make sure that they're not splaying this way, that the armpits are more connected. And we wanna look for the humeral head. Sometimes if someone is very hypermobile and the shoulders is actually not a good technique to do for them because the head of the humerus will actually kind of pop out of a socket here. So keep a mindful, this is for your tight person, not your hypermobile person. And we're gonna roll that in.

So now I'm gonna take the bar and I'm just gonna take up some slack of her tissue. So we're gonna lengthen here a little bit, there. So I feel the barrier here and I'm gonna ask her to keep her arms straight and pull the bar towards your head. So she's doing a lat pec pull downward. So there's a strong connection and contraction going on through the armpit through here.

And then she's gonna let go, that was about five seconds and I'm gonna just lean back, give her a little length and she smiles. Okay and again she's gonna pull the bar towards her with the arms straight which sets up an isometric contraction of the lat and the pec. And then she's gonna relax. Just keeping breathing, good. Yeah.

I'm gonna lengthen again and pull. Good. Holding for five seconds and relaxing and lengthening and if you notice I'm not pulling, I'm just leaning back. And one more time. And I'm being sensitive to feeling what her tissue is sliding, how it's sliding, how it's moving.

And release. So here's a slide. There's a nice skip to her tissue, I'm not pulling super hard. Now she's gonna hold this position. I'm gonna ask her to push the bar away from her and I'm gonna hold the bar still.

So push it away which is activating the opposite set of muscles to set the length that we just created in the lat and the pec. Okay, I have the bar so take your hands and cross them on your chest and just stay there for a moment. I've got it. Very good. Okay, now I'm gonna show you a really easy way. Now that we've released the front through here, we're gonna wanna have her come up without curling up.

So I'm gonna take my hand, put it under her head and take the towel away so she's resting on my hand, right? And you can take your feet out. So what I want you to do is just kinda lean back into my hand. Just gently pressed down into my hand. Keep a little more, a little more down.

That's it, now keep that and up she goes.

v.5.2

Muscle energy technique I also call MET for the lateral trunk. So we're gonna put Amy into a side bend position. We're gonna use a trapeze bar and some manual resistance to use a contract and release technique to create length especially on that left side. In her hip hike assessment, Amy's left ilium was not able to lower itself to drop as I call it.

So we're gonna do an MET technique in here to restore her ability to have that little bit of dropping in her gait pattern. So we're gonna lie over the bolster, the shoulders on the table and head here. So this is creating an opening of the lateral trunk here. This leg is straight and this leg can be bent like this. Now, I'm going to have the bar help as another set of hands to create some length.

I will note that this position of the bar is the most dangerous place for the Cadillac bar. So you have to be very mindful that the client never lets go to the bar, so you need to instruct them on that. So it's top loaded and it's on the outside of the frame. And you bring the bar to the client and have them hold onto the bar. So I maintain holding the bar for the moment until they feel really secure and that I've got the shoulder in a little bit more of like an externally rotated position overhead.

And they relax. The bar is actually creating the little bit of traction. So Amy, you're not to let go of the bar until I instruct you to do so. Okay, great. Now what I'm looking for is shoulder stack innominates or pelvis stacked with here.

And the hip extension is gonna vary to where you're gonna put this leg on the person's extensibility of the front of the hip. So what we wanna do is we want the contraction to happen more in the posterior lateral side of the trunk. So we're really focusing on the erectors on this side, the internal oblique on this side, we can just name everything here, quadratus lumborum on this side is what we're trying to lengthen out to create more slide and glide of the thoracolumbar fascia. What people tend to do is to be dominant in the abdominal muscles. Can you do that first?

Can you contract in the abdomen? So they'll hike the hip up which is what I'm gonna ask her to do by contracting the abdominals in the front. And what I'm gonna be asking her to do is to actually hike the back of her hip up, very good. See, she can do that really well. Okay. So the angle of the legs, so I'm gonna lift the leg up, hold it by the ankle and I'm gonna play with this angle because what I wanna be able to do is facilitate, as I said, the contraction of the back here.

Now, whenever a person does this MET technique, they usually have to reset or I will reset their pelvis. So we're gonna start here and this is a nice relaxed position. So Amy, can you feel me lengthening your leg a little bit away? Okay, good. So what I want you to do is to hike the back of your pelvis here up towards your ribs and contract and then I hold the leg still so we're creating an isometric contraction.

We hold for five counts, two, one and now slowly let go of that contraction and I'm gonna lengthen. I'm just leaning back. I'm not pulling with my arms. I'm just kinda leaning back to feel that length of her tissue. And always, always the pelvis rocks back a little bit.

So I always say let's roll forward a little bit. That's fine. Now watch she's doing fine but some clients' legs will roll in so you actually have to kind of set the femur in the socket there. Okay. Let's do that again. Hike your hip up from the back. Very good.

Hold two, three, four, five. Now slowly let go and I'm just leaning back. I'm not pulling, I'm just leaning. Good and Amy can feel how the bar's pulling her in the opposite direction. And again, hike the hip up two, three, four, five and then slowly let go.

Excellent. We'll do one more. Usually I do about three repetitions. This is four. Good. Hold it and let it go, go go. Now I wanna do a reciprocal contraction so I'm gonna keep the length that I created and you're gonna push your foot onto my hip here.

So push me away, Amy. Push away. Push. Excellent. So we're setting that new length of her left side. Okay and bend. And we'll just place the leg down.

You can also take advantage of this position between the rib and the pelvis and use the bar to kinda give a little extra length here and you can add an MET for the lats that connect into the thoracolumbar fascia. So keeping your arms straight, go ahead and pull the bar towards you and hold. So now I'm resisting the bar because I'm trying to create an isometric contraction here for that five seconds. Now she's gonna stop contracting and she's gonna allow me, I'm just leaning again. I'm in a lunge position and I'm just leaning.

Great and again, pull two, three, four, five and then slowly let go. Very nice. Oh yeah. One more. Pull two, three, four, five and then relax. Now I'm gonna pull the bar into you, Amy, and you're gonna push the bar away.

Push it away. So we're setting the length of the arm, the lat into the thoracolumbar fascia and then relax. Okay. Bend the knee. I've got the bar so you can let go. Very good.

And you probably should do the other side.

v.5.3

We're gonna do a JH Pilates classic exercise called horseback on the barrel except for this is a variation of it that has a thoracic and lumbar focus. So Amy's gonna step up and we're gonna work on left lowering of her ilium and that rib translation to her right. So the legs are as parallel as possible. All right and she's sitting and let's place your hands behind your head.

Great. So at first we just wanna notice that her weight is equal on both sit bones, right? And she has a nice plumb line here. So the first action I want you to reach your left leg towards the floor so that we're trying to create that five degree lowering, the hip drop, that was great. Now contrast that with a translation to your right here.

So we're asking the lumbar spine to move to the left and the thorax to move to the right so that that TL junction and S2 actually stay in that alignment and then come level. That's it. So the leg reaches to the floor trying to create dropping of the left innominate which is actually a hiking of the right one with a breathing into the right rib cage. And then level yourself. Now, sometimes having a tactile feeling to press into you could use a TheraBand across the ribs here so the client can see and feel the expansion into that side.

It kinda helps facilitate that. So here we go, we reach to the floor dropping the left innominate breathing into that right rib, and then relax. And again, reach to the floor and translate. And what Amy is doing really, really well is she's really keeping her body in the central plane here. She's not going into extension.

And reach and reach down to the floor. And relax. So we'll do one more. So we're working with her non-preferred side of the dropping of the hip. There you go.

And that mobility of the thorax, okay. Now, after doing a few repetitions to help improve that motion, now you can do the horseback. Go ahead and the hands behind your head's fine, you can keep it there. Now just find bilaterally you're gonna engage through the pelvis and then sitting back up. Good.

Now just try to go straight up now. Let's just go straight up. That's it, feel the levelness there and come back down. Let's do one more. So what we're looking for now is that she has symmetry on both sides of the ribs and symmetry through the sit bones there and rest.

Excellent.

v.5.4

The lean back series is a variation similar to the short box series on the reformer, except for we're just doing it on a set of boxes or you can actually sit on a stool. And it is challenging the trunk motion on the legs. So I'm interested in the trunk remaining in its alignment and the leaning back comes from the pelvis on the femur. So the idea that we can do, this is pelvis on femur so it's like a hip hinge here that's leaning forward.

Then the pelvis rotates around the femurs, and then you go into hip extension and the trunk is moving around those femurs. So we're not doing a spinal arch or flexion. It's really the pelvis and trunk rolling on the femur heads. So it's a sequence and you can build up to doing the more difficult ones as we go. So simply we're gonna start by just being upright and then finding that leaning back.

So you feel how the pelvis is moving on the femurs and then you come back and then you can lean forward. So it's like a hip hinge here without the feet coming up. Yeah. And again, just rotating the pelvis, good. And forward.

So you get the feel for how that motion's happening in the pelvis, okay. Then we're gonna do it with one leg. So very good, lift the leg and now lean back and come forward and down. That's good and again, good. We're alternating legs.

This is good, Amy, good and come back to the center and down. And what we're looking for, do one more each side, is how the pelvis moves away from the femur creating a little bit relative extension and then switch and excellent. That's all right and come down, all right. Both legs so you wanna, you can hold so that body's in the lean position, excellent and the legs are up and then you can reach and hold. It's like a Pilates teaser position and then lower your legs and then sit upright.

Let's do that one more time. So you can lean back, get your trunk position, legs up. Good. Reach forward. Lower the legs so we're getting that eccentric contraction and coming back up. Great. We're gonna do rotations.

So hands behind the head. So we're gonna start with the lean back and now you're gonna rotate to your right. And as you do that you wanna feel like you're leaning to the left to create that rib translation, yeah. And come back to the middle and twist to the other side. So she's doing a great job of that translation of the ribs and the anchoring of the opposite pelvis.

Try one more time. So leaning back, when she rotates right she's leaning a little bit to her left and anchoring the right sit bone. And when she does the other side, same idea. There's a lean here and anchored on the sit bone and come back up. All right. Difficult.

Two legs or one leg. Yes. Let's do one leg. You got it. That's okay. And then we're gonna rotate towards the leg. Come back to the center, rotate away.

And there should be a little more translation here. Breathe into that side. Excellent. And come back and center, leaning back. Excellent and turn towards the leg. Translate.

That right translation that we've been working on so you wanna think about that when you rotate to the left. Great. And now both legs and coming back. Good. And gonna reach the arms. Okay. You're gonna go for it?

She's going for it. Okay. So her preference is to rotate right in the ribs so now as you're doing that, keep that translation here. Nice. So we get that oblique work here. Feet down, eccentric contraction, and come up. Excellent.

You can build on it, you don't have to do many reps. If you did the whole sequence, you could do two or three reps in each of the positions or you can choose what's doable for you. Maybe your client can only do the part with both feet down on the floor for a while. You can add the twist and then start to introduce unweighting one leg. Thank you. Good.

v.5.5

Lateral lifts on the small barrel. A strap is necessary. This is not a movement you can do without the strap. We use the strap to engage the lateral hip and then we're going to lift the entire rib cage up off it, maintain that position. So this is a myofascial core including the hip.

Exercise to sustain that position and then going into the side bending. So slide your foot under the strap. Good and then she's gonna lie over the barrel. And we wanna make sure that the side that's on the curve of the barrel is lengthened out. I like to say take the wrinkles out of your skin there.

Exactly. And then we want the pelvis stacked and the ribs stacked and shoulder stacked. All right. Actually gonna inhale as you lift off the barrel. So you're gonna breathe and lift this and I always say reach through that elbow.

So we're creating that length on both sides. Reach with this elbow too, we got length. That's it. And using this hip, use your leg and then lower back down. That's it.

And again, use your leg lengthen on both sides. You're lifting up, reaching through those elbows. We want the thoracolumbar fascia to get taut and come back down. And let's do one more and lengthen, excellent. And back down.

Now, based on our assessments this is her preferred way of moving through the rib cage, her translation in right. So we're gonna do the other side and take a look at how her work that she needs to do on her left side. So this might be a little bit more challenging. And then you'll be able to see the tautness that I'm talking about with the thoracolumbar fascia. That helps create stability in the trunk.

So we have the sacrum and the lat thoracolumbar fascia and in through the glutes here. So the arm action of reaching through both elbows are gonna create that traction, that length. That's it. So breathe into that side a little more. Good and back down.

Excellent, Amy. Good. Now use the leg, press up into the strap. A little more length, take the wrinkles out. Reach to that, there we go. There we go. And back down.

We wanna keep the length here. Excellent. Inhale into the ribs as you float up, float up off that's it. And back down. So this is a side she needs to train a little bit more.

We'll do one more and lift. Beautiful. And lower down. Rest.

v.6.1

The ribs are concentric rings from rib one through well, really 10. The first two ribs are attached to the manubrium and then we have through rib six attached to the sternum and then lower ribs attaching to the cartilage.

And of course, 11 and 12 don't have an attachment. They're floating ribs. And we want to watch when we're moving in all planes. So in flexion, extension, rotation, and side bending how these ribs are moving. So when we move into flexion from the top of the head, we start at the OA joint through the cervical spine but what the ribs are doing the clavicles and the first rib will start to rotate anteriorly as the front ribs as it cascades down.

These ribs will start to close which I can't make this plastic skeleton do but it will, they'll start to approximate as the back ribs, you can start thinking about the back ribs opening up. So the front ribs move a little inferior as the back ribs will move superior. And each and you can think of it as you progress down the spine. Each one of these ribs are rotating upward, and then to come back upright, you start at the lower ribs and the lower rib that will reverse, the back ribs will start to move inferior as the front ribs start to move superiorly. And they start to do more of like a posterior rotation.

So flexion you can think of it as anterior rotation of each of the individual ribs and extension as a posterior rotation of each individual rib. In rotation, the rotation happens like your pelvis in the innominate. There'll be an anterior posterior motion of the ribs. So if I start at the top and the skeleton is to rotate to its left, the right side's gonna go anterior as the left side is gonna rotate posterior. So the right side as it goes anterior, again, these front ribs will be approximating and the posterior ribs are actually gonna be expanding and opening and moving superiorly as the opposite sides are doing the opposite.

So, that the front ribs are rotating back and opening and the back ribs are approximating. So we have this real articulation that's possible in the thorax. In side bending when the body goes towards the side, especially you start at the top of the head. There's a cascading effect of the ribs opening on the side, your side bending away from and approximating as you do it to get that side bend of the spine. So ribs approximate and the ribs open.

So we're gonna take a look at that in the real person here, so with Amy. So she's gonna start at the OA joint as she flexes down. Now, what's happening already is the front ribs are going down and these back ribs, as you can see, as she progresses into thoracic flexion each of these ribs are traveling upward, and she can think of that trying to articulate. I kind of sometimes give the image of like piano keys along than one at a time. Right, now to come back and start at the bottom ribs so they start to approximate as the bottom ribs in the front start to open and you kind of flow right through the top there.

Now to go into extension, we're gonna start with the clavicle as you're gonna rotate them posteriorly and feel especially these upper ribs. These are the guys you wanna feel really to go inferiorly as you open up. So now the ribs in the front are opening. And then to come back, we start at the lower ribs. They're gonna rotate anteriorly as each of these ribs open up to the neutral.

So let's cross your hands and we're gonna do the rotation. So there's that anterior, is if she starts at the first rib ring goes to the right, you can see there's even the clavicles are doing this anterior posterior rotation and each rib has this opportunity to do that rotation. And then to return the opposite's gonna happen where the right side goes anterior and their left side goes posterior. Each rib is having that articulation and go to the other side. Good. Well, you started below.

Start at the first rib, there. We wanna get the mobility even in the upper thorax, see, there's the start of the rotation. A lot of people will just start at the TL junction. So we wanna start the rot, there you go. You can really see that rotation.

And then you start at the bottom and rotate. Imagine that rotation happening. Nice. Very good. Through there. Okay. Now hand, put your left hand behind your head.

Actually, yeah, let's turn the view. Will be easier to see and put your left hand behind your head. Okay. So you're just gonna reach to the floor with your right hand and you're gonna start from up here. So now we're thinking of the armpit opening up, these ribs opening, these ribs opening and the opposite sides approximating.

And then to come back up, start down here, approximate, approximate. That's it. Good. Yeah and the other side, start at the top. Think of the armpit opening. And then each of these ribs opening up to create that side bending and then to come back cascade.

Yeah, finding that connection. So that really emphasizing the proper mobility of the thorax in all three dimensions of movement.

v.6.2

So this technique is a muscle energy technique to improve the bucket handle motion of the lateral ribs in breathing. So what we're gonna do is take your hand and follow the lines of the ribs. As you can see, my fingers are on each rib here, on both sides, and you have to watch your thumb.

So you just relax it on the side here. And you're gonna ask the client to take a breath in. So she's gonna breathe in and you should feel some expansion here, and I expand with my fingers. And as she exhales, my fingers are gonna relax and I'm just following her ribs here. Now many times there's not a lot of movement here, breathe in.

So we wanna introduce an isometric contraction to the intercostal muscles in this area to allow the ribs, to have a little more mobility. So what we'll do is the technique is this, as she starts to exhale. So she's inhaling now. As she exhales the ribs come in close together and I'm gonna draw my fingers in and hold them there. Now she's gonna breathe in and I'm gonna resist the ribs opening.

And then relax. And as she relaxed, I let go of my hands here to let her just relax and re-engage those ribs again. And she breathes in and I'm resisting the ribs moving. And then she exhales, I relax. And at the end of her exhale, I'm gonna recoil again and I'm gonna hold them there, and exhale.

Now you might notice that last one, her breath because I was holding the ribs actually started to expand which is natural through here. I'm not gonna ask her to hold here but I want her to send the breath into my hands to try to open those ribs. So here she goes, inhale again, exhale, I'm drawing the ribs in. Now she's gonna breathe there and try to open the ribs as I'm resisting, much better. So I hope you notice and review again, exhale, how that changes the belly breath here.

We'll do it one more time. Emphasize, here we go. She's gonna relax for us, I'm not doing anything there. And I draw the ribs in. She's gonna inhale into the ribs.

So you have to cue them to feel that into the rib cage much better and then relax. And then you'll notice after three or four times breathe in again. Yes, more expansion is possible here.

v.6.3

So we're gonna use the Magic Circle to help emphasize and teach a person how to move through the sternum and the rib cage as they're breathing. So we have the Magic Circle on a box with the Magic Circle, leaning on the sternum.

So be careful when you place the Magic Circle on the sternum you don't wanna be on the notch here and you wanna not be on the xiphoid process. So we wanna find the midpoint of the sternum or the circle so it's comfortable. All right and then we try to achieve more of a neutral thoracic spine here. So the person's elbows have to be wide into the box keeping the width of the back. And simply what she's gonna do as she inhales I'm gonna ask her to move her sternum onto the circle.

So she's gonna inhale and there should be a little extension up in here and a little pressure into the ring. And then as she exhales the Magic Circles should recoil and go back into her sternum through here. So inhale little lift of the sternum and the clavicles are rotating upward. And then as she exhales she relaxes and there should just be a little retraction and recoil of the Magic Circle. So keep doing that, as that is that cuing happens here you wanna pay attention to what's happening at the lower rib cage.

So keep breathing, very nice. There's a bucket handle motion that happens down here so as her sternum is moving, can she coordinate that with a bucket handle motion like this of the ribs? So the inhalation goes, rib cage, bucket handle's opening. Sternum reaching forward. Exhale sternum softening, bucket handle returning back.

Let's do it one more time. Inhale bucket handle's moving. Sternums going into the ring. Exhale, sternum softening, ribs are coming back down.

v.6.4

We're gonna work on a breathing and we're gonna use a sling with a trapeze to help the client feel and be able to see when their breath is going into the back and sides of the rib.

So I added a black strap which is called a sling attached to the bottom of the trapeze bar, two long purple springs, little heavy. If a person doesn't have the sensation or ability to breathe into the back of the ribs I would recommend using long yellow springs and then progress to the purples springs. This is really an educational tool so it's not an exercise you'd be repeating quite often. Once they get the feel for it, it's just part of their practice after. So then you ask the client to bring their feet between the two straps 'cause I only want it on the sling part.

She's gonna lift up like a bridge and we're gonna bring it back to the posterior part of her diaphragm. So not on the floating ribs per se but just above it a little bit. All right and then usually what happens is the weight of the spring will lift most people's bodies up. Amy's a little more grounded so she has contact but you might say, and that's okay, because then they're gonna breathe into their back and the whole sling is gonna move towards the table without pushing. So relax.

So the client can watch the bar now. So I'm gonna cue her to inhale into the back of the ribs and as she's expanding, see if she can notice how the bar is very subtle is moving downward. And as she exhales she relaxes, there's a relaxation and the bar moves back up. So inhale into the strap. So we're trying to expand the ribs and the back and exhale, relaxing.

So one more time, expanding into the ribs, moving the bar downward and exhale. And once they have that motion, it's wonderful to add any kind of stabilization leg movement so she can inhale down. So now I'm gonna say keep the strap down. You can exhale but don't allow the bar to go up. Excellent and that engages the core with that.

So inhale into the strap again, the bar may not move 'cause it's already down. Now, exhale and bring your right knee up. Dangle your leg. You can dangle it, yeah. And then place it down. Just unweighting the foot inhale into the strap keeping it down, exhale, keep it down and unweight your foot and bring it back down.

So you can do a variety of leg motions. You can do leg slides. Any kind of motion through the core to practice keeping the breath in the back of the ribs and the stability of the lower thorax. Very good and rest.

v.7.1

So we're gonna do some scapulohumeral training movements of the scapula, humeral head, and the clavicle using the stick.

So the client holds the stick on the low end and we start with the arm low. See that the scapula is sitting on the rib cage in a more normal position. Let me ask the client to gently pull the stick down towards the floor as I lift the stick up. So pull down. Great. So they feel this engagement through the scapula, through the armpit, and not too hard.

Good, now we're gonna keep some tone. There's some sensation of keeping a pulling down and I'm gonna slowly lift the stick up. And as they're doing that, they're engaged in the muscles which is the serratus anterior primarily, and there'll be upward rotation of the scapula to about 60 to 90 degrees. So already right here then the clavicle takes over. And as she's going up at the pole, she's now, if I lose a little sensation, I'm gonna ask her to pull down a little more.

I wanna keep those muscles engaged but not locked up. And she's gonna continue the motion. Sometimes you have to add a little assistance to get that scapula moving out there, get that clavicle to rotate upward. So when the arm is fully up, we've got full rotation of the scapula, full elevation of the clavicle. Then from here, the client can pull the stick down, I can add resistance here as she's pulling down and I watch how the scapula moves back into its normal position.

So right here, we're gonna pause. So what I don't wanna see any more scapular movement at all she just brings the arm down without any motion of the scapula. We'll do that one more time. So pull down gently. We're gonna watch the scapula rotate as the arm is going up and I can feel that she has resistance.

The muscles are working, she's resisting the stick, but allowing it to move, very nice. Rotation, elevation at this point of the clavicle in the front. I hold the stick up, she pulls it down. I'm watching the scapula move back in a downward rotation. And when it comes to a neutral position on the rib cage which is around 90 degrees, maybe 60 degrees right here then I'm gonna cue her to not move her scapula anymore and to continue moving the arm downward.

And this is a technique to teach the client the sensation of how the scapula should be moving in a full arm range.

v.7.2

The seated thoracic assessment gives us the information on the motion of the ribs in rotation, and we're gonna choose which side is a more preferred side of rotating, so that when we choose our movement repertory we can actually help the person enhance the more restricted rotation. So, we're just gonna start. You can cross your arms place your right hand on top, yeah 'cause we're gonna rotate to the right. So you're gonna start from the top.

So you can start with your head a little bit but think of the first rib and the clavicles moving first. And what we wanna observe is at what point does her scapula start to adduct or over abduct on that side? So right about here that right shoulder blade starting to adduct. And then we wanna also notice the T12 positioning and that it stays centered and that part looks pretty good. Okay and now just bring yourself back to the front and now she's gonna go, let's switch hands, yeah.

Let's go to the left. So start at the top. Yep and start to rotate. Very good. And so she's going much further in her rotation to the left and her scapular staying on the rib cage.

They're not trying to help by adducting or over abducting. So this is, you have a lot of mobility in that direction. Come back to the front. Let's look at your non-preferred side now. Yeah, to the right.

And this has been matching the pattern through all of the work we've been doing together. Yeah. So she can think about it. She's thinking about it now but you can start to see that scapula starts to do the motion which means her ribs have actually stopped moving at that point. Good.

v.7.3

Okay, we're going to do a fascial stroke with arm movement to open up the fascia under the clavicle and also the pectoralis area here.

So the client lies on an arc with support of the head or you can use bolsters and towels and pillows to get this angle of the trunk here. So to set the arms up what I would like is that you externally rotate the arm. And I come in and I want the client to rest their arm on my chest so that their muscles are relaxed in the arm and that will give me a chance to set the scapula. So your back hand here is gonna come under onto the spine of the scapula. So I'm holding the spine of the scapula.

My other hand is coming under the pec muscle so my thumb is going into the armpit and I'm on the top of the scapula over here around the back. And what I'm gonna do is just rotate bring the scapula down and lift the pec up a little bit to set the shoulder. Then I ask the client to maintain that position of the arm. Let me do the other side. So bring the arm up, it's gonna rest on my shoulder and my underneath hands on the spine of the scapula, the top hand is on the top of the scapula as well.

And then I'm gonna rotate the scapula down so we have a nice set. Now you're gonna need a little bit of lotion for the skin. So you wanna check with the client that they don't have allergies or any kind of complications with certain kinds of lotion. A Biotone cream is also very nice 'cause you don't wanna inflame the skin and you wanna be able to get a good glide. So you come up over the top and what I'm gonna do is cross my fingers.

So the pads of my fingers are gonna be right under the clavicles here. Now, as the client is moving the arms out to the side, I'm just gonna roll right across underneath the clavicle, leaning my body weight into it out over the deltoid, creating that nice length. And we're gonna repeat that and I encourage the arm motion and external rotation come back up, there. So we're gonna make sure the shoulders are set. So I'm gonna go about one inch below where I was before and she's gonna go.

Now, I'm just leaning my body weight lightly into it, finding that line going across the pectoralis here onto the arm. And we'll do a third stroke, she's gonna rotate the arms back. Good. Last one. One inch below that and we go across the chest over on to where it attaches onto the humerus and then coming back up, and finish.

v.7.4

So this is a release for the upper fibers of the serratus anterior.

The upper fibers of the serratus anterior tend to tip the scapula upward and present as a raised shoulder blade. So many times we're thinking that it's a levator or perhaps upper trapezius which is keeping that scapula elevated. But on the front side of the scapula, the serratus fibers can also be restricted holding the scapula in that place. So it's one little piece that can be missed in terms of helping the scapula sit better on the rib cage. So we're gonna start sideline, I have the blue spring loaded also in the dangerous part of the bar on the other side and the client starts with arm extended with the elbow soft.

And I'm gonna take a whole, now she's gonna, I'm gonna let go of the bar so the client really has to understand that she can't let go but I also don't wanna death grip. So she's in charge of the bar and I'm gonna trust her. And I'm gonna take my hand right here at the inferior angle of the scapula and my other hand underneath the upper trap here on the top part of the scapula. And then I'm gonna ask her to her arm slowly and I'm gonna encourage this upward rotation of the scapula. And we're gonna pause right there.

Now what I'm gonna do is try to hold that scapula in place, not let it move and ask her to bring the elbow towards me slowly. And you can see what's happening. Now pause right here, it's great. The top part of the scapula is starting to tip away which means it's stretching, that's far enough. It's stretching the top part there of the fibers.

Good, now you're gonna reach the bar away. Good and I'm gonna continue to help her upperly rotate the scapula a little more, a little more, a little more straight on. That's perfect right there. I'm gonna hold the scapula there as she pulls the bar towards her which is gonna tip the top part of the scapula away from the ribs elongating those upper fibers of the serratus. That's far enough and then extend the bar away.

We only really need to do this about three times. There we go and encouraging the upper rotation. There we go. Nice. And then she's gonna pull the bar towards her and I'm just holding, all I'm doing is holding the scapula in place as she's moving her arm. And then release up and finish and relax.

v.7.5

So this is called screwdriver and it's a motion of the whole spine, the upper thorax head and shoulder in its rotation, flexion, side bending, extension. So it's a full spiraling motion to the right for her and then to the left upper corner. Now the bar is set up where it's top loaded. Her hand is turned downward and you notice she's sitting on this end of the table. And what I wanna see is that the angle of her arm is comfortable for her range.

You don't want the arm too far back 'cause the shoulder will come out of its alignment. And then the other piece to look at is your bar. If the bar is too high for the person it could bring the shoulder up. So you may need to move the bar down one notch. So we're looking for already before we start a good alignment of the shoulder and integrity here.

All right, so the movement we'll start with a chin tuck and flexion is gonna soften the chest, and she's gonna start to rotate to the right. And that inspires an internal rotation of the shoulder as the bar goes up. Now she's gonna keep reaching the bar away. And then the arm is gonna screw. This is the screwdriver part where she's gonna rotate, come towards me as she extends and rotates opening the front of the chest and the pec.

And she's gonna circle around, the head's gonna drop down. She's gonna make a half a circle with her head softening the chest so that we get flexion, we get internal rotation of the shoulder. Great and then she comes back, leaning into the bar, rotating the shoulder, opening the chest kind of leaning into the bar. Very nice and one more time. Chin goes around circle, half circle, the shoulder spiraling, and now she keeps reaching the bar away so it's not jamming up and I've got control of the bar as well.

This creates a nice length through the neck, the side of the neck, rotation, mobility of the shoulder, and then external rotation. She leans, we're getting some fascial stretching. There you go. That was nice. So the pec and the lat here. And then come back to center and let go, I have the bar.

Oh, and rest.

v.7.6

Side lying rib cage arms. This is where the position of the bar is in that most dangerous place for the Cadillac. So you have to be very mindful to teach the client not to let go of the bar. So blue spring top loaded, bring the bar towards her.

Here. So Amy, you're gonna keep a hold of the bar. Okay. Good. All right. So we begin in a side lying position and she's lying on the side that when she rotates towards the table, she's moving into her non-preferred rotation.

And what we notice in the thoracic rotation when she went to the right is the right scapula adducted and her left one abducted. So we're gonna wanna cue that the humeral head and I do a hands-on where I take the humeral head and I bring it back towards the joint here, the glenoid fossa and the scapula so that she feels this congruency at this joint. Now you're gonna maintain this congruency and you're rotating from the rib cage. So think of your manubrium rotating towards the floor, you can keep your head here a little bit, that's okay on your neck. There you go.

It's just a small motion. Now we're already down into the ribs, that's as far as we go. And now you're gonna start to rotate back and we come back to your side. Now you can start bending the elbow as you open your chest towards the ceiling, lift the elbow up. And this is a point where I can hold the bar 'cause this is the point where the bar's gonna pull really quickly.

So I'm just guiding and she's gonna continue rotating so we're getting that rotation in the ribs, making sure the pelvis stays forward. That's it. And then you come onto your side. And again, I'm gonna check that congruency of the humeral head and the scapula there. Now she's gonna rotate back with a straight arm trying to feel that connection of her humeral head here.

And then here, this is a very hard place right here to pull so I'm gonna assist her a little bit. And then as the arm comes forward and straighten she's rotating her ribs to here. There's a lot going on. We've got scapula and humeral head congruency. We've got that rotation through the cascading ribs going on and then she can come back from the bottom of the ribs to here.

That's correct. Sternum rotating up. We're getting an oblique action here, reach this knee a little bit, there we go. And then she rolls onto her side and we go back so she's rotating from below, bending, very good. Rotating and pause right there. Perfect.

v.7.7

Thoracic extension with overhead arms challenges the local stabilizers of the upper thoracic so that the glenohumeral joint can go into flexion. So we're going to, as you see she's on a box and I placed an arch here for her to rest on. You can also use another box, another reformer box. So the body is prone with the legs slightly engaged but they're not just hanging down. And the arms can reach out a little bit touching the frame.

And then she's basically going to engage her back, local stabilizers and then float her arms up. Perfect, right there. Hold it. And then lower the arms down. And again, so she's using her exhale and finding the lower trapezius here and the local stabilizers of the upper thoracic spine. This is actually also an assessment and a test to see if someone has the strength to be able to hold the arms in that position.

And come back down and we'll do one more and you can use it as a nice strengthening exercise. Now you can hold it here and actually do a little swimming action. Exactly. You can add the legs if you want. Go a little slower, go a little slower.

Kind of feel that connection between the glute and the lat. Yep. Head up is good, Amy. So we're getting this diagonal here if you wanna add a little more work to the exercise. Now come to both arms lengthen. Good and then lower down and rest.

v.7.8

We're gonna use the overhead press to actually work on not just loading the arm in the overhead press, but to work on that translation of the upper thoracic. So we've been working on Amy's left translation in the thorax. So turn around and face the other way. And you wanna be fairly close to the bottom loaded bar. That's it, it's right above the shoulder.

So when the arm pushes up and you extend the arm, you want the hand so that the force vector comes down into the shoulder there. Okay and then bend as you come down. Very good. Okay. Now pause for a second. So we wanna sense that the weight's equal on both sit bones and then as she's going up with the arms, so she starts that scapular rotation. At the very top she can think of translating the upper T spine, there you go.

And then slowly come down and then this hand can be a little more forward. We wanna keep the scapula resting on the rib cage here. So again, pressing up and then push a little bit so we get a little bit that translation. Very good and then coming back down. One more time and again.

That's it, Amy. Good. Reach through there and coming back down. Yeah. A blue spring is pretty strong so I would really recommend that you use a lighter yellow spring to get the sense of the movement. And then when you have learned that patterning then you can start to increase the load.

v.8.1

The wall plank assessment with a sway again, gives us information about the motion from the ankles through the head. So she's gonna sway to the right and as she sways to the right what we wanna notice is first at the feet. Do the feet adapt to the sway? Does the right foot supinate and the left foot pronate? So there's very limited supination of her right foot.

Come over to the right again. So the feet adapt, supination on the right, pronation on the left. And what we should see as she's swaying to the right is that that ilium which is her left side, there's is a little more difficult drop set, five degrees, and the ribs translate to the left, and then come back to the middle. Now this is her preferred side. So as she sways to the left, ah, she's starting to actually rotate that pelvis this way.

Okay. So rotate, now supinate the left foot, protonate the right foot. That helps, doesn't it? And then we have the hip glide, remember the hip sway. So we wanna see the medial glide of the right in that lateral here, the lowering of this hip.

Don't go too far. You're over moving, yeah. And that translation of the ribs and then come back to the midline. So it's definitely her preferred way of moving. So we go to the right and we're observing how the feet are doing it. So I might cue her to try to supinate a little bit more on that right foot so that gives me information in terms of my session that I could focus on that right foot and then the dropping of the left ilium, okay, and that translation left which is what we've been basically working on.

And then to the other side she tends to go anterior. So there's some restriction, maybe it's in her left foot, can left foot supinate, don't push so far and then come back to the center, come back to the center. Just do it as like a natural sway to left. Don't try to push it, just kinda sway. And we can see that this is what she wants to do and the rotation's actually coming up here in the rib cage, and then come back and go to the right again.

So just do a natural sway. Just kinda shift to the right. That's improved so much and then shift to the left. There you go. And back now think of your feet shifting.

Supinate on the right, that's it and shift through your feet. There you go. And then come back to the midline. So again, you can use it as a movement experience in terms of getting the articulation through the joints and use it as a valuable assessment to give you information on how to work and design your session.

v.8.2

So we're gonna take a look at the alignment of the wrist bones and the radius and ulna where the weight should be on the hand.

We're doing it on the wall and you can transfer this onto the floor in a quadruped position and also when you start working on plank. Everyone has a slight different alignment here so I'm gonna show you where the emphasis should be. One is looking at the wrist crease here. The radius is a bone that comes from the outside of the elbow and it will cross over the ulna to come over to the thumb side So we're looking at a diagonal from the outer elbow towards the base of the thumb. And the radius is wider here so we're gonna be including the second and third fingers.

So the weight of the hand needs to be more towards the second finger and the base of the thumb so that the radius weight is here, it's thicker at this end. Then to find the alignment of the radius at this end, we can roll the radius this way or we can roll it out this way. But as you notice the wrist, as she rolls with the elbow up people try to bring the elbow up thinking they're creating external rotation which they are of the shoulder trying to keep the chest open. But I'm gonna show you a little bit different. What that tends to do is kind of depress the humeral head down.

So we wanna keep the armpit free. We wanna have the weight at the base of the thumb. So I'm gonna ask her to roll her elbow out and in and we're gonna watch where the weight jams. So here it's jamming at the little finger side and when she rotates that way, yeah. So now we're gonna find a medium in between there.

So we have a nice, that's great. Vertical line here, no tension at either end and then weight at the base of the thumb and the second finger. And that lines up her elbow a little bit facing me this way. So let's try this hand. Now I'm gonna note too that the finger alignment here is very slightly.

Some people actually need to have their hands slightly turned out so that the second finger is more vertical or maybe even a little bit out. For her it's actually better straight up, right. And spreading the hands a nice amount, not too much 'cause that can weaken the hands. So we wanna have the hands just spread. Good and the elbow position.

Now the activation to keep the chest open now is going to be, I'm gonna cue her, gonna bring my hands in here and ask her to bring the lower arm bones in towards my hands. So she's gonna draw the bones in towards the midline, a little more, there. So these bones are moving in towards the midline which puts more of the weight at the base. I know it's hard work. And then we're gonna ask, I'm gonna ask her to widen her shoulders by pressing out against my hand.

So there's a contrast of outward with the shoulders with an inward, with the lower arms which actually then engages through the whole arm. And it feels extremely, look, very strong and balanced here. So when you're doing a plank, having this alignment of the wrist and the hand creates a more stable position for someone to hold and move in that plank kind of position.

v.8.3

When we're working our arms like in an arm support like a plank or a side plank, or we're working our arms with the reformer straps or with some weights in our hands, we wanna have the sensation and the feeling of full arm engagement. So this is a little exercise that's fun to do with a partner to feel that activity.

So you face your partner and there's two actions you're gonna be doing at the same time. The first action is feeling the humeral heads, your shoulder go wide. It's like they're pushing sideways and that gives a sense of width and space across the front of the chest here. So it's just a sensation of widening through the shoulders. And then the other action is the lower arm and the hands going in towards the midline.

So we start here, you can be on top. And so we want the fingers on the side of the arm so that I'm gonna give Amy that pressure inward and she's gonna give me the pressure inward. Okay. So relax. But I'm gonna counter that, we're both compress our shoulders out into the hand so I'm pushing out feeling that width, so can you feel it's like pec, lat but in an open way. The armpits are open and you press the arms and they'll keep your shoulders pushing out and then you feel the tricep coming in and you hold and then relax.

So you try it now, I'm gonna be on top this time, okay? So shoulders connected. Here we go. So we're feeling the width, feeling the width of the shoulders, yes, and the pushing of the arms. It's a full arm engagement here.

Yeah so then when you get your arms out, right, you can try to create that yourself through there. And if you are weight-bearing on your hands you can have that same sensation.

v.8.4

We're gonna do variations of Swan on the Wunda Chair so that we can really assist not only the rib motion of the extension and coming back down, but more importantly, that rotation. And then articulating the ribs through all the three planes of motion. So come lie on your stomach.

The pelvis is on the top of the chair so that the ribs are free to move. So you want your lower ribs off the, exactly. The legs are in parallel, the feet grounded. All right and so first let's just start, yeah, come forward a little bit more. Your navel almost should be on the edge of the chair.

There you go. Perfect. Okay, so to warm up first, we'll just do, come down to level, you can into flexion even, and think about the ribs motion that I was describing. As you bring the bar up, you're gonna start the lower ribs so draw them down so they're starting to move inferior. So keep coming up and find that clavicle rotation posterior. And then just start from here and go down, push through the arms and come down.

So you can go into flexion. We're just warming up the extensors a little bit so we're gonna find that rib motion as they're closing in the back and opening in the front and then coming forward. Great and now come to a more neutral position. So you're level with the floor. Excellent. Okay.

So now I'm gonna take the pole out, all right. You're gonna maintain that position, okay? And we're gonna start with a little rotation. So we're gonna stay in a more horizontal to the floor position to begin. So you're gonna start with the right arm.

So as you press the right arm down but think of really the ribs are doing that anterior rotation on the right and a posterior rotation on the left. And then as you come back, you're reversing that rotation. So instead of thinking like I'm just turning my chest, I want you to really try to feel that articulation, yes, of the ribs as they do that rotation. Anterior on the right, posterior on the left and then they reverse, this goes anterior on the left posterior right. Now, as she's doing that movement, keep going, I'm watching for the thoracolumbar fascia here and that I wanna see that there's a tautness so that I can get the motion in the spine and the ribs a little bit more.

So I'm gonna do a hands-on, so come on back to the neutral. She's tending to bunch up the thoracolumbar fascia on this side so I'm gonna put my hand at the bottom of her scapula here and as she rotates to her left, I'm gonna give her a little bit of a pull of this side so that we're kinda taking the wrinkles out. That's it, right. And then bring it back and to the left. There you go. Exactly.

So we wanna find that length on that side. Correct. We're not approximating the ribs, we're doing a posterior and anterior rotation, that's better. And you wanna feel that your armpits are open. There's the spinal and rib motion.

Excellent. Good, Amy. And then find that rotation. We got to open up that armpit. Yes. It frees up. It allows when you have that tautness of the thoracolumbar fascia with that.

It allows for the bones to be a little freer to move, they're more suspended, right? And even though I'm mentioning the back thoracolumbar fascia, there's also the fascia in the front, right? So that pec in the front and the opening of that pec in the front. So it's both of those areas as you go. Doesn't that feel freer?

Yeah, it looks better. Okay, now come back to the horizontal position to the floor and now we're gonna do like a whole circle. So you're gonna find that we're gonna go into extension, so coming up like you did when we started. Now push the right arm down, start the rotation, that's it and go all the way down to the horizontal position, push your left arm down and bring yourself to the horizontal. Now rotate to the right here.

Bring it up, take your time. Find that rotation at the top. Keep the rotation moving. There you go. Find that rotation, now let's reverse it.

Go rotate left coming up, center the extension. Rotate. Excellent. Come back one more time. Find that full three-dimensional motion in your rib cage. Nice, Amy. Yes, very yummy.

And rest. Very good. So bring the pedals up, place your hands on the side of the chair and push yourself up. Very good.

v.9.1

So we're gonna work with a small bone called the hyoid bone which is floating on the front of the neck here, as you can see. And there are attachments of the muscles on the top of the hyoid bone that creates the floor of the mouth.

And then from underneath the hyoid bone, there are muscles that come down onto the sternum and onto the first rib. And I like using this bone as a movement cue and movement as you flex the head into kind of a curling up position. So the bone will actually be moving in the direction of the ears. So in a real person, the hyoid bone is approximately across from C3 in the back. And you can just gently place the thumbs on either side and you can find the little edges here and here.

Very, very gentle. It's almost like holding almost like a newborn baby, newborn baby head. You gotta be very, very gentle here. I'm just finding the outer edges of the bone. And when this bone is forward, it creates that line of double chin mouth breather, kind of feeling.

We want the hyoid, if we think of flexing the head on the spine when we do that movement, let me show you, the hyoid bone actually moves back and up towards the ears which creates the length of the neck. So the front muscles and the neck engage to bring the hyoid bone, can you see the motion forward and back towards the ears this direction. So without my hands, the hyoid bone go forward and then draw the higher bone up and back towards the ears.

v.9.2

Head suspension using the TheraBand. The point of the TheraBand is to support the head enough to relax the overworking superficial anterior neck, and perhaps for some people it might include the upper traps so that the head can be somewhat supported, but it requires the work deep in the front of the neck.

So the band is placed along the occiput here, right above the ears, and the band will actually cover the ears. So go ahead and grab the band. This is a wonderful home program for your client, right? Now, you wanna keep the cheekbones somewhat down so that your nose is in line with your chin. Your nose isn't higher, okay, in this space if that makes sense.

So you wanna keep the cheekbones down and you're just gonna suspend or float the head. You unweight it so your face doesn't change the angle and then you just, now it does require the arms. Now, if you're a practitioner, you could be a nice practitioner and hold it for the client if you want. All right and then she's just gonna pull her left arm so that her head is gonna rotate towards the right and she's resting into the right side of her head in the band, and then rotate pulling with the right arm to get that rotation. And just keep doing the movement.

So the rotation is occurring high up. So the rotation is C1 and two and then as you go, if you went further, you would be going further down the chain of the neck. So it depends on which segment that you wish to try to improve in some mobility. And usually it's the upper C spines, the one and two and three get a little bit stuck there, yeah. And if you know that you can prefer to turn in one direction more than the other, you can actually add just a few little repetitions to the other side and then lower the head back down, and rest.

Could you feel how that's really working deep in the front of the neck? Yeah. Good.

v.9.3

So this is a movement re-education tool using the foam roller to teach the client how to engage the anterior cervical muscles when they're going into a chin tuck to curl the head up off the mat, and also to find where in the neck is a nice neutral position for them, and then we're gonna add a rotation. So the client's lying comfortably. I've chose to lie on a bolster so that the head is level with the roller.

And the client's forehead is placed on the roller and now you're simply just gonna move the roller away with the forehead which lifts the chin up. And then she's gonna drag the roller back in. And again, we're getting to feel that hyoid bone moving up into the neck this way, and then she can push the roller away. So you can observe as they're moving and pulling in which direction they need to emphasize. Some people's necks are too flat so they need to emphasize kind of pushing the roller away and then pausing so that they have a nice curve of their neck.

Some people are too arched to the neck and they need to emphasize the pulling in. So as you're working with someone you wanna find which range do they really need to work a bit more. Now we're gonna come right into the middle so not too arched, not too flat. Good. And then all you're gonna do is float your forehead up off the roller to unweight it and then you hold.

So this is contracting via gravity the neck muscles both in the back and the front, and then she can lower it back down. And we can do movement, she can go away with the roller and pull it in but not flattening the neck and then lift up and hold just easy. And then come back down. Now I want you to observe. She did it very well.

What many people do when you ask them to float their head up off the mat is they will extend in the upper back. So can you show us that, lift your head up by extending? So we don't want back muscles to be doing that motion. We're really looking for the cervical muscles in the front and the back to do the motion. So it's a very small movement.

So now we're gonna do rotation. So we're gonna turn the roller this way and I'm gonna ask her to place her cheekbone near her nose, near the nose. Actually it's gonna feel like you're closing your nose. So you're on the cheekbone. Yeah.

Yeah, so you wanna be sideway, just the edge near your nose. There you go. Can you feel that? Now you rest your weight of your head on the roller. Very nice. And all you're gonna do is roll along that cheekbone towards your ear.

Slowly. That's too fast. Yeah. So feel the weight of your head on the roller. There you go. Now keep the weight of your head on the roller and roll it towards your nose. Mm-hmm. Good.

And roll it back towards your ear. Now, it's very hard to keep your head weighted. There you go. Do it with your cheekbone, the cheekbone's doing the motion. There that is different activity in your neck muscles and push it away.

Very nice. Beautiful. So now we're getting the motion higher up in the neck where we want it to happen. Engaging those muscles, yeah, really deeply and pushing back. And rest on the roller and we go do the other side.

Good. So resting. You wanna start near the nose, so you're not in a full rotation because that's down in lower part of the neck, there you go. And rest your head on the roller and then we're gonna roll it away towards the ear, easy, and pull the weight into the roller and drag it back towards your nose. Good and push the roller away. Very nice, keeping the weight of the head on the roller, and pull it back and rest.

Good.

v.9.4

The seated head sling. We're showing this with a loop around with a single spring. You could also use the sling that has two islets on it and two springs depending on what type of sling or loop you have. But what we want to do is have the weight of the head into the back of the loop.

And Amy's gonna lean back, like we've practiced the lean backs earlier. So she's leaning back but the ideas to have the weight kind of falling into the back and then bringing the self kind of allowing the spring to pull you forward but having a slight drag with it. So it's not a huge resistance. So you lean back so as if she's falling into my hand here and then using the spring to kinda drag yourself forward. Yeah, so one more time without my hand there.

So she's leaning back, wonderful trunk position with the pelvis on the femur and coming back. And now she's gonna lean a little to the right side so is leaning into the right ear and then come back to the center and then leaning into the left ear. Very good. And she's maintaining the arrangement of the pelvis to one more each side. So there's not a disassociation of the head on the neck, it's not what we want.

We wanna keep the length of the neck and the trunk and do a body lean to the side, just leaning into the resistance and then come back up. And then we can also lean straight back and do a little circle. So going back side a little bit up, the other side and back, that's it. So it's a small circling feeling. As you can see, it's a whole body engagement and then go the other direction.

And you wanna think of the ear, the back of the head, the other ear but without doing separate neck movement. And then bring yourself to the middle and then bring yourself up and then we'll release nice and easy, okay.

v.9.5

This version of pulling straps is articulating the rotation of the upper thoracic spine with the manubrium and clavicle rotation incorporating extension and flexion. So we're gonna start with the flexion rotation to the left, Amy's looking under her armpit right through here. And then she's gonna pull the straps so start the extensors, come through the midline, so the head comes through the midline.

And then as she continues, pulling the strap, she's gonna try to do that rotation to the right. And then reversing it coming through the mid-line and then doing rotation left looking under the armpit there. That's the motion. So pulling through, so the rotations happening in the upper ribs here. There we go.

So we're really amplifying that rotation that's necessary, keep going down and yeah, just keep doing the movement. Do one more before we switch sides. We wanna amplify that gait patterning that we have in terms of the rotation of the upper ribs. Excellent. And look under your left.

Now, switch your head so we get to rotation. So now we're in flexion rotation right and as she pulls the strap through the midline, she finds her head through the center and then we have that rotation to the left with extension. And then she rotates through the midline, rotation right with the flexion. Two more times. So pulling, find the manubrium, feel the clavicles doing that rotation.

Nice. Very good. And come back down through the midline. One more time. Coming through the middle line, finding that rotation. And come through the midline and lower down.

And rest. Excellent.

Comments

Amy S
Hi Madeline, 
Where can I purchase proprio balls you use?
Thank you:)
What bolsters are being used during the MET for lateral trunk? 
Madeline Black
Hi Cate, it is a yoga bolster. 
It appears that the video is the same as the 1st Edition? Is this correct?
Madeline Black
Barb, yes some of the videos are from the 1st edition because that content is in the 2nd edition in addition to 28 new videos that is not in the 1st.
Thanks for letting me know. I will be checking out the new videos

You need to be a subscriber to post a comment.

Please Log In or Create an Account to start your free trial.

Footer Pilates Anytime Logo

Move With Us

Experience Pilates. Experience life.

Let's Begin