Description
About This Video
Transcript
Read Full Transcript
Hi, I'm Tom McCook. I'm back at plot is anytime really excited to be back. I'm here with Aaron and Aaron and we are a, the lesson today is going to be a tutorial on the clavicle, the elusive clavicle, so the clavicle is the beginning of our shoulder girdle. So if you consider your shoulder girdle, which we're going to be working on today, it consists of your clavicle, your Scapula, and your upper arms. So you can think of those three bones form your shoulder girdle. But the clavicle is the only one that connects to the skeleton to the bony connection. So you can really think of that. Your arms starts here.
And another way of thinking of your clavicle is it's like a dynamic spacer. It gives your arms space to move around the torso. So we're just going to experience ours and you can see how you can relate it towards improving your posture, being more efficient with how you use your upper body and relieving tension and get a little better quality out of the polarities exercise that you do. So we're just going to take a moment just to touch our own clavicle. So I'm going to take this guy out of the way, but before we, before I do that, there's a bone that we're also going to include, which is the top of your sternum, which is called the maneuver IOM, and it's a bone that comes down to the notch right there that ties into your second rib. And we want to, I'm going to show you how you want to have that to maintain a little bit of movement. We'll call that your sternum Bray the front spine.
So I'm going to take this out of the way.
And just feel the shape of it. Feel how it's goes all the way out there. It's a big spacer. I noticed when you get to your sternal notch that the, the head of the bone is pretty thick and that's called your sc joint sternoclavicular joint. And that again, like I mentioned, is the only bony connection to the skeleton itself. And now if you put your hand on the clavicle and you feel that, just notice when you lift the clavicle up, does it downward slide at the sternal notch. Is there a role in a slide that's called the saddle joint right there where it slides on the top of the sternum on the top of them and Noobroom. And notice when you lift your shoulder, you don't have to engage our muscles because the muscles that are lifting your clavicle are not our muscles. Just saying, here we go.
Now if you come just below the clavicle and just massage along the muscles that go right underneath it, now you're massaging your Pec major underneath that is your Pec minor. We can hold a lot of tension here that can compress the nerve plexus that goes under it from our neck to our spot to our arm called the brachial plexus. We want to have this to be a little more fluid. It feels of good to to rub that. Now notice if you, when you rub it and you take the clavicle to the back, think of it's swinging this way, you're lengthening those muscles and release them. They're lengthening and releasing and just think of it when your clavicle is going back, your show, the blades going back, they're both moving together.
And notice that if you, for you to get your middle back to work, the clavicle and shoulder blade have to go back. The peck has to lengthen. Otherwise the two are kind of fighting each other. So we want that to be easy. Just think of, we want the arm to kind of be suspended from the shoulder girdle opposed to braced on the shoulder girdle. Now let's just play with the movements of the clavicle. So first, the first one is elevation. So just imagine when you lift the shoulder up that medial or the border close to the sternum goes down and then it comes down.
Just feel out a few times I'll go for nice fluid. Easeful. Lift is a sliding down on the sternal notch. Now take the outer border forward. That's protraction, and then take it back. That's retraction.
Let your arm do basically nothing. Let it go for the ride. That's a whole lot nicer. Now the other version is, another version is when you lift the arm overhead, the clavicle does an interesting thing. It elevates on the lateral border and the whole clavicle rolls back like a log in the water.
Let the weight of the arm fall into the sternum. That's what you're, that's called being center loaded or you're letting it fall into the midline and then lower [inaudible] hey again, let's do them all one more time so you can lift the shoulder up. Clavicle goes up on the lateral border, comes down. Do that one more time. Now take it forward, take it back, take it forward, take it back. And now we're going to go into elevation of the arm and feel the clavicle roll back and drop down on the sternum. That's the upward rotation of the Scapula, but we're focusing on the clavicles action, which we tend to not think about too much. Then lower it down.
Now just take a moment. We haven't done a whole lot. Just notice the difference between the two sides. They might notice that shoulder, it feels a little lower already. Even notice the length of that arm in comparison and this and this. Notice the ease and range of motion. All right, let's see, and that's soon.
We have just so think of when you focus on function, you become more efficient and you usually improve function. So we want it. We want to keep playing with that. Now let's add in. We'll do the dynamic of clavicle, show the blade head and spine. So when you take the arm forward, you can notice it. What? Imagine if you didn't have a clavicle, that's as far as your arms go.
That's kind of boring. You'd be a little bit limited. Now take the clavicle forward and show the blade forwards. That's protraction. Now take the Scapula and clavicle back. Take the arm back and look back. And again, it's arm, clavicle, Scapula, Scapula, clavicle, arm head follows. So there's this swiveling around the torso that gives the arm more range of motion and no one muscle or one joint has to length into an extreme because at the extremes is where we're weak.
Now let's add the spine. So it's going to be arm, clavicle, Scapula, spine, coming back, its spine, Scapula, clavicle,
And one more time. Shoulder and neck tension is a great way for you to kind of get better function and understanding and be able to help yourself relatively quickly. Now just brush down the arm to your hand. This is all the Franklin method lesson on this clavicle, but it can tie right into your plot is work. Beautiful Way to improve function and understanding and to come back to the center. Take a moment, degrees of better, uh, and again, notice, notice range. He's, and you might even notice your breath on this side feels a little more expanded.
I can feel the long fill up more on that side. Might even notice. Turning your head to that side feels a little easier. So shall we do side to, so let's touch side too. Just feel the shape of the clavicle on the left side. Now just feel it's dimensions are can when you're doing this stuff, get very curious about your own design.
Body is brilliantly designed and to improve how we function, we need to put our attention on how we're using it while we're using it. Now massage underneath it along the under border massage, the line of muscles that attaches to the clavicle and even some that are under it. Tech Minor.
And one more. Now let's go through the movements. So as you lift the shoulder up, see the clavicle goes up as the, the border at their sternum, the sternal notch goes down and then the outer border goes down. As the sternal notch slides up, no CRM arm can stay relatively relaxed and go for the ride. And now take the clavicle, the outer border forward, that's protraction. Wrapping around the rib cage to the back is retraction. Just feel that action. So we're focusing on bones, but there's a lot of muscles being affected here.
Your pecs, all the muscles that connect to your Scapula, mid back, shoulder muscles, neck muscles. There's a lot going on there, and then when you lift the arm up overhead, imagine that the sternal notch is going to slide down on the breastbone. As the clavicle opens up on the lateral border, go up like a flag and then roll to the back. That's it. It's like [inaudible] and then it rolls down and the lateral border comes down.
Let's do that one more time. It rolls in, lifts and slides down on the sternal notch. Now let it rest on the sternal notch. Even bend your knees and let the weight be low in your body so you're getting your center of gravity a little lower so the arm can be supported from a low place.
One more time. Arm, clavicle, Scapula, spine, spine, Scapula, clavicle, arm. Place your hand on the Trapezius and just picture that your Trapezius, the upper portion attaches to the lateral third of the Scapula, RF, the clavicle. How's your rest? Your hand on there, the knees. And as you lift the shoulder up, you're shortening that muscle. But give it a little squeeze. Squeeze the water out. Now let it lower and just see it filling and spreading.
As the weight of the arm drops the shoulder and lengthens the trapezius. And again, lift,
Notice posture. Now we're going to take it into including the top of the sternum. So touch this the notch at the top of your maneuver, IOM. And there's notice if you go down about an inch and a half, you'll feel a bump. And that's the joint where that bone meets the the longer body of the sternum.
But we're going to work with just where that joint is. So put your fingers there and you can picture right above the clavicle attaches to it in that notch. So it's soft knees on the exhale, just softly push back into the joint and see it flexing to the back. And as you inhale, open the heart towards it and let the clavicles go back
IOM is moving, which assist to the thoracic spine and having better mobility.
And as you open and round, see the outer border go forward and the maneuver IOM go back. So inhale up the front that the weight of the arm fall into the clavicle open. Then in curl,
You can even think of some epic mew music from a, from a movie. Oh, here we go. And then just take a moment, Huh? Notice posture. Notice breathing. Notice the feel of the shoulder, girdles and neck. You also might notice when you relax your neck and shoulders, you have more space in your head and your minds a little quieter.
You're a little more grounded. Now we're going to come down onto all fours. We can take the balls away. We won't need them now. So I'll just give you a picture. So then movement that you want to think of, the clavicle is going to go like this and the position that you'll be in, you'll be kneeling with your hips, your knees about a little wider than your are about shoulder width and your hips about six inches behind your knees. Now my right hand is on the floor a little bit in the front. My left hand is going to be in front of my chest for the first piece of it and I just create a straight line head detail.
And imagine that you're going to take the free hand collar bone towards the back to turn the spine. And now as you come down, turn into the arms. So this is the easier version and see you can keep the weight even on both of your knees and turn around like a central access that goes from your head to your tail. Now from there, if you have, if you feel like you can go further, you'll put that hand behind your head now lightly. Press the head back in the hand into the hand to lengthen through the back of the neck. Now lead with your clavicle on that up arm to the back to open the other one goes forward.
Now wrap them towards one another to bring the elbow to the other elbow and then inhale to open. Exhale to close and get the feeling on the weight bearing shoulder. That shoulder can stay nice and low and you're opening the clavicles away from the breastbone and you're bringing them towards the center line. And there's two, two more. So this is for thoracic mobility, shoulder organisation and even some thoracic strength. We'll do one more and then back to center and we'll switch sides and start with that first version with the second side hand on the opposite shoulder. And just imagine you're going to lead that lateral border of the clavicle to the back to turn and then fold in towards the other arm. And again, it feel how you rotate in that clavicle open and notice that it gives you a little more mobility without stress.
And now as you come back to center, bring your hand behind your head if you, if that was appropriate for you to stay with that. You could stay with that version. Now as you open up that clavicle, turn and see the two ends of the clavicles going away from each other and then towards one another, away from each other, and then towards one another.
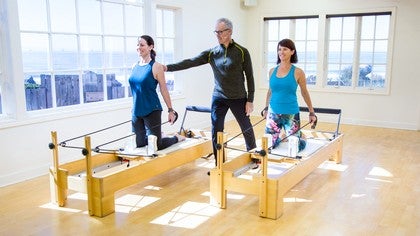
So when you're in tall kneeling, just think of the initial movement is the clavicle, the Ha, the lateral border. Going back to drag the arms back, thank than a little bit through the back of the neck and open the top of the maneuver, IOM to the front. Now hold that and turn your head to one side center, second side center and release. And again, drag back, feel your middle back. Stand down into your arms. Turn Center, turn center [inaudible] and release. We'll do one more drag back turn center, turn center and release. Yeah, so you can play with those and include those in your mat classes or your own practice. We're going to do one more on the reformer. So now we're going to finish the tutorial with another uh, version of the chest expansion on the reformer. So we're, we have one blue spring.
You could go anywhere between a red or red and a blue or even heavier, but I would start light for this particular lesson. So you can learn how to get the mechanics well before you make it any heavier. So we have one blue, they're going to come into a nailing position right up against the shoulder blocks and then reach through the straps and hold the beginning of the rope right above the buckle. And just like when you're on the floor a moment ago, being tall, kneeling and just get the feeling that you're not even going to think of that you think of your arms are just these two poles that happen to be attached to your shoulder girdle and all you're gonna do is initiate by drawing the collar bones back and notice right away the car will start to move and then continue drawing the collarbones back as you reached down into the arms and then control the return. Just get a feel for that, that it's the lateral border of the cow clavicles going back and then feel the where to reach all the way through and notice. Notice as you pull that you can also get a sense of getting taller from that ground reaction force to going down into your legs, going down into the strap. Let that create a little more lift and length into your body.
Beautiful. Now the next one, do the same thing. Initiate from the clavicles. Now just let them maneuver IOM. Open a little more to the front and now turn your head to one side center, second side, center and release. We'll just do that two more times. Initiate from the clavicle, open the [inaudible] to the front, and then turn center. Turn Center and release. The last one.
You have to have just a little bit of a smile. Nothing conspicuous, just you know something. Here we go and draw it back. Open the top of the chest and again, turn the head center, turn, center and release. And that's not true. Too early. I hope you enjoyed it. Please practice a lot. I find this work amazing. If you really go into learning how to understand the body better and bring that to your clients, bring it to yourself. You'll inspire more people and your body will still healthy for life.
Hope to see you again. Thank you everybody.
The Teacher's Corner: Embrace How You Teach
Mention
 |
Tom McCook (Teacher) |
 |
Cheryl Z |
 |
ML |
 |
Liya O |
 |
Sornam S |
 |
Tahmour B |
 |
Jennifer O |
 |
Caroline B |
 |
Patricia P |
 |
Genevieve Malcolm |
|
|
Stacy W |
 |
Sophia Vrissanaki |
|
|
Rachel P |
 |
Vicky |
 |
Traci R |
|
|
Becky C |
|
|
Gerri M |
 |
Judith R |
 |
Kristi Cooper |
 |
Lynn P |
|
|
Heta K |
|
|
Deanna W |
 |
Vanisha T |
|
|
Leslie H |
 |
Lori M |
|
|
Natasa A |
Comments


Regards, Natasha from Belgrade,Serbia

Thank you for your message and really great to work with you in Venice! My intent is for the tutorials and class content be an additional, support for the new discoveries and teaching from my workshops. Happy to hear you're getting the value of Pilates Anytime to support your learning and practice. Hope to see you again and be well!


You need to be a subscriber to post a comment.
Please Log In or Create an Account to start your free trial.
