Discussion #4144
Teaching Seniors
Description
Links and Resources
About This Video
Transcript
Read Full Transcript
Sherri Betz, thank you for joining us again. All the attendees from last webinar last week with John, we had just an amazing outpour of gratitude and thanks for being part of what we're trying to offer and educate our members. So as we saw that, we just kind of scratched the surface I mean, people wanted more so here we are. And welcome everyone, this is my first webinar hosting so new kick off is called teacher talk and my first teacher is Sherri Betz, so again welcome. I'm so honored, I love it, thank you.
This is so fun. Also just quickly too, I will say for everyone who was in the webinar last week with John, thank you for coming back, for anyone who's new who wasn't in that one, we won't spend as much time today on the COVID issue because we covered that so intensely last week because we also have a lot more to unpack today. And a lot that Sherri has to offer and really to help us with the theme of working with seniors and what to do. I don't need to introduce Sherri and all of her expertise, advisor, mentor, researcher of the law, she's now in Louisiana full time the Pilates of the Guardian District in Monroe no longer in Santa Cruz, hence go back to the webinar last week to check what's holding up. But Sherri, how would you like us to start right now?
I would love to hear what you've outlined for us and how you can present that for us. Yeah, I have a four part outline for getting started working with seniors in a virtual setting. Most is from working with seniors face to face. The first step is basically to get the seniors online. So there's four parts one is getting the seniors online, setting the scene for safety so you'll see my little scene here and I'll explain everything as we go along.
And then the third part is exercises that may be contra indicated for certain population, certain diagnosis and we won't go into in great detail but that might be unpacked in another webinar later on. But I will talk about the importance of each person knowing their own medication and precaution as directed by their healthcare professional. Then the last part is what are the best exercises to do for the seniors and to help with balance issues and balance density is the main target. So that are the four sort of realms that we're gonna cover. The first one I'd like to talk about is getting them online, Lord have mercy.
Exactly. I'm gonna cut in just for a second we had numerous questions coming on this which is exciting I think that there's some interest and obviously teachers that are watching, we know we've clients that are ready to handle the zoom world. And it's really an opportunity for us as teachers to get them, as you said, get them in. So, just one question, I'm just gonna read one maybe from a big long list, what's a good way to explain to our older clients why they can't... Hold on, jumping ahead, hold on a second.
I'm most interested in teaching seniors through zoom as I am teaching several of them now. Since they are the most vulnerable category, they are not really in a hurry to get back to the studio so we know that they are here, they are doing very working virtually but it'd be great to have a little more insight on how to get them, teach them safely and other new ideas. Lets talk zoom, lets talk zoom. Okay. So, are they on zoom already or you want to get them on zoom?
Let's say we wanna get them on zoom. Okay, okay. So my best advise to you to get an older adult on zoom that is not tech savvy is to call them. Just pick up the phone, if they're already your client, pick up the phone and call them and talk to them about their interests, keeping their strengths up, keeping them motivated to keep moving. Because if they are shutting and they are not going to get their groceries, they're not going to church, they're not doing any social activities outside the home, likely they're sitting around a lot and their strength is going to decline rapidly.
We start loosing muscle strength within 24 to 48 hours of being stationery. So, its very important that they stay moving. They need to be on their feet at least four hours a day. So that being said, you have to kind of help them understand that they can't wait for three months, they're gonna loose so much strength and mobility within three months. The older they are the more physically frail they are the more difficult it's going to be to build that strength back.
So with that being said, you wanna keep them going as much as possible and motivate them to get online. You gonna educate yourself on the zoom platform. If you're gonna teach on zoom, you're not gonna get text support from them they are overwhelmed, you cannot get them on the phone, you cannot get them on email, they don't respond to chat they just basically are not responding to any questions that I've ever sent to them. So you have to figure out on your own how to do it. Yeah, so another sub question someone was asking about the security factor of zoom.
So with our older population, they might be a little apprehensive to jump in the zoom game just because they've been hearing that the security issues are problematic. I mean I've done the same thing on my studio just call them, talk to them, ease their mind. Call them and talk to them but if you're worried about the zoom boomers or when the zoom people kind of jump into the classes, is that the security issue? Or are they putting their credit cards online. 'Cause they don't have to share any credit card information it's free for them to join a class, so they don't have to share any credit card information or proprietary information just their name and email address and figure out a password.
I think it might have been the person that wrote that question didn't really elaborate but my hunch is that the security issue is like the boomer issue and that. So the way I fix that was that I don't allow screen sharing by anyone. I didn't even want a password because that was another step for them to have to remember, oh, I gotta remember this password. So I don't have a password on any of my classes. All of my classes are the same link.
So I don't publicize the link. I just send them directly the link by email or by text, whatever they prefer. If they're using their phone, sometimes text is easier. But if you know what device they're using, whether it's a Mac, computer, a PC computer or an iPhone or Android, so other types of smartphones and iPhones. So you need four devices, you've got to get savvy with four devices and to help them understand how to upload and download the zoom application.
So getting that done first is going to be your first step is to get them to understand how to put the zoom application on their device, depending on what device that is. I spent over an hour with one client helping her get her sound working. She had four different speakers in her PC. We had to go into her sound settings, we had to select speaker number one, that didn't work. Speaker number two, that didn't work.
Speaker number, she was ready to give up. I'm like, don't give up. I'm sitting here doing nothing. I don't have a studio right now. I'm not doing anything except helping you get in this class.
So that's my main goal. Like, don't worry, I'm not upset. I've got as much patience as you need. So stay with it. Tell your husband to go in the other room so you guys don't get a divorce because the husband was like, do this, do this, do this.
So, anyway, we finally got it to the last set of speakers and it worked. And we were just, yes, hurray, we were so excited. And so we have to really problem solve and troubleshoot. If you're not super techie, you might have to get somebody to help you with that tech support issue. And maybe it's just not right for you to teach virtually if you're not very techie, because you pretty much have to troubleshoot quickly on the fly as soon as you get online.
I mean, every day there's a problem. Like today I got on zoom and my video didn't work. I was hosting a meeting for the PMA research committee. My video didn't work. Something happened with the update, something didn't work.
So I just had to quickly log in on my phone, stick my phone above my PC or my Mac and shoot the video myself and I was like an extra person in the class, but they could hear me from my host and see me from my login as a participant. So I had to figure that out on the fly because I didn't wanna have to delete the whole meeting, start over again, turn off my computer, turn it back on And so troubleshooting on the fly is always especially after there's been an update. This isn't always interesting. Yeah, right. And let's just face it, we are in virtual land now it's kind of like things have just gotten sped up for us.
I'm looking at it too with at least clients at my studio is I'm looking at my virtual classroom as my studio classroom in the mindset of, I'll do whatever it takes to get that client in under. That's right. And have them feel safe and all of the things I would normally do in my studio brick and mortar physical space I have to do here. So it's a level of, as we were talking the other day of high level of customer service that we need to provide for these people. So I'm gonna segue us in because we have so much to cover.
Let's say that they're on zoom, they're in it to win it they're for you. And they want to learn and they're ready to set up their scene, so can we go to? Right, absolutely. One of the things I was going to say to people, before we go to this part is, please call everyone that's new to your class. If you get a new participant in your class, unless you've got hundreds of people, which hopefully that's not, I don't want to have that problem.
But that's an issue, but it's another issue of it in itself. But anyway, if you could see a new person in your class, call them, find out what their precautions are, what kind of issues they're having just something just basic, make sure they filled out a liability waiver. And then after the class is over, and they participated in the class, call them again. How did it go, were there any problem? I did that with every single client, and I still do that with every single student that comes into my class I call them before, if I don't know them, if they're brand new to my virtual classes I call them.
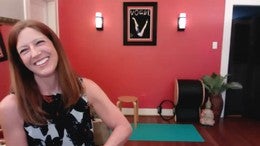
So that being said, setting up the scene. Setting up the scene, you've set it up so beautifully out there. This is also part of customer service. Yeah, right. Okay, so I'm gonna introduce you to my little scene here.
The first thing is that people should be, if they're frail, which I don't call people frail to their face, but if someone is frail... Yes, Amy. Sherri, I have a quick question, can you please define senior for us? Okay, all right. So if someone is a senior, a lot of times people will call up and say, "Hey, I'm a senior." Which means literally that they're over 65.
And if they say that they're over 65, that could be a marathon runner. That could be someone that's in a nursing home, so that doesn't mean anything to me, really their age. What a senior to me is someone that cannot get down to the floor and back up again without assistance. And we technically call that frail. But there's no way I would ever call someone frail to their face.
We have the fit senior, we have the frail senior. The fit senior can go down to the floor, and back up again without assistance. A frail senior is not able to get down to the floor and back up again. So I will also teach you guys how to help people get down to the floor using a chair. So carpeted surface is going to be very important because if the person is frail, or they have low bone density and poor balance, if they fall, they're less likely to have a fracture if they're not on a hard surface.
So the carpeted surface is usually better for that. If they don't have carpet, which I don't have carpet in my home, so I have a large rug here that's large enough to wear no matter where I step, I'm on the rug. And I also have a non skid pad underneath it, or those waffle weave kind of pads underneath. So it doesn't slip because rugs can be very slippery. If that is not possible, then I have a yoga mat.
I just have my little yoga mat and I make sure it's clean. Because if it gets dusty, you can just wash it. If it gets dusty, they get very slippery. So you want to make sure they're clean. And not just for sanitization, but for non skid because if they get dusty they start getting slippery, and I just probably will throw it in the washer, you know you can wash these things or spray it down with something and make sure the non skid surface is still sticky.
Okay, so then we have we want to have a sturdy object and a chair against a wall. So what I have here is a sofa that's very heavy. This is actually a high to bed that's a twin size and then my chair is against my wall here for any exercises I'm going to do that the chair might slide. This can be a countertop, it can be a buffet. It can be something very sturdy in your home that you can hold on to that won't move if you fall against it, right?
So if I fall into this, it's not going anywhere. Now I can turn my chair around and have a chair and my couch here. I can also have a broomstick. So this is a broomstick, that does not have the rubber stoppers on it. The problem with this kind of broomstick, this is great if you have carpet or yoga mat.
If you put this broomstick on the floor, here's some wood floor right here. Slides right out, right? So I do not recommend a regular broomstick unless the person is on carpet. And you can get these little stoppers here. And they're just little chair stoppers rubber stoppers, pain tips is what they're called.
I got these at Home Depot. Don't buy them from a medical supply, you'll pay four times. Exactly there. You can get these for like $5 for a pair of them. Home Depot Home Depot or Lowe's or any hardware store.
So I love these for that reason. These are four foot poplar dowels that you can also get at Home Depot, or Lowe's. And you put these rubber stoppers on there. The whole thing costs $5. Okay.
So when you're setting the scene like this, are you doing this over the phone and that initial kind of still acquisition, you're trying to get them or? We've decided they're already coming to class. So you're telling them on the phone this or maybe they're on a zoom meeting with you and they're sitting-- On the phone, then we go and do a practice zoom meeting. So if somebody has never been on zoom before, I'll be doing practice zoom meetings with people and getting on there, seeing if they got it, then help them set their scene up, put their camera in a place where I can see them. The first class I did, there's a woman that's been in our classes for years.
She's actually a doctor. She almost fell. And I saw her. She was next to her buffet. And she was in a safe place.
And I saw her losing her balance, and she fell against the buffet. But she caught herself. She didn't hit anything but she fell. And I about lost my cookie. I was wanting to reach into the computer but there's nothing I can do just stand and watch.
Right, I mean, here we are trying to set them up for success and then. Exactly. But luckily she was next to a very sturdy piece of furniture on carpet and she had a dowel so she was fine. She actually was able to catch herself. So that being said, all right.
What's in the basket? Okay. So then the chair can either go this way, if we're doing some balance exercises and I'm facing this way, if I'm doing a maybe a squat or sit to stand, I'm going to put the chair behind the wall and so it should be a chair that's easy to turn that has some arm rests on it. This a special chair, this is actually my grandfather's chair. And he's no longer living but this is a very special chair.
And actually used to be a rocker, just for rocking. And I love this chair. This is the chair I sit in when I'm doing my work at my desk. Love it. It's a nice sturdy chair with really good armrests and it's 18 inches high.
So the other thing is you want to measure the seat because some chairs, I have a chair that's really low. I'm gonna put it next to you so that you can see it. Let's grab this other chair, I actually love using this chair for a challenge. For toilet squat, sit to stand. But if you look, this chair is low because it's padded, and it's a lot lower than this chair.
So this chair is around 16 inches high and this chair is about 18 inches high. That two inches makes a huge difference to someone with weak legs. So it's really good to kind of figure out what height chair they're using. Because if they can't get up and down then they might need a higher chair surface. You can also put a pad like fold up a yoga mat or fold up a cushion and put in the chair to make it higher.
And that make that can make a big difference but 18 inches is your standard height. I like for people to be able to get off the toilet by themselves. So do I. Toilets are often like 15 inches high. And I hate elevated toilet seats that's the worst thing possible for an older adult.
I agree and they don't like it. Their mindset, and they have got sit up, right. Let's get them strong-- Yeah, they like those elevated seats, but I don't because every time they get off that low toilet, they're doing a bit of nice little squat. Exactly, exactly. Okay, so let's keep going.
You asked me what was in the box? I'm so curious. The reason I have a box is because I have balls in the box. So just imagine that all this stuff was just laying around here I've got tennis balls, usually I'll have two, let me grab my other one. Because when they're sitting, they can do their stuff on the side.
So you've got all this stuff around that's easy to trip on. So they have to only get the thing that they're using at the moment out of their box. So balls in the box. Tennis balls in the box, cellar bands in the box, nothing to trip on, okay? And then either that goes under the chair.
Usually at the community center we had those stackable chairs so you can easily put it under the chair. But this particular chair has a the bar under it. So I'd have to put it to the side. You want it nearby so they can just not bend over and reach into it like this. But you want them to be able to do like a hip hinge.
Put it in front of them and practice their hips to get their things out of their box. Perfect. So, just to review, surface either carpeted or yoga mats. And then the chair either against the wall or a sturdy surface and or a sturdy surface to be next to to hold on to, four foot dowel with rubber stoppers. And then your box with your supplies in there.
And then the other thing is shoe 'cause that's gonna be variable. If you're lifting weights, dumbbells, anything like that you need to have shoes on 'cause the last thing you want is to drop a weight on your foot. So I have these kind of hard shoes that I can just slip on for me as a teacher. So when we lift weights, I can put these on. I recommend that older adults use lace up shoes or something that fits more firmly so they don't trip.
Please get rid of the crocs, those are terrible. If somebody comes in here with crocs and like if you come in here crocs and you're in the same space with me you will not leave with those crocs. Anyway, so those are trip devices basically based on what I've seen. So a good fitting shoe that will protect your foot in case you drop a weight. And then eventually, I remember when I first started teaching at the community center, I had a lot of students in the class, maybe 30 students.
And the next class I only had about maybe 15. And I thought, they hated me, I was so upset. And what happened was, I made them take their shoes off. And they told the nurse of the community center when they got their blood pressure taken, and they go for lunch and all that stuff. They told her, who she told me that they didn't want take their shoes off.
They didn't want to come back to the class. If you're at home, maybe that's not going to be as big of an issue. I like working in bare feet. Yeah, me too. And the reason why is because I want that proprioception I want to use the Kennesaw massage, I want to move those toes, I'm going to fix a hammer toes and Bunyan, and get those feet moving like free the feet, please.
And if somebody has orthotics or has been directed or kind of surgery or has been directed by their doctor to wear a special orthotic, when they stand or exercise, absolutely let them wear them. But I encourage people to get their shoes off and do their foot work. It doesn't mind flipping tips. I love it, setting the scene for safety and setting them for success. I mean, when I've done this with some of my clients at home too, is they're really excited.
They really feel like they've taken care of that you've taken the time to set them up and they're ready, they're committed by this. I'm just going to kind of dodge in and out of a few things here. One of the questions which is kind of relevant right now is how much would you charge for a group class you yourself or average-- That's a good question. Right now I'm charging $15 for drop in and it's $60 for a package of five sessions. That's a steal.
And so it's like $12 for drop in, not dropping, but for the package rate. Now at the hospital, we charged $5 a session in a series of six. So there is no refunds if you didn't come. With a virtual class, I don't charge you if you don't come. And I don't worry about the cancellation policy so much because I'm at home.
I mean, I'm not driving somewhere and setting everything up I'm at home, if nobody shows up, it's not a big deal I just go about my day. Because our cancellation policy is usually to prevent inconveniencing the instructor to show up and be ready for you to come to class and then you don't show up. So I'm not so concerned about the cancellation policy with my virtual classes. You can do what you want with that. But sometimes people can't get online or something comes up, they're ill, there's a million things that happen.
So I don't want to charge people if they can't come. And I'll call them if they don't show up. Yeah, right, hello, text a little. Find out what happened. Is it a 55 minute class that you or 60 or long?
Yeah, it's 50 minutes. I usually end up going 60 minutes I can't usually get it off. I know, it's so hard to stop it. I try not to go over but sometimes I do. I don't wanna go to in this because we've so much about exercise protocols to talk about, but like the liability waivers.
I already did my liability waiver with an attorney. And put it on site and I'm happy to share it with everybody. If you want me to send it, I'll put it up as one of the resources. That I'll be great, thank you. He looked at it for me for free so I didn't spend anything to try to get it done.
So I can show what I'm using. And maybe there's something I'm missing that I need to be putting in there. But I did change it to cover myself for telehealth sessions, for PT and also virtual classes. Perfect, I think that's great advice. And I know that has been a question that's come up in many of the webinars on various topics of, and I know we have another webinar up that John did that kind of talks more about how to handle the virtual liability issues.
What's nice about some of the platform too myBuddy online has a little click, has a little checkbox that you can check and so I loaded my own liability form up there. And then the person, you can either sign it and take a picture of it and send it to me, or you can email it to me or fax it or you can check the box on myBuddy online. But some people never get on myBuddy online, I process everything for them. And they never even do anything on there. As little as possible is better usually to avoid confusion.
Yeah, customer service, get them in the door, get them in the box, get them in. So there's many of my clients that have never been on myBuddy online they make a scheduling appointment themselves or cancel anything, they just email me or text me or call me. Yeah, we've been going backwards with that. Okay, let's talk about the third point, because a couple of the other... Well, we had a liability question, but then people are starting kind of chomping at the bit with exercises they really want.
Like last week when you talked about the heel lifts, well, people got excited because we're curious what to do and why or why not. So this is kind of talking about some of the contra indications. We have some questions specific to how to work with someone with osteoporosis virtually. But this also goes back to I think our responsibility as a teacher to do a little homework on that client prior to having them join in a group. We have to know what their contraindications are, we need to verbally communicate with them.
And doing it I think in a way, that's not you can't be do that. More of this is what you can do. Right, right. This is what you need to focus on. Yeah, right.
Because we don't want you doing that if there's a different time and it might shy them away from coming into class. But let's say, what are some exercises we can avoid? Things like your bullet point number three. Right. I'd like for people to know their diagnosis and what it means.
So when somebody says, I have this diagnosis, so, all the osteoporosis, do you know what that means? Do you know how that means functionally? And what are the things that you are trying to avoid? Have you been told to avoid anything? So I give them usually a sheet that has all of the contraindicated exercises and some precautions if they're doing pilates, if they're doing yoga, if they're doing strength training.
Depending on what they want to focus on. So we're gonna stay with pilates because we're talking about pilates and so I have the sheet that I go through that has, so you want to do pilates I have exercises to focus on and exercises to avoid. And yeah, so I can share that with you guys too. I think people would love that Sherri. I think they might like it.
Okay, so lets see, I've got a yoga one and I've got a pilates one. I made these for the National Osteoporosis Foundation. And so, you want to do pilates for your bones. Beautiful I've seen this-- To work on core control, dynamic alignment, legs training, final extension. So those are some of my favorites.
And then when you want to do pilates, this is what you want to avoid. So, lifting up in the hundreds, the rollover saw, rocking, doing the rock on the rib cage. So that's a really simple graphic that you can actually download it either from my website or it's been branded for the National Osteoporosis Foundation therapy or whatever. I will absolutely send it to you you can brand it for your own studio if you want. That is so generous, thank you.
You're welcome. So those are the kind of things we go over with people with osteoporosis. Now, with older adults, you're going to have things like stenosis, what does that mean? They can't extend and they can't bend forward if they have osteoporosis as well. So that gets a little bit of a conundrum.
However, when they have stenosis, it's probably not going to be in the thoracic spine. It's going to be in lumbar. Usually it's lumbar or cervical, so lumbar avoid extension, and then thoracic you can focus on extension. But I'm not going to go too deeply into that because that can be a whole topic. But really helping the person understand their diagnosis.
And understand the precautions for movement with that diagnosis. You don't have to know everything about it. You just need to know what are the movement precautions for someone with that diagnosis. You can get that from the PMA study guide. I actually wrote that section.
Can you also share because maybe some of the people watching or who will be watching this later may not know some of the other resources like the National Osteoporosis Foundation or World Health Organization. Can you list some of those right now for us? Absolutely. The National Osteoporosis Foundation is nof.org. American Bone Health is another one, American Bone Health is all spelled out all one word Americanbone.health.org has wonderful resources.
And then another great resource is Osteoporosis Canada, and it's called osteoporosis.ca. Wonderful videos, they have the best series of videos for exercise and appropriate exercise for different types of people. So like a golfer, a person that's like let's say older adult, and then a very frail older adult. So those are great and Laura Jungler Gloria has done a great job of putting all that together. Thank you, okay.
Quick question coming in, since we're on this topic is who's giving the client, student the prognosis? It is a physical therapist, a doctor? The doctor gives the diagnosis. So a physical therapists can only give a physical therapy diagnosis. So the doctors give the patient the diagnosis of osteoporosis, we can't do that.
That has to come from an MD. And then once they've received that diagnosis, we look at the dexa scans. I definitely look at it, I wanna see what those numbers are. Because sometimes they're really borderline just barely over the border to osteoporosis so that's always a good thing. And sometimes they're osteopenia, and they're not really sure what that means.
So I explain that to them a lot of times, and then those diagnoses come from their doctor. Now, don't expect your doctor to know all the movements contra indications, precautions and indications for the patient. That's not their thing. They treat with medication, surgery, injection, that's pretty much their options. If you need movement, you go to a physical therapist.
And if the physical therapist says you're ready, you know you go through your rehab process, you get all of your needs addressed, pain issues addressed, then that person in my world goes to my pilates teacher and she's on here, right now, Michelle Frienzella, I can give her anybody with any diagnosis and say this is their diagnosis unless it's something weird and show me what to do with them. She probably would, even if it was really weird. Yeah, even though it's weird, we talk about it. And say, these are the precautions, these are the things that she shouldn't do. And there's often a times that she'll be working with somebody and she's like, that doesn't feel nice.
So when she goes do a consult with Sherri, and then I do a console and say, "Okay, do this." I remember one time all I said was do ankle movements like that, because she had an entrapment of the peroneal nerve, and freed it up, then it's done. So that's all she added to her program and she was fine. Go to the doctor, didn't have pietila it was just a simple thing. Sometimes it's a very simple thing. That' a funny.
I remember when I first moved to Santa Barbara, 2001, I was in the Bay Area before that, and I had got... I just swallow my words when I get so excited. I had received a lot of my training from Madeline Black and Jim Solace. And physical mind was my program and I remember when I was moving having a chat with Madeline and the osteoporosis really wasn't 20 something years ago wasn't really, as known of, and fibromyalgia. And in one of her chats with me, she said, you're going to really need to know about fibromyalgia and osteoporosis.
So I get down Santa Barbara, I have my intake sheet for my clients. And sure enough, almost every gala that was signing me checking those boxes. And I remember feeling pretty overwhelmed. Like, I don't know what to do, really. But that stirred my curiosity.
And that's actually when I started, anywhere you presented. I was like, I'm going to see Sherri, I want to learn from Sherri because it was such a big thing. And the writing on the wall. I need to learn how to work with this demographic. I had the same experience as a PT.
It's like I got these patients with osteoporosis. I didn't really know what to do with them. We had two people doing courses at the time in 1995 that was Kathy Ship from Duquesne University and then Sarah Meeks was doing some courses. Yeah, exactly. I met with Kathy Ship and she was fantastic she was doing research and instruction and safe exercise.
Yeah, so I guess what I'm just plugging there for anyone who's listening right now, don't feel overwhelmed. Just go look at Sherry Betz, go to Rebecca Rothstein, go to Maria Molnar, just get on the website list that Sherri just called out and do some research. It's actually very exciting to take on this demographic, there's so much that they can do a lot of things to avoid, but they don't need to even know what they need to avoid really, it's like-- One of every two women and one out of every four men over age 50 have low bone density. So here we go, folks, right? It's the demographic, right?
And people are getting older, you know. We're living longer, we're living longer and so let's just keep building that. So let's talk about-- Living longer and living stronger. Yeah, I love that. I'm getting questions about let's get exercises they wanna know what to do.
Okay, great, all right. I'm gonna start with what I usually start with, is I have people take their shoes off, and we put some tennis balls in front of them. We've got to get to feet more alive. Can you just do one thing real quick? Can you move your other chair out of our way a little bit?
This one, yeah Move, thank you. Thank you, sorry about that. Okay, all right. While they're sitting and waiting for a class, they're gonna massage their feet, rolling back and forth and then doing what I call the parakeet. This is what helps with hammer toes because a hammer toe means that the metatarsal phalangeal joint is an extension and the DIP is in flexion.
So it looks like that, I don't know if you can see my finger but. You can come closer and give us some little. Yeah, let me show you. So this would be a hammer toe. Go higher.
Where that joint, hold on, that joint is in extension, let me do with my finger. That joint is in extension, and that one's in flexion. So it's like when your knuckles get rubbed on your shoes, that you get from a hammer toe. And then of course your Bunyan is when they're going across like that. It's what we call the winds flex look.
Okay, so what I like for Bunyan is to put the pressure right between the first and second metatarsal and push down on the kenasol. And then for hammer toes, I like to wrap it around like a parakeet. Like, imagine that you're on the flip bar, and you're wrapping the toes around and really getting all five knuckles to show and you put the kenasol under whatever knuckle you want. Then once we've done that, we put those away and we keep one of them but I'll go and put it away for right now. Okay, then the next thing is we should get out of the chair.
Here's the issue with getting out of the chair. So usually if people have clear balance, they're going to do this right on the back, and then maybe this and then stand up. So that's somebody that definitely has weak legs. So they'll rounder trunk, and then try to get their legs up pushing off with their hands. So you're looking for four things.
Do they push off with their hands to get up? That's an indication of leg weakness. Do they straighten their legs too early to get up? And then another thing is, if they brace their knees together to get up, that tells you that their legs are weak. And that's a really sneaky one, they do that a lot.
And the other thing is if they put one foot forward and one foot back every time, then the front leg is the weak one, 'cause they'll push themselves off with the leg that's behind. So you're looking for rounding of the back, pushing off from the hands, knees coming together, and then balance as they get out. So how's their balance once they get up, right? Are they unsteady, they don't want to be holding the chair. So those are the things that indicate leg weakness.
And what do we do about it? All right, I'm gonna turn it back to the side. I don't turn the chair around as many times but I just want you to be able to see what I'm doing. No, this is great. I'm gonna push on the chair-- Yeah, the more we can see, the better.
Yeah, and I'm gonna keep my shirt off so you can see this with a contrast of the color of the dowel my top on here, I'll take it off in a second. But you're gonna put your thumb in between the stick and your low back. So here, this is the ideal situation where you can keep the three points of contact and hinge forward. So here's what's gonna happen with Miss Myrtle when she's trying to do her exercise. Everyone does it.
Every single person. They flex their thoracic, it's easy to flex your thoracic, your ships are stiff, and then they're doing this. So then the other problem is, I have a sore shoulder and I have thoracic kyphosis so how am I going to get back there if I can't get my hand back there? So sometimes they just have to hold key points of contact, keep your eyes forward and just do it this way. So with your thumb in between the stick and your low back, so that they're stabilizing as best as they can with a thoracic kyphosis that's stiff.
Ideally you'd want to head all the way back but there are times that they are not going to get there. And so there might just do like I said two points of contact. I have stuck the dowel and in the pants and then tie it around so you can tie it to people. I have one drilled with holes that I've been kind of playing around with a prototype that you can tie it to them but you just tire a cellar band here and cellar band here and just tie around their body that works so they don't have to hold on to it. If they have a shoulder problem and can't hold it from above.
Sherri-- That's the first thing I teach is that hip hinge. That's so important because everything they do all day long, getting out the stool, getting out of chairs, getting off the dining room table, getting in and out of bed, they've got to be able to find that hip hinge. Will you do something for us real quick, stay closer to the camera just in case somebody missed that. And then pretend like you're sitting in your chair and then show us and then maybe even turn your back to us so we can see where those thumbs are. Thumb in between the stick in the low back.
Thank you. And being able to maintain that position. Whatever the position the spine starts in, it stays in. And that goes to lifting as well. So if someone is trying to lift something off the floor, and they start out in this position, they basically stay in that position and nothing changes.
So if they were to lift something, and then, oh, this happens, like aah aah, don't lift it like that, because you've compromised your spine to lift this object. You want them to be very stable, and then be able to pick whatever it is that you've chosen to pick up off the floor, with stable spine. And again, it might not be pretty, it might not be the perfect spine. It might be a little curved, but at least it doesn't change when they put a load on it. That's fantastic.
Does that make sense to everybody? It does. I'm gonna back up just real quick to with the tennis ball warm up, what if someone has gout? If they're having a gout, kind of episode? They wouldn't want to do, they need to do whatever they normally do for that.
Whether it's medication or let that subside. You don't wanna irritate a gouty joint. Because its gonna get swearing. Don't do that if they have gout. Okay, perfect, okay, thank you.
Okay, now, next event, I'm gonna move this box out of the way. Again, the box, I like it under the chair better than with this one, but. All right, so we're standing and practicing our stance I like to do testing that normally we do in physical therapy for balance or for whatever, as an exercise, so we put the feet all the way together. This is the first step to the fourth stage balance test. And then we have the person lift their hands two inches off of the surface.
And in the typical tests, their arms are crossed over. So it just depends you have to watch them to see how they do. But then cross your hands over the chest, and then hold their see if they can do that. Then the next step is to step just half a step forward so that the heel of your right foot is in line with the arch of your left foot. That's called semi tandem.
Put that on the other foot, they hold it for 10 seconds. And then the last one is actually quite hard, a lot of people hold on the balance is full tandem. So that's like standing on the balancing and it's not turned, your feet are both parallel and they're in a straight line. That's hard. And holding there, it's actually hard actually it's like standing on one leg.
You do both, right foot forward and left foot forward. And then the last one is standing on one leg for 10 seconds. Now you can't touch the other leg. You can't flail your arms about, you can't hop and you can't put your foot down. Otherwise the test is disqualified.
So you see how many seconds they can do that. I was just gonna say, do you time them or do you say hey, we're gonna do this only 30... Okay. Time them for 10 seconds. If it's a group, I will just count out loud.
Okay, five, four, three, two, one so I'll count out for them. Then we go right into heel left with the feet together. Now here's the thing, if somebody doesn't have good alignment at their knees, your tennis ball's the perfect way to help with that. So if they have valgus knees, knees coming together, they can put the tennis ball between their heels and then rise up. And I have had people that need this size of a ball to put between their heels.
Me too, me too. But you do what you got to do to get their heels together. so they have better control as supination of their feet because what usually happens is that. So sort of doing that. So that's my first step to going into the heel raise, which I think is the number one exercise for all older adults.
Everyone should be doing that. Why, why, why? Tell me why. Okay, so the calf is your second heart. It pumps the blood back to your heart.
If you were to stand still lock your knees for several minutes, you'll probably pass out. Because your blood will pool at your feet. And that shows you how important those calf muscles are to pump that blood back to the heart. The heart needs a little bit of help sometimes even in a normal person. So in the military, you'll see guys pass out because they're standing with their knees locked.
So if you soften your knees just a little bit and stand for a long time, that means your calf's are gonna work a little bit and come back like that. So that being said, you lift up, up and down. Now, an older adult between age 65 and 80 should be able to do, how many of these? I'm gonna take a poll. Can we do a poll?
I can set up a poll. We're gonna do a poll, but I would love to do a poll on how many single leg heel raises should an older adult be able to do? Let's see if anybody-- You guys can chat. Yeah, chat it away. Yes, some people say five to eight.
Some people said 25, so I've several people saying 25. Some people have to learn that, Look like what, I don't even think I can do 25. So yeah, they should be able to get 25 on one leg. After they can do 25 on one leg, you start adding weight. So really getting strong and getting those calf stronger so important.
It strengthens the arch of the foot plus the plantar fasciitis for leg strengthening, bone building, balance, it's just great for everything. It's everything. So I love that one. And then another one that I love. I'm gonna put my chair like this just so you can see better.
Is just step one foot forward, one foot back, and then let that get the calf working. Let me put my camera down just a little. Tilt it a little bit, yes, there we go. And then if I stretch down and back, I've got a hip extension, I've got calf work and I've got ankle mobility and the arch is working to push off. This one sometimes requires padding, and sometimes I have to have people put shoes on if their metatarsal are sore or sensitive.
People's padding of their feet diminishes as they get older. So their feet are tender and sensitive sometimes on a hard floor, especially tough on people, sometimes. So you can wear your shoes with this or use a thick mat, if you want to but I love that. And I call it my lunge preparation. And it's also slow motion walking.
Then we might go into some lunges, but not until they have three foot stride at least so 36 inches from toe to toe. And then that hip can extend with the leg straight. Because if you can't do that, that means that that hip or that metatarsal might be way too tight, and then you're going to get too much weight on that back knee and your knee's gonna hurt. And that's what I was just gonna say is that some of the other questions that came in or thoughts I can just hear the thoughts right now from a lot of people out there who are already working with this demographic. What about knee issues?
What about arthritis, what about the-- This one I love for any knee, any hip, any foot pathology, you can pretty much get around it 'cause you can start small and start to work here. And then you gradually bring it back, bring it back. When you start doing the heel raise with a knee problem or a hip problem, you will eventually help that knee so so much 'cause you're working out all those muscles around the knee. And again, 70% of the shock absorption for the knee comes from muscle. And what do people do when they have knee pain?
Nothing, less. They baby it and that's exactly the opposite thing that they should do. And usually within three weeks of working with anyone 90% of people that I've worked with and I'm just trying on a number of them I'm sure you're understand, but have benefited from doing strengthening and their knee tend to survive as the training goes up. I don't want you all to feel afraid. But that leads me to my next exercise that I wanna make sure we get in before we finish.
So I'm super excited to show all this one because string assisted squat on the trapeze table is my favorite, one of my favorites after heel rise. But you can do those with a heel raise too, in the studio. But what we're going to do is I'm gonna show you how you can do a spring assisted squat at home. So you have to have, I'm watching a dock. Here it is.
All right, you have to have this. This is a simple, I guess it costs three or $4, door anchor. So it has a little knob here that goes into the top of the door. And then this is another brand of it. It's Spri door attachment.
This one is a Clara loop. Okay, we'll put those in the chats. You wanna get them. I swear I did not pay more than $5 each and so you take a cellar band, let me stay close and you put it inside this loop like that, evenly and I've got two as you see, there's one brand of them all. So you're gonna need two blue, two green or a heavy gray or black one to do the spring assisted squat 'cause it's gonna be quite a bit.
Now I've got this, can you see my door here? I'm gonna have to turn it. We can't see the top of it. Thank you. Now you can.
So I'm gonna put this here and I'm gonna close the door. You gotta remember you're closing the door. You don't wanna pull the door open. So this is the right way to actually have this situation. You open the door outward, you put the wall anchor on the top and then it's super sturdy.
And then I'm gonna pull my chair up I have spring assisted squat. So if somebody is weak, they can start doing these at home. And then when they get better, they can release one of the cellar bands and make it less assistive. It's like going from Red springs to Blue Springs to yellow springs. And then eventually no springs.
So I love that for homework. And then I can also do, stand against the pedal pole, pull down. Ensure they pull to and fro and thoracic extension. And they can also choke up on it a little bit and do their heel raises. So if they don't have good strength, they can crawl on this to do heel raises.
The other way, someone last week asked about the heel raises if someone doesn't have good strength? Yes, or frozen ankles. We have a question coming in on that. Putting your foot on a stool. And then doing it that's a lot easier to do than to have your full body weight on that.
That one-- Yeah, right. So there's some of the things I love. Oh, my gosh, I see more follow up. I mean, Sherri, you're just like this fountain of information that is, it's just you have so much to say and show. Necessity is the mother of invention.
You kind of figure it out when you're in a pilate studio, you want to work with older adults, you have a person there that's so frail, that you know the kind of population I tend to attract with osteoporosis and you figure out lots of things of how you're going to be able to help them and then you want to be able to help them complement it at home. So I always necessity is the mother of invention. I agree. Can I show one more thing, if we have time Absolutely. No, we've got a couple more minutes and I would add is that you just have to keep asking your goals.
So one more thing I think is super important for seniors is to address their thoracic extension mobility so that's the calf post is curved. And so I have these two balls, and one of them is mushy. So it's a lot like what we call a Gertie ball. These, you blow them up with a straw, they have a little hole right there, and they're just mushy. And that's a great one to start with for people that have pain or sensitivity in their thoracic spine.
And then eventually, this is the same kind of ball. It's super firm. So some of you might know about yelman and body rolling balls. It's like the silver one. And then this is just not filled up quite as much.
So we start with the squishy one. And I'll sit forward you can see a little bit better. I think it's actually better with my black chalk. And then I'm gonna put this as high as possible. What I love about this chair is it's really high and I can get way up in my upper thoracic with it.
So, hands behind the head, lifting up on the hairline, and elbows actually forward. And then I'm gonna wrap around the ball. So there's small amount of extension. Now notice I'm not doing, I'm gonna take my hand down just so you can see I'm not doing that, right? It's called cervical extension.
And then bring it down just a tiny bit so you can see better and now, so my face and my breast bone are basically facing exactly the same direction and moving at exactly the same rate. I'm wrapping around the ball like that. Now then I go down a little bit and wrap around at that level. So you're kind of searching in your own body or in your clients body, helping your clients find the position that they need to work out and then going down just a little bit more extending back. Beatrice, she always has to show herself eventually.
Arching back. So you notice that I'm not moving my neck but I'm really focusing on moving my thoracic spine. And I have a lot of videos on pilatesanytime and actually I'm working with Amy on one of them. And I'm using this curved surface in the studio to work. I used it a lot, right here.
Right, yeah, exactly. You can go all the way down and then once you get to the low back you don't do the extension you do flexion. So we're gonna take it here and then I'm just gonna do a slight pelvic curl, and you're really going to feel those low abdominals working. Because in the older adult that's not gonna get on the ground. You're not gonna get that abdominal work that you want.
So you can use the squishy ball and press into it. And then release. So I'm a really big fan of the dowel and the ball. Love those and release. Amazing.
Okay, I think I've covered most of the highlights that I wanted to cover today. Any other questions coming through? Well, what I wanna do, we have like, maybe two minutes, we have so many wonderful... Everyone's saying thank you. I think they'll probably be another time that you come quite soon, I would love that.
Would you like to come back? 'Cause I think we can carry on. And maybe you can do like a sample class for us, per se, I think how would you guys like that? You can chat in and let us know. Because, you know, as much as we want people to think kind of on their own and create their own format.
Some might need a little bit more guidance with that. So yeah, great idea, yes. I'll see you, you bet. You have so much to share Sherri. And just like I said, this is a really important demographic that we can...
This is great. Thanks for the gratitude. I am committed to getting the word out there and that has been my goal. I don't need any more patients, right? I have plenty of patients to work with a full practice.
But what I want is for every older adult to be able to go in every pilates studio and do this wonderful work without having a fracture, without being compromised, without being injured. And really getting effective exercise where they're going. Exactly, I have one question, one more and I know I could talk to you for four more hours is show us the transition from standing to the floor and back up. You mentioned it at the very beginning. Yes, somebody did say that.
Yes, Lis, thank you Lis. Okay, let's answer your question right now. Okay, just make sure I'm in the camera. You're in there. Move this out of the way.
Okay. So you have to have a soft surface underneath. And I'm gonna start here. So this is my little warm up so we do that first, and then we bend the front leg a little bit, come down to the chair and see if the person can keep their spine elongated and not pumped up like that. So getting in the best spine position possible and do another kind of if the leg can be straight, it might not be able to because you wanna hamstring flexibility, so doing that.
And then this is the trick is that getting to the floor, so bending halfway down, and then up, and then three quarters down, and up, and then full, lowering down. That's the trick is that if they can get their knees to the floor without collapsing, and then before you even try to go on to the floor, can they actually get back up. So they have to be able to do this three or four times, you know, several times, which is a lot of curb strength. And then you know that they're ready to go to the floor. Now you take the other leg to come down and I'm gonna turn to the side I'm gonna put this pan on the floor, and then from here, I'm gonna lean towards the chair to lower my hips down.
This is another tricky spot. I'm leaning towards the chair. So that shoulder has to be okay. They can't have a really bad shoulder there, if they're gonna go and feel really terrible holding position so come down to here. And then once I get there, all right, can you get back up?
You know, because especially if they're virtual. If they're stuck on the floor, what are you gonna do? Call 911, fly in there if they are by themselves. So coming up and down. One, I'm gonna go all the way down to one elbow.
And then I lie all the way down to the floor and I roll towards the chair so I'm always really close to the chair. And then I do my bulging, dominoes, whatever it is that you're going to do there. And then I'm gonna go over a little bit, enroll torque the chair now I'm really close to it, I'm gonna take my form and put it on the chair. And then this is another tricky part right here is to get up on that elbow. So it takes a little bit of arm strength to get up there.
You have to prepare them for this exercise. All right? And then coming up with the hip, and again, that hip going down, hip going up. That's another barrier right there. And then coming up to all fours, once you get into all fours, they're home free usually.
Yes, that's true. And they go on to their forms. And now another tricky spot. If you have a total hip replacement, you're not gonna be able to get the hip in that position. So you gotta use the hip that's not replaced if they are, and maybe this side is the one that's not replaced, and then turn your toes under and push.
Now I had an amputee ones, that she would do it like this. And that was really easy for her, and then she'd be okay. She didn't like doing it the other way 'case it hurt her knee. 'Cause she was an amputee and she was in her 90s. So she would do this, and then walk in.
So you can do it either, 'cause sometimes this is just too hard to get their hip support that much. It's true. If you keep their head down, don't come up too soon, because then it's gonna be really hard to get up. So if you keep your head down, then get their booty up. And then come in and then climb back up.
Its really funny how people get off the floor. It's true, oh my god. Yeah, thank you for doing that. And I know that there's a whole class just in that, in my opinion. That's right, 'cause that's a whole exercise class.
I did that once with a group of 12 and I'll never do that again. Because I did that with 12 people that were frail that could not go down and back up again without assistance. I got to workout more than they did. It was rough, I got them all down on the ground and then I thought how will I get them back up. Yeah, so you want to do that when they're ready.
I'm really sharing all these things 'cause I've made every mistake you can. Well, you're setting an amazing example as always for people to just learn and be humble about what they need to know, it's okay if you don't know this yet. Go seek out the experts who do and ask more questions, right? We're here for that to help answer. That's why we're partly doing these webinars and these teacher talks and bringing on our experts.
So Sherri, I hate to wrap it up because we have so much we could do more, but it's time to go for today, thank you. Thank you, everyone for watching. It really was fun, always wonderful to work with you Amy. Thank you so much, right back at you. And look at all the people saying thank you.
It's just a multitude. You all, thank you so much. I'm glad you enjoyed it, that's great. Yeah, very important information. Really appreciate it.
Okay, all time to head out. Thank you. Thanks for attending. Hope you enjoyed it and I want you to get out there and work with our seniors, don't be afraid. Thanks everybody, bye.
Bye.
The Pilates Report
Mention
 |
Amy Havens (Teacher) |
 |
Sherri Betz (Teacher) |
 |
Christine H |
 |
Kristen S |
|
|
Patty Hafen |
|
|
Oonagh McDevitt |
 |
Diane Duvall |
|
|
EvaMoves |
 |
Jackie H |
 |
MKV |
|
|
Deana |
 |
Amy V |
Comments


You need to be a subscriber to post a comment.
Please Log In or Create an Account to start your free trial.
