Description
About This Video
Transcript
Read Full Transcript
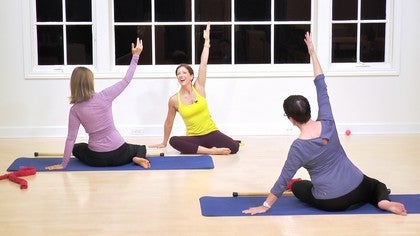
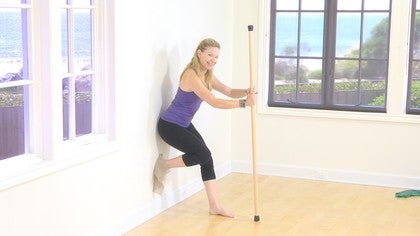
Hi, I'm Sherry bets and I'm here to teach a class that's for fit adults who have osteoporosis and want to promote better bone health. The class will be focused on balance, leg strength and posture, and especially thoracic extension and hip extension. So you'll see the modifications of the traditional [inaudible] mat exercises in the class. So if you're at home, it'd be great if you could grab a broomstick. You'll want that for your balance exercises because you will probably be challenged in the balancing. And then you'll need a tennis ball or some type of a firm ball.
To do our foot massage, um, we'll be using a Fletcher towel, which is developed by Ron Fletcher. And, um, the, uh, tube, you'll need a tube. So you can either use theraband, you can use surgical tubing or some kind of stretching material that you can put around your legs in order to provide resistance for the leg exercises in the hip exercises that we'll be doing. So you might want to Matt as well if your carpet is not very, um, squishy or cushy. So you'll need something to protect your spine. You don't want to lamb, just a hard floor. All right, so let's get started. You'll need your broomstick and you want to make sure that the broomstick has rubber stoppers on each end. If you're using it on a hard floor as we are here, if you're on carpet, you don't really need this stoppers, but you can get those at any hardware store and place them on the ends of the Dell. All right, so I'm going to hand out some tennis balls.
Do you prefer a tennis ball or a Pinkie Ball? Tennis Ball. Okay. And I'll give you a pinkie ball and place that pinky ball on the floor and you'll place your foot on the top of it. And what this is designed to do is prepare the foot for weightbearing and also to release any tension that happens in the foot. If you have plantar fasciitis or Bunyan's, this is a great exercise for you. So placing the ball between the first and second toe, you're going to roll from the first and second toe directly to the heel.
And you don't really want to go in sort of messy lines with the foot because the foot is arranged in longitudinal lines. So what you want is to have the tennis ball deeply release that, that fashional structure or those four layers of thick muscles underneath your foot. And the idea is to spread the toes out. If you look at my toes closely, you'll notice that I've done this a lot, so maybe too much. So you can be too mobile in your foot and this might not be a great exercise for you if you have a lot of mobility in your feet. And um, you have some low tone. So now let's go between the second and third toes and then to the fourth and fifth toes or third and fourth tones. I want to skip any and then to the fourth and fifth toes and you'll do through two or three passes on each foot. Okay.
And then stop for a moment. Place the heel just in front of the ball with the toes, sort of hanging over the ledge of the ball. And we're going to do the little parakeet action here. So we'll wrap the toes around, exposing the five metatarsal heads that are like the white knuckles of your foot. And the goal is to keep the heel on the floor and wrap the toes around. Much like you would if you were on a reformer foot bar.
But if you've never been on a reformer foot bar, you'll call this the parakeet where you're wrapping the toes around. Some of my clients call it the bat, you know, so you're hanging on for dear life. So wrapping those toes around. Nice. Inhale to reach the toes up and exhale to wrap around. One more time. Inhale to reach them up and exhale. Hell to wrap them around. Good. All right, and let's change feet.
So placing the ball between the first and second metatarsal head or the big toe ball of the foot, and then roll the ball all the way to the heel and slower is better. You want to go slow and deeply into the plantar Fascia and make it go in longitudinal lines so that you don't go in circles much more effective to get in between those long bones of the foot.
So I recycle them for him and I give them out to everyone and they can take them home and he brings me garbage bags every once in awhile full of tennis balls. So there's no reason to go out and buy tennis balls. So just go to the local tennis club or recreation center and ask for some old tennis balls. They'll be thrilled to give them to you so it's always nice to recycle. All right, so you should be at the fourth and fifth toe by now.
Maybe you want to find some of those sore spots and work a little bit more on those spots and just go slower and deeper and even hold positions is very effective for releasing some of that tension in the foot. All right, now take the heel and place it in front of the ball, having the toes over the ledge of the ball and then wrap the toes around and see if you can reach around and touch the ball with the toes. Inhale to lift up and exhale wrapping around hands and that's it. An inhale up and exhale to wrap it around. And one more time. Inhale up and exhale, reaching around. This one's great for hammer toes.
If you've had those hammertoes that are annoying, that rubbed the top of your shoe, it usually means you have too much tension in your feet or you're gripping the floor with your balance. And this is a great one for hammertoes. Okay, now let's take the tennis ball and place it between the heels. And so we'll just give it a little hug for right now. And then what I want you to do is send 60% of the weight to the forefoot and then 40% to the back of the foot. So we've got a lever here. So we're going to send a little weight into the front of the foot, a little weight to the back. So we're naturally going to have a little bit more weight to the front of the foot. Now I want you to think about 60% of the way to the outside of the foot.
40% of the inside. So if we were standing on the side of our feet, that's like 100% of our weight on the outside of the foot. We don't want to have all of our weight to the outside of our feet, and especially not all the way to the inside. That leads to collapsing of the arches. So if you just lift your toes off the floor like that, you'll notice that your arch lifts, that puts your sub tailored joint or that ankle joint in a perfect neutral position for weightbearing and for good foot health. Place the toes back down, keeping the art slightly lifted, just like you keep your abdominal slightly in as you stand, right?
So it's the same idea. No one ever told us to keep our arches lifted when we were young, right? They told us to hold our shoulders back and stand up straight. That's what my mother said, but they didn't tell us to keep our arches lifted, right? All right. Now I don't want you to do is move your attention to your hips and pelvis and then think of rotating your thighs inward and then rotate your thighs outward and feel your hips sort of spin in the socket.
Notice what happens if you rotate your thighs inward. It tends to make your arches want to collapse, maybe, maybe not so, and then pull out. And that tends to make you want to lift your arches. So there's this connection between the arch of the foot and the outside of the hip. So the external rotator to the hip and the the outside muscles here. The gluteus medius muscles are very important for making that connection with the foot. Also the thigh muscle here guides the knee cap.
And we want to think of the thigh actually guiding or or tracking underneath the kneecap. It's not about the knee cap being in the right relationship, it's about the thigh bone or the femur being in the right relationship under the kneecap. So that's always helpful for people to have knee problems. All right, now let's take our attention to our pelvis and think of the pelvic bones being like two headlights shining straight ahead. So we're going to draw the pubic bone up. So that's a more of a tucking action and then roll the pelvis forward. And that would be more like an anterior tilt. So we have tucky butt and we have ducky butt.
So we don't really want either one of those. We want something in the middle. So how is it that we know that we're in the right alignment? We really don't all the time, right? But our back muscles will tell us if our back muscles are relaxed. That means we're holding ourselves up with our core.
So take one hand and place your hand on your back muscles. Okay. And we're going to do the all those same things that we just did. Shift the weight to the front of the foot. Notice how the back muscles might contract there. You feel that? So that wouldn't be the right alignment for you, right?
Shift your weight back more onto your heels, lift your toes, do the back muscles quiet there so they probably will be a little more quiet there. And then now Tuck your tail and notice how your back muscles lengthen. But they contract, right? So that's an east centric lengthening. Now Archer tail and lift your tail up to that Ducky, but position right and feel the muscles contract. Can you feel that in your back muscles? So that wouldn't be the right position.
So finding the position of your pelvis is about going forward and backward until the back muscles contract. Okay? Now the next frontier is the rib cage. The rib cage should be like the lid of a jar that fits over top of the pelvis and the pelvis is like a jar. And then the rib cage is like the lid on the jar. So if the lid on the jar is too far forward, it won't fit right, and if it's too far back, it also won't fit. So it needs to be centered right over the top of the pelvis.
So if your back muscles are relaxed, then you're probably in the right alignment. If you send your ribs forward, try that for a moment. It's kind of like belly dancing, right? And you send the ribs forward. Do you feel the back muscles can track there? Right? So that will keep your back muscles contracted all day long. If you hold yourself like that, that's not a good way to hold your body. Those muscles are not designed to hold us up all day long. Okay? Now, if you bring your ribcage back over the pelvis, that's going to quiet the back muscles here and turn on the abdominals a little bit without even saying pulling your abdominals.
I don't have to tell you to pull in your dominoes. Your nervous system does it automatically by you positioning your body in the right alignment. That's the goal is that to let your nervous system decide what muscles to contract do the movements that we're going to be doing. Okay, all right. Now shoulder girdle, right? So if you pull your shoulders back like that, you are probably going to need a massage tomorrow, right? If you held yourself like that all day long, that's what my mother said to do.
She was almost right. Mom, you were almost right. Not quite, but almost right. So definitely better than this, right? So what we want is to have this width across the collarbones and the shoulder blades so that we're, it's like we're wearing a cape that is not hanging forward in the front or hanging down in the back. So it's centered right? And we're not holding anything to get it to be there. So that's part of the struggle in life is to keep this open enough to be relaxed in the position so that you have this sense of length, but you're not working so hard at it. But posture is work.
Being Upright is work. So that's the idea that I want you to know immediately is that posture is always work. You can never just be like this and think that you're in posture. This is posture. You know, you can't hang on your bones, you have to be contracting some muscles at some point. So now let's go to the head, shift the head forward and then pull it back.
So we've got chicken neck and we got swung neck. And so we don't want to be a chicken looking for corn for sure, right? We want, and we want to be more like a swan, right? But we want the ears centered right over the shoulders. And when you get in the right alignment, you're going to feel a little bit of work in that cervical muscles here. So the front of the muscles, I call these abdominals of the neck, these are the cervical, um, um, deep neck stabilizers, right?
And they are supposed to work to hold our head in the right position if they get like this and they get all stretched out, right? Okay. So it's the idea of that. So those are the kind of concepts that we're going to be thinking about throughout the class. Okay. And I'll try to remind you of those concepts. All right, now you've been hugging that tennis ball for a while. So let's keep the idea of the foot, the pelvis, the rib cage, the shoulder girdle, and the head alignment. And let's take that tennis ball and bring it up with us and we're going to inhale and then exhale, lift up, drawing the heels together.
Now think of keeping your head glued to the ceiling and for us the heels back down to the floor, lengthening the spine even more. And inhale, exhale, lift up.
Now if possible, let's get rid of the tennis ball and then heels together and see if you can draw the heels together and do this like a little set of magnets. I know Ron Fletcher always talked about the magnets between the heels. So draw the heels together, keeping the heels together so they don't splay apart. If they splay apart, you're going to stretch out the lateral ligaments in the ankle. So draw those heels together and then connect upward and then pressing back down. Good. So that gives you a little bit of anchor there. So a little bit of a tripod basis support. Okay, so up you go, and then take it down. All right, so here we go.
Let's send all of our weight to our right leg. Lifting the left leg up. Good. All right, so we're going to keep the distance between the ribs and pelvis and then here we go. Breathe in and breathe out to lift and two and three and four, five and six, seven and eight. Last one holding there. Now fold at the hip, knee, and ankle. So you folded the hip first.
Allow that hip socket or hip joint to move deeply in the socket. Staver to call holding steady. Okay, that's okay. So yeah, shift more of the white to the right. That's it. And use your Dow. Maybe move the doubt out to the side a little bit more. That'll give you a wider base of support. Yeah, that's it.
Then see if you can lift the dowel if possible. If not, you keep it there. That's fine. Yeah, there you go. And holding steady. All right, now we're going to point forward and in and side and in and back and in. Excellent. Now point forward, make a circle two times this direction. Exhale, circle. Keep that pelvis stopping here. Extending back. Reverse. Inhale. Exhale. Extend back and circle. Nice.
And then coming back up, leg is warm. Yeah, that. Okay. All right, so shake it out a little bit. Same thing on the other side. So that whole sequence is more challenging than just doing one at a time. So we blend it all together. Yes, change the dial to the other side because you want to encourage the shift towards the doll. Okay, so shifting the hips toward the doubt pelvis, rib cage connection here, lifting the leg. All right, so here we go. Up and two and three and four, five and six.
Seven and last one, holding steady and then fold that the hip, the knee and the ankle holding steady there. Breathing in, see if you can lift that dowel. There we go. Nice. Keep your focus on a vertical line in front of you. That's very helpful. Breathing in and breathing out. Excellent. All right, now point forward and in and side and in and back and in. Now point forward and circle.
Keep that pelvis steady and forward and circle staying here and then send the like back and reverse. Breathe in. Exhale, send it back. Yeah, let's do one more like that. Extended back and then return. All right, shake it out. Well done. Okay, very good. All right.
Now let's put the dowels down and we're going to pick up the red towels. We're going to start with what a curious Sabin used to call Sherry's shoulders setting exercise, so it's about trying to get the shoulder joint in the socket in a better position in the socket. We tend to hold our shoulders forward and this exercise tends to encourage the shoulder to move back in the socket by activating the back of the rotator cuff. So feet together, wrapping the fingers around the towel, just like you're holding a serving tray. Film is loose, beautiful elbows are just by your waist. Shrug the shoulders up for a moment and then down. That's it. All right, now pull the towel gently as you inhale and feel that the back of your shoulder blade is what's working. So pulling here, that's it.
And the shoulders are not coming together. It's the shoulder blade that staying firm on your back and the humeral head is moving back in the socket as you pull. Great. And you're going to keep that length in back of your waist. So when you pull, you don't extend your back. Yes, you keep the back of the waist long. And Paul, that's it. Now if you can see if you can slide the arms apart as far as you're able to, because you're only going to be able to go to about 75 degrees or so unless you're very mobile initial. That's it. And then pull, stretch that towel thumb is loose and then release.
Nice. And in how to pull and release and you can reverse the breath if you feel more effective with an exhalation. Exhale to pull and release. And one more time, Paul and release. All right, very good. Now our shoulder is ready for work. Throw the towel up and catch it. All right, fall the talent half. And then take the towel across the collar bones from shoulder to shoulder from the folded end to the open end. Measure the distance there and then hold the towel at the open end.
So you should have like four or five knots left. Yeah, pretty much. That's good. That's good. All right, now take it. Take a tot towel pole at the hips. Shoulders roll back and down. That's it. So you're keeping that shoulder joint in its optimal position as you work risks are down or the rings are are shown to the floor. Yes. So point your rings to the floor. All right, now pull and release.
Inhale to pull. Filling the lungs with air. They can fill in the back of your lungs with air.
And then think of the arm pit drawing down, like occurring. Rotating down as your arm goes up to collarbone height. Yes, risks are flat. Arms are more like a parenthesis shape. So think of hugging a tree here. So take a your fist together and take a moment to hug a tree.
And then think of the oval, the treason, more like an oval instead of perfectly round. And your arms are like a parenthesis shape there. Okay. All right. Keep the arms in that parenthesis. Shape. Wrists are flat. Yup. Rings are shown to the front. Shoulders down. All right, take a pull there. Inhale, exhale, release.
I want you to remember this position because when you get in weightbearing for pushups and quad, your pet and plank position, this is going to be a very important movement in weight bearing. Okay, and one more time. Inhale to pole. Exhale, wrap the shoulder blade around the back. Thinking of the arm pit pulling forward. So if you have a little smiley face in your armpit and you want it to show, yeah, you think of a big armpit, not a small one, a small one looks like that big one looks like. All right. Now from here, pull with the armpits to get the towel to stretch. So instead of pulling like that to get the tallow stretch, we want to pull with the outside of the armpit to get the towel. The stretch. Exactly.
And that helps encourage the Scapula to get in a better position like a golf ball on a tee. So your Scapula is facing up so that the tee is on top and the shoulder just sits right on that socket. Good one more time and pull holding steady there. Take The v feet to a v, reach up to go over, keeping the pelvis steady and then exhale back to center. Inhale, reach up.
So it's more about the lengthening of the right side of your waist. Not so much about curling over. Inhale up and over. Keep the towel in the frame. Yes. So let's take the towel to the top of the head. This is a kind of like, I'm a little teapot exercise, shoulders down, elbows wide, and then reach up to go over. So that way it's all spine and not so much the towel.
And then exhale back to center. One more time. Up and over, and then back to center. Now take the towel up, keep it in that shape to go over much better. That's it. And then exhale back up. Last one, a bend over. Beautiful and back to center. And then take the towel down. Roll the shoulders. It does get easier as you get that shoulder blade around and underneath.
It's just really easy to balance that, that towel over the head. It does get easier over time. Okay, so now let's do a lunge out to the side and make sure your accoutrements are not in the way. Yup. Okay. And what I want is the pelvis to stay forward and the left knee is going to be right over the ankle. [inaudible] so you're in a pretty wide lunch. And so your goal as we get going is to get there in one step. Okay? So, and then we're gonna add the towel work that we'll do. Just do the legs for right now. Good. That's it.
So I have to make sure everybody can get to the position that I'm looking for. All right. So from here, try to step back all the way back. One step. There you go. Good. And then big step out. Yeah, that's it. Nice. So the knee is right over the foot. [inaudible] pelvis is square to the front. That's it.
Collarbone Square to the front too. All right, that looks good. Let's step together and then other side. Yeah, that's it. And together and with the breathing, inhale. Exhale together. Inhale out and together that's it. And out and together. Okay, so here we go.
Tot Tele pulls to the front. [inaudible] I know everybody's looking at me like up overhead. Step it out. That's it. And we're going to do a little side bend and then back to center. Now see if you can and then come back together. Bring the towel down.
That's it. And reach it up and out and over.
So take your towels and put them aside and you can pick up your dowel. And I'm your tube. Put your tube right in front of your mat. And let's throw the tube in front of the Mat. I'll get one, one myself and step into the tube without actually touching it with your hands. Okay. And yeah, so just yeah, walk into it. That's it. There you go. [inaudible] you got your dial in your hand for protection. So there were somewhere. Okay, so now let's take the right foot forward.
Let's put the dowel in the left hand so we don't kick it out from under us, right? And then however the heel off the floor, so length in the spine and then take the ribs off the pelvis and remember the relationship of ribs to pelvis so you don't hold the ribs too far forward. Cause as soon as we start balancing we go back to our default patterns. Okay, so let's hover the leg. That's it. And lift and touch. Exhale and touch three and knee is very straight. So this is also like a straight leg raise. That's great for strengthening the muscle, right on top of the knee. Yeah, that's it. And if you feel like this is too much for you, take the tube off or you can take the tube and put it up above the knees and that just gives you a little bit less resistance. Yeah, the red tube is a little heavier. This is the lightest tube and then a blue, the blue color tube is actually even more heavy than these. Okay. Last one.
Hover and pulse.
Keep the distance between your ribs and pelvis the same so that your pelvis doesn't hike up. That's it. Get Taller with each movement.
Welcome to your gluteus media. So if you haven't known it before, all right, now we're going to extend the like back. So let's take the right leg and extend it back. Square off the hips to the front. Yep, that's it. And then feel that stretch to the front of the hip, lift through the pubic bone, and then let that right foot be airborne. See if you can hold the position and you want to keep your knee really straight.
So put your foot on the floor and get that leg open in the back. There you go. That's it. Now see if you can hover the leg. Exactly. Now if you're having a hard time hovering the leg without arching the back are rotating, then you can bend the standing leg and lean forward just a little bit if you need to. And then lift. If you let that knee bend, the hamstrings going to dominate. So I want the glute to work this movement. Okay. Yes, this is our, this is our booty bar. Okay. And then lift the plug for you Tracy. All right.
And lift and lift and lift. Exactly. That's it. The reason people's glutes go away is because they don't do hip extension, so we have to get that hip extension in there. We only have 15 degrees of hip extension that we're born with. We got to keep all of them. We get 140 degrees of hip flexion. It's so unfair.
Yeah, we need more. Exactly. All right, so no more talking. Pulsing, ready and
Hey there, train. All right, and lift and touch. I love that train. And to exhale three and four. Exhale fine. Yes. Keep that standing leg strong. Keep the knees straight but softly straight in the right leg. Left leg can be really straight. Yeah, that's it.
Don't be afraid to lock that left leg cause it can be cause it's not weight bearing. All right, one more time. Hold here and pulse ready and
Lift and keep the length. That's it. See if you can keep the length, keep that ribcage over the pelvis. Nice. And then keep the distance between your ribs and pelvis. The same on this side. Yeah. And if you want to get rid of the two, that was absolutely fine. Yeah, that's okay. Yes it is. When you start to compensate, you don't want to strengthen a faulty movement pattern.
So you want to make the movement easier, but see if you can continue one more and then the pulse is ready and
And lift. You may have to look in the mirror. If you're at home you can look in the mirror and see if your knee is bending cause it's sneaky. It will bend on you. Alright and four exhale, five and six, seven and eight and hold and the pulses ready and
Take the tubes off and you can shoot them at me if you want to. I know you probably want to at this point. All right, let's stand at the back of your mat here. So these mats are six feet long and you're going to stand here at the back of your mat facing that way and the bay. Your heels will be at the back edge of your mat. Okay, so let's put the dowel in your right hand and we're going to start by stepping forward with the left foot. So the goal is to step halfway forward on your mat. So this will be about the halfway point here.
So could you take a big stride forward there? Great. Yeah, that's it. And then square off the hips. Both like stay straight at this point and then we're going to lift the heel of the back foot. Now think of spiraling that thigh inward so that both feet are standing on an imaginary set of railroad tracks. Exactly. Lift through the low belly and the pubic bone.
Bring the rib cage over the back of the pelvis. It wants to go forward. Okay, now send the heel back and down. Stretching the calf. That's it. And then exhale to lift. Inhale to stretch. That's it. And lift and stretch and lift and stretch. One more time. Lift and hold. Okay, now see if you can fold the back knee forward without going down. Good. Nice. That was excellent. Those of you at home that is not easy.
What they just did is really hard. Okay. All right. And then fold the front knee, that's it. And then see if he can straighten both and then fold again without going forward or down. Most of the time what happens is we bend forward, I go to Jim's a lot and teach polities and I see people doing like lunges like this. And I'm thinking, okay, I'm going to throw my car down because you're gonna need me pretty soon. But we want, we want is to be able to load the knees evenly and equally without losing the energy of the lift so that we don't collapse down into the knee joint and the knee takes all the brunt of the movement. So we want the body to share the burden. Okay, so fold and fold. Here we go. Now think of it being against a, a wall or a petty pole, right? Or a pole.
And then hinge coming down at the front hip and then back up. So you're like a piston inhale to come down a quarter of the way and an exhale back up. So if a quarter of the way was, okay, try going half, inhale to half beautiful and exhale up. And again, inhale half. That's it. Bring this ramp up. There you go. And up and in how to three quarters, if it's okay, if you want to stay at a quarter or half, if that's plenty, that's you find your edge. If you have to tilt forward to come back up, just stay where you are and go that far. So there's your three quarter point and then back up. Alright, now we go.
If whatever your full is, some people's full might be this, which is fine, right? And then some might be to touch the ground. Your goal will be to touch the ground. I always tell people it may happen in two months, two years, or two lifetimes. So it may not be in this lifetime that you get all the way down. And that's okay. It's all a progression. Yes.
And you don't worry about what your neighbor's doing. You only worry about where your body's doing. Exactly. All right, now come down to, to the point that you can hold. All right, and we're going to move the left arm. Okay, so we're going to go up, up,
Two more. Up and down. Last one up and stay. All right, fold the back knee and straighten it. All right, good. And fold the back knee. Now fold the front knee and straighten. Beautiful without anything moving in the upper body. Full. Beautiful. Okay.
Quarter of the way down here we go. Straight down, not forward and that's it. And down. And if these are painful for your knees, feel free to go back to just the long stride preparation. That's fine. Stay with that for awhile. Also do all the balancing exercises we did at the beginning of class to help strengthen your legs so that your knee is able to get that support. It needs 80% of the shock absorption for your knee comes from muscle.
So you've got to strengthen your muscles. If your knees are not, not, I'm happy with you. Okay, so now three quarters down
Put Your dowels down. I place your towel on your hands. So we're going to do thigh stretch on the mat. I know you're so excited, aren't you? Okay. So again, folded towel across the collarbones. All right and take, can you go into both knees on the ground and it's up to you. This puts a little more pressure on your knee cap. This is a little easier on your kneecap. So pointing the foot down.
If you press into your, the top of your feet, it takes a little stress off your knee caps. And if you need a pad underneath your shins, if you can't put weight on your knees, you can do that too. Okay, so let's take the towel forward, shoulders down, process how forward, and then pull it back. And one more time. Press it forward, pull it back, find the happy home on your back. That's it. And then inhale to hinge a quarter of the way back. So it's a little tiny movement. Exhale to come up. Inhale halfway back, and exhale.
Inhale three quarters back and up, and then fully back. And maybe you already went to full. That's okay. And then take it up and go back as far as you think you can control with the pelvis in neutral. Exhale, reach the towel up. Inhale forward. Exhale, return to vertical. One more time. Like that. Inhale, take it back. Exhale up. Beautiful. Inhale. Exhale. Return to vertical. Now hinge at the hips, placed the towel on the mat.
You're going to place the heels of your hands on the towel and fingertips off the edge of the towel. So the palm should not be touching the towel. That's it, Karen. Yes, that's it. Great. And Are you okay? And weightbearing like that. Good. All right, so from here I should be able to put the dowel on her back so that it touches the mid back, the back of the head and the sacred, and that she has at least a couple of fingers. That space between the stick in her back. Same thing here. Yeah. Perfect. Beautiful. Exactly. Okay. So from here I want you to hold that position and then inhale, sink the chest toward the floor without dropping the head so that you're, you go, imagine that you have a little candle underneath your nose and you don't want to burn your nose, right?
So you're going to keep your head as far away from the floor as possible, but you still have to sink your chest toward the floor and then come back up. Great. All right. Hold that position with the wide back. Think of pulling apart on the towel and then place a champagne glass or the drink of your choice on your tailbone or your sacrum. And then without spilling the champagne, extend the legs back without spilling the drink on your tailbone. Beautiful. All right, very good. Now sink between the shoulder blades.
That's it. And then press away feeling the strength of the outside of your shoulder blades. That's it. Sink. Let the shoulder blades come together. Beautiful. And press away from the floor far as you can. That's it. That changing your spine position, press away. That's it.
Lift through the back of your neck. That's it. And then keep the length through the front of the pelvis and the front of the hips. There you go. One more time. Exactly. Hold the position. Point the right toe back. Yes. Extend the heel. The left heel toward the back of the room. That's it. Now Return. Place the right foot down. Point the left toe back. Extend the left, right heel, back and return. Exactly. And one more each side.
Inhale, point x, heel flex. Inhale, return and replaced. Inhale point. Exhale, flex. Return and replaced. One more time. Left side.
It stretches the shoulders and lengthens the spine. Your hands are about the width of the mat so that your pinkies are touching the outside of the mat and you're finding that sense of length through the spine. Beautiful. And you feel the shoulder blades wrapping around here. So that you're supported with the outside of your shoulder blades. And again, right here is why you want to feel. So press the outside of your shoulder blades down and the back of your neck up.
So there's this opposition between the back of the neck lifting and the shoulder blades going down. So it's not a passive stretch. It's very active. All right. And then come back to Quadra pet are all fours. Good. And sit on your mats and you can face swing your feet around and sit facing me. All right, so here's our sexy beach pose. So either in Santa Barbara, Santa Cruz or Miami, wherever beach I might be.
Um, Brent Anderson's little girl cause Miami beach, your Emmy Beach. It's all right. So I sync here. She's in college now, so I don't think she calls it that anymore. All right. And sink and feel how it just, your elbows are locked and you're just hanging out, right? This is our normal beach posture. Well, what if a cute guy walks by or somebody really attractive walks by, no matter how old you are, you are probably going to sit up a little taller, pulling your belly a little bit more. Yes and no Sharon Stone moments, right? We want our legs together. Yes, there we go. All right, so now the trick is to keep that position as long as we can.
And then when we get tired we got to get out of it, right? We changed positions. So let's see if we can roll the pelvis back like a wheel rolling back without changing our upper body and see what that happens to the abdominals. The pelvic floor, like I don't have to tell you to pull your abs in or contract your public. Florida automatically does it. Right? So now pull back by keeping the length in your spine, you're gonna activate exactly what you want to like.
You want to activate and then forward roll the pelvis. So roll the pelvis like a wheel rolling back. So think of taking your belly away from your thighs. That's it. Good. Now take your hands to the outside of your mat so you're a little bit lower and then roll the pelvis like a wheel coat going back and then forward. Good.
And then wheel rolling back and forward. All right, now roll the pelvis back like a wheel. Hold that position. Stay there. Lift one leg to your tabletop. Okay, now that second leg coming up may require you to lean back a little further, so that's fine. So the second leg coming up and now you're in your big girl teaser position. Yeah, so we can put a little pool of water under our feet and if you want to widen your hands a little bit more, that's fine. And then see if you can touch the floor without changing your pelvis.
Keeping the abdominal wall drawn him. Yes, that's it. Now see if you can go a little bit further, put that pool of water towards the end of your mat or not. That's okay. You challenge what you can do if you start to arch your back or the belly starts to bulge is too much for you. Okay, so just ease off. All right. Then if you wanted to, you could extend. That's okay. Yeah, this is challenging. So you could even go down to your elbows if you need to.
So don't feel like you have to stay up on your hands, but you do have to keep your chest lifted yet you can't round. All right. Now for the big challenge, extend both and in shape. Like I said, this is big girl. [inaudible] yes we may have bone loss, but we're strong. And then one more time. Lower and lift and lower and lift. Take it in and to him. All right, so from here, spread your arms apart, keep your chest lifted and go right over on.
Go right onto your back. But scoot forward just a little bit, cause your heads are not going to be on the map. So at this point, if someone has a lot of roundness in their back, I have towels that we can use under the head so that they can be supported in that position. So if someone has roundness in their back, you'll want to have a little, a few towels available or a pillow to pump into the neath. The head, but I think you guys are okay with that. Straighten your legs all the way and then place your hands underneath your low back and feel how much space there is there naturally. Okay. Now keeping your hands there. Bend your knees and notice how if you're just relaxed, your back will just flatten onto your hands because of the position of your pelvis. We'll pull on your back a little bit. So from here, straighten your legs again and this time just keep your pelvis in the same position and just keep it resting. Yeah, just let it, let it be. Let it be heavy on the mat. That's it.
And then fold at your hips, keeping your pelvis and your spine in the same position and bend your knees. Exactly. Good. Okay. Now do you have enough space under there? Most of either. Do both of you have enough space? If you have enough space underneath your back, what I'd like you to do is take the towel and put it underneath your back so you can use the sleeve of a jacket. You can use a hand towel, fold it up in three or four thicknesses to put underneath your back. So this is going to make sure that when we do our abdominal exercise that our back doesn't arch. It's not dangerous for osteoporosis, but it's just helpful to keep control of the spine so that you don't compress the fossette joints in the back of the spine as you do your long lever work.
All right, so from here, take a breath in and on the breath out. Float the right leg up to tabletop position and then breath in, breath out. Float the left leg up without changing the position of your pelvis and spine. Now lets notice if, can you pull one side of the towel? Does it move underneath your back? Okay, so if that's the case, you're going to keep that.
If you do an exercise that the towel becomes loose and you're able to pull it out from under your back, then that means that the towel or that the back has come out of position and has gone into an arch. And that's not going to be comfortable. You're going to say [inaudible] hurts my back and then you won't come back to class. Right? So I want to keep you in the class. All right, so now extend your right leg out to a 45 degree angle. Tug on the towel, make sure it's right, exactly. Come back in. Extend the left leg out on the exhale. Tuck on the towel, make sure you've got it. It's always your little check system. Okay, come back in. Now extend your right leg to a 45 degree angle and lower it halfway down and then come back in still. Okay. Keep one hand on the towel. Always keep the tug. Okay. Extend the left leg out, lower it halfway down, and then back in. Great. All right, now right leg lowers all the way to the ground.
And let's see if you can keep that towel top underneath your back. Beautiful. Okay. And then back down, back. Got No back up. Sorry. And then extend the left leg out. See if the towels daze down. Lower it all the way down. Yes. Great. Okay. Now for big girl plots, right?
Extend the legs to both legs together to 45 degrees. And then with your head down, this is actually a little bit harder and then lower down. That's plenty. That's plenty. So you find your edge, right? If you let the towel go loose, you've gone too far, so it'll help keep you in balance. Okay. All right, so we could go to the point where you lower all the way down. And again, even if you don't have kyphosis with a pillow under your head, it's a lot easier to do this exercise with just a little bit of support. All right, place the feet down. Excellent. Feed about hip width apart. Take a breath into length in the spine and then exhale.
Peel the pelvis up just to the top of the sacred. So just your, so the, the bones where the dimples are at the back of your pelvis are still on the mat. Breathe in. You're pressing onto the towel. Yes. And breathe out. Peel up to the point. Just pass the towel, take the towel out from under your back. There you go. That's it. And then let's peel up to the shoulder blades.
All the way up to the shoulder blades. Lengthen the spine here and think of the shoulder, the ribs, the hips, and the knees. All being in one line. Lengthening out. Breathe in and breathe out. Soften the breastbone first and one breath to the bottom of the rib cage. Breathe in.
And then let's get all the way to the bottom of the rib cage right here. Get that bone on the ground all the way down. Yeah, right there. Another breath to the waistband. Yeah, that's it. And then another breath all the way to the top of the pelvis and then all the way down. So we don't skip any, the juicy parts cause people are so anxious to get to the top that they skip all the juicy parts. All right, so here we go. Breathe in and think of the sacrum or like an airplane taking off to the top of the pelvis and then to the waistband right there and then to the lowest ribs, God, and then to the full length. Nice. Right there.
Exactly. Now if you feel like your hamstrings are cramping, just press into your feet and that's going to push you back on the mat. So push this way into your feet. Other way. Push back dads. That's it. Do you see that? How that makes the quadriceps turn on? And I'll keep the hamstrings from cramping. Breathe in and breathe out.
Roll down in one bone at a time, down to the lowest rubes stopping there. Take another breath and then down to the waistband. Take another breath and all the way down to the top of the pelvis and then allow the pelvis to melt into the mat is if you're making an impression of your sacrum in the sand and just even let that pelvis just are those hips deep and in the socket. That's it. Good. Very good. Okay. Bring the feet together and then peel up all the way to the top of your bridge in one breath. Excellent. Okay. Now keeping the pelvis level.
Sometimes I do this to keep the pelvis level and then lift one leg up. That's it. Without the pelvis dropping on one side, extend the leg toward the ceiling. Put a paintbrush on your foot and paint a rainbow, reaching out the windows with the right toes. Touch the heel to the floor. Exhale, bring it back up. Inhale, touch the heel to the floor and up. One more time and touch. Keep that lifted that side. And you can take over holding this on your pelvis.
That's it. And up. And then place the foot down and then other side, keep those pelvis is lifted. Okay. And you can use this like a little litmus test. Yeah, little altimeter reading. Flex the foot and bring the heel to the floor and point and reach it up and flex it to the floor and reach it up. One more time. Flex and reach it and then place the foot down and roll down one bone at a time. Excellent. Nice work. All right.
Dowels to the side. Very nice. Okay, so let's roll over onto your right side and get up on your right elbow. So I want you to imagine that you have a wall behind your mat and you have your head, your mid back, your sacrum or buttocks and your calves and your heels against that wall. And you also have a wall at the end of your mat and your feet are stacked up against that wall. So I want you to have all 10 toes in a row. Make sure you can see your bottom pinky toe. Exactly. This is a multipurpose exercise. You've got to have everything in alignment, the shoulders just over the elbow.
So let's bring your elbow in just a little bit more and think of lifting up the rib cage away from the floor, creating a triangle underneath the armpit. All right, so here we go. Let's bring the pelvis forward a little bit more so that you have an openness to the front of the hip. Exactly. Take the top hand and help yourself. If you'd like to breathe in and breathe out to lift the hips, that's it. And then touchdown. Inhale, exhale, lift the hips. That's okay. Lift the hips, that's it. [inaudible] and lift and lengthen. That's it.
And then touch. So you shouldn't even be putting much weight on this hip at all. It should be just a touch and then a lift. Right? One more time. See if you can hold at the top. Lift the top like one and two and three, and then release. Excellent. I know that's such a hard exercise.
Roll over to the other side, facing the back of the room, and then find that imaginary wall behind your mat. You can still stay in the middle of your mat if you want, but it does help to have that line. Flex the feet, stack the feet, all 10 toes in a row. Make sure you can see your bottom pinky toes. You don't smash it. Elbows just under your shoulder length and from your head to your heels before you start. Lift the rib cage. Breathe in, breathe out to lift and return. Yes, barely touch. That's it. We're going to do four like that and listen. Lengthen and return. Excellent.
And let them lengthen and return. All right, last one. Lift and hold. Lift the top leg and two and three. And Return. Oh, thank you. Very good. Okay, let's push up to the mermaid to push straight up to the mermaid here. All right. And if you need an alternate position for the Mermaid, if you've had a total hip replacement, something like that, you can take your legs and put them forward like this. So this works well, or you can sit up on something. All right. So from here, let's take the arms out. Yeah, shoulders down.
Place the left hand down, right arm up. And then let's bring that right hip forward and rotate it down and reach it up and forward and rotate it down. One more time. Up in forward and down. Good. And then take it back to center. Right hand goes to the ground, left hand goes up, ribcage lifts up. So this is our mermaid. We don't go way over. We just lift and lengthen and then back to center.
And then take it up and center and reach it up. Inhale and back to centers. Stay here. See if you can change positions without touching the floor. Okay. Teach you the trick in just a minute, but I'm going to show you first. Can you get there? Yes. That's it. Okay, so I'll tell you the trick, right?
You did it, but you didn't need the trick, but some people need the trip. All right? So the trick is lift this leg up first. Bring it around than this one and that the easy way to do it. Put that foot down and then this one. So if you do it simultaneously, it can be done, but it's harder. Yeah. Okay. All right. So take the arm up, right hand, goes to the mat, and then reach the pelvis forward and then sink it down and really get that hip to deepen in the socket. And feel free to use your hand if you want to. We didn't on the other side, but you can use your hand to help you deepen in that socket because our hips take such a beating and we don't pay much attention to them.
So really getting that hip to rotate in this socket. One more time. Inhale and exhale. Go ahead. All right. Find that vertical alignment. Beautiful. All right. Right hand goes down, all left, goes up and then reach longer and then back to center. And then reach that right arm up, right rib cage up more, and then back to center and the left and center and the right and center and back down. Swing the legs forward. And I'm going to bring you a treat.
[inaudible]. All right, walls here. So lean back on your hands and you're gonna place the ball just at your bra line. Or if you're a man at your bro line. So right at your rib cage, you don't want it in your low back. You wanted at the ribs. Okay. Or You want it at the base of the ribs. All right. Hands behind your head. And what we want to do is start in a neutral position.
So drawing the head back, it's pretty far and now that's a long line and that's a lot of work for the abdominals. Okay, so that's your start position and your end position. Yes, that's it. Great. So that's your start position and your end position. Now we inhale, we think of the breastbone being like a seesaw to rotate back. So the head may or may not touch the floor. It just depends on your mobility. And then what brings you up is the exhalation, the ribs funneling down toward the pelvis and you stop at neutral. All right, so our queuing length in the back of the neck, and I place my hand on your Chin and Wa and my fingers on your chest. Okay, so we're going to inhale to go back. That's it. So it's not about the neck moving, it's about the middle back moving.
Inhale to go back, lengthening the back of the neck and XL. Ribs descend to the pelvis to come back up. There we go. That's better. That's better. Inhale to go back. Keeping the length in the back of the neck. And then the other thing is to make sure the pelvis is heavy on the Mac so it doesn't posteriorly tilt that you'd come up. Yeah. So keep that tailbone anchored even more that way. That's it.
That's it. Just a little bit more. Not too much of an arch. There you go. Yeah, that's it. So you just keep that pelvis steady so it doesn't do the posterior tilt as you come up. Same thing here. Just think of anchoring the tailbone. Yeah. Nice. All right, and then on the next one, come up and stay okay to move positions. All we do is lift the pelvis, roll the pelvis towards your feet and you've moved up towards your neck. All right, come back down. Now do the next level. Inhale, arching back.
Elbows need to be a little bit forward so that you get more motion in your spot. If your elbows are really wide, you're going to end up stretching your chest instead of your spine mobilizing. So my goal here is to help you mobilize your spine. You can do a couple of repetitions with the elbows wide to stretch the chest. That's fine. Absolutely. That's it.
And an Lang in the back of the neck as you go back and then exhale ribs to the pelvis. That's it. Beautiful right there. One more time. Inhale stretching back and then exhale. All right, now everybody lift the pelvis, roll forward, and now you're getting toward what we call the HR program. Okay. Inhale to stretch back. I will explain my clients call this HR program. It's the Hump Reduction Program. Yeah. Nobody wants to talk about humps. So they just say that HR program and so it's the thoracic extension.
We're getting rid of that dowager's hump. That's it. Nice. And then you can also feel a little bit of movement in your throat as you do this because you're mobilizing those upper thoracic and lower cervical vertebrae. Great. Okay. And then for the favorite part, lift the pelvis roll forward until the ball is in the nape of your neck. So it becomes sort of like a little pillow. And then it also will feel like it's releasing that suboccipital area. Okay. And then you can place your hands down by your side. If you feel supported, you might want to come forward just a little bit more. There you go right there.
Great. And you can be anywhere you want on the ball and feel that sense of length in that release that you get. You can move to the right or to the left feeling. You know that you could release a certain area of tension that you have. That's it. And just let your collar bones open and melt over the ball. That's it. Beautiful.
One more deep breath in and then breathing out. I know, I wish I could leave you here a little bit longer, but there is one more thing we need to do. All right, so turnover on your stomach and place your hands under your forehead. And I want you to think of stretching long on the mat. So wiggle your pelvis away from your ribs and stretch out long on the mat. Breathe into your belly. Let your belly expand into the mat.
Shrug your shoulders towards your ears and then draw the shoulders away from your ears. And then from here, keeping the shoulders down away from your ears. I think of lifting your face one inch off the mat. Still looking down at your thumbs. Press into the forearms to get a little bit higher.
Keep lifting the face off the mat, eyes on your thumbs and press as far as you can away from the floor without moving your elbows. Keep the elbows planted. What that's going to do is encourage you, I don't like to say force, but force you to move in the upper thoracic spine. I want you to move this area right here and then release back down. Inhale, lengthen the spine. Exhale, reach the face away from the floor. If you had a tattoo on the back of your neck, everyone could see it exactly from here.
See if you can lift one hand off the floor, one elbow as well. There you go. Drawing the shoulder down. Armpit reaches down toward the floor. As you lift the arm, see if you can lift the other arm and hold and we're going to breathe in and out. Out.
Now lift the face away from the floor. Lift the back and the neck and the throat away from the floor and go up as high as you can without moving your forearms. Yeah, so keep going up and keep your face away from the mat. Back of the neck lengthened. So front of the throat has to go away from the mat a little bit. Look down right there. That's it. There you go. Okay.
Holding that position. See if you can go up as high as possible. Now lift both arms off the floor. That's it. Keeping the pelvis heavy on the mat. Now inhale. Inhale, exhale, exhale.
Beautiful. Now bring your hands to just underneath your shoulders. Fingertips under the collar bones right there. And think of rolling your elbows towards your feet. Feel the collar bones open at the front. Shoulder blades draw down and back.
And so they're going to come closer together. That's it. Nice. All right, so float the face up. The Chin, the throat, the sternal notch, the breast bone. Think of shining a breastbone headlight forward and pull the breastbone through the frame of the arms. Beautiful. That's it. Keep the lowest ribs on the mat. So we want to keep the movement to that lower thoracic area. That's it. From here. Take the hands up and inhale. Inhale, exhale, exhale.
And then holding here, come down and turn your face to the right. Here we go. Double leg kick with alternate hand position. Feet together. Flex the feet and kick three times. One, two, three. Stretch it up. Perigi. Ababababab. [inaudible] there you go. And then turn your head to the left. I'll help you.
And then one kick to three, stretch the legs down and reach the chest up and hands on your buttocks. That's it. Nice. And then coming back down and kick, kick, kick and stretch it up. Feet all the way down. Nice. Turn your head to the left and last one, kick, kick, kick and stretch up. Inhale. There we go. Oh, isn't that great to have help from your friends? Okay. Reminds me of my time.
Massage lessons from years ago. All right. Take the hands down by your side. Press yourself up to all fours. And this time you do get to go into child's pose. Let's take the legs apart. Send the hips toward the heels. If you have a total hip replacement, go back to the downward half downward dog position or the prayer position here. So if your hips are okay, then take the pelvis back to the heels, press into the hands, press the tailbone away from the hands to increase the length.
So lift your elbows off the floor and press into your hands. Press into the outside of your shoulders. That's it. So that you're lifting. So it's an active stretch. Yes, that's it. From your hands to your tailbone. So think of your hands to your tailbone, getting this beautiful stretch arm pits pulling down back of the neck, lengthening up. So take that up and this down. Do you feel the difference? Yes, that's it.
That's opposition between the back of the neck and the shoulder blades going out and wide. Beautiful. Come up to all fours and then find your way to a seated position that's comfortable. And you can face me if you'd like and you can either sit on your heels or sit cross legged. Ah, very nice. All right. And then shrug the shoulders toward the ears and all right, come up to full kneeling. Step forward with your right foot. Okay. And you can use your dowel if you'd like to. Okay.
And then straighten the right leg forward and then glide forward into Eve's lunch. And then draw the tailbone down, lift the pubic bone up, that's it. And then lift your left arm. That's the arm of the leg that's extended back. And then lift the ribcage off the pelvis. Give yourself that lovely long stretch down the left side of your body.
And then coming back down. Come back to your kneeling position. See if you can keep the length. So try that one more time, Karen. So see if you can keep the length. So lifting up without losing, lengthen your spine to take the leg down. Yeah, that's it. So that's called using core control, right. Shift the weight over.
And let's do the other side. Yeah. Better to shift. Better to put your dial on this side if you're going to encourage the weight to shift to that side. Yeah. So whatever side you're going to shift to is the side you want to put the dial on. There you go. Now straighten the front legs, you know, go too far forward and then glide forward as far as you're able to go to get that openness to the front of the right hip. That's it. God. There you go. And then if you wanted to do the the arm stretch, you would just let go of the dowel or put it in the other hand. Yeah, so exactly. And then if you want to stretch that rib cage up towards the ceiling and reach one more breath in and take it down and then shift your weight back over the knee length in the spine and then place that in, like back down underneath, and then come down to your nailing position.
Go ahead and let's close our eyes and send gratitude to every cell of our body for the amazing movements that you were able to do. You've stimulated your proprioceptive cells, you stimulated osteoblasts, you stimulated muscle cells to regenerate. So send gratitude to your body and then send a note of gratitude to someone who needs it. Repeat it in your mind. May I be happy? May I be well, may I be strong.
May all my friends in this room be happy, be well, and be strong. May All beings on our planet be happy, be well and be strong. Send a smile to your pelvis, smile to your rib cage, smile to your collar bones and the smile to your face, and then shrug the shoulders up toward the ears, letting them light return to your eyes. I exhale and let the shoulders slide away from the ears. Hmm. Thank you very much.
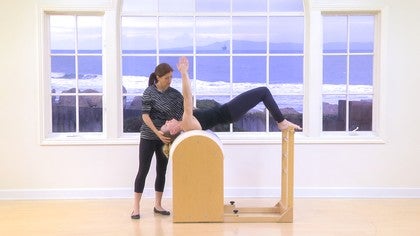
Bone Health: Standing and Chair Workouts
Mention
 |
Sherri Betz (Teacher) |
 |
Conce P |
 |
Marchel A |
 |
Mona H |
|
|
Liz |
|
|
Debra H |
|
|
Christine T |
|
|
Cynthia G |
|
|
Anne L |
|
|
Sue D |
|
|
Senada B |
 |
Jill |
 |
Danai Pappa |
 |
Amy C |
|
|
Karen S |
 |
Francisca A B |
 |
Berit R |
|
|
Helen O |
 |
Anne P. |
 |
Penny M |
 |
Angelica B |
 |
Sharon Spaziani, Lmt, NCPT |
 |
Fiona |
 |
Michelle H |
|
|
Luciana R |
|
|
Joel L |
|
|
Emma B |
 |
Deborah M |
 |
Veronique L |
|
|
Jenn D |
|
|
Joanne D |
|
|
Leslie S |
Comments


I sure did mean relax! I can't believe I said contract! Thank you for listening so carefully and for commenting so that I could correct the error.
Sherri
Learnt a lot from this class regards teaching... Really hope Sherri will be teaching more classes for Pilates anytime. Thank you for an excellent class .
Joanne dales
Thank you so much. I am glad that you found the class helpful. I hope to inspire you to teach this population!
Sincerely,
Sherri

Thank you! So great to "hear" your voice! Please stop by the studio in Santa Cruz to say hi and show me your little boy-bet he is growing fast!
I would love to take your class next time I see you!
love xoxo
You need to be a subscriber to post a comment.
Please Log In or Create an Account to start your free trial.
