Description
All of the exercises with the Rotating Discs and Foam Roller can be done standing on the Mat, without these props. It is always a good practice to make sure you have control and stability in your body before adding these unstable surfaces.
About This Video
Transcript
Read Full Transcript
Welcome to [inaudible] any time. I'm Elizabeth Larkin and I'm so happy to be back with you in this beautiful studio. Our focus today is on the program on the chair, one of my favorite pieces of equipment and this program is inspired by a recent book from handspring publishing edited by Robert Schleifer. The title of the book is fashion in Sport and movement. You can reference the list of books, the list of reading material and resources that I've recommended to augment this program. For this program you'll need a chair, preferably a [inaudible] chair with a split pedal. Um, it's my preference to use the pedals, uh, separately, independently. That's a little bit more challenging than if you were to have a dowel in place.
Optional for this program are the, are the rotator discs. You can see I have a pair of nine inch disks here and there will be some exercises in which I choose to use them, but the discs are not essential for this exercise. For this program. Now it will be for safety sake. It will be useful to have a couple of non-skid mats available so you can keep the discs from sliding or use the mats to cushion your foot or your knee on the pedal. For the UHM program we'll use the lighter springs. Those are the uh, wide springs for the upper body work and the black springs, the heavier springs for the leg and foot work.
Feel free of course to customize the springs for your preferences. Now we'll get started with a with Lumbar fluxion at Lumbar side bending, lumbar side flection, lateral flection. Whoa, I did manage to get it right with the third try. Now place the heel of your hand on the forward pedal, the heel of your hand in the plaintiff's scaption. Just slightly forward of your shoulder joint. Position yourself so that your left leg can be in left foot, can be in contact with the ground.
Now as you press your left heel into the ground, your right hand will press the pedal down. You create a upper pulsing rhythmic pulsing action here of Lumbar and thoracic side bending it first. Your arm is down. You can feel the transfer of force from the ground force through your foot into the ground force of your hand on the pedal. Now put your left hand on top of your head and poke. Aim your left elbow up to the ceiling as if your elbow were going up and beyond the top of your head to where the ceiling meets the wall.
This will increase the tug and the glide that's req required from the heel of your foot through your elbow. Now if art's going reasonably well, slide your palm over the top of your head as if you could cover your floor ear. I can't hear you, my palms covering my ear. And to this you add a slight rotation of your thorax. Look at your right hand. Look forward at the ocean.
Look at the ceiling. And so here you have a pulsing rhythmic pulsing action that addresses the length from the little toe side of your left foot to the little fingers side of your left hand. Reach out, reach up, come on up from here. Stand on, two feet, go. Whoa, that's different on the left side as cause we've been addressing just the lateral line, the length of that other side. Now have a seat so that you're right. Sitting bone is off the edge. Drive your right heel back behind you and place the heel of your left hand on the forward pedal, slightly forward of your shoulder.
And we'll start the same motion. Creating a pulsing, a rhythmic pulsing at pulsing action from the ground force of your foot to the ground force of your hand on the pedal. Reach up and bring your palm to the top of your head. Inhale as you pulse down that inhalation, as if to fill up your right lung will increase the distance, the length of your right side, the length from the lower right ribs to the right pelvis. Slide your right hand over the top of your head as if to cover your left ear and add the rotation turn to so your chest bone eliminates your left hand, your chest bone, ah, catches the light from the ocean and your chest bone catches the light from the ceiling. So we go turn to the floor. Turn to the ocean, turn to the ceiling, rotating the thorax with respect to the pelvis, creating a ground force from the heel of your right foot to the heel of your left hand. Inhaling, as you push down, reach out, reach up. Come on over.
Now the first side again with two differences. First of all, you place your hand on the back pedal so your hand will be either in line with your shoulder or slightly behind. That's going to require more emphasis on scapular depression. Don't let your humerus internally rotate. Oh No, don't do that. It's a bit of external rotation as if the back of your right lung could push your right hand down.
Now instead of your pelvis and lumbar spine going into side bending here, it's going to rotate. It's as if you had a paintbrush on your left sitting bone. Thank you, Eric Franklin of the Franklin method and your left sitting bone could brush the floor. [inaudible] how does that work? Inhale, rotate back, exhale forward. So your pelvis and lumbar spine sustain lumbar side bending and you add a rotation. The right sitting bone is on the chair and the pelvis and the lumbar spine are turning around the right hip joint.
Bring your palm to the top of your head. That's your left hand on the top of your head. Rotating your pelvis and your lumbar spine, sliding your hand over the top of your head as a stick. Cover your ear and you look down at your right hand. Forward up at the ceiling and forward preparing your shoulder girdle, your arm and your hand for the weight bearing work through the um, upper body that's coming up in this program.
The new site awaits swivel around position your left sitting bone on the chair. You're right, sitting bone off the edge and position your left hand back of where it was before. Your left hand will be on the back pedal now and here we go, right sitting bone aims down rotation and side bending. Bring your hand to the top of your head, fanning. Open your right ribs so that there is a lot of room between your right heel and your right elbow. Lengthening the lateral mile fashional Meridian, making a long distance from your right heel to your right elbow to your hand and adding rotation. Looking down, looking forward to the ceiling and forward chest bone towards your hands has spawned forward chest bone to the ceiling. All of the these rotations enable you to access a different vectors, different grains of fiber, connection of connective tissue between your ribs and your pelvis.
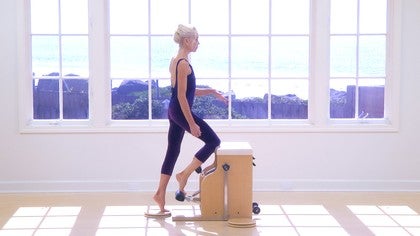
Now that you are well prepared in thoracic side, bending and Lumbar side bending, it is time to stand in front of a chair to address the alignment of your foot, knee, foot, ankle, knee and hip. We'll change up the spring off with the lighter springs on. With the heavier springs. You have options. Now you may stand in mother, May I? Yes, you may. You may stand in front of the chair, um, without the rotator disk. If a rotator disk is within reach convenient, then place it on the floor in front of the chair in order to be safe so that the disc won't slide.
Put a non-skid mat underneath the desk and that will ensure that you don't combine ice skating training with your Pilati chair work. Now a non-skid mat will be useful to cushion your patellar tendon from the corner of the chair standing with your left foot directly in line with the center of between the pedals. Your left foot is in line between the pedals. You'll bring your ball of your right foot, the sole of your right toes in contact with the foot pedal, steer your rights sitting bone towards your inner left ankle, which you were well prepared to do because you just practice lumbar side bending. Here's the rhythmic action. Quick, slow, slow, slow quickly, and the Plantar flection and slowly into Dorsi flection. While you do this, steer your right sitting bone towards your left ankle so the side right side of your waist is long. Draw the right side of your pelvis back.
The tendency is to rotate your right pelvis towards the chair. If all is going reasonably well, rise to the sole of your left toes, pressing the sole of your left toes firmly into the floor or firmly into the desk. Sliding your shoulder blades down your rib wall. Come down and change to the new side. All you need do to change to the new side is to relocate your patellar tendon cushion. Sure, I'll get right on it and plant the ball of your foot and the sole of your toes on the chair pedal.
Now adjust your foot on the chair pedals so that when the pedal is all the way down, you can have all the metatarsal heads in contact with the chair pedal. Granted, they'll be more weight the first metatarsal, the first three toes than the last two than the fourth and the fifth and your toes will suction onto the a chair pedal, particularly when during the ecenter control, when you lower your heel and bring the pedal up gradually, that's when your toes suction onto the chair pedal. Drawing the left side of your pelvis back and aiming your left sitting bone towards your inner right ankle. Take a breath. Okay. Here we go. Quick, slow, slow, slow, quick, slow, slow, slow, quick, slow, slow. As if you could prepare the souls of your feet and your legs to move with cat like precision and cat like grace. Challenge yourself to keep that rhythm going as you press into the sole of your right toes and the ball of your right foot finessing the ground force of your right foot and your left knee who into the carriage.
You can see this as challenging my ability to be level and steady on this disc. Come down from here. Now we're going back to the first side again. This time with two different, um, orientations. With respect to the chair, you are most likely much more familiar with this sagittal orientation. We're going to switch it up a little bit. If you don't have the disc reposition your left foot so that you are on a diagonal. With respect to the chair, you can see your femur stay steady and you turn your pelvis around the head of your right femur. So now you have a different orientation, quick, slow, slow, slow.
This different, uh, orientation. With respect to the spring resistance. We'll place the different vector of force in the connection from the sole of your foot up to your abdominals. And then when it's time for the Relevate, when it's time to go into Plantar flection to lift your heel off the ground disc or no disc, you will have to, um, orient two different sets of ground forces, which is a useful motor control process. Change now to the new side.
Your right foot will be aligned with the center and then without the disc, you just relocate your right foot on this angle. If you do have the disc swivel it.
Quick, slow, slow, slow steering your left sitting bone towards your inner right ankle, the right medial Malleolus. It's always a good time to remind yourself about the elongation at the back of your neck, especially in this age of laptop, neck and computer posture. Now this one is really difficult for me, so I have to be quiet and focus. Plant the sole of your right big toe. And this, as you can see is creating a ground force of stability through the inner left knee. That where I don't have much left, I don't have any left actually since my injury was when I was 15 and that's decades ago, left sitting bone towards your, in her right ankle. Now note to self do that more than once a year. Okay. Finally, uh, we'll take a different orientation and that will be rotating your pelvis towards your supporting leg.
We've been straight on, we rotated away and now there's going to be the direction of a relative internal rotation and the supporting leg and of the working hip. Quick, slow, slow, slow. Now the center of the pubic bone and the chest bone are aiming on this diagonal. Still steering your right sitting bone towards your inner left ankle and with or without the disk rise to the sole of your left big toe. Pressing your right toes strongly into the disc and keeping your laser like focus with your inner vision, keeping the rhythm going and last time for the new side and the next variation. Setting up and then internally rotate.
Reposition your supporting leg and your pelvis quick, slow, slow. So [inaudible] recommitting yourself to the length of the back of your neck.
Sliding your left shoulder blade down towards the right. Gluteals the right psis. Next, it's time for upper body work again. So change back to your upper body springs.
You'll come onto your front. Remember we have the, the lighter springs here for the upper body work come prone onto the chair with the heels of your hands wide apart. It's my preference to have the hands to the outer edges of the pedals so that um, the notch between your Thien, Our Eminence and your hypothenar eminence can snuggle right over the padded corner of the chair. And that makes this a kinder weightbearing position for your wrists. Now pressing the souls of your toes or your toes and your metatarsal heads into the wall. Hover above the ground with your spine up parallel to the ground.
Position yourself so that the pedals are not in contact with the ground. And if your arms are much longer than mine, it may be useful to put a mat on top of the chair, um, so that you, uh, will not bottom out with your hands on the ground. Now this is going to be a proximal initiation of drawing your pubic bone towards your chest bone and your xy FOI process towards the pubic bone. And you rise in spine flection and then undulate in despite extension, ex hail, bringing your lower lungs up to the ceiling and then unfurl from pubic bone up through your throat. Exhale here. Inhaling a gentle way like undulation of spine fluxion and spine extension.
This undulation is primarily through your thoracic spine. Um, this is not a whiplash of your cervical spine. We reverse spine IX extension going up. That's not reversed at all. Now that I've talked about whiplash, I'm all confused. This was flection to lift the pedals up and extension to come down. Now it's extension to bring the pedals up flection to bring the pedals down, undulate into spine extension spine flection.
Just this position of the touching or the pressure of your toes into the wall will help to activate the entire, um, sling system of your back, connecting your feet with your spine and your shoulder girdle. Next event is rotation. So hovering your abdominals up to your spine, press down with your left hand and the right pedal will come up. Turning is if your left ear could listen to the ground. Inhale, right ear listens to the ground.
Exhale to return. Inhaling, collecting your lower left ribs towards your right. [inaudible]. Inhaling, collecting your lower, uh, left ribs towards your right. Asi Ais, the anterior and Posterior Oblique sling systems are at work here with this rotation around your central axis. Anchor the right anchor, the left side of the pelvis. When you turn to the left, anchor the right side of your pelvis. When you turn to the right anchor and rotate and return anchor and rotate.
Now we'll combine rotation and extension, thoracic extension and Lumbar to rotation and flection. Rotation and extension. Being quite conservative with your cervical extension. For example, don't look forward. That would be shortening the back of your neck.
Once more in this direction. Rotation, when you rotate to the left, press your left foot more into the wall. Rotate. Extend. When you rotate to the right, press your right foot into the wall. So stabilize with the lateral line of the lateral [inaudible] Meridian. It's time to return anchoring. There they go the other way. Anchor the right side of your pelvis, pushing your right foot into the wall rotates so your left ear listens to the ground spine extension wide across your collar bones.
Press with your left foot into the wall when your right hand comes down. That real mile fashional Meridian festival. Engaging all of the frontline with your abdominals and the back line and the sides twice. More. Inhale to extend. Exhale to return.
Inhale to extend. Exhale to return. Now [inaudible]. I would recommend that when you have time after, after practicing this program, practice the move we just finished. Practice that sequence without your feet on the wall because when your feet are an open chain, you will realize a lot more responsibility for proximal control. It's a richer whole body experience when you have your feet in a close chain position. It's a more focused, more concentrated proximal control.
When your feet are open chain, it's time now for the lower body work again and that will be sitting seated sidesaddle on the chair. Let's change the springs now off with the lighter ones and on with the heavy ones. You'll be seated with your sitting bones at the back edge of the chair. Your right sitting bone off the edge and your midfoot nestled over the foot pedal such that your heel is the front of your heel, is in contact with the pedal and the soles of your toes are off. Your right sitting bone is aimed down to the ground and here you are on your central axis. The volume of your ribs are on top of the pelvis. As you inhale to your right lung, press the pedal down.
There will be a tendency to shift to the left. Don't do that. Inhale one, end two and three and four palms are on your thighs. Six and seven and eight. Change to the sole of your toes and the ball of your foot and contact with the chair pedal. Your femur is in external rotation for which you're well prepared.
One, a reminder to keep your chest bone, the xiphoid process right above your pubic bone to lengthen up through the back of your brain as opposed to [inaudible] the front of your throat. Now we have stilettos and flats. The previous rhythm applies.
You could slip and put too much pressure on these tissues here on your Perrone hills. One, two, three, four, one, two, three, four. Reminding yourself to stay, to climb up your central axis. Don't shift to the left. I was fun as it would be. Don't go forward. Stay on top of yourself that will anchor this where you needed most. The vastus, medialis and medial aspect of your quad. Quick,
Keep this sitting bone. That's your right sitting bone off the edge of the carriage. This might be six, maybe seven and eight. Now move your pelvis forward over the head of your femurs as if you were in jockey position. I know nothing about jockey position, but here we are. Quick,
You're left sitting almost sitting bone will be just slightly off the edge. Now if you have left sacroiliac joint instability, then it might be prudent to keep your sitting bone on the chair supported by the chair so that you don't experience a shearing force. That wouldn't be a wise if, however your sacral Iliac joints are in are quite cohesive, coherent, congruent is the c word I was looking for there a, then you can have your left sitting bone just barely off the edge now, um, with the volume of your ribs on top of your pelvis and bringing your left long towards the left. Just to avoid this mistake. Quick,
When you have your left thumb over the area of the Vastus medialis the inner aspect of your quad, then you can feel that you are accessing the target.
It's as if your left sitting bone. We're pressing the pedal down.
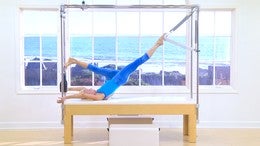
Now bring yourself up and we'll just stay in this orientation close to the wall because it's time for your upper body work again. And this time a side arm plank like situation for lateral translation and flection, lateral flection, undulation of your thoracic area. Let's change up the springs from the heavy spring to the lighter spring now.
A distance test from the [inaudible]
Left the side of your left neck. Elongates the side of your right neck fanning. Open your left ribs fanning. Open your right brims. Meanwhile, back at the right shoulder blade, slide it down away from your neck and away from your ears. Reverse inhale, you'll go concave to the ceiling. Exhale, convex to the ceiling. As the pedal comes up, you are concave with respect to the ceiling as the pedal goes down, your convex. Now of course, the soles of your feet in contact with the wall are making a really significant contribution to balance here.
We'll do this first version on the new side and then take this with open chain for the souls of the feet. Position Your greater trocanter left greater toe canter on the central axis of the chair and the heel of your left hand will be on the pedal that's in front of you with your arm in the plane of scaption, the soles of your feet in contact with the wall balancing there on the side of yourself. First of all, you'll snug your left shoulder blade, your left scapula down away from your neck, away from your ear, and this is inhale convicts to the ceiling. Exhale, concave. With respect to the ceiling. Inhale, puff your right lung up. Exhale, puff your left lung down. Inhale, a thoracic translation and side bending, translation and side bending. And yes, your neck and your head. Respond to that motion of the thoracic spine. Reverse concave with respect to the ceiling. Facts.
Inhale your left lung puffs to the floor. Exhale your left lung puffs to the ceiling. Maybe. Does this make sense? Exhale, yeah, this makes better sense. Exhale. Inhale, exhale. Inhale, exhale. Inhale. Exhale. Now in Ale. Now we're going to slide this chair just a smidge away from the wall so that you can practice this again without your feet in contact with the wall, there's going to be more proximal control required.
And here's what's going to, here's what you're going to do with your feet. Your right Achilles tendon can nessel between your uh, left to toes between your left big toe and your second toe. The Achilles tendon, Nestle's there with the right foot in front or the left Achilles Tendon nestles in here. That will connect to your feet in some useful ways. So I'm going to slide the chair just a smidge forward so that my feet can no longer touch the wall. Now we're ready for the side undulation with the souls of your feet being open chain no longer pushing against the wall and you'll discover that's going to require a lot more proximal control for the spine translation and lateral flection undulation as well as more control through your shoulder joint. Okay. Place the heel of your hand. Um, no, we start with the greater trocanter.
It goes between the two pedals and your weightbearing hand will be at the front pedal, but near the back edge of the front pedal. Launch yourself over the chair top and place your ceiling leg. That's the left leg in this case behind so that your right Achilles tendon is nestling between your left two toes. Place your palm on the side that your left hand on the side of your leg when you're just getting started. Of course, it may be more comfortable, more reassuring to have your hand for an extra point of stability. Now, scapular depression on the right side. Inhale to hover up, exhale down. Inhale and down. At first, you can see that the tendency is to for the fingertips to grasp the chair pedal, challenge yourself by opening your fingers so that you have a much more proximal control from the heel of your hand to your ribs.
Change that position now, right lung towards the floor, left lung towards the ceiling, right for left ceiling balancing on your greater trow canter. If it's uncomfortable from a pressure standpoint, then by all means put some cushions under your greater trocanter change now so that the left leg comes in front. Inhale to the ceiling, exhale to the floor, left long to the ceiling towards the floor. Lots of opportunity here to work on your trunk. Stability for your side planks, lots of opportunity to accentuate the connection across the anterior [inaudible] bleak sling system. This also has the benefit of making yourself translate the Thoracolumbar junction to the left and to the right.
You might ask yourself, what difference does that make? Well, actually it's really important to have equal opportunity to, um, translate the t l junction to the left of the sacrum and translate the t l junction to the right of the sacrum. And most of us are good at one side, but not so much the other. Uh, now position your greater trocanter. This is the left side in this case in line with the center, the chair pedals and the heel of your left hand on the top of the chair pedal. Taking good care of your left wrist. Launch yourself over the chair pedal and your top leg. That's the right leg in this case is behind checking to see that you are in your axial elongation of sideline and inhale the right lung puffs to the ceiling.
Exhale, the left lung puffs to the floor. Inhale, translate to the right. Exhale. Now the reason this caught my attention is that I was talking about what the TL junction was doing, the Thoracolumbar junction was doing and not paying attention to the stability of the left shoulder joint. Reverse. Inhaling left lung towards the ground, exhaling right lung to the ceiling. This requires, um, congruence of your left humerus into the shoulder joint. It would be useful if I would let go the fingers that white knuckle grip, you know, requires more proximal control.
Now change your front, your top leg, which is the right leg in this case to forward. All right, when this top leg is forward, that changes quite a bit. The um, vector of stability from your left greater trow cantor to the heel of your left hand. And remember again, this is a translation and a lateral flection or side bending of your lower thoracic spine rather than a cervical whiplash. Oh, hard for me to do that. Making a connection from the below your armpit in the um, left ribs towards the little finger side of the heel of your left hand. Note to self. Practice that some more.
Now we're onto standing again and this time we'll be standing facing the chair with or without the disk. We're back to our lower body focus. Now the chair doesn't need the wall. So position it where you like in your studio. Make sure that you have the heavier springs on. Now for the lower body work, if you're working with a rotator disk, then you'll place it in front of the chair using a non-skid mat for safety sync and aligning the disc in the center like so. You won't need a non-skid. Uh, you won't need a cushion for your knee because your knee won't be anchored against the front of the chair. Stand with your left foot in the center on the floor and place the sole of your right toes and the ball of your right foot in contact with the chair pedal.
Do a test await tests to make sure that when you push the pedal down, all of your metatarsal metatarsal heads are in contact with the chair pedal and your toes are suctioned on top of the chair pedal. No need to lift your toes or your eyebrows. Settle your eyebrows and settle your toes. Now steering your right sitting bone towards your inner left ankle quick, slow, slow, slow, quick, slow, slow, slow. When your knee comes up, you're right. Sitting bone drops down.
Four more of these just in case you bobbled like I did and have to regain your composure. Seven, eight. It would be preferable to keep your rhythm when you lift your left heel. Three and four, four more of these five end Oh good heavens, six and fortunately the chair is there to catch you. I don't think I was really focused on that. Maybe I can redeem myself on the other side. All right, now I plant the sole of your foot on the disc and bring the ball of your left foot and your left toes quick, slow, slow, slow, quick, slow, slow, slow.
Aligning your chest bone over your pubic bone, aiming your left sitting bone towards your writing. Go lengthening the back of your neck, lining up along your central axis in preparation for the Relevate or the Plantar flection. Plant the sole of your right toes and continue steering with your left sitting bone. Four more of these, keeping your head on top of your neck, not going headlong into the ocean and come down from here. I could try to excuse myself saying I'm not used to practicing with such a gorgeous view, but okay, now we're going into an external rotation. If you don't have the disc, place your foot in external rotation.
If you do have the disk, swivel the disc so that your um, a single leg Pallavi Zvi stance or external rotation of your left hip joint. Now do a congruence test to make sure that you have the soles of your right toes and the ball of your right foot in contact with the chair pedal. Here we go. Quick, slow, slow, slow,
Hover your left heel off the ground. Or in my case off the disc, you can see that I really do not have the control and the proprioception. Once I put this left foot on a rotator disk, much better on the other side. Now external rotation and your left foot is on the chair pedal. Quick, slow, slow, slow.
It's as if you're right, sitting bone could push the pedal down as the pedal pushes down, you have the feeling that you're maneuvering them. Your chest bone rise is a little bit changed to the new side. No, I didn't forget the Relevate. It's coming soon. The plant reflection crossing over the mid line, drawing the left side of your pelvis back. You have options with the breathing.
You could inhale to push the pedal down or you could exhale to push the pedal down. You determine which you prefer. Now to rise to the soles of your toes. Um, get rid of the disc for the moment and stand your left foot, your supporting foot on the ground. Cross over the midline and hover your left heel off the ground onto the sole of your left toes and push the pedal down. It will be when you're first getting accustomed to crossing over the midline. With your heel lifted, you'll have a little bit more control, I hope, when you don't have to work with the instability of the rotator disk change now to the new side, crossing over quick, slow, slow, slow, regaining your rhythm.
It's not that the sound went dead. I was just focusing.
Nestling the notch of the heel of your hand right over the corners of the chair. Top as if you were moving into some spine extension at an anterior pelvic tilt. Shift your weight forward to your hands so the light from the chest bone goes between your hands and as the abdominals come in and you shift your weight towards your hands. Leading your sacrum up.
Snuggle your shoulder blades down quick, slow, slow, slow. These different hand positions. We'll challenge the um, a number of vector connections between your ribs and your pelvis. We've had variation. One hands forward variation. Two hands close to you. Variations. Three variation. Three hands on a diagonal. Uh, do not accompany. This was side bending. Keep your spine long from sacrum to occiput. One, two, three, four up. Ooh. Three, four, three and four and change and hold
Now it's side bending and you're well prepared for this thoracic side bending. Slide your right shoulder down and drive your right sitting bone back. So your thorax is in side bending lateral flection here. Change to the new side, lateral flection side, bending to the left without the pedal in place. Do your best to have equal weight on both feet.
Actually, you know, I don't think that is really equal weight on both feet. Isis spect, that there has to be just a little bit more weight on the left foot to counterbalance this diagonal. So I don't know if it's equal weight, but the fact of the matter is the pedal should stay level together. So we've had one, two, three, four, five, six. Here comes seventh variation. This is the only one in spine flection drive your elbows towards your knees and the back of your neck, long snugging all your abdominals up to your spot so that they're, you have seven different variations of an abdominal and arm exercise.
By changing the positions of your hands, you discover a variety of vectors of abdominal connection and shoulder girdle connection to trunk as well. Now we're going to take standing facing with your side to the chair. Then we'll come back to more abdominals with the side to the chair. All right, the rotator disk can go at the back of the chair this time and your right foot will be facing forward. Your left foot on the chair pedal. Do a test here to make sure that when you push the pedal down off of the first three toes are on the top of the pedal and your heel is placed squarely in the middle of the chair pedal. As the pedal comes up, it takes a trajectory of swinging, uh, towards the chair laterally, which is going to take your femur into abduction.
Draw your left sitting bone towards your inner right ankle and your entire in her left thigh. We'll be asked to draw towards the center east centric control as the pedal goes up. One,
Rotate from your hip joint. Now the sole of your toes and the ball of your foot are in contact with the chair pedal. Drawing your heel toward your heel. We'll draw on a diagonal trajectory toward your inner right thigh. And as your heel goes down, there will be a drawing up of your inner right thigh going heavenward as the left sitting bone goes down, balance those forces for two more repetitions here.
Keeping your east centric control changed to the new side. Relocate that. This okay. It's a safety first. Non-Skid Mat external rotation at your left hip joint.
Aim your right sitting round down or one, two, three four,
Next we're going to another abdominal and arm exercise. This time with your side to the chair, your inside foot will be on the back pedal. Your outside foot will be on the forward pedal. The reason I was looking up to the left and did a pause is because the next variation after this we'll switch the legs up and I just wanted to make sure that I did the less demanding variation first and the most demanding. Next.
Now with your feet in parallel on the chair pedals, Nessel glide your shoulder blades down and have a bit of thoracic extension and we're going to shift forward and to the left weight onto your left hand sometime today. Get off the tarmac [inaudible]
You're prepared for this will well-prepared. Continue turning your pelvis to the left, rotating around the head of your femurs in your right hand goes to the back corner. Lots of weight is on your left hand. Now your left shoulder blade, the left side of your ribs.
Corners closer to you, less side bending than before and the foe as an FAU x false headstand. Don't put your head on the chip top. Lengthen the back of your neck. 3M for now, the new side of which will be side bending the other way, which is really fortunate. I think the inside foot is on the back pedal. Checking your ground forces there.
Make sure that you're on top of the chair pedal, not on the side of it. Leading your chest bone forward and up your sacrum up and back. Sitting bone spread wide as you have her
This is side bending lateral flection of the left side. In this case, turning your pelvis to the right. Bring your left hand behind. Now there's more weight bearing on the heel of your right hand.
And finally come onto your forearms, pressing the pads of your fingers and thumbs against each other in order to elongate the upper trapezius. Your sacred aims up to the ceiling. Having the intention of keeping the pedals level easy. Now on the dismount come up from this.
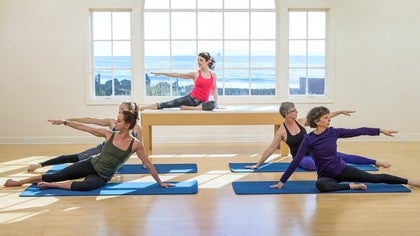
You could either get a mat now so that you can lie on the mat on the floor in front of the chair, or you can use a foam roller. I prefer the roller. So let's pause for a moment and get the gear that you need. In preparation for your hamstring bridges. You'll be lying on a mat in front of the chair or on a foam roller. I prefer the roller set, the springs so that it's right for your hamstring strength and your trunk control. I prefer to use the, the lighter springs, the white springs in this case because I'm a not so strong in that area.
When you come to lie on your back, um, align your sacrum and your thoracolumbar junction in line with the crease between the space, between the chair pedals
If the RECO Lumbar junction be neutral in that area, the TL junction in line with the sacrum. All right already. Now, um, the force of your foot on the chair pedal is the following. It's as if you could draw your right heel towards your right sitting bone and that will activate from proximal to distal, distal to proximal, the activation of the back of your leg and the sole of your foot. Initially your arms are here too on the ground, uh, to provide a stability inhale, exhale to return alternate sides. You could also exhale to pull down
And this time it's a neutral bridge aiming the Asi us up to the ceiling and using your arms for support. You alternate one heel and then the other drawing the right ribs towards the left pelvis, drawing the left ribs towards the right pelvis. If all is going reasonably well, lighten your hands off the ground and continue this motion. Having the intention of keeping your Asi bias level and steady with respect to the ceiling. And don't put your foot down with so much force either. Okay. Land your pelvis, land your arms as you exhale, settle your front ribs away from ceiling and it's inhale both legs land.
Exhale to return. Drawing your heels towards your sitting bones, sliding your shoulder blades down, your back, down your rip wall with a split pedal, having the intention of both pedals twice more, landing simultaneously
Now the inside foot will be forward and the outside foot back said the other way. The outside foot comes across the mid line to the back pedal and the inside foot comes to the forward pedal. This is exactly opposite where we were moments ago when your left foot is forward, it's encouraging the pelvis and lumbar spine to rotate to the right when both hands are on the corners of the chair, it's encouraging the thoracic spine to rotate to the left. So here we have a situation of the pelvis and the lumbar spine rotating to the right. And the thoracic spine and the shoulder girdle rotating to the left. This oppositional rotation is not new to you.
You do it every time you take a step. Now shifting your weight forward to your hands. We'll lift the sacred up, drawing your abdominal wall up towards your spine. Land the chair pedals. Move your left hand to the left and your chest bone aims over the free corner.
All toes are aiming forward. All fingers are aiming back. Two then three and four and you'll have both forearms onto the chair, top pads of your fingers and thumbs touching. Shifting your weight forward with your head coming in the direction of your hands. Inhale and exhale to return. Inhale coming up. The inhalation will help your sacrum lift.
The exhalation will help you. Slide your shoulder blades down and use your abdominals to help twice more here and finish. Come out of your adult. Twist your game now and we'll take the new side with your side to the chair. The outside foot comes to the back peddle. The inside light comes to the forward pedal.
This is implying now that your pelvis is rotating to the left and when you take your hands to the right, it's a rotation and a bit of side bending of your thorax. The sacrum leads up to the ceiling. Both pedals travel together collarbones wide and shoulder blades. Nessel down side bending one end to end. Notice the fingers are outstretched, not not a white knuckle grip here. Left hand moves to the next available corner.
This is fanning open the left ribs side, bending of the left thoracics area, right hand goes to the accessible pedal to end. It's a constant battle to avoid scapular elevation and your left hand goes all the way to the back of the chair side. Bending, fanning, open the left side of the ribs, the left lung. Unwind a little bit. Bring your hands close by too and say creme leads up and come onto your forearms.
You see, it's a, everybody has differences between sides. I mean is that not the human condition? Um, it's a lot easier for me to externally rotate the left leg and therefore a lot easier for the pelvis to rotate to the left. In contrast on the other side, when the um, left leg is forward as the pelvis turns to the left, that's more and more internal rotation of the left side, which is so difficult to do. Our closing event will be a single arm push up on the disc. For this you'll need the lighter spring. I'll just change the springs up.
Position yourself on a diagonal with Richie with respect to the chair pedal. Here's why I like to do that. The notch between your thumb and the little finger mound on your hand. The Athena and Hypothenar Eminence that nestles right over the padded corner of the chair pedal. Aiming your fingers in on a diagonal and then your other hand will be on the disc aiming inwards. The light from your chest bone will shine right between your hands.
Now when the chair pedal lifts, this is the right hand on the Chair Pedal Aiming Your Right Asi bias towards your thumb. Your left thumb. Now standing firmly through your right foot. Lift your left leg. Hover your left leg up. Continue this hovering motion. Steering Your Right Asi as towards your left thumb. Plant the sole of your left toes, the ball of your left foot, and continue on this campaign of keeping your pelvis and your shoulder girdle level with respect to the ground.
When it's time for the new side, you'll just need to position your chair so you have room on the new diagonal position yourself so that the heel of your hand is right over the padded corner of the chair. Peddle your other hand, either on the floor or on the rotator disc is aiming inwards so your fingers are aiming on a diagonal towards the point between the pedal and the disc. Tuck your toes under, collect your lower front ribs and shifting your weight as is necessary. As much as necessary, as little as possible to keep weight steady on the disc. Hover one leg, one end, creating a dyed in all conversation between your foot on the ground and your hand on the disc, shifting towards the lateral line towards the right hand and the right foot. Still aiming your left eye sis towards your inner right thumb.
So there you have it. And exercise on the chair. A whole sequence of exercises on the chair that will challenge your ability to integrate all of your mild fashional Meridians and your sling systems. Thank you so much for being with me on Palazzos anytime. I look forward to the next time. Bye for now.

The Teacher's Corner: Focus on Fascia

Mention
 |
Elizabeth Larkam (Teacher) |
 |
Elizabeth D |
 |
Tiffany L |
 |
Maureen M |
 |
Patti S |
 |
Vanisha T |
 |
Lisa R |
 |
Renata Š |
|
|
Avishag H |
|
|
Pilates Tree |
 |
Sandra M |
 |
Misty M |
 |
Lynn P |
Comments


You need to be a subscriber to post a comment.
Please Log In or Create an Account to start your free trial.
