Description
About This Video
Transcript
Read Full Transcript
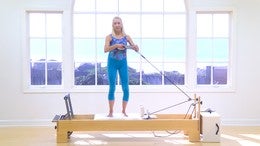
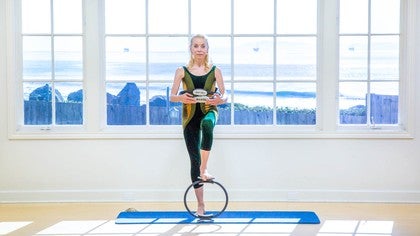
Welcome to Palladio's anytime. I'm Elizabeth Larkin and I'm very, very glad to be back with you with this mat program. This map program is inspired by the recent book from handspring publishing. It's edited by Robert Slipe and the title is fashion in Sport and movement. You can access that book and other books on the reference list for this program by taking a look at the supportive materials on the plot. These anytime website here you are on your mat, no props visible. It's the just view show, just you and your mile.
Fashional slings, the neuro mile, fashional web, the whole body systemic, a web of continuity, Fascia being the organ of communication. Please come to line your side. Here you are lying on your side. You can support your head, your neck with a pillow or cushion if you'd prefer. Bend
Now add rotation of the pelvis and lumbar spine. Inhale, slide your knee top, knee forward, your right knee forward. Exhaling. Slide your top knee back. Now I think I have the breathing, uh, confused here. How about exhale to go forward.
Inhale to go back. As you exhale, slide your top knee forward. As you inhale, press your psis into your thumb and lead back with your psis. You know those of us who have spent decades in the [inaudible] environment facilitating a posterior pelvic tilt and spine fluxion the tendency would be to go into spine fluxion. Don't do that. Instead, it's extension and rotation. Exhale forward. Inhale back. Now connect all four of those points. Making a circle or perhaps it's an oval.
Inhale to hike up and slide back. Exhale to press down. D, hike and forward. Here you are creating a circle with your ceiling. Greater trow canter, yeah, undulating your pelvis. Indice and lumbar spine side, bending, extension and rotation side, been the other way. Rotation to the front. Inhale to the back. Exhale forward.
Inhale to the back. Reverse. Sit down with your sitting bone. You're right, sitting bone towards your right heel back and shorten your top waist. Exhale down. [inaudible]. Inhale, inhale, exhaling, rotating forward and [inaudible] down. Inhaling back in up. Exhale, forward and down. Inhale, back and up, forward and down.
No surprise to you. You could do this with your ceiling shoulder as well. Circle your ceiling. Shoulders [inaudible] up and forward, down and back. Up and forward, down and back. Slide your palm and your arm on the side of yourself, the side of your thigh. Reverse the direction forward and up. Back and down. Forward and up, back and down. Twice more. Inhale up and back. Exhale down and forward. Up and back, down and forward. Now
Switch around now and come to lie on your right side. Here you are lying on your right side with both knees bent. This time, your top leg is your left leg and we'll address the movement of the pelvis and the lumbar spine. First you rock from side bending to side bending. Press your ilium up towards your ribs and suppress your ilium away from your ribs such as your sitting bone goes into your hand, side, bending, shortening your sealing, waist side, bending, shortening your floor, waist. Inhale, exhale and continue this rocking motion, rocking your pelvis over the floor. Greater trow cantor, that's the right greater toe canter. Moving now towards rotation of the pelvis and your lumbar spine, forward and back.
Slide your left knee forward and then push your hand your fingertips into your left knee cap to drive your femur back and that will facilitate rotation of the pelvis and the lumbar spine in the direction of extension. Exhaling. Inhale back. Exhale forward. Inhale to the back, slide forward and back. End and forward and back. Circle up and back. Down and forward.
Inhale up and back into extension. Exhale down in the direction of fluxion, up and back. Down and forward. Okay, knee. Inhale. Exhale, reverse. Inhale to the back. Exhale forward. Inhale down and back. Exhale up and forward.
Inhale. You know, frankly, you could make a case for breathing any which way. It's just important that you, that you do breathe of course. But, uh, you can make a case for inhaling or exhaling during this circle. Now it's time to address this shoulder on this side. Shrug your shoulder up as if to come to your ear, roll it forward. D, shrug it and back. Inhale. Exhale, down and back.
Inhale up and forward. Exhale, down and back. Reverse the direction for [inaudible] back and down as your shoulder joint moves it brings with it your shoulder played. And as those two areas move, they bring with it the risk, uh, the responses of your ribs and your thoracic spine and also your lungs. [inaudible]. Now that's pelvic circles and shoulder circles on each side. Time. Now to go to the first side, come to lie on your left side again, and this time your shoulder circles and your pelvic circles will happen in the same direction. At the same time, set up with your knees forward of your hip
Exhale down and back. It's as if you had a light source on the side of your shoulder and the side of your greater trow canter so that you could create a, uh, a light show on the ceiling above you with the circle coming from your shoulder and a circle coming from your pelvis. Reverse up and forward, down and back. Inhale, up and back. I said that badly before, I'm sorry. Inhale up and back. Exhale down and forward.
Inhale involving the movement of your and your thoracic spine. Together with your pelvis and your lumbar spine. Now having circled the ribs and the having circled the shoulder in the pelvis in the same direction at the same time, it's time to circle them in opposite directions. Shrug your shoulder up towards your ear and d, hike your pelvis away from your ribs. This is lengthening your ceiling side of yourself and then shorten the ceiling side of yourself. Pelvis sitting bone and shoulder.
Go away from each other and then they come towards each other, puffing up to the ceiling, puffing down to the floor. Slide your knee forward, your right knee forward and your right shoulder back. Slide your right knee back and your right shoulder forward. Rotating your pelvis and lumbar spine opposite the direction in which your shoulder is moving time to put these together in opposite directions. Aim your sitting bone down your shoulder up.
Aim your knee forward your shoulder back, HighQ your pelvis up and bring your shoulder down. Take your pelvis back and your shoulder forward. Inhaling, having us your intention to create a smooth circle in opposite directions of your greater trow Kantor and your shoulder. What's implied here is that you are creating a figure eight light show on the ceiling. Now, reverse the direction pelvis goes back and shoulder goes forward. You might ask yourself, why are we doing this? Because the ability of your thoracic spine and your pelvis and lumbar spine to move in opposite directions.
That's included with every step you take on a good day other side. Now
Go back as your left psis goes back. Your left lung comes forward, rotating your pelvis, lumbar spine and Thorax in opposite directions. Resting your lungs in your rib basket. Circling now shoulder up, pelvis down, pelvis, back, shoulder forward. Hike your pelvis up and Dee. Shrug your shoulder. Knee forward, shoulder, back.
Inhale to separate away from the center. Exhaling to come close to the waist in the hailing away. Exhale and close and away and close by and away. Reverse pelvis, back, shoulder forward, pelvis down, shoulder up, etc. Sit down. D Shrug. Sit down.
And one more here. Now that you've addressed mobility of your pelvis, lumbar spine and thoracic spine in sideline, challenging your coordination a bit. You're coordinating abilities there. Let's take a preparation for the Peloton mat exercises. Sidelight, kick come to lie on your side, your left side. In this case with both arms forward, both hands forward of the bottom of your chest bone, both hands forward of your Cyphort process. Now each knee is in front of their eight, their respective hip joint. Your right knee is in front of your right hip joint, et cetera.
With your left knee, hover your uh ceiling limbs parallel to the ground and bring your right knee forward and your right shoulder blade back. Bring your right psis, Mac and your right fingers forward. Here you are unscrewing the lid from the base and the base from the lid. Lift up your ribs and lift up your waist off the ground. Turn your arm thumb up and then turn your arm thumb down.
External rotation and internal rotation.
This is a great way to tone your lateral pelvic stabilizers. The gluteus medius. This is an open chain movement. The sole of your foot is not touching against a steady surface. It almost makes it more difficult because you're not getting any distal feedback. Come to lie on your new side, both arms outstretched one your left palm is above your right, your left inner thigh hovering above your right inner thigh and pelvis back. That would be your pelvis forward and your shoulder blade back and change up.
Creating a ground force with the right side of your shoulder into the mat, creating a ground force with your right greater toe into the mat so that you can lift up your ribs and lift up your waist, rotating the pelvis and the lumbar spine in opposite directions. The usual error, uh, when someone gets tired, I can feel myself doing this as say, oh, maybe if I take my leg back into hip extension, it will be easier. It will be easier. It will also be wrong. Okay, you're going to get more of a benefit for your pelvis, your lumbar spine, and your lateral pelvic stabilizers when you keep your knee forward of your hip joint. Now the transition from one side to the next is going to be the following. You open this, uh, your left leg and your left arm, um, abducting. And then as they open, knee and elbow aligned simultaneously, your right leg and right arm hover off the mat.
I know I'm leaving the mat, but it's for a good cause. And then you rotate keeping your knees and elbows lined up with each other and you land on the new side. Inhaling, scanning the heavens for signs of intelligent life, opening your right arm and your right leg until simultaneously your left side from this land, the right and land the left. Inhaling, exhale to the other side. Inhaling X. Hey [inaudible] this is so much fun. I could go on, but really we have more to do. Alright, having, um, done that on the rotation of the pelvis, the lumbar spine and the Thorax in opposite directions and practice the transition rolling to each side. Come on to your side.
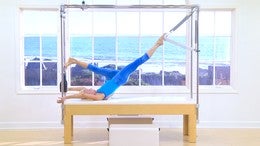
Now for the uh, side leg kick, you'll be so well prepared for this. Pressing the palms of your hands against each other. Lift up your ribs and lift up your waist. Creating a ground force with the side, the left side of your shoulder and the left side of your pelvis. Aim your right sitting bone towards your left ankle bone. Inhale, sweep your leg forward. Exhale, lift up your ribs and lift up your waist.
Inhale forward. Exhale, lift up your ribs in waist as you reach your leg back. Funnel your ribs towards your pelvis. Inhale forward x hell to go back, taking the longest possible distance. Um, is that true? You know it's not true. You're not taking the longest possible distance from your xiphoid process to your right big toe. Instead, you're taking the longest distance from your Asi s to your big toe.
Inhale forward. Exhale to come back. Sideline legs circles forward up and around [inaudible] to the back, sliding your low ribs towards your pelvis, up and around to the back. Reverse direction. Back up and around to the front. Exhale back. Inhale to come up and forward other side.
Now of course, your welcome to support your head, your neck with a cushion or a pillow as you like there. If your lateral neck stabilizers get tired and who's wouldn't? Aligning your heels in line with your sitting bones and pressing your palms together in front of the Xy foot process. Lift up your ribs and lift up your waist. Inhaling sweeping your heel forward as you exhale.
Start now. Don't wait to glide your ribs towards your pelvis. Inhaling aiming your left sitting bone towards your inner right ankle. Wrap the sole of your foot around space and press the sole of your foot back as you connect from pubic bone up to chest bone. Inhale forward. Lift up your ribs and lift up your waist as you sweep back.
Inhaling forward. Exhale to go back to circles in each direction forward. Press into your ground forces to circle up and around keeping your left Asi as forward as you circle. Exhale back. Reach out and come up and around.
Exhale back. Reach out and come around. Come on to all fours now. Here you are on all force and pressing your both palms into the ground and your right knee into the ground. Inhale, turn your pelvis around the head of your right femur and hover your left knee. Inhaling, exhale, sail to land. Inhaling, rotating your pelvis around the head of your steady femur.
Now plant your left hand and hover your right plant, your right hand and hover your left. Inhale to lift. Exhale to land, rotating your thoracic spine a little bit so the chest bone aims to the left, illuminating your left hand and the chest bone aims to the right, illuminating the lifted hand. However your right knee and your left hand and put them down. Spread your sitting bones wide, wide behind. Create a diagonal to stand on. That's your right hand and your left knee.
Hover your right knee and your left hand. Create a diagonal to stand on with your left hand and your right knee. It's as if you had three helium balloons, one on your Coxix, your tailbone, and the other on each psis, each posterior superior Iliac spine, and you took turns. The left helium balloon floats higher and it comes down the right helium balloon floats higher, creating a diagonal to move from and a diagonal to stand on. Now that same pattern of activating the anterior and Posterior Oblique sling systems can be done lying on your back.
So come to lie on your back, taking into account which side your mic box is on. Okay, so here you are lying on your back. SFU had been on all fours on the floor, the palms of your hands towards the ceiling and your knees directly in front of your hip joints in the hailing your left palm goes to the ceiling. Exhale to land. Inhale your right palm towards the ceiling. So this is a movement of your shoulder blade and also of your thoracic spine. Create a ground force with your left scapular and your right shoulder blade comes up.
Create a ground force with your right Scapula and your left comes up so you stand on the left. Move the right stand on the right and move the left. Create a ground force with the back of your right pelvis and it's as if you could bring your left knee closer to the ceiling.
Turn your naval slightly to the left and bring your right knee closer to the ceiling. Plant your left shoulder blade into the mat. Turn your naval slightly to the right and your left knee will come towards the ceiling. Plant your right shoulder blade. Move your navel to the left. Bring your left hand to the ceiling and your right knee towards the ceiling, left knee and right hand towards the ceiling, right knee and left hand. Do your best to edit out hip flection and have your femurs perpendicular to the ceiling. Do your best to keep your knee cap going directly up towards the ceiling, not illuminating the side walls.
Those are examples of abdominal work that focuses on the diagonal connections without going into, without going into trunk flection. Now it's time to address bridging with rotation and rotation along the long axis of your spine. For this, uh, we have some specialty options. Let's see. I'll continue to face this direction. Interlace your toes for that. Um, for that you will place one big toe on top of the other and then interlace your toes. Now is this required? No, you could just press the soles of your feet against each other. However, um, there's something to be said for practicing the interlacing of your toes.
[inaudible] come to lie on your back. Now with the souls of your feet together and your knees wide to the side and begin to create a, um, a pelvic clock. Perhaps it's, you know, it as a Feldman Christ's pelvic clock or perhaps you know it from your, uh, is training. This would be rocking in the direction of a post here. Your pelvic tilt and spine reflection. Press your, uh, naval spine. Uh, the postier spinus process of l three press set into the map and then roll around to your left so the back of your left pelvis is in contact with the mat.
Continue to move down in the direction of six o'clock, as if your pubic bone could be heavy and then roll to the side. Inhale to circle. Exhale to circle. Inhale to circle. Exhale, reverse. Inhaling, exhaling. Inhaling, exhale, cross heel on top and circle your pelvis.
Reverse the direction going backwards in time. Resting your lungs into your rib basket. Cross the other heel on top, circling and around. Inhale to move in the direction of extension. Exhale and deflection.
Now with the souls of your heels against each other, nod your nose downward and roll up. Change the interlacing of your toes, the new toe, the new big toe is on top now and the toes interlaced and come to lie on your back. And if you find that just maddening or quite uncomfortable, realize that it takes a while to condition the tissues between your toes. Um, and that, uh, you can just press the soles of your feet against each other. If this is your first round to experience this, it does get better with time.
Come to lie on your back and circling your pelvis with both heels against each other. Inhale to move into extension. Exhale and deflections. Circle and around and circle. One heel comes on top. Circle and around articulating your pelvis, your lumbar spine and your hip sockets, your hip joints, and reverse your ribs and your thoracic spine will respond.
Also [inaudible] pressing the soles of your heels against each other. Nod your nose downward. Look behind the cheekbone, stuff your face, pressing the heels of your hands against each other and the souls have your feet against each other. Now for your further practice of this, be aware that the pelvic clock that you just practiced here, the Felton Christ's pelvic clock with the soles of your feet, feet together can be accompanied with a clock of the cervical spine and you can circle your pelvis and your head in opposite directions. When you have a little bit of time, you can practice that for more coordination patterns. Now with your soles of your feet, press together or your toes interlaced.
It's time for some bridging. Plant the palms of your hands into the ground with your elbows towards the ceiling so that you can create a ground force here. Slide your left heel on top and as you inhale, press into your left hand turning your pelvis, ribs, shoulders, neck, head, and I was turning your head, neck, and eyes to look underneath your left elbow, peekaboo. Turn to see and then return. Your right heel goes on top and points to the left.
Turn your pelvis and lumbar spine to the left, your head, neck, and eyes to the right. Your left heel points the way for your pelvis to turn Ruritan and come down and rotate. Pressing your right palm into the ground. One more each side. It's as if you could open the eye of your left hip joint, turning your navel to the right, sliding your ribs towards your pelvis, opening the eye of your right hip joint, turning your navel to the left.
You could of course, practice that with the new big toe on top, just for equal opportunity for all the different sides. Now let's continue with the idea of rotation here. And this'll be more of an axial, a rotation, a longer axis. Let's say. Um, place your right heel in line with your right sitting bone and Nessel your left Achilles tendon between the big toe and the second toe. Interlace your fingers and press your palms away from the top of your head. Settling your lungs into your rib basket. Now Amy, your toes to all toes to the right, both knees to the right. Aim Your naval and turn your pelvis to the right, pressing away from the top of your head. Turn your head, neck and eyes to the left.
You have a long diagonal from your left elbow to your toes. Exhale to center, pressing away from the top of your head. Turn your toes and these to the left. Your navel to the left. Turn your head, neck and eyes to the right. Inhale to reach long on this axis.
Exhale to collect. Inhale to reach long and a reminder that your upper obliques and your intercostals are active in order to keep your, um, TL junction, your Thoracolumbar junction, t 1112 and l one to keep it in neutral, not too much compression there. Keeping your left Achilles where it is. Relocate your right in the center of you as if to be in line with your symphysis pubis. Inhale to rotating all knees and naval to the right.
Exhale, center head, neck and eyes turns opposite the direction in which your navel is pointing.
Relocate your right heel so it's in line with your left sitting bone. This will be the most demanding of the rotations. So now as your toes and knees go to the right, your pelvis, your left p Asi [inaudible]. This area of your pelvis turns all the way to the right as you keep the back of your left lung in the direction of the Mat. Exhale here. Inhale to rotate. Exhale to return.
Rotate and rotate, keeping the collection of your ribs to your pelvis. Those three variations are present on the new side. Align your left heel with your left sitting bone. Turn all toes and your navel and your pelvis to the right center and turn to the left center. Pelvis goes one way. Head, neck and eyes go the other once more.
Pressing the palms of your hands away from the top of your head. Plant your left Achilles in line with the middle of your pubic bone and continue with your rotation, settling the lower lobes of your lungs in contact with the mat. And finally put your left heel in line with your rights sitting bone and continue this motion. Last two and last one. Nod your nose downward. Put the, uh, stick out your tongue actually for the roll up. If you stick out your tongue, it'll be easier because thinking out your tongue and moving your gaze down to see behind the cheekbones of your face will make your abdominal stronger.
If you put the tip of your tongue to the roof of your mouth and look up with your eyes, that gives your system the idea that it's time to go into spine. So if you want to make the roll of harder, touch the tip of your tongue to the roof of your mouth and look up underneath your eyebrows. You can do the role a bit. It'll be a lot harder if you want to make it easier, stick out your tongue. Look down behind the cheekbones of your face and roll up. All of these moves have been preparing you for um, wall jumps with your arms, palms pushing off the wall.
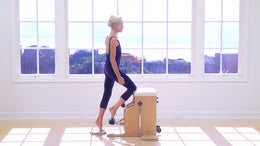
It's necessary for these wall jumps to have your shoulder girdle and your thoracic spine well organized, which I think you are prepared for that. And to have prepared the mobility around your hip joints so that your pelvis can rotate to the right and to the left. We're going to pause for a moment now so that you can go and stand. Go and stand in the corner, find a corner where you can face and put your hands on the wall. Here you are standing in the corner. It will serve you well.
This will probably be the only time in your life that you'll celebrate standing in the corner. So face the corner.
In order to focus more on the serratus anterior and the lower Trapezius, bring your shoulders down and bring your hands down more at the level of your lowest ribs, the level of your Seifert process. As you inhale, anchor the soles of your heels. Bend in your elbows, keeping a strong connection from pubic bone to chest bone. As you exhale, slide your shoulders down and push out. Now we'll take this in a pulsing, a rhythmic pulsing action. Planting the souls of your toes, planting the heels of your hands, especially into the wall and keeping a strong connection from ribs to pelvis. Lengthen the back of your neck, putting the focus on scapular depression.
Now from this rhythmic pulsing, you push off the wall, rocking back on your heels and then timber fall into the wall. Push and Lan. Then push and land. Then push and Lan. Then push both hands to the left wall, both hands to the right wall, aiming your navel straight ahead best you can into the corner twice.
More. Push and land. Push off and land. Now Cross your forearms, right forearm on top, left below and crossing the forums. You can tell that my heels left the ground. It would be preferable to walk forward so that you can keep your heels anchored when your forearms cross EQ. Sail to land.
Inhale to push off. Exhale to land. Inhale to push. Take turns crossing each forearm on top and land. Now we'll go a little bit higher with both hands and a little bit lower with both hands, upenn and down. It takes more trunk control to avoid bowing your spine when your hands are high, a little bit less. When they're low, high up and low.
Both hands up. Left. Both hands down, right both hands up right both hands down. Lift up, left down, right up, right down left. Crossing your forearms up and crossing your forearms. Down. Upend and down and right for on top left forearm on top right in and left. Reverse it now left forearm on top, right arm on top, left and right twice. More. Append down in hours of entertainment. Okay. Now no surprise to you.
You could change up your base of support. So standing only on your right leg, tucking your left foot in beside your right ankle. You start this whole project again, keeping your navel directly forward. Change standing only on your left. All the previous variations are possible standing on your right foot.
Cross your forearms, crossed your forearms, keeping your navels straight ahead, and then standing on your left foot crossing. [inaudible]
Now when you aim your pelvis to the left, this will be relative internal rotation of the left hip joint. Turning your pelvis, ribs, shoulders, neck, head, and eyes to the left. Here we go. Turn to the rider.
See the right corner of your eye sockets and you'll turn. Move your eyes to the left. So lead yourself around with the right and lead yourself around with the left. Stand only on your right leg. Turn and pull.
You can, uh, continue standing on one leg or stand on two and vary the height of this. Rotate high, rotate low, rotate higher, rotate low, reverse, rotate, high-end, rotate, low end, rotate, high-end and low. Now you've seen so many variations that it gives you some ideas of how you can vary the stance. Two legs, one leg, a forearms, crossing, arms going high, arms going low. As I said, hours of entertainment. Thank you so much for being with me on Pilati is anytime I look forward to the next time we're together. Bye Bye now.
The Teacher's Corner: Focus on Fascia
Mention
 |
Elizabeth Larkam (Teacher) |
 |
Lola A |
 |
Theresa Raess |
 |
Jill |
 |
Katra K |
|
|
Luciana G |
 |
Sara P |
 |
Eva Maria O |
 |
Clare R |
 |
Ellen W |
|
|
Aline B |
|
|
Ann S |
|
|
Giuseppe S |
 |
Sharon Spaziani, Lmt, NCPT |
 |
Jitka R |
 |
Ellen P |
|
|
Sari R |
 |
Lisa F |
|
|
Liz A |
 |
mbrown |
 |
Lynn P |
Comments


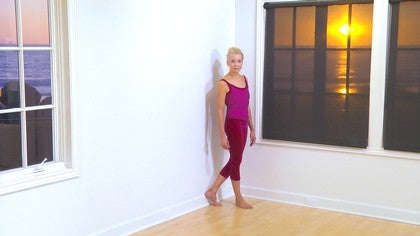
sunset. Such a pleasure to share these moves through Pilates
Anytime.


You need to be a subscriber to post a comment.
Please Log In or Create an Account to start your free trial.
