Description
About This Video
Transcript
Read Full Transcript
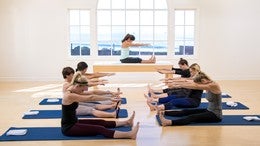
All right ladies. Today we are going to do number three out of 10 out of a beginners series. And uh, this is kind of going to be my little, uh, bio nerdy, geeky class of opposite and equal and equal and opposite reaction. That's one of the big, the big theme that we're going to go over today because one question that, uh, randene asked is what is the difference between reformer and mat? And some of you might know that Joe supplies and Ben and Matt First, but then quickly realized that not everybody was, had that acute awareness of every muscle in their body.
And so he developed the reformer to help you do a better map. So it is really, really challenging to learn Pilati strictly on the map. So I'm going to try to give you some of those things, but if you have the opportunity to do a reformer with somebody, you really get to feel all those muscles a lot more. It's much more intense and specific and so it helps you really tone from head to toe and then you can use that to get more better at your mat work. But I'm going to give you, try to give you some of those little images and everything right now.
So let's review our Pilati stance. We're going to have our toes two to three inches apart, heals together on do you want weight on the ball of every toe, the weight on the side of the foot and the weight on the heels. Your toes are only two to three inches apart, just a tiny bit closer, Celia, perfecto. So you're going to lean your weight forward. And then we have our box. So we have a straight line from one hip bone to the other hip bone and we have a straight line from one shoulder to the other and that forms our box and we want the shoulders to be directly over, not one leaning to one side. And you don't want your hips forward or behind.
They want to be directly under your shoulders. I like to draw a laser beam we talked about from one hip bone across to the other, meaning there's no little hill that goes on, there's not a little push out for your belly. We're going to pull our belly in really deep. I want you to work on that right now. Make sure, again that your weight's a little more forward wounding, just a teeny bit good so that you might engage your seat. Also, we talked about from these a hip, each hip bone. We have a spiraling image of barbershop poles spiraling all the way down, so hopefully that engaged your outer thighs and your seat a little bit to help lean your weight forward from those muscles, not from your lower back.
All right, so back to this laser beam. It's super important to pull your belly that deep into your lower back and we're going to be focusing on that today as well. So we want to feel almost like you're stretching your lower back because you're pulling your belly into your lower back. So much, many of us, we all have postures, but one common posture is that our lower back starts to shorten and our belly starts to haying and our hip bones start to go down. So today we're really going to work on pulling your belly in behind this line, but also as if your spine continued, not just to your tail bone but to a tail and you have a little bit of length in your lower back, not tucking. We were going to talk a little bit today to emphasize that that is not our goal.
Our goal is just to have a nice long lower back versus shortening pulling up that tail bone towards you. All right, so we're gonna be talking about that quite a bit too. You guys were going to come forward to your mat, front edge of your mat and then lie down however is comfortable. Now this is number three out of four, so it's not going to be as intense as maybe we're thinking, but um, if you need a towel, because when you lie down your head, you're looking behind you or there's too much space underneath your neck, go ahead and just fold up a towel and put it underneath your head. How's that look? Maybe a little bit. All Right Celia. Okay. Bend your knees and have your feet flat.
Thank you. So we got our box. We're trying to stay in the center of our mat. Are you good with the sun? Yeah. Okay. And we are going to review bringing one knee into our chest. But before you do that, we have our line right from one hip bone to the other and our belly is pulling in. A lot of times when I'm taking a lesson I think my stomach is in and then either I catch a side view in a mirror or my instructor really reminds me it is might be in, but not to the degree that we want to work at today.
So don't just pull your belly in. Really intensify that feeling belly really deep. So we talked about our pelvis like a bowl of soup. So I want you to tip that bowl of soup towards you, towards your chest. So your whole pelvis is just going to tip.
And then I want you to tip it away from you. Let's make sure our knees are a little bit of hip width apart and feet hip width apart. There you go. Good. And maybe a little closer to you with your feet, Celia, just towards your bottom. Excellent. All right, so we're going to try not to have energy in our size right now or pushing with our feet. Just our pelvis is going to be tipping towards you. We're very aware that our lower back is flat at this moment, and we're going to tip the bowl of soup away from you. So we're going to go this way and a little tunnel forms under your lower back. Can you tip it away from you anymore, Celia? If it doesn't bother your back, it should feel like a good stretch, not a pinching at all. Okay. Nope.
No heart pain in your lower back, tilting back towards you. Great. And tilting away from you. Great. Now try to find some middle ground for a second. All right, so here's my equal and opposite reaction. My goal today is that you can hold something stable in your body and then stretch away from that. Okay? So in order to stretch something, if you had two items here, you wouldn't want to pull them both in the same direction. That's not stretching, right?
So my goal for you today is to hold something which is going to mainly be your powerhouse strong and stable into the mat and pull something away from that to stretch. And that might be your legs pulling away from your strong powerhouse or could be your arms pulling away from your Shaun powerhouse. But don't take your powerhouse with you. And we do that. Okay. And eventually, Huh? I'm gonna want a strong powerhouse and pulling your arms and legs both in opposite directions so that you really get that length of place.
Does that make sense? Okay. So when we tilt our power, our pelvis towards us, you can feel that your lower back is anchored right? When you dump your bowl of soup away from you, that's pushing your energy away from your center and you're not going to be able to hold your powerhouse stable. So ideally I want you to pull your belly in and make your belly pull in. And that's what pulls your pelvis towards you. And I want you to use your stomach to bring your right knee into your chest and hug it.
So enjoy a stretch both hands good and put it down as you inhale and exhale, bring in your left knee so we're just feeling that our lower back is not arching. It's stable and put it down as you inhale and exhale, bring in the right and now straight in the leg up to the ceiling. Good and you put your hands behind your thigh and if that's too easy, you can crawl up behind your calf, but make sure your shoulders stay down as you stretch that leg. Avoid the knee. We're going to point the toes and we're going to flex the foot. When I want to point, I want the foot to completely straight, make a straight line from the Shin all the way to the toe and flex the foot and I want it to look like a waiter coming around with a tray of champagne glasses and then point, good job and flex and point and flex holding behind your thigh and then circle the ankle. That's it.
I love how your boxes are square and reverse on this. Also, I want you to challenge your range of motion and make sure it's a full circle, three one way through the other. And then hug the knee back into your chest, making sure your back is still flat on the Mat, and then put the foot down as you inhale. Exhale, bring in the left. So we're hugging in the knee. Straighten the leg up and stretch it. And again, you're going to point and flex and two more times it'd be great. Both cheeks are on the mat, not one off that would throw off our box and three circles with that ankle. Good circling and nice and reversing it for three.
I am seeing one hip higher than the other right now. So we'll be getting to that and hug your knee into your chest and put the foot down. So we're going to try to do our equal and opposite reaction. So we're going to draw your belly in. Bring your right knee into your chest, hug it, straighten the leg up to the ceiling. This time, make sure that you can see your inner thigh. So I want your leg a little turned out so that your knee and toe are pointing towards your right shoulder. As you stretch. Go ahead and roll it in so that your knee and toe are pointing to your left shoulder and feel how that lifts the hip when you do that, and then turn it out and feel how it drops down the hip.
And now they're straight across. So when we do our work today, be conscious of that. Don't let those barbershop pole muscles go and roll in. You want to keep them active so that you can keep those hips square. Everyone's belly is anchoring their lower back down. So we're going to press your arms down by your side and without the hips moving or your cheeks coming off the mat, try to touch the ceiling with the leg so your thigh muscles are trying to get longer and longer and longer. They're stretching away from your stomach. That's anchoring into the mat.
And now I want you to lower that leg until your let thighs are at the same level. Perfect. A little higher, Randy. Good. Good, Chrissy. A little higher, Celia. Perfect. Just stay there. And Are you pulling in that bowl of soup towards your lower back? Are you stabilizing with your powerhouse and in opposite direction? You're reaching that thigh far, far away from your center. Also hold this leg down the middle of your body.
So there's a straight line from nose, belly, button, foot. Very nice. Now let's go a little lower. Keep anchoring and lower the leg down to about mid calf of your other leg. Hold. See if you can pull away from me more with your belly. Yes. So that's your stabilizing. And this is Lincoln. Excellent.
Now go as low as you can go without losing your belly. Excellent Celia. Keep stretching. Nice. Turn out good. And now pull it all the way up to the ceiling and just sweep it down. Two more times. Stink anchored, but reaching all the way down. Don't arch your back and one more time. So if your leg goes down, your back starts to sway, then you've gone too far.
Hug that knee back into your chest. Put that foot down. Exhale, bring in the left. I move too fast over here. Exhale, hug. In the left. Straighten it. Good. So put your hands behind your thigh again or your calf if you're that flexible, never the knee, but again, roll out that knee and that toes announced pointing towards your left shoulder. And now roll it in and feel how that leg, that hip came up and sent that alignment off. So turn out that thigh, engage those barbershop, pull muscles that we've worked on and watch how those hips go.
Nice and square across. Yeah. Arms by your side. Anchor that lower back into the mat with your powerhouse and reach that leg down until they're at the same height. The thighs are together at the same height and down the middle. Hold it right there. Keep anchoring. Yes. So we're going to keep anchoring our belly and reaching that thigh and now go down a few more inches and really feel how you're controlling it from your powerhouse.
And now go as low as you can without letting your back go and pull it up to the ceiling. So remember that image we're going to do two more sweeping down of keeping a long lower back, not as short and up. So think about keeping your lower back, long on the mat, all the way out to your toes and then pulling it up. And then one more just for safe measure all the way down and scooping it up from your powerhouse and hug in that knee. Very nice and put that foot down. So that's pretty easy actually with um, one leg out at time.
It's harder when both legs go. So let's see what that means. So hugging the right knee, hugging the left knee, extend both legs up. Good point the knees almost towards each other. Just being a little silly here. I don't want your legs like that. Now, knees, just looking parallel. I want you to engage the barbershop pole muscles and turn them out, out, out.
Keep your back anchored. And now let's see what happens when you lower your legs as they go down, does it start to pull your pelvis out? You don't want to go so low. Keep the legs up where you can keep control from the powerhouse. Hug the knees into your chest. Return the feet down.
I hope that made a little more sense that as both legs work, oh, now we're starting to really have to work hard because you might have been pushing with one leg into the mat to hold onto the mat. Okay, one hand over the other, behind your head, one hand over the other, right there. Good. And we're going to think about the big space underneath your bottom of your shoulder blades or for you ladies, your Bra Strap. So you're going to take a big breath. And as you exhale, try to get connected with the back of your ribs into the mat in with the air. And exhale, we're trying not to have a tunnel right behind our shoulder blades and big breath. And as you exhale, try to really get nice and connected right there.
So your whole spine is flat and we're going to take a breath. And as you exhale, get even a little deeper. So now I want you to revisit the seesaw image. So as our head's going to come up, something has to go down on a seesaw, right? Like that or like this. So that is your chest bone. As your head is going to come up, your chest bone is going to go down.
So let's take a breath into the mat one more time. And on your exhale, the chest and the back of the ribs go down so your head can come up. Beautiful. Take a breath while you look at your belly. And as you exhale, pull it in more like a lot more, like really, really more in with the air. Celia. See if you can curl up just a little more. Exhale looking your gaze at your belly. Yeah, take a breath this time as you exhale, keep your belly in, but re lower down your neck and head. Great job. Okay, so I want you to take a breath into the Mac and we're going to see saw up. Exhale, chest, back of the ribs. Go into the mats, take another breath. As you exhale, draw your belly really deep behind that line. There's no little hill. Curl up. Just a little more. Thank you. A little more to randene. That's it.
Good. And now I want you to take a breath and exhale. Bring in your right knee. [inaudible] make that belly disappear. Okay. Take a breath. Exhale. Use your belly to bring in the left knee. Good. Reach your arms long and strong by your side and pump. Inhale, two, three, four, five. Exhale, drawing up belly and inhale. Two, three, four, five. Exhale, two, three, four, five. Inhale, keep going. That's it. If your head and neck get tired, lower it down.
Good. Let's straighten those legs to the ceiling for the last 40 make sure there's barbershop poles working. Turn them out. Turn them out. Yes, yes, yes. Excellent. Two more big breaths. Make sure your belly is Ain. Kering your lower back as you reach those legs. One more time in with your, squeeze your legs together. Heels together. Yeah, and hug the knees into your chest. Great job. Good.
We're going to sit up very good and just have your knees together and feet together. Everything together. Hands underneath each knee. Perfect ladies. Good. Sit up as tall as you can. One bone on top of the next. Now round that back for our rollbacks. You're going to round your back. The shoulders will still be directly over the hip bones, but your back will be round. There we go. Good.
Now I want you to try it right here to tip as much as you can. That bowl of soup towards you so that you're lengthening that lower back underneath you. You don't want to be tipping that bowl of soup away from you. Okay, so we're going to take a big breath and we're going to exhale. Pull that belly in and roll down through your lower back. Keep your hands exactly where they are. Don't let them move. Keep them there.
Take a breath, and as you exhale, come forward keeping your belly behind the line of your hips. We're going to do one more like that. Take a breath and exhale. Scoop in, pulling your belly into your lower back against those hands and take a breath and exhale, scoop it in. Good. So stay there for just a second and you can sit up or get comfortable. So I want to really use that opposite.
You don't have a reformer to work against. Let's use our own body. So we have our hands here and instead of just kind of not having much energy when you're rolling back, let your thighs push into your hands. So here we are tall and here I am round and as I go back I'm going to push my thighs that women use my seat a lot too, but to give myself opposition so my belly can pool against my hands as I get to stretch my lower back into the mat and then come forward. So you don't want to be all the way down here before your lower back finally gets down. You want to have your hands. The goal is to have your hands underneath your knees when you're stretching your lower back into the mat. Okay, so use your hands on this one, especially on the way up when it's a little tough. Round your back.
We'll do one more like that round, round, round. We're going to tip that bowl of soup towards you. Length in your lower back, push your thighs and trans. Yes. And Start Rolling back your lower back. Good until your arms are long. And feel that opposition, feel that energy. Beautiful. And exhale to come forward again. Really using your belly. Now if you can, we can go a little lower.
So we're gonna pull our belly and tip that bowl of soup length in that lower back. Make sure your waistband touches and then add a few more vertebra. Go down a little bit more down maybe to the back of your bra strap or the bottom of the shoulder rates. And exhale, come forward one bone at a time. Try to articulate and roll up and rolling down. Good. Lower back. So when I say tried, articulate, I mean right here, keep your waistband down and round forward your upper back. How long can you keep your waistband down as you're coming forward?
Keep coming forward. And then you can again use your hands to help you. Yeah. And again, like that, squeeze your bottom. Send your thighs into your hands. Pull belly back. Good one bone at a time until you touch the bottom of your shoulder blades. Take a breath and exhale. Come forward. That's it. Excellent.
Now, if you feel that that's too easy or you need more challenging, go down to your head. So we're going to always start with the pelvis going, lengthening your lower back, get in the lower belly to scoop, rolling back a little bit more. Rounding in that lower back. Go all the way down to your head, but then inhale, lift your head and exhale come up. Very nice. Keep rounding and one more and pulling that bull suit towards you. Excellent start. That's what I wanted to see and just go to where you feel good and then come forward. Does not that. That's what you want to see that control. Excellent.
And to keep working out. We're going to do one all the way down for the next exercise, so you're going to start with that waistband first. The next bone, the next bone. They all want to go in a straight line, not crooked, and then you're going to get to stay down. Stay down, Celia. Yeah, I'm going to fix your pillow a little bit. Okay, good. All right, so your knees are bent at a 45 degree angle. A little higher up for me. Good. And your feet are flat. All right. Stretch your arms long by your side.
So eventually this exercise will have one leg straight on the map, but we're going to keep it bent for today and I want you to take a breath. And as you exhale, hug the right knee into your chest, making that lower back flat on the mat and your belly disappear. Straighten the leg up to the ceiling. Stretch it again. You guys know that your hip should be in, turned out your leg so that you're engaging the, um, barbershop pull muscles. Drop your shoulders into the mat and have them away from your ears. There we go.
Good. Watch the rib cage for me, Chrissy. Go a little lower. That's it, Christie. That's it. That's it. Nice. Little bit more grounded in that upper back area. Perfect. All right, so just for, just to make it extra clear, let's roll in your knee and toe so that it looks at your, uh, left shoulder. Vala. Okay. You are not able to see your inner thigh when you do that. Okay? You can see a lot of your outer thigh.
I personally don't want my outer thigh to get any bigger. That might help you stay a little more serious on this one. So you're going to turn it out, hide your outer thigh and you want to see your inner thigh. Okay? So when you do this exercise, you want to see your inner thigh at all times. I want you to press your arms down by your side.
Use your belly to pull that leg up to your nose. Cross your box, go. So you're going to the left down around and pull it back. Center and cross around. End Up, cross around and up. Cross around and up. Cross around and up. One more. Cross around. End Up reverse. I love how you turned it to keeping stable and down. Around and up.
Don't show me your outer thigh. Good. Keep that inner thigh only. Yes, two more beautiful. Keeping grounded. One more and hug in the knee. Put your foot down. Good. So when you're doing that, make sure the hips are not going side to side. All right, and you're staying nice and square and grounded. All right, let's see. A little bit more equal and opposite reaction here.
Hugging the left with your belly deep and grounding. Straighten that leg up. So one thing's going down. One thing's reaching up, right? Turn in that knee so you can feel that hip and you can see how that outer thigh gets. You're seeing it. And then hide your outer thigh, turning it out so it's not looking at your right shoulder. Good and arms down by your side. Use your belly to pull that leg up. Cross it around and pull it up.
Good. Cross around it up. Nice. Keep it turned out. Let me see that inner thigh at all times to more crus around in up. One more Belize anchored. Reverse. Go down around enough. The backstage is flat. As you go down, it doesn't arch rounded up nice and square. Good. Two more. Down, around and up. Try not to go out for me. Go down. Yes, and then cross. Yes. One more.
And Hug in that knee. Very good. Put that foot down. All right. Have your legs. This is a good position calling. And same with UCLA. Maybe a little straighter. Randene and together. Good. All right. Remember how we roll down one bone at a time? Let's try to roll up. So you're going to lift your head up to your chest as you inhale, cold behind your thighs and exhale, tried to curl up as you walk up your legs. Pretty Nice ladies. Keep pulling in.
Keep pulling in. Keep using. Yes. Good. All right, so now we are here, but we need to be a little bit closer to the front edge of our mat. So I'm going to introduce transitions. So in between each exercise you are going to want to really keep your muscles engaged and working out, increasing your stamina. So when you transition, don't slide or let your shoulders go up or lose your powerhouse. You're going to want to keep your shoulders away from your ears so you can use the tricep muscle and you're gonna want to use your bottom and stomach your powerhouse to stay light. So it's more of a transition like so. Okay. So everyone come forward and notice that my pelvis is really tilted towards me.
Sorry. You keep your hands behind you and not away from you. So keep your powerhouse towards you. Good. And then see if you can keep it like that while you put your right hand underneath your knees. I had to move my feet a little. So adjust if you need to and then keeping your powerhouse in your square. Put underneath your left. Okay, so your weight is clearly keeping a long lower back.
We're focusing on long lower back. Randy, you're a little forward and up. I want these bones looking more up at the ceiling and I want this part a little more round hat. There you go. Excellent. So easy as can be. We're going to balance with the right leg, just a little off the mat and put it down. We're looking at our stomach and it's pulling in more. As you lift the left and down, our belly pulls in deep and you pull up the right hold, the right up and nothing changes as you scoop into bring up the left and then put them down. We'll start with your left. The left comes up, and then you're going to, nothing changes as the right comes up. Excellent.
And now you're going to pretend there's a rocker, right? You're like a rocking chair and you're going to rock back and up. And every time you come up, you balance. You don't send your pelvis this way, right? Let's go. Let's rock back then. Rocca balance two, three and go rock back and keep your powerhouse towards you two, three and rock back and come up. So we're gonna hold there and pull deeper more.
Yes, yes. See how it wants to go forward. So you're just going to keep working on that. Excellent. And do two more rock back. Exhale up. Love it. This stays here. Use your upper belly to go forward more with that part. Yeah.
One more with you and exhale, what you want to work on is initiating from here, not initiating from the upper body. Try One more. Pull this back until you fall off balance. Ooh, that was nice. See how much? Sometimes it can be easier. Now lets switch your hands, keeping your balance too on top of your ankles. So you're just going to keep your feet up. Hey, grab onto your aid goals just like that. Fingers all pointing towards each other and pull your heels to your bottom so you get tight. Linkable e yeah, head to your chest. Damn, there you go. Good. All right so we're, this is a goal.
We're going to roll back like this in with the air. Exhale come up and you're going to try to keep that lower back. Round. Eyes on your belly. Inhale, roll back. Exhale, scoop up. Inhale, roll back. Exhale. How's that lower back? Is it round? Inhale, roll back. Exhale. Roll Up. One more.
Inhale. Roll. Exhale, scoop in. Stay up, stay up, stay up. Rest your feet down. Very nice ladies. All right so same thing. Transitions are important. So we just finished our rolling like a ball. We put our feet down, we put our hands way behind us, and we get to use those lovely triceps, powerhouse and belly as we go back. Pretty good? All right, so go ahead and lie down onto your back. Bend your knees, feet flat on the Mat, and we're going to remember this series of five. You guys are pros at this from the first and second. The first class we introduced to exercise, the second class we introduced all of them.
We're going to go a little deeper into three of them today. So you're going to bend the right knee into your chest using your powerhouse. Great right hand on your ankle. We learned about hands left hand on your knees, switching hands. Very good. All right, anchor your lower back into the mat, right God. And now I want you to think of that seesaw as we lift our head to our chest. Good.
Now keep your powerhouse and your bowl of soup dumping into your chest. As you reach that left leg long higher, we're going to hold it right there. So this one's spiraling. Reaching lengthening and switch. Good. This one's a little higher. There you go. Head up a lot more. Beautiful and switch. I'm going to have you switch hands for me.
Beautiful. And switch. Equal and opposite reaction going on here. I got you. And sewage. Keep your legs up higher. There you go. And switch. Yes. And switch. If your net gets tired, lower it down and switch. Good and switch. And it fixed your hands too. And switch and keep your legs higher. That way you can keep them anchored over.
There you go. And switch. Last time ending on your left. Pulling. Yes. Now you got it. Hug your knees into your chest. Your head first. Second. Good. All right. Put your feet down on the mat. Hand over. Hand behind your head. Good. We're going to do double leg stretch. I'm t going again deeper into it. So I want you to feel, is your pelvis super important cause we're going to do two legs together.
Very easy to lose your powerhouse. Very easy to not to use your back on here. So dump that ball soup away. So years a tunnel underneath your lower back. I don't want this to happen. When your legs move right now, pull your belly in behind that laser beam and get your lower back flat.
Use it to bring your right knee into your chest. Just keep your hands where they are and now use it to bring your left knee in as well. So key bangard ankle anchor. All right, knees a little bit apart. So their shoulder with a part and feet are a little bloody stance. Now I want you to spiral those muscles and go, oh wait, wait. A little easier is we're going to take a breath into the mat. Exhale, see?
Saw your head up and you're looking at your belly that sinking into the mat. And now squeeze those legs straight and use your belly to pull them back in. When your legs go straight, your powerhouse does not go out. Keep your dumping your bowl of soup more. Yes and bend in and as your legs go out, come up with your shoulders and bend in. Stay up the whole time, Celia.
Awesome and reach. Dump that bowl of soup. More thing. Thank you. And one more time. Hold the legs long, that bowl of soup and are you spiraling and reaching and an opposite direction of your belly and bend in and hug those nice rest your head down. That was good. That's a lot of what the legs do. This is actually one of the most all encompassing is exercise. That one where I told you we're going to learn how to stretch one day, two things in opposite directions today.
If you stretch your legs and keep your belly, I'm excited. Or maybe it's your arms that you stretch and your belly states, but I doubt we're going to get both of them today. So hands on your ankles and I all the way down and let me see you use your belly to seesaw, your head up scooping in your belly, round up your head and shoulders so those knees should still be pretty much on your chest or close to your ears. Good. Keep your knees where they are. Keep your upper body exactly where it is, like there's a nail sticking up right behind you and reach your arms long by your ears, just your arms, and then circle them back to your ankles as you exhale. Inhale, look at your belly. Pull in, in, in, and exhale. Let's hold the arms by your ears. Inhale, reach.
Can they get longer without losing the belly longer, longer, longer, longer, and then keep them long as you pull it. All right, let's add your legs. Your belly stays down, your legs and arms go out, and you pull yourself back together in how? Reach belly, belly, belly, and exhale. Curl up a little more. Inhale, arms straight by your ears, not out like a y. Closer, closer. And then pull yourself together. Yes in your arms. Straight. Thank you. Exhale, two more. Inhale, keep your bold suit yes and exhale. Head up and shoulders up. One more time. Don't get poked by that nail behind you. Yes. And next exhale.
Rest your head down so your thighs are starting to work a little bit. When your legs go parallel too much, then it's easier for your back to do that. So you help yourself if you turn out a little bit more. So to keep that back long, it's really hard to keep along lower back and using your powerhouse. When your legs start going Parallon those quads start to take over.
It's very hard. All right, very nice job. Now we're going to do single, straight, like put your feet down on the mat. You've done this like till we're bored about it. We're going to take a breath into the mat. Exhale, bring your right knee into your chest. Hug It, straighten it up to the ceiling. So it's one of my pet peeves, so that's why I'm going over it in detail. I don't have many, Maria, not me. Crawl up behind your cat if you can. Good. All right and stretch it. Now we're going to press your arms down by your side. The legs turned out, the hips are square, equal and opposite.
Reaction your bellies in and your legs long. And now sweep it down to the middle, down the middle of your body, down to the floor, almost to the floor. And then pull it back up using your belly. Do it one more time so your belly stays down. God bless you. And exhale, pull it up and bend the knee into your chest and put it down. And use your belly to bring in the left. So you're dumping that bowl of soup in.
Hug It in, straighten it up. You're activating those barbershop. Pull muscles as you stretch. And then press your arms down by your side. Anchor that belly, lengthen that leg, and it lengthens down the middle of your body and pull it back up from your belly. Try to feel that equal and opposite reaction. Go and down with the stomach, but legs reaching out of that hip and pull it back up. Really Nice job. Good. And now bend that knee and put the foot down. Good.
So what's my pet peeve on this one? Well, it's called single straight leg. But in the very, the beginning of the series of five, we do single leg stretch. And in this exercise it's called single straight leg, but it turns into single leg stretch again. So it's not the same exercise. It's different. So we're going to do it differently. So we're going to hug in the right knee.
Good, straighten it up. Good. And this time you're gonna use your belly to crawl up that leg a little higher and lift your head and shoulders. Make sure you didn't dislocate everything and you're hanging. Plug your shoulders back in and use your upper stomach instead. Good. Now keep the right like right there and just straight a little higher behind your calf if you can. Yeah, yeah.
And then bring your left leg straight up to the ceiling as well. All right. Don't move your right leg. Just reach that left like down the middle of your body. It's straight and pull it up all the way. Hold. Switch your hands to the left leg.
Now the right leg goes down the middle of your body and you put back up with your belly. And switch. Grab onto your right leg and left leg goes down and pull in. Get up. That's it. And switch. Right light goes down. Good. Pull it up. Nice. Switch to the other leg and straight, straight, straight, straight, straight. And pull it up. See how this one's bent. Ooh. And pull it up and that one's going down. Good. Thank you Christie.
And pull it up. And last time left. One goes down. This one stays straight and scoop it up. Good. And now our hands are behind. Which one? Behind the left? Good. Let's do it to tempo. Right. Goes down and switch. They switch and switch. You stay grounded. Your bull soup didn't dump.
Switch ice on your belly. Switch and switch and switch and sweats. Yeah. Bullet and pull your balls up to your bullet. Yes and yes and yes and that's enough. Hug your knees into your chest. We're going to do it again in a moment, so I'm not worried if you were off on a leg and ended on the right or something crazy like that. All right, so now we're going to straighten both legs up. Well before you straighten up, put one hand over the other behind your head and put your feet down on the mat. Let's make it nice. Good.
So we're going to inhale into the mat and exhale really ground into the mat. Dump that bowl of soup towards you as you bring your right knee into your chest. Good. Dump the bull soup. As you bring the left knee, your belly should be Rulien. Use those seesaw muscles to lift up your head. So you're going to round up your head and chilled. Good. Now extend the legs, spiraling them. Just the legs straight for me. Randene and make sure that you feel like it's a mermaid tail.
Like all of a sudden you've come all together. There's no light between your inner thighs. Lower the legs just one inch. And to bring them back towards you. Dump that bowl of soup into your chest. Lower them down one inch and use that. Make that belly disappear as it pulls back to you. One more time.
They go down just a little and you scoop in to bring them up. Good. Now how far down can you go? Go, go, go, go, go. And then pull them back up. Don't arch go down, down, down, down, down, and then pull back up. You got to come up with me down, down, down, and then from here, boom. Back Up. Excellent. One more. Down, down, down, and blow them up and hugging those knees and rest your head.
Very nice ladies. Okay. Finally we're going to do the crisscross. You're going to put your feet back down on the mat. Go ahead. And I want you to think of the Chris Cross is not a quick bicycle. It's slow and controlled. It's really big twist. It's a huge stretch and it is going to incorporate all of your abdominal muscles. So not just your six pack, not just your rectus Abdominis, not just your size, your obliques. It's going to incorporate everything, your trans versus everything.
So most important thing is equal and opposite, right? So we're going to draw right now line from one hip bone to the other. Can you guys do that? Put one finger on one hip bone and draw to the other side. Good. All right. They're square. They're flat on the Mat.
They're not one higher than the other. You feel both cheeks are on the mat. Okay. We want to keep our pelvis stable and on the mat while we do our crisscross, it can move when we get super extreme twist. But in the beginning you don't want to lead by using your lower back and lead by pushing that hip over to the other side. All right, so we're going to put your hands behind your head. One over the other. Take a breath and as you exhale, bring in the right knee.
Dump that soup. Good. Nice job. But are you pushing with the left foot? No. Good. And we're going to take a breath and we're going to exhale. Bring in the left knee. How deep can you bring it into your chest, Celia? Yeah, use that belly. Excellent. Good. Now I want you to take a breath into the mat and exhale, bring up your head and shoulders. Scoop, scoop, scoop. Good, good, good.
All right. Keep your knees deep in with your pelvis and then stretch that left leg away without losing your bowl suit and twist your left elbow to your right knee. And hold to the re. Bring both knees in, touch, elbows to both knees and look at your belly as it in. Keep your left knee straight and your left your right leg. And then take your right elbow to that left knee. Twist, twist, twist.
Good. And pull both knees and touch both elbows. Straighten your left leg, touch your left elbow to the right knee and both elbows to both knees and straighten your right leg and right elbow to the left knee and hug both knees into your chest. Good. All right. How are you with the crisscross? Yeah. All right. Tan Hands Behind your head ladies. You're welcome to sit up if you want to see what our goal is. Um, so I'm going to help Christie demonstrate it and that is to have a straight line, a beautiful long line down the middle of the mat.
And it should go from one elbow all the way to the other toe. That's how much you wanna twist. So she's gonna bring her knee into her chest. And the other one, she's also, we had talked about last class keeping your elbows wide behind your ears. So you're gonna come up using your powerhouse. Good. So this leg is going to stay here. We talked about that last class too, that it doesn't push away from you with your back and your quad hip flexor.
But your powerhouse keeps it in while this like reaches equally and opposite of your belly down the middle of your body. Does that make sense? Good. So stomach's in and this like barbershop pull muscles spiraling down the middle. So here's one end of the spectrum. And here's the other, she's gonna use her powerhouse to twist, twist, twist, and try to bring this elbow down. The middle of the mat behind her. Bring your left leg down the middle. Yes. Good. And switch. Staying high with the shoulders as you bend your left knee in.
And that right leg is wrapping and squeezing. Watch the knee soft. Yeah. And get your left knee all the way into your chest, please. Thank you. There. Straight line from toe to elbow and then back center. Hug your knees in. Very Nice Christie. So that is the goal is to, to use your powerhouse to twist all the way back in a straight line. A goal today might just be looking at this elbow and making sure it is on your mat because if you watch yourself right now, you'll see that it's kind of off on the floor, hasn't actually made it back onto the mat yet. So that'll be a goal today. Okay?
All right. Any questions on that? Questions are good. Okay. All right. We're going to do the series of five really fast lie on your back. Hope you remember him. And of course you remember the difference between single leg stretch and single straight leg, right? Okay, good. Alright. Hugging the right knee to your chest, dumping a ball, soup, hugging the left.
Lift up your head, using your stomach. Right hand on ankle. Left hand on me. There you go. Good like that and left leg out. I'm going to help you with your hands and switch pulling in switch. Dump that bowl of soup. Keep your legs up higher for me so that you can keep your back anchor and switch and right and left and right.
And the arms reach straight and you pull back in. Good. And you're going to stay up? Yeah. Pull back and inhale, reach and exhale. Don't lose that ball soup. Keep it pulled towards you. And in two one spiraling legs. One more time. Reaching an opposite direction. Good. Right leg goes up, left leg goes forward.
Yes. Yes. Scoop both hands behind calf. Yes. Left
Excellent. And switch ball in there.
It's very hard to, um, understand without a reformer and without a wall. So later on we'll get into more detail on this one. But for now, I want you to think of your spine. I just want you to really be frumpy. Not very good, straight legs and a little wider. Good. Good. Now I want you to give me all, you got to lift up tall. Use your belly and lift up tall. You've got the straight line.
Here is what I want you to feel, okay? If your quads are clenching your hip flexors, go ahead and bend your knees. You can use your belly more. Kay. Or if you can't sit up tall cause your hamstrings are tight, I want you to try to tip your bowl suit towards you so it would look like this. Yeah. Good. And now sit up and I want you to do the opposite.
Stick your tailbone out behind you so that you're like this. Good. Okay. So in this exercise, we're learning how not to do either of those. You're going to keep your hipbones directly over your sit bones. So if you weeble wobble back and forth in your cheeks, you're going to feel two bones on the floor, no matter how well endowed you think your bottom is, you're going to feel those bones. Okay? You do. You feel those two bones, try to keep the two hip bones directly over those. And that's what I want you to really learn today.
Let's lift your arms here and now let's see if you can pull your belly in. We're going to lift your arms up to the ceiling using your waist muscles. So try to get longer in your waist. Try to reach for something way up at the ceiling so your waist got taller and longer. Now keep your waist like that, but bring your arms to shoulder height. Take a breath, exhale, head down to your chest and try to touch the crown of your head down to the mat as you exhale. And then inhale, roll up.
Ah, take a breath and exhale. Go down, go down, down, down, down. Stay here for a moment. Can you look at your hipbones? Do you think you pushed your tailbone out behind you or can you keep your hipbones right over your sip on? Stay down there, take another breath while you're there. And XL, Steven, go lower. Use your belly to pull deeper. Remember I said you've got to pull it in more.
And then inhale all the way up, one bone at a time, and exhale all the way down. Head to your chest. Start with the upper back rolling forward. Then the next, then the next good. And then when you roll up, roll up your lower back first and then your middle back. Good. And then these bones really count yes to improve our posture to more. Exhale forward. See if you can keep your feet flexed. That would be great.
Exhale down, down, down, and use your belly as you roll up. Stack each bone one on top of the other. And Chrissy's doing a really good job of lifting up off her seat. Let's even now that lift up off your seat and exhale down. Head to your chest. Your seat is lifting off the mat, like covering off the mat and inhale, roll up. I lied. We're gonna do one more man. Dean, do you think you can go a little wider with your legs and then can you touch your head? Download so head down and then good. And then keep going.
Lower, lower, lower, lower, lower, lower, lower. Is that tough? That's really good for you. And then roll back up one bone at a time. Nice job. Very good. All right, we're going to introduce corkscrew and saw. So I want you to lie down onto your back. That's right Chris. You'll probably have to go forward a little bit. Good. Lie Down.
Bend your knees, feet flat on the Mat. Okay, so on double straight leg, we briefly talked about a Mermaid's tail. When you have both legs up. Again, it's super challenging on your lower back to when we're developing our powerhouse. So two things have to happen as we're starting Polonius. Our stomach muscles get stronger, which is great, but also our back gets more flexible and you, even if you really are athletic and you have super strong stomach muscles, your back might be really tight. So as your legs go lower, you can't keep your back on the mat. It starts to arch. So I need you to keep your legs up higher and as you keep repeating these exercises, it's going to stretch out your back and you'll be able to take your legs really low to the ground and still have your back flat, but you have to let the two work together.
The back flexibility and the stomach strength have to come together for pious, for you to be make your range of motion bigger. So exhale and hug your right knee into your chest. Good. And straighten it up to the ceiling. We've grounded our lower back into the mat, right? Press your arms down by your side and we're going to once again, reach that leg down. Just actually, let's keep it at thigh height.
This is as low as I'm probably going to want your leg to go for corkscrew, but just because we know how to do it, keep your belly into your back and lower that leg all the way down middle of your body and then feel it. Pull back up with your powerhouse all the way up. Feel that, yeah, there you go. Hug the knee into your chest, put the foot down as you inhale. Exhale, bring in the left by dumping in that bowl of soup. Excellent Celia, and straighten that leg back up again. If you rolled that knee in, it's going to really make this hard, so arms by your side and you're going to bring that leg down just so that the same height, and this again is where I want your legs to be for corkscrew. They're not going to go lower than this. Keep incurring more and more and more and then lower it all the way down the middle of the body and then feel your powerhouse. Pull it back up to the ceiling and hug the knee into your chest.
We talked about obliques earlier. We're going to keep actually your left knee in and we're going to add your right knee into your chest. In this exercise, we're going to be using the sides of your waist. Also, we're going to be using your obliques. Your arms can really help you, so tone the back of your arms and press them into the mat. Lift both legs up to the ceiling and have them turned out so that you can see both inner thighs, your knees are not looking towards each other. You have applied his stance just like we started when we stood good wrapping and squeezing, and I want you to lower the legs down one inch and then use your belly to pull him back up and lower them down one inch and then use your belly to pull them up and hold them there. Let's all go towards the ocean, towards the ocean a little bit and then pull them center
We'll do three sets. Press your arms down as your legs go right on up. Pilati stance good and bring those legs up as high as you can using your stomach
And one more away from the ocean around and scoop, scoop, scoop,
They're not behind you. You should be able to see your pinkies in your peripheral vision. And I want to see every sculpted muscle in your body. Pull your belly in. Keep both cheeks on the mat and let's twist to the right. So we're gonna twist, twist, twist, twist. Good. Hold it.
There are both cheeks down. Good. Did you switch your hips or is one foot shorter than the other? Make sure they're both equal. And now keep taking your left hand so that the left Pinky is going to go down to your right baby toe as you exhale. Two, three, roll up your spine as you inhale and untwist. How are those muscles in the arms? Can you show them to me?
Twist to your left using your belly. Hold it here when you can't twist anymore or both. Cheeks down. Has one leg gotten shorter? Don't let that happen. Keep taking your right hand. So your right pinky goes to your left baby toe. And exhale, exhale, exhale. And then roll up your spine as you untwist.
Good and relax for one second. Good. All right, Celia, I'm going to use you if that's okay. Are you able to sit up tall with your hamstrings or do they feel tight and so you want to bend them a little bit? I'm not sure. Okay, so straighten your legs. Nope. Nope. Where they work? Good. And Flex your feet. Excellent. And you can sit up tall. You're doing really good. All right. If it starts to feel underneath your thighs and you can bend your knees a little bit, but you look good. All right, so this is a super important breathing exercise.
Arms are going to show that. Exactly right. Good. And we're going to twist to the right. Good. And you're going to exhale. Bring this pinky down to that baby toe. Head down first, top of your spine, good. And reach for your baby toe. I'm going to use her waist, her hip went forward, which is really common. So I'm going to yup.
And now use your belly and exhale as you go down Dan. Dan, keep pulling away from me here as you go down. Keep pulling away. And now to roll up, use this first. Yes. And then untwist. That was really nice. Twist to the other side. So this hip is going to want to go forward. So she's going to hold it there with her obliques as she twists. Ooh, yeah.
Now take your right Pinky to that baby toe, scoop it in good and go down, down, down. Good. And then when you're going forward, that chic is also gonna want to come off, which then I could push her over. So you guys stayed grounded. That equal opposite reaction. Good. And then go forward. Forward, forward. Nice Celia. Thank you. And then rolling up. I'm going to do one more with you to talk about the breathing.
So we're going to twist your right. Good and flex your feet. So Palladio's was really famous for keeping your body really healthy. Your lungs really clean from stale air, so the pinky needs to go to that baby toe because go ahead and exhale. Good cause when you do that, the rib pulls right into your lung and squeezes out all the stale air out of your lung. Inhale up. There's always 10% of stale air that can get you really sick.
Scoop in and twist to the other side. So there is precision. Reach forward with his pinky to that baby toe so it really squeezes. Exhale, right scale. Exhale, exhale and inhale up. Very important. Alright everybody, arms up, legs out.
Let's all twist to the right twist. And now exhale, keep both cheeks down, exhale all that error score. Use it all out and inhaling up and twist to the left. And exhale. Did one leg get shorter? Exhale Dan darn legs and inhaling up.
Keep both hips down as you twist to the right and feel that left side of your obliques and hips pull against as you twist and stretch and inhaling up and twist to the left. So now it's your right side's turn. It has to keep holding back so you can stretch in the opposite direction. And one more set. Cause remember we don't want to pull both our hip with us. We want an opposite and equal reaction here. Beautiful. And inhaling up. Why? So shifting legs, twist and exhale all that air. Exhale, head down to the knee. Go, go, go.
And then inhaling up and rest down your arms. Nice job. Let's go ahead and stand up at the front of our mat. Good or a little in towards the middle. Scoot back a tiny bit and review that. Always important. Leave your pilates. Work positive, standing and ready for the day. So we have two to three inches between our toes, heels together, sa weigh on the side of the foot, on the ball of the foot, on the heel. How our legs, if our quads took over, let's remind them that you should have the side of your thighs and your seat working as well.
Draw that line from one hip to the other and your belly should be in hopefully right now. And for the rest of the day. You're not going to walk around with your bowl soup dumping out, but it's going to be your hips are straight ahead and your lower back is long. Let's see. A little challenge. If your weight's really on the ball of your feet, we're gonna scoop your belly in and lift up your heels slowly for one, two, three, four. Can you, if not, pull your belly in more member. Always can bullet in if not wrap and squeeze more. Then think of lengthening your lower back as you lower your heels.
Start from here. Stretching. Two, three, four. Let's do it one more time to see, cause I saw out of the corner of my eyes. Wait, go. Going back here one more time. Scoop it in. All our PyLadies muscles are sculpting and working and hold it there while we pull our belly and more. We are making sure our boxes square, wrapping and squeezing and now lengthen that lower back. Keep the weight on the ball of your foot, not on your heels and you're all finished. Nice job, ladies. Good work.

Pilates with Monica Wilson: Monica Wilson's Starter Series


Comments


Gracias Monica


You need to be a subscriber to post a comment.
Please Log In or Create an Account to start your free trial.
