Description
About This Video
Transcript
Read Full Transcript
Good afternoon everybody. Today we're going to do a very popular class, judging by how many people turned up, which is about releasing tension in the shoulders. And unfortunately, our lifestyle right now is no longer very conducive to good posture because we're all on our cell phones. And we're sitting in front of the computer. And our head is working too much.
And even in we're pilates teachers and we're doing pilates, it's literally an ongoing process to unravel this. And I am becoming a big strong advocate of also releasing the fascia before we actually do the movements. Cause what happens with our bodies is that the tissue-- Our bodies are supposed to have sliding tissues. The skin, the muscles, the ligaments and the tendons should all be lubricated and oiled. But if you spend too much time in one specific shape, that part of the body gets hard and dry.
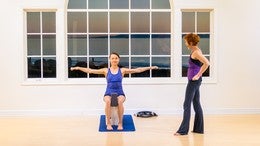
And then you go and you try to do, let's say, pulling on the straps, and the joint just isn't moving good enough. And you need to actually release that tissue to restore the flexibility and the hydration in it. So we will do therapeutics in the first half or three quarters of the workout because I found this profoundly effective in shifting the whole skeletal alignment towards the optimum and then when you train it and you exercise, it's so much easier to reinforce the shape. So to go through what optimum alignment is, I would like all of you to just stand for a minute with your feet under your hips and the legs going straight forward. And you know how when you lie down on your back, if you're doing a yoga class, you're just relaxing, your feet will naturally unwind and roll outwards.
This is the natural shape that our bodies will fall into when they relax. But there is a winding into the joint that the body naturally does in order to stabilize the shoulders and the hips and hold them in correct alignment. And we're going to be reinforcing that on the upper body in today's class. But the hips are harmonic of the upper bodies. So most everybody's got dropped arches and they're overworked in the inner part of the knees and they have a hard time finding the adductors.
If your standing straight, the way you are, I'd like you to just start externally rotating without the feet moving. Do you notice how the arches lift? And there's just a slight tightening of the glutes. That's the foundation of the pilates stance. It's these muscle groups. Notice what it does to the hips.
It widens them and it anchors them into the socket. So they're on the side of the body. From that foundation, you gently lift up in the waist so that the trunk and the spine is getting longer. You notice how the stomach goes in because you're actually creating length in the body. This is again, what we're looking to reinforce.
The skeleton is long, supported and functional. Now, shoulders, this is our chronic condition that we're all in. And what do people do normally? They say stand up straight. And they jam their shoulder blades together so that the front of the body looks like it's more open, but that's not actually solving the problem, just creating tension in the back body.
And it's not creating you back into vertical line. If you took the arms, actually before you start, just notice where your arms hang because it's a clue to what's going on. If your hands are more facing this way, your upper arms are internally rotated. And this is very, very common. I see people off camera trying this out.
Now, if you take the arms, and you can be on camera and try it out. If you take the arm bones, and externally rotate. So you've taken this arm, notice what happens to the shoulder right away. You've actually broadened the collar bone. And if you position now the place of the shoulders on top of the hips, you have now a well organized body.
Keep the hands here. Heidi, see if you can even externally, more. Now notice, it's easy to rotate the hand. I'm actually less interested in the hand in the upper arm. Do you feel your back muscles start to activate?
Those are the muscles that have become weak. And if I look at everybody in the room right now, everybody's shoulders are wider, but you didn't slam your shoulder blades together. So the real problem in shoulders is very often that the shoulder arm bone is not sitting properly. And then to compensate the shoulder blade is being made to work differently. So people are hiking the shoulder blades back.
Notice please, that your shoulders blades are just naturally feel like they're engaged, but you haven't mentally and psychologically done something. Now, just let the arms relax, but keep the shoulder open. So this means it's fascia all around the arm bone, the front of the chest, and the back and the upper back that's tight, that's already gotten glued together in the more traditional shape that most of us are in. Now, one more time, externally rotate. Externally rotate your size, lengthen the spine, and can you feel the head now sitting on top of the spinal column?
This is how we as humans, are designed to live and walk. And notice how elegant and vertical you feel. And if you relax the arms and keep this position going, do you feel like you're balancing something on your head? Yeah. And look at all of you. You all look great so you can go home.
(laughter) Actually, we're going to do some therapeutics. So let's come down. This is what we're looking to unravel. This is what we're looking in all workouts to create as a natural intelligence in the human body. So let's have all of you starting out on the foam roller.
So, if you're at home and you only have one of those short foam rollers, you can have your bottom on the ground. But it's better to have a long one. Sit right close to the front of your foam roller. Check that your feet are hip width apart. And then slowly roll yourself down onto the foam roller so you're lying.
If your head if off the edge like mine was, wiggle yourself down so your head is on. The most important thing is that your head and your chest are on. And if your elbows are dropping straight down, notice how it allows the shoulders to go wide without you needing to do anything. Now, the feet, you want to use your feet to push your body gently up towards your head. The feeling will be like someone's grabbed the skin at the back of your neck and your shoulders and has pulled it down so that you are-- like if you had a cape, someone grabbed your cape and pulled it downwards so that you're lengthening the tissue down to allow the neck to be long.
And now take the palm of the hands and turn them up and see if you can just keep that nice, wide sense in the shoulders and then gently stretch the elbows and lengthen the fingers. So maybe only the nails are touching the floor. Lengthen the fingers towards your feet. Just to get this sense of a nice, wide, open position in the collarbones. Now bring the hands up to the ceiling.
And let the shoulders relax down towards the floor. And notice you're not crunching because the foam roller's keeping your shoulders from crunching. Lift the arms up so you reach towards the ceiling, and drop the shoulders down. So you don't want to muscularly move it, and then lift up, you want to relax into the position. So Sally, less muscle, more just soft tissue.
Lift up. And lower down. And lift up, and lower down. Now lift up again, turn the palms to face beyond your head. So you rotate the little fingers towards each other and the thumbs away from each other, and again, drop the shoulders down, and lift them up. And drop them down. So now we're externally rotating those arm bones.
Drop. And up. And drop. And up. Now, keep the hands reaching to the ceiling and see how far over your head you can go with the palm facing the floor. And you may feel super tight because this range of movement is tight for you. Bring the arms up, and bring them down.
So the interesting thing with fascia, or with just starting to loosen up the body, you don't need to force it. You need to just go back and forth and allow the body to hydrate again and the tissue to figure out what's tight or where it's kind of jammed up. So just start going back and forth, nice and easy. And as you're doing this, check to see if your ribs are still on the mat. And if you find that your ribs are rolling up and down, that just means there's a lot of tightness pulling into your side ribs.
So, that will eventually sort itself out. But in an ideal world, you want the ribs staying down, not because you're jamming them down, and not letting them move, but because the tissue connecting between your lats, or your side ribs, into the arms, through the shoulders, is nice and loose. And that's what we're going to be working on today. Now bring the hands back to the ceiling. Take the palms to face each other and just reach the hands as far out to the side and then down towards the floor to open up in the front chest.
So you feel a stretch in the pecs, perhaps. Bring the arms up. And take them out and down. And bring them up. And take them out and down.
And bring them up. Now same thing, turn the palms to face your face, or beyond your head, and take them down. So the thumb is going to the floor. And up again. Little finger to little finger. And reach them out. And come back up.
And reach them out. And come back up. So Katie, you want to take your hand sideways. Sideways, out, thumb to the floor. Thumb to the floor. And up. Bring the hands back to parallel, and take the arms out to the side again.
And now, they should be shoulder height. Not to the floor, but shoulder height. So you're six inches off the floor. Sally, lift the hands up. More, lift it. There we go.
Now pull those arms apart, as wide as, try to imagine someone's holding your wrists on either side of the room, and is pulling you. And you want the hands lined right up with your shoulders. There we go. So you just pull them. And forget about technique, let the shoulders widen. Just see what's going to happen in the shoulders.
There's your shoulder line. And stretch. Now stretch the fingers and pull the fingers to the floor. Pull, pull, pull. Stretch the fingers down to the floor so you press the wrist, ow, ow, ow, that's it. And then bend them up. And press them down.
Groans because it's so tight along here. And up. And press them down, pull, pull, pull, pull, pull. Really pull those fingers down and back. And up. And press them down and back. And up. And now bring the hands back up to the ceiling.
Make fists, so you have your thumb wrapped around the fingers, and bend the wrists in towards each other, or the fists. And take the arms out. Again, parallel to the floor. And pull them apart. So you may feel even more stretch now all up through the tissue of the arm.
Take the fists towards the floor. Curl it up. Take it towards the floor. Curl it up. Take it towards the floor. Curl it up. Take it towards the floor. Curl it up. And now start to circle this around.
Biggest circle that you can. Try to really go beyond what you think you can do and keep your elbows straight, Natalie. So you also want this rack. And then reverse it. And reverse, that's it. And circle. And circle. And circle.
Shake your hands out. So all of the fibers of the muscles can get really tight and gripped and sticky. And even though probably you felt it more in the hands and the forearms, this definitely effects the shoulders a lot. Now, hands up to the ceiling. Let's have the palms facing towards your knees, and take one hand over your head, and the other hand try to touch your heel.
And then reverse it. So think more of how big a reach you can do in both directions. Reaching so the shoulders are moving. That's it. Some of you may be able to get to the floor, but you don't have to get to the floor, but you want to work the range of movement your body can give you. So you just keep working this range of movement back and forth, and back and forth.
And back and forth. And back and forth. Now bring the hands up to the ceiling, and turn the palms to face above your head, and same thing again. And you may find that your range of movement is very different now because now you're externally rotating. So anything that is blocking you from achieving full range of movement means that you've got sticky junk glued together. I have lots of it. But that's the beauty of the work.
You want to find where the pain is. You want to find what's not moving. You don't want to force it, you want to just keep visiting it and it will loosen up super super super fast, which is amazing. Okay, bring the arms out. Shake them out. Bring the hands to the floor, reach them towards your feet again so the nails are down, and open the shoulders. Let the shoulders drop wide.
So do that and notice that you are not rolling the shoulder blades together. Katie, right. Yes. I want the whole fiber of the upper arm really rolled out, it's like you're trying to expose the tissue of the armpit. Oh, she's tight in there. Yes. Nice and long so that you really have, and literally send those arms into the hands, but don't grip the muscles.
It's literally like someone is grabbing the bones and stretching them, that's what you want the feeling to be. Now start moving the hands sideways with the nails touching the floor. So you're going to take the arms up. Some of you are going to get all the way over your head. But keep touching the floor if you can, and then slide the hands back and down. So if you notice, you have the hands in an external rotation of the whole arm in an external rotation.
And if any of you feel that it's going into something that may be restricted, just start going back and forth like this. So any restriction that you feel you just come to the edge of it and then you come back down. Because sometimes if you've had injuries, or you have had even things like frozen shoulder, or something, your range of movement will be quite limited, but you just want to keep encouraging that tissue to restore and come back. That's it. Nice and long. And come back down. Very good. Shake your arms out.
Lift the arms up to the ceiling, and bend your elbows sideways so they go to the floor. The fingers are reaching to the ceiling right now. So you're like pegging yourself down. All of you are great because you're actually getting to the floor. A lot of people can be so tight they won't get there, so you can pile up books under your elbows.
Sometimes I've even just had people do this on the floor because it was too much to go to here, they were so tight all across the chest. Now in a relaxed way, let the hands start to fall in the direction of your head and it makes no difference how far you go, it makes a lot of difference that you're not pushing with your muscles, but you're allowing the bones to float. And float the hands up. And float them forward, and down towards the floor. So it's an internal rotation.
And lift the hands up, and let them float back. So try to imagine you're like a ragdoll, and bring the hands up again, and float them down. Because you're looking to soften the tissue again. So just keep going back and forth a few times. And just keep on moving.
Now what will happen if in the either external or internal rotation, the joint itself is glued and tight, what will happen is the whole shoulder joint will move, so the shoulder blade is actually adjusting on the back to compensate for the fact that the joint in the arm is sticky and stuck. So you just want to be aware of that. We're going to work very specifically into that a little bit later one. But ideally, the shoulder should be staying open even as you internally rotate. So just observe within your own body.
If you feel areas pulling, areas tight, pain, range of movement is very limited, that's where your unique pattern and program of the tissue has started to become a holding pattern, and those are the beginning causes of injuries. Because then the body doesn't have full potential to work from, and compensatory programs kick in to place. Okay, very good. So from here just roll to one side, come off your foam roller, and come up to a sitting position. Place the foam roller width wise behind you. So a lot of shoulder restriction also is caused because of the upper back, and because of the trapezius muscles.
So we want every bone in the upper back should be able to move and have range of movement both in and out, and for most people, by the time they're in their 30's, this is already very restricted. So place the foam roller just above the floating ribs, kind of below your shoulder blades. Place the hands behind your head, and just for a minute get a sense of lengthening the back of your neck, and gently bring the elbows a little bit forward and then lean back and get a sense of length into that part of the spine, and then curl up again. And do this again. And I'm just going to demonstrate. You want to watch that you're not flaying your ribs because this is just actually creating a fake movement in that part of the spine.
You just want to think of length. Lengthening out through the head. So the rib cage will shift some, but it's not going to like open up. That's it. Lean back again. And then come up again.
And now curl your bottom up, so you tuck your tail extensively up. Roll down and in so now it's kind of at the base of your shoulder blade. Lower your bottom down and again, lean back and see if you can get a sense of lengthening, and up. Now we'll add the pelvis here. Lift your pelvis. You're not moving on the foam roller, you're just using your bottom to lift to push into the foam roller a bit and soften it. Lower the bottom down, lean back again lengthening the back.
Come up, lift up again. Now, keep the elbows forward so your shoulder blades will stay wide, and lower down one more time. And then again, lengthen back. And up. Lift your bottom without the foam roller moving. And back. And lean back again, lengthening out a little bit.
And up. And lift up again. And now roll yourself right to the top of the shoulders. So you're sitting right at the top of the shoulders. Lower your bottom down, and then see if you can lengthen a little bit. Curl yourself up. Lift your hips.
Lower your hips down. Now as you go back, don't let your head fall. Think of a band around your floating ribs, and just lengthen your neck out. Kind of like neck pull. Just lengthen back. So you're going to feel more like a plank.
And up. Now this time when you life up, roll all the way down until your head is on the foam roller. So it's kind of lifting your neck up. And you want your hands down by your sides. Let's have the palms up actually. So you're externally rotating.
Check that you're really rotating from the armpits. And then stretch your hands towards your feet. So you are pulling your shoulders away from your ears. And lift your hips up, and push into the foam roller. So you're actually stretching your neck a little bit, and stretching all the band of muscles in the trapezius.
Lower your hips down, and again. So it's like someone is hooking your head. And lift. So down you go Natalie, even more. Your shoulders should be just about on the mat. That's very nice there, Heidi.
And lift up and stretch those hands towards your feet. So you're getting a huge stretch right in the neck and the shoulders. And lower yourselves down. And Katie, move down another inch. And you want to really feel that the roller is hooking the top of the skull.
And one more time, lift yourselves up and stretch the hands away from you. So that the hands are on the floor, and also open the shoulders and use your feet to push into the foam roller. You can have a lot of achiness in the neck. And lower yourself down. Very, very good. So from here, lift yourselves up again.
Bring yourselves back so the foam roller is just in the tips of the shoulder blades area. Somewhere in the middle of your back. And give yourself a bear hug. So you're going to wrap your hands, I'd like the hands around the ribs. Not the shoulders, but the rib cage area.
And you'll be going back and forth again. Let the ribs come up a little bit. So you're going to go back, and up. And use the leverage from your feet to really push into this area. And if you're spending time do this at home, any spot that is really painful, if you want to wiggle up and down a little bit.
Like for me, if I go upstream a little bit, towards my neck, I'm more tight in there. You want to just find the places that have more pain. This kind of movement and work should not create pain in your body. So the pain is the clue where you need a little bit of work to kind of release it. Now, make sure the foam roller is close to-- wherever you're feeling tight is probably the best cue.
And you want to roll a little bit to one side. So you're rolling towards the hip, and you're putting more weight into the shoulder blade. And just kind of do a crunch there. So you're going to bring the pelvis in and curl in a bit. And make sure the pelvis is tucking, and releasing.
And curling, and releasing. And curling, so pelvis and rib cage contracting. I'll keep my hands out of the way so you can see what you're trying to do. And then come back and go to the other side. So the same thing.
You're going to crunch a little bit, and release. And crunch a little bit, and release. And crunch a little bit, and release. And crunch a little bit, and release. Roll back to the middle and clasp the hands.
Now see if you can lengthen yourself out and stretch the arms over your head. And bring the hands back. And take the hands back and reach them over your head. Now, for some people this can be quite tiring on the neck. If any of you in the room have that, support your neck with your hands.
And I will often get a pile of pillows and put it under someone's head so they can just move their hands back and forth without needing to strain in the neck. Because the neck has been doing so much work because the back is tight. That's it. And one more time. Very good. Now, bring yourselves up. And let's have everybody facing me so you can see what you're going to be doing.
You will start with the elbow on the foam roller. The legs can be straight or you can take the top leg to be bent to support you. I usually work like this. So now see if you can get yourself on both hips. And really pull the stomach in, and then lengthen out.
So you're stretching the whole side body. And curl up. And stretch yourself out. Now really start to get tone in the whole body as you're doing it. So your stomach is long, the legs are long, and lift. And press out reaching.
So you're stretching all through the side, lats and the intercostal muscles. And lift pulling the stomach and ribs in, and stretch yourself out. Now, you can lengthen. Eventually, you want all of this going down. Can you stretch the arm out? And you can drop your head.
Oh, she's trying to do the big version. Well, let's have a go here. This is Heidi's contribution. Lift up a little bit, and down a little bit. And up a little bit.
If it's digging into those muscles, they are tight and glued together. Really, we're supposed to be like a cat. With that very soft skin, but very powerful. Now, bring the hand behind your head and stretch it out. And bring it behind your head, and stretch it out.
And bring it behind your head, and stretch it out. And one more time like this, and out. And now roll a little bit over this muscle in the arm. So just above the armpit, Sally. I think you're right in the armpit.
No, a little bit into the arm. So you're into, yeah. So you're really working tricep and bicep. Yes, it can be very serious. Alright. Just for a minute, let's lie down and just place both hands with the palms up. You want your knees bent to feel what this is like.
And notice, if one side of your body feels different from the other. See, you want to be in a very relaxed way, if one side of your ribs, your chest, and your arms, is closer to the floor than the other. You've already done a lot of work on the whole trunk, but this is just to keep checking what's changing to reinforce it. So let's go on the other side. So you start out with the elbow.
If you want to turn around so you're facing this direction. You want to be on the elbow. And in this position, really pull the ribs in and up. So now you're engaging all the way through the trunk. And then lengthen yourself out and see if you can get a sense of tractioning.
The whole side ribs, for some people it can feel like you're literally on the rack, and you are. The Pilates Anytime rack. And stretch. And up. And stretch. And up. The good news is, this will give you a beautiful waistline. And stretch. Because it just starts to stimulate the muscles to work again.
Now here you are, you want to get as long as you can. See if you can lengthen this arm out. Just take a breath here, take a big breath in. And breathing out, see if you can sink and release into the muscles. Breathe in, and breathe out.
And now, bend the arm and straighten. And bend. And straighten. And bend. And straighten. And then just start rolling forward and back. So you're basically rolling across the tricep, the bicep, and softening up all of that area that can get really knotted up.
It can get knotted up because you're doing a lot of working out. It can also get knotted up because it's not getting enough exercise. Just because you have a computer life. Which I have right now and I don't like. I like to work out a lot more. Yay.
Okay. So get the foam roller off for a minute and just lie on your backs. And see what your body feels like, and what your shoulders feel like, and what your rib cage feels like. And what your neck and your head feel like. And hopefully you're closer to the floor than you were a few minutes ago. And come back up to sitting.
So, we're covering a lot of different variations. For different people some of them are going to be like "This is hell," and for other people it'll be, "What's the big deal?" I mean it's literally that extreme. The places that you have a lot of pain are the places that you need to work on. And it's not like one formula will have the same results on everybody. I personally have found that sometimes when I start, there's a lot of resistance in my body.
If I do it for a few days in a row, by the third and fourth day, I'm done. It's like gone. The beauty of this work is that the pain leaves your body. This is unconscious pain that we're storing and building up, and it affects our personalities. It affects our energy level, and our joy of life, and the quality of our sleep, and our ability to perform as athletes. So I'm very passionate now about doing release work because I think it's a very important addendum to working out; it's getting the tension out, so we can build a higher level instrument.
So we've done with the foam roller. We're going to work with the balls. They are a little more extreme. So let's put the foam rollers away. Just get them out. So each of you has two balls.
There're different types of balls out there. These balls I bought in the local supermarket. They're like this. They cost about two bucks. Tennis balls. Somebody in the room has quite hard-ish balls. The harder ones, I'm trusting you that you're willing to go for it.
Bigger smalls, smaller balls, tennis balls are great. I love tennis balls because you can find them anywhere in the world. So no matter where you live, you can get tennis balls. And don't get too caught up on the type of ball you need. It doesn't matter. You just need to break up your body.
So, trapezius muscles are very, very tight and locked up for everybody nowadays. They become very grippy because of the fact that they're holding the neck, and up because the shoulder girdle is collapsed forward. So remember, again, when this bone is sitting sideways, the whole upper skeletal body is supported correctly and these muscles can actually relax. But the moment the shoulders come forward the trapezius muscles start to fire. So if you look at little kids.
Kids who are like three years old, four years old, five years old. They have this beautiful vertical plate, shoulders are right on the side, the head is up. They're running around, they're falling down, they're doing their kid life, and they look gorgeous, and there's no tension here. And the shoulders are right on the side. So if there's an example of a good physiology, look at children before they've gone to school and are being made to sit too much.
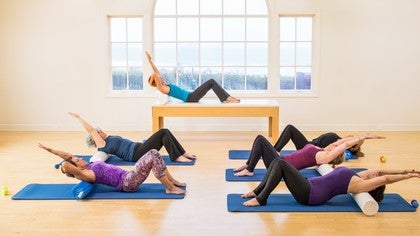
But these muscles very tight. So we're going to work on them. If you can lie down on your back, and you will put these two balls right here. They're in this meaty part that builds up all this tension. The trapezius muscles.
So, you want the balls there. And get your hands behind your head, and lift your head up a little bit. And that may be as much as you want to do. Or, you can lift your hips up in the air and use your feet to push into those muscles. And again, for most people, this is a very extreme place because it's so tight.
And then if you roll from side to side, you will start to loosen up all of this tension that builds up in those muscles. Because they actually become knotted. And then roll your body down for a minute, and I just want to check, does everybody feel where they are? Is this a complete non-experience? Everybody's having an experience.
Anybody in trouble, or question? You do feel it? Okay. You're not feeling anything? Okay, just wanted to double check. So Sally is having a good time. She's in another part of her body, but that's okay.
So you want to be here.
Because again, all of the movements of the arm pull in and lock into this muscle group. So if you feel this pulling into your arms, its because the connective tissue is tight. Roll your bottom down just to release a minute. And just drop your hands by your sides in relief. And then lift your hips up one more time, and just reach the arms over your head.
Again, very relaxed. Very similar to the feeling you did on the foam roller. And you may be having an anatomy lesson about how one part of your body connects with another part because you're forcing that muscle to stop holding so intensively. The good news is, if you do this more than once quite close to the same time, you may find a huge shift happening quite fast. And then roll your bottom down.
Take the balls out for a minute and just lie there. So all of these muscle groups affect your shoulders. So while you're relaxing, just glance this way. You're going to take the balls now and place them kind of between the shoulder blades area. And we will go slightly up and down the spinal column.
So if you have any adhesions between the bones, we'll be relieving them. So if you place the balls close together. And even if they're not perfectly even, just roll to the place that you can feel that they're between the shoulder blades and lift your hips up, and just roll up so your bottom is going down towards your feet a little bit. So you're like ironing out the erector spinae. Lower your bottom down, lower your head down.
And push into the balls a bit. Lift your head up, lift your hips. And let's roll so we're all on the same page. You roll up with the balls so they're almost at the top of the shoulder blades, kind of close to where your neck would start. And roll down for a minute so you're really at the trapezius muscles, you're revisiting that area just about.
Lift up again and now roll down an inch, you're rolling towards the middle of the shoulder blades but you're not there. So you're going to go one vertebra at a time. Lift your head a little bit more, lifting your hips up. Lower your head, lower your hips. Stretch your arms over your head so you can feel all of the interconnections, and swing the arms down.
And see if you can just relax here for a minute. Lift your hips up. So you curl your tail up, grab your head, and traction it up. Roll down another inch so it's coming towards the middle of the shoulder blades. And just up and down. Roll your hips down.
Roll your head down. Stretch your arms up over your head again. Circle the arms. Bring the arms up, and bend the elbows towards the floor. So same thing we did on the foam roller.
Take the hands up, bring the hands down. Take the hands up, bring the hands down. Bring the hands up, bring the hands down. Bring your hands behind your head again, and curl your head up. Lift your hips up in the air. Roll, whoopsy daisy, a little bit further down.
Wow I'm just stuck in my mic. Okay, I released my mic. Roll down a little so you're closer to the bottom, you're below your shoulder blades. Roll your hips down one more time. Roll your head down, stretch your arms over your head. Sweep the arms down to the side.
Let the shoulders drop open, and see how much you can externally rotate now from this position. And one more time, bring your hands behind your head, curl your head up, and roll back up. So you're going up towards your neck, just roll all the way to the top. And then take the balls out and let yourself relax on the floor and see what it feels like. So the next part we're actually going to work with one ball.
So I will put my ball here. Take the one ball and place it under, again it's in the trapezius muscle area. So you want it there, and lift your hips up. So you are putting pressure into the ball. If you ever wanted to increase pressure, you can lift your head up, or you can keep it down.
And then take the arm on that side and reach it up. And then take it across your body on a diagonal. And out. And across. And one more time, out, and across. Roll your bottom down. Let's do the same on the other side.
So again, taking the ball on the trapezius on the other side, and lift your hips up. And you can use your feet to gently wedge towards the ball. And then reach the arm up, and slightly across. And up, and across. And up, and across.
Roll your hips down, take the ball out. And the next part will be, as you're relaxing there I'll talk, part of what also pulls the shoulders forward is the pec minor. There is a band of muscles. The pecs, of course run as a bigger band, but the connection into the deltoid and the shoulder tends to be tight and pulled. So we've been doing a lot of work to release the back, release the arms and the structure there. But that band is a very important one too because in an ideal structure, we do want the shoulders riding on the side of the rib cage, and the neck vertical.
Some of this I'm hoping you will take into your daily life. Everybody across the world. And it means conscious attention to how you stand and how you sit to break the patterns that we're all now very used to. So let's have all of you placing the ball right here. Kind of where there is a cavern.
So it's below the collar bone, just on the corner. And I think, Maria, better to face this way just so you can glance in my direction if you need to. So you have the ball right in that place. You can have your forehead on the ground. Or you can make a fist with the other hand to support your head.
Take the arm that has the ball to the side. And then slowly take that arm, that has the ball, and reach it over your head and try to keep the shoulder down so the neck stays long. Right. Take the hand back out to the side, and then take it down. So it's basically holding the shoulder cuff off the floor. And then see if you can internally rotate, and bring the hand behind your waist.
So what usually happens in this position is the shoulder cuff is dropped, but the ball is keeping it. For some people, I would actually elevate. I would put a book under this because depending upon the size of the -- If it's a woman, maybe she has bigger breasts. Or for the big barrel shaped men. You want to support the shoulder so it's actually right on the side of the body.
And then start rolling to your side. So the elbow that's bend behind your back is being bent backwards and you're opening that shoulder out. And if you catch it just right you will find that point. And I'm going to have a look at you as you're doing it. So I'm grabbing. This needs to be right here.
So if you were manually adjusting, Heidi you're doing great. Bring this hand to here, and start pushing so you're using the ball to open up the shoulder blade. The front. So what I'm doing in the back is I'm grabbing the shoulder blade and pressing it. This should be on the floor, Natalie. And now this hand you use, no, use it on the floor, to roll into it.
But keep this going backwards. So you're forcing the stretch into that part. Yes. So you're really opening this up nicely. There it is. Okay, let's have you roll back on your stomachs and take the ball and place it on the other side. So I will usually roll the tissue of my skin and once the ball is there, so it's grabbing the cuff of the shoulder and pulling it out just a little bit.
So the ball is actually allowing the shoulders to get wider. And the goal is you're literally trying to get a broader shoulder line. Take the arm right to the side, and just stretch it. The palm is down, and just pull it as far as you can. Right. So ideally someone like you, let's give you this bigger ball. Yes. Right, right.
Now take that arm and slide it over your head. And keep the shoulder, Katie bring the hand back down again. Reach it out, let's have your head straight on your forehead. Okay. And now as you come up, don't let the shoulder go up. So it's the arm bone. Yes.
That's it. Good. So this is down, and that's up. Good. Take the hand back to the side. Bring it down. And then turn the hand and place it on the center of your waist. You kind of work your way to there. Very good.
And then slowly, so again, we're trying to do this movement. These balls actually could be bigger for this one motion. So it's taking the whole cuff and lifting it. And then slowly start to roll. Get the hand right to the waist.
So Sally, drop your head. Come back to the middle for a minute. Not over crossed for you. Relax. You see how much width you have? Now, here we go. Okay. There, do you feel that?
And start rotating away. So now it's forcing her ribcage to open. Beautiful. Yes, and this is being pulled up and back. Wonderful. Wonderful. Okay, roll back on your stomachs. Take the balls out.
Sit into your heels for a minute, into child's pose. And drop your forehead down to the mat. And I will gather up the balls. We look like kindergarten here. Okay. Bring your hands by your feet on the floor, and let the elbows drop out so that you're just nice and wide in the shoulders.
And then, start rolling up to sitting. So pull your stomach in, and slowly articulate your spine all the way up to sitting. And then broaden the shoulders. Roll the hands out, get the head placed right on top of the spine. And just feel that position. Stretch your arms up over your head.
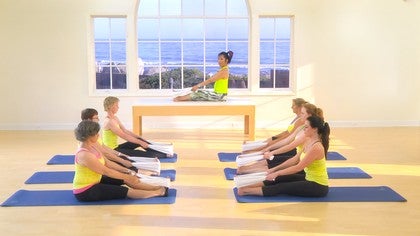
Very nice. So you're just nice and long. You want that external rotation. Come up on your hands and knees. Cross your feet. Sit back into your heels and just wiggle yourself forward a bit because we're going to do quick and fast, well I don't know fast, but just a few of the mat exercises to kind of see what it feels like. So with your feet together.
Actually, hip width apart. I changed my mind. See if you can get this sense of getting the hips externally rotated, the knees don't go out, they stay straight. But you get that anchoring. And now bring the arms in front of you and externally rotate them. Notice it's not from the hand, it's from the arms.
And then take them out a bit, and broaden the collar bones. Right. Head is on top of the spine. Lean back a little bit. Now see if you can slowly roll yourself down with the external rotation. So very broad in the shoulders. Yes. All the way down. Hands to the mat.
Lift the hands up. Think of the armpits coming forward. Curl your head forward. Tuck the tail slightly. See if you're abdominal muscles can bring you up. And now I know why Martha Graham studied with Joseph Pilates. And roll back again. So you want to get this long position.
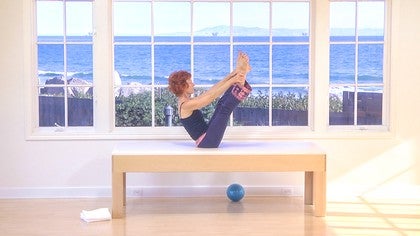
Long diagonal, then get the articulation. Keep the collar bones wide and the neck long, and roll down. Hands to the mat. And now stretch your legs out. Bring your feet together. And flex your feet, and bring the arms over your head.
And just for a minute see what it feels like. Most of you have done some pilates before. Do you feel more of your spine on the mat? And it's not because you're jamming your spine down, it's just longer. Bring your arms to the ceiling. Lets turn the palms into an external rotation, so you have a sense of wide shoulders.
Lift your head and peel yourself off the mat. Lean forward, and roll back palms to the ceiling, Katie. And shoulders wide. There we go. Roll down articulating the spine. And arms to the ceiling. Take them over your head.
Still keeping the external rotation. This is just fun and games. Arms up, lift your head and chest. Peel off the mat, stretch forward, and roll down, roll down, roll down. And lie flat on your back. Very good. Roll yourself up to a sitting position.
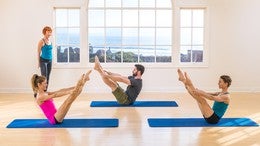
Rolling like a ball. Externally rotate your arms. Lift your feet up, see if you can get a scoop. See if you can get the arms to connect. Think of the armpits going into your waist. Stomach is really tight.
Yes. Can you roll back and come up again? And up. And roll back and come up. So it's all about the powerhouse. Yay, Natalie! She's been a pilates student by watching Pilates Anytime videos only. This is her first live class ever.
Roll back and up. Very proud of you. Roll back and up. And one more time, roll back and up. And roll down on the mat. Roll down, roll down, roll down. Bring your knees to your chest.
Keep the hands on the mat with the palms turned out. See if you can get the sense. It's not really palms, it's armpits. So I want. Yes, that's exactly it. I want to see the flesh. So your bicep is in the front, and your tricep is in the back.
And now can you relax your sternum in? Yes. Yes, yes. So really get, no, don't tighten so much, Katie. You don't want to tighten the muscles, you just want to roll the tissue. And keep this down. That's where your position should be. Now your shoulders are nicely wide.
Don't push them, try to find the release into them. Yes. Exactly. Very, very good. Now, keeping this nice wide collar bone feeling, can you still lift your head and chest off the mat? Hands are very relaxed. One leg goes out, and the other knee pulls in.
And switch, and switch, and switch, and switch, and switch, and switch, and switch, and switch. Bring both knees in. Lower your head to the mat for a minute. Check that the shoulders are broad. Use only the powerhouse, ribs to pelvis, to curl yourself up again.
So it's actually the whole front trunk, but not the shoulders, that's the trick part. Both legs go out, both legs come back. Both legs go out, both legs come back. Both legs go out, both legs come back. Both legs go out, both legs come back.
Lower your head to the mat, lift the legs to the ceiling. Anchor into the powerhouse, and lift your head and chest up. So now we'll use the arms, but try not to stretch the shoulders forward. Take your right leg and pull twice. Scissor. Pull, pull. Pull, pull. Pull, pull. Pull, pull.
Pull, pull. Both legs up, bend your knees. Head on the mat. Feet on the mat. Stretch your legs out. Bring the arms to the ceiling, and again, externally rotate to feel more the shoulders sinking into the mat. Keep the shoulders on the mat, and how far can you stretch your arms over your head without losing that sensation? Bring the arms to the ceiling, lift your head and chest.
Peel off the mat. Yes! Okay, open your feet a little wider than the mat for spine stretch forward. Let's have everybody with feet flexed. Maria, go a little off the mat for me. Yes. Just a little bit wider, very good. Just for a change, externally rotate.
Now once you're externally rotated, it's real easy. Let's have everybody pull the shoulders forward, yes. Lift the spine, and now pull the shoulders. So the armpits are on the side body. Bring them forward again, just for the sense.
But keep lifting up, Katie. That's it, and then pull the arms to the side body. One more time, bring the arms forward. And then bring the arms to the side body. Get taller, that's it. Now, relax.
Even though the arms are out in front of you, relax the muscles of the arms. Just want you to be aware of the armpits and the trunk working hard. Get the sense of your head on top your spine. It's a lovely, long neck. Someone's grabbing your ears and lifting you out of the floor. Yes! Now big breathe in, breathing out your head will dive forward and you're going to start to round out.
The spine stretches forward, but the palms stay facing the ceiling. Grow back up, broaden the shoulders, and lift up. Big breathe, and breathing out, round your spine. And I want to see the rib rounding. So all of this is going back, good, and come back again.
And sit up tall and the armpits are dropping. One more time, drop your head, round the spine, the arms are floating forward. Grow back, lift the arms up. Palms face backwards. Backwards, see what happens. So the shoulder blades get wide.
Now can you get the armpits to the side body? So they're not forward, they're back. And then you get length. Good, neck is long. Hands come behind the head, one on top of the other. And the elbows are wide. Big lift, twist towards me.
And the elbow courts to the same knee. So this is a kind of variation. It's not soft, but it will open up the whole side of the ribs, open those ribs. Come back, twist away from me. Elbow to knee. Not crossing over, Sally, left elbow to left knee for you.
Yes, open the other elbow up. And come back up center. Lift, twist to the first side. And over you go, and stretch between each rib. Come back up and center, twist to the other side.
And take the elbow down and open the rib. And come back up. And first side again, twist, and stretch over. And open those ribs up. And come back up, and other side.
Twist, and stretch over. And come back up. Very, very good. Legs together, arms out long in front of you. Roll down on your backs. And everybody roll onto your stomach for single leg kick. You can have your feet facing each other.
Start out with your arms stretched out in front of you on the floor, long. So your little finger is on the floor, so the palms of the hands will face each other. It's like you're clapping but you have them shoulder width apart. Right. Lift your head and look between your hands. So Maria, you want your little finger on the floor.
Maria, yeah, yeah, yeah. Now, lift your chest up a little bit more. Pull the shoulders down into the back. So the armpits pull towards the ribs. So think of, now, get the palm of the hand flat on the floor. No, other way, back of the hand.
Back of the hand down on the floor. See if you can get that external rotation. Katie, elbows to the floor. Think of the external rotation all the way into your back and your armpits. Now, can you wiggle them in a little more.
I know you're on sticky surfaces. Sally, you want the back of the hand on the floor, yes. Now bring the elbows up so they're almost under your shoulders. Can you use that? If anything, have the hands wider than the elbows. So you're externally rotating, and then lift the stomach up and broaden the shoulders.
So Katie, open the shoulders wide. Pull the shoulders back away from your ears. Back of the neck is long. Can you lift your stomach up so much it's off the mat, and your chest is long? Yes, that's it Heidi, yes. Now, bend your right foot towards your bottom, and point it in, and flex it in, and stretch it out and lift the stomach.
And stretch the leg out. And other leg. Point, and flex, and stretch and lift the stomach. And point, and flex, and stretch and lift the stomach. And point, and flex, and stretch and lift the stomach. And point, and flex, and stretch and lift the stomach.
And point, and flex, and stretch and lift the stomach. Very good. Lie down for double leg kicks. Both hands will be behind your back. And the fingers of one hand will touch the other. Just like this. And you use the thumb of one.
Turn your nose towards the ocean. Yes, that's it. And now, right here see if you can lift your shoulders away from the mat any way. So your shoulders are wide. So the cuff lifts off the floor, but can you press your elbows towards the floor? Now we're working internal rotation, very good. Hips are tight, feet are tight, knees are together, pull the stomach in.
That's it. You have this lovely corset. Bend your knees, kick your bottom three times. Kick, and kick, and kick. The feet go down, stretch the arms back. And if you know what to do, you lift your head and chest up.
So you stretch your arms and lift yourself up. Turn your head the other way. Bend your elbows. Kick your bottom three times. Kick, two, three. And pull back and lift and stretch away. And first side. And kick, two, three.
And pull back and stretch and lift your chest. And other side. And kick, two, three. Press your feet down and lift, lift, lift, lift. And first side. Kick, two, three. And pull back and lift. I knew you had it in you.
And last one. Kick, two, three. And pull back and stretch and lift. Very good. Sit back into your heels. Stretch your backs out, child's pose. Nice, long stretch.
See if you can send. If you can't get your hips down, it's either tightness in the knees, or the hips, or the feet and the lower back. And unless there's joint replacements, which can be a factor, and I don't know with this lady. It's tissue. So, again, there's whole processes that can be done for the hips and the knees, and the feet as well. Very good. Come and sit facing each other again for teaser.
We can never do life without teaser. Knees bent, one leg up, arms long. Armpits down into the waist, broad collar bones, roll down to the mat. And roll yourself up. And roll down. Knees together, Katie.
And roll up. Shoulders down, roll down. And armpits to the waist as you come up. Change legs. And roll down. And roll up. And roll down. And roll up. And roll down. And roll up.
And just to make sure that we haven't worked not enough, roll down again. Roll up. Roll down. Roll up. Roll down. Roll up. One more time, rolling like a ball, but this time you hold your ankles. And to your shoulders, and come back up.
And to your shoulders, and up. And literally use this now to massage your spine. Hold a little lower down, Katie, and let the knees go a little bit wider. That's it. Roll down, roll up. And one more time. Roll down, roll up.
And sit. Okay, ladies! Thank you for coming to my torture chamber. (laughter and clapping)
Beginner Mat Workouts: +50-Minute Classes
Mention
 |
Niedra Gabriel (Teacher) |
 |
Mikaela L |
|
|
Terese S |
 |
Elizabeth D |
 |
Sam Govoni |
|
|
Naomi R |
|
|
Justine J |
|
|
Cigdem A |
|
|
Christine T |
|
|
Robyn H |
 |
Heather P |
|
|
Katherine S |
 |
Elizabeth A |
|
|
Sharon C |
 |
Kate T |
|
|
Wendy K |
 |
Claudine H |
|
|
Lori |
|
|
Yuka S |
 |
Sonia V |
|
|
Amy S |
|
|
Katrina K |
|
|
Suzanne Wooder |
|
|
Veronica H |
 |
Kate N |
 |
Z A |
 |
Kristin F |
 |
Tahja |
|
|
Erin B |
 |
Kirsten L |
 |
Trisha Donnelly |
 |
Yardley C |
 |
Andrea F |
 |
Jennifer W |
|
|
Petra S |
|
|
Judith K |
|
|
Bruna X |
 |
MKV |
|
|
Eleshia H |
|
|
Emma Oclee |
|
|
Donna H |
|
|
Terry T |
 |
Michele P |
 |
Inma F |
|
|
Catherine F |
Comments


I just filmed a class with some prior release work for the hips so you should find it on the website sometime in the near future.

You need to be a subscriber to post a comment.
Please Log In or Create an Account to start your free trial.
