Description
This class is great for all bodies, whether you are pregnant or not. Courtney encourages you to make the workout your own by adding modifications or challenges when they are needed.
About This Video
Transcript
Read Full Transcript
Hi guys, I am here today, and I'm 34 weeks pregnant. I've had an awesome pregnancy. If you're following along with me, I hope you have too. I'll be doing a mat class today. You'll be seeing some infusion of some different props, we're gonna be up, we're gonna be down, we're gonna be all over the place.
If you're not pregnant and you're joining me for this class, that's awesome. I think you're really gonna enjoy it as well. I will give you some modifications, or things that you can advance based on how you're feeling. I was here a few months ago, I was almost six months pregnant the last time I was here. And I was talking about how our bodies and our emotional state are so closely connected.
So we're gonna continue to talk about that theory. And today's theme for this mat class is balance. So we all know balance is difficult to find physically, and it's difficult to find emotionally, and then it's difficult to find the balance between both of those as well. So as you participate in this class, I want you to think about finding that balance within your body. That's front back, left right, up down, but then also emotionally and mentally.
And how can you apply that to your everyday life? I know that once I become a mom, that's gonna be a challenge for me. So you'll hear me make reference to that as we move our bodies today. Let's begin with a warm up. We're gonna be on all fours.
I have a nice kushy mat, hopefully you do too. Wrist issues are quite common throughout pregnancy, especially later on in the pregnancy, so feel free to double up a mat, or use a prop underneath the heels of your hands so that you're not so flexed at your wrist joint. Come into a comfortable all fours position. So to help with the wrist alignment, spread your fingers wide. Your middle finger will point straight ahead, and just sort of shift your weight a little bit more toward the pads of your fingertips.
You could almost lift the heels of the hands off the mat. Press through the knuckles of the hand, all five knuckles, and then lower the heels of the hands back down. So if I was pushing my hands into sand, or memory foam, and I were to remove it, you would see a perfect indent of my hand, including the fingertip pads. Knees are underneath the hips. Feel free to go a little bit wider if you have SI discomfort, or tightening or pain.
So let's just begin with some scapular movement. On an exhale, push the hands down, push the back up. Drop the head a little bit. So I don't wanna go too much into a cat cow yet. I just wanna feel that width through the shoulder blades behind me.
Inhale the shoulder blades, retract, they come together, and you can just allow a little bit of extension in the spine. So exhale push up. Inhale, let them retract or come together. One more time, push up, finding width. And this is gonna be a really good exercise postpartum as well.
And inhale, retract. And then find that spot in between. So that neutral scapular position, where you're wide through your back body, wide through the front body. So right now I feel an even emphasis through my pectoral muscles, the front of the chest, and my back muscles. Maintaining that, we're gonna move the hips and pelvis in a circular motion.
So from here, we're gonna shift our weight over to one side, round the back, drop the head, come through center. As we come to the other side, we allow the belly to drop. Pause and center, and go back the opposite direction. So exhale to circle, and inhale to extend. Exhale to circle, and inhale center.
Now you can see, I'm moving through a neutral spine into extension, lifting my tailbone. Exhale, round. And inhale, one more each direction. Hopefully, you can also see during the scoop, my naval draws in and up, the belly draws up as well. So at this stage of my pregnancy, the flexion of my spine feels fine when I'm in this four point kneeling, or plank position.
I'll tell you when it doesn't feel good, it feels a little compressive sometimes, but if you're feeling compressive, just minimize the flexion. Now we're gonna make this movement a little bit bigger. So shift to one side, sit the body back. You may even wanna open your knees a little bit wide. Start to come through center and over the wrist.
And we're just gonna circle the body in one direction. Now I feel like I'm moving less through my spine here, but I'm getting awesome movement through my wrist, through my shoulders, and through my hips. And if it feels natural for you to add flexion or extension, then I encourage you to do that. Last time like this. These circular or spiraling movements are gonna be really beneficial during labor.
Come forward, shift, and back. And just breathe with your movement, finding that connection between the two. So breath helps to facilitate movement, movement creates breath. So we just keep going, and we just keep breathing. Last time here.
And press back. Bringing the knees underneath the hips again, and come back to your perfect four point kneeling position. Don't forget about the scapular position. We're gonna shoot one leg back behind us. So pick a leg, the opposite arm reaches forward.
Now we're keeping the hands and the foot onto the ground here, because the focus right now is length and stability. And the stability is in the hips and the stability is in the shoulders. And then drop back in. And we're gonna stay on that same side for five reps. So we already did one.
This is four, pull it in. Three, going for length and stability. Two, one, and take it to the other side. Now you will feel a little bit of shift in your weight. Opposite leg shoots back, opposite arm goes forward.
Just for a moment, hold, reach. Find length through the toes, and through the fingertips. Find length through the top of the head. Slide it back in and under. Four more, that's four.
And bring it in. Three, keeping your stabilizing elbow just a little bit soft. Two, and one. Bring it in. Going into the original side that we started with, but adding a new element.
Adding a reach and a lift. Reach first on an inhale. Exhale to lift, belly draws up as well. Inhale to tap, and exhale to bring it in. Let's stay on this same side.
Inhale to find length, exhale to lift. Inhale to tap, exhale in. Out, tap, and in, one more. Out, tap and in. Other side.
Spread those fingers, soften those elbows. Opposite leg and arm, reach, that's a breath in. Lift, tap, and in. Reach, lift on an exhale, tap and in. Length, stability and strength, and in.
Stretch, lift, one more time this side. Stretch, lift, lower and in. Widen the knees, press back for a moment. You may notice one side feels more stable. You might notice one side feels a little bit more tense.
Just start to observe these things in your body, because we can apply these later on in the class. Okay, we're not done yet. Coming back to that same sequence, except this time we will be alternating. This alternation of arms and legs, so different sides, is gonna create a little bit of a rocking motion in the body. And this rocking actually is really, really good in your third trimester.
You can recreate this rocking motion standing up as well, and it helps the baby descend into position. So here we are on all fours. Pick your favorite arm and leg to start. We reach, exhale lift, inhale tap. Other side.
Reach, lift, tap and in. Other side, reach, lift, tap and in. Reach, lift, tap and in. So how's your lower back right now? It's not that we want that curve in the low back to disappear, it's just that we don't want that curve in the low back to get bigger when you lift like that.
Notice in your own body. Abs are engaged. Yes you still have abdominals. Lift and tap, up, down. Tap, up, last time and we're gonna hold it, freeze.
Pull those abs in. Now the hand that's reaching long, we're gonna do a little bit of what's called thread the needle. The arm is gonna go under, the elbow and the forearm come down. The elbow lands so it's directly below the shoulder. Now this allows me to come into rotation.
So as I push into my top hand, woo! My shoulders will rotate, and so will my hips, okay? So push to lift and open. Outside leg is lifted high, shoulders are down in the back. Inhale, bring the knee in, flex the spine, think knee to nose. Exhale, lengthen, and I like to look.
I like to check out what's going on back there. In, to round, exhale to lift. Inhale to round, exhale lift. Inhale to round, exhale to lift. Let's do four more.
Now as much as I feel the leg that's lifting, I feel an opening, I feel some work. I feel a ton of work in the leg that's supporting me. And that's good. Last two. Last one.
Bring it in, and come back up. How'd you do? Let's try the other side. So opposite arm and leg reach long. And they lift up.
We thread the needle by placing the elbow and forearm down, elbow right underneath the shoulder, press into the hand. Allow the shoulders to rotate, allow the leg to lift. Flex the spine, that means drop the head, scoop the belly, hold the knee in. And exhale look, lift. Now this is where you wanna really scoop abdominals in and back.
Try to straighten your leg a little bit more. Inhale, and exhale. Now again, if the flexion is feeling uncomfortable for you, just make it smaller, just limit that range of motion. It might feel really good for you to bring the knee in. Making sure that kicking leg is super straight during the extension.
Squeeze your seat to lift the leg, not your low back. Four more, three. And this side feels a little bit harder, but remember, it was working to support us when we did the other side. Two, and one. Bring it in.
Take a seat, and breathe into your back and sides. That's our warm up, guys. You should be feeling those big muscles in the body are nice and warm, and we're ready to do some more work. I'm now in a standing position on my mat. And you can choose to be on your mat or off the mat.
If you're off the mat, the balance aspect may not be so great. The mat creates more of a challenge because it's squishy. However, if you're off the mat, it's gonna be harder on your wrists. So why don't you try it a few different ways and find your favorite way. Standing toward the front of your mat, separate your feet nice and wide.
So my preference is to have my feet wider than my hips. We're gonna go through a yoga inspired flow using Pilates breath, and Pilates principles to get the heart rate up, and to continue to warm up the larger muscles in the body. On a breath in, sit the hips low as you reach the arms forward. Coming into a chair like posture. Just scoop the belly under a little bit, and see if you can work your back extensors to draw the arms behind the ears.
That's your inhale. On an exhale, take the hands to the ground. Inhale, try to lower the hips and lift the heart. Exhale, lower the heart and lift the hips. Inhale, step the feet back, coming into what I call a modified downward facing dog.
So bend the knees a lot. Spread the fingers like I taught you earlier, and push into the fingertip pads. Knees are bent, hips are back. Now this type of inversion is awesome for the prenatal person, especially in their third trimester. Exhale, hips come up, inhale hips come down, five times.
Two, three, four, and five. Bend the knees and inhale. Push yourself forward to your plank. Exhale, lower the knees down. Coming to the four point position that we've been in already.
Inhale, lift the chest into your cow pose. Exhale, round the back. Curl the toes under, hover the knees and repeat the series. Inhale, lift the chest, cow. Exhale, curl.
Inhale, step one foot forward, and exhale, step the other. Coming back into this yummy low squat position. Breathe in, reach the arms up, push all the way up. Parallel the legs, and take your arms down on exhale. And we're gonna repeat the whole thing four times in total.
You can see how it gets my heart rate up a little bit. Inhale, sit down, reach up. Try to scoop the belly, lift the arms. Exhale, hands to the ground. Inhale, hips go low, chest goes up.
Finding length and space. Exhale, chest goes down, hips come up. Inhale, step back into your modified dog position. Nice wide legs, bent knees, spread the fingers, chest toward the thighs. Exhale, hips come up, inhale, bend the knees.
Exhale lift. Inhale, think about pushing the chest back towards the thighs. Exhale. And inhale one more time, exhale lift. Bend the knees and inhale, push forward, high plank.
Exhale, lower the knees. Inhale lift the chest, lift the hips. Exhale scoop the belly. Hover the knees, inhale lift the chest, lift the hips. Exhale, scoop the belly.
Inhale, step one foot forward, exhale step the other and come into this awesome low squat position, let those hips open up. Inhale, push down to the ground. Exhale parallel the legs, bring the arms in. Two more times. You can see my heart rate's definitely going up.
Inhale the hips go down, the arms to up. Exhale, hands to the earth. Inhale, lift the chest, lower the hips. So think like you're being rooted with your sacrum. Exhale lower the chest, lift the hips.
Inhale step back to your modified dog position. Wide legs, heels high, bent knees. Push the chest back. Exhale hips up. Inhale sit low, two, three, four, five.
Bend the knees and push forward. Bring the knees down. Inhale find length and space with extension. Exhale scoop the belly. Hover the knees inhale, a little bit harder.
Exhale, inhale step, exhale step. Settle in. Inhale push down to rise up, exhale parallel the legs. One more time. Inhale sit low, arms up.
Exhale hands to the mat. Inhale hips low chest high. Exhale hips high, chest low. Inhale step back, bent knees. Exhale one, you can play with the heels going down and up if you like that stretch.
If you tend to get cramps in your calves, which is common, just leave them in a lifted position. One more time. Bend the knees, push. Hold it just for a moment. Lower the knees down.
Inhale into your cow, that means hips up, head up. Exhale into your cat, create a mountain let your back be the peak of the mountain. Inhale, exhale. Using a little bit of momentum, come to your low squat. Stay here for awhile if you'd like to, but on inhale press down into the feet, lift the arms, lift the body.
Exhale, parallel the legs. Very good. Bringing the feet hip distance apart, shifting your weight to one side. So I have my weight into my left leg. That glute's gonna work to support me as my right leg comes up.
My right leg is gonna step way back as the arms go up. Finding a crescent lunge position. Let's just stay here for a moment. Keep your arms up while I explain this. Think about your tailbone pulling down, your pubic bone pulling up towards your chest.
See if you can straighten your back leg more, and lift your back heel so it's right over your toes. Good. Now keep that, and bend your back knee. Five, four, allowing the hips to open, three, two, one. Push, turn and open to a warrior position.
Keep your arms reaching long while I show you what we're doing with the hips. Think about the tailbone dropping down. So we're creating more length in the low back. The pubic bone pulling up. We're creating some work in the abdominal muscles.
Knees right over the mid feet, arms are long. Inhale, see if you can deepen the pose as you reach. Exhale, come up and inch. Now when you reach up, think about creating length and space in your spine. Exhale that was two, we're gonna do five.
Inhale, and exhale. Pushing into the outer edge of your back foot. One more time. Inhale, and exhale. Now pivot on your back foot, look towards the ground and place your hands down.
You're not done yet. Keep your back foot anchored, and take that front foot through. Pivot turn into a modified side plank and the reason it's modified, my feet are nice and wide. So it's easier for me to support the shape of my body here. Take the hands down, step back, find your plank position.
Modified dog, step forward, we've been here before. Stay as long as you need to. And when you're ready on an inhale, rise up. And we get to do it again on the other side. Let's see how balanced we actually are left to right.
So in preparation for supporting myself, I'm gonna shift my weight to my right side using those glutes. Left leg comes up, left leg steps back as I reach my arms up overhead. Now take a moment to settle in. Arms are up, pubic bone pulls towards the chest. Tailbone drops down towards the ground.
This scooping sensation is actually a really great way to manage your surges or your contractions. It creates the quickest path for your baby to descend. So a little bit of that scoop is gonna be good. Back heels lifted high, bending. And up one, remember we're doing five.
Two, three, four, and five. Oh, feels so good to push it open. So here we are, knees over mid feet. Find that scoop again, bring some life into your back leg, pushing into the outer edge of your back foot. As the arms go up, we deepen the position.
Exhale, we can back off a little bit. But when the arms go up, get a little bit more space and length. Four more. And up, one. Two, three, and four.
Pivot turn, see if you can find that crescent position again. Hands go down, don't be in a rush to go anywhere. Front foot steps through. Place the hand, pivot turn and hold. So I have a nice wide stance with my legs, little bit easier for me to support the shape.
Arms are up, chest is open. I'm happy. Look down, take both hands down. Take it back through plank. Modified dog as you know.
Step it forward. Sit low, kinda just sink into it. Press down through the heels of the feet as the arms rise up. Come all the way up, and take it down. Now you guys are welcome to do that whole flow again.
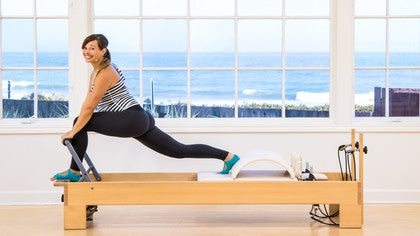
So just hit rewind, start it again. Do it a couple times to get that heart rate up. I'm gonna be moving on to the standing Pilates series. So we're about to go into our standing Pilates series. I have a balance aid, I'm using a chair.
You could use a chair that's stable, not something that's gonna slip of course. The back of your couch, or even a wall. You could also do this series without the assistance of a prop. I'm gonna stand beside my prop so that I'm comfortably supported by it. I don't wanna feel too jammed up and close, and I don't wanna feel like I'm having to reach for it.
Stand with the feet together, and then opposite hand onto my hip. Let's just start with some reformer footwork. So lifting the heels up high for your tendon stretch position. Focus on shoulder over shoulder, hip over hip. So almost creating that square, that box through the front body.
Kiss your ankles together, squeeze your inner thighs. And lower your heels back down. We'll do 10 repetitions of each variation. Inhale to lift and exhale to lower. Inhale up, and exhale down.
So this is a great time to bring your awareness back to your posture. What's happening with the lower back. Can you find that the tailbone is dropping down or heavy, because the pubic bone is lifting up towards the chest. That's a good position. Remember, it's not that we wanna decrease the curve in the lower back, if it's the normal curve, we want to avoid having an exaggerated curve.
On the next one, we're gonna lift the heels up high. Squeeze the ankles together. And bend the knees. Now think of this as your reformer footwork presses. Come all the way up to straight legs.
So really engage the front of those thighs. Think about becoming longer and taller in every joint in your body. Inhale bend, exhale to lift. Now it's really not important how low you go. So this could be a teeny tiny slight bend in the knees.
Focus more on your posture, the shoulder and the hip alignment, focus more on the low back. See if you can work to keep those knees together. And the ankles together. Exhale to lift. We've got two more here.
And one. Now let's go down and pause. Now here, we're doing our reformer mid range work. So this is where the intensity goes up. Lower the body down an inch, and lift up an inch.
Keeping the squeeze of the ankles and the inner thighs. Down and up eight more. Eight, seven, how's the upper body? Neck is long and free of tension. Six, five, four, three, two, and one.
Come all the way up, and lower the heels down. You should be feeling that heat in the legs. Let's change our foot position to our Pilates V posture. So again, think about being on a reformer carriage if you've ever been on one. You would have the carriage behind you, your shoulders against the blocks, your head against the headrest, and your feet onto the foot bar.
Lift the heels high, and connect your heels all the way together. Give them a good squeeze. Draw up through the belly, draw up through the pubic bone. Let's repeat our bend and straighten. Bend, all the way up.
Remember, little bend is okay, but focus on the lift and squeeze. Eight more. Down and up. Make sure your grip is light if you're using a balance aid. Down and up, push evenly through your big toes, and through your baby toes.
Last two. And one. Go down and hold. Keep your heels squeezed together, and we're gonna circle the pelvis, similar to what we did in the beginning of our class today. Remember, these circular motions are very good for baby.
Scoop, tuck and circle. We'll do four in each direction. One, two, think of this as standing abdominal work. Three, and four. Keep the shoulders open, and reverse your circles.
One, two, three, and four. Lift all the way up, and lower the heels down. Nicely done. Let's give those muscles a break, and turn to face towards your balance prop. Now stand a fair distance away.
I would say about a leg's length away. So longer than your arms. Separate your feet so that they're comfortable onto the ground and you feel rooted. Shift your weight to one side. I'm shifting to my left side.
And send your right leg back. Take your arms up, and squeeze your seat muscles on your back side. So what I think about, is stretching my leg long like we did in the beginning of our warm up, and squeezing my bum, and that's gonna lift my leg an inch off the mat. Now keeping that squeeze and lift, hinge forward. You should be able to comfortably touch your balance prop.
So I don't wanna grip with fear of life, but I am gonna push down onto it, so it helps me to stabilize. Engaging through your back muscles, and squaring your hips. Push off the earth, and come all the way back up. Now would be a good time to readjust if you're not in the right position. Hinge forward, using the seat muscles, stay long, square those hips and push off your standing leg to come up.
We're gonna do five, so three more. Hinge, take a moment to find it. Push to come up, two more. Hinge, and sometimes slower is a little bit harder when we do these ones. Push to come up.
On the next one, let's stay in the hinge position. So hinge, lift that back leg, and hold. Square the hips. Tap your back foot down, and lift your back leg up. Five, four, so the muscle focus has changed more to my seat.
Three, two and one. Bring the foot in, round the spine, push off the ground. And come all the way back up to standing. So this is a balance class, so we have to do both sides to see how symmetrical we are, or maybe are not. So find that standing leg.
Now should be the opposite leg. Shoot the other leg back. Remember, the reason the leg is lifting off the ground is because of the glute muscles. So if you don't feel the seat, and you feel something else, like your lower back, I encourage you to find that belly contraction, and focus on your buns. Really straighten your leg, that'll help.
Arms go up. So let's just practice one first. So hinge, pause. Make sure you're in the right position, this is a good time to readjust. Neck is long, back leg is straight, abs are engaged.
You push off of your standing foot, not off of your hands to come all the way up and tap. Now that we know it, let's do our five. Hinge, and come up. Hinge, squeeze, squeeze, squeeze that seat. And lift.
Back leg strong, abs are in, three more. Hinge, and up. Two more, hinge, and up. Let's hold the next one, hinge and hold. Readjust.
Back leg taps down, find length through the spine, five lifts. Four, three, two, one. Foot goes down. Round the back, push off the floor to come all the way up. That was awesome.
I'm gonna turn around and do a series facing the other side. This is good, because you're gonna be able to see my upper body. Stay facing toward your television or your computer though, so you can stay with me. So here I am now on my other side. Opposite hand is on my hip, and I'm gonna go right into that Pilates V that we did on the other side.
So heels are together, remember we lift it and then we connected our heels, okay? Now the last time we practiced just going down and up. Let's put a little rhythm into that. So come down into your bent position. And just find your alignment, shoulders over hips.
From here, we're gonna do three mid-range presses. Down a little, up a little, one. Two, three, all the way up and squeeze, really squeeze. Feel your thigh muscles externally rotating, the seat is active, the tailbone is heavy. One, two, three, up squeeze.
One, two, three, up squeeze. One, two, three, up squeeze. One, two, three, one more set. Heels are connected, knees over toes, and squeeze. Go down and stay down.
Let's do those hip circles again, you'll be able to see the movement differently from this angle. Scoop, circle forward, and back to center. Now keep those heels together. Four, three, like standing core work. Two, one, reverse.
Four, three, two, one. Come all the way up, and lower the heels down, very good. Come to a parallel position, we were here on the other side. Lift the heels up nice and high, squeeze the ankles together, bend the knees. Now we're gonna play a little bit with tempo on this side as well.
Instead of going up and down on the body, we're gonna go down and up in the heels. Three times, that's two, that's three. Push lift. Let's do it again. Get low, tap one, two, three, and push lift, squeeze.
Get low, one, two, three, I just caught myself having a death grip, don't do that. And come all the way up. One more time, go down one, two, three, and push all the way up, and lower the heels down. Very nice. Turn to face toward your balance prop, very good.
Let's do another standing balance series. So I'm gonna start with my left leg heavy. Again, I'm a comfortable distance away, you might have to readjust once you've done it a few times. Send one leg back like you remember from last time. Squeeze the seat while staying long and decompressed through the spine.
Take the arms up like we've already learned. Hinge forward, lifting the back leg up. Now this time, we're gonna bend both knees as we round our back. You'll remember this series from the mat. Round, bend, scoop.
Stay here for a moment, shoulders away from the ears. Push, lengthen, lift, okay? That's the series, five times. One, two, three, make sure your back leg is very straight. Four, and five, hold the back leg up.
Bend and straighten your standing leg. Five, think of this as the grand finale. Four, three, two, and one. Both feet down, both knees bent. Round the back, push the earth away, and come all the way up.
Now we could just forget about doing the other leg, and move onto the next thing, but this is balance class so we have to do it. So the sooner we start, the sooner we're through. Opposite leg is stabilizing, other leg is back. Okay, we've got this. Drawing the hip bones or the pubic bone forward.
Feeling the tailbone heavy, lifting the arms up. Hinge forward and pause for a moment, just settle in. So rounding the back, both knees bend. Stay here. Watch the shoulders, okay?
So root them down, pushing down through the pinky side of the hand is gonna help you keep your shoulders away from your ears. Push, don't go into your cow, just go into your long spine. Five times, round, and lift, one. Two, work on that back leg getting straighter. Three, four, and five.
Standing leg, bend it a little, and lift. Sometimes less is more. That's two, three, four, and five. Place the foot, round the spine, push to come up. And you're all the way up to standing.
Nicely done. Let's continue with this idea of working our core, working our hips in a vertical position. Standing with your feet in a Pilates V position. So we know this, we've been here before. Taking your outside foot forward.
That's one one away from your balance prop. Hand onto the prop, opposite arm comes up. Now your front leg is gonna lift. And as your front leg lifts, you're gonna do a little abdominal flexion. Now for me, I have a baby's butt right about here, so I don't flex a lot.
Just enough to feel a contraction through my front, and some length through my back. If you wanna flex more, you can. Exhale lift, inhale lower. Exhale lift, inhale lower, good. Exhale lift, inhale lengthen.
Exhale lift, standing leg is strong. Let's do four more. Four, think about the leg getting up being more important than the chest getting down, yeah? So leg up, three, standing leg is strong. Two, and one.
Take that leg and bring it to the side. Now we're gonna practice the first set, trying to keep the hips level. Lift, and tap, then we'll add a cinch, so don't cinch yet. Lift, and tap, lift, and tap, I feel my arms working too. Is that what you're thinking?
What about my arms? Yeah, I do too. And up, standing leg is working to hold you up. Let's add the cinch toward the direction of the leg, and up. And up, and up, three, two, and one.
Take the arm down. Bring the legs to parallel position, and come a little bit further away from your balance aid. One more exercise before we turn around. I want you to bend the knees a little. Laterally flex toward your balance aid.
And feel that you can anchor your hand. Now I've got my elbow bent, so I can engage through my back. Avoid overextending the elbow, or letting the shoulder roll forward. Outside hand is on the hip, leg extends. Now this one is all about less is more.
Especially if you do have some sciatica, pain or stability issues, okay, less is more. Think length, leg up, leg down. Think length up, and down. And when I think about length, there's a few things I'm thinking about. One is creating space in my hip.
Where my thigh bone goes into my pelvis. I'm trying to create space there. The other element of length is creating space in my torso. So I'm trying to lift my ribs away from my hips, so that when I stand back up vertically, I'm taller. On the next one hold, circle the leg.
Four, three, two, reverse. Four, three, two, one. Bring it in and push to come up. So hopefully I've kept that length and space, which means I would be taller through the sides. So let's even it out.
Finding our balance on the other side. So first, starting with the standing abdominals, Pilates V position. Light hand grip, leg comes forward, arm comes up. Keeping your standing leg strong, little bit of a C curve, but more important than the C curve is the lift. Put them together.
And tap, and length, good. So just a little flexion in the spine. Lots of flexion in the hips and trying to feel that shortening of the abdominal wall as the leg comes up. Three, two, one. And take it to the side.
Now I'm not gonna cinch yet. So just practice the movement of lifting the arm, and the leg in unison, and working the stabilizing glute to hold you here. Two more, and we'll add the cinch. And one. Now remember I said this lateral tilting and movement of the hips is good for the baby.
So lift the hip, laterally flex the spine, find your neutral pelvis. Exhale, and lift, laterally tilt, level hips. Up, four more. Three, two, one. And bring it in, good.
Come to your parallel position, and come a little bit further away for side leg work. Bend, lift to laterally flex, so you have that space, soft elbow. And you can see on this side that the shoulder is not rowing forward. So make this full body. Take the outside leg long, lift it up, and just for a moment, pause.
Finding your length. Find the pubic bone drawing forward, the tailbone drawing back. Lengthen space, lengthen lift. Less is more. Now make a note, the more your upper body is tilted, the higher your leg will be able to lift.
The higher your upper body is, not so high with the leg. As long as you're feeling effective work in the seat, no pinching or tension back here, and your standing leg working, you're good. On the next one, hold the leg up, circle the leg, five, four, three, two, one. Hips don't move when you circle the leg. Five, four, three, two, one.
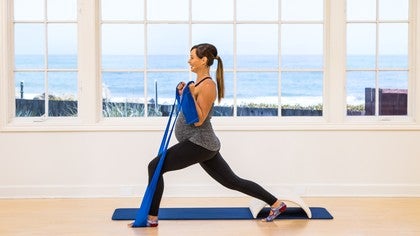
Bring it in, lift up, and you've made it through that part. We do have some more upper body to do, so let's grab your resistance band and I'm also gonna ask you to grab either a rolled up towel or mat. A baby arc barrel if you have one, that's what I'm gonna use, or a yoga bolster. Something to help you sit up a little higher, and something you can lie back on. Are you ready for some upper body?
I have a resistance band that I feel is an appropriate tension. It also just happens to match my mat. So if you have a band that you feel is too light, just fold it in half, and voila, you've doubled the resistance. If you feel like it's too heavy, then you can just open up your grip a little bit, so it's not so heavy, okay? So play with it, make it your own.
I'm gonna fold this in half, mostly for aesthetic purposes, so there's not a lot of extra hanging out. I've got my arc for later, so I'll get there in a second. It's just gonna be out of the way. Be careful if you have a prop that you don't step onto it. And we're actually gonna come into a lunge position.
So one foot forward, one foot back. Now we've been here before. This is our crescent lunge position. So reaching the arms forward, I have the band between my thumbs, but I'm gripping the band with my whole hand. So thumbs, whole hand, good.
From here, the arms will go up. And the chest will pitch forward. Now what I'm recreating, is positions that we do lying prone, or on the stomach on the mat or prone on the box, which we can't do when we're pregnant. So a lot of upper back and a lot of upper body working here. So find your lunge position, and won't you just press out with the band.
Eight times, legs are important, so engage them. Last two, last one. Lift the whole chest up, repeat the presses out. Keep the wrist strong. Abs are engaged, three, two, one.
Pitch forward, one more set. As we come up, I want you to pull out on the band, bring it back behind you. As you pitch forward, reach. Pull, squeeze the back, pitch reach, pull squeeze. One more time.
Pull squeeze, pitch reach. Use the legs, step it up, roll those shoulders out. Balance, that means we have to do it again on the other side. Opposite leg is gonna step back. Nice wide lunge.
That's gonna help you with stability. Don't make the legs narrow, make them wide. Bend into the front knee, reach the arms. Pitch forward. Maybe you can get the biceps a little higher than the ears.
Try to avoid being here. Get a little bit of a lift happening. Use the whole hand as you press out. Eight times. Neck is long and free of tension.
Four, three, two, one. Lift the whole shape up. Second set. Push, push, resisting the end, working the press. Four, three, two, one.
Pitch forward, now as you come up, pull out, squeeze, open the chest, open the heart. Reach forward, pitch. So think about moving through neutral into a little bit of extension, and finding your long line again. Two more, pull squeeze and reach. One more, pull squeeze and reach.
Use your strong leg muscles and come all the way up, roll the shoulders out. Nicely done. We're gonna come back to a lunge position, except this time in our lunge, you'll open up your band. The foot that's gonna remain forward will stand onto the band. And we'll stabilize it, right about there.
Leg goes back, finding your lunge position. Choking up quite a lot, okay so you want this one to be heavy. Choke up a lot, come to your vertical lunge, so not pitched forward. Elbows narrow into the sides. Bicep curls, and release, eight times.
See if you can co-contract your stomach muscles. Drawing in, hugging the baby as you wrap your abdominal muscles three dimensionally around them. One, there's only one in there, for me. And pull, and pull, pitch forward, release a lot of the tension, making the band longer. Come back up to your vertical.
Bend, push up, bend and release. Bend, push up, bend and release, two more. Bend, shoulder press, and release, one more. Bend, push, and release. Strong legs to lift you up.
Give it a little shake out. And try the same thing on the other side. Now the more often you do this video, the more you'll be able to adjust and gauge what tension is appropriate for you. So what's important in the first set is that it's heavy. So get some weight.
Step back, square off the hips, instead of pitching forward, try to stay vertical and lifted. Legs are engaged as we pull. And back, chest is open, and squeeze. Working it in both directions. Don't just collapse on the way down.
Three more, two, and one. Pitch forward to adjust, release. You want more band, you want less tension. It starts with a curl, we add the press, we bend and release. Curl, press up, bend and release, two more.
Curl and release, one more, curl and release. Step forward, release the band. Now I know you're thinking it, you wanna sit down, I do too. So let's sit down. We're gonna sit onto your prop.
So I've got the arc barrel. You might have a rolled up mat, you might have yoga blocks, you might have a yoga bolster, by sitting up onto something, it allows me to have a lot of freedom in my pelvis, in my lower back, zero tension. That's what we're going for, zero tension. Sitting with the legs extended, find your band again and wrap it around the feet so that it covers the toes and it covers the balls of the feet. So just kind of like that.
If the band falls off the feet and slides towards you, it's okay. It happens all the time, okay? Just put it right back on, and pretend like it didn't even happen. We're gonna do a second set of bicep curls, except now that the legs are out of the equation, the focus is on posture, so sit very tall. You need lots of tension again, okay?
So choke up. Drawing the elbows into the sides, pulling the abdominals in, exhale this time we're pulling the elbows up, or the hands up towards the shoulders, elbows stay in and releasing out. So make this more about your posture than it is about your lower body. Bending your knees a little bit if you're feeling tension in your low back, or sitting with straight legs if that feels more natural to you. Try not to lean back.
We'll do three more. Wrists are long and strong, two and one. Now hold this position. Lift the elbows up high. Release a little, and with the elbows up high, pulse the arms in.
Pull, and pull, and pull, and pull, last four, keep evolving in your spine. Three, two, one, release it out and lower the arms down, very good. Criss-cross the band so it makes an X in front of you. Now this is a good time to note, I'm sitting with my feet apart, it's a little bit more user friendly to a client or a body in their third trimester like myself. If you're more comfortable with your feet all the way together, bring them together.
Push through the baby toe side of your foot so you feel like you're pushing evenly through your foot as well. So with the band crossed, grab ahold. The extra band is coming out through the pinky finger side of the hand. Again, make it about posture. Bend your knees if that feels better for you.
Exhale wide row, so elbows are high, chest is lifted, inhale release. And you're gonna want a lot of tension here too, so don't be afraid to choke up on that band and work it, okay? These muscles are gonna be so important post partum. Reach and pull. I'm thinking about the back of my head.
Right at the back, the crown of my head. I'm thinking about that going straight up towards the sky. My chin staying parallel to the ground, and my tailbone heavy. On the next one hold. Release an inch, now don't think about pulling from the hands, pull from the elbows and pull from the back.
Pull squeeze. Make it about posture. Five, wrist are long, four, three, chin level to the ground, two, and one. Send it all the way forward, very good. You can uncross the band.
Now here's what I want you to do. Whatever you're sitting on, move forward so you're not sitting on the apex. Do you see how the top is here, and my bum's down a little bit, okay? So find that position for you. Keep the feet anchored, keep the knees bent.
Come back to your bicep curl position. The position you started in. Lift the arms up. Now all that resistance you feel in your arms, that's actually gonna help you with the next one. So keeping the elbows up, inhale, start to lean the chest back.
This is a little bit of core work. Exhale, using your biceps, and using your core to come back up. Now that you know what we're doing, you might wanna inch forward a little bit more so you're ready for it, okay? So inhale, my arms will straighten as my chest goes back. Trying to stay flat back position.
Exhale, there's a combination of arms and abs to get back up. Inhale, exhale. This is a short box series that we do on the reformer. Think of it as a flat back hinge, and exhale. Scoop to come up.
Inhale, try not to look at the sky when you hinge back. If anything looks slightly downwards, inhale. Lean, exhale, pull. Three more, inhale, lean, exhale, pull. Inhale, exhale.
One more time, lean back, lift up. And release, very good. Let's do that with our row. So make your X, anchor your feet, choke up. So this was the movement we were doing before if you remember.
Wrists are long and straight, feet are heavy, tailbone's heavy, go into your row position, elbows are high. As you lean back, the arms will get straighter. Maybe they won't get all the way straight, but straighter. And exhale, you're using a combination of core and upper body to come back up. So hinge, lean, stiff as a board going back, exhale coming up.
Inhale, tilt lean, exhale. Don't look up when you go back. Inhale, if anything, slightly tilt your gaze down towards where the floor and the wall meet in front of you. Last three, lean, lean, lean, lean, lean. And pull to come up.
Last two, lean, lean, lean, lean, lean. Pull to come up, last one. Inhale, and exhale to come up and release, awesome. Don't lose this, we're gonna use it for the next one. But adjust your position.
So kneel beside your prop. Now this is gonna make it a little bit easier for you to do a side bend. So you don't have to touch the floor, you just have to be able to reach your prop. Taking your band down so that it's on, remember, it could be your rolled up blanket, your arc if you have what I have, a bolster. And then your lower hand is gonna go onto it, okay?
So take a moment, find that setup. Your knees are hip distance apart, heavy and anchored. When I'm in my lateral flexion, I feel a nice stretch and opening through my side. And I have to find the right amount of tension in the band to work my triceps. So since I'm filming a video, I'm gonna really go for it.
Make sure that you find the right tension for you though, okay? So that's where I'm gonna be, right about there. Keeping your hand anchored, hips forward, look down, or look up. One might feel more natural for your neck position. Exhale, straighten the arm, inhale, bend the elbow.
Exhale push, inhale bend. So two awesome things happening here. One, some good upper body work. Two, some nice opening through that right side. Four more, four, three, notice how the elbow stays very still in space, notice how my arm is shaking.
Two, and one. Now baby bends, little bend, ready? Eight of them, eight, seven, I am gonna look away. Six, five, four, three, two, one. Take it down and come all the way up.
Good, I feel really good through the side. So either move your body, or move your prop, whatever works easier for you. And let's see how we do. Placing the band down, you'll have to stabilize it with your lower hand. Approximately the same amount of tension that you used on the other side.
Anchor your knees, hips push forward, laterally flex so your hand is on your prop, try to open that top shoulder up. Exhale, straighten the arm. Inhale, bend the elbow. Exhale, push up. Inhale, bend.
You can look up, the nice thing about looking up is you'll be able to see if your elbow is moving. It should stay in the same spot, it's just hinging. But if you find that that creates tension in your neck, look back down. Four more here, four, three, roll that top shoulder open, two, and one. Look at it, baby bend, eight presses.
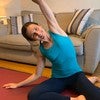
One, two, three, four, five, six, seven, and eight. And come all the way up. That was very good. Place the band down, come into a comfortable seated position, so your mermaid legs. Let's stretch and breathe, we've earned that.
So one hand goes down onto your prop. Depending on what you're using, this might feel more comfortable or less, so make adjustments so you can comfortably come to a sideline position. Inhale, lift your outside arm up, exhale, slide over your prop. Now let your head feel heavy onto your arm. Let your hips feel heavy.
Now scoop the belly in, and come into flexion. And like I said, for me this is a little bit limited, although right now, it's really more about my upper back than it is my belly. Come back to your side position. Lift the arm up to the sky. Now look up at it, let the arm go back.
Take your bottom hand, give yourself a little bit of support through the head. And let the chest and the whole side open up. And feel free to stay here for a few breaths. Come back and into your sideline position. Now in Pilates, usually we're doing a lateral posterior breath, your breathing into the back body.
But what I want you to think about during this series is breathe into the belly. Breathe into the front body. Inhale, see if you can expand your abdominal muscles. And exhale. And this is the type of breathing you're gonna wanna do during your contractions, breathing into the front belly, feeling movement and expansion, like your inflating a balloon.
Lift the arm up, support the neck. Let the chest open, same thing. See if you can breathe into the front belly. One more time. Come all the way up, come through your sideline position.
Use your hands, give yourself a little bit of help to come on up. Either move your body, or move your prop. Let's do the same thing on the other side. So I'm in mermaid legs, if there's another lower body position that feels better for you, go ahead and take that position. Inhale lift, exhale, just slide.
The nice thing about using this arc barrel is it's really helping to support the shape of my spine. Exhale, flex. And remember, this is more about the upper back, so feeling the shoulder blades wide and behind you. Lift the arm, look back, support the head, take a stretch. And see if you can feel that breath expand.
I can feel my belly touching my thighs. I was saying earlier, that's a weird feeling. But right now, I can definitely feel that I breathe into the front. Come back to the side. Let's do it again.
Flex, scoop. Lift, support the head. Let the chest open. Again guys, these are really good exercises to do postpartum as well. Come back to your side position, push, use your arms, help yourself to come up.
And there's one last thing we have to do, and it's the best thing. So use your prop in a way that you can lay back onto it, so your shoulders are gonna be higher than your hips, okay? So in our third trimester, we're not gonna be lying down flat on our back for very long periods of time. You might even want a pillow behind your head here. So assisting yourself to come into a comfortable position, and that might mean opening the legs wide, that might mean knees are bent, feet are onto the mat, maybe legs are straight.
Remember, maybe a pillow underneath the head. This is your time to just sort of rest. Think of it as a Pilates shavasana. I like to open the arms either out to the side, sometimes I even like to take the arms back if I'm feeling a little bit tight through my chest. I might even grab opposite elbows and let my arms feel heavy behind me.
And so we just get to breathe, and hold, and think and get a little deeper into our body. I don't always do these movements in a Pilates Anytime class. These are rare opportunities where we're not breathing heavy and sweating, but it's as important as all that other work that we did. So I have definitely been taking the time to find balance in my own workouts. So that I can find more balance in my everyday life, and my emotional state.
So what I do, is I take about five minutes, sometimes 10 unless I fall asleep, then it's a little bit longer, where I just lay in this comfortable position. I focus on my belly breathing, breathing in through the nose, finding that expansion, and out through the mouth. This is also a time where I start to either just send some love to my baby, sometimes I think about positive affirmations, visualizations of the birth process, positive ones of course. One of the affirmations I love is that I release all fear, and that I welcome excitement and joy about this birth. That was a hard one for me to release fear.
For me, fear came from the unknown. So what I did is I researched, and I found out a lot of great information. And I'm not fearful anymore. All I have is joy, excitement and love. Another affirmation I love to think about is that my body and my baby are in harmony together.
And that they know exactly what to do. So I can get out of my head a little bit. And as a Pilates professional, it's hard to get out of our head. We have to think a lot. So out of the head, and into the body.
I take my time, I breathe here. Make it your happy place. And my suggestion for you, is at least five minutes if you can in this position. Thank you for joining me for this class. Feel free to stay here for longer than five minutes.
Good luck with your pregnancy, and I will see you guys postpartum.

Prenatal Pilates: Third Trimester Reformer Workouts

Mention
 |
Courtney Miller (Teacher) |
 |
Allegra D |
|
|
Marija V |
|
|
Charlotte F |
 |
Hagar S |
|
|
Dani P |
|
|
Katy B |
 |
Eva Alonso |
|
|
Agata G |
|
|
Maggie M |
|
|
Paula P |
|
|
Teresa F |
|
|
Emelye Jane P |
|
|
Nicole C |
 |
Jacqueline D |
|
|
Lauren A |
|
|
Shari A |
 |
Kerry H |
 |
Nicola Laye |
|
|
Ashtyn C |
 |
Gabrielle C |
 |
Z A |
|
|
Angela |
|
|
Liz M |
Comments


You need to be a subscriber to post a comment.
Please Log In or Create an Account to start your free trial.
