Description
About This Video
Transcript
Read Full Transcript
Welcome to Pilates Anytime. I'm Elizabeth Larkam, so honored to be back with you on Pilates Anytime in my sixth year. It's a real privilege to be with you, the global Pilates community. I'm here with Norris Tomlinson. Norris and I have collaborated for 17 years.
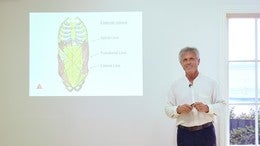
Norris is the creator, the owner, the director of Sirron Pilates in the Andersonville neighborhood of Chicago. In our Reformer program today I'm going to continue with the exploration of fascia in motion and turn attention to Biotensegrity to living Biotensegrity the architecture of the body in motion that's the interplay of tension and compression forces. Now let's setup the Reformer. You will need to use a box. And the box is to be one box length from the riser end of the Reformer.
Just like this. Start with the foot bar down and don't use any springs at all. So off with this spring. Then you can center the carriage with respect to the box so that the pad on the carriage is symmetrical with respect to the box. And put the headrest up.
We have the loops outta the way because we won't need them until the very last section of the Reformer class. If the shoulder rests will come off the carriage it will be easier for you to do this first exercise without the should rests. If however, your shoulder rests stay on, that's completely fine. We'll work with them in an effective way. Now you'll have a non-skid mat at the foot bar end of the carriage so that you can create a really stable ground force with your foot on floor.
Now climb aboard the carriage so that the carriage is even with respect to the box. Your hands are over the side edges of the box and the chest bone, the light from your chest bone is right over the center of the box. I don't recommend having your hands forward over the corners although that might be more comfortable for your wrists it's also a little unstable, unsafe on the box. Neither do I recommend having your hands close to the frame because as we move forward in this program it will be useful for you to launch yourself forward onto your hands and that's why we'd like the box to be stable when you're there. Now, there are so many different styles of Reformers these days, which is a good thing because we have more variety and it shows our field is growing, is evolving.
It's important for you to have your hands on a platform that's a good match for the height of the carriage. It's better if the platform for your hands is slightly higher than the carriage. If you have a higher Reformer, a clinical Reformer height, the box will be at the same height as the carriage. So you could put some booster blocks underneath your hands that will prepare your shoulder girdle to be more stable. More scapular depression instead of shoulders up to your ears, not a good look, okay.
If you have the Reformer close to the ground then also find a platform that's a couple of inches higher. Now, by this time you're probably thinking could we just move along? But I'm hear to tell you that the Pilates instructor that you want is an obsessive compulsive individual who's had enough therapy to get over herself. And that's why we're here. Okay, here you are centered on the box as noted.
Your central axis long from your tailbone through the top of your head. Push with your riser hand, pull with the foot bar hand. And your whole structure will glide from one side to the other. This is for organizing your shoulder girdle and activating your anterior and posterior oblique sling system. Just in case one of your clients says to you, what am I feeling?
Yeah, now level in the center and lift hover one knee shin and foot. So this is keeping the carriage steady. Turn your pelvis around the head of your femur. Keep the organization, last two coming up, of your shoulder girdle. Now, hover one leg up and resume the side to side glide.
Keeping your supporting femur perpendicular to the carriage. It's the shoulder work we were doing before. It's a lateral translation. Last one coming up here to each side. Now return to the middle.
Put the new knee down, hover the other leg and resume. Keeping your thigh bone perpendicular. Your thigh perpendicular to the carriage. No rotation here of the femur or of the pelvis. Or we'd prefer to edit that out.
Last two to each side, coming up. And last one. Now that your shoulder girdle is prepared we're going to work around those shoulder rests. So side step with your knees towards the foot bar end of the carriage. Not so close that you'll be off the edge, nope.
You need to leave a few, an apron of space such that you can be safely on the side of your thigh. Now, push with your riser hand. Glide your central axis towards the foot bar. Push on the foot bar hand and immediately rotate your pelvis so that your navel aims to the risers. Push down with your hands and launch yourself forward over the box, exhale, push with your foot bar hand and return your thighs to vertical.
You know you just can't make this stuff up, okay. Push with your foot bar hand. Glide to the risers. Immediately rotate and if we did the job well you will avoid being impaled on the shoulder rests. That's not a good feeling.
Push with your riser hand and return. We'll do this again. Slide to the foot bar. Immediately rotate thoracic extension, rotation of the pelvis and the lumbar spine for your abdominal obliques. Push, pull, rotate shoulder girdle descending for support.
Now we'll do that same thing again and add onto it. Laterally translate, rotate. While you're here, push with your riser hand. Pull to the foot bar, push pull. Whoops, I'm pretty close to that edge.
Twice more gliding and gliding. Continue to lower your greater trochanter until it's time to return. Laterally translate to the new side. Knees even with the riser hand immediately rotate so that your knees are even with the foot bar hand. Cheating your pelvis away from the shoulder rests.
Side glide now. Lowering and lowering, and lowering your pelvis. Lifting, and lifting and lifting your thoracic spine. As if you could suspend your pelvis from your shoulder girdle which is not a common occurrence. Come back to center.
Now we finished with the use of the box in part one. We'll leave the box here because we'll come back to it shortly. Bring the carriage towards the foot bar end and put on a spring. I'm gonna put on a blue spring at the top. Norris is also.
The foot bar is down out of the way. You'll be standing diagonally behind the foot bar and your gesture foot will be on the carriage. Align your second toe on the upholstered corner so that your big toe is off the front edge of the carriage and your other toes are on the top of the carriage. Now sending your supporting heel slightly outward. Slightly outward and that will make a strong connection up to the lateral pelvic stabilizers.
The gluteus medius. Sure, I'll get right on it. Now a standing leg press. Exhale to extend, inhale to come in. Lifting your chest bone.
Nodding your nose downward. Bring the jaw up and back she said to herself to put her head on her neck. A long standing axis from the center of your arch out through the back top of your brain. This time we'll slide out and stay out and glide to the side and come up. Extend your knee, glide further, making sure you have a clear ground force on your standing foot.
Exhale to press, inhale to press a little further. Planting the sole of your big toe firmly. And we'll take one more of these. Driving your lifted sitting bone towards the opposite ankle bone. In order, as if one could, keep the pelvis level and steady.
Now, one size never fits all. So one size of equipment, it isn't right for everybody. Let's just say you're of a different height and leg length than I such that the carriage feels uncomfortably high for your hip joint. Build up the floor giving yourself a safe and stable platform so that you can get your pelvis higher with respect to the carriage. Or if you are on a Reformer lower to the ground you might, you're outta luck unless you're going to put your Reformer on a stair step and stand lower.
So this is beyond my, as they say pay grade or expertise. Alright now, pushing out to straight leg having accommodated the floor to the Reformer. Glide a little to the side and now begin to rock. So you're rocking your pelvis over the head of your femur in the frontal, the coronal plane. So you push your foot on the mat.
Aim your pubic bone towards the lifted thigh and rock your pelvis shortening this side and then lengthening this side. Shortening this side, it's a hip hike. And then a hip drop. Rocking up. Now often times my clients will confuse or combine rocking the pelvis over the head of the femur in the frontal, the coronal plane with something else.
Which is a lot of fun, but that's another channel. That's not my channel today. Alright now bring your hands down. One hand is on the foot bar the other hand is on the frame. And we'll take this action, similar action again.
With the spine parallel to the ground. Exploring more range of motion in abduction. Push out now Norris and stay out here and slide further creating the ground force with your foot on the mat. Especially pressing down with the sole of your big toe so that you don't slip and then come back in. Exhale to slide and translate.
Laterally translate, inhale to come in. Twice more here, way out and down. Making sure that your heel is anchored on the mat. Now as you push the carriage out and translate, rotate towards the risers and rotate towards the foot bar. Rotate towards the risers and the foot bar.
And we do one more of these. Inhaling, lengthening the riser side of you pelvis, exhale. Change to the new side, rotate. And rotate to the risers. The pelvis is aiming towards the risers and the thoracic spine is aiming towards the foot bar.
Now a long wingspan. Sweep your straight elbow hand up to the ceiling creating a ground force with your hand on the foot bar and then take a dive looking long beyond your hand. Two more of these. Push turn, rotate turning everything in the same direction at the same time. Pelvis, ribs, shoulders.
Neck, head and eyes. Change hands now. Put one hand on the frame, turn rotate. And to the risers, and rotate. Aim your carriage sitting bone towards your supporting leg sitting bone.
So that both sides of your waist are long. As you might expect the new side awaits. So turn around. Create a good ground force behind the foot bar. Diagonally behind.
And your second toe on the upholstered corner of the carriage, your big toe over the front edge. We'll stay standing now, vertical, for the leg press. Push out and return. As you push the carriage out you aim the lifted sitting bone towards the supporting side ankle bone and you have the idea that your sitting bone is dropping down towards the ground. One more here so the side of your waist is long.
Now do that again Norris. The leg press and create a firm contact with your left big toe and slide the carriage out further. And then come to vertical, bend your knee in. Continue this action. Push out and side glide and return.
Keeping your pelvis level and steady in the frontal plane. One more of these because it's interesting. Drive your sitting bone down. And come back in. Now push out to extended knee and it's the pelvic un-leveling.
Push with your ground force foot, your mat foot, and rock your pelvis towards the risers and then rock your pelvis towards the foot bar. Yes it's a small range of motion and a necessary range of motion at that. The mobility of your hip, of your femur head in the acetabulum, this is useful and necessary for a medial and a lateral hip glide. Twice more here making sure that it's not a rotation or a shimmy but a clear motion. Come all the way back in.
Now put your hands down on the foot bar and the frame. And we'll take that in a different plane of the torso. Push all the way out with your leg keeping your central axis level and steady. One more here. Next section push out to a straight leg and side glide.
And bend your knee in aiming both sitting bones back behind you. And while you're at it, spread the sitting bones wide. Push out, now turning towards the carriage bring your hand to your shoulder, turn towards the risers and then turn towards the foot bar. Turn towards the risers. And towards the foot bar.
One more of these. Change hands, one hand on the frame. Turn towards the foot bar, turn towards the risers. Foot bar and riser. Once again.
A long wing span hand on the foot bar. Sweep the ceiling. Exhale. Look far beyond your outstretched hand. Inhale.
Extension and abduction. So knee extension and abduction. Yes, rotate, change to the new side. Hand on the frame, use the ground force of the hand on your frame to encourage rotation of the thoracic area around the central axis. This one is particularly demanding because the pelvis is turning in one direction.
We're going to do one more because it's so demanding that it's difficult for me to do. Rotate and come back in. Now climb up from here all together. And next we're going to do some supine overhead arm presses. Lying on either the roller or the half roller.
Bring the foot bar all the way up. Make sure it's secured in place. And change to the spring that you'd like to use for your overhead arm presses. I'm going with a red spring on the hook on the bottom deck and Norris what's your preference? Red on the post, as it should be.
Bring the head rest down and then put your roller in place. Okay we are, we're keeping the boxes right where they belong because immediately after this we're back to the use of the box. Now if you're looking at the half roller and saying. I think you'll need to move that back a little Norris for your head, I think. If you're looking at the half roller and saying, bummer I don't have one of those in my studio, in my closet.
Or you're looking at the full roller and say no, no, no, no, no I'm not getting on that thing. I understand your feelings. You need some kind of platform that will support your head. Because if you lie on the carriage your head is free in space. Okay, climb aboard.
And once you get your sacrum and your head supported, place your feet on the head rest. Now if that feels a little Cirque du Soleil like to you, you could certainly have your feet wider apart. More in line with the shoulder rests, as it suits you. Have your hands over the end caps of the foot bar. And as you inhale move your thoracic spine in the direction of the roller.
Because inhalation will deepen the spine curves and can give you a more secure ground force into the roller with your thoracic spine and your sacrum. Don't rely on your head, the pressure of your head into the roller for stability. That's not sound on many levels and can result in a headache. Alright so as you inhale press out. Exhale to come in.
And once more inhale to press out. Turn your head neck and eyes to one side. Looking beyond your bending and straightening elbow. Turn your head, neck, and eyes in the direction of the other side. Now keep one foot firmly planted and cross the other thigh.
Of course exhaling is just fine. You could exhale as that will facilitate scapular depression. Turn your head, neck, and eyes. So you have a choice. Of course you always have options.
Inhalation will deepen the spine curves. And exhalation will facilitate scapular depression. Plant the new foot on the head rest and cross the other thigh on top. Collar bones wide, turn your head, neck, and eyes. And turn your head, neck, and eyes.
Now put your feet wide apart on the frame. Open both arms wide to the side. Palms open, fingers spread. Shift away from the camera towards the ocean and turn your head, neck and eyes towards us. And then look away from us towards the ocean again.
Roll the roller towards the ocean. Look towards us and roll the other way. Bring one arm down. The left arm down, Norris and the right arm up. Roll towards the bottom arm, look towards the top.
Roll towards the top arm and look to the bottom arm. Once more of those, palm wide and fingers spread. Move your arms to the other diagonal. Roll towards the uphill arm and down the hill arm. Looking away from the direction in which the roller is rolling.
Now bring your shoulder blades into the roller. Telescope your arms in and hold on underneath the bar. With your thumb on top and your fingers, your palm underneath. Your palms are aiming upwards towards the ceiling. This will initially be a more secure grip when you bring your legs to tabletop.
Inhale to push out. Exhale to bend. Or exhale to push out and inhale. Turn your head, neck, and eyes. Nestling the back of your lower ribs onto the roller.
And turn your head, neck and eyes. Widening your collar bones connecting low ribs to pelvis. Now put your thumbs underneath the bar and do this again. A second one, overhead arm press. Turning your head, neck, and eyes.
Without the opposable thumb grip there's a little more instability that you can manage with proximal control. Put your feet down on the frame. Open your arms wide apart. Roll to the ocean, turn to look towards us, roll away. Turning your head, neck and eyes away from the direction that the roller is moving.
One arm goes low the other arm goes high. You can think when they go low, we go high. Oh stop me now, okay. Alright now for the dismount you can place your palms on thighs or palms together, fingers interlaced. Slide your feet forward to the risers and here you have a Pilates style roll up.
Unless you're on a half roller and your tail bone's off the edge. Now let's park this roller or this half roller or this platform. Put it off the edge and we'll take the headrest up. And we'll take the spring off. We're back to the box now.
Back to the box again. With your knees together, even with the center of the box and your hands safely over the sides of the box. Keeping your femurs, your thigh bones, perpendicular to the box, push with riser hand, pull with the foot bar hand and you will glide from side to side. Delete, omit, edit out, rotation of the pelvis. This is the front of your pelvis.
One more each side, Norris. The front of your pelvis facing the carriage. Now give each leg a turn so one leg gets it's own turn to stay vertical as you side glide. Ab and abduction of the scapula with respect to the rib wall. Press into the heels of your hands.
Change now to the new leg, Norris. So that you have a good support from the front. Bringing your chest bone up to the spine between your shoulders blades. One more each way, aiming the lifted AS IS towards the inner supporting knee. Now, walk both knees towards the foot bar end of the carriage but remember not too far to the edge because you need an apron of space.
Push with your foot bar hand. Glide to the risers, immediately as the pelvis turns towards the foot bar you lift your chest bone over the riser hand. So you have rotation of the pelvis and the lumbar spine towards the foot bar. And launching yourself with your hands. Lifting your chest bone forward and up away from your knees.
Push into the riser hand and bring thighs to vertical. Other side, inhale to the glide. As you exhale wring out your spine, oppositional rotation. Sinking your greater trochanter but not your shoulders. Push with your foot bar hand and bring thighs to vertical.
Again push pull, laterally translate. Hover your knee, rotate wringing out your spine and return. Other side, knees even with the foot bar hand. Knees even with the riser hand. Sink your pelvis but not your shoulders.
We'll do this again but add on. Inhale to slide, exhale to rotate. While you are here steady your shoulder girdle and aim your tail bone to the risers, to the foot bar. Push with the foot bar hand, push with the riser hand. So this is, it's a lot of things.
Among them, being spine lumbar extension, lumbar flexion. Lumbar extension, I've been addressing you at the camera but really it should be a more dramatic pose. Over on the diagonal. Come to vertical cause we've over stayed our welcome on that side because there was so much to say. Slide to the new side.
Oppositional rotation and while you're here tailbone back. Tailbone forward. Keep your shoulder girdle level and steady as your pelvis turns. Lift your jaw bone a little bit but keep your chin in. That's not possible.
Last two coming up. And last one. Return to vertical. We are really done with that. Now slide the carriage in and put on a blue spring for our standing work.
Bring the foot bar all the way down. And the box, we'll just move the box outta the way. 'Cause we're very done with that. We'll just go to this side. Is that right, great.
Oh, is that the right thing? You know we choreograph this furniture but I get confused. Okay, so the box goes here, ha ha. Nice, okay. So you'll be standing on your steady mat with your foot in the center of the foot bar end of the carriage and your other foot on the carriage.
With you second toe over the edge. Your heel in contact best you can. And your lifted sitting bone towards the opposite ankle bone so you're not jacked up on one side. But remember if things aren't feeling well then it's not your fault. You should blame the environment.
So you might need to build up the floor. Now if that doesn't work you should blame the instructor. It's my fault, okay. And only if you think I'm doing my best for you, then you might think oh maybe the medial hip glide is, needs a little attention. Okay, pushing out and coming in.
That's how I came upon these moves, 'cause my medial hip glide needs a lot of attention. Okay, push out keeping your pelvis level and steady. One more here, Norris. With respect to the ground. Now push out, anchor your big toe and glide out until you run into the foot bar.
Indicating change of plan here, we need a little bit more abduction. Not so you'll go into an ice skating rink split but so you have the appropriate spring on the carriage to provide support for you and the appropriate ground force with your foot. One more coming in here. And out. Now as you push out rotate.
Turn to see over your back shoulder. And then rotate, turn to see over your new back shoulder. Exhale to press. Lowering your sitting bone as you come in. Twice more here turning one lung and then turning both lungs.
Turning both lungs towards the risers and beyond. I said one more and then I got so fascinated. Now take your arms above your head. Rotate lifting your chest bone as you turn. And lifting your chest bone as you turn.
So it's not only rotating around your central axis but spiraling as if your brain could turn in the back of your skull. And one more here, really I'll stay to it. Rotate and rotate. Change now to the new side, climb off. Stand in the center of the foot bar end of the mat with your feet lined up in parallel.
Lower your lifted sitting bone towards the opposite ankle and resume. Keep your supporting leg perpendicular to the ground. And put your head on your neck, she said. Now we'll go out further, Norris. Knee extension and abduction, slide on out.
Slide in and return. Keeping your AS IS aimed to the train tracks. Aimed to the ocean. Twice more, push out and. And in and.
And out and. And in turning towards the carriage, thoracic rotation. Rotate, and come back in. And rotate. And in and.
Twice more seeing behind you and seeing more behind you. And rotate. Fingers interlaced, palms above the top of your head. Turning towards the carriage. Turning away from it.
Turning towards. And away, twice more. Appreciating the connection between the soles of your feet and your hips. Your lateral pelvic stabilizers and a lot of your gluteus medius. Come down from here now.
It's time for the single arm overhead press. For this I'm using a very light spring. And Norris, what's your preference? Red. For the single arm overhead press?
Norris is on a red spring, I'm on the much lighter one. Lock the foot bar in place to it's highest setting and then you'll put the head rest down. And your roller or half roller in place. As before, climb aboard. Scoot on down so you avoid the frontal cortex in the foot bar.
Now one hand will be underneath the foot bar. With your thumb underneath and both feet on the shoulder rests or wider. The hand that's not on the foot bar has many options. You can place it on the carriage, on the shoulder rest. Elbow on the mat or hand on your torso with your elbow off the ground.
As you inhale or exhale, just breathe and do something. All the way out to over head and come in and press out. Turn your head, neck, and eyes towards the lifted arm. Settling the back of your ribs, the back of your lungs onto the roller. Turn your head, neck, and eyes the other way.
Right. Cross one thigh over the other. Turn your head, neck, and eyes. Keeping both shoulder blades heavy towards the carriage and turn your head, neck, and eyes. Shoulder descends and moves wide on the thoracic wall.
Uncross the current leg. Cross the new thigh on top. As you extend your shoulder blade moves towards your pelvis. Turn you head neck and eyes wide to the side. And turn your head, neck, and eyes.
Now put both feet down, change sides. Change arms, the new hand has options. Holding on or not. The inhalation. Turn your head, neck and eyes towards the lifted arm.
Yup, um-hm. The inhalation will encourage a widening of your shoulder blade. Turn your head neck and eyes the other way. The exhalation will encourage the shoulder blade for scapular depression. Now cross one thigh over the other.
Inhale for scapular to go wide. Exhale, turn your head, neck, and eyes for scapula to focus on coming down. And turn your head, neck, and eyes. Change to the new thigh on top. Inhale to press out.
Exhale to come in, or vice versa. Turn towards the lifting arm, the lifted arm. And turn away from it. Plant both feet wide on the frame. Open both arms wide to the side, palms open fingers spread.
Shift your weight towards the ocean and look towards the opposite hand. Alternate sides there, looking away from the side to which you're rolling, spreading your fingers. Left arm goes low, Norris, right arm goes high. Looking away from the side to which you're rolling. Once again here.
And pinwheel your arms the other direction. Rolling and rolling and rolling, and rolling. One hand is on the foot bar again. Either thumb on top or thumb below. Bringing your shins towards the table top position.
Pressing out. Creating a clear force through the little finger side of the heel of your hand. Turning your head, neck, and eyes in the direction of the lifted elbow. And your head, neck and eyes in the other direction. Put your feet down on the frame.
Change to the new side. Steady yourself, bring your shins up. And pressing out and. And in and. Out and.
Turn towards the lifted elbow. Sorry for the clunking. And turn away from the lifted elbow. Put your feet down on the frame. Now when we do this again for each side you can keep your legs as they were before or if it suits your hamstrings you can take your feet directly up to the ceiling.
So you have options, you always have options. That way everyone's taken care of and no one's bored. So knees can be bent or knees can be extended. Here we go. Pushing out and, and in and.
And out. Anchoring your sacrum as you turn your head, neck and eyes. Anchoring your sacrum as you turn your head, neck, and eyes. For the transition bring your feet down. Change to the new side.
Prepare and here we go. Pushing out and. And in and. And out. Turning to look towards your moving arm.
And away from it. Put your feet on the frame. Open your arms wide to the side as if your hands, as if your hands started at the center of your chest bone and then cascade from the center of your chest bone out through your middle fingers. Rolling towards the ocean, look away. Look towards the ocean, one more each side.
Left arm down, Norris, right arm high, rotate. And rotate. Some neural flossing of your arms, your shoulder girdle and your upper torso. For the dismount get yourself out of the way of the foot bar. Arrange your hands to the backs of your thighs or palms together, fingers interlaced.
Making sure your sacrum has a floor. And we learned that the first time and roll up from there. Only because I have such a great cue that I forgot to tell you I'm going to do that once again. Relax, yeah okay. So when you roll up not only is it helpful to press the little finger side of your hand, actually it's not true.
If you wanna bring your shoulder blades down then you press the little finger side of your hands together. If you like more abdominal activation, more abdominal strength on the roll up. Who doesn't need that? Press the thumb side of your hand together and that will get your upper abdominals. More the rectus but that's okay, we can use it.
Now to get the deeper abdominals you would press your tongue into your lower lip. Um-hm. I mean last year, I know, I was all about sticking the tongue out but you know, that doesn't go over very well. So instead if you press your tongue into your lower lip it's less attractive but it's less, not as extreme as this. So press your tongue into your lower lip.
Press your thumb side of you hand against each other. Nod your nose downward and aim your gaze behind the cheek bones of your face. And then you just can't help yourself. You'll just roll up. Thumb down, tongue down, eyes down.
Much better, okay now. We're really done with the roller so we'll park, actually we're not done forever but we're done with it now for the moment. So this is outta the way and we're returning to the foot bar end of the carriage. Bring the foot bar all the way down as before. Change to the spring that you're going to use for your, that you have been using for your standing work.
You've already worked in hip flexion and hip neutral. Now we're going to approach hip extension. So stand forward with respect to the foot bar. The foot at the front edge of the foot bar. And your carriage leg will be behind you.
In the direction of hip extension. Now adjusting for the floor as you, as we've discussed. As you exhale aim your sitting bone down and drive the carriage back. It's as if your heel could reach towards the edge of the carriage. Driving out.
Twice more here. Now once you get out there, plant the sole of your big toe firmly and we'll slide a little bit on this diagonal. Sliding back and coming forth. I forgot, Norris, to bend my knee on the way in, sorry. And come in here, right.
Twice more. Exhale to push out, inhale to come in. As you push the carriage out dive down. Bending your supporting knee. Reaching towards the little toe side of your foot.
So you're rotating towards your supporting thigh and then swing your hand above your head and lift your chest bone. Fingers interlaced, Norris, there we go and palms up. As you exhale it's taking some liberties with the P and F pattern of the torso on the diagonal. Going from extension to rotation. Side bending and flexion.
And coming up and. Exhale to dive forward. Inhale to sweep up. Twice more cause you just can't get enough of these. Rotate, connecting the ground force of your foot to your pelvis, the pelvis turns and that's why the carriage goes out.
I wanna do one more because I can't count when I am talking. Rotate. Okay. The new side awaits and one thing we know for sure is that we'll always be different. That's the human condition.
Two different sides. They always were different, they always will be different and we'll always be in that process. The Pilates practice, the process of perfecting. Not being perfect, cause perfect is a static state. No, process of perfecting.
Your standing foot is forward. I'm just putting it off because this is my hard side. Okay, now here we go. Staying upright push out. And come to vertical, or stay in vertical and push the carriage out.
Pushing out and anchoring your big toe. And wiping your heel slightly outward. Twice more here, aiming the lifted sitting bone towards the opposite ankle bone. Now this time Norris we'll go out and stay with knee extended and slide further into abduction. And then bend your knee to come upright so your sitting bone can drop down.
Out and. And up and. Out and. A very unusual activation of the hip joint here. Functional, but unusual for us to be able to get in any standing vectors.
Last one coming up here, okay. Now as the carriage pushes out you dive down. Reaching for the little toe side of your foot. And then sweep up into rotation. Exhale to dive down into rotation.
Inhale to come up. Exhale, rotate, flexion and rotation and a little bit of side bending. Standing your ground, turn, rotate. And up, we'll do two more of these. Connecting the ground force of your foot to all around your hip joint, particularly the lateral pelvic stabilizers.
And last one, over and. And up. Better. Now we need the roller again but before we get it let's bring the foot bar up. The high position is fine, lock it into place.
Now you're getting ready for being on your back on the roller with your feet in the loops. So you have options, the half roller, the full roller or no roller at all. Because there are plenty of surprises with our foot in the loop series. It may be prudent to practice it first without the roller and then build up to a half roller and a full roller. Put on the springs that you prefer for feet in the loops.
I'm with a red and a blue on the hook, the lower area. And we need half roller, full roller or as you prefer, no roller at all. Put the loops over the shoulder rests or over the posts. If you have shoulder posts. But before you do that, as you know, it's always wise to check to see that the loops really are the same length because sometimes they migrate.
Alright, climb aboard now. Let's just see how this goes. Scoot your hips down towards the tail end of the roller and come to lie on your back. Now. Take both loops in one hand or here's one way to get a hold of these.
Take both loops in one hand and scoot down so that your free hand can easily hold onto the spring edge of the carriage. Push back and lean onto that side of your hand that's holding on. Lasso your foot and then, oh I'm trouble now with my mic box, we will see. And get your feet in the loops. Not doing a lot to engender confidence for you people at home, so sorry.
But the fact of the matter is I'm going to excuse myself now. You see, I'm having to cope with a mic box on a roller in a carriage so remember if things don't go well, always blame the environment. Okay, I will be a responsible role model now. Externally rotate and have your heels touching. Bend both knees, anchoring your sacrum near your tailbone.
Bend both knees and push out. And we'll do this again. Bend and push. Parallel legs now. Feet are separated about sitting bone width apart.
And bend. Internal rotation comes next. Big toes touching, heels wide. As you bend you knees, sitting bones widen and heels widen. All toes to the right, knees bend, both heels stay to the left as you do this again.
Other direction, all toes go left and heels aim right. Now we do that same process again without the knees bending. So externally rotate as your sacrum anchors your heels polish the ceiling. As you exhale they polish the wall. Inhale will help to anchor your sacrum.
Exhale will help to anchor your abdominals. Parallel legs now. Pubic bone aims towards the mat. All the abdominal layers hug in. Inhale to come up, exhale to return.
Internal rotation, big toes towards each other. Heels wide. All toes go right, all heels aim left. Change now, toes aim left, heels aim right. Leg circles come next.
Two each direction and heels together in external rotation. Sustain external rotation once again. All the way around. Bring both feet towards the ceiling. Reverse the direction of the circle.
Maintaining external rotation. Every bobble's visible in this over head camera, right? Parallel legs now. Sustaining parallel such that the little toe side of your foot stays parallel to the walls of the room. Reverse direction, exhale down around.
Inhale to come around. Down around, and open. Internal rotation, Norris, did I get that right? Um-hm. Okay, good.
I'm thinking about bobbling and forgot whether we did enough circles. Toes stay together, reverse direction down around. Keep the back of your low ribs in contact with the carriage. All toes to the right, all heels to the left. Around and, up and around.
Around and. Keep your toes to the right and reverse direction of the circle. Switch, toes left heels right. Around and. Many possible vectors here that reverse direction of the circle.
That will challenge the connection of proximal to distal and distal to proximal. That's part of what we come for. Both legs start down, short spine stretch. We'll start in external rotation. Bring your feet towards the ceiling.
Roll your hips up. Sitting bones go higher as you bend your knees. Bring your heels down with your pelvis, with your spine. And push out. Change to parallel legs now.
Articulate at your hip joints. Pubic bone and tail bone down towards the roller. Peel your pelvis and spine up. Lift your sitting bones high as you bring your knees to the cheek bone sides of your face. Roll down your spine and push out.
Internal rotation. Big toes touching pike. Peel up. Now when you bend your knees heels go wide, knees touch. Bringing your knees towards your third eye.
Roll down your spine and push out. All toes left, all toes right my mistake. All heels left, lengthen the left side of your spine as you go up. Both knees aim towards the right as you roll down lengthen the left side of your spine because internal rotation, um-hm, will tend to make the hip hike. Now all toes left, all heels right.
Lengthen the right side of your waist as you roll up. Sitting bones go higher as your knees bend to the left, heels to the right. Lengthen the right side of your waist as you come down. And we'll take the last one in external rotation. Just to come back to some sense of normalcy.
Roll up, pretty twisted if you think this is normal. Lift your sitting bones higher. Bring your heels near your ears and then roll down your spine and push out. Now there's a good behavior way to get out of the loops and then there's a realistic way to get out of the loops. Bend your knees.
Plant your hands firmly on the ground and just take one loop out to the side and shake it off your foot. It's loud, but it's effective. Put your foot on the foot bar, then you can take with control, the other foot outta the loop. Now you can use your queuing skills to roll up off the roller. Remember, palms together or palms on your thighs.
And nod your nose downward, tongue into your lower lip. Eyes down behind the cheekbones of your face. And roll right up. So we are very done with that. Thank you so much for joining us.
Norris thank you. We'll look forward to seeing you next time on Pilates Anytime, and we'd love to hear from you. Thank you now, bye-bye.
The Teacher's Corner: Focus on Fascia

Mention
 |
Elizabeth Larkam (Teacher) |
 |
KIM Hye Kyung |
 |
Emma Oclee |
 |
Katherine R |
 |
Tahmour B |
|
|
Terese S |
|
|
Linda S |
|
|
Stacey G |
|
|
Florence P |
 |
Helen P |
|
|
Katie M |
 |
Melissa R |
 |
Beverly L |
 |
Anne-Marie S |
 |
Vanisha T |
 |
Theresa J |
|
|
Shika J |
 |
Julianna R |
 |
Emma W |
 |
Mastaneh N |
 |
Doris K |
 |
Dusty L |
|
|
Denee D |
 |
Brand Girl |
 |
Katie H |
 |
Bahara |
 |
Vicky |
 |
Jamie K |
|
|
Anne F |
 |
Pandora Pilates |
|
|
Dawn B |
 |
Brenda C |
 |
Rachel |
 |
sandyjgrant |
 |
Evgenia K |
 |
Amy Havens |
|
|
Donna B |
 |
Lynn P |
 |
Terri V |
 |
Wellness through movement |
Comments


You need to be a subscriber to post a comment.
Please Log In or Create an Account to start your free trial.
