Description
About This Video
Transcript
Read Full Transcript
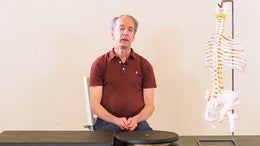
Welcome to Pilates Anytime. I'm Elizabeth Larkam, and I'm so honored to be in my sixth year with Pilates Anytime, and really privileged to be with you, the global Pilates community. I'm here with Norris Tomlinson. Norris and I have been collaborating for 17 years. Norris is the creator and the director of Sirron Pilates.
You think I'd know by now, but that would be Sirron Pilates and that's in the Andersonville neighborhood of Chicago, where Norris has a full service comprehensive Pilates studio. Today on the chair, we're continuing with my exploration of fascia in motion. Evolving it with the interest of biotensegrity. Living biotensegrity, the architecture of the body in motion, which is the dynamic interplay of tensional and compressional forces. Let's get started.
Now, to set up your chair, you'll have the handles in place on the high setting, and put loops through the handles so just in case you can't reach the handle, you can always reach the loop. We're working with a chair that has a split pedal, and we're working without the dowel. Of course, you can modify this program and adapt it to use it for any style of chair. We have both the light springs, the white springs, and the black springs, the heavy springs. Of course, you'll use the resistance that's optimal for you for each of the parts of the program.
I'm starting at the moment with the white spring on the second setting from the bottom. Now, as you know, one size never fits all. The reason I have such a successful Pilates career is that I always fit the equipment. But just in case the equipment's too short for you, by all means, build up the chair top so that when you're kneeling on the chair and you push the pedal down with your foot, you won't bottom out with the foot pedal, you'll still have room to maneuver. I won't be using this additional floor, so I'll just get rid of it now.
You'll have a moon box behind the chair, which is a stepstool for your other leg. I think we've got it. So, please come to kneeling, kneel at the side of the chair, so that your inside knee is even with the space between the two pedals. Place your hand on the forward pedal, and your hand will be in a comfortable position for your wrist. If you prefer to have your fingers straight ahead, and that gives you the best option for scapular depression then by all means, do.
I prefer a little bit of an angle in the plane of scaption. Bring your outside leg forward to a 90 degree angle, and then reach up and over with your outside arm to take ahold of something that you can. The handle of the chair, the side of the handle or the loop. And here we go. As you exhale, rock forward to your front foot, look down at the pedal.
And as you come forward again, bring your chest bone and your gaze forward as you push down, and stay looking forward as you rock back. As you push the pedal down, turn your lower lung upwards to the ceiling. We'll repeat that with the foot wide to the side, heel wide to the side of your knee. Looking down at the pedal, your shoulder blade pushes the pedal down as you lean away from the chair. As you look straightforward with your chest bone and your gaze, lean away from the chair.
As your shoulder blade pushes the pedal down, your lower lung turns to the ceiling. Now, slide your leg back as if it were between, on the clock between four and five o'clock. If this is 12, one, two, three, four, five. Dorsiflex your feet as you push the pedal down, press back through your back foot, and rock the pedal up. As you exhale, turn your chest bone and gaze forward, and stay looking forward as the pedal comes up.
As you push the pedal down, reach out through your back leg, turning your lower lung towards the ceiling. And now, reach your outside leg way back behind you in hip extension. Have the intention of bringing your pelvis forward, so your pelvis is forward to the wall in front of you, and good intentions are sufficient here, doesn't have to be, remember, perfection is a solid state, a static state, whereas perfecting, that's a process, and we're in the process, the practice of Pilates, perfecting not perfection. She said, excusing herself. As you push the pedal down, press through your back heel and come up.
As you press through your back heel, turn your chest bone and gaze forward. And now, turning your lungs, your chest bone to face the ceiling, we'll do this one again, just because it's so interesting. Push the pedal down as you take the longest distance from outside hand to outside foot. Look forward to the space in front of you, and as you exhale, spread from the center out through all of your touchpoints, all of your contact points. Now, change to the other side, twirl around.
Your inside knee is even with the space between the chair pedals, you have a 90 degree angle at your knee joint here, and your hand on the forward pedal in the plane of scaption. Dorsiflex your back foot. As you exhale, shoulder blade pushes the pedal down as you rock forward, and rock back. Exhale to rotate, chest bone and gaze forward. Exhale, turning to see the ceiling beside your elbow.
Heel wide to the side towards the three o'clock area, lean away from the chair as you push the pedal down. Look forward and, taking the longest distance from your foot on the floor to your hand on the handle. Slide your leg back at a diagonal, reach out your heel from your heel of your hand. Forward and turn up and, and finally remember it's a process, Pilates is a practice and a process. Slide your foot back behind you as your chest bone and gaze come forward, turn and we'll take this again, because you just can't get all the benefits by doing it only once.
We'll take the first side again, this time instead of your hand being on the forward pedal, take your hand on the back pedal. Bring your outside foot forward, and your outside arm will take the back handle, or the back loop. Now, you might wonder, where do you put this hand on the back pedal? Start conservatively with your hand forward on the back pedal, and then you can move it back as your range of motion improves. Tuck your back toes under.
As you exhale, focus on the shoulder blade pushing the pedal down, and rock forward towards the front leg. As you rock forward, chest bone and gaze, aimed towards the wall in front of you. Now collect your lower ribs to your pelvis, because yes, this is side bending and rotation in the direction of extension, but don't flare your lower ribs. Heel wide to the side of your knee, exhale to lean away, control the return of the pedal, exhaling chest bone and gaze forward, the longest distance of your top arm to your top foot, and turn to the ceiling. Now slide your leg back behind you on the diagonal.
Pressing down with the pedal, you could push your upper hand into the chair handle, taking the longer distance from your back heel to your top hand. Looking forward, pushing away with your top hand, that will give a different balance of the forces of compression, turning to the ceiling, and tension. Slide your outside leg back behind you, and by now, the limits of range of motion keeping your form are certainly being challenged. Collecting your lower ribs to your pelvis as you push the pedal down, turning forward. And then sliding your back heel behind you, collect your lower front ribs, all the abdominal layers are active, keeping the spine out of compression.
And we'll take that again. Exhale to lower, inhale to come up, rocking a little bit through your back heel, and turning to the ceiling. We'll take this same sequence on the new side. Turn around, remember, it's never the other side, it's the new side. Your inside hand is on the back pedal, your outside arm is on the back handle.
As your shoulder girdle organizes to push the pedal down, not that I could say it, look down at the pedal and come up. Looking forward now, still integrating your ribs, your thoracic spine with your pelvis, and turn to the ceiling. Now your heel is wide to the side, lean away as you push the pedal down, lean out, and rotate up. Glide your outside leg back behind you, dorsiflexion of your ankle, with your weight on the side, the big toe side of your foot. And finally, sending your foot back behind you, exhale to press down, inhale to come up, and turn, once again, intending to have the pelvis straight ahead, that's my good intentions this year, for this side.
And turning up. Now, you would think that that's enough of that. However, we have just a little bit more in this position, which is sobering, but useful. Now, this time it's your outside knee that's in contact with the mat, in line with the space between the pedals. And it's your inside leg that's forward, a 90 degree angle.
Take your inside hand on the back pedal, reach up and over to the back handle, and here we go. Exhale to push down, remember, this is an exploration of biotensegrity, the architecture of your structure in motion. Once more, exhale to push the pedal down, inhale to come up, and a balance of the tension and compression forces within yourself, in relation to the environment. I was just trying to distract myself, 'cause that's really hard. Now turn to the other side, it's the outside knee that's between the chair pedals, that line.
The outside foot in dorsiflexion. This is hard for me to do, okay. Now, take ahold of something that you can reach. Exhale to push down, inhale to come up. Rock forward, and turn, and again.
Push down, and turn and... And... Up. Okay. We're filming this early in 2017, so my New Years resolution is to improve on that side, so when I see you in 2018, I'll be better.
Okay, now we're on to part two, and for part two of this series, we don't need the handles. As a matter of fact, we're done with the handles, so off they go. We're going to be seated now on the chair top for the side saddle seated leg press. For this, I'm going to change to a black spring, and put the black spring at the top. Off with the white spring, and on with the black spring.
Of course, you'll make the spring adjustments that you prefer for you. Now... You'll be seated with your side to the chair pedal, adjusting the moon box so that you have a foot rest, some support for your back foot. Position yourself so that your pedal side sitting bone is just barely off the edge. That way, you can have the idea that your sitting bone lengthening down is responsible for pushing the pedal down.
And that will ensure that you're doing all the right things. Okay, now you'll be in external rotation with your mid-foot nestled over the top of the chair pedal, your palms on your thighs. Getting your ribcage on top of your pelvis, your head on your neck, and here we go. Three of these. Inhale to push down, exhale to come up.
Inhale to keep your central axis from the tailbone right up to your occiput and out the top of your head. Now, rotate your torso to look towards the leg that's pushing down. Rotate, and rotate. Rotate the other direction. Your sitting bone presses down, and you spiral up the staircase of your spine, looking back behind you.
Change now so that your forefoot is in contact with the chair pedal. You have the sole of your toes and the metatarsal heads in contact with the chair pedal, drive your heel down in dorsiflexion, palms on your knees. Inhale to press, and the pedal brings your knee up. As your sitting bone pushes the pedal down, you drive the back top of your head up to the ceiling. Rotate towards your front leg now, we'll start here, Norris, here's one and, And two and, staying true to your central axis three and, other direction of rotation.
One and, steering your knee wide open over your fourth toe. Now palms on your thighs, keep your knee at hip joint level, and stilettos and flats or plantar and dorsiflexion, two and and three and, rotate towards the pedal leg, one and, increase the spiral, particularly of the thoracic and the cervical spine, and rotate the other way, one and, and two and. Remember, your sitting bone is still driving the pedal down. Change to parallel, now, so that your first three toes are in contact with the chair top, and your heel is in contact with the ch - that's not the chair top, it's the pedal, I'm sorry. And then have your heel in contact with the pedal as well.
Palms on your thighs, ribs on top of your pelvis. One and, head on top of your neck, she should say more often to herself. Two and turn towards the pedal, one and, two and, pelvis aimed straight ahead, and thoracic spine rotates. Rotate the other direction, turning your pedal lung around to the back of the chair. Palms on your thighs, sitting bone is still off the edge.
Plantar and dorsiflexion, there you go. Heel in the center of the chair pedal, two and, rotate towards the pedals. Eyes go up and around to lead you, and turn the other direction. One and, sitting bone is still continues to lead. Down and.
So, that was five different foot positions on one side and, fortunate to have a second leg, we will do the second side. Adjust the moon box as you need to. Sitting bone is off the edge, your mid-foot is nestled over the top of the chair pedal, leg is in external rotation with your knee steering wide over your third or perhaps your fourth toe. Now, in order to keep this sitting bone down, you could press your tongue down to that side. Here we go (chuckles), not very attractive but so useful.
You're pushing the pedal down with your tongue telling your sitting bone to stay down there. Now keep your tongue there, sitting bone presses down, and eyes lead up around where you're going. Tongue stays with the sitting bone side and your eyes lead you around. Change to the sole of your toes and the ball of your foot, make sure that they're in contact with the top of the chair pedal, and here we go. To remind yourself to sit up taller, you could press your tongue to the roof of your mouth, just behind your upper teeth.
Rotate, and eyes lead you around. Rotate the other direction. Tongue presses the sitting bone down, eyes lead you into rotation. I'm just about at the limit of my multitasking abilities. Okay.
Sit tall now from tailbone, reminding your lung to inhale to the side that's pressing. Particularly if that's your less strong side. And rotate the other direction. Two and, three and. Change to parallel now so that your first three toes are in contact with the chair top, the pedal top, and your heel is in line with the chair pedal.
Three of these, one and, making sure that you don't shift away from the chair pedal, sit your ground, (chuckles) stand your ground. Rotate the other way, one and, two and, tongue drives the sitting bone down. Other way, one and. Two and, stay on your central axis as you rotate, and finally, plantar and dorsiflexions, stilettos and flats, which is by far the most demanding of the adductor area of the deep front line of the adductors, and particularly of the vastus medialis in this case. One and, two and, three and.
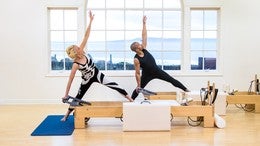
Done with that. So that's the seated aspect of this program, part two. Now we're going to go from sitting to kneeling. And for kneeling, we'll start with heavier springs. I'm going to leave the black spring on top, and add a yellow one on, yellow spring, yellow (laughs).
No, that would be the next class we do, that's the reformer class, right now it's the white spring. So, you'll be kneeling on the chair top. And if you find that that kneeling is uncomfortable during this section, or during the first section, of course, by all means use your kneeling pad to cushion your patella. Now, climb aboard the chair top, and you'll nestle your hands over the corners of the chair, and put your outside foot in contact with the pedal. Now caution, this pedal has heavier spring than you were using pre... (loud clang) Right, heavier spring than we're using previously, and that's not any dysfunction, it's just a spring adjusting.
Okay, now your hands are nestled over the corners, and your knee is such that your thigh bone is approaching perpendicular, vertical. You have your three toes on the, inside three toes on the top of the chair pedal, and your heel in contact, too. Lengthen the back of your neck so you have a good relationship between your sacrum and the occiput area. Now, do not bend your knee, but turn your navel towards your supporting thigh so that your pelvis rotates and pushes the pedal down. Now, turn your navel towards the pedal side, and your pelvis will rotate over the head of your femurs.
Let's do five more of these, one and, up and, two and, standing high on the chair top leg, do twice more, because I can't talk when I'm counting. Okay. So you maintain your central axis. Now to this, we'll add an ankle action, pushing the pedal down with your knee extended, and then lower your heel to the pedal. Now bend your knee, rotate your pelvis, and turn your navel towards the bent knee side.
Here we go. Turn your pelvis towards the supporting leg, turn your pelvis towards the pedal side. It's as if your pubic bone could aim, could arc towards the supporting thigh, and the pubic bone aims towards the lifted leg. For that particular cue, we're gonna keep going north 'cause I have an attribution to make. And that particular cue of where the pubic bone aims, that comes to you courtesy of Jean Claude West.
Don't miss, we have two more to do, don't miss his workshop on the pelvic clock and then you'll know, you, too, will know how to aim your pubic bone. All right then, so that's the first section on this heavy spring. Change now to the new side, and here you are on the new side, climb aboard. Similar set up as before, get all your contact points. The distal contact points so we can prepare for proximal articulation.
Now, turn your pelvis so that your naval aims to the pedal, and the pedal comes up. Turn your pelvis so you aim towards the steady leg that's standing on the chair top. Do your best not to shift your central axis towards the back of the chair and the front of the chair. You rotate your pelvis and your lumbar spine around the head of the femurs, but not by lateral translation. Norris, I've thrown out the window any number of counts, here, just 'cause I'm so interested in all the cues.
Okay, let's just see if we have anything more to tell you about this. Probably, but we should move on. Okay, now as you push the pedal down, that's when you align your ankle in plantar flexion, lower your heel, and align your ankle in dorsiflexion. Your PSIS comes to the ceiling. Now, you will notice that as your pelvis rocks over the femur heads, there will be a change of weight on your hands, which is correct, which is accurate, which is to be expected.
Twice more here, and remember to keep the sides of your waist long. Meaning, don't confuse hip hiking and shortening between the ribs and the pelvis with rotation. You could install an overhead camera at your studio so that you can really see if you're keeping the sides of your waist long. Rotating in this plane, the rotation, the transverse plane, and not the coronal or the frontal plane. Now it's time to lighten the springs, so off with the white spring, off with the light spring.
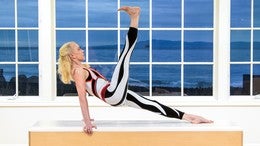
And we're returning to the chair top, but this time with lighter springs, because you'll be doing single arm balancing. Climb aboard. Nestle your hands, cradle your knee, and put your foot in contact with the back pedal. Now, after all that motion with the pelvis, we're done with it for the time being. Keep your pelvis steady, because this is Pilates.
So your pelvis is steady, you push the pedal down and your heel rises, and the pedal comes up but your pelvis doesn't. So this would be, quote, a more standard leg press, except there's not much standard about our current configuration on the chair. Now, open your arm to the back. So you're standing, so to speak, on your anterior oblique sling system between hand and opposite knee. Change hands, don't change your central axis, shore up your central axis as you keep your pelvis steady.
Now it's time for rotation, bring both hands down now, rotation of the pelvis again. As you push the pedal down, lift the back hand to your shoulder, and turn your thoracic area, aiming your gaze down at the handle of the chair. Looking at the handle knob of the chair, rotate your torso, your thoracic spine towards the pedal. So you alternate, pushing the pedal down with your pelvis rotating, and rotating. Once more here, turning pelvis, rib, shoulders in the same direction, and in the same direction.
Change hands now, keeping your gaze steady down at the ground. Your pelvis turns to the back of the chair, and your thoracic spine to the pedals. Or at least that's the theory of it. It's really difficult to put oppositional rotation of the pelvis and the thoracic spine into practice here, but we're as prepared as we're going to be. Now, both hands are on the chair corners, open the back arm, huge wingspan, press the pedal down and look up towards your fingers to the ceiling.
As you exhale, dive down so your ear can listen to the chair top. Inhaling, standing your ground on your central axis, exhale, dive in, turning both lungs in the direction of your outstretched hand. Once more here, aligning your heel high over your second, third toes. Pelvis and lumbar spine are rotating, change to the other hand. Now, as the pedal pushes down, you turn in the same direction, and then...
Now I'm so confused about what's turning, no that's wrong. The pelvis is turning towards the back of the chair, the thoracic spine turning towards the front of the chair. And you're thinking, oh, whatever, could we just, just do the moves and be quiet about it? Okay, well, we could. Up and, and, down and.
Now, the new side awaits. Climb off, walk around, and climb on. Knee up, hands over the corners, align from tailbone, what's that called, coccyx out to occiput, and now the pelvis stays steady. Is that right? Yes. Push the pedal down, and bring the pedal up.
So this is the leg press without the rotation of the pelvis. Open the back arm, one and, keeping the PSIS's level, two and, making the connection between the hand on the chair and the knee on the chair. Don't shift to the back of the chair, just stand up on your central axis, which means a lot more work for your abdominals, which is what we like to hear. Now, as the pedal pushes down, lift the back hand, keeping your gaze down at the knob of the chair handle, whoops, I forgot that part, and then take a nosedive right down to the chair handle. Pelvis, rib, shoulders are turning in the same direction, at the same time.
Once more here, the motion of the pelvis is what pushes the pedal down, and then you change to the new side. Now the pelvis is turning towards the supporting leg, and the chest bone turning away, best I can. Take a nosedive. (humming to self) Open your back arm, a huge wingspan from the sole of the toes out through the fingers. And then dive in, your ear listens to the chair talk.
Inhale, pushing down, pushing up, pushing out, balancing the forces between all of your contact points. And change to the new side, get a ground force through your chair top in order to find thoracic rotation. Turning to look towards your outstretched arm, two more of these articulating from ankle up to hand. The oppositional rotation of your pelvis, and your thoracic spine. Now we've completed part three, and it's time to come to the mat for supine hamstring presses, and hamstring bridges.
For this, I'm going to change to a lighter spring, Norris has of course a much heavier spring than I. Come to lie on your back with your mid-foot nestled over the chair pedal. You won't know exactly how close you should be to the chair pedal until you take a test run, so with each foot, press the pedal down just to make sure that you are the right distance on your mic box, okay. Now, your arms are down by your sides, pressing your shoulder blades into the mat, we'll start with the right leg, Norris. Press the pedal down, four of these, one and, two and, three and, four.
Bend your elbows, fingertips to the ceiling, shoulder blades hug the mat, two and, three and, four. Palms stand next to your ears, aiming your bent elbows a long way from your bent knees, settle the back of your ribs, the back of your lungs down on the mat. Arms straight up to the ceiling, palms together, fingers interlaced, hands in line with the bottom of your chest bone, with the xyphoid process. Fingers interlaced, palms above the top of your head. Elbows wide apart, integrating your lower ribs with your pelvis.
Now bring your arms down by your sides, pressing down with your palms, lift your hips forward and up, pelvis towards the chair top. Draw your right heel towards your right sitting bone and press down. As your left foot comes down, aim your left ASIS towards the ceiling. As the right foot comes down, your right ASIS aims to the ceiling. Elbows bent, fingers towards the ceiling, hug the mat with your shoulder blades so you have a good support for your thoracic spine.
Palms stand next to your ears, elbows press away from the knee that stays steady, the knee that stays lifted. Arms straight up to the ceiling, palms together, fingers interlaced, low with respect to your ribcage. And now arms wide apart, elbows wide I should say, fingers interlaced. Have the idea as you draw the pedals down that your heels are wiping to the outside. Two more of these, Norris, to get that, heel wipes to the outside.
You're thinking, yeah, thanks for the update, you coulda told me earlier, we did enough of those. Land your pelvis. Well, I messed up, but I tried. Okay, now, for the dismount, you could use your palms on the sides of your thighs, or your palms together, fingers interlaced, and roll... up. You're very well prepared for your next advanced exercise.
This will be, I'll need a little heavier spring, so I'm gonna move the white springs high. Norris, what do you use? (muffled response) And he uses the black on two. Okay, now, I announced this as an advanced exercise, but it doesn't start out that way. You sneak up onto it, meaning you'll be very well prepared.
Okay, your mid-foot is nestled over the chair pedal, your sitting bones are forward near the front edge of the chair, and your arms and external rotation are nestled over the corners of the chair. Now, your shoulder blades, the bottom of your scapula, the inferior angle of the scapula is pressing down to the little finger side of the heel of the hand. Collar bones are wide. Right leg starts just a simple leg press. Mm-hmm, you're thinking, like, yeah, that was my Pilates first course on the chair, what's so special about this?
You just wait. Okay, now. As your hands press into the chair top, one foot pushes the pedal. We'll do four of these. As you push the pedal down, you have the idea that your heel is wiping slightly to the side.
Now turn towards the leg that's pushing down. Using the pressure of your left hand when you push the right pedal, using the pressure of your right hand when you press the left pedal. Now turn towards the leg that stays up, two and, and we're encouraging thoracic rotation with the ground force of your hand. Now both legs simultaneously, and as both pedals press down, use the ground force of your hands to lift your chest bone. When you press the tip of your tongue to the roof of your mouth behind your upper teeth, two more Norris, and your gaze goes up, your spine will go up also in thoracic extension.
Now, press both pedals down. Press into the heels of your hands, and move your pelvis forward and up. One pedal comes up, tuck your chin in so that your chest bone has the idea of lifting higher than your chin. Turn towards the pedal that's coming up. Chest bone turns, thoracic spine rotates.
Press with your left hand when you turn to the right, press with your right hand when you turn to the left. Now, turn towards the pedal that stays down. Press and turn, press and turn, activating the posterior oblique sling system. Stay up, and hover your heels, hover the pedals up. So now you are suspended between pedals, foot pedals, and hands.
Staying straight ahead, one pedal pushes down, tip of your tongue to the roof of your mouth, gaze up to the ceiling but chin in. Turn towards the pedal that pushes down, remember it's thoracic rotation more than cervical whiplash. Turn towards the pedal that stays up. Two and, pressing your hand in order to get a ground force, and now both legs simultaneously, chest bone and pelvis lifts up away from the chair. Tongue up, eyes up, last one.
Swing your hips back onto the chair top. Thank you so very much for joining us. Thank you, Norris. We look forward to seeing you next time on Pilates Anytime, and we'd love to hear from you. Bye bye, now.
Comments


I am going back to work now that my baby is 2 months old and I know that my clients have been looking forward to their chair class so thank you for helping me design mine!


Really wonderful as always, Elisabeth! An exquisite work of alignment and rotation. Thanks for this great class and of course, thanks also to Norris.
Thanks Greetings from Madrid, Spain
You need to be a subscriber to post a comment.
Please Log In or Create an Account to start your free trial.
