Description
About This Video
Transcript
Read Full Transcript
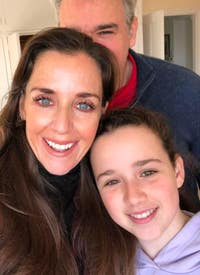
Today is a very exciting day for me because my friend Alisa is here from Italy. Welcome. And my girlfriends are here so that's fun too. What we're gonna do in this class is we're gonna teach without doing really any spinal flexion. And you hear that and you say, "Really?
We're gonna do mat work and we're not gonna do any spinal flexion?" Well, yeah. That's happening. And the reason for that is is that sometimes, there's disfunction or pain or whatever and we don't want the spine to move a lot. We want to be able to stabilize the spine so that's what we're gonna do today. I'm gonna encourage you all and you all to get onboard with really having to think about potentially creating challenge within your own body cause a lot of the stuff that we're doing can not feel very challenging but it can be very challenging if you just put the right mindset on it. Here we go. Lie down.
What I'd like for you to do, for us all to do, is just lie down on our back. And bring your arms down along your sides and we're just gonna start to pay a little bit of attention to some pieces of our body. Can you feel just that the feet, feet are just flat, and they're about hip distance apart from one another. And then, want to look at or sense into the natural curves of the spine. We feel the back of the head on the mat and notice that the neck, the cervical spine, is slightly lifted off the mat.
Then bring your awareness to the center of your spine in between your shoulder blades and from where the neck meets the body all the way down to the very bottom most rib, that section of your spine should lay nice and flat. Then, bring your awareness to your shoulder blades. I would like for you to feel that they're wide on your back out towards your arms more than in towards your spine. And that they're as flat as you can without creating a lot of tension in the upper back. So as flat as you can without creating tension or lifting the middle of the back or the lowest rib off the mat.
Take the heels of your hand and place them on your asis, the front bones of your pelvis. Let your fingers run in a V shape down towards your pubic bone. Now we're gonna just hold all of those natural curves of the spine. What I'd like for you to do is just start to inhale and can you imagine as you inhale the ribs, the outer ribs, expand outwards and the place where your fingers are, that space, drops. It contracts.
And then exhale. Feel that same space in the lower abdominal area continue to contract. With the hands on the pelvic bones, we could guide them towards one another. Now are they gonna move closer together? No. But you can put a little energy in with your hands and use your breath to feel that you're trying to draw those two bones together.
And inhale. What do we do as we inhale? What needs to move? We need to allow the ribs to move. Can we slide them away from each other to open up, expand into the back of the body?
What we're trying to do, and then exhale, is just use our breath. Use our breath. And as we're exhaling completely, we're allowing the ribs to slide back towards one another and we're feeling those sitting bones, no, not those sitting bones, the asis narrowing, and the tissue beneath your fingers dropping away from your hands. We'll just do that one more time. Inhale. Feeling all of the bones of the spine that we noticed just staying still.
And exhale. Now keeping your hands on your pelvis, we're gonna keep them there just to notice if there's any shifting. Inhale again. Imagine that there is a fishing line attached underneath your rib cage and you're gonna engage there and you're gonna lighten up on your left leg and you're gonna pull that left leg up towards a table top shape. And then inhale and let that leg go down.
Now all the time, the skin underneath your fingers, exhale to lift again, is trying to pull down. It's trying to stay contracted. That means that as we're moving that leg through space, we're having to inhale and exhale using the lateral expansion and contraction of the rib cage. Exhale. Pull up. And we'll just do two more.
This is what I was talking about. Like this sort of a movement. It's real easy to just pick your leg up with your leg muscles, but what we're doing here is we're using our deep hip flexor muscles and we're using our abdominal muscles to stabilize. If you feel a little work in your hip flexor, okay, guess what? That's because it has to work.
And then put that foot down, but do that without shifting. Yeah, let's change to the other leg. We'll lift it five times lifting on the exhale. Yeah, we can talk about moving the legs with the abdominals, but is that actually a fact? No. What's moving the leg are the hip flexors so can you use your hip flexors without feeling your hip flexors?
Sometimes. Not always. So don't worry too much if you feel your hip flexors. It's okay. But I want you to worry a little bit more if you don't feel any contraction or any support or any awareness around your abdominal area. That's what we're trying to bring our awareness to.
Last time. Now, as that leg goes down, now this is harder. As that leg goes down, we're gonna try to put that right leg down. Don't shift at all and bring the other leg up. The putting of the foot down and the lifting of the other leg is that moment where one goes down and the other one has to lift up, for me, is the hardest.
Lift. As the one leg goes down and you do a breath pattern that works for you. I'm exhaling to bring the leg up and inhaling to put it down. But as I put that leg down, I'm gonna start my next exhale as I pick my leg up. I'm proceeding the movement slightly with my breath.
Can you feel stable still? That perfect stability in these tiny little, very, very small movements, for me I feel is, can be, valuable. It definitely is valuable. And can be if we've put the right attention to it. Harder than something with, say, a little bit more choreography.
Pause here. Inhale. As you exhale, you're gonna change legs. So one's gonna end up at the top, and this is easier, I think. One's gonna end up at the bottom.
Inhale. And exhale. Change legs. And inhale. And change legs.
Now still feeling, the hands are still resting across the lower abdominals. Can you still keep going? Can you still feel the bottom ribs on the mat? Do you feel any tension in your lower back? You shouldn't really feel a lot of tension in your lower back.
If you do, make the movements small. Make it like baby at the top. And if you feel your lower back feels okay, you can just keep going. Notice any tension in your shoulders? Working with the breath, we'll just do two more times through.
Shifting and shifting using the abdominals to stabilize the spine. One more time. Shifting. Now we're gonna, we have to do one more to be actually even so the right leg finishes or whatever leg was there and now, we're gonna bring both legs up to the top. And then, keeping your tailbone down, if it feels good to your back, just bring your knees into your body.
Then we're gonna come back out. Let's keep the thighs perpendicular to the pelvis but no shins up yet. No table top yet. Just the heels resting towards the back of the legs and then we're gonna inhale. Make the knees move away from the body a tiny bit, maybe two or three inches.
Keeping your hands on your pelvis. We're just keeping the hands on the pelvis so we can feel where it is in space. And exhale. Sometimes, what feels like neutral isn't so we're just gonna make sure of that with our hands. Inhale down or away.
And draw in. Try to pull your skin away from your clothing as you bring your knees back in. I know it looks tiny. It feels tiny but it can be hard. What do you think, girls?
Is it hard-ish? Yes. Yeah. It's good hard. It's the deep stuff, that's it. That's it.
Sometimes the deep stuff appears boring but it can't be boring when you're doing it because you have to think so much about it, in my brain anyway. We can do that one more time. And now, go ahead and lift your legs up to table top. We're gonna take the legs down like that. So just go as low as you want to.
Go as low as you can. What helps me is to think about the back of the legs pressing up as the thigh bones are going away. And pull back. Or in other words, I'm using the back of my legs, my hip extensors, to press the legs up to support some of the weight of the legs as the legs move down, and then same thing, stomach muscles in. Pulling and we'll do three more.
Inhaling down. And exhaling up. And two more. Inhaling down. Remember this feeling and remember the single leg lifting feeling cause that's gonna come up in another place in a minute.
One more time. And then again, just bring your knees into your chest. If that feels good, onto your back. And then place one leg down and place the other leg down. We're gonna bridge, and yes, we are gonna bridge without articulation.
Is that sacrilegious to Pilates? I don't know. I think it's okay for now. If you feel like articulating your spinal, there's certainly nothing wrong with that. But we're gonna go straight up.
Here we go, ladies. Push down into your feet. Lift your back straight up. If you feel a contraction through the backs of the legs, feel the heel slide back, the fingers slide forward, and then take your spine down in one piece. The challenge to the one piece lifting and lowering of the spine is that we don't overdo the extension in our thoracic spine, our middle spine. You wanna keep the front ribs coming towards the back ribs all the time.
As you lift up, the front ribs almost resist the back ribs from lifting too high, and as you come down, the front ribs press the back ribs down. We're gonna do that two more times. Feet pressed down, pelvis lifts up, arms are soft, neck is long, tailbone comes down. And then one more time. Press up.
Now hold up. Connecting, feeling equal weight on both of your feet. Take your arms and just reach out over your thighs. Notice that your pubic bone is higher than your two front hip bones and your ribs are below your arms in space. If your ribs are higher than your arms, tuck them back into the middle back a little closer to the floor.
Take your arms down to the sides of you. And inhale. Now, we're gonna do what we did on our back. We're gonna lift the left leg up and lower it down. And lift it up.
So now we have to use the abdominals to stabilize again and we've gotta use the hip extensors of that supporting leg to hold ourselves up. We're gonna do two more. Lift. And down. And lift.
And now, can you reach down, put that leg down, no shifting in your pelvis, take some thought. Then the left leg stays down. The right leg comes up. And down. This hinges from the hip joint. Lift.
And down. Can you imagine that same fishing reel right at the base of the ribs dragging that leg through space? Last two. And now, one more. Now we're gonna do what we did on our backs.
We're gonna put one leg down. Shift. Other leg comes up. That leg goes down. So just like before, just like before, the hardest part is the transition.
The transition. So three more to each side. Here's one. Using your breath. Using your exhale to lift.
Transition. Two. The hardest part for me, and maybe for you, is that elimination of any unnecessary movement. One leg up. And down. And the other leg up.
Good. Now hold that. Now we're gonna keep the leg lifted and bridge the spine. Go down to the mat and lift up. Go down to the mat, ribs down. Lift up.
Go down as you're lifting your pelvis up. Your belly button and the very bottom of the rib cage pulls energetically downwards. Last time. You place your leg down. You shift without shifting.
Switch without shifting. Now we lower and lift. Lower, soft arms, soft shoulder blades. You can have energetic arms at the same time as you can have soft arms, I believe. Last two.
One more. And then place that leg down. Then what would it feel like to try to come down with a flat back but also lengthen down. Can you make that happen in your body? Come down with a flat back but also lengthen it.
Yeah. I don't know. It's possible in my imagination. Bring your ... Turn over onto your side.
Just lay down on that arm. Okay. Stretch your legs out straight along the mat. Line em up. Let's flex our feet today. So we can imagine that we're just standing.
We're standing on our side as we lie. Use your hand for support. What I want you to feel again is that sense of abdominals drawing in. Rib cage drawing back. Like you can create some space between your skin and your clothing.
That's one of my favorite games to play with myself. I play all the time. Stretch your legs away from you so far that they just lift up. Now you don't have to move your pelvis to do that. And then lower down.
Right, the legs would get higher if we allow the pelvis to move, but we don't have to. Not today. Not every time. Sometimes, we want to just work with a little bit of a different intention. And today is that day.
As you're using the weight of your legs against gravity to what? To work the center of the body. Just do a few more. Let's do, let's say, two more times. I think that's six.
If you know me, you know I don't count very well so if you want to do even numbers on both sides, I'm gonna let you be in charge of yourself. Hold at the top. Can we take the top leg up? And back down. Keeping again the spine is just still.
Out and back down. Out and back down. Two more makes five. And back down. Last one.
And back down. Now we're gonna keep that top leg up. Bring the bottom leg up. And then down. And up.
As your bottom leg lifts, can you feel that your underbody lifts? Your undercarriage? Your bottom waist? Two more makes five. And last one. Now we're gonna lower the legs down and bend your knees. So your heels line up with your tailbone and your knees point straight out.
Take you hand on your pelvis. Just rest it there so you can feel if it's moving or not. Now we're gonna lift the top knee. It's gonna go up and gonna push as much as you can but nothing shifts. And down. And back. Push.
So there's a lifting. There's the lifting that you can do with your leg and then you can create more, right? You can push against that end range. And down. And push against the end range.
And down. We'll do two more. And down. Last time. Now we're gonna go down.
We're gonna make a circle with the thigh bone. It's gonna come into the body. Oh, did the pelvis move? No? Up. Around. And out. That's where you're asking yourself all the time.
Is my pelvis moving? Or maybe you're not. But I'm asking you. Is your pelvis moving? I'm asking myself.
I'm asking you guys. I think everyone in this rooms pretty still. We're gonna do three. We're just moving the thing around in the hip. Two, and what you'll feel is your hop muscles working cause they have to work to move the thigh around.
It's like magic. And then go back. The hip muscles move the hip. Isn't that exciting, Nicole? The hip muscles move the hip.
It's like a brand new revelation. What? Aaron thinks her biceps are not being challenged. I think we have two more to make six. I got chatty and forgot to count.
Last time. Okay. So now, we're gonna put that leg down. That's enough. We're gonna help ourselves up. And come up onto the forearm.
This is challenging not to do a lot of spinal shifting. So we want to do to avoid that is we want to really get clear about what's happening in the bottom waist. And how I do that is I push into my arm and I pull my ribs up. The ribs are coming up and the arm is pushing down. This arms just gonna rest and we're gonna put some weight into our feet.
It's a little easier to cross one foot over the other if you want. What we're gonna do is we're gonna lift the bottom waist up and the pelvis is just gonna hover and we're gonna hold. Two, three, four, five. Now can you keep all of that still and just drop back down. We'll do four.
So again, we're gonna lift. Up, bottom waist up. Top of the head's reaching away. And lower down. I think we'll do five.
Four seems like not enough. To think front ribs to back ribs. Bottom waist. Then down. All these simple movements get us ready for the more tricky choreography.
I said it once. I'll say it again. They're the foundation. Lay a strong foundation. Last time.
And now lower the pelvis. Now, keep that line from the shoulder blade to the hip. Take your top leg out straight. In fact, put your hand underneath your rib so you can notice if you're sinking into yourself and don't. And then we go forward, forward.
Reach, reach. With your arm underneath you, you might notice that there's a little forward and back shift of the spine. That's okay. Let's all come together so we don't run into each other on the rep. The back now.
And here we go. Forward, forward. Reach, reach. Three, back, back. Nice and stable, two.
Back, back, one. Back, back. Let's bend. And we'll sit up. And bring the leg around.
And hike it into the chest. And just sit nice and heavy on your sitting bones. You good? Okay, good. Just checking in with my friend, whose pelvis doesn't like to move around. This is for Caroline, my friend here.
I really wanted her to come to class today and she said, "Well, I can't really move my spine." I knew that. And I was like, "Oh, shoot." Then I was like, "Oh, I know. We'll just, we won't move our spines around. That'll be perfect." So that's what we're doing. Isn't it fun? Switch sides.
You know, I think it's a great idea to know how to do that. Cause you might run into that someday. So your head is down. We started with the legs out straight. I like to look down and see where I am in space.
Nice long line. Knees facing forward, toes facing forward. We flexed our feet. We imagined that we're standing on the ground. Now we take the legs out and up.
We keep the pelvis nice and stable. Then we go down. And reach out and up. So I'm just resting my hand, but if you wanted to, you could do like a single arm down push push up, if you want more work. I'm happy just being relaxed in my upper body but I'm also aware of where my shoulders are in space.
We do two more. Reaching out. Remember the out. That's what lifts us up. And one more.
Then we hold the legs. We're gonna take the top leg and just go out and up and then pull it back down. And out and up and pull it back down. And both feet are reaching. Got last two.
And one more. And then lift and then bring the bottom up and down. And up, both knees facing straight ahead. And up and down. Keep that top leg lifted.
And down one more time. Up and down. And now both legs can come down. We'll bend our knees. Finding your alignment.
Hand goes on the pelvis. We have a little bit of space. I don't want you to actually lift your ribs up cause that is spinal changing. But just maybe depending on the shape of your body, you might have some space underneath you and then we'll go up. Maybe you don't and that's okay too.
But there is some energy there. And up, so we're not moving the pelvis or pushing against the end range of that external rotation action. And so we go three, and down, and two, and down, and one, and down. And so now, we go into the hip rotations. We're gonna lift the leg up.
It's gonna come into the body. This is where we have to be really a little bit more particular about being still but it's possible. And it's actually really good to work this way. Up, around, and push back. As far back as you can cause you want to get that glute max working.
And then up, around to the back, and we did six times. So that means three more. I think we did. Now I can't remember so I'm sorry. And two.
And stable. You just have to, or I have to, keep reminding myself let's go the other way to just continue to check in all the time. That skin away from clothing thing is my favorite thing to think about. But you could think navel to the spine. You could think about whatever your favorite idea around staying engaged, interested, focused on what's happening in the middle of your body.
We do three, and two, and one. Good. Now the leg comes down. We helped ourself up. Came up onto the elbow and we spoke about the relationship of the rib cage to the pelvis and how we can create a straight line from that greater trochanter, the bone on the outside of your hip, to your shoulder blade, right?
Straight line. Push away with the ribs. Lift up with the ribs Push down with the forearm. And now, we just push down with the feet and we lift just, just hover. And I gave you the option, sorry, I had an itchy nose, option of crossing one foot over the other.
That's perfectly fine. The hard part for me is the coming down. Like I can't even come down without losing it. And then we go again. Push down left, hover, float.
And good. Come down. And we did five of these. I remember that. Cause I wanted to do four and then I decided four wasn't quite enough.
So we did five. Then we're being aware of where your neck is in space. I just reminded myself of that so I thought I'd say it out loud to everyone. And down one more time. Out.
And down. And so now, we keep the bottom knee where it is. We took the top leg out straight. You can shift it if you need to. Take the bottom hand underneath the ribs.
You can feel that, almost like you're trying to pick your own ribs up. Flex your foot. Altogether now, we go forward, forward. Reach, reach. Forward, forward.
Reach, reach. Inhale. Exhale. Or the breath of your choice. Might just remember that breath is life.
So don't hold it. Last time. And back. And then bend, and sit up. You could try to hold your breath but you wouldn't be able to forever.
There's that. We just keep breathing in and out all the time. Sometimes with focus. Sometimes without. But right now, I'm gonna suggest that maybe we put a little focus into breathing into the stretch and to lifting a little taller.
Align that breath to support us, being grateful for it. And we'll turn around and lie down on our stomach. What I want us to do is we're gonna go, we're gonna go just down onto the forearms and the upper arms are gonna be just on the outside of your body. Let's squeeze in real close so that the forearms can be just outside of the biceps. And then, you can put your forehead on your mat or you can just float your head up off of the floor.
Here's what I want us to do. I want us to find those two front hip bones that we were holding onto earlier. And make sure that those are just resting flat. And then lift your belly. What does that mean?
It doesn't mean lift it off the mat. It just means lift it up towards your spine. And then lift your knees. And see if you can lift your knees with the back of your legs. And then we're gonna take the head up and we're gonna a little backward gliding of the shoulder blades.
I want you to see if you can keep your pelvis level so it's not gonna be a real high lift but we're gonna reach long. We're gonna reach out long with the body and we're gonna lengthen the spine as we come up into extension. Then we're gonna go back down. Let's do that again reaching the head forward. Inhale as we slide the forearms back and the top of the head forward and the belly button to the spine and the thighs up.
And all of the things that we want to think about or being thought about, and reach back down. And then elongate. Scapula slides back. You can even put a little attention to your elbows. I want you to keep your elbows on the mat, though.
Don't lift any higher than you need to or can. I'm not even lifting the maximum that I can with my elbows on the mat. So I want us just to feel that forward energy, that forward reach of the body. And we'll do this one, and then one more. Beautiful.
So scapula sliding, abdominals firing, lifting, focused. And then, I'll go all the way down. Now, I'm just gonna slide back a little on my mat. You can too if you need to. I'm gonna take the arms out in front of us.
Slide the arms back enough so that you're lifted a little into a little bit of back extension. And if you're more well endowed than some like me, you might remember that just by having boobs to rest on, breasts if you will, you'll already be in a back extension just by a feeling like you're not lifting very high at all. There's an idea for you to ponder. Abdominals in. Reach the left arm away from you and pick it up just up towards the ear and then take the right leg away from you but I don't want you to shift in your pelvis again.
And then go down. So this is not an exercise in lifting high. It's an exercise in stabilization and reaching long. The fingers and the legs pull away from one another. The arm can come up, up near the ears, which is pretty high up there.
And then down. But I want the leg to just barely, barely come off. Barely come off. And can you feel this cross patterning work as a reach rather than a push. A long, a lengthening, rather than a fighting.
So now, what we're gonna do is we're gonna take both legs just off the mat real, real low. Both arms can come up as high as you want your arms to come up. And we'll continue that pattern. So let's go at this pace. Inhale, opposite arm, opposite leg.
Two, three, four. Exhale, two, three four. Inhale, two, three. So this can be bigger and fancier and larger and faster but not today. And out, two, reach.
Last one. Two, three, four. And breathe out. Two, three, four. Place both arms down.
Place your legs down. Let your forehead rest on your hands and just allow your spinal muscles to soften. Just let them go for a minute. And we're gonna bring our forearms under our shoulders so my wrists are basically right underneath my shoulders. We're gonna press up onto our hands and knees.
And then we're gonna do a long spine, upstretch down dog's child's pose. So we just, long spine, down dog, upstretch looking kind of child's pose. Okay, let the back stretch. And then we come up. Now up onto the hands and knees.
Again, we're just looking at that spinal stalization from all different directions, right? We did it on our back. We did it floating with the pelvis. We did it on our side. Now, we're doing it on our knees.
I want you to draw your ribs in, your navel to your spine. Look for the alignment of the asis and the psis, the two front and the back bones of the pelvis. Take the right leg forward, or backwards, rightly. Go as backwards, sorry. The left leg goes forwards.
Can you do that without shifting. Can you keep your spine still? Bring the arm down. Bring the leg down. It gets a little bit more complicated when you're taking two things away instead of one thing away. Left leg, right arm.
Lifting the naval to the spine. Making sure the scapula is nice and still. And then coming back. Left arm, right leg. Reach. And we feel the back of the leg, the back of the lifting leg, lifting the leg up.
And bend. And stabilize first. And then reach. And back. And stabilize first.
There's that moment where we want to set ourself up for success. Okay, now hold here and just take the back leg down. Take the bag leg up. Don't arch your back. Take the back leg down.
Take the back leg up. So it's not a high, high lift. It's more of a reach away. Last two. One more.
Bring the arm down. Bring the knee in. Stabilize for success. Arm and leg go. Hold. And now, just down with the back leg and out.
Down with the back leg and out. Down with the back leg and out. Just last two. Pulling the abdominals up into the spine as the leg lifts. The arm comes down.
Knee comes down. Make sure you have enough room on your mat so that you can step into a plank position cause that's where we're going now. So standing on your hands, and then we have to find that pelvic alignment again so we don't want to be too arched, round. Just nice and neutral, step one leg back and stand on it. Lift your abdominals up.
Push the floor away from you with the front of your ribs, and then step the other leg back up. You're just gonna hold here and we're gonna bring our awareness back to our breath. And inhale. And exhale. And inhale.
Five breaths. Strong through the legs. Strong through the spine. So now the abdominals work to hold the spine against gravity. Again, they're stabilizing.
Okay, so now what we're gonna do is we're gonna inhale. We're gonna exhale. Bend one knee. Pull it in to keep the spine stable. Step back. Exhale. Bend the other way.
Pull it in. Step back. One knee, Exhale. Step back, nice. Other leg. Exhale. And back. Two more.
And back. Can you do that without any shifting in your body? Yeah, one more. Sorry, two more. Two more means two more on both legs to me.
And then back. Now here, we're gonna keep the spine still. And we're gonna drop both knees. Your pelvis will come a little bit. It has to. But it doesn't tuck.
And then straighten. So keeping the spine still. Five times. Bend both knees. And straighten. Stomach muscles, pull up as the knee drops.
And straighten. Push through the back of the legs as you straighten your legs. Last two. And straighten. One more, bend.
And straighten. Bend. Once again, flat back. Lean back so you might have to scoot your arms a little forward to achieve that long back stretch. We just reach down. You can let your forehead rest on the mat.
Here's another place where the spine might want to overextend, so look at that. Feels good to overextend your spine. Please feel free. And then, we're gonna walk back and we're gonna sit down and we're gonna be done. (Applause) Thank you for coming.
Pilates with Meri Rogers: Restorative Workouts


Comments


You need to be a subscriber to post a comment.
Please Log In or Create an Account to start your free trial.
