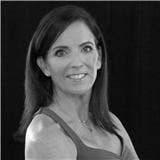
Description
This class is designed for those who can get up from the Mat and down to the Mat easily. If you aren't able to do this, you can try some of our other Active Aging classes.
About This Video
Transcript
Read Full Transcript
Hi everyone. I have a mat class for us today in this class is geared toward the older female clients. I'm older is really what you might describe as older. Um, let you do use your discretion. But uh, someone who can get down to the ground and up on their own should participate. If you can't get down to the ground and up on your own, this isn't your class because I'll be doing some up and down. Okay. You, if you have osteoporosis, you can take this class. If you don't have osteoporosis, you can take this class. Uh, for those that do have osteoporosis, we'll, we won't be doing any loaded flection.
There will be a little flection and I'll talk about that when that time comes. Uh, for you teachers that are watching, hopefully you'll get some ideas that you can work with this population. And for those of you who are at home, our members that are enthusiastic and are doing polarities with us, welcome and thank you for joining me. I have a soft spot in my heart for you all. Um, so this class really is focusing on standing balance, proprioception, hip strength posture in her upper back and some standing loaded work in the legs for strength. So lots of things and a little bit of wrist. Your whole body, you'll need these props, some kind of dowel or stick. I've got a metal one. You'll need some kind of squishy ball, kinda like not fully inflated.
You will need a couple of hand towels. I've got one rolled up and one that's still kind of bolded and then a tennis ball or something like that. Four feet and then a TheraBand loop or piece of TheraBand that you can wrap around your knees for some hip work. Okay, we'll get started. Let's, when you put the ball down on the ground, let's hinge from the hips gaze you're folding down, placing it down already, a little balanced work and let's just scan the body first of all, legs underneath Elvis. You're in parallel or thereabout. Your toes can phase out a little bit and just take about three deep breaths here. Nice inhale through your nose and an exhale and just kind of gathering some energy and focus through your mid body.
So those inhalation moments were letting those ribs expand and articulate. Open a little bit and exhale and just feeling maybe some muscle tone in your tummy. Okay? Nothing too incredibly deep. But let's grab the ball. So reach out with one foot and put one foot on the ball. And I want you to go on the ball of your foot on top of the ball, okay? And just lightly press it.
So what I want us to feel first here and with the connection of how our foot and the muscles down with the end of our body have some re a relationship and connection of course from our hips. So hips down, but also from feet up. Okay? If you feel unsteady, I didn't mention this, you could also have some kind of stick or a chair nearby for some of these. Okay. So hands on hips is where I'll be. And what I want us all to do is lift through your spine, create some space between your rib cage and your hips. And see if you can press your ball without shifting your weight too far forward.
Okay. And then just release it. So it's like, um, if you're stepping on something outside, I don't want to say a bug, but stepping on something, you're pressing the ball of your foot down and then releasing the tension. There'll be a subtle weight shift, but I don't want you to really shift ahead. Okay. A, the ball might roll out from underneath you and that's a little bit, not what I want, but also I want to see if you can feel some opposition. So here goes some of the relationships as we pushed down with the ball of the foot. Less think of ourselves growing axially longer. Okay. And then release your pressure and press the foot.
And I have my heel, somewhat normal, not too high of a heel, not too low. Just feel the effort of pressing the ball and hopefully some work up along the back of your leg, up into your hip, all the way into those glutes and hip extensors. Okay, so a couple more. Just press release the pressure and per press and release the pressure. Let's up our ante, cross your elbows, press your elbows and hands together so you're gonna feel more muscle connection in your shoulder girdle to your sides. Four more times. Let's take a breath first. We're going to push on an exhale. So press the ball, release your pressure and this fellow and for us the ball and release two more.
And press the ball. You'll feel the engagement of your hip in the back of your hip and your last one. Press the ball. Stand nice and tall everybody and release the pressure. And then lower your arms. Let's do the other side. So just step down and feel the difference from foot to foot.
Scoot that ball over. Okay, so it's the ball of your foot on the ball. Feel yourself pretty steady in your hips. You may have to wiggle into place. You're tall. Okay, hand on hips. Here we go. Pushing your foot down on the ball and release again. We're trying to minimize weight shift forward right now. We'll get there later.
So think, just push down but grow taller and push down and grow taller. Okay? Keep on going and feeling that work. Now starting to probably to increase or the muscle work increasing in the back of your hip and the glutes and hamstring junction right there and press
Exhale, press the ball and release and exhale. Press your ball and release. And I know maybe some of you might be thinking teachers especially, uh, and maybe if you're doing this at home with me, if this is hurting the bottom of your foot, you can step off for a second. You don't press very hard. I know that the fat pads on the bottom of our feet start changing as we get older user discretion on the press.
But you do want to keep the tissues on the bottom of your foot healthy by giving them movement. Okay? So if it hurts, don't do so hard that it hurts, hurts, hurts. Um, I think you know what I'm talking about. Okay. Next place is your heel. I'm going to stand to the side for this one just so you can see there will be something more specific. So the ball of the foot of his on the floor, put your heel on the ball lightly for starting for starters. Okay, let's get a nice sense of upright. We're going right into those folded arms. And then the same thing. I want you to press the ball with your heel without rocking back or forth.
So on an exhale, we're going to smush the ball and it's really a feeling contracting all the way through that gluteal area in hamstring and grow taller as you hold the push of your heel and release three more times. Let's breathe in. Exhale, press stand tall and release. Two more. Press the heel. Can you stand taller and release and one more press and release. Okay. Other side I think I'll just keep turning sideways so you can see.
I don't want you to shift your weight back and forth to get the muscle connection, pressing your hands against your elbows. Your shoulders are set back. Take a breath. Here we go. Everybody press your heel. You Longet your spine and release. Press the heel down. Spine grows tall.
Hips aren't hiking up and release. Last to pressing down in your tailbone is right underneath your spine. Your abdominals are pulled against your low back in one more and press and release. Okay, and just step off your ball. That's really all we need it for for now. We may see it later, but I'm not sure and to put it down. Okay. Lastly, before we get to the mat, start to move the heels up and down off the floor. I want you to rock through the balls of your feet.
Just moving through those metatarsus joints, flexing. We really want to keep those foot movements, agile, mobile, Kay, knees tracking straightforward. Now pause and then just angle your legs and your toes out a little bit, kind of out to the side and we'll do the same thing. So I'm lifting a heel and lifting a heel. I'm trying to get us to bend or flex right in those metatarsal joints of the foot. And if you're home doing this and you're saying, gosh, that's hard to do. Yeah, it is hard. But if again, you gotta keep doing these things, uh, or else we'll really get too stiff in the feet, which could lead to not walking efficiently and effectively and well, I don't want you to trip and fall. Okay?
So having good healthy mechanics of the feet and ankles is essential. We're going to work on just soft knee bending now, so your knees are pointed straight forward, your feet are straight forward and all we're doing is just subtle and little knee bends. And I want you to notice where my knees are pointing. They're pointing straight forward and you know in mind from hip, knee, ankle, toes rather than knees in. Okay? So if you need to look down and check that this is what needs in would be like, we're not really interested in that. All right? That's not what we're promoting. We would rather go this way or even bias a little bit. Knees out.
Let's go for more. So one and two. You might feel some stretch in your ankles and we'll hold the last one four. Just hold right there. Okay. Now, right here in the crease of your pelvis where your leg meets your pelvis, that's your hip joint. I want everyone to start to tip their torso forward and do so with the new long gated spine or flat back such as this. And then just bring your torso above the pelvis.
All we're doing is tipping forward and back, tipping forward or hinges we like to call it, and then coming back a couple more times. So as you're hinting, remember the heels on the ball that we just did. Pretend your heels are on those little ball hosts. You're pushing your heels down and see if you can feel some connection right in your buttocks. Just in this small little move here as if you're pushing your heels on the tennis balls. Okay.
We're waking up some pretty big connection back here. One more time. Yeah. Okay. Last thing to warm us up. Let's take our arms slowly above our shoulders. I'm reaching my arms quite up high. I like to think of the stars out here and reaching up to those stars and just take both arms up and just do a little soft one side.
Then the other side. Okay, one, uh, arm and rib side up, and then the other side I want you to breathe a little bit more fluidly. So maybe an inhale on the reach and an exhale on the release, the other side and inhale and an exhale and an inhale and an X. That's okay if the rest of the body is starting to move with you at sexual, I love that. Let some natural organic movement happen. Let's go just a little quicker for eight movements. One and two and three.
Hopefully you're feeling some interesting stretch in your front here. Four, three, two and one. Lower your arms right down in front of you. Next one more thing before we get on the mat. I promise take one foot and step backward and one foot is forward. I've got some distance. I decide between the feed for extra balance support.
You don't want to step your foot directly behind the other one that sun steady. Okay, so take a little bit of stance separation. Now, Ben, both knees, a little soft, the back heel can come up, that's fine, but I want you to take the pelvis here, the top of your hell pelvis, and pull your top hip bones backward a little bit and your pubic bone slightly forward. So it's a little bit of an angle change of that pelvis like this. You don't have to do much a little bit. You'll feel some stretch occurring in the front and the hip. Let's take those arms again. Eight movements, two, three and four just to let those ribs start to move.
And six, seven and eight and then change sides. So the back foot comes up. Second footsteps back. This is to stretch to the front of you. Okay. Your abdomen muscles and down into your hips. Here we go. So you've got your stance set up, arms can reach either arm to start is fine, and two and three breathing.
Feel the stretch. Six and seven and eight. Okay. And then take both feet together. All right, we're warmed up. I think you're warmed up. Let's get down to our mat now. I've got a high mat. I'm lucky if you're at home and you have a low mat, try to do so by going through that hinge like this to get down, maybe down to your knees, okay, and then down.
But I just don't want you to go into that real rounded back kind of posture. I'm trying to get rid of that thing. Okay? Move your props a bit away. You're going to want that cushion for your head right away and probably your towel. Okay, we're down in our mat now. Everybody bend your knees and place your feet flat.
You can have your feet wider than your hips or right in line with your hips. Make it comfortable for you. Hands behind your knees, unless just all take our arms and use your muscles in your arms. What I mean is kind of pull your on your legs and establish a really high lifted back. Okay? So we'll take a nice inhale through our nose. Let's use some exhale and move our pelvis now and I want you to rock your pelvis back a little bit and I'm thinking pelvis more than spine this point and rock it back up. Small weight shift. This is really to start some strength work in your abdominals and the lower region.
Really kind of the sides here and lower belly and some mobility of your low back in your pelvis. Okay. Now as you do these weight shifts in these rocks, can we still think that we're tall from the rest of our spine up even though our pelvis is rocking back a little bit? All right, three or four more and you can exhale. I think about really easy movement motion in your back and your lower spine and last too in the last one and that's it. Walk your feet together. Now we'll get down on our back. I'm going to use my hands to move my fetal or hips a little bit forward. Now if you do have an osteoporosis spine, you don't want to roll on it.
If you're not that woman you could or man, you can roll back. I'll show the modification, which would be to come down, elbow, elbow, and lay back. Okay, here's that ball. Let's put that underneath our neck and skull. Don't go to sleep. Walk your feet a little closer to everybody. Heels towards sitting bones, and then what I want you to do with your neck is lift your chin more so the chin is pointing straight up to the ceiling.
Rather than having your chin compress down on your chest, I don't want your neck so flat. Okay? Your chin really should be more lifted so that your neck has a curve to it. This is to support your neck. Take a breath in through your nose. I want you to exhale and feel your abdominal muscles pull inward. Gather inward. You can curl your tail a little. That's fine.
Let's do three more. Inhale through your nose and you're excelling. It's just very internal work. Thinking of that strength from your abdominal muscles, really coming in against your organs and your spine. Last two inhale and an exhale. Simple, simple, but effective. One more time.
Nice port for your neck. Now let's add on. Take a breath. On the next exhale. Take one leg and start moving from that hip joint and just bring that knee up and then lower the knee down. Inhale, alternate sides. Exhale and raise the opposite side. Inhale, step it down. Exhale the first leg and so eight that's four already, so right from the hip joint.
You're bringing your thigh towards your chest. You'll probably feel some stretch in the back of your back. Second leg, exhale and shins still facing the ceiling. Last one on the first leg and lower last run. The second leg, you're going to keep that leg there. Everyone hold your position.
See if you can engage your tummy inward a little bit more. Hold it there as you bring the second leg to join this first leg. All right, so you all have two legs towards your chest. Let's take our hands right on top of our knee caps. Gently start stirring your thigh bones. Outward circles, inward circles.
This is to bring some sun warmth into your hip joints, some mobility in there. Other way about four or five circles. Why don't you to do this and see if you can hold your belly button region in against your body. Stabilize that support. Okay. Keep your knees towards your chest, long, arms by your side and gently press your palms on your mat. Open your shoulders and see if you can press the back of your shoulders down and then release that effortless. Do twice more so the hands against the mat, but it's also the back of the shoulders against the mat, the stomach in and release. Inhale, and one more time again, press. Now if your thighs are tired, being held up like that, which they might be. Just set your feet down. Let's do three more with the feet here. Inhale, same idea.
Press the hands and shoulders back. Inhale, release. So really good exercise. Basic to work. Some posture correction across your upper back. All right, and that posture zone in your chest. One more time. Inhale, exhale and press. Okay. You're not out of the woods yet with your abdominals though, and your knees. So I needed to bring a knee back up. And then the second one. All right, hands on your shins. Either side, you're going to pick an arm to reach to the ceiling to take one arm up.
I want that shoulder blade on the mat. Take the opposite leg forward so you're going to have to move the other hand. So one leg reaches forward as the other arm is staying reached up to the sky. So if you could just hold this position your stomach in your back on the mat, your chin to the ceiling, and then bring those limbs back in. Okay? Pretty simple. Second arm to the ceiling, shoulder on the mat. Opposite leg reaches forward of you.
Okay, we're going to make this a little bit more exciting and maybe a little more challenging. So first arm up, first leg out. Okay. If you want to lower your leg and reach your arm further behind you so you're increasing the load and the demand and the stability challenge in your mid body. Bring them back up where they started. Exhale tote two more times. So arm reaching overhead leg reaching long in front of you spine doesn't come away from the mat and bring him center.
Last one on this side. Exhale, hold those abdominals in and then bring everything back to centers. The second leg and arm ready leg out. Arma you could also just hold here and repeat the first sequence or go for it. Arm, overhead, leg reaching, long and center. Round to exhale. Arm reaching leg, reaching abdominal, supporting the spine and in we're always wanting to get long and Palase.
Long spacious, strong open and everything comes back in. Okay. Stir the legs around again and around the other way. And then I want everybody to place their feet back down on the floor. Stretch your legs out and flex and point your feet. Okay. In fact, to start a little rocking with your legs, that's fine. Alright, back in, leg up and leg up. Now one hand in front of each knee. Hands are pretty high up by your knees.
I want you to take a breath through your nose. And then as you exhale, pull your knees into your hands. At the same time your arms are pushing your legs away. It's a very intense abdominal exercise. And then release two more times. Knees, pressing hands, inward hands, pushing knees. Outward. Stomach is in and release. And your last one.
Knees pulling into him. Hands, pushing away on the knees and release. Okay, place your feet down for good for awhile. Okay, I think I have my dowel. Here it is next to me. Everybody reach in. Grab your doubt. We'll now where your stick. Okay. So what is in your hands? You're gonna reach it right up above your shoulders. And for right now, let's just take a look up at your wrist and we want the risk to be straight, not flexed or extended or rolled like this yet. Okay? We'll be moving through there, but I want you to establish first a really nice straight line here. Keep that as best you can. Let's begin by reaching your arms back.
Any amount, any amount works. Some of you are really mobile and you can take that. Dow will all the way probably to the floor. Some of us have a stopping point. I don't want it to hurt your shoulders, but I do want you to feel like you get some stretch in your underarm area. Okay, now raise those arms.
Reach your Dell all the way forward towards your thighs. Touch your thighs, so it's an arm arking movement. Here we go. Up toward the ceiling and back overhead. Any amount, chin is still toward the ceiling. And then bring your arms up and toward your thighs. Two more times. Arms up, arking back. See if you can go a little further.
Arms straight up and toward your thighs. And one last time. Inhale, keeping those wrists straight. Kinda glance at those and then bring your arms up and then to your thighs. Okay, now bend your elbows to the mat. Just let your arms rest for a minute and then we'll take those arms straight up.
Again, this is where I want you to move the wrist, so curl your wrist. It's a sense of rolling. The Dow will forward and you'll feel a very interesting stretch on your wrist. That's important and intended, and then roll the wrist the opposite way. See what you feel. One way is probably going to feel easier than the other. Roll forward.
Roll backward, roll forward and backward. A few more times. Want to do a couple little checkpoints? Chin away from chest, shoulder blades, flat on the mat. Okay, ready for some coordination, everybody, so keep their wrists moving while we roll and move the arms back overhead. Roll the wrists, take your arms back overhead. Keep some movement going.
It might be easier and keep those risks moving and we're going to take the devil to or thighs. Keep 'em moving. We'll just do two or three passes because this starts to get a little fatiguing and the arm muscles rolling. Those risks. Take those arms if you have a little more, reach in there and keep rolling the wrist arc in the arms for the Dow or the dowel toward the thighs. One more. Roll those wrists, keeps him breath coming in. Exhaling out and roll arms are working towards your thighs and didn't want to get further. I wonder. I did. Cool. Okay. Put the dowel down. Everybody turn over to your side so that you face me.
Okay. And then we'll keep rolling onto our stomach for a little bit of back work. Now what I want you to do here is put your squishy ball right at the chest level and then your rolled up towel for your forehead or now, okay, you may need to move one of these prompts out of your way. Okay, so we really want upper back strength and good posture. I really want you to feel that and achieve that. So this ball right in for your chest, you may have to move your breast tissue out of the way. Gowns, just move it overK and then set your hands down on your mat and you should be able to see those fingers out of your peripheral vision. That's where they are.
My elbows are just rested. Forehead is on the hand towel, legs extended behind you. Now let's, before we lift to a head and work the back, check your pelvis. And what we mean there is that your hipbones are evenly pressed against your mat and your pubic bone and you've got a little bit of tummy in for support for your low back. Okay? Take a breath through your nose. This is not about a lift very high, but I want everyone lift your forehead off your towel.
You won't want to anyway cause you'll feel pressure in your back. For those of you, your goal is more length than height. Okay. And then everybody come down with your forehead. Let's go again. Take a breath through the nose. So as you lift your forehead, let's do a few more cues. Roll those shoulders, back, stomach, and for support. Long space between your ear lobes and the top of your shoulders and then lower your head back down. Inhale, and then again, exhale, lifting the head.
Now I'm going to invite you to feel as something a little more. Feel your chest pressing forward against the ball. Almost like you're rolling the ball toward your tower. A little bit of interesting articulation that's going on in those upper thoracic vertebra, your upper back to help them more times. Lift your forehead.
You can roll the ball a little bit toward your towel. Make sure you can still see your fingertips there and then roll your head back down. One more time. Inhale and exhale and it's a hover of the head and I'm scanning my towel. We're looking at it with my eyes and then using my eyes to look forward to the front of my mat and or rolling my chest on the ball. Okay. So I'd like us to keep doing that movement, but with a little extra motion in the neck and turning the head in the neck while we lift. So before we do that, turn everyone to your head to look at me.
So we'll be on the side of our forehead here or side of our, yeah, forehead. Okay, so take a breath through the nose. What's happening next? Exhale. We lift that side of the forehead. Turning the eyes to focus down. Rolling that boss slightly forward. Return the other side of your forehead or your temple region down on your towel and your chest comes down. Let's do it again. So your head comes up, you're turning your eyes to face down. You're sliding your collarbone back.
Turn the forehead to the side. We'll do each side a couple more times. So you're coordinating some neck turning while you're working your upper back posture. Okay. And again, inhale as we lift, rolling the shoulders back. Exhale, turn the head, place the head down. Remember this head movement because it's going to happen again. It just the second lift. Turn ahead and then lower the head down onto the side.
You've got one more lift. Turn the head to face center and place the forehead straight down on your towel. Okay, excellent. Let's keep on going with some backwards, but I want you to come up off the ball. You're probably happy about that. Put your forehead down on the low towel. Now you need me need to move it further forward so that you're longer.
Okay, now put the ball in your hands behind the small of your back if that's okay for your shoulder. Some of you might have some shoulder issues that this angle won't feel good. If not, just put the ball to the side and you're going to be doing this with your arms straight by you. Okay? So those of us that who can do this, put it up in the small of your back and let your elbows come draping down. Okay, give me that forehead turn again. So lets turn to face each other. I've got my eyes looking at you and here's your looking my way.
So we're coordinating, doing some coordination. You're lifting your head, you're turning your eyes. Look down, make your arms long behind you. Now reach your ball towards your feet. What does it feel like to reach your chest towards your towel? Turn your head. Let's start all over. Ball to the back side of your forehead to your towel. Inhale, start lifting. Reaching your ball to your feet.
Head above your towel. Chest forward and turn. Okay. Remember, not too high. This is more about length. Here we go again. Ball to the feet. Chest to the towel. Energy at the top of your head. Turn and down. We've got three more. Everybody. Inhale, get high. Lift long. Exhale and turn.
One more each direction and long arms ball to the feet. Turn and lower. We've got one more and reaching arms. Two feet. Head to the towel. We're going to finish with the forehead on the towel and then just let go of that ball. Take it away. Okay. Move your hips a little bit from side to side.
Okay, got one more bit ball back into the chest. One more time. Elbows down. Hands can be palms face up. And what the heck? We've got our Dell, we'll go ahead and put your hands, the dowel in your hands. Okay, so what I'd like you to feel here is again that chest reaching forward. A little lift up off the ball. If you're with your S's in your stenosis issues, take your chest down lower, but take your both your feet in and I want you to feel like you're pulling your heels towards your buttocks, but all at the same time, pressing your hips down to the mat and just hold there. And then lower two more times, heels into the buttocks and then lower. One more times, heels into the buttocks and lower. Now separate the feet a little bit. Just one leg at a time. Two little kicks in. So we have one, two, lower second leg, one, two, lower, one, two, lower and one, two. Let's take a little breath.
We did a lot of back work in your back. Might feel fatigued here, so you're just going to keep a little bit of movement going. If this doesn't feel good in your knees, you might want to be this person wagging up here. Um, or if it doesn't feel good, either place you just rest and come laying on your side because we'll be going into some sideline here. Okay, so almost done with the floor. We're, but we have to do our hips still can't really get away from doing anything with their hips. Here comes this thing, so get it in around your feet of it and the band up around your knees. Okay? Choices. You've got choices here. You could come all the way down on your roll towel with your head and you would tuck your arm underneath your shoulder. Something like this. Okay. That's one option. I'm actually gonna choose similar, but my ball for my head, I like that little more lift for my head. I think you guys might too.
And also then gives your arm a little arm, a little more clearance. So your elbows folded right underneath the side of you. It's a little strange setup and making a fist and that hand is pushing down my, the side of my ear and head is just on that ball. Okay. I like the ball also because we have to stabilize our neck. Well on this, I don't want your neck rolling around so you've got to use some muscle in your neck. Your shoulders are stacked one over the other. You can have this hand on your hip, you can have it here for now.
Let's just start working on clam exercise. So your knees are stacked, your heels are together and that TheraBand, that elastic band is adding a little extra challenge for the hip strength. So we are wanting to pull those knees, rotate the thigh and pull the leg into the Thera-Band. You can exhale. So at the same time that the knee is doing that movement, the leg is doing that movement. Can you all push your forearm down on the mat more?
You might feel like that anchors you and somewhat lifts your weight up off of your shoulder, which is quite nice and you're not smashing that shoulder, compressing it. A couple more rounds of the femur movement and your leg movement. Hold it now and just see if you can hold it. An isometric hold, pressing your elbow to the mat, your thigh to the ceiling or the wall behind you. Little extras that meaning pull a little more, two or do 10 of them.
Three and four. Five, six strengthen your shoulder by pushing it down in the floor. And three and two. I think I just gave you 12 okay. And lower. Alright, keep your legs bent here. Take your top leg. Just straight up your ankle comes with you this time. Okay. Pull up high enough or press up high enough that you feel the resistance of that TheraBand and you'll feel the work again on the side of your hip.
And I want you just to start moving your thigh forward. I'm thinking knee coming toward my elbow, but it can't go far because of the band. And then knee back and forward and back. Kind of looks a little like a ho down going on with my leg. But you will feel the work. We want strong hips. We want a good long spine. Okay, so you can keep going hand on the floor. One a little better, more challenge. Arm up to the ceiling requires a little more stability or a lot more stability. Concentration.
Got a couple more rounds here. I know you're feeling this. Hips into the front and to the back. Last one, front and back, and then lower your arm, lower your leg and you're going to rest. Okay, last round is something pretty simple to straighten your leg. Just straighten it from your hip to your foot. Now we can't put the tennis ball under the heel, but back up your mind at the beginning of the class and that feeling of pressing the heel on the ball. Push your heel as if it's pushing against a ball. Okay, there you go. I saw you do it. Take your leg a little forward and roll into a small movement.
So I'm moving my whole femur as if I'm rolling. My heel on a ball out there on that wall over there. Just turning. You're going to feel a little bit more work back in the tush.
We'll do for three and welcome to your external rotators of your hip. Just pause and just feel what you feel really, really clear. Okay. Time for the other side. So use this arm, push yourself up. You've already got the band on your knees, you're just going to wheel yourself around and bring yourself down. Okay, elbow is down.
My upper arm is right up against snug here. Forum was pressed and my hand is pushing the mat. Okay, get the side of your head on your ball. Now I'm putting my ball in a slightly different position on this side because I have a microphone here that I don't want to smash. So if you're looking at that and like, Hey, it's in a different place on her. I'm making a an an adjustment for our filming. Okay?
And there we are, but again, we're trying not to roll the ball. I want you to feel stable in your neck. This top shoulder should be right above this bottom shoulder. You're pushing this forearm down and here we go. Clamming the leg and the hip so that TheraBand provides that nice feedback for us too.
And the resistance to strengthen. You could do this without your TheraBand. Sure feels good with it though. Press and it keeps you honest also in your range of movement or for those of us that need more in the hips, you really can use it to increase it. So stretching that hip open and stretching. So the stronger these get over here, the more freedom this hip will have to move in this way. All right, last two press and this particular exercise, these hip strengthening movements are so essential also for the standing work we'll be doing in a minute and in daily living. Okay.
Keeping those hips strong. So raise your thigh and your foot and just hold here for a moment. Okay, so we just went into front
See if you can get a little more length connection in your body somewhere. Maybe it's between your waist. Maybe it's through the space in your abdominals, like less pressure on your organs. Maybe it's your neck longer, maybe some posture energy out the top of your spine. Maybe it's your tailbone getting long out there. Two more. This is a nice challenging exercise.
Sometimes when I align my side, my eyes start to water. That's what's happening here. Take your knees together. We've got one more round. Straighten your leg. Okay. Get long. Press this arm on the mat. Remember that tennis ball? It's underneath that heel. Bring your legs slightly in front of you and then start to internally rotate and externally rotate your thighbone. But if your heel was on that tennis ball, you're making a little pivot in and out. I don't know.
You're going to feel that right deep in your hip. We've got four more years in and out. Turn in. Turn out these external rotators of your hip. Last one there and fold your knees and rest.
Use your top hand for some support. We need to get up off of our side and come up to standing. Okay, so everybody [inaudible] come on up. You can take your feet out of the loop, your legs out of the loop and just put that down and then I'll see you here. I am kind of taken advantage of this. I'm on a high mat. All I have to do is step down, but for those of you who are on the low level down there on a regular floor mat roll to one side, you may want to crawl yourself back into a little crouch position and walk your hands up to come to standing. Okay? So kind of take advantage of that sometimes. Okay, next is your folded towel. Put it down.
Now even if you're on carpet, you can do this. Um, if you're on a carpet surface, the the out there, it won't slide as well, but that's okay. If you don't have a C, you could also use like a paper towel, I should've said, or a paper plate. I should've told you that at the beginning about we'll play. Okay, so now your foot is on the towel rather than the little ball. Still lightly pressed the ball of the foot. Both knees will be bent here. Okay, pause for a minute. Just feel where you feel. I want everyone to hinge at the hips ever so slightly just right in those hip joints. Now we already worked aside of the hips, we're going to work on a little bit more in standing, so I want you to slide your leg to the side, slide though, towel with you, and pull it back in.
Slide it out and pull it back in. Now you can put your whole foot flat on the towel. I'm not going to get too concerned right now with that. You can also just be on the ball of the foot. What I want you to feel and the work here is the load on the standing leg while this leg is moving out in, in, okay.
And that you're not losing your alignment with your standing leg. That thigh isn't leaning in it, staying right over that foot. Okay? Couple more. Should be about nine and 10 now I'm going to give that leg a break and just stand. Let's try the other side. So you take a little stance with bent, knees hinge slightly forward, and then you start to slide your foot and then towel to the side. Standing leg stays stationary. You're in a slight hip hinge, nice, elongated spine. You can exhale and inhale, press and in and press and in and seven and aide.
Hope you're feeling this work here and this work here and your last one. And then we will change feet again. So step around. Now bend both knees again. This is an awkward one, but we want the leg to come forward. Now as you come forward, you absolutely have to wait. Shift to your standing leg and then come back in. My body isn't pitched forward this time, I'm actually a little more upright. Torso over leg. Whoa. It's challenging there.
This leg may want to start cheating in. So let's work on, imagine that TheraBand on around your knees, right? And you're pulling your knees away. If you want to lean forward, you can. But if you're doing that, make sure you're in a hip hinge with the long spine. If you're upright like I am, let's try arms out to the side, reach for these walls and three, a lot of good ankle stability as well going on on our standing leg and our last one and in, in time to change. These are sneaky exercises but they really work. So bending the knees, chocking parallel.
Here we go to the front and in to the front and N
I'm starting to lose my balance and last two woof. Feeling some heat and last one and in. Okay, we've got one more direction. I think you can probably guess at what you want it is. It's going back. So bend those knees again. I absolutely want everyone to hinge forward slightly shift weight slightly to that standing leg and move your leg behind you any amount and move it forward and move it behind you any amount. If you can get straight, wonderful.
And gonna turn sideways so you can maybe see what's happening here. A little different vantage point. Yeah, and extend. If you wanna take your arms to the side, you could also take your arms in front of you out in five, four more times out. Think of length, feel length, last one, reach and in and all the way up. Time for the second leg. I'm going to turn sideways that way. Don't bump into the table. Bending both knees, hinge forward, leg starts to slide, so keep a small, maybe the first few.
This is the same movement you did with the TheraBand around your knee. Back. Just feels a lot different here, but if you can go straight, wonderful. Stretch and [inaudible].
Stretch and in and stretch and in and then recover. Okay. One more thing. This is going to be a little circle, a little circular move. So tell him, meet the first TA, the first foot bend both knees. Shift your weight toward your standing leg, right. Your knee isn't going to drop in. So now light touch with your foot. Keep your knee a little bit bend.
I'm just taking my arms out like this for some stability. You can also go here, here, your choice. Make a circle
Reach to the side and the front end in.
And then for front side and back. Last one, front and side and back. Okay, a little rest. Last run from the back to the front three times. So it's back side in front and back and side and front and your last one back side and front and [inaudible].
Just feel a nice stretch through the back of your legs. Bend your knees, everyone roll all the way up. Way to go. Thanks for taking class with me and we'll see you next time.
Empowered Aging: Active Aging with Amy Havens


Comments


You need to be a subscriber to post a comment.
Please Log In or Create an Account to start your free trial.
