Description
About This Video
Transcript
Read Full Transcript
Hi, I'm Julie driver and I'm here today with Christie who's going to be my beautiful assistant today. And we're doing a class that is titled studio to stable operators to arena. And it's to compliment the other classes that are here and plus any time that are specifically aimed at a questions. So what we're looking at today is the BCCs with the studio, the barrel, the chair, and the Cadillac. So the reformer class is already there. So if you're looking for reformer information, you can go to the previous class.
So today what I really want to focus on is how these other pieces of operators really work for the ride. We're going to be looking at symmetry and asymmetry, which is really specific for the rider. And we're going to look at all the things that the riders need to improve their writing for themselves and for their horse. So we're going to be looking at spinal stability and spinal mobility, shoulder stability and shoulder mobility, limb disassociation and hip and pelvis. This association. And the other thing that writers really need is they need good ankle movement, knee stability, and good hip mobility. So we're starting with footwork. So the barrel is medium to heavy sprung.
And I'm going to ask Christie to sit at the front and she's going to put her feet in Polasse stance. So this is, she's on the toes and we're going to fold the arms in front of start with. And as she inhales she's going to press down and as she exhales, the pedal comes up. So what I'm looking for is that her spine is vertical as it would be in the saddle, but her pelvis is undisturbed by the moving up and down of the legs.
I'm going to ask her to bring her hands up and place them behind her head.
One more.
So I'm going to take my arm off. So I've given her some feedback, but now she's going to try and do it on her own. And we're really looking that we've started with symmetry before we go to the challenge of the asymmetry.
And what I really need her to do is to lengthen into this right hand side to draw up this hip down there. Good. So she needs to keep her body really square. And again it's the same movement. She was just doing it in a different position there. So she's going to Dorsey and plantar flex the feet, foot.
So Christie is going to sit at the front of the chair position for you. Good. Okay. So you're gonna bring your hands behind her palms facing back and as she acts how she's going to start to roll back. So we really want her to get her sacrum on the chair and the hands come to the pedal. Good. Now really elongate the neck. And as you exhale, think of the pedal moving because the spine is moving. So as she starts to roll back, she's going to take the pedal with it. So she's not leaning on the pedal good. And I keep going.
But I want you to almost think of getting a flat length and spine goodness. Stay there. So she's going to continue to press the chair away as she starts to round the spine, back up and over. Good all the way. And then she's going to sit back to neutral. Good. So the next time we do it, now she knows where she is and what the movement is.
We're going to keep her there and she's going to come up and down three times into the movement. So she exhale she's going to roll back. So if you imagine the chair was to continue, she's lying her spine along the length of the chest. Stop that. Now she's going to start to round up over my hand. Pull the head back a little halfway stop and now it's like a tug of war. She almost wants to keep proper body still as she rolls her lower body backwards.
Really move from your pelvis. Good. Hold it there. And now start to roll back up. Get that same sense of a tug of war happening. Good. Take the head back with you. Good. And then start to roll back again so I can feel she's really leaning into me with her feet. So I'm going to ask her now. She comes back up to hold her own legs up
So the reason I really love this for riders is that left and right sidedness that riders haven't equally horses have. So what you might find with your rider when they come, if they say that they struggle with turning to the left rein or the right way, often this comes from their contact with the left leg or the right leg on the side of the horse. So this will really give you an idea of their one sidedness. So what I'm looking for is that Kristi has a neutral spine. The options for the hand position are at the front of the chair as her hands on now folded in front of her or behind her head. Now I've got a feeling that Christie's going to be absolutely fine, should happen behind her head. So we're going to inhale to press down and then exhale for the pedal to come up. So what I'm looking for, especially from, I now know from the ankle articulation exercise, how Christy favors one side.
So I'm going to get her to send her left it forward. More there, but then the right rib forward. Yes. Good.
So we're gonna make it harder because that's what we do. So now what she's going to do is she's going to press the pedal down and as it comes up, she's going to turn towards her leg. Yeah. And as the light goes down, she rotates back. Good. Now this time she has sheared slightly, so I need a little bit of proprioception for her. So as she turns back towards the window, she keeps the length. Beautiful.
That's better too. More so you can think of this in terms of your, um, that one from the mat work. What's it called? Chris cross. Good. Last one. And the hands give great feedback as well. You can have this idea of pressing the head back into the hands. Really elongate the spine. Good. So now stand up, have a little walk and see how that leg feels. Is that a good Ooh, good. Okay, let's do the other side. So now you're going to face the window.
So ideally we want a quality of turnout on both sides as well. So now here we can really see this is the same side on the ankle articulation that we had with Christie. I need it to almost think of dropping into her left. Sit bone more. Yeah, bring the hands behind the head again. Good. And now we've that length we need to find here that we needed to find an ankle articulation. Can you lift off my there? Yes. Good. Now a little bit more turnout here and a little bit more of this dropping into this. So we're going to go ahead to start moving.
So press the pedal down and find that length. Good. So on this side, I really wanted to find more space around this hip bone. So what I'm going to cue is I want her to think of rather than her leg going up and down, I want her to think of this like going out towards the corner of the room and out towards the corner of the room as it left better. But again, we still need to get that little sink. Yeah. Beautiful. Keep the sense of wrapping and spiraling the fireboat out. Good. One more leg comes up and now we add in the rotation. So now,
And three more. So I really want her to twist into her leg, not away from it. Good. Last one. Good. And relax. Okay, so we're going to take the box away and we're going to do a little side stretch. So if you can sit facing the window for me to start with
She's going to press the pedal down. Just draw the ribs back. Good. Now I want her to think of turning her stern. I'm her breastbone, towards the pedal. The pedal will lift good. And then she's going to turn her sermon to the ceiling. And again, the pedal will move because the spine moves beautiful. And she's going to do one more. As she turns, she's going to lift her heart into the back of her ribs. Beautiful. And again, so the pedal will move because the spine is moving, therefore the shoulder moves and therefore the arm moves good. And then she comes back up. Beautiful. Let's change sides.
So just bring your left leg a little further forward. Good. And again, this is the side we really need that sense of dropping into the sit bone without shifting. Eat. Good. So we're going to do three straight forward to the side. This arm lifts to the ear and we side bend. So again, I'm just gonna keep my hand here just to remind her to find the pedal and the length. Beautiful
I wanted to really think of what her ribs are doing so she's not extending. Yeah, good. It's quite easy when we side bend to simply thrust the chest out.
So from here she's going to turn her breastbone to the pedal and lift into the spine and then to the ceiling.
Literally to the horses mouth. So that's why the rotation and the breathing are so important. So our next exercise, we're going to come back to the legs and we're going to go to pumping. So Christy is going to come and stand at the front of the chair and we're going to play. So let's start with your right leg as the support like so the left leg will go onto [inaudible].
Now press the leg down. So in the same way we did with his seated, we've now brought Christi up to standing to vertical to see what happens. And I really want her to think when she's pulling the pedal down, that it's not an up and down motion. If you look at the way the chair works, it works on an arc. So what's happening is her leg isn't simply pumping up and down. If she thinks of pulling back and through and down and lifting back and through and up. Good.
And that allows her to drop into this hip without rotating this rib back. This is really challenging for you, isn't it? Yeah. Good. Last one. And then change legs.
So when she was on doing her foot work, her left foot, the arch kept pronating super knitting. Can you think of your, the arch of your left foot lifting off the floor more. So you're going to really draw up through this inside thigh. Yes. Now allow this hip to drop. Good. So it's the support leg that's really doing the work. Yeah. So I feel different. Good.
So this is where the feet are so important. Anything that's happening at the ankle is going to go up through the leg into the hip and really affect the standing posture. There we go. Last one. Press down and lift. Good. And you can stop. Good. These are the exercises on the chair that I choose to do with the riders.
Obviously all the chair repertoire is fantastic, but these ones I specifically look up because they deal with the asymmetry in the cemetery. So now we're going to move on to the ladder barrel. So we in start all of the barrels section with some extension. So we're going to start with Swan dive and I'm going to get Christie to start with the heels down on the frame and she's going to rest her body over the barrel. Good. So the hands are facing inwards and all I wanted to do to start with is to allow her body to take on the shape of the barrel just to allow her body to curve as the first time we've really done much flection and extension. So the first thing that's happens is she will lift her arms in line with her ears and then she starts to extend her spine. Good.
And she's gonna lift, reach back. Beautiful. And then all I want her to do is to come back forwards and then wrap around the barrel again. Good, lovely. And again, arms come in line with the ears that had left. And now I really want her to reach behind her and really find the work and opening from the hip as well. Not too much in the neck. Good. Now she's going to come forward into a straight line. And then from here I want her to really lift her abdominals over my hand and really lift up and round over the bar.
Lift off of my hand more yet more curve. Beautiful. Good. And last one, the arms lift, the spine lifts, she reaches back and then she's going to reach forward and out to that lovely long, straight line. Good. And now she's going to reach back again for the last time, all the way back. Good. And then forward, find this long, straight line and then really lift to come up and curve and flex over the belt. Beautiful. Good. Now she can drop her heels to the floor and slowly roll up.
You can drop them onto the actual wood. Good. And then roll up. Ooh, good. Okay. Horseback. Horseback. What do I need to say anymore? I love horseback. So you're going to Mount your Steed. Okay? So always make sure that they are about a hands gap from the edge of the barrel like we do on the short box. And the last thing, you want them falling backwards off the horse. So we're going to start with the hands at the front just to make sure that she's aligned and just come back. So again, we have that vertically aligned spine.
Now lift the legs a little higher. Good. A little higher. Even still, there we go. So
So this time what I want her to do is rather than her spine going backwards, I want her to think of her limbs going forward and she's going to lift into her flection. Less here, more from your lumbar spine or wrapping there. So we get a much more equal curve starting right from the tailbone. Good. And then she's going to lift back up to that vertical. So the way this really relates to the rider is the work that we get here. So when you're giving direct a through the leg, we really wanted to come from here. Yes. That that's what I want her to feel.
And then back up. Now obviously with horseback we have this cube, we want to see daylight onto them. But so now I'm going to see if she can lift. Good. Now hold it and circle the arms.
So just reach forward and about, think about the size of a cricket ball cause we're British on British. Really tuck the tailbone under that and keep the lift good. And then she's going to sit back up. Um, pull the arms back in. So again, as you sit back up, really make sure that they don't then sit into extension and undo all the good work you've just done. Bring them back to that vertical spine. Good. So now we're going to come in a dismount.
We're gonna come off from horseback and we're going to do a little side stretch. So I'm going to take the pole. Okay. Place your feet upon the wooden frame. Good. So what we're looking for in this position is the hip should be comfortable into the barrel. And I don't really mind which foot they have in front of the other. What I'm looking for is it that pelvis is level.
So if having one foot in front of the other makes their pelvis really twist, then just simply switch the legs around. Now she's going to raise her arms overhead. Good. And what I want her to do is I want her to lean over the barrel. So if she makes a long diagonal from her pubic bone to her head and then back up, good and again and she's going to reach out to me and lean over the bow. Good. That's low enough. And then up. Good.
And again now I need her to bring her as foot there and bring the head back. Yes, I'm then up. So I really want her to reach through both arms equally. So this underneath arm lift off my arm there on up cause there's a tendency to kind of lean into the side and I'll lift off my hand so we get more length here. Good. And then up. Good. Now she's going to bend her arms.
I'm going to remove the pole and she's going to place her hands behind her head. So now we add in a little cheeky oblique twist. So she's going to find the same long diagonal that she had. But now what I want her to do the same as we did earlier is I want her to turn her sternum towards the ladder, not just the elbow, the sternum. Good. Then she's going to come back to face. Front.
Now she's going to turn her sternum towards the ladder. Lift your chin. Good and back. So what I'm looking for, you can see she's kind of come out of that lean. Lean a bit there. So you really want to keep this length here. As you twist this, she's going to twist without losing and shortening the side and come back. Lean a little more. Yep. And twist. Good. How's that? One more each way.
I'll give her a pullback. She's going to lift it up. Good. So can you, yeah. Drop the lower ribs down. Lift the back of the grip cage up. So now you've got this lovely back view. What we're looking for is that as she reaches out, she's not leaning down. It's an active reaching out.
Stop and lengthening this side. So come back. That's what I want to see is this side lengthening. And then this side lengthens to come back up. So really watch that this sides get the length that beautiful on up.
Cause she's going to lie on the barrel. Good. So if you think of why the apex of the barrel is what I want, is her ass to be about an inch behind the apex, the barrel, which is come a little further forward onto the barrel. Yeah. Okay. So now she's going to bring her hands to her forehead and she's going to lower her rib cage down. So she's in this neutral position that was a little overcooked. So yeah, think of lifting your chest. Good. Okay. So from here, Chris is going to be delight, isn't that we're doing more rotation. So as she exhales, she's gonna turn away from me.
So now I'm really wanting to encourage this length here through this side and then back to the center and twist. So this sequence with the barrel is really focusing on this upper body mobility while keeping this all still good and lower slightly cause you started to rise. Good. So again with your riders, what they're looking for is the ability to give good, clean cues and you can relax for a second. Always give your body a bit of a rest good. And then you're going to come back up. Good. So now we're going to add an extension.
So Chris is going to rotate away from me. She's going to release her right arm down to her side and she's going to extend straight up the back line of her body. She's going to reach that hand back and then come back down. Good. Now keep the head up a little higher. She's going to rotate towards me. Now I really need her to keep this length here on this side because this is the side she wants to shorter reach the arm down to your side and you're looking at the extension is a clean line directly up the spine. Good.
They don't shorten to one side. They don't twist and down. Good. Two more each side. Good. And again, really make sure they don't mix up the movements. There's a very distinct rotation and a distinct extension. So hold it here. Length and more. Good. Lifts your head more. Good. Now reach the arm. Now.
Extend good. And again, she twists. Now come back down lower, slightly lower and lift your head and now twist. Good reach and extend. Good. Last one. This left leg is really working to hold for still my Tony.
You can see we've got a tremor of truth going on here. Good. And relax. Like I said, the safe way to come out of this is if you just place your hands on the ladder barrel and then she's going to take one leg out, place it down. Good. And that's the end of our ladder barrel section. So we focused on rotation and uh, symmetry and asymmetry again through the rib cage, which gives us on our riders the real ability to hold the reins without tension and without, um, unnecessary holding patterns. Uh, last section for today is the Cadillac. So our first exercise on the Cadillac is leg Springs.
So I've got purple once
So just wiggle away until the arms are straighter. So when she was on the ladder barrel and she was holding the pole, we've got this idea of her really lifting and reaching out. I want the same thing here so much and you're still holding that pole. Lift the chin. Good. So as you inhale, as you exhale, just let the back of the ribs drop. Good. So we're starting with frog. So the heels are together, the toes are report.
As she exhale, she presses out and then Ben's good. So what I'm looking at as she keeps moving is all the work we've been looking at in the thoracic spine. We still have a little bit of this extension pattern creeping in. So I want you to bend the knees in and as you exhale, really allow the ribs to drop. Good. So find the back of the mat with the ribs. So this is really common with riders.
It's the most common place for the intermediate to the advanced rider to hold their pattern. So we really need to make sure that the breath is really, really being expelled well and being allowed to have this inhale and exhale, this lateral breath pattern that we talk about. Good. Last one. Exhale. Good. That's better. Good. So the next time she straightens for legs, we're just going to do just some lowering of the leg. So as she XL, she's going to pull the legs down and I want her to really reach out and long on an arc. Good. And then lift. And again, as she exhales, the focus almost needs to be more on the ribs than the legs and the spine.
[inaudible] what I'm looking at is all the things we were looking at on the chair. Is her pelvis remaining stable as the limbs move? Yeah. And I really need, I'm going to hold the straps and I want to, I'm going to ask Christie, can you lengthen as this left hip? Normal? Yup. Good. Drop into your left hip more. Good. Now we're going to do some circles. I'm just going to give her a little bit of good. I will finish that sentence. I'm just giving her a little bit of feedback.
So now I want you to keep that stretch on the spring when I let go. Good. So this is really highlighting the asymmetry that we've been seeing left to right. The left leg is doing something completely of its own choice. So what I'm going to cue, we're going to reverse and I want you to think less about opening out. I want to think about bringing the legs together.
So you're going to bring the legs together and you need to reach more to me through your left. Back of your fi. Yeah. Back of the thigh. More that you feel that. So we're going to look at the cross body coordination. It's the left hip. I want her to press into her right arm even more and drop into the left hip.
So I'm going to let go. And the two circles. Yeah. So also with the legs Springs also focused on what the upper body is doing as well. And then if she's going to bend her knees and she's going to have a little breather. And then the last thing we're gonna do is beats. She's going to do six at the top, six in the middle, and six in the mellow position. I'm going to get out. [inaudible] it's, you know, straighten her legs out to about 45 degrees. So again, we're thinking a beating from the inside Feis so she's going to open and close the legs together. I want her to keep them quiet, small, and stop. So when you're doing this, look at the spring, she's going to lower her legs down to about halfway. Now controlling what happens at the ribs. Now look at the spring.
I want you to keep this tautness of the spring as you open and close your legs. I don't want to see any of that sort of bagging of the spring. We get some times that's better. So we're really getting a to control the spring and then stop. So it reached the legs out on an arc. And again, one, two, three, four, five, six. Good. Lift your chin, look happy and lift your legs again.
Halfway and last set here in the middle. Two, three, four, five, six stop. Loss at at the top. Controller ribs on one, two, three, four, five, six. Good. Now she's going to bend her knees in. And what I'm going to do for the last set is we're going to bring her heels as close to her bottom as they'll go for frog. Good. Now she's going to straighten her legs out.
They'll go. So for the last time, this way, what I want you to before you straighten your legs is really find the back of your ribs. You're gonna inhale, exhale, and really now straighten the legs. Yes. Extending the legs from a stronger foundation. Part the legs. Lift the legs, bring them back together. Keep attention in the spring as you bend the knees and bring your heels close to your bottom. Good. So now we reverse straighten the legs up into the air.
It goes low. As you are comfortable, bring the legs together and then bend them in. The legs don't need to go to the mat. They need to be in control of the spine more than the legs. Need to go to the mat, straighten the legs up part, pull down. Good. Bring the legs together. Bend last set. So she's going to straighten her legs up.
Open, pull down together and bend in. Good. And you can relax. So by the end of that section, Christy had really found much more depth of control at the back of her ribcage. Well done. Did you feel the difference? Good. You can take yourself out of the Springs. So our next thing, while Christie does that, as I'm going to set up the push through bar, so she's going to come and sit with her feet against the two uprights and place the hands on the bar. Good. So wrap your thumbs around the bar for me. That's good. And can you straighten your legs? Good.
So bring the heels as close to the foot bop to the uprights as you can. Good. Now what I want to do is I want you to start by rolling back, so you're gonna start to roll back and bring the ball with you. I'm going to keep going back. Keep going back and now find the moment. Hold the bar properly really firmly where you go up and over the bar. Good.
Now lift into my hand here and find more roundness of your spine. Good. Lift the head up. Now what I want Christie to do is to keep pushing the bar, but start to roll back up from underneath and really lift a spine. And so my hand is, she rolls back rolling from underneath as if you're doing a robot with a robot bar. Good. Then the bar comes through and up and she pushes the bar up all the way. Now can you lift from your pelvis, bring the rib cage back and send your pelvis down and the ribs up.
Send your sit bones backwards. They're good. Now she's going to start to roll back again. She's going to pull the bar down with her and really pull the bar down. Good. And watch the head. She finds that moment, that biting point where she can us the bar down without retracting the shoulders and lift up and over it. Good. Now think of pressing the bar forward, not just from your arms.
Press the Buffalo from the rib cage.
More there. That's better. So we still almost need more. Can you send your sit bones backwards? But now bring your ribs backwards.
You can't do breathing without a trapeze. Okay. So what I'm going to check is I want her about a hands with from the ends. If you just move back slightly and when her feet are in the strap, it should hang pretty much perpendicular. So I just need to adjust it. It's going to bring it slightly more. Oop.
Okay. Sorry. So in this position, the heels are together, the legs are turned out, and I want her to really remember how it felt when she used her legs in the legs spring to get this sense of lengthening through the back of the leg without tucking. So let the front of the body open more. Good. Breathe in. As she exhale, she's going to control her ribs. You're going to lift her chin. I'm going to give her the ball. Okay. She's going to take hold of the bar. So the first time part, just the arms.
All I want her to do is as she inhales to think of bringing her knuckles towards her hips. So as she breathes and she's going to bring the knuckles to the hips and just hold the position. Two, three, exhale. Good. So really use the in-breath to help you. So as you inhale, hands to hips. Yep. Good. Exhale. And again, breathing in
The connection that we're looking for is the most important part of the exercise. The connection they get here down the sides of the body. So would normally do three. I just want one more. So you're going to breathe in? Yeah, that's better. Now reached the bar towards me. Find that right shoulder a bit more. Yeah. Beautiful. And then control. Good. So now we do the hips.
So as she breathes in this time, she's not going to spine curl. She's going to lift the body up. She's not going to articulate the spine. It just lifts. Good. Hold the breath, and then exhale to roll down. All the way to the neutral. So again, you're going to breathe in and lift and then lower down. Good. So I really want her to think about legs. Spring work.
So rather than the legs pulling down into the strap, I want her to think of lengthening through the strap and over. Lift up. That's better. Good and down. So now we bring the two elements together. So this time on the in breath, we bring the hands to the hips and the hips to the hand. Two, three, and release. Good. Two more. As you pull the bar to your hips, I want you to imagine your net getting longer. Free up the neck, reached the bar to the hips. Good and release.
And again, lift the chin and let the net get longer as you pull the bod down. Beautiful. That's so much better. Good. And you can let go of the bar and you can take your feet out of the trapeze. Good. So our last exercise is such a lovely way to finish with the breathing and the spread Eagle. Chris is going to stand up onto the Cadillac.
Now from here, I want her to think of horseback. She's going to find that horseback position of the arms and the legs going away as the spine goes backwards. Now from here, she's going to articulate her spine. She's going to press the pelvis forward and she's going to come into the extension, but not by pressing the hips too far forwards by really articulating the spy, pressing its foot slide. There we go. Good. And then from here she's going to come back to her long stretch position. Bend the arms and come forward. Good. And again, she leans back. She finds her long stretch, that long line from ear to shoulder, hip to heal. Now she's going to round back.
This is that push through position I really wanted before lifting into her back of her ribs. Now she's going to press the hips forward. Find that beautiful extension. Good. More hip, more hip, more there. Now last time I forgot to round again. So she's going to come back into her seeker. She's going to find her horseback. She's going to find her push through that she had here. Good.
And then she comes back to her long stretch position, opening the hip, going open. Those hips. Yes, and then bend the arms and come forward. Last one. So we're putting all the elements we've worked on together. She rounds her back. She finds a horseback position. She comes through, she finds the long length we were trying to get in the leg, spring position. She's going to extend like we did on the ladder viral. Then she comes back and she passes through neutral into that lovely rounded position.
The weight should be equal through the fate that we've been looking at on the chair. She comes back up, she stops and she brings herself back up to hopefully a vertical position with our arms in line where they would be on the horse and she's finished. So this is the kind of work I do with my riders on the barrels, chairs and caddy. Any work you do with a rider is going to be fantastic for them. But these exercises are specifically when I work with them, I look at the asymmetry of where the pressure is going with through the legs, how they're moving through their thoracic, so that when they come to ride, they can bring all this subconsciously into their writing. So thank you, Christie, and thank you for joining us today.
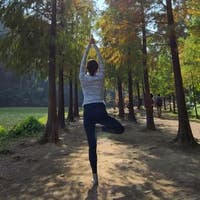
Pilates for Athletes: Pilates for Equestrians


Comments


You need to be a subscriber to post a comment.
Please Log In or Create an Account to start your free trial.
