Description
About This Video
Transcript
Read Full Transcript
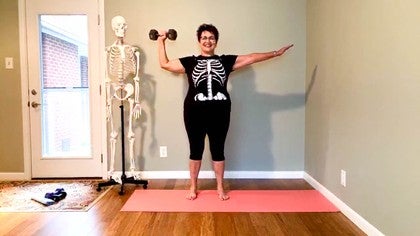
Practice is the art of rehearsing a behavior over and over for the purpose of improving. Patience is a part of our practice, as is persistence. I believe that we have to practice at our practice. So I'm glad you joined me today for our class on Thoracic Mobility and Movement and today's props, we have a couple of blankets, a couple of yoga blocks and what we're going to start with is a dowel or a short box pole. So in this sequencing today, I'm going to spend some time in a very deliberate way explaining to you how to set up some of these props and using the wall to get into the thoracic area with our breath.
First, we're gonna just start with our legs apart, we're just gonna take the stick up and down. And as you do this with me, I'm gonna talk a little bit about the act of what we call a deliberate practice and doing something deliberately means that we get a little bit of knowledge included in it. So I just hope to spill a little bit of knowledge into you today as you practice the idea of how entertaining our thoracic spine, if you will, will help our neck, help our back, help our breath, help our mobility. So as the arms go up and down, the first thing that we tend to think about is we're hanging on to the dowel, we're raising our arms up and down. But what I want you to do is to raise your arms up and push the dowel up as you push your feet down and squeeze your upper shoulder blades together, and then come down.
So the thing that's important here, if your arms say only come to here, we don't want to take the stick higher and lean, we wanna take the shoulder blades up and the upper shoulder blades come together as the lower shoulder blades are broad, okay? Do that a couple more times because in order to fully move your arms, you have to be able to move your blades. In order to fully move your blades you need to experience the full expansion of your thoracic spine and your rib cage because the ribs, of course, attach the thoracic spine. And so now with the arms overhead pushing up the bar, side bend inhaling into the side you're leaning away from, to the length and side pull the stick back up. Go over to the other side, I'm gonna push with my top arm, okay?
I'm gonna push with my top arm and then I'm gonna pull my top arm back. We'll do that again. Push with the top arm. Exhale, stay there. Inhale again, pull with the top arm, come back.
You want to feel this in the side of your thorax, okay? Not in the nape of your neck. So I'm not even gonna demonstrate it in a neck grabbing fashion because you could certainly feel if that's in a neck grabbing fashion. So now we're going to do the same action arms up, side bend again, add rotation to the floor. It's okay if the pelvis moves, and then come back to center, bring it up.
Inhale opposite side, exhale, rotate to that side, get a sensation, bring yourself back and come up. Arms up, if your arms are getting tired, please take a break. So reach up with the shoulder blades, side bend, exhale, rotate. Back to center, bring it up. One more time, to the other side side bend, rotate, center, come back up.
Now we're gonna side bend and instead of rotating towards the floor, we're gonna side bend and rotate away from the floor so that's a little extension force and then come back. Side bend opposite side, rotate away and bring it on up and then rest your arms down. When you do a very dynamic breathing exercise like that that incorporate your arms and your shoulder blades, it does take a little bit of strength as well so wouldn't be surprising if your arms got a little bit tired. The next thing we're going to do with a dowel is to take it behind your back and raise it up so that it's kind of at your thoracic so I'm gonna take my elbows and bring it underneath. So as I pull my arms forward, I'm gonna exaggerate here, I'm gonna pull forward and then I'm gonna take my upper chest and lift it, okay?
So we wanna be careful here that you're not gonna thrust your thighs forward, you want the thigh bones to stay back, the belly to come in and now you're vertical. So now from here, I like to have the legs apart just a little bit, you're just gonna have a little rotation, and a little rotation. So now the shoulder blades are not upwardly rotating, your arms or not going over your head and so now you can leave the shoulder blades on your back and pull, see with this arm right here that I'm waving to you, pull that stick forward, let your pelvis go creating a spiral, and then use the back arm to push that stick forward, and then go to the other direction. Now here comes the tricky part, I'm gonna rotate my thorax this way but I'm gonna turn my head this way and I'm going to keep looking at the camera as I turn my thorax to the other side and keep looking at the camera. We may or may not feel that we go one side more than the other, I can certainly feel which side is more mobile on myself but we just make a notice because before we can have any change, we have to make a notice.
All what we're doing here right now, going through some breathing exercises, going through some thoracic mobility exercises. Now I'm gonna take the bar over my head again and if I have the range of motion in my shoulders, I'm gonna take it behind me so that it's kind of in that where the spine of my scapula is, okay? And then from here now I'm gonna squeeze the stick with my hands and I'm gonna add a twist, I'll take my head with me, add a twist. I'm also pressing into the opposite foot then the direction I'm rotating. For example, for me right here, I'm pressing down into my right leg as I twist my trunk to the left and that actually gets my posterior oblique system engaged as well.
So I'm gonna twist to the right as I push with my left leg, and come back again. Good. Just using the dowel, using the stick to get us to some rotation. Again, you're doing it only to the distance that your thoracic spine allows. Now we're gonna separate the legs, we're gonna hold the dowel in front of us or your pole in front of us, you could even have a foam roller if you needed to for a little bit of support.
I'm gonna turn my knees out and I'm gonna put the dowel on the floor and I'm just gonna come to a little squat pressing down on the stick. My stick is gonna go away from me, my shoulder blades protract and then I'm gonna stand up, I'll do it facing to the side. So as I squat down, my knees come forward, the dowel goes forward, my shoulder blades protract and then I press down and come up tighten my bottom. So what happens here is the depth of my squat also helps me to not collapse my thoracic spine. So also needed for thoracic mobility is core engagement, core strength and core control.
Let's do two more of these. Inhaling, exhaling, switch which hand is on top. Inhaling and exhaling. Now I'm gonna squat down and hold and then I'm gonna stir the pot with my arms and my blades and then come up. And then I'm gonna do that again and then I'm going to stir in the other direction not jutting my head forward but circling the dowel to get a breath in that 360 degree area around your thoracic spine.
You'll see just by doing a couple of those you get a little breathless, we're adding functional movement, of course, with a squat or a lunge, we'll do that after. I mean a lunge, that was a squat. And now we're gonna take the pole, now you need to be careful with this, depending on how high your pole is, I'm gonna take my pole up to the ceiling and now instead of pushing down to squat, I'm gonna push the pole up as I sit down. I'm not gonna collapse forward, I'm not going to tuck my bottom, I'm just getting into my hip mobility as I keep my thoracic spine up. So remember the joys of your thoracic spine being mobile and open allows you to do other exercises more efficiently and effectively as well.
So put that down, you should be warmed up with your breath, warmed up with your body and now we're gonna come down to the hands and knees for a sec. And just take a little old-fashioned, I don't know why I call it old-fashioned because I do it every single day, a little cat cow, both pieces going into extension and then both pieces coming into flexion. So I'm gonna take both of my feet and sway them to the left, turn and look over my shoulder, shorten on the left long on the right, come back to center. Take both my legs to the right as I look over my right shoulder, lengthen on the left, shorten on the right, bring myself all the way back. Now when we do this cat cow exercise and we do both extension, both flexion that gets that nice mobility through the whole spine, a piece that often gets missed in our thoracic spine, especially for people that have a little bit of a forward head or a little bit of a collapsed front of the body, that can actually lead to shoulder problems and the forward head.
I mean, I'm not saying everybody's like this but when we want to open the chest, it can't just be throw your arms back, right? We have to be able to lengthen the front body, lift the chest. But sometimes when that happens, we arch the low back too much. So I want you to grab your blankets or your towels right now and we're gonna take a minute to set this up because I think this concept is an important one. I'm gonna take this blanket and put it like this, that is gonna be for my bottom and it's gonna give my bottom a passive feeling of lumbar flexion.
And then the top part of my blanket is going to be rolled and this is going to give me a feeling of thoracic extension. So it's gonna look like this, you can watch first and then do it and then we'll play with it again. So I'm gonna take my torso and put my buttocks over the blanket as my torso lies down. I'll leave this out of it now just so you can get the gist of it. So with this blanket kind of positioned underneath my bottom, you can see that my pubic bone is higher than the sides of my pelvis.
So I'm in essence in a posterior pelvic tilt, I couldn't engage my belly, this top of my torso is shorter because I'm in this posterior pelvic tilt, okay? So by posteriorly tilting my pelvis, I've elongated my low back. Part two, keep that there. Now we're gonna take the other blanket, takes a second to get there. So I'm gonna feed the posterior pelvic tilt with the lower blanket and then I'm gonna feed the thoracic extension with the upper blanket.
Take time, give yourself permission to take time to get set up for practice, okay? Because if you've never done this before, it's gonna feel a little foreign. So what have I done here? Well, I've occupied my low back in a position of a posterior tilt, engaging my belly. And now this blanket under my chest, if I even raise my arms, I'm gonna get a little extension of my upper chest.
So now I'm not driving into my lower back extension because my lower back is flexed because of the blanket. But my belly is turned on, my heels are pressing down, my glutes are a little active but nothing's gripping and then I take my arms up. With my palms touching, I can turn to one side, come up, turn to the other side. I can hold my hands here, I can sway my knees to one side and alternate with my arms. I'm creating that feeling of, you know, like fascicle stretching, breath, but really going through the idea of extension in my upper back without just gripping into my lower back.
I could put my hands in a back bend position because, ultimately, this is how we would do a back bend, we'd lift the chest without punching the belly up first and we would just hold that so I can just play with my arm position here a little bit, I can alternate my arms, I can put some weights in my arms to tie the core in. Most important thing is this passive feeling behind your chest of opening the chest and lengthening the low back, okay? So coming out of that now, that would be of course in our sagittal plane, right? So now as I come back to this position here of the hands and knees, let's see if I can maintain my lumbar area without sagging it and then just extend the thoracic area. And then see if I can maintain my thoracic area while I lumbar flex from my tailbone.
Again, flattened low back if you will, and then arching the chest maybe I reach one arm up and then come down. Other arm pushes away, shins pressed down, lift, come back. Curl the toes, sit back and forward, remind the hips that they need to stay mobile, okay? And then from here, now, take your left arm out of the diagonal, and lift that up from your back body as I push on the right side, it's like a little half rotation, half extension and then down. Right arm lifts, a little piece of rotation and extension with the arm out in front.
So we know that this exercise opposite arm and leg reach, so important, now we do opposite arm and leg diagonals to lengthen the space between the ribs, right? All those things and now I'm gonna take my arm out to the side and then as I open my chest by pressing down on my bottom arm and raising up the top arm, and then I bring it all the way down. Let's do that three times. So as I do an active twist in this quadruped position, I push down with the right, my upper arm shoulder blade is pulling me back. And we'll switch sides.
I don't wanna hit the wall. So in this particular sequence, it requires me to have strength as well as mobility. If I just took my arm and reached it up then that would just be wigging out my arm. So I'm gonna hold my arm then I'm gonna pull that upward shoulder blade towards my spine, like my upper shoulder blade is chasing my down shoulder blade and then come back. And then sit yourself back, round your spine, take a breath, inhale all the way through these back ribs and exhale.
So in that sequence, it was more of a active feeling, okay? Where you need your muscular strength to get you through that. So now coming back to the side, we're going to weave in kind of another passive exercise for thoracic and you guys have all seen this before, but I want you to be sure you can do it with a support under your head, your knees fully in. And that when you do this exercise of opening your chest and taking your arm out, I want you to be really mindful of this top arm. So I don't want this top arm to just throw back, I'm gonna have you take it into your sternum and I'm gonna have you turn your sternum as you turn your bottom body forward of this bottom arm.
So now as I open my chest passively in this, I'm not just throwing this arm back but maybe I can guide my sternum, I can guide my ribs, I'm going for a feeling of a spiral. Maybe this arm goes to the ground, maybe it doesn't. Maybe this top leg can get heavier if I straighten it out and that adds weight going that way so that my thoracic spine can feel the rotation this way. I'm gonna turn my head and look all the way behind me and see if that will help me get a little more rotation and then I'm gonna take my head forward. And then I'm gonna mobilize my neck just by rotating it, nothing extreme and then I'll bend my knee again, take my top arm, reach it forward, protraction looking down.
Now I'm gonna take my top arm, bring it up over my head, maybe my arm touches the ground or something over me, maybe it doesn't but what do you remember when you lift your arm over your head, it comes from a lift of that shoulder blade, right? Not a shortening of the neck, your arms have no attachment to your neck. So reach that blade up and then open your back blade towards the floor, open your back blade towards the floor. And then take it around, and then take it forward. So talk to your blade, pretend like you don't even have this arm, the blade goes forward, the blade reaches up like you're pushing that down over your head and then the blade goes back.
This is a good idea, look at this ball just happened to be there, if your hand didn't touch the floor, it can touch a ball or blanket, and then come all the way around. We'll switch to the other side. So what I mean by talking to the blade is that a lot of times we circle this arm, this humerus bone in the joint and if the blade doesn't have nice mobility on the rib cage and the rib cage doesn't have nice mobility, then your shoulder can get a little caught at the top, a little impingement, little acromio-clavicular challenge here, you know, where the shoulder joint meets. So sometimes we have to think blade, blade, blade, blade, okay? So see my arm isn't even going over my head but I'm asking that blade to come around.
So it really can't talk about thoracic mobility without really talking about the blade as well, which is what we're doing here. So now I got this microphone here, I have this microphone here. Bend the knees in so the top arm will go forward. You want your head to be supported enough that you're not just hanging on, okay? As I open my chest, my hand will go on my sternum, my bottom body will move forward a little bit, I'm gonna open my chest.
And then maybe my hand will go to my ribs. My knees will come further forward, top leg gets heavy so I'm creating this spiral in my spine and you're not going to a certain point, you're going to the point where you feel a little bit of opening in your chest. This wall is behind me, I can use that to help me a little bit. So now watch on this side, I'm just gonna put my hand on my shoulder, okay? So that reaching my shoulder is really stiff and I'm just gonna do blade forward, squeeze my blade back, open my chest.
Blade, blade comes forward, comes back, opens the chest. One more time, blade comes forward. Maybe I can lift my arm up a little bit, maybe I can paint the ceiling with my elbow as my blade comes back. Now I'm gonna leave that blade back, turn my head, look towards you, turn my head, look towards the other direction, bring myself back to center, sit myself all the way up. So as we work the blade, we in essence, work the thoracic spine as well.
So coming to your knees now, we're gonna move the blankets out of the way for a second and we're gonna come and take this yoga block here and we're gonna take the yoga block and put it underneath our hands. So then you're gonna say, well, wow, how does this help my shoulder blades? Well, a lot of times what happens in doing quadruped work is that the wrist gets really tired and people kind of collapse in their elbows. I'm gonna actually do this head on just for a second so you can kind of see this here. You'll notice that my fingers are flexed over the brick and I'm kind of grabbing the brick with my pads of my fingers and the pads of my thumb.
And what that does is it gives me a very good connection into my arm so that now I can squeeze my shoulder blades together and press my shoulder blades away without changing the angle of my elbow. I probably should have done this first before the other quadruped experience but it's okay, you you'll understand when you come back. So I'm not resting, I'm not resting on my hands, I'm grabbing the brick with my finger flexors over the edge, okay? Because what happens again, people come out here, say this bothering me and then the shoulder comes forward, and they can't ever get it. So I have to pull that shoulder back, tidy myself up, make sure my radius bone receives the brunt of this work so maybe I do need to prop up, okay?
So that these arms stay really strong. Then as I keep the left shoulder blade engaged, I do something with my right arm. Again, we've already done this but I'm making it a point now looking at the wrist. The right one, okay? Any variation there of the arms so that one of the blades is stable and one of the blades is moving, okay?
So this is an important aspect here of that. We'll come back to that in a little bit, we'll come up to standing now. I'm gonna put both of these bricks against the wall. Now I'm gonna use the wall to give me a little active assisted work of my thorax, I'm gonna put one leg on both of these bricks, I'm gonna make sure that my left thigh is pressing down to keep nice engagement in the back of this hip and then I'm going to reach my right arm up, my blade will slide up, I will turn my torso towards the wall, I come up and down. You'll notice my thumb is facing down, when I turn my chest, my palm is on the wall.
I can do it like this and then turn my palm down. Get a good amount of these in. If you don't have the range of motion in your shoulder, watch, you just take the arm behind you, you see over here so now my arm is down and I just turn my thorax. So I let my right shoulder blade, that's this arm right here, I let that shoulder blade pull back towards my left shoulder blade, okay? If my arm can go up, it goes up and around and then over here, it's still pulls back towards my other shoulder blade, okay?
Because that's giving me the rotation of my thorax, okay? Other side. On this side, I'll do the version first where the shoulder blade isn't going up. So I'm just gonna take my thigh is here, my belly is engaged, my core is engaged, I'm gonna turn my chest. If my pelvis moves a little bit, that's fine but I just don't want you to, you know, lurch into it like that.
So both of my arms are down, say my shoulders bother me, I'm gonna still use the wall as I turn my chest towards the wall. So now I'm gonna let this one where my thumb is pointing, that's my left shoulder blade and I'm gonna pull that left shoulder blade towards the right. And then I'm gonna reach my right shoulder blade maybe this way, and then come back and do that again. So I'm elevating this foot so that I have something to press against the wall, you could put your leg on a short box or on a chair but I'm using the wall for feedback. And then we'll come to the full one where we take your arm all the way up and around and all the way up and forward remembering again, that when the blade lifts and the blade lifts to rotate, it's the upper part of that blade that's pulling in towards the spine and then we come up and then around.
So with that rotation, with the knee lifted and you try to rotate, you're trying not to extend your back to get more rotation, sometimes that happens. So to take that away, I'm going to remind you of the exercise we did with the blankets, right? Where we put one of the blankets under the bottom to create the posterior tilt. So what we're gonna do now is we're going to advance that in a squatting posture and I'm gonna take this blanket, and I'm gonna fold it in thirds because that will give me a nice lift of my heels, okay? So that I can indeed squat down.
You can watch this first to see if you think you have it in your body. It's just a little way, as I squat down now and my heels are lifted, okay? I can easily squat down and easily stand up. So as I squat down, it's gonna pull my tailbone down a little bit and now in this posture, I'm in somewhat of a posterior pelvic tilt, so that when I do this rotation, and I sit back on my heels, that I can talk to my upper chest to rotate, and my lower back is not in extension. So I'm gonna push my hands against the wall, twist my torso and I'm gonna look in front of me with my head, and then look behind me, because sometimes just going through some motion of your neck will let your lower part of your thoracic spine or the lower part of the neck which is the upper part of thoracic spine do its work.
And then take my arm up and forward and bring myself all the way up. You can do that a couple, two or three times. You could also do it sitting in a chair but this is a little, it's a little more advanced, it gives you a little more information in your thighs because our mobility is not only passive, as we practice and get better, what we're doing will become, you know, more proficient, if you will, in some of the other exercises. So on this side here, I'm going to squat down and open the chest trying to keep my heels down on the blanket, okay? So that this part of my back is dropping down and obviously, this is my side that's a little bit stiffer so I gotta leave that arm down.
And I felt this again in the stick one as well. So I'm gonna turn my head that way, and then turn it this way and I'm gonna try to turn my chest more letting this arm shoulder blade pull towards my spine, and then pick it up and around and then bring myself all the way up to standing. Do that a couple times to get your legs going as well. All right, so now we take that away. Let me have a little interlude here because I think it's important to have interludes.
I've got two bricks, but one brick between my knees, you can of course use a ball. I'm gonna take the other brick between my hands. So my interlude is a gentle squeeze of the brick and a pull of the belly and a tightening of the buttocks. So really, you shouldn't really be able to see anything, because I'm not tucking or rolling my spine, I'm just squeezing the brick, tightening my bum and then release. Now I'm not over squeezing the brick, I'm just holding it, arms come up over my head and then they return.
So now I'm getting my front core and my back core is well engaged as I raise and lower this weighted brick, I can take the brick around in a circle and that will kind of feed information to the front of my trunk without chucking it or changing it and then I can take the brick and one of my hands and I can twirl it around. Again, why am I doing this? I'm practicing becoming aware of how my blade and my arm tie to the awareness of my trunk and my thorax. So right here now I'm gonna lift my opposite leg up and now I have this nice diagonal in the front of my torso, making a nice key connection with my core without trunk flexion or extension, okay? Switching hands.
Good. So a lot of concepts here, you know, all these exercises in isolation you may have done before, and we're just putting them together to speak to the thorax. I'm gonna reach this arm at a diagonal, take the right leg out, I'm neither tuft nor arched. Again, people's buttocks are different size bellies are different sizes so I'm looking for this diagonal connection to make a feeling and I come back to center and now I'm gonna start a little bit of bridging. So I'm gonna tighten my thighs, lift my bottom, lower my bottom, not a hybrid, just enough to get the glutes to be engaged.
Inhale, arms up, butt up. Exhale, arms down, butt down. one more time, inhaling and then exhaling, okay? So that's just a way that it helps you. When I have a little interlude, I just wanna get back connected again to my trunk, connected into my core.
So now we're gonna use the bricks in another way, okay? For more of a challenge here, so I'm gonna take one of my legs and bring it up. Take my hands to the brick. My fingers are gonna go over the top of the brick so that my elbows can be straight. So then we say here, wow, what are we doing here?
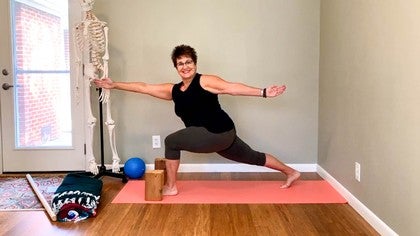
Are we stretching the hip? Are we resting? Well, first, what I want you to be aware of is actually bringing the bricks back and I want you to recognize first where vertical is in your trunk so you're not lunging forward, okay? So now we add our three dimensions so we have this sagittal plane arm up, frontal plane side bend, and then we add our rotational transverse plane rotation, okay? Bring it back to center, Up, side bend, rotate, come back out the way you came.
Okay? Now we move the brick forward, we take the leg forward, we kick the leg back, we're now in a low lunge. So now we have the added challenge of strengthen load, arm up, side bend, rotate, maybe I let one arm go, maybe I don't. And then I come back, I lower down. So now we've added leg strength to the thoracic mobility.
And that thoracic mobility, if you take care of it with a handful of the exercises that we did previously, then you may be better able to come into, you know, something like this that might hit you in a lunging class or different kind of activity like that. So we gotta do the first one first. So this is the one that sometimes people avoid because people wanna jump right into a lunge. So we want to feel the lifting of the torso, we wanna feel the thigh underneath the hip. Arm up, side bend, rotate, stay back Karen.
And then come on back. And then up, arm up, side bend, then add rotation. So my shoulder blade is gonna come away from my spine on this arm, it's gonna come towards my spine on this arm, and then bring myself all the way back up. It's a good idea to talk to your shoulder blade periodically, find which one chases the other, okay? In rotation.
So now we're gonna come into our low lunge here, I'm gonna use the bricks because if my hands were way down, I may not be able to lift up so having myself elevated on these bricks becomes a little more successful here. So arm up, side bend, and then rotate. This is my harder side to rotate. And then I come back and then I come down. So in those, again, the legs become a little more active as you use the bricks to help you do that.
What I'd like to do now with the bricks is kind of go back and forth to see how you can get hip and spine and chest mobility. So we're gonna use the bricks here and take one leg up, lift up, come back. So now both of my legs are straight, okay? My torso is flat, my upper torso is flat. I'm yearning for this back heel to press down and then I'm gonna take the leg that's back, that's my right leg, my right arm is gonna come out in front and then those two pieces are gonna become really, really long and then bring myself back.
Come back to a plank, pause in a plank, it's a good interlude, my fingers are grasping over the bricks, so that I hold myself from my shoulder blades on my back, my front body connected, I take the other leg forward. And then I straighten both legs, I lengthen out my torso, have a roughly flat back and then my back leg is my left one, my left arm reaches really across the room, not from my neck but from the whole side awareness here and then I bring it back, I come back to my plank, and I hold right here. Then I drop down on the knees. So now all props aside. So now one of our very classic exercises in Pilates repertoire is the side bend, right?
And that's a tough exercise so I'm gonna show it to you here, I'm gonna add a twist to it at the same time so we get all the motions of the spine with weight bearing in a side plank ish. Let's see what we got, okay? So we're gonna come this way. So first, I'm going to bring myself up into this side plank, I'm going to hold right here. So in this position, I'm gonna look over my shoulder, side bend my torso down, push into my arm, paint the ceiling and now I'm lifting up my top ribs.
Then I'm gonna take this arm, dive it under, really reaching this left shoulder blade under so I get the rustic rotation and then I come back, and then I come down and rest. Of course, we can do that three to five times because that's kinda like the epitome, right? So it's kinda like the side bending of the ribs to each direction, and then it adds the rotation. So in this one now, I also believe when we get into the side plank, it's kind of important not to use your hand because I mean, you can use your hand if you need to but a lot of times that's a kind of a push up position versus a bottom rib whole lift up to this, okay? So then two arms come out and then I push down with my bottom arm as I lift up with my top, I turn, I look over that shoulder, I press up, I paint the ceiling, I lift these ribs up like a suitcase handle and then I dive under trying to take this right shoulder blade away to twist me, major oblique action, and then bring myself back and then come on up.
So in that essence, weight bearing on the arm, active movement of the ribs, much more strength is required to go through the motion. But if you do a handful of those exercises that we did in the beginning, positioning yourself over the blanket, get some stuff against the wall, maybe some stick mobilization in the beginning, it helps you to feel that connection a little bit better. So to end this, I'm gonna show you something that I teach some of my clients that don't like to be on their hands and knees a whole lot, either because they don't like to be on their knees or they don't like to be on their hands or they can't for some reason, pain or whatever. So we did this a little bit with the chair, but I kind of like the stick because it adds a little dimension of challenge and mobility there. So, we're gonna take our first exercise, okay?
Which is kind of cat cow. So you'll see here my knees are bent, okay? My spine is relatively flat. My hands are actually below my shoulders, okay? So I'm gonna nod my head, lift the back neck, kinda like a mama cat lifting her kittens and then I'm gonna lift my lowest ribs, I'm pushing the stick down, rounding my spine, and then I'm pushing the stick down, letting my buttocks kind of stick out and then I'm extending my spine.
And we'll do that two more times. Inhale big. Exhale, stick pushes down, tailbone curls, legs are very active but they're staying bent. And then inhale. And then exhale.
And then come back to level. Now I can crawl my hands up the stick if I have enough shoulder range of motion, okay? So you'll have to monitor that in yourself but now with my back is still flat, my core is engaged, I'm gonna shrug my shoulder blades as the stick goes away from me, I hope you can see that. And then the blades drop down as the stick comes back. I'm pressing down on the stick the whole time forward and I'm pressing down on the stick the whole time back.
You'll notice that I'm not sagging in my back. Now I'm gonna go forward and then to the left with the stick, I straighten my left knee. I come back to center, I go to the right with the stick, I straighten my right knee. I come back to center, I take my torso, stand up, pull the stick all the way to center. Taking the stick in front of my left leg, okay?
So we know where your range of motion allows in the stick so maybe your arm is lower, maybe it's higher so now like it's a stick shift, okay? So I'm gonna push the stick to the left diagonal, okay? As I try to turn my chest rotating left. So my right arm is on the stick, I'm pushing that right shoulder blade and then I come back, push down on the stick, stand up. Again, bend, reach, rotate, hold, breathe because breathing is one of the best expanders of the whole thoracic cage.
Come back and come up. Stick goes in front of my leg, left hand grabs the stick, I bend, I reach, I rotate. As I rotate, I'm trying to stay long in my torso, this is my left arm the one I'm bending, that blade is in upward rotation. And then I come back and come up one more time. It's a bend, a reach and a rotate.
Hold, reach it and then come back and then bring yourself up. So finishing kind of the way we started, take the stick, maybe your hands can go wider now and maybe your breath is flowing a little bit easier. Maybe you don't feel as knacky as you did, and actually my rotations are a little bit better, I can just kind of feel that. Again, practice just means we get better at doing something. Stick behind the back.
Never underestimate, you know, the power of just a gentle practice to get some mobility. And then take the stick behind this way, these are all the ones that we started with. Sometimes I actually do this on the short box on the reformer with people with a short box pole. Good. And then in final, I'm gonna put the stick behind my back and I'm gonna give myself a little knee bend with a hip hinge.
And when I stand up from the hip hinge, it's my buttocks that stands me up. So I bend, I hip hinge, I stand up. The knees bend, the hips flex. The knees straighten, the hips extend. The knees bend, the hips flex.
The knees straighten, the hip extend. So you'll notice that I'm not swan-diving myself forward with my lumbar curve but my chest is staying nice and lifted without involvement or grabbing into the low back. So a good thoracic spine, good we all have good thoracic spine so an educated thoracic spine is one that can experience different motions of your shoulder blade, different motions of your arm, challenging your breath, adding rotations in all the three planes, and then tying it together with some strength in your legs either in a low lunge or in a squat. So give this a try, be sure and email me if you have any questions, I'll be happy to be involved. Thanks for joining me.
Key Connections: The Power of Props

Mention
 |
Karen Sanzo (Teacher) |
 |
Sue S |
|
|
Jeri Ann Alexander |
|
|
Diane W |
 |
Sarah Edwards at Positive Pilates Solihull |
 |
Elizabeth D |
 |
Kate- My Pilates Room |
|
|
Joleen |
 |
Karin S |
|
|
Danni J |
 |
Magalie C |
 |
Katja Maria Kataja |
|
|
Cathy S |
|
|
Rebecca T |
 |
Holly Holland |
 |
Beverly L |
 |
Pat S |
 |
Paula G |
 |
Sandy |
|
|
Tami P |
|
|
Zee F |
 |
Amy V |
|
|
Cynthia G |
|
|
Claire R |
|
|
Corinna S |
 |
Virginie B |
Comments


You need to be a subscriber to post a comment.
Please Log In or Create an Account to start your free trial.
