Description
About This Video
Transcript
Read Full Transcript
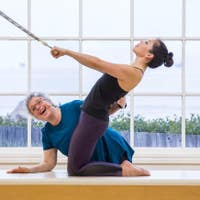
Hi, everybody. I'm Tom McCook. I'm here with Christie and Erin. And this class today is gonna be on exploring benefits of how you can improve your gait. Something we do all the time. So I'll be introducing concepts from something called Anatomy in Motion from a guy named Gary Ward from the UK and Franklin Method combined with Pilates.
These three things I find are the best things that I'm currently teaching, and I find them amazing to get into how your body's actually designed and then improve your experience of your body for the rest of your life. Think of something we're doing all the time, which is walking, relating to gravity. And that's my passion at this point in my life is to help people get better, what we do all the time. So we're gonna grab our Franklin balls. You're gonna need a pair of balls.
They don't have to be these particular ones, but around the same size, and we're gonna do something to release a little tension so you can feel your body better and improve function. So we're gonna take our feet about six inches apart, or maybe a little wider, and now bend your knees. Keep your legs in parallel and just bring up one of your arms like you're hugging a tree and with the other arm, you're gonna tap your chest, then open. There you go. Let your eyes follow the moving arm. And you just come right back to center. (exhales) So tapping the muscles into your chest while you open is helping them get the feedback of releasing into length.
These muscles tend to get pretty tight from modern life, and tapping feels good. Now, as you open, turn your palm up and have your hand open to about eye level. And when you turn your palm up, you're unraveling your chest muscles into more length because of where they attach. So you get a little more opening. Ah. Feeling better already. Just a couple more.
And one, and just that simple bit. We'll go, huh, okay. We'll take that. We'll go right into side two, bend, tap and open. Nice and fluid. Here we go. And always let your head turn with it so you can, it's more of natural to let your eyes go with it. (exhales) Feel the weight down into your feet. (exhales) Just use this as an opportunity just to come into your body, let go of the rest of the day.
Now turn the palm up. Picture you're unraveling those chest muscles into greater length (exhales) and just a few more. And one, there we go. Now, put the balls on each side of your neck, right below your earlobes, unlock your knees. Now, as you exhale, just roll the balls towards one another in the back, massaging your neck, and release.
And as you're doing that, relax your jaw and your eye muscles. That's it. Now, add a little chin nod as you roll, and you go a little higher, a little lower on your neck. We tend to hold lot of tension in these muscles, having the head slightly forward, being on our computers or our smartphones. Just get those muscles to release. (exhales) Just a couple more, and one.
Now, we're gonna tap our lower backs with your knees bent, right behind your belly button. Tap down to the back of your pelvis. And as you do that up and down, start to curl your tail forward and back. Tapping those lower back muscles gives them the feedback that they can release and slide better. Now, add a little side bending, tapping up on one side as you tap down on the other.
There we go. Now, let's tap our big muscles we're gonna use today. So your knees bent, tap the front side and back of your hips. As you hinge up and down, waking up those big muscle groups. Ah, there we go. Couple more.
And one. Last one, we're gonna do the ball standing is, well, up here anyway, put 'em under your armpits. It's a new fashion statement. (Christie laughs) (Erin laughs) So now with your arms long, just take a few breaths where you practice breathing the balls laterally, pushing your arms away with your lungs, (inhales) and on the exhale phase, let yourself deflate. But imagine, you're getting taller through the crown of your head, (exhales) breathe into your width (inhales) and deflate.
Now, we're gonna do a movement of the shoulders and legs to drop our center of gravity a little bit. So as you inhale, slide the shoulders up. Imagine the balls are filled with helium. Now, as they drop, bend your knees to drop on the top of your legs. (exhales sharply) And again, slide the legs long, lift the shoulders up (inhales) and drop. (exhales sharply) Just two more. (inhales deeply) (Tom exhales sharply) And one. (inhales deeply) (Tom exhales sharply) Now, shift over to your left leg. Take your right foot out in front of you just for balance support.
Now, we're gonna do the single leg. So as you lengthen that standing leg, lift the shoulders up. Now, drop onto that single leg. (exhales sharply) Just two more. (inhales deeply) (Tom exhales sharply) And one. (inhales deeply) (Tom exhales sharply) Let's switch to side two. Keeping that leg long, lift the shoulders up, and drop. (exhales sharply) Two more. (inhales deeply) (Tom exhales sharply) And one. (inhales deeply) (Tom exhales sharply) Ah, then we'll take those away. Now, put 'em on the ground, but you're just gonna use one.
And our feet are really the thing that we want to become more skillful with. So putting the ball under the ball of your foot and your heel on the floor, leave your knee a little bit bent. And what you wanna do is twist your forefoot back and forth over the ball where you're bringing the big toe towards the floor, then the little toe, but you're keeping the heel on the ground. So we're getting our foot to counter twist the front and the back of the foot, a designed to counter twist, to absorb and transfer a force, but also adapt to the ground. There you go.
Now, from there, with the ball onto the same area, reach into the ball and roll it to the front of your heel from the ball of your foot to the front of your heel. Might bring it a little closer to you so you can preach into it, and then just let your arms relax. Get that tissue that plant our fascia to glide. Really important to get those muscles to be more fluid. So the foot can do what it's designed to do, which is to absorb, transfer, give us better balance.
There you're, now, straighten your knee joint, touch the floor to the front and then the heel to the back. Now the focus is more your ankle. Feel the glide and your ankle joint. How nice that feels. Ah. There you go.
Now. in relationship to gait, I want you to put the ball under your first metatarsal head. That's the ball behind your big toe. Keep your knee a little bit bent. Make sure it's the ball of the foot, not the toe itself. Now, what you wanna do is not lean a little too much, lean a little bit forward, but press that first med head into the ball.
Do it like six times. Just relax your upper body. Feel how you're getting, that's one of your primary weight bearing points of your feet, the ball behind your big toe. Ah, feel how that's waking up that center line of your leg. Two more (exhales) and one.
Now, put it under your fifth metatarsal, which is the ball behind your little toe. This is the other front foot point that's super important. And now press that one down and resist the temptation to grab with your toes. Leave your toes kind of relaxed. Ah. There we go. That's a party.
(Christie laughs) (Erin laughs) The feet dictate what happens up the chain is dictated by the base of your body. One more. There you go. Now, slide it back closer to you and put it under your heel. Now, keep those two front foot points on the floor that you just work with, the first and the fifth. And as you squash the ball, shift your pelvis towards the leg and stand on it, and then shift off it.
Now, you can keep your back foot on the floor. You can float it off the ground, but notice you want to keep your upper body relaxed, stay low in your body. Like you're getting right up on top of that leg, on top of the foot. Head over the spine. Three more. So we're improving balance alignment, efficiency of movement.
One more. There you go. And then just take a moment as you come off, just notice the difference between the two. Ah, we're more on our foot, which relates to everything above the chain. So let's take side two. Heel on the floor, ball under the ball of your foot, knee bent.
Start by twisting the forefoot back and forth over the ball to get the joints and bones in the middle of the foot to move. So the foot can counter twist and lengthen and shorten. There we go. Great to do before you put your shoes on to go do running or hiking, 'cause it'll make that first mile feel a whole lot better. There you go.
Now, from the ball of your foot to your heel, reach into the ball and let the tissue glide. Like a gesture. You're reaching into the ball. Keep your head up over your spine. Shoulders easeful. As you got a rolling pin under your foot. Ah. There we go.
Now, straighten at the knee joint, touch the ground of the front, the heel to the back. Now that axis is your ankle. Feel that glide. There we go. Nice and fluid. Just a couple more.
Now, roll it closer to you and put it under your first metatarsal head, the ball behind your big toe. Heel on the floor. Knee bent. Now, just shift very slightly and press down with that first metatarsal head. So you can wake up that connection from your foot to your leg to your hip. Might even feel your pelvic muscles turn on your lower belly.
That's it. One more. Now, shift it over to your fifth metatarsal, the bone behind your little toe. Press into that one. Try to reach into it. That's it. And a few more, (exhales) and one.
Now, bring it back under your heel. The front two metatarsal heads are on the floor. Now, as you shift your body towards that foot, squash the ball and open the front of your hip. Get right up on top of the leg, each time, arms relaxed. You're stepping into good alignment.
You're stepping into the next thing in your life. You're feeling good about it. Here we go. Life is always about the next minute of your life. So this next minute, let's be here. (exhales) That's it. (exhales) Just a couple more. (exhales) And one. Nice work, you guys. Then come off for a moment.
Take those out of the way. Now, we're gonna go through some movements of the spine and pelvis in the body in three dimensions. The first dimension is this way, meaning arch curl or sagittal. The second dimension is this way or this way, which is the frontal plane. And the third one is this way, which is the transverse.
And we're gonna do all three. And I want you to just have this image, 'cause this might be new. When you're in gravity, your pelvis and your head tip in the same direction at the same time, and you're lower back in rib cage, do the opposite. And you might thinking, I have no idea what you just said, but it's all good, 'cause we're gonna do it together. And while you're doing it, I want you to think of keeping your three foot points on the floor, the ball behind your big toe, the ball behind your little toe and your heel.
And you'll notice when you bend your legs a little bit, the foot will lengthen and widen. And when you straighten, the arch will lift more. All of that is designed to happen. So put your hands on your hips, and I'll do it sideways too. And just practice, imagine your head, your ribcage and your pelvis are on imaginary wall.
So without taking your head off the wall, tip your pelvis forward, meaning tail to the back, arching your lower back and let your knees bend. Now, tip your pelvis to the back and straighten your legs and just do a few front to back where you're feeling okay. Is one easier than the other? Can I start to get that movement in both directions? Head staying right over the pelvis.
Now, curl your tail to the front, tip your pelvis back and touch your front low ribs. So here's the moment where we're gonna do the opposite in your lower back and your rib cage. Now, take your front low ribs back and in so you feel your lower back flex and then lift your chin slightly. So the image you have here is your tail and your chin are moving in the same direction at the same time. Now, take your tail to the back, lift the top of your breast bone up and drop your chin, but keep your eyes on the imaginary horizon.
Now, curl your tail to the front, sink your ribs in, lift your chin slightly. I know that's a lot of information. Just go really slow. Tail to the back, chin drops, chest lifts, tail to the front, rib sink, chin lifts a little. There you go. Now just take it nice and slow. Now come into the moment where you've taken the tail to the back and touch right above your pubic bone and touch the top of your breast bone.
Now lift the top of your breast bone straight up, lengthening the front of your spine and lengthen up the back of your neck by dropping your chin slightly. Now do the opposite. Curl the tail to the front, close the gap between your hands, and lift your chin slightly. Now, tail to the back, heart lifts, chin drop slightly, curl, chin lift slightly. Now as your head's moving, keep your eyes on the imaginary horizon.
So the movement of the head isn't too big. Notice your feet. Can you keep those foot points on the floor? And start to feel that there's a spiral happening in your legs. On the next time as you curl, hold it.
See if you can feel, my whole leg is turning out. As I go forward, the whole leg is turning in. Now, curl and hold it. We're gonna add the shoulders. Holy crap. So when you're here, (Christie and Erin laughing) take your arms and roll them in, and pull your shoulders down and forward.
Fill your lats, your side muscles. Now, tail back, heart lifts, turn the arms away, shoulders back. Now, feel your middle back. Now, curl, tail forward, ribs in, chin lifts. Reverse. Now, add your breathing.
Exhale. (exhales) Inhale. (inhales) Exhale. (exhales) Inhale. One more time. (Tom exhales and inhales) And now pause for a moment and just notice, just from that, you might notice you're a little lighter. A lot of work. It's a lot of mental work, but you're moving your joints in gravity. The way they're designed, we're just amplifying it.
Now we're gonna go into the side plane. So touch the side of your hips and just glide your hips side to side, but keep your eyes on the imaginary horizon. So when we're walking, there's a moment when the pelvis shifts like this. We're making it a little bigger. Now, shift out to your right and hold it.
Now take the same side arm up. Now on your foot points, press those three foot points into the floor on that shifted side as you're loading your lateral hip, pull up with the up arm. Now take the bottom arm and reach it forward and let it rotate your spine slightly towards the upper arm. Be keep looking straight ahead. Take a big breath. (inhales deeply) Exhale back to center.
Shift to your second side, take the same side arm up, bottom arm forward. Feel the reach up, out and forward. Take a breath. (inhales) Exhale center. (exhales) Shift out to your first side. Reach, reach, reach. Nice big breath. (inhales deeply) Exhale center.
Second side shift. Feel the feet on the floor. Reach, reach, reach, breath, and back. (exhales) Ah, so that's called off axis. Meaning if you had a line through your belly button, we're taking the axis with us. So it's called off axis. Now the next one's called on axis.
So you have your hands on your hips. Imagine you got two sheets of glass here. So when you bend one knee, you don't bump the glass, but your pelvis tips down on the side that you bent, and then come back up and on the side that's bend, the hip pulls down. Now feel your three foot points, stay on the ground. And this one can be the most challenging, but it's the, maybe the most important in some regards, because it's the one that we tend to not do when we're moving as much.
Now on the bent side, hold it. The drop tip means the lower back and the rib cage on that side are long. Take that arm up. Tip your head slightly towards the arm because your head and pelvis do the same thing and pull the darn arm down. Now press into your feet to relevel yourself, bend the second leg, on the drop knee side, take that arm up.
Tip your head slightly towards the arm. Reach down through the other arm. Press into the ground to come back up. Side one, bend, reach, reach, press into the ground, come back up. So you start to picture in your mind's eye possibly that your spine is creating an S shape right now.
Press into the ground to come back up or maybe you're just feeling it, it's all good. One more reach side for each and back up, bend and reach. So this is related to the moment in the gait cycle called suspension, where there's the most change in the spine. Now we're gonna go into rotation, but I want you to initiate the rotation from your ankles in heels. Now, when you turn, you'll notice there'll be a tendency to rock one of your two front foot points off the floor.
We're not gonna do that. So as you turn slightly towards your right, press your big toe mound into the floor, but feel your arch is lifting, can track the front of your thigh. Now feel the whole leg turn, the pelvis turn, the spine turn, the shoulders, the head. Then come back to center. Now, as you turn to the second side, anchor that big toe, make it small in the beginning, relax your shoulders.
And as you contract the front of your thigh, turn the leg, pelvis, spine, shoulders, head. Big toe mounds going through the floor, back to center. First side, anchor the point. Turn, leg is toned. Take your sit bone in towards the midline.
And look back. There you go. You should start to feel your waistline muscles and again, anchor your big toe, contract the front of your thigh to protect your knee, turn. Make sure that foot point stays on the ground. That's more important than how far you turn, and come back. Now, we're gonna add the arm.
So as you turn slow, feel like you're gonna anchor your point. Now on the opposite arm, the arm you're turning away from, reach it across your body to amplify the twist and then come back. Anchor the big toe mound, stay vertical. Let the weight go towards the reaching side, reach across. That's it. Just one more each side you guys.
Nice and fluid. Anchor into the big toe. Start to feel a little more of your lateral heel and your big toe on that side. Reach across. Awesome. One more. Turn, reach.
Big time example of full body rotation. Yeah. Hasn't shake that out for a moment. Now we're gonna go directly into lunging. So for lunging, I'll face this way for the first couple, then I'll turn just so you can see it.
So when you're lunging, just take one foot in front of you in a small lunge, maybe like a foot distance front to back and have your feet about six inches apart left to right in parallel. There you go. Now put your hands on your hips. We're gonna open up the lateral hip muscles. So I want you to shift your pelvis towards your front foot to load it and then lean a little forward. Now imagine we're gonna move from our pelvis.
So keep reaching into your back leg and the front knee doesn't move. Slowly turn your pelvis into the front knee. Feel you're getting those back of the hip muscles to activate. Now, press into your foot points to come back to square. And again, rotate into it, press into the foot points to come back to square, keep your shoulders and arms relaxed.
I feel like it's really mostly pelvis rotation to load those lateral hips. There you go. Two more. Those hips are saying, "What's up with that?" One more. So one of the things we're discovering more and more is that muscles need to lengthen before they shorten. And let's take side two, but lengthen until load, 'cause that's what they're designed to do, decelerate us.
So as you take your pelvis towards your bending leg, feel your three foot points, reach into your back leg. Now really slow from where you're touching, turn your pelvis into your front knee, press into the ground to come back. Feel you're opening up that lateral hip. You're also setting your femur more into the socket. Really useful if you spend a lot of time sitting that tends to get a little imbalanced.
Couple more. There you go. Great way to open up your piriformis. One more time. There we go. Now switch your legs again. So when you do this next movement, think of that it's not about my upper body, I wanna take my pelvis over my foot.
And put your hands on the back of your pelvis for a moment like this and practice pressing your pelvis forward and reaching into your back leg and just hold it there for a moment. Now with your back leg, feel your back two foot points and let the leg spiral out. That's it, but not necessarily change shape. Just feel like it's inside of the body. Now go more forward.
So you start to feel the load of your foot in your hip. Now at a reach to the front to load your butt more. There you go. And it's okay to let the knee come slightly in towards the midline. You'll start to feel your inner thigh muscles.
That's it. Add your exhale. (exhales) It's called the meeting of the hands here. Here we go. (Christie and Erin laughing) It's all good. (laughs) It's all friends. (exhales) One more. Now, this next time as you go forward, go up the front of your spine, up the back of your neck and take the arms up and then shift back. Shift forward, go up the front, up the back of the neck.
Notice how that improves your shoulder flexibility. (Tom exhales) One more. Now we're gonna add a rotation. So go up and hold it. On the front knee side, take the arm out to the side with the palm up. Now just start to turn as you go more forward, turn in that direction, but keep looking straight ahead and then come back.
We'll do that four times. Go up, open, rotate. That's it. Just two more. Keep reaching into that back leg as you open, feel how that opens up your hip flexors. One more. (exhales) Last one here. A different lung, but same position.
Shift forward again. Now with your back leg, reach into it, bring your arms back like you're working on your posture. Now, just lower and lift your back heel. But keep that body line, shoulders back. You're feeling your middle back muscles, energy out the crown of your head.
Now, next times you shift forward, pour the weight into the front leg and float it off the ground. Then lower it back to the floor. We're gonna do that four times. Shift and float and lower. Two more. Feel how the strength, the connection to your standing leg, your mid back, and we'll switch.
Very nice. So second side. Small gap front to back. Parallel legs. Now just practice taking your center mass towards your bending leg. Hold it there for a moment with your hands on the back of your pelvis, press your pelvis forward and your shin forward. Feel you're opening that back hip and let the back foot, the heel, just lift a little bit, press into those two front foot points, and you'll start to feel your butt on your back leg.
Now just do that a couple times. This might be feel like we're not used to shifting our pelvis that far over the foot. Now add the reach to the front. (exhales) There we go. Nice and smooth. (exhales) Keep reaching in that back leg as you pour the weight into your front three foot points. Couple more. (exhales) And two (exhales) and one.
Now go forward and up, lift up the front of the spine, up the back of your neck and lower. And again, keep reaching into that back leg as you pour the weight into the front leg. (exhales) Two more, and one. (exhales) Now we're gonna add the rotations. So go forward and up the same time on the front knee side, open it out to the side, palm up. Now, keep going forward and turn towards the front knee. Slowly lower and again, forward and up, open, spiral.
Keep reaching into that back leg as you spiral towards the front leg. There you go. One more. Last movement. Go forward and hold. Bring your arms back like airplane wings. Turn on your middle upper back.
Now lower and lift the back heel for six. Feel that full range, but keep those two front foot points on the mat. There you go. One more. Next one, lift. Now shift the weight into your front leg, float the back leg and lower.
Three more times. Feel that connection to your foot points to your pelvis, to your spine. And one more and lower. Very nice. Now we go into the hamstrings. What were we just working?
So now, (laughs) (Christie and Erin laughing) take one foot just about six inches in front of your other foot. So this is related to heel strike when you're walking. So lift your forefoot and think of the weights on the back of your heel and a little bit towards the outside of your heel. Now stand nice and straight, and on the exhale, sit your butt back, let your back knee bend, reach the arms forward and down. And each time you come up, let the forefoot come to the ground just for a moment.
Then lift, shift, and reach. (exhales) Now, add your exhale to that. So feel how it's dynamic. It's moving, and there's a moment of relaxation at the top. Nice and fluid. Instead of thinking of stretching, think of loading.
So now start to press the front heel into the ground as you're shifting back. So you're loading the muscles that are lengthening at the same time. (exhales) One more straight on. Now, just like the saw, take the opposite hand of the foot, same side hand of the back. Do that for four. Still press the heel into the ground. (exhales) One more.
And now same side hand to the foot, opposite hand to the back. (exhales) Two more (exhales) and one. And we'll switch sides. Lift the forefoot, take a breath, (inhales) exhale, sit your hips back, let the back knee bend, arms forward and down. Each time you come up, let the forefront have a moment of coming back to the ground. (exhales) Fluid connected. Start to press your front heel into the ground as you shift. (exhales) Image the muscles in the back as they're lengthening.
They're like catapults. They rebound you back up. One more. And now opposite hand to the foot. Same side hand to the back. Nice and fluid. One more.
Now, same side hand to the foot, opposite hand to the back. Last two, and one. Very nice. Now we're gonna go into something called the clock steps. So for the clock step, imagine you're standing inside of a clock. 12 o'clock is in front of you.
One's to your right, and we're gonna slide one foot towards all the numbers, but you wanna stay upright on your standing leg while you bend it and practice keeping your standing three foot points on the floor. Don't worry about how big you make it. Just make it nice and clean. So we'll start with our right foot sliding. So as you bend your left leg, slide to 12, come all the way up to one, all the way up to two, all the way up to three.
Now, as you go to four, you can let your pelvis turn. Keep your foot points all the way on the standing leg to five, to six. Now, as you go across the back, reach the same side arm forward the leg that's sliding. Come all the way up, and now we're just gonna go to seven and then all the way to eight, who knew? I got balls in my way. Here we go.
That didn't come out so well. So now from there, we're gonna go to side two. (laughs) (Christie and Erin laughing) So side two. Left leg slides forward all the way up 11 And take it slow enough that you can keep your foot points on the ground, on the standing leg. Back to eight, seven. Let the pelvis turn, six, across, same side arm to the front, and then across one more time, a little deeper.
And we're gonna do one more round. Same thing. Go a little slower. See even keep your three foot points on the ground for your standing leg. So first side, go to 12, head up over your spine. One, two, three.
As you go to four, stay on your standing leg. Five, six. Now as you go across same side as the moving leg, take that arm forward. And then to eight. Second side. 12, 11, 10, 9.
Let the pelvis turn as you go to eight, seven, six, across the back, same side arm forward. There you go. And last time. Very cool you guys. Now from there, we're gonna come into a kneeling position for the hip flexor stretch.
So as you come into a kneeling position, have your back knee right under your shoulder and with your back leg, take the foot and take it a little wider than your knee. So it's a little internal rotation. Now with your pelvis, just curl your tail slightly forward, and now take your arms forward, your palms forward, fingers down. Now press the heel of your hands forward, your tail forward, but pull your waistline back. Feel how that's opening up your quad and hip flexor.
Okay guys, take a few deep breaths as you're holding that activation. One more breath. Now your front knee side, lower the arm inside the knee and press them into one another. Take the free arm overhead. Now slowly side bend towards that arm, but press the knee in the arm into one another and keep your breath nice and low.
Relax around your neck, the tops of your shoulders. Long inhale brings you up. Now in the stretch side, bring that hand across to the knee, hold the knee. And all you're gonna do is take the free arm forward and up overhead. Now turn, look, and reach to the back.
Do that for six, and you can let it come all the way down and do like a full spiral, kind of like the pin wheel. But as you're opening, keep that stretch side leg active. Just two more (breathes deeply) and one (breathes deeply) and let's switch our legs. So front knee right over the ankle, back knee under your shoulder, back foot, a little wider than your knee, so little internal. Tip your tail forward, pelvis back slightly, arms forward, palms forward, fingers down.
Flex at the wrists. Now press the heel. Your hands forward, your tail forward, and pull your waistline back. Take three or four nice fluid breaths. (breathes deeply) We're opening that up there. One more breath. Now on your front knee side, lower the arm inside the knee and press them into one another.
Take your free arm overhead. Slowly side bend towards the front. Smooth breathing. (breathes deeply) One more breath. Lengthen, back up. Now that arm that was overhead, bring it to the opposite knee. Take the free arm forward.
As it goes up overhead, turn, look, and reach to the back. Do that for six. Feel how you can keep the pelvis and legs stable. Fluid motion in your upper body. And two more (breathes deeply) and one. (breathes deeply) Very nice. Now we're gonna help ourself down onto our back.
Now on your back. I want you to grab one of your Franklin balls and just come on to your back with your legs bent when you're ready. Just take a moment there. So now that we're on our back, I want you to take your one Franklin ball and put it under your sacrum, which is right behind the center back of your pelvis. I think it like right behind your pubic bone.
And just imagine that we're gonna use the ball to get a little more range of motion out of our lower back and move the pelvis in a nice fluid way. So just take a moment when you're here and just take a few nice big breaths, and on the exhale phase, let your pelvis fall into the ball. Let chest tension melt away. Start to feel your foot points on the floor, and start to follow the belly wall in as you exhale so you feel there's like a cylinder between your waistline, between your pelvis and your ribcage that starts to get a little smaller and more toned. Now the next exhale, as you start to feel that, curl the tail towards the back of your knees and lengthen the lower back towards the floor.
Now tip the pelvis forward, taking the tail towards the floor. And this is similar to what you were doing standing. We're just focusing on the pelvis right now. The center of the body. Think of your tail is six o'clock, your belly button is 12, and you're moving in between 12 and 6.
Start to notice when you tip your tail forward, the bottom of your pelvis widens. When you tip it back, the bottom of the pelvis narrows. Now come back to where it feels level and touch the two front of your hip bones. Now let one, you're gonna move between three and nine. Let one hip go towards the floor as one hip goes towards the ceiling, but keep your knees straight up and down.
So we're just giving it that motion in this plane, which is the transverse plane, the rotational plane. So your body's just getting another hit that this is designed to happen when we're moving through space. Now we're gonna combine the two. So go back to your first movement and curl the tail towards the back of your knees. Now we're gonna lengthen towards one hip bone, either three or nine and go all the way down to your tail on one side and exhale up on the second side, moving through a clock, hitting all the numbers on the back of the pelvis between 3 and 9 and 12 and 6, rolling around the rim of the ball for feedback.
If it feels a little ratchety, just slow it down a little bit so you can smooth out the edges. Start to feel your inner thigh muscles and waistline and lower back all working together. One more in that direction, and now reverse. (exhales) See how fluid you can make it. Keep your foot points on the ground. One more. Now come back to the center, take the ball away, and put the ball between your knees.
Now we're just gonna do a neutral bridge, neutral bridge, meaning that the shape of the spine stays the same. We're just gonna hinge from our hips. So press into your foot points, relax your arms, and levitate your pelvis up, opening the front of your hips and then float the pelvis back down in one motion, place in the back of the sacrum on the floor. Let's do that six times. Go for efficiency as you open the front of your hips.
And then as you float it back down, go for evenness. Feel how that ball is just helping you get a little more into the center line of your body. Just three more (exhales) and two (exhales) and one. (exhales) Now as you come down, if you have your second ball close by, grab your second ball, and now we're gonna put both the balls under our feet. It's an adventure. And have your feet, just the width of your sit bones.
Now the key thing with your feet that's helpful is let your feet relax. Go for efficiency. Now, as you press into the feet, levitate your pelvis up again, float it back down. We're gonna do six of those. (exhales) Relax your shoulders, arms, and neck. (exhales) Three more (exhales) and two (exhales) and one. (exhales) As you float it down, take the balls outta your way. We're gonna go into some traditional Pilates exercises.
So first thing, just hold the back of both your thighs and just straighten both legs up to the ceiling at the same time, and then bend. Do that a few times just to let those muscles release tension. One more. Now, as you bend your legs, take hold of your left knee with your right hand and hold lower on that left shin with your same side left hand and take your right leg straight up to the ceiling. Pull your elbows out to the side, set your shoulders low, take a breath, and do an abdominal curl.
So you're looking towards your belly and reach that leg out to a 45. Now pull that knee in a little tighter for single leg stretch with an exhale switch. Knees tracking right over your hips. Back of the waistlines on the floor are close to the floor. Breath is smooth.
Two more each side. Come back to the center, lower for a moment. Now we're gonna go into single straight leg stretch. So take a breath. Now exhale. As you curl up, reach your left leg straight up, hold a little below the knee.
Reach into your long leg with an exhale switch. Fluid. Two more each side. Back to center, interlace the fingers behind your head. We're gonna go into crisscross, same leg pattern as single leg stretch with a rotation of your torso. So take your breath and do an abdominal curl, hold, nice and slow.
Turn towards your right knee as you straighten your left and switch. (breathes heavily) Fluid. Feel one leg is pulling in, one's reaching. Two more each side. Back to the center. Now slide your legs almost straight on the floor and flex your feet and bring your pelvis into relatively neutral.
So it feels like the front of your hips and pubic bone are the same distance from the floor and bring your elbows in close to your body with your fist right above your elbows. Now take your shoulders back towards the floor and press your elbows into the mat. So you're turning on your side body, the muscles in the back of the shoulder. Now, as you press the elbows down on the exhale, rotate your right hip towards the ceiling to the left. Inhale back to center, rotate the left pelvis off the floor as you press the elbow down on the left side.
Now feel how you're turning from your waistline with that connection to your back muscles, pressing the heels into the ground. Nice and fluid. Two more each side, (exhales) one more each side, (exhales) last one, (exhales) back to center. Draw the knees in, rock around on your lower back just for a moment. Very nice.
From there, we are gonna help yourself onto your belly. Now, as you come onto your belly, rest your forehead on the back of your hands. So hip extension, which means to take your leg behind you is such a big, important part of walking. And we tend to lose it from modern lifestyle, even though it's not a big motion. So we're gonna work on that a little bit here.
So when you're here, just practice bringing the front of your hips and pubic bone close to the mat. Now, breathe low and wide into your torso, and on the exhale phase, follow that lower belly wall in and feel like you're narrowing the bottom of your pelvis. You can even feel like the pelvis bones themself are narrowing with the exhale. Now the next exhale, as you feel that, bend one leg halfway at the knee without changing your pelvis or lower back, inhale to straighten and alternate to four each side. So simple, but feel like you're connecting to the back of your hip without changing the shape of your lower back.
And then notice, can you keep your neck long and relaxed? Now the next one, whatever side you're on, bend, still exhaling, lift the knee an inch or two off the floor from the muscles at the bottom of your butt. Lower and straighten. On the exhale, bend, lift, lower and straighten. And get that feeling and that moment of lifting that you're keeping the pubic bone close to the ground.
Take it fluid and smooth. That's it. One more each side. (exhales) Now for the last three, each side, on the exhale, bend, lift. Now, keep the knee lifted as you inhale the straighten, and lower, and again, exhale, bend, lift, lengthen, and lower. Nice and smooth. (exhales) One more each side. Help yourself as you finish.
Come up under your forms for single-leg kicks, so elbows wide, fist close. Now, press into your elbows and widen your shoulder blades and have your gaze like about a foot in front of your hands. Tone your inseams, with a double exhale, kicked one heel towards your butt. (breathes heavily) Feel that connection like the previous exercise, but also your abs, bottom of your shoulders. (Tom breathes heavily) Open across your chest. (breathes heavily) One more each side. (breathes heavily) Now, as you lower, turn your head to one side. We're gonna go into double leg kicks.
Bring your hands on the back of your hips and let your elbows drop out, but pull your shoulders down and away from each other. Now feel that same feeling in your pelvis of anchor to the floor, and on the inhale, do three kicks of both legs towards your butt. Inhale, kick, kick, kick. Now exhale, reach back, open your chest, center your body to the middle. As you come down, turn your head to side two, kick, kick, kick, reach, open, energy out the crown of your head.
First side, kick, kick, kick, reach and open. Side two, kick, kick, kick, reach and open. One more each way. Kick, kick, kick, reach and open. Last one. Best one.
Kick, kick, kick, reach and open. As you lower, rest your head back on your hands for a moment. Shake your hip side to side for a moment, and then take a couple big breaths into your belly again, or diaphragmatically. Feel how just the breath itself can lengthen your lower back. Now, come up onto your forearms, interlace your fingers.
We're gonna do a forearm plank right from here. So the first thing you wanna do is press into your elbows and tuck your toes under. Now. Start to curl your tailbone down, reach into your legs and come into a forearm plank. Now just hold for a breath. Now, nice and slow from your pelvis, rotate your pelvis to the right, squeeze back to center.
Four each way. (exhales sharply) In that moment of rotation, try to avoid arching your back. One more each way. As you lower your knees, help yourself back to a Child's Pose, take your knees as wide as you need to. Rest for a few breaths. Now I can see, and then nice and slow, roll back up, come up onto all fours.
And we're gonna go up into a Downward Dog and walk in place in the Downward Dog. So tuck your toes under, lift back to Downward Dog. Now just start to walk in place to let your pelvis shift in the direction of the straightening leg. Keep relaxing the back of your neck as you reach into the ground with your arms. And then when you're ready, just slowly walk your hands to your feet.
Soft knees, roll up to standing. All right, so to finish you guys, let's grab your Franklin balls and put 'em about sit bone width apart, maybe like six inches apart and put 'em under your heels. Now here's a great image for you. So when you're standing, feel your front two foot points, unlock your knees, and at your pubic bone level, put your hands and bend your knees a little bit. Now, at that level is the level of your hip joints.
So imagine you're standing in the water and the water is this deep and your femur heads are two buoys, and you're gonna bounce on the buoys. And as you bounce on the buoys, the places that are not supporting weight, you don't wanna be working too hard. So relax your tail, relax your jaw, the tops of your shoulders. Just feel how you can be springy, fluid. Now, as you inhale, you're gonna sweep the arms to the back.
As you press into the balls, float the arms up to just a little above your shoulders. Then again, (breathes heavily) feel this spring. Just two more (breathes heavily) and one. Now we're gonna do a very slow roll down. So bend your knees.
Now, nice and slow, curl into yourself. Keep your two foot points, relax your shoulders. Take a breath at the bottom. As you reach into your foot points, slowly stack the spine. Feel how that puts you way more in the center line of your body.
Let's do that one more time. Small bend, curl into yourself, even more efficient, more fluid. Foot points growing roots, take a breath at the bottom, nice and slow, restack, and then carefully step off. Take them out of the way and just take a moment to notice. Now we're gonna finish with one last balance exercise.
So as you shift your weight onto your left leg, take your right foot out in front of you. Just lightly touch the floor with your toes. You could do this with the foot in the air, but for today, just do with your toe on the floor. Feel your three foot points. We're gonna do six head positions.
So turn your head to the right, center, left, center, look down, center, look up, center, laterally flex your neck, center, laterally flex, center and release. And take the second side forward. Feel your three foot points relax up top, rooted standing leg. Turn your head to the left, center, right, center, look down, center, look up, center, laterally flex, center, laterally flex, center, and down. Then just come back to the middle.
Come back to feeling your foot points, unlocking your knees, centering posture, breathing. Knowledge yourself with great work. Thanks you guys for today. Thank you Pilates Anytime. (Christie clapping) Hope you enjoyed.
Let us know how you feel about the class and hope to see you again sometime soon. Take care.
Mindful Movement: Functional Practices


Comments

 Thank you!!


You need to be a subscriber to post a comment.
Please Log In or Create an Account to start your free trial.
