Description
If you want to learn more about how to sit with ease, try Tom's tutorial, Sitting Better Tips.
About This Video
Transcript
Read Full Transcript
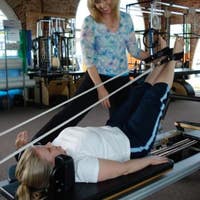
Hi, I'm Tom McCook. And it's so great to be back again at "Pilates Anytime." This class will be performed almost entirely sitting. In our modern world, sitting is a part of our life. Let's learn what you can do while sitting to take care of your body. This class will help you improve your posture, energy, and help bring balance into each area of your body.
You'll need a small towel and a stable chair without arms. So we're gonna start sitting, but I wanna show you, just to give you an idea of when we're sitting, what's an important little bit of important information about your own body that'll help you sit better. So, here's a model of your pelvis. So, our pelvis has two pelvic halves. This is one.
The top is called the ilia. The bottom is called the ischia, or your sit bones that we're sitting on. And in the middle is the pubic bone, the pubic symphysis. In the back you have the sacrum, and at the bottom you have your coccyx or tail. And in between the sacrum and the two ilia, you have what's called your SI joints, sacroiliac.
And there's movement there. So what's interesting about the human pelvis, where the only pelvis that has movement, is the pelvic bones move when we hinge at our hips and when we straighten. But we wanna learn in the beginning, 'cause I'll give you a little more information as we get through, is we wanna just feel where our sit bones are and how to sit on 'em. You can see them from the underside of the pelvis. They're kinda shaped like a canoe.
They're a little bit rounded. So when we're sitting, what we don't wanna be is we don't wanna be in the back of the canoe 'cause that brings our head forward and distorts our posture. And even though this might be comfortable, it's not doing our body any favors. So, let's just try this for a second. Put your fingers and touch your sit bone on one side, touch the bottom of your pelvis.
Just feel it. You can even touch both sides. You're sitting on 'em. Say, "Okay, there's my sit bones." So just so you know where they are. And then take your hands away and just take a little small rocking back and rocking forward on your sit bones, just to feel okay. Can I move evenly on both, and just sense them for a moment, just feel that. Now just get to where you feel like, okay, I feel like I'm up on the middle of them.
This is where we're gonna start. So with your head right up over your spine, now lift your 10 toes and feel your foot points on the floor, which is the ball behind your big toe, the ball behind your little toe and your heel, like a triangle on each foot. So those are your key weight bearing points. So now we're bringing the feet and the pelvis together to start in a balanced aligned place, and then let the toes come down. Just do that again, lift and lower.
Now keeping the foot points down right up on your sit bones, let's do some movements of your shoulders before we go into the rest of the class. Let the arms hang. As you breathe in, slide the shoulders up. Now exhale, let the shoulders slide down and grow taller. Imagine your head floating up.
(Tom exhales deeply) Inhale, shoulders lift. (Tom inhales deeply) Exhale, shoulders glide down, grow tall. Like a balloon floating up through the head, or the head's a balloon as the shoulders glide down. (Tom exhales deeply) One more. (breathes deeply) Now we're gonna add rotation to the arms. As you go up, turn your thumbs back, rotate your arms in.
As you glide them down, turn your hands out and spread your hand bones. Inhale, rotate in and up. (inhales deeply) Exhale down and spread your hand bones. Now add, as you turn in, make a fist, (inhales deeply) glide them down and spread your hands. You're opening up your nerves and your muscles two more times. (breathes deeply) Just freeing up stagnant energy, getting tissue to move. Now we're gonna add a head movement to this.
Inhale up. As your shoulders glide down, spread the hand bones and just slowly side bend your head to one side, feel the stretch in your neck. As you come to center, float it back up, lift, make a fist, spread your hand bones, side your head to the other side. We're gonna do that two more times. Let the weight of your head be enough in the pull of the shoulders.
Doesn't have to be aggressive at all. Inhale to the middle (inhales deeply), exhale down. (exhales deeply) One more. (breathes deeply) Last side. (breathes deeply) Better already. Now rub your hands together. Make a wish. Now from there, we're gonna put those warm hands on top of each other on the back of your neck. So right on the back of your neck, let your elbows come a little forward so you can relax your shoulders, stay up on your sit bones, and we're gonna sponge the neck to release neck tension.
So take a breath. On the exhales, you squeeze your neck like you're squeezing the water out of a sponge, relax your jaw and your eye muscles. (inhales deeply) Inhale, release the squeeze. Exhale, squeeze through the exhale. (exhales deeply) Relax the jaw, your tongue muscles, your eyes. (Tom breathes deeply) Now add to the squeeze a simple nod of your chin.
(Tom breathes deeply) Float it back up as you release the squeeze. Just two more times. (breathes deeply) And one, (breathes deeply) Let that go. Take a moment, let that register. You might notice that sitting is already a little bit easier 'cause you've let go of residual tension in the body. Now we're gonna go into the feet.
So this is gonna be a movement for your foot. It's manual. You're gonna use your hands. So you're gonna cross one of your feet over your other knee. Now you might need to slide the leg out so you can drop your knee and you're able to grab your foot. Otherwise, if you have the flexibility in your hip, you could have it in closer, but it's not necessary 'cause it's really just for the foot.
Now I'm gonna hold my heel with my opposite hand and hold my forefoot with the same side hand. But my ankle is relatively straight and neutral. The movement is in the foot. So what I'm gonna do with my hand is twist the forefoot down, then turn it up. So our foot does this on the ground, but you don't see it 'cause your foot is fixed to the floor.
Your foot is a mobile adapter. So we're getting the joints to move in the foot, which makes the foot more resilient. You have better balance and you're getting movement in the places that we need to get movement in that don't tend to happen as much when we're wearing shoes and on flat, predictable surfaces all the time. So, do like 6 to 10 of just the forefoot. Now imagine your heel is a doorknob and you can pull the doorknob towards your belly button and push it away and get movement in the heel.
The joint between your heel and the bone, right above it, is called your subtalar joint. And we want movement there. Won't be a lot, but you definitely want some. Now we're gonna counter, we're gonna do the two at the same time. You're gonna pull the heel towards you as you turn the forefoot down, countertwisting the foot.
Great thing to do. It feels good. It's so good for your foot and your balance. Who knew your foot does this? It twists and untwists whenever you bend and straighten your legs. You just can't see it.
Now from there, just take hold of each toe and give it a little pull. Little love for your toes. They'll say thank you. Then take all of your toes and bend them back and forth. Now work your way across your arch, just massage down along the arch. Might find some sore spots.
Spend a little more time there, give it a little bigger rub. You can spend as much time as you want 'cause it's your class. Back to your ankle. And just give your Achilles tendon a little grab, right up to where your calf starts. And then just put that foot down and you might notice, wow, my foot feels so much more alive now.
And the other foot's saying, "Is it my turn now?" So let's take side two. So again, slide the leg out to make yourself able to sit up. Hold the heel with the opposite hand, forefoot with the same side hand, ankle is relatively straight. Now turn the forefoot down and then turn it up. Get the foot to move.
That's it. 6 to 10, in that range. Now leave the forefoot still and pull the heel towards you and push it away, getting the heel to move. There we go. And now the counter. Pull the heel towards you as you turn the forefoot down.
Countertwist. There we go. Then starting with your little toe, give each toe a pull, you might even feel a little crack. You're just mobilizing the joints. And then bend all the way back at the ball of, your foot level is where the toes begin.
Bend the toes forward and back, getting those joints to move. And then working across your arch, just massage along your arch with your thumbs. You find a sore spot, just give it a little circular rub. All the way back along the underside of your inner ankle. And then grab your Achilles and just give it a little pull.
Work your way right up to your beginning of your calf. And then just take a moment, put the foot down. Now come back to sitting on your sit bones and we're gonna go into breathing and core activation, but also moving the lower spine. So just put one hand on your belly. So when we do diaphragmatic breathing, a lot of times you'll hear belly breathing.
We don't actually breathe into our belly. Our belly just moves. When your lungs go down, your organs have to move somewhere because your diaphragm is pushing the organs down and the belly needs to move. So when you breathe in, feel your belly move into your hand as you breathe in. Then as you exhale, just deflate. (exhales deeply) So a diaphragmatic breath is just a relaxing breath.
Breathe in, (inhales deeply) (exhales deeply) breathe out. Now start to feel that you can breathe into your belly and then all the way up into your upper chest. (Tom inhales deeply) And then on the exhale, feel the body deflate from the upper to the lower. (Tom exhales deeply) So the tendency if we tend to breathe shallow and high, our chest will move first. We'll be like (inhales deeply).
If you catch yourself doing that, let the breath be lower 'cause you wanna get your breath lower in your body 'cause it actually creates an internal relaxation response. Let your belly wall move and then your rib cage and chest. (Tom breathes deeply) Now put one hand on your chest so you can feel both. Belly first, and then chest will slightly lift. Then the chest will deflate, the belly wall will naturally draw back.
(Tom exhales deeply) I'm breathing in through my nose and out through my mouth. I recommend you do all the inhaling through your nose. You could also exhale through your nose. (Tom exhales deeply) Now put your hands on your side ribs and feel, when you breathe in, you're still gonna let the belly wall move, but notice that your ribs also move out into your hands. (Tom breathes deeply) So it's belly, side ribs, and then upper chest.
(Tom breathes deeply) Now feel it like a wave. Belly, ribs, chest. We'll just do it with the hands on your legs. (Tom inhales deeply) And deflate. (exhales deeply) One more. Not complicated but full.
(Tom breathes deeply) Now, in Pilates, we teach something called lateral breathing. It can be a little confusing at times. But when you're doing lateral breathing, you're still using the same breathing muscles, but what you're doing is you're keeping your abdomen a little bit more still so the stretch goes more into your rib cage. So see if you can, when you breathe into where your rib cage is, I want you to put your thumbs around the back, lower part of your ribs. Breathe into where your thumbs are in your hands even though the belly's gonna move.
Think of it moving less 'cause you're not letting it push out now, just feel that. (Tom breathes deeply) And now in the exhale phase, as you blow through imaginary straw, just start to draw your abdomen in so you feel the exhale and the waistline muscles come in to help you empty your lungs. Try that for three breaths. (Tom inhales deeply) Exhale slow through a straw. (exhales deeply) Inhale, into your hands. (inhales deeply) Exhale, belly wall. (exhales deeply) Now do it with your arms down, breathe into your width. (Tom inhales deeply) Exhale, belly wall draws back and the waistline gets smaller and tighter.
(Tom exhales deeply) One more time. (Tom breathes deeply) Now we're gonna take movement into this. We're gonna move the pelvis forward and back with the breath. So grow tall with your inhale. Now on the exhale, your pelvis is like a wheel, as you exhale, curl the tail under and round back.
(Tom exhales deeply) Pull with your hands, pull with your feet. Rock up onto your sit bones. Exhale, slide your hands forward, curl back. (Tom exhales deeply) (Tom inhales deeply) Go slow. (exhales deeply) And as you're performing this, think if I want equal pressure on both of my sit bones and I'm attempting to move evenly through each side of my lower back. (exhales deeply) (Tom breathing deeply) Back of the sit bones, rolling towards the front of the sit bones. (Tom breathes deeply) Two more.
(Tom inhales deeply) This feels really good after a lot of sitting. (Tom exhales deeply) Get all those muscles in your lower back, your pelvis, and your abdomen start to move. One more. (Tom breathes deeply) Now as you come up, I want you to grab a towel. And I want you to fold it so it kind of gives you a little elevation.
I'm gonna make mine, that should be fine. Now you're gonna put that, the towel, under one of your sit bones. So now your pelvis is unleveled. So basically your muscles at the bottom of your pelvis, your pelvic floor are the muscles that connect to your tailbone in the back to your pubic bone in the front and also to your sit bones. It's the aperture of the bottom of the pelvis.
And from too much sitting, these muscles become shut off, and it's the beginning of your core. So what happens to the imbalance we develop is the bottom is shut off, the lower back gets a little tight and cranky, and the abdomen to lower back relationship is imbalanced 'cause the bottom of your pelvis is the beginning of your core. So by getting these muscles to move correctly, it helps your abdomen work better, it helps you lower back feel better, and helps your leg and spine alignment. Lot of benefits. So, let's play with that.
So, I have the towel. I'm gonna lift my sit bone off the chair on the side that doesn't have the towel. So right now, my sit bones are lifted. So now as I lower my sit bone towards the chair, I'm gonna breathe in and feel how the muscles of the bottom of the pelvis is really lengthening. Now I'm gonna use those muscles as I exhale, feel a lift, (Tom breathes deeply) to lift my hip back off the chair.
Inhale to lower, exhale to lift. Key thing when you're doing this, when you go to lift, relax your shoulders and your arms and feel like you're doing it from those pelvic floor muscles at the bottom of the pelvis, like the pelvic floor. The sit bones are coming closer together to lift you, then they spread as you drop. (exhales deeply) And even the tail and the pubic bone come a little closer together as you lift. Try not to drive too much out of your leg, like do it more from the pelvis. We're just gonna do like 200 of these on each side.
Just getting warmed up. No, just kidding. Just one more. (chuckles) Now lift and hold. Now to get more movement in the pelvic floor muscles, we're gonna rotate the pelvis around the fixed standing leg. So you're gonna rotate your pelvis forward and back, keeping the hip in the air. And that affects your pelvic floor, it also reflects the muscles that attach to your sit bones, your hamstrings and your glutes, gets more glide in those muscles.
Maybe 6 to 10, or somewhere in those range. Now as you lower, take the towel away and just notice for a moment like, wow, my sit bone feels way more on it without effort. Really useful. Let's take side two. Put it under your second sit bone.
Lift the sit bone on the side that doesn't have the towel. Now as you lower the pelvis towards the seat, breathe in so you're stretching the pelvic floor muscles with your breath. Then exhale, feel the lift. (exhales deeply) Your pelvic floor and your belly wall, your deep core muscles work together to create stability and support. (exhales deeply) Inhale to lower, exhale to lift. Keep your shoulders, your neck relaxed. Great thing to do if you've been sitting a lot and your back's feeling a little tight, think of the activation process might even be better than stretching.
Two more like that. And lift and hold, (exhales deeply) and then lower as you breathe in. This next time, lift and hold. Now we're gonna rotate the pelvis forward and back. Slow.
Picture you're rotating your pelvis around the fixed legs so you're getting movement in your hip joints. You're getting that glide in your hips. You're also getting the bottom of the pelvic muscles to slide. And just a couple more. (exhales deeply) And then down and take it away. Wow, that feels a whole lot better.
I'm sure you're gonna be enjoying that. So now from there, we're gonna walk with your pelvis. Who says you need to be standing to walk? So you're gonna walk your sit bones back and then walk 'em forward. So you're gonna set a trend in your office, if you're at work.
We're walking in our chair. So all of this is getting movement in your SI joints, your lower back, your pelvic floor, your hip joints. You can do this to music. Add a little upper body movement if you add a little flare to it. There we go. Just one more time, front to back.
Think of what we're trying to do is make these muscles and tissue more resilient and fluid. Were designed to move. Now from there, we're gonna go back to the arch curl movement, but we're gonna add the arms in the upper body to add a little more strength to it, and we'll also add the feet. So what I want you to do is just pull your elbows in, pull your clavicles back, lift your toes and tip yourself more to the front edge of your sit bones and lift your heart straight up and breathe in. Now exhale, curl your tail forward, roll back, press into your feet and press your arms forward, rounding your lower back.
Inhale, pull and lift. Exhale to curl. (exhales deeply) When you pull, you use your middle upper back muscles. When you press, use your abdomen to keep your shoulders low. (Tom breathes deeply) Exhale. (exhales deeply). Two more. (breathes deeply) Feel as you're turning on the back chain of your body.
As you press, you're turning on the shoulders and the front chain of the body, the abdomen, the pelvic floor muscles. One more. (breathes deeply) Now go right into pressing one arm forward and pulling one back. And feel that as you're doing it in the beginning that you're doing it without your spine changing. So pulled for a second, pull that shoulder back more so you're feeling the muscles in the back of your shoulder. And on the pushing arm, set the shoulder low.
So one's pressing and one's pulling, one of the primary functions of your arms. Do that a couple more times, pulling and pressing. Now, on the pulling side, add a rotation. Pull that shoulder blade in towards the spine and let your head start to turn, but be right up on your sit bones. Let's do three more each way.
(Tom huffing) One more each way, as we come back to the center. Now we're gonna go into lateral flexion, but we're gonna include the breathing. So take your left hand, put it on your right front ribs and bring your right arm up overhead. Now the tendency when we side bend, what we can do, because we're used to using our arms, we can tend to pull with our arm and shrug our shoulder. But we're not gonna do that 'cause that's actually not a good side bend.
You wanna keep your shoulder dropped, your sit bones anchored, take a breath, feel like you're breathing into where your hand is. Now as you exhale, start to feel the belly wall drawing in, like the ribs are dropping away from your hand and slowly side bend. (exhales deeply) Now let the inhale bring you back up. Then exhale side again, feel the ribs start to drop. (Tom exhales deeply) So you're feeling a sense that you're using your deep core muscles and you're bending in a clean way. (exhales deeply) So you're not trying to make it too extreme or too big. Two more. (breathes deeply) And one more, both sides of the neck, stay long.
Watch the tendency to drop your head forward when you side bend. One more time, keep looking straight ahead. (Tom breathes deeply) Lengthen up and switch your arms. And on your rib, take a breath. Now feel the rib start to drop as you're exhaling.
(Tom exhales deeply) Let the inhale bring you back up. Keep reaching into the sit bone that you're moving away from (exhales deeply) so you're not taking the hip with you. And again. (breathes deeply) Two more times. (breathes deeply) Inhale up and exhale. Very nice. Now from there, we're gonna take that into a hip flexor stretch.
So we're gonna change positions on the chair now. Very exciting. So you're gonna turn to your side and have your outside leg straight up and down if possible so your knee is right under your shoulder. With the back foot, with the toes tucked under, feel like you're pushing the ground to the back so you can turn on your butt. Hips are level, so you feel your butt turned on.
Like you're literally pushing the knee back which will help open the muscles in the front of your thigh. Now put your hands on your front knee and just set your shoulders back and just start to lift your heart straight up, keep the neck long. Just feel how that little action helps this, you feel a bigger stretch down the thigh on that stretch side. Not extreme, but you're starting to get that open 'cause these tend to get short and tight from sitting for long periods of time. Take a couple breaths there. (breathes deeply) One more breath.
Now we're gonna add an arch curl of the pelvis to open up the hip flexor more while you're in this position. So on the exhale, curl the tail towards the front knee and pull the belly wall in. (exhales deeply) Inhale to let it go. Feel the stretch and then let it go back to neutral. Turn on your butt. This next time, curl, push with your hands but pull the waistline back.
Contract the glute, like you're pushing the knee back and hold for a couple breaths. Relax your neck, the tops of your shoulders. One more breath. Now as you come back up on your front side, take your arm inside your knee and press them into one another for stability. Take your other arm up overhead, now slowly side bend towards the back of the chair.
Take a couple extra breaths. (breathes deeply) One more. Now come up. And now we're gonna just do a dynamic movement. Bring your hands in front of you like you're doing a push-up. Imagine the rotation is just from your rib cage up, no movement in the pelvis. Keep your glute turned on.
Now as you exhale, slowly turn towards your front knee. Four times, (huffing) no strain in your arms. One more. (exhales) And we'll switch sides. So your outside knee is right under your shoulder, front knee right over the ankle. Feel that straight line, get that sense on your, you're right up in the middle of your sit bone, that'll give you feedback of your pelvic alignment.
And with the back leg, feel like you're pushing the ground to the back to activate your glute. That creates what's called the reciprocal inhibition. It releases the muscles on the other side of the joint. So just with your hands on your knee, curl the tail towards the back of the knee following the belly wall in. Small arch curl like you did when we were sitting.
That stretches the whole length of your quad and your deeper hip flexors. Two more. (breathes deeply) Next time hold it, pull the waistline back more. Reach into your back leg. Relax your neck, tops of your shoulders. One more breath.
Come back to neutral. On your front side, put your arm inside the knee, press them into each other. Take your free arm overhead, now slowly side bend towards the chair and hold for two more breaths. (Tom breathes deeply) Now as you lengthen up, bring your hands into a push-up position. Set your shoulders back, keep the back hip active.
Now exhale, slowly turn towards your front knee. Feel like you're turning from your spine and rib cage and your shoulder girdle, but your arms are fairly relaxed. (Tom breathes deeply) One more. (breathes deeply) Come back to the center. Now we have something, this is called foundation, this is a system around decompressing the spine. Very relevant to improving our posture and strengthening the center line and learning how to use your breath and opposition to create lift.
So with your feet together, knees together, just practice squeezing your inner thigh muscles as you exhale. (exhales deeply) So feel like the inner thigh muscles are the holds against the traction, we're gonna traction away from our inner thighs with our breathing and then with our arm movements. Now put your fingers on your side ribs for a moment. So this is a little different. When you breathe in, I want you to breathe in from your side ribs all the way up to your armpits like you're getting wider and taller. So just feel that for a moment.
I'll just show you once you go. (Tom inhales deeply) Now you're gonna keep the length, even though you're gonna follow the belly wall in we're not gonna shrink down, we're gonna stay tall. So I'll do that one more time. Still holding the inner thighs. Then exhale belly wall in as you squeeze. (exhales deeply) Now imagine your head is sliding up an imaginary wall.
So you're growing tall through the crown of the head. Now put your fingers, your pinky on the front of your hips and your thumb on your low ribs. We're gonna call these your measuring sticks. And you wanna increase the space. So as you breathe in, breathe into your width and length.
(Tom inhales deeply) Keep the length as you draw the belly wall in. (Tom exhales deeply) Keep the inner thighs active. One more breath. Now take your arms by your side, bend the elbows and pull your shoulder blades a little bit back and broaden across your chest. Inhale into the same breathing pattern. Inhale into your width and length. (inhales deeply) Exhale belly wall in and up, stay tall.
Crown of the head is going up. (exhales deeply) Use your upper back muscles. One more breath. (Tom breathes deeply) Stay tall. Scoop your shoulders down, now bring your 10 fingers to touch like you're holding a globe between your fingers and press all 10 together. Now, same breathing pattern for four more breaths. Breathe into your width and length. (inhales deeply) Exhale, press the 10 fingers, draw the belly wall in, squeeze your inner thighs. (exhales deeply) Inhale, length and width.
Slowly start to lift the arms higher. Breathing in. (breathes deeply) One more time. (breathes deeply) Nice and slow, lower. Shake it out just for a moment. We're gonna do one more round. We'll move a little quicker to get you there.
A lot happening in that movement. So feet together, knees together again, sitting up on your sit bones. Pinky on the front of your hips, thumb on your low ribs, shoulders broaden across the clavicles back. Now breathe into your length and width. (inhales deeply) Exhale, draw the belly wall in as you squeeze your inseams. Stay tall.
One more breath. (breathes deeply) Go right into elbows back, broaden across the chest and gauge your upper back muscles. Breathing in. (inhales deeply) Exhale belly wall and inseams. (exhales deeply) Scoop your shoulders down, bring your 10 fingers to touch. Breathing in width and length. (breathes deeply) Slowly start to lift the arms overhead, but keep your length, stay long through your body. Feel like you're growing taller against the hold of your inner thighs. Two more breaths. (breathes deeply) One more breath. (breathes deeply) Slowly release and rest.
That's a lot of work. Really useful 'cause we wanna get these muscles strong, which give you more feedback and then you have the awareness of noticing how you're aligning yourself with gravity. So now from there, we're gonna go right into some legwork. You can put your hands on the edge of the chair so you can stabilize yourself. More advanced would be arms by your side.
First thing, just practice on the exhale, staying up on your sit bones and sliding one leg straight and flex your foot. Now having socks, you can slide your foot on the floor. If the floor isn't slippery for you, you could put a towel under your foot, under each foot, a small hand towel. Slide out and flex, point to return. And practice doing it in a way that you're not changing the shape of your lower back.
Arms by your side to continue. Staying tall, staying aware of your posture. Exhale out. (exhales deeply) Inhale in. (inhales deeply) One more. Now we're gonna add a hinging forward. So as you slide, hinge forward from the hips and then return.
So now you get a hamstring stretch. See if you can do that without rounding your lower back so you're rocking forward on the front edge of your sit bones. Again, you can do it with your arms long for balance. (Tom breathes deeply) Two more each side. (breathes deeply) And one. (breathes deeply) Now slide one leg long and straighten it so you're contracting the front of your thigh. Now I want you to straighten it.
And then without changing your spine, lift the leg. Do that for six. Keep the leg straight so you're strengthening the quad. If you need to have your hands back more for stability, you're welcome. But try not to be back here. Be up.
So you have to use your leg strength to lift without changing your lower back. Two more on that side. Slide it in, slide the second leg out and now lift. You could also do this with your arms long, straight leg. It's okay if it's really small.
(Tom breathes deeply) One more. Now as you come in, sitting up on your sit bones, let's go into the feet. Press into the balls of the feet and lift the heels, then lift the forefoot. Now, especially lifting the forefoot is gonna be smaller in this position, but it's really important to get that range of motion through the feet and ankles. Sit up tall, feel the weight centered on your sit bones.
Head over your spine. Now you can hold on. We're gonna go right into lifting one knee. Roll into the ball of your foot and lift. Alternate like you're flicking the floor away.
Challenge yourself to stay up on your sit bones as you do this. (Tom breathes deeply) Strengthening your hip flexors now instead of just stretching them, along with your pelvic muscles and your abs and lower back. Two more each side. (breathes deeply) Very nice. Now from there, we're gonna go into something called chest expansion. This is to strengthen your upper back, but also some work for your shoulder girdle. So with your arms, let's start with your rotator cuffs.
Have your arms down by your side like this. Set your shoulders back, head up over your spine, now just spin the hands away from the midline and then towards the midline. But feel like you're moving in the shoulder joint opposed to moving your shoulder blades around very much. You're keeping them relatively still. You're spinning the head of the arm bone in the shoulder joint.
Now if this level feels fine for you and you feel like you can go to the next level, bring your elbows up to shoulder level. But if this is uncomfortable for your shoulders, go back down to the first position. Set the shoulders back, now spin the hands to the back and then forward. Feel how you're using the muscles in the back of the shoulder, keeping your head directly over the pelvis. (Tom breathes deeply) Let's do four more.
(Tom breathes deeply) And two. (breathes deeply) And one. Now for chest expansion, imagine the first bone to move is your clavicles, that's the beginning of your shoulder girdles. Your arm really starts right here where your clavicle meets your sternum. Draw your clavicles back to drag your arms back. Now notice as you're doing that, let's add an exhale and draw the belly wall in so you feel that front to back balance. (inhales deeply) Feel your middle back, your abdomen, the back of your arms, even your side muscles, what are called your lats.
Press into your foot points. Now the next one, pull back and hold. Now turn your head and look to one side, center, second side, center, and release. We're gonna do three more. Pull back and hold, turn, center, turn, center, and release.
Two more. (breathes deeply) Turn, center. Turn, center, release. One more, last one. (breathes deeply) Turn, center. Turn, center, release. Now we're gonna work your back a little bit differently.
Take the arms out to the side with your palms up. We're gonna pulse the arms back. We'll call this three and nine. So exhale, pulse back, four times, (huffing) belly wall in as you pulse. Now go to 10 and 2 or 8 and 4 and pulse.
(Tom breathes deeply) Next stays long on both sides. Now the opposite and pulse. (Tom breathes deeply) And release. Now from there, the last movement. Go back to this movement, the rotation, externally rotate.
And as your shoulders go down, reach up into a high V, bend, rotate forward, spin to the back. Try to avoid this. Shoulders stay dropped as the arms go up. (breathes deeply) Just two more. Forward, spin, reach. One more. Spin, reach. And lower.
Now we're gonna go right in what's called sit to stand. Really quickly, to show you, when we're sitting, we're way down here. When we stand, we have to get up on the top of our leg, which is way up here. So you have to go from here to here. And I'll show you with the femur.
You're gonna get on top of your femur, your thigh bone, from here. So you have to roll your pelvis over your leg then let your leg lift you. Who knew? So we're gonna play with that. And the key thing to stand well and train your body well, you don't wanna do it from your upper body. You wanna relax your shoulders and neck.
So bring your feet pretty close to you. Now just practice visualizing. Tipping your pelvis over your legs without changing the shape of your spine, then hinge back and keep your shoulders and arms relaxed. Now picture you're gonna transfer from your sit bones onto your femur heads. Now I'm on my femur heads, the shoulders are relaxed.
From my femur heads, the top of my legs, come up to standing. And then hinge down slowly back to sitting. Forward, up. Hinge, slow. I'm riding down the top of my legs.
I recommend you do this many times a day. Hinge, lift. Float back down. One more time. Shift, feel that moment where you transferred the weight evenly into your feet, come up.
Float back down. And notice now how sitting feels very different and more balanced. We're gonna finish with a stretch called the greatest stretch in the world. I hope you're looking forward to it. So I'm gonna change the chair angle to have it turn sideways so you can see a little bit better.
And you might wanna do the same thing so you can have your foot back on the floor when you reach back. So I'm gonna put my hands on the chair, put one foot up close to the chair and step back into a lunge. I wanna create a straight line from my back leg to my head, keep the top of the chest open. That's your starting position. Now as you breathe in, you're gonna reach the arm out and spiral open without taking the pelvis with you.
Now as you exhale, you're gonna bring this elbow to the other elbow or on the way to it. Then inhale to open again. We'll do this three times. (Tom exhales deeply) One more. (breathes deeply) Then we finish with the hands on the chair, take a breath, as you tuck your chin in, lift your waistline, round your back and lengthen the front foot and rock back onto your heel, then go back into your lunge as you open your chest. We'll do this four times.
(Tom breathes deeply) Exhale to go back. (exhales deeply) Inhale forward. One more. Now this last time, as you go into it, hold it, squeeze your legs towards one another and lift your waist and hold for two more breaths. (Tom breathes deeply) As you come forward, step forward, switch legs. Reach back, open your chest to the front, create that line through your body. Reach out, now spiral open.
Now elbow to the other elbow. (exhales deeply) Inhale the open. Exhale in. (exhales deeply) Two more. (breathes deeply) And one. (breathes deeply) Come back to the middle, take a breath. As you round your back, lift the hips up and back, rock back onto your front heel, inhale into the lunge. Keep your neck and shoulders soft. Two more. (breathes deeply) And one.
This time we're gonna hold two extra breaths, squeeze the legs towards one another. (Tom breathes deeply) Lunge in, step forward, bend your knees, drop your head and roll up to standing. And there you are. Thank you so much for joining me today.
Empowered Aging: Moving Well


Comments


You need to be a subscriber to post a comment.
Please Log In or Create an Account to start your free trial.
