Description
About This Video
Transcript
Read Full Transcript
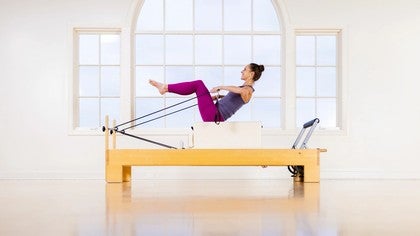
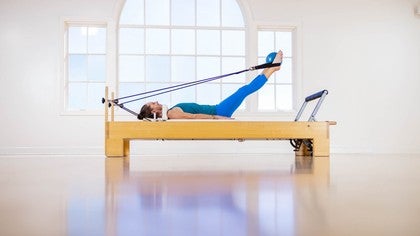
Hi. Thank you for joining me here today for this reformer workout. We have everything we need right here, and we have one blue spring set up. We'll start at this side of the reformer. My bar is lifted. You can also take it down as you wish. So what we'll do is bring the arms down just next to the body.
I like to give us a little time. Find our bodies. Feel the arms reaching down. Bring the awareness inwards and get ready to move. The arms will go straight up the front of the body.
As the arms are reaching up, I want you to feel your your body growing, taller, taller, taller, taller as though the arms are pulling the body longer and inhale. And round down as though you're diving into the reformer, place the hands onto the carriage. Reach out with the spine. Getting nice and low. You may have to lean to go over the top of the foot bar.
You can even lean on the foot bar. It's kind of nice. It gives the body a little bit of traction. And then round through the spine, drawing in finding the carriage at the stopper and rolling back up. The arms will just come right in front of the footbar.
They'll come up overhead as the body lifts up. Remember that sensation of getting taller and longer. Take them this time out to the side. And then as they reach back towards the shoulder distance apart round down. Again, we're gonna add on this time. So we go out with the spine flattening out that back, keeping the weight into the heels.
This time, bend elbows wide. Stretch the arms for leaning a little deeper into that stretch and then exhale. Unjulate through your spine. Find your weight on your feet. Roll up through your spine.
Continue the arms up with the body. And open again. My favorite thing to do. And that the arms go down, follow the arms forwards. Find the carriage.
Lengthen the spine every time we'll add that one arm bent. I just wanted us to do once without it and bent wide elbows and stretch the arms out. And round back up, find your feet, roll up through your spine. Take the arms. Take them around.
Last time, rolling down, opening up through the backs of the legs, opening up through the spine stretching out with that spring, lean back to the heels, reach forward with the spine, bend the arms, stretch the arms back to straight, round through arching in the back, roll up, reach up, and open. And let's come to the reformer. I'm gonna change the spring from a blue to a red. So one red spring. Taking the legs through the shoulder blocks.
If your legs don't fit through the shoulder blocks, you can do a couple of things. You can either cross your legs or you can make a diamond with your feet. So as you wish, we'll reach through the footloops and hold on to the ropes. Wanna have enough space behind you that the small of your back will be able to come into contact with that reformer. The first thing that we're gonna do from here is let the springs help you assist you as you deeply round into a c curve.
And now as the exhale happens, we'll roll back. Rotating the pelvis under. Do a little down push on the arms just energetically feel the low back connect. Inhale. X out, keep that c curve shape in the spine.
The spring will pull the reformer back as your body goes forward, but don't let that spring do your work for you. Really deepen back into the abdominals and then go again, rolling down. Rolling down, rolling down, rolling down, find the low back in here, and lifting up. As the body's coming forward, the abdominals pull back in the direction that the spring is pulling and go down. And inhale and go up After this one, we're gonna do one more.
So enjoy. And done. Letting each movement just flow into the next movement. Hold to inhale. Exo to work your way up.
Rollback. Rotate to the left. Roll up the left side of the spine. Come through the center. Roll back.
Rotate the other direction. Roll through that side of the spine. Come through center, bend the arms and lift the back. Point the elbows down and lift the chest. Stretch the arms forward around the spine back forward and go down again.
Rotate. Roll up. Come through center. Go down. Rotate the other way.
Roll up that side. Come through center, bend the arms to bring the body up. Point the elbows down lifting the sternum. The sensation is more like going forward than it is like going backwards. And take the arms forwards.
We'll do that one more time through roll back. Reaching out through the legs. Rotate. Roll up that side. Come through center, roll back, other direction, roll up that side. Come through to the center, bend the arms, lift the body.
Open the chest, take the upper spine into extension. It just feels so good to me that and reach back forward and round. What I'd like for us to do now is give yourself a little bit more space behind you because you're wanna you wanna have more support of the carriage. So maybe a spread out hand or more if you need. Keeping that same arm position, we're gonna roll down.
Find the small of the back. Bring the legs up one at a time. Inhale as you take your legs out. XL as you bay bring your knees in. Higher is easier if it's hard to stabilize the low back.
We need it to stay connected to the carriage. XL as the knees bend. Inhale as you reach. As the knees bend, you can let the spring from behind. Pull the chest up to those thighs.
Two more times, reach. And, Ben, this looks easy if you're just watching, but it is not. And reach. And holding here, one leg forward, and change. And four.
And four. And three. Keeping the height of the trunk, the spring does assist you, which is nice. Two, and two, one, and bicycle the legs. Five, four. Hit that straight line each time. Three, three, two, two, one. One. Both knees in rotate. Five.
Five. Four. Four. Counting to just make sure we stay on track. Can't be trusted. Two.
One more. And bicycle in rotation. Five. Four. Four. Three. Three. Do. Two. One.
One. Bend both knees in. Roll up. Go. Go. Go. Go. Hold in the balance. Lifting into a flat back, bring the feet down, bring yourself all the way up, and hang up the straps.
Taking the springs now to a red and a blue. And we're gonna sit on the foot bar. So how you wanna position yourself here is you wanna have your sitting bones right on the front edge of the foot bar because you're gonna use the bar to push into. We're gonna take the heels of the feet on the edge of the carriage. So my feet are pulled back.
I'm in dorsey flexion. Hold on to the underneath of the foot bar and pull up with your spine. So there's a fair amount of arm work here starting in a 90 degree angle with the knees, we take the carriage out and back. Push out. So this is where those sitting bones really help so you can feel that your equally grounded over your sitting bones. Don't let your arms get lazy.
They're active, and in. And four, and pull. And three, strong arms, and two, and back. And one, and back. Take the feet towards the toes. Right on the edge of that reformer, lifting up, stretch out, and in.
When the legs are straight, the feet are pointed, when the knees bend, the heel stay as they are. And reach. Control the spring. So you're right in just to a 90 degree angle at the knees. Stay lifted up off that foot bar. Feel the sitting bones equally grounded.
Three, and in. Two, and in. One. And back to bend. Small v shape. Same foot position. We take it out and pull in and reach pulling the abdominals back away from the thighs as the thighs reach for it.
Did you forget about your arms? Mine are working very hard. Just doing eight today if I can keep track. So that means three more by my counts. And in. Lift with the arms too.
Feel the abdominals and the back extensors working one, bend the knees. Step onto the carriage and let it come all the way in. It's not really a beautiful way to transition into the a different spring. So bend down and change. One spring works really well here.
One red. I chose a green spring because it's in the center. So if you have a red spring in the center, that would be perfect. I don't think I've done this on a green spring, but I think I'll be okay. So finding the positioning same positioning, getting the sitting bones anchored, take the arms out, and reach out. So here we're holding our balance.
The reason this spring in the center is better is because the feet go on just both sides. Out and down. Trying to not lean forward or back. I'm doing my best, but I can't see. And pull the feet through and point.
Pull and point twice more and reach. One. We're heading into prancing now. Keep those sitting bones even. And change. One foot pushes, one foot pulls and change.
Lift and change. Lift and change. Lift and change. Lift holding the balance. Four.
Four. Three. It takes a little bit of concentration. Two. One more. Come back up, bend the knees in. You can place the hands down for a moment.
Take the right heel onto the carriage, lift the left leg so that the legs are parallel to the ground, even to one another. Use the arms. And push and bend. And two, lifting the spine and using those arms to pull up. Keeping even on the sitting bones.
We'll do four more reaching out and bending and reaching user arms and bending. And two, feel the mid back and bend, and one, and bend. Change. Take your time. Get sorted, organized, and go. And pull.
Fully extend the knee. Keep those sitting bones equal and reach and bend. The foot doesn't have to touch the carriage, the whole foot rather. So I'm always pulling my foot into Dorothy flexion, and four, and bend, and lift, and bend. And two, and bend, and one, and bend both feet down. Bring the carriage in, step over the top of the carriage.
And step off. Let's go back to the red and the blue spring. Maximum two reds, if you like, more heavy. We're coming down onto the reformer and all the way down onto our back. Once you're on your back, take your straps and step your feet into the straps.
We're gonna do a little combination of movements here. So we'll start in a frog position. The knees look just a little more open than the straps, active through the arms. Here we go. Press out. And bend.
Now here we're gonna open the knees, press up like a hip opener and bend. Change the legs back to that frog shape and push. And bend, and open the hips as you go up keeping the carriage steady, and bend, and orienting back into the more narrow position. And bend and opening the hips and press straight up and bend last time forward. And bend, and up, and bend, and forward making a change. Open the legs.
Come back, bend the knees. Open the hips, press straight out. Open here. Oh, I'm tight and bent. And bend the knees, and we go back forward again, and open. And together and bend, and up, and open together, and open the hips as you bend, and then reach forward, and open together and bend and go up, keeping the pelvis grounded open, squeeze together.
And bend and last one reach forward, and open, and together, and bend, and go up and open together and bend and take the legs forward. Keep your legs straight as you come up, and we'll just go five circles down, around and together, and down, around and together. Jointing that freedom of movement in the hip, taking some caution to keep the spine nice and stable, pelvis nice and stable, one more down and around. At the top, we take the rivers. Go open and reach out and open.
I like to think of my body going away from my legs, creating a lot of length in the waist, a lot of abdominal work that way. Two, and one. At the bottom of the circle, the legs will stay together. We'll bring them up. Fold the body in half.
Bring the carriage into touch, roll up through your spine. You can keep balanced over the mid back. We're gonna keep one foot up and take one leg done, like control balance. I'm not in my most high back here, staying rounded in the spine. That leg stays the other leg goes.
So the tricky part Or the part that feels the most difficult to me anyway is where you have to catch the tension on one leg stabilizes the other leg drops. Up. Catch the tension, stabilize, and drop. And up and touch the tension and stabilize thinking about moving the leg from the center of the body, reaching down. We'll do one more to each side, reaching down and back. The other leg has to work holding it the body in that upright position. Stay at the top.
Bend the knees in tuck in tight. Roll the spine down in that tight little shape, taking a stretch, dropping through the hips, and taking the legs forward. Two more the same, not the control balance, just the short spot and variation. Coming in, coming up and back, bending the knees in, rolling that shape into the carriage, feel the massage of the abdominals against the spine. Drop the pelvis through and stretch and feel the arms working and feel the resistance of the abdominals as the carriage comes into a stop, the stretch in the backs of the legs.
We roll up bend back in. Roll down. Massaging the spine. And all the way down. You can take your feet out of the straps now. They can hang up And then we'll just turn to the side and come up.
Change from the red and the blue to our red spring. Come onto the carriage. We'll put the left foot against the shoulder block, tucking those toes nice and deeply under, and we'll take that right foot and we'll step out over the foot platform, the platform of the reformer using our hands to get organized. And then feeling into that hip stretch. So I'm not at the stopper with my carriage.
I'm reaching back with the back leg. Reach the arms up. There's a little balance here. Take the arms around. Bring them to the foot bar.
And as they go to the foot bar, stretch that front leg out. Breathing in, there's a pause there. Cup pausing long enough for a few breaths. And then so not just one inhale as was queued out of my mouth, but some breathing. Lifting up into that hip flexor stretch, bringing the arms up, bringing the arms around, taking them down, and into the hamstring stretch.
Squaring the pelvis as best as you can. Coming back in keeping that back leg actively reaching. Once the shin touches the, foot bar, foot bar, take the left arm up and side bend. So we're stretching even more deeply into that hip flexor. Come back, bring the carriage in. Position the right foot against the shoulder blocks, block.
Position the left foot forward so the shin is right up against that foot bar, get nice and low into that hip flexor stretch, and then reach up. Open the chest. Stay very active through that back leg. Arms come down and we take the hamstring stretch. I really do feel like I live in two bodies. I know I've said it before, but I'm Not necessarily surprised, but always curious. Take that.
Keep that back leg back. Reach up. Maybe one side of body is my friend, and the other side doesn't like me quite as much. And reach out. Breathing.
And come in. Oh, taking the right arm up now. And lean and keep that back like super active, super active. Come back. Bring the carriage in.
Step the left foot back onto the shoulder blocks. Now both feet are against the shoulder blocks. Sit back towards your heels, getting those toes tucked right under. We're gonna round through the spine, drop forward with the pelvis, and we'd do one down stretch like this. Pull up and forward through the spine.
Keep the carriage at the stopper as you round your spine. Straighten your spine. Push back with the legs. Feel the backs of the legs working. Think about bison towards a little bit of a tuck, a posterior tilt, come to the stopper, stay at the stopper, and round.
Stay at the stopper and extend. Push back with the legs. Drop the hips through. Come up into that foot bar, round the spine. Flatten the spine.
Last time, drop through, lift up, round the spine. Flatten the spine, and then just untuck the toes and rest the arms on the foot bar and lean into that shoulder stretch. Okay. Let's come up from there and turn around. I'm still on the red spring.
So you can do the legs straight If that's a difficult position for your body, you can also choose to make a diamond shape. So as you wish, I'm gonna do legs straight. What's more important than the positioning of the legs is the positioning of the spine. So do as you need to make sure your body's in a nice upright position. Going into the seated chest expansion, we take the arms back and forward.
And four. And forward, and lifting up, and one more, and then we'll make a small change. So here we start the same. Go back with the arms. Push down and arch the back.
Come back. Take the arms. Take the arms back. Push down. It's not a big backbend. It's an upper spinal bend, come back, and arms, and two, reaching pushing the arms down, lifting the spine, oppositionally.
Come back. And arms, it's difficult. I'm a little breathless. Go back and reach up. Nice simple movements.
Back. And arms all the way forward, loop the arms through like we did before. Holding on to the ropes. Take a rotation so we bend the right arm, spinal rotation, and center, and bend and reach the other arm forward. And center and bend and reach the other arm forward and center.
So it's a nice heavy spring for the arm, but really feel that the waist is where you're putting your focus, your energy, two more to both sides. So for a total of four, reaching around, and keeping the legs still. Last one. Reach and back. Reach and back. Hook the loops over the elbows.
I'm bringing the arms in front of the body. Take the arms out. Think elbows right underneath the hands and center. So in order to do that, the idea in your brain is that the elbows are reaching forward as that thumbs pull back. And two more just holding the upright orientation of the spine. And one more. And, yep, after this one, you guessed it. We are going to once again add thoracic extension, open elbows forward, chest up, thumbs back, come back, and through, and open.
And elbows forward thumbs back almost like you're turning in the arms to move the spine through space. Come back. Arms forwards. Two more times open. And lift that chest, and come back widening the arms, and center one more time my friends open, and reach up thumbs back, come back, come through center, remove your elbows from the straps.
And turn around. You could take your foot part down if you want, but it won't be in the way. And we're gonna need it again in a minute. So we're sitting again with straight legs or you can choose your leg position. Again, the more important thing is the upright placement of the spine, arms out to the side. We take the arms into the hug a tree, oh, close, and open, and close.
And open just two more. Close, lifting into the spring. And open, and lifting into the spring. And open this time Go past the hug a tree shape, turn the pinky fingers up, let the spring assist you as you go into that upper back extension, and then from that place round. Arms reach forward, abdominals pull back Keep the arms reaching straight out in front as the spine stacks one regular haggot tree. And then open. Use the spring for assistant, but really use your body more than you use the spring.
It's not lazy. It's active extension. Not to say that anyone's lazy. That's just what I'm thinking about. Don't just let the spring pull you. The spring is an assist.
Not the not doing all the work. We're doing two more. Arms forward. Arms at, externally rotate the arms, work into that extension, and then enjoy the flexion, moving the body in the opposite direction, and then stack Last one. Oh, yep. The Haga tree first.
Almost forgot that piece. And now we open. Left Take your extension. Ground through flexion. Stack back up.
And then we can just bring the arms in and hang up the straps. I really think that feels good. I hope you do too. We're gonna come into a mermaid position now. We're gonna do a little mermaid combination.
So we have the one arm on the bar. The other arm down. We go out, pressing the reformer out, bring the arm around. And as it finds the footbar, let the other one just shift, bend the arms. Straighten the arms, lift through the spine in that rotational position using the arms to square the shoulders go back out.
Let the other arm come back to the center unwind and in. Just feel like there's a little move few moving pieces and around, but just let it flow. Change the hands, bend elbows are just under the foot bar, and pull up, and go at And adjust and open. And in, we'll just do one more time and go. And ring out this spine.
Just the hands bend elbows just underneath that footbar, pulling the footbar apart, reach out. Lift up. Last one on this this side. So take your time. Explore the feeling.
Make it count. And reach out and center and unwind. Come all the way in this time. Hold on to the hook or the shoulder block. Raise this arm up and then just pull yourself into that counter stretch and up.
Take that hand around to the shoulder black. The other arm comes around to the other shoulder black and use the arms to help you pull yourself into rotation. It's meant to feel good. So if it doesn't, you can let it go. And then we'll do the other side.
So the arm one arm is on the footbar. Getting the pelvis as grounded as possible. We go out and around. Adjust and bent. And push and come through and go down and adjust and in.
And out. Trying to get that arm nice and low and around. And adjust and bend and reach. And pull through. Use that back leg against the shoulder blocks. It might give you a little bit more and go out, just and around and like a dance and aunts.
One step becomes the next step, becomes the adjustment, becomes the shoulder push, becomes the straight arms, becomes the extension. Here's our last one. I'm gonna give us that chance. Take our time. Explore, and come back, and in, and open, and up. And over. Using my arm to pull, you can hold wherever you want, really. And then come around into that rotation.
I pull with my outside arm, push with the arm closest to the camera, and come back. And take the feet down. We're gonna go into a blue spring now. One blue spring, almost there. Coming onto the reformer on the knees.
I like to keep my legs tucked in underneath my body for this, but if you keep them out underneath your pelvis more, it's much more difficult. So as you wish, I'll do it my way. So we do hands on the risers. So what I mean is if you're way out here, it's a lot more difficult for the arms specifically. So up to you. It's nice and supported here.
What we're gonna do is bend the elbows and extend the back. Keep the spine extended as you let your arms straighten. And then almost as though the spring is pulling the back back into straight, let it come back into straight. Let that spring pull. Then support from the scapula's shoulder stabilizers, bend and extend the body.
Keep the extension in the body as the arms reach out, and then allow the body to drop. Two more. Bend and extend. Hold the extension as the arms reach out. Follow through back into that straight body.
Last one. Bend and extend. Reach out. Reach down. Take a moment just to let the body drop, shoulder stretch.
Nothing fancy. Hand back to the frame. Carefully in. One more exercise, we're gonna scoop back on the reformer a little bit. Take the straps in your hands.
Arms start forward. We're gonna bend the arms out to the sides. Rotate the elbows forward hands go up. Arms reach back, taking the body back. Come around to the side, and and let the spine bend forward.
It's not a big bend, but it we do just counter stretch. Bend the arms. Rotate the arms. Go up and back with the arms. Come around from there, then allow the spine to counter stretch.
And two more. And rotate. Reach up around. Counter a stretch. Last time. Last exercise. Reach up.
Left the body. Come around. Count or stretch the body while you're there. Drop the straps, taking the hands and onto the shoulder blocks and really pull into that rounded spine. And then let the hands just softly come away and bring your body into an upright position. And that's it.
Pilates with Meri Rogers: Reformer Workouts
Comments
You need to be a subscriber to post a comment.
Please Log In or Create an Account to start your free trial.

