Premium workshop

You can view a 2 minute preview. For details, scroll down below the video.

Workshop #3589

Reformer Group Formatting

2 hr 25 min - Workshop
169 likes
Loading...

Description

Join Courtney Miller in her workshop that will help you build consistency in the way you express yourself and teach. She shares her three-step intelligent group programming technique that will help you build a roadmap for your classes so you can eliminate any surprises that could show up. She starts with a discussion, explaining her layering system, and then moves onto movement flows so you can see the technique in action.

Objectives

- Learn layering techniques and other strategies to help you maintain continuous movement and precision

- Learn how you can create a positive experience for your client

- Learn when and how to use reset exercises to help your clients maintain their connections and precision during the challenging exercises


Once you purchase the workshop, you will have access to the pdf attachment. It will be located underneath the description.
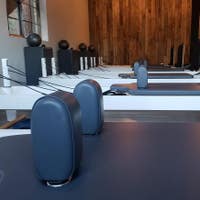
What You'll Need: Reformer w/Box

About This Video

(Pace N/A)
Dec 14, 2018
(Log In to track)

Transcript

Read Full Transcript

Chapter 1

Teaching Techniques

Hi Guys. I am Courtney Miller and welcome to my progressions and group formatting reformer workshop. Um, this is a workshop that I will teach in a live setting. It's part of my whole body integration reformer course, which is a four day course. Um, but this particular workshop is more about teaching techniques and I'll get into that more, um, as we start. But I do want to welcome the people who are here with me. So thank you so much for coming and we all have a little workbook that we're going to be using for those of you who are following along. Uh, there is a pdf that you can download that will go with this course and it'll be your little workbook that she can write and take detailed notes in. Um, if you guys want to take a look, let's just open up to the first page.

I just want to explain a little bit about what we're going to be learning today. This particular workshop is open to [inaudible] professionals, uh, from very new in their teaching career to very experienced. Some of the courses I teach are designed for [inaudible] teachers who have been working in the field and the industry for at least a year. Um, but this particular one I think is really good for teachers who are just starting out. Uh, and it helps to build confidence and consistency in the way that they, um, express, um, and um, and teach their courses. Um, but it's also a really great workshop for Polonius instructors who have been teaching for a long time who are very experienced but maybe have been teaching in a small group setting or a private and one on one setting. Um, this workshop was great for them to give them the tools to create a, a class that has a very strong flow but still allows them to have that precision and control that they love about the PyLadies method. Um, so what I've done here is I've created what I call an intelligent group programming technique. And, um, that technique allows the instructor to master flow and efficiency in a class. But one of the things that it really does, which I think we all appreciate, is it builds people up. So it's all about this sort of like upward elevation versus tearing down.

And we don't do that on purpose, but sometimes that happens, right? We, we offer an exercise or a variation and then we realize that we haven't checked off these boxes yet and we're teaching it and we're not quite certain that the body is ready for that yet. And so we bring them back and say, Whoa, Whoa, Whoa, let's do this instead. And that can sometimes be a less than positive experience. So, um, the idea with these three steps is it's building the, from a very strong base, it's building upward and it's eliminating surprise, which I think is really important in a group class. So as a teacher, if I have everybody on the reformers that say, have a group of 10 and we're going to do a back splits series, it would not a good surprise to be like, whoops, they don't have the stabilization to stand on the equipment during this reciprocal type movement. So the idea with this three step process is that you will be able to identify, you'll be able to see that they have certain elements, whether it's, um, uh, mental awareness or a physical ability to go into what you are planning to do for that class. It's kind of like building a roadmap, if you will. Um, we're going to discuss creating a positive group experience and, uh, layering techniques, um, also strategies to maintain continuous movement, but also maintain precision, which I think is a challenge because it sort of feels like you have the option to do one or the other. It's like we're either gonna move, move, move and flow without breaking that flow. Or we're going to stop, we're going to discuss, we're going to feel it a little bit deeper. So the idea is how do we, how do we fuse those two things together because they're both really important. And then I do offer a three step model, um, for teaching and exercise.

And you can use that for more than just teaching an exercise. Um, and then in this workshop you will also receive a reformer class format. And we're going to be doing it. So the first third of this workshop will be discussion and then the next two thirds will be workout. But we'll be really focusing on how this three step model can be applied in a group environment. Yeah, that's about it. Um, so go ahead and turn the page and you'll see that I have listed what this formula is, what this intelligent group formatting technique is. And it's essentially three stages or three layers.

Um, the formula can be applied in one exercise. So for example, footwork and this formula can also be applied in a sequence of exercises. And for me a sequence is three to five exercises that have been fused together. This concept can also be applied in an entire class. So think of a 60 minute class sort of having these uh, stages where the first 20 minutes are layer one and then you begin to evolve as the time goes on. And then you can also utilize this over window of time. And I think that that's something that, um, I have observed in my own teaching that is kind of missing.

So when I teach classes, each class kind of has this very, you know, spontaneous feel and, and I do program it, I think, okay, so this week I'm going to focus on that. But the next week it's usually something totally different. And, um, there is tremendous benefit for the client and the teacher in offering consistency and repetition. Um, and so if you utilize this technique over a window of time, like 30 days or 60 days or 90 days, you'll start to see this evolution in their practice. And you'll also kind of create this expectation where they know, okay, this is what we're working on. Um, it also gives you check marks that you can see, okay, so, you know, 30 days ago or a month ago, this is where I was, but now I have changed. I understand the exercise more, I become physically stronger or more flexible and I can execute the movement differently. Okay. The three steps that I, um, have, uh, utilized our foundation progression and challenge. And if you want to flip the page, I'll tell you a little bit more about each.

So I call layer one foundation. And we use that word a lot in place. I just want to define what I mean by it. When I say foundation, I mean finding a baseline from which you can build the rest of your exercise variations, sequence class or window of time. And so that foundation or that baseline is something that is relatively familiar to that body or to that group. So it's something that is known. It's not a brand new sequence.

It's something that you know that they will have a relatively high success rate at doing. It's during that foundation stage that you are offering all of those amazing foundational cues that you know and love and that are so necessary. But it's during that foundation stage that they're applying those cues quickly. And I'll tell you why. When you're teaching exercise or sequence that they're familiar with, they are living in a comfort zone and they've done this before and they know how it feels and they know what to expect.

And it's just this very sort of, you know, yummy space to be. And so when I'm there in my comfort zone, I am open to going more internal. In my thought, right? So, okay. So she said, you know, we're doing bilateral footwork. She said, heels of the feet onto the foot bar and pushing all the way out. I'm coming in, I know this, I've done this before. Um, and so as the instructor, as you're providing all of these amazing foundational cues, the client is absorbing that information and they're applying that information. Um, it's during foundation that you are essentially planting seeds and these seeds will grow and germinate throughout the entire class. I want you to think of that baseline or that foundation as the more of an information stage. Now, they're still moving, but you're applying a lot of information as to why and where and how.

And they're listening to because the, what they're familiar with, right? The, what is the bilateral footwork. So you've given them that, and now you can say all of those amazing things and they're applying it. Now, that doesn't mean in a foundation that you can just walk away and go get your coffee and come back. You know, they don't go on autopilot. And I am very fortunate to work with amazing Polonious professionals who have years and years of experience. And when I teach my life workshops, I usually start with a class and I include this technique. And even though I'm starting with that baseline, that foundation and exercise that I know that they have done before, and I know that they are confident and capable and doing it, I still go around and make my hands on adjustments and I still provide my individual cueing to that body. But what I see during the foundation stage is that those cues and those adjustments are applied quickly and that they stick in the body.

So an example might be if we're doing bilateral foot work on the reformer heels on, and I'm asking them to push all the way out, full range of motion on an exhale and pull home on an inhale. And I give them these directions maybe two or three times, and now they're all moving. This is my time now to switch to those foundational cues. So I would cue things like straighten the legs all the way, pulling up through the Vashti's and moving the Patella. And I would see a couple of people go into that, right? Maybe they weren't, maybe they weren't activating the vast days. And I would cue things like, you know, relax the feet, be a little more passive or push through the big toe and pull back through the baby toe.

And I see a few corrections happen here and then maybe I see one or two people in the room that are having an issue disassociating the femur from the pelvis. So every time they push out there rocking to a slight posterior pelvis and as they come home they recover to neutral. So I can go around and offer that there. And all the while the group is still moving in that foundational stage. Okay. What I'm looking for in my head is kind of like a precision meter.

So the image in my head is this. So no movement started, there was nothing happening. And then you give them directions. So this is what we're doing and we start to move. And because we're in foundation, and I know this is relatively familiar place to be, that precision starts to go up, right? They're moving, they're feeling it, and I'm offering the cues and they're listening and they're applying them. And I walk around and I offer individualized and hands on adjustments and they're applying them and now we're here. And so now the group is moving and the precision level is high and it tells me then I have the option to make their life harder.

How do I make this more challenging for them, right? Because that's what we really stay at. We stay up late at night figuring out, right, how do we make things harder for people? So that gives me the green light to go to that next level or that next layer. If I don't see that, if we start moving and I kind of get stuck around a certain area, let's say we're doing bilateral foot work again with the heels on and I'm noticing that there's an issue with maybe that transference issue, maybe the keeping the pelvis stable as we mobilize the femurs appears to be, um, problematic with this particular group. Well then that tells me great IRS actually great information to extract because now I know what this particular group going into, perhaps a unilateral variation of footwork wouldn't be ideal.

That tells me that there's a whole bag of exercises that I can draw from for the rest of the class that will help them to find those foundations to be able to stabilize femur and pelvis. Um, you know, so they're not moving at the same time when they're not supposed to be. So the idea is you're extracting information, right? It's not like we're thinking, oh, we have to get here every time. It's not your watching that precision meter and you're identifying if there's a particular issue that's happening that allows you to then hone in. And maybe that's the theme of your class, right?

You're starting with your bilateral footwork. You notice that the pelvis is moving every time people press out and so boom, that is your theme for maybe that class or maybe a window of time. We're going to work on stopping transference when we move those legs and keeping the pelvis stable, but if you are checking off those boxes in your, in your head and you're seeing that precision meter is going up and you have the green light to go to that next level, the next level is progression. Okay. It's progression is a place that brings them outside of their comfort zone now, so they're not in that familiar land anymore. Okay.

During progression, they, their brain has switched from how, where and why to what and what you see. You can identify, you can see it happen as soon as their brain goes from those two. What it's kind of like their body goes, Huh? Right. And you see them. They sort of will look to the side, the look to see is the other person beside me doing what I'm doing? Or they'll look to you, they don't need to verbally say anything.

You can see in their body that they have now come from that more internal self dialogue place. Oh, that's what she's talking about. I got it. Yeah, totally. To what, and that's okay. But when that happens, when we see that transition, the precision meter is going to go down a little bit, which is why it was so important that you planted those seeds earlier on because now you're coming back and you're reminding them. So we, we, you know, let's talk about straightening the legs all the way again. Let's talk about lumbopelvic stability. Yeah. There's three ways that I progress in this type of work, this more athletic kind of style work. The first one is coordination challenge.

So if I've built a baseline and I've seen that precision meter go up and we're moving and it's feeling great and people are happy, and I say, let's make things harder. There's three ways in which I choose to progress. The first one is coordination challenge. A coordination challenge could be something like changing breath pattern. So we've been pressing out in our bilateral foot work on an exhale. Now we're going to change that to an inhale.

A coordination challenge could also be something like adding a combination. So maybe I'm doing a a, a, a and it's great and then it B, B, B, B, both are in that baseline foundation and they're great and I want to increase the challenge, then I can put those two together. All right guys. Now let's do them both a, B, a, B, a, B, other ways to offer a coordination challenge could be things like changing tempo. Um, and we'll talk a lot about that but it's basically getting their brain thinking a little bit more, pulling them outside of that comfort zone. And another progression opportunity is whole body integration. So a lot of the exercises that we teach have what I would call a star of the show. Like Umaine Star, like it's Ryan Gosling, right?

And so the idea with whole body integration is that we add a second major component into that. So lets go to that bilateral foot work examples since we keep going back there. So if I'm pressing with the legs, heels are on, feet are hip distance apart. I've established a foundation, I've seen success and I choose to progress using whole body integration. Then my options would be to add an upper body movement or spinal mobility.

Those would be my two options. Right? But I'm sure you can understand the importance of building that baseline first because if people came in from a long day of work and they were sitting in traffic on the way to the studio and they're frustrated and they know they have to go to the grocery store and pick up food to get home to make dinner and they're just in their plays class and then we all lie down the reformers and we're lifting our arms and we're pushing out with our legs and we're curled up in our spine. And your expectation is that that precision meter is evolving, you might not be setting them up for success. So those are the two progression opportunities I've listed so far. The first one is coordination challenge. The next one was whole body integration opportunity.

And then the third progression strategy that I use is weight transfer or load transfer. And what I mean by that is changing the points of surface on or the points of contact onto a surface. So if you are doing a supine exercise, for example, a weight transfer would be transitioning to sideline. If you are in a quadrupedal kneeling, a weight transfer would be to lift a leg. Okay. Similarly, if you are vertical and standing on two legs, a weight transfer would be going from two legs to one and weight transfer is extremely functional.

The ability to be able to change our points of contact onto a surface while maintaining stability and posture is adaptable to everything that we do. So it's kind of an important one. So again, just to go over, we've built our baseline, it's during that foundation stage that we're offering all of the yummy foundational keys that we know and love. They're moving, but we're giving them that information and they can do both at the same time because they're in their comfort zone. And we see this evolution through the movement as they continue to go. Reps, one and two precision meters here, reps four and five it goes up six and seven it goes up. It's great. Eight and nine. So that tells me, I can add on my options to add to this layer to this would be a progression and the ones that I pull from are coordination, challenge, whole body integration or weight transfer. Once we add that progression, what we see is a drop in the precision meter because instead of being in that inward space and I closed my eyes because that's kind of how they feel. Yeah, that's what she's talking about to that precision, which is what?

What does she say? Left leg. Right leg. Huh? So we see them come a little bit more external, but because we've planted those seeds, we can continue to have them grow and the precision meter continues to go up and we start to see that again. Okay. Rev One and two it dropped a little bit because they're thinking about what am I doing? Rep five and six it starts to go up because they're thinking about how I'm doing it. Rep Seven and eight even more because I've worked my way around the room and now we continue to move and flow.

If you see that precision meter go up during a progression and you want to continue to build in this strategy, there is a third step. There is a third layer, and I call that challenge. Now, I don't always get to the challenge because again, this technique helps you to extract information and the information that I'm extracting tells me whether or not I'm going to have the green light to continue to build, but it's not that I go into a class or a session with the objective to go from foundation to progression to challenge in every sequence. It's not that at all. It's I know that I'm going lay this out in this three step techniques so that if there's a place that I need to stop and focus on, then I'm able to identify that. Okay, so I'm eliminating uncertainty and I'm in eliminating surprise. So we've added our progression. Let's say we've added coordination and it's great and I want to continue to build.

The third step is challenged and there's two ways that I added challenge in this technique. The first one is to take your current progression and to amplify it. So turn up the volume. If my progression is coordination and perhaps I'm doing a combination, I've done a a, B, B, B, Great. Let's put them together. A, B, a, B, a, B. So I've just went from foundation to progression and I want to make it harder.

I could add in a c, now we have got a, B, c, a, B, c, or maybe I go ABC, CBA or AAA, BBB, CCC. Now one of each. ABC, ABC, right? So I can take a progression and I can just turn up the volume, right? The other opportunity I have in, uh, the challenge stage is to layer in a second progression. So if I'm already doing coordination and I see that there's a successful movement experience happening and I want to continue to build, then I can layer in some whole body integration into that. I can layer in some weight transfer into that. But as I, again, I'm sure you can imagine if somebody came in to their class and we all lie down and we start pushing out bilateral footwork, curling up into abdominal crunch, lifting the arms to the sky. As we press out, do that two times.

Now lift your right leg up, push out two times, then come in and switched to the left. It's too much. Right? Smoke comes out of their ears. Not a good experience, not a good experience for clients and not a good experience for teacher either. It's nobody likes feeling confused. Right? Um, so this idea with these three steps allows you to build from a strong base. It's during that base that you are saying all of the important [inaudible] cues and principles that you need to and you know that they're listening and you can see it in their body. Once we go to progression, we are challenging them to the point where it's bringing them outside of that comfort zone just enough. And we're choosing one of the three options, coordination, challenge, whole body integration or weight transfer.

And we're looking for that precision meter to start to come up again. Now if we don't see it come up, if I've perhaps selected coordination as my progression and I'm asking them to do an exercise that has an a and a B and an a and a B, and I'm seeing that there's a real disconnect here that when I say a they're doing B or what's happened is when we add in that second component they've regressed and those foundational cues and adjustments I gave just come back again. Then again, that's information I can use to build a class or a strategy over a window of time to help them with that and I've absolutely seen that. I'm sure you guys have too, or you have a regular Monday night group and you know, you know that they have done things like front splits on the reformer very successfully. But this particular Monday when you go to Cheech footwork and you go into a single leg version of that and half the people aren't paying attention or some of them lifted their left leg when you ask the right or when they're going through the exercise, they just were very wiggly, wobbly in the pelvis. There's been something else going on in their life that perhaps has effected their, uh, experience in your studio today.

And that's information that you need to know because if those people aren't listening or feeling it in their body, they're probably not a candidate to be standing on the reformer in a position where they could fall and you can't spot them. So, uh, the idea with having this three step process is that it eliminates uncertainty for you as the teacher. And it also empowers the client. Um, it creates this very upward evolution and momentum in your class, building people up versus tearing them down. And we don't do that on purpose, but there definitely have been times or we throw out an exercise, a variation that's Kinda complicated and then we see that, okay, so there is an issue with coordination here and we have to simplify and bring it back a little bit. And I think that that's observed. The, the client observes that maybe it's like, oh, I didn't, I didn't do that. Right. Um, this is allowing you to establish that baseline and then great job guys. Let's continue to move on from here. If you are establishing that baseline and you've identified that there's a movement pattern issue, then you have great, you have the information you need to continue to work on that. Um, I will say that these stages are not something that I verbalize, so I don't want a group comes in. I don't say, Hey, guys are right.

Let's see if we can get to challenge today. Oh, you didn't. Uh, this is something that I know in my head, it's my roadmap. Um, but I often am taken into different directions based on my observations. And I think that's really important to be flexible that way, to know, okay, I'm building the baseline and you know what, I, I thought this, this group of bodies were, you know, relatively used to doing a, you know, lateral footwork. But today for some reason there's an issue with stabilizing the pelvis. And so I'm going to continue to work on that. Um, by eliminating uncertainty, you teach with confidence. So I'll give you an example.

If you're teaching like a quadrupedal kneeling exercise on the reformer, and I love quadrupedal Elaine because all of our PyLadies cues and principles apply, right? Um, if you're teaching that and you see that precision meter go up and you decide to add a progression and maybe your progression is a weight transfer progression, so one leg lifts perhaps and arm lifts and you see that precision meter drop a little bit, but again, you're, you're able to bring them back to that place. By the time you get to challenge and you're going to give them a very high level balance challenge. You're not teaching it in a place of fear like, okay guys. So we're going to really carefully go into this next one carefully because I don't want you to fall. And so just if you don't think you can do it, then you don't have to do it. So let's all really carefully go into this. And I think the language you're giving them is, I don't believe that you can do it. I think you're probably gonna fall and hope that you don't. And um, that's a scary place for them to be, right? So if, if you're not sure that they can do it, then don't teach that one. Right?

But if you teach it this way, all right guys, so we've moved from doing this four point kneeling exercise. Now you've done your single leg variation. It looks amazing. You are strong and stable. I'm going to continue to challenge your stability. Here we go. Then they're like, wow, okay, let's do it. We can do it. And, um, I think that's a really important factor, especially in a group environment, right?

And I think that we try to instill this concept of empowered movement and fearless movement. Um, but we also have to be smart and we have to be safe. And if there's 10 people and there's only one of you, you have to choose exercises and, uh, variations that are gonna work in that environment. This concept of layering in three steps gives you that confidence. Okay. Um, yeah. Great. And then I've also listed a couple of other elements that I use in what I call the intelligent group programming technique.

And one is called a reset and it's a little word, but when I say it in a class, it gets a really big response. And the response it gets is usually this, ah, reset, right? A reset exercise to me is after we've done a long unilateral series, brings them back to center. And it's usually something that is physically challenging, relatively simple. It's not a high level of complexity. And it brings them back into this is what your were feeling, this is what we're doing. And that's why I kind of gets this and I'll give you some examples of reset.

So for me, a great reset exercise is a bridge, a great reset, reset exercise is a plank or a long stretch version. A great reset exercise is a quadrupedal kneeling exercise. And I'll do these reset exercises again after doing a long unilateral series. So maybe I've done and a a on the right side, a BBB on the right side, a CCC on the right side. Let's put them together, a, B, c on the right side, a, B, c on the right side. One more time, ABC. And I'm wanting to go into that left side personally.

I'll choose a reset exercise before going into the same thing on the left side. And I find that that kind of shakes them up a little bit, right? So, um, okay. Just, just, you know, get rid of any tension and rigidity that may have creeped up. Um, I don't want anybody you regret, uh, like, um, um, not wanting to do an exercise or feeling like, oh, we have to do that again on the other side. I want them to feel excited about doing an exercise. So sometimes when you're so fatigued after doing that long series on just one side, the last thing you want to do is flip around and do it again on the other side. Um, and the reset exercise again gives them this opportunity to find center to feel balanced again and then go into the series. On the other side, a reset is also an opportunity to again, drive home those foundational cues.

So if you've done along unilateral series or maybe just a really complex series or perhaps a really dynamic series where there was a lot, a lot of movement, a reset, that's how I say it to reset. Um, a reset is an opportunity to kind of bring it back again. Okay. Um, I want to discuss the concept of super setting and so this is not a new thing at all. This has been something that, you know, we, we've used in fitness training for a long time. Um, but it might be a new concept to you. I think one of the challenges in teaching a very movement focus class is how do you keep people moving without sacrificing precision and form? Because if that goes out the window, then the effectiveness of what you're doing is also gonna lower a little bit too. So the concept was super setting is to maintain continuous movement, but switching muscle groups before you get to muscle hypertrophy or to fatigue because it's when we start to get to that very, very tired place that we start to use other muscles to do the work or just our form starts to soft four or maybe we just stop altogether. We stopped the movement, I'm done, I quit and he checked my phone.

So I'm super setting is the concept of choosing a particular muscle group and working that muscle group to the point where fatigue begins. Not saying that you just do one or two reps, you want to get them to that place where they feel challenged physically, but before you push them past that point where they have just [inaudible] not doing anymore, then you switched to a different muscle group. And a really good example of that, I think a, is an upper body exercise. So if you're doing an exercise that's a very bicep focus exercise and you can tell they're getting fatigued, maybe they're starting to recruit other muscles, like their packs to assist in the exercise, then it's time to stop and let's do a chest expansion exercise. And now we're working the opposite direction. We're opening the PEX, we're lengthening the biceps and the muscle focuses in the posterior chain.

And even though they're still working, they're actually resting that muscle group that was feeling very tired. So then you can come back to what you were doing before and you can go back and you can kind of play with that. So you have that flow and that movement, um, without the fatigue that starts to affect form and the way they execute the movement. Okay. Um, so just a quick little recap here. If you want to flip the page, I'm just looking at key markers. So the idea with this layering process is that you're looking for certain indicators that tell you I have the green light to move forward in this exercise. If you're choosing an exercise or a sequence. And let me just be clear what I mean by applying this strategy in a sequence of two or five or you know, so exercises are movements is that you might have like the first one or two movements be very foundational based and then the next one or two variations or movements be very progression based. And then at the end you're doing a challenge and then you repeat that flow again using different muscle groups. So I hope that that's clear.

So it can be one exercise like footwork. You can bring them from foundation through progression to challenge info at work, stop, move on to your next flow. It can be in a sequence where perhaps your footwork and your bridge are very foundational based. And then you go into a mid back series and a kneeling series. And those are progression based.

And then you go into a dynamic sort of plank series and that is your challenge. So you can build it within a sequence and then of course over a class time period or window of time. But the idea is that you're looking for certain markers or key indicators before you go onto that next stage. And for me, when I'm in that foundation zone, my expectation is that they're relatively quickly and efficiently applying the and the tactile and the visual cues that I'm providing to them. Um, and if I'm not seeing that, then that tells me that that might be a place that I need to stay a little bit longer before I move on. I'm looking for what I call an Aha moment.

And I think that everybody needs to experience that. Oh, that's what she was talking about. Oh, that's where I was supposed to be feeling it. Um, and I think that that's an important thing to happen before we move on. Now that doesn't mean that I have to do 175 repetitions of heels on the foot bar, bilateral leg presses. And my footwork, waiting for that one person to have that Aha moment because there's a lot of different ways that I can build in the concepts of activating through the vast [inaudible], moving the Patella, stabilizing the foot as the Tibialis and the femur moves lumbopelvic disassociation from the femur. There's a lot of ways that I can do that. I don't just have to do bilateral footwork for 45 minutes, but I am looking at that Aha moment of the essence of that type of series is absorbed before I build on that concept. Okay. Um, as far as progressions go, it is my expectation that I am bringing them a little bit more external in their experience. So for me, in that comfort zone, it's, you're inside, you're feeling the words that I'm saying and you're focusing on things like why, where and how in the progression, I know that I'm pulling you out of that a little bit and I'm asking you to focus on the what. And sometimes when we focus on the, what we forget about the where, why, and how. And that's why we see that precision meter drop a little bit. So I have that expectation. I know that that's going to happen. Um, but what I'm hoping for is those seeds that I've planted in the progression can be sort of called upon. Again, it's not new words that they're hearing.

They've heard these techniques and these, um, suggestions before. And so when I layer them back in, it's familiar and as soon as they start to get comfortable again in the what, then they can start to feel the where, the why, the how again. And it's really often when I'm teaching a group classes that I stay in those two zones and I just kind of go back and forth foundation progression and I've got those three different progressions to choose from. So there's so much content within that, um, when the time is right, if you're seeing it in your group that you have selected a progression and it looks amazing and you want to continue to evolve, then you do have that third layer, which is your challenge. And it is a challenge during challenge.

They're focused on what period they're focused on, what, what am I doing? And your cues are also very directional focused. This is what you're doing because at the point that you've got the, when you get to challenge, there's going to be high level coordination. There's gonna be probably some weight transfer in their whole body integration. It's very much a what kind of place to be.

And so if they haven't already felt the where, the why and the how and applied that, then they may not be as successful in that challenge zone as they could have been if you build them there. Okay. Um, I say this in my live workshops all the time and everybody laughs, but it's the truth. You don't like surprises. And I know that because you're a pilates instructor and all polities instructors are control freaks. Yeah. And we'd need to control our environment, right? We, I mean if you walked into the room and a pitcher was slightly askew, you wouldn't be able to deal with it. You'd have to go over and straighten it. Um, and so this technique, it takes away the unknown and it gives you such valuable information and it's not information that's extracted verbally. Hey Sam, how you feeling today? Oh, you know, my back's a little bit sore. That's a totally different thing.

You're extracting information on how are their bodies moving today? How are they absorbing your cues and the information that you give them today and what direction does your class focus need to be today? And if you do this every time, the sort of three step process, then you'll be completely in sync with what it is that they're needing to get from their class on that day. Because it is very dynamic. It changes all the time. Um, and again, it's creating the sense of confidence in you as a teacher and empowering them as a student. Yeah, I know you can do this. We've built you up to here. This is going to happen. It's going to be fabulous. Um, so, so yeah, it's, you know, it's something that I, um, it's kinda been an undertone of the way that I've been teaching and, um, it's created sort of this consistency and cohesiveness in the style of teaching.

And that's another benefit to, um, if I didn't say that already. Um, consistency and repetition is a really, really important thing and it sets expectations for clients. If they know, if they know that you're gonna offer opportunities to progress or offer additional variations, then they might not come in with this sort of self competitive or maybe they're competitive with the people beside them sort of mentality. Oh, she's doing a bridge with one leg and I should be able to do that too. If they know that you're going to be guiding them along this process where there's plenty of opportunities to make things more complicated and more challenging. Um, but this particular one, maybe they're better in this particular phase, then I feel like they're able to kind of self manage their own workouts to the way you know, they feel in the class. Um, and I've also had a lot of feedback from studios that I've worked with whose instructors have gone through this course. And what they say is that the efficiency in the flow in the groups is greatly increased. Um, the, uh, positivity in both the instructors and the clients has a increase and there's this sort of, um, cohesive vibe within a studio. And I think that's an important thing. So if a client takes a class from you on Monday and Wednesdays and then a class from you on Saturday, it's not that they need the same personality or the same repertoire, but if there is a certain similarity in the way that the exercises are offered to them, um, then that's a really positive experience for the client, the having that expectation. Um, so it's something that I encourage you to, um, consider.

And um, chances are that there's a technique that you've been using that is somewhat similar to this, but maybe it wasn't, you know, laid out as that sort of one, two, three. Um, but give it a try and, uh, even in your own body and, um, remember that it's not, it's not about getting a gold star, going from progression to challenge. It's, that's not the end game. It's how do you extract the information you need to know about these movers today and every day that they come in and choose the right variations in the right progressions to give them what their bodies are needing. Um, and it's about empowerment and taking away surprise. Okay. So, um, what I've offered in this workshop is a class format. So what we're going to do is go through the class format. Now for some of you, um, these variations that I'll be doing will be new. Um, and um, it'll be a great opportunity to learn some more, uh, sequencing and some new choreography. Um, but I'm not going to focus so much on the exercises that we're doing. Uh, what I'm going to focus on is layering in foundation progression and challenge into these exercises. And what I'm going to discuss is, um, how the class, it begins sort of in a foundation place and then build to progression.

And you will see some challenges in there. Um, and I'm going to discuss how within each exercise I build from foundation to progression to challenge and I'll use those particular words so that it's very clear. Um, but I do want to just remind you that this is not the language that I use in the class cause it's never this idea that my expectation is you get to here. It's not that at all. Um, and um, and yeah, and I'll discuss where certain progressions, um, like the ones you choose, whether it's coordination or whole body integration. I'll discuss where those sort of come into play and what information that gives you on their body and how you would then select the type of challenge based on what you've observed. Okay. So let's get ready to work out.

Chapter 2

Foundations and Progressions

So we're ready to start the exercise portion of the workshop. For those of you who are following along at home, if you look in your workbook or now at the reformer class format and we're going to be starting with page one. So I'm going to have two people come on up.

You're going to be starting with footwork. So, um, set up your footwork settings. I personally like three red springs, a mid bar. Um, and then I do have these sticky pad placed where their sacred is going to be so that we can progress into a, another variation. So you guys can go ahead and set up your springs, set up your gear bar, um, ensure that your headrest is in the right position for you. And I just wanted to remind you that the dialogue is going to be very obvious when I talk about foundation progression and challenge. But in a class I might not use those exact words a good. So we're going to start with a foundation. So let's stretch your arms long wide.

In Our collarbones heels of the feeder on in parallel, we didn't practice that, they just went there. So that's great. Um, toes are going to point up to the sky. Take a breath in before you move and then exhale, push out to two straight legs. Pause for a moment while you're out there. Draw the kneecaps up, draw the tailbone down, and then inhale yourself almost all the way home to begin again. Exhale, depress out. Inhale as you begin to come home. And then exhale, push all the way out. Good. You guys, keep going. So those cues that I just provided are very direction. I just told them what to do. I didn't really tell them how to do it.

Now that they're doing the movement, what I can say is let's keep going and I go into those foundational cues that are so important. And let me just reiterate, it doesn't matter how long you've been doing [inaudible] we all need these reminders, right? Let's press all the way out and pause for a moment guys. I want you to feel a little more passive through the feet. So toes can be a little relaxed yet. Think about the big toe mound pushing forward. Yeah. And bring yourself in. Continue to flow here. Yup.

On those exhales that see the ribs dropped down into the carrot and as you inhale and come home, see if you can just slightly anteriorly tilt the pelvis. So as you come home, see if you can slightly tip your tailbone down into that sticky. Yeah, and so you guys can keep going. So again, I just want to remind you because we're talking about the workshop content, if I was going to be giving them all of these cues, it's kind of a lot, right? A lot to absorb. If they were also doing a high level coordination exercise and I was saying all of these words, they wouldn't be able to take it all in. So again, that importance of the importance of having that baseline to begin come halfway in in pause, but they have done a great job and it tells me that there is an opportunity to build here. And so I want to choose my progression, the progressions that I can choose from coordination, whole body integration or weight transfer. Let's play a little bit with weight transfer. Draw your right leg up to tabletop.

Good place the heel of the foot back onto the foot bar. Draw your left leg up to tabletop. Place the heel of the foot back onto the foot bar. Push out with both legs all the way drawing up through the thighs. Come halfway in and repeat that flow.

Right leg comes up and place it back down. Left leg comes up and place it back down. Push all the way out to two straight legs and come halfway in and again can continue there. What I'm looking for during weight transfer is disassociation. So I want to see that they're able to mobilize the femur without changing the position grossly in the lower back and pelvis. This is also a challenge for spatial awareness, so as they place their heel back onto the foot bar, they need to be able to strike that heel down in alignment with their sip bone on that same side and they're doing great.

So I could take this current progression and amplify it to bring them into a challenge. And here's how I would do that. Good. So push out to two straight legs, guys. Drawing up through the front of the thighs. Nice. Come almost all the way home. Draw the right leg into tabletop. Yeah. Push all the way out with the left leg. Good. Come almost all the way home and place the right heel back on.

Taking the left off and pushing all the way out to two straight legs. Continue the flow as you come in. You make the switch, push all the way out on one leg. Good. And keep going here. Now it's totally normal and expected to see that those uh, those foundation, uh, issues that I corrected, they kind of reappear, right? So if you saw somebody who is maybe having a little bit of problems in lumbopelvic stability or maybe somebody was gripping in that like Tibialis anterior and you see those toes drawing back towards the knees, it's common that when you go into that challenge zone, because they're so focused on the what those kind of creep back in again. Yeah. Good.

And press and one more time and press nicely done. Good. Bringing the carriage all the way in. Just scooch a little bit away from the shoulder blocks. Then dangle the legs over the foot bar. Awesome and open your arms out to a letter t turning your palms up. Good.

So I would consider this a little bit as a reset, but this is also a transitional opportunity in the effort to maintain flow and efficiency in your class. You'll notice that you have these transition opportunities that keep the bodies moving, but also serve a purpose. And in this purpose it's going to be a spring change. I'll have you draw your arms in towards your sides and as you do, nod your chin towards your chest. That's cranial vertebral flection. Then on an exhale, you'll lift all the way up over your thighs, reaching your arms over the foot bar coming into a full roll lap.

Four head down towards the knees. Good. Soften the knees. Good. Reach through the arms. Drop the head down. You're in spinal flection here with the shoulders dropping down away from the ears. Inhale, roll halfway back, keeping the legs heavy onto the foot bar. Lift the arms up to the sky and exhale, roll the rest of the way down. Take your time and stay heavy in the legs. Good. Try it again.

Open your arms to the tee. Nod Your Chin to the chest as the arms come into the body, all the way into the sides. And exhale as you roll up, melting the ribs down. Good. Feel free to use the hands on the thighs to get yourself up. Flex over the thighs, drop the forehead down, release through the shoulders. Get a back stretch here and take a second to breathe into the back and sides.

Inhale, row halfway back. Good. Keeping the legs heavy. Lift the arms up to the sky and exhale, roll the rest of the way down. Open the arms to the sides and repeat the flow. You guys are going to do two more here. I particularly love this transition and I love it.

After doing footwork for two reasons. One, in a group of 10 or more people, it helps them lift up so that they're in a position where they can change their own springs, right? So that's going to help with efficiency. But two, I know in my choreography that after doing footwork, which is a very stability based movement, um, I'm going to do something that's about spinal mobility. I want them to move their spine. And what this transition does is it allows them to warm up the back to fire into the abdominals. So when I ask them to do an exercise like the hundred, which would come up soon after footwork, then they're more prepared to do that. Stay in your flex position. Good. And take your hands under the foot bar. Good. Yeah. Take your arms under, flip your palms up. Perfect. And then start to roll back until you can grab the foot bar. Yep, exactly right to there. Now I can build into a progression here too.

So they were just doing their roll up and roll back down was very foundational based. Let's take her right arm out to the side, twist and open it. Good and look. So go ahead and twist through your body. Keep going, keep going, keep going. So what I've done is added some spinal mobility into here. Circle the arm high to the sky and take the hand back under the foot bar. Try the left side, so sweet. The left arm, open, twist and look good. This also tells me valuable information.

Are they rotating through their t spine or through their pelvis? I can see it in their legs and I can correct it here. Before we go into an exercise where that's a really important component. Try that again. Reach to one side. Good. Lift the arms high to the sky, up and over and hold the foot bar. Other side reach and up and over. Very nice. Let go with the foot bar. Keep the leg soft and roll yourself all the way back down.

Arms go up and arms go out to the tee. Good. The other thing, just pause for a second here guys. This roll up transition tells me is how the movement is being initiated during that flection. I'm asking them to keep their legs heavy and keep their legs on the foot bar, which they're doing a great job at, but often in a group, what you'll see is the legs lift off the foot bar. Do you guys want to demonstrate what it would be like to try to grip in your hip flexors and power up with your hip flexors versus flexing your abdominals, draw your arms in and exhale. Just try to pull yourself up. Yeah, there you go. Well done. So that's what you'll often see in a group, right? And it's not that you get in trouble for doing that, but as an instructor you can flex over your thighs and breathe as an instructor.

That tells me important information that tells me that the people who are doing that might need to work a little bit more on mobilization of the spine before we go into flection exercises or that those people may have to do those flection exercises in a modified position so that they're working in the place that I want them to be. Right. They might not feel the hundred in the same place as the other body behind up beside them and feeling the hundred. Okay. This is also the time for them to change their springs. So go ahead and reduce your springs for your bridge. Setting a for me, the bridge settings springs are two reds. If I'm feeling super strong, I'll do one red and one blue. Great.

Float your arms good. Lift your arms up to the sky and then exhale. Roll yourself all the way back down and their headrests are down. So I'm just going to leave them down. Hands Down beside you. Heels of the feet. Go back onto the foot bar. Feed her hip distance apart. Good. Inhale. As you get ready to bridge, pull your sit bones towards your heels.

Exhale as you flex the spine. Feel your lower back. Come into contact with the carriage and then roll yourself all the way up into your bridge position. Reach long through your fingertips and wide and your collarbones. Inhale. As you begin to roll down through the thoracic spine, feel the distance between your sternum and your chin. Get longer. Pause when you're halfway down and exhale, roll back up again.

As you roll up, think about pulling your sit bones towards your heels. Do that three more times. So this might be a very nice foundation in place for them to be. What I'm asking them to do has all of the components of a successful bridge, right? I'm asking them to feel that isometric contraction in those hamstrings, keeping the carriage into the stopper. I'm asking them to mobilize the spine and articulate during the roll up in the roll down during the apple.

Let's remind ourselves to engage through those glutes, right? Especially glute Max to get that sense of pushing pelvis up and opening through hip flexors. We can relax the feet a little bit and drive the heels down. That'll also help us to fire into those hip extensors. So this is all really valuable information that I need to verbalize before I take them outside of their comfort zone. On the next one, lift the hips up and stay up. Good.

Using your arms actively to help maintain a level pelvis. Draw your right leg into a tabletop position. Good. So now I'm going to be going into a progression and this progression is going to be a combination based progression. The first part of the Combo will be a toe tap. So draw your right leg downward. It doesn't have to touch the foot bar it can and exhale as you draw it back up again. Do that three more times. Trying to keep the pelvis level and stable.

Your upper body does have a role to play there. Good. Nice. Lower the heel of the foot onto the foot bar. Lift the pelvis up higher and exhale, massage yourself all the way down. So I would call that a the first part of the combination. And they did. Great. So let's learn B, take a breath and while you're down, exhale, flex the spine. Scoop and roll back up. Yup.

Draw your right leg into a tabletop position. We've been here before, it's familiar and let's push 80% of the way out with the left leg. So almost all the way out. And exhale, pull yourself home. And as you're coming home, try to lift the hips up higher. Yeah, so you're pushing almost all the way out. Exactly. And as you come home, you're lifting the hips up higher. Very good. Press and return. Bring the carriage home, bring the right heel back down in line with the sip bones and exhale massage. The spine all the way down. Going for length here. Yeah, so now that I've established an a and a B, let's put them together. Inhale, get ready. Exhale, roll up. Hearing your bridge position.

Dry Your right leg into a tabletop position, keeping the pelvis level push almost all the way out with your left leg. Pause. Do your toe tap here, drawing the right leg downward. It'll probably go past the bar. Lift it back up and bring the carriage all the way home. Picking the hips up. Try that again. Push a more than halfway toe tap, maybe even past the bar.

Recover leg and tabletop and pull yourself home. Pelvis up. One more time, prs. Almost all the way out. Dip the toes downwards. Lift the leg back up and pick the pelvis up to return home. Place the heel of the foot on. Lift the hips up higher first exhale as you massage the spine all the way down. Great job guys. I want you to note how my my tone changes, right?

The direction is very clear and I'm relying on the fact that we built a baseline already, right? And I can remind them of those foundations, but we've already gone through those foundational type cues. Now I can continue to build here. So I would consider that challenge. We started with the foundation, bilateral bridge, focus on articulation. Then we built to a progression. And the progression that I chose was coordination. I taught them a, I taught them B and I said, let's put them together. Now for my challenge, I could either take that current progression and amplify it, turn up the volume, or I could layer in a nother component. And I think that's what I'll do.

Uh, let's switch legs though so you're not lopsided for the rest of your life. Okay, so heels are the feet or onto the foot bar and he'll get ready. Exhale, flex the spine, roll up into your bridge position. Good. Now the uh, addition I'm going to add here is whole body integration. And I'm going to add in upper body, draw your arms up to the ceiling and turn your palms in. Good. Yup. In towards each other. You got it, girl. Okay, so take your left leg up to tabletop so we can kind of even you out a little bit here. Nice. Let's practice one round without adding the arms.

Push a little bit more than halfway out with your right leg. Pause. Now remember when you do your toe tap, the flection of the knee stays the same. The movement is where the femur meets the pelvis. Yeah, and return to come home. Lifting the hips up higher. Try that one more time. So push a little more than halfway.

Do your toe tap so you probably won't even touch the bar. You're going to go probably in front of it and down, and then like comes up and you recover. Coming home, hips up higher. We're going to add the arms. You push a little bit more than halfway. You open the arms as you do your toe tap. You close the arms as you recover the leg and you bring the carriage home.

Try that again. You Push, you open as you toe. Tap. Good. The arms come up, the leg comes up and the carriage comes home. One more time. Push a little more than halfway toe tap. As you float those arms open, lift the arms, draw the leg back up, bringing the carriage home, the hips up, the heel floats down, the arms float down and the spine articulate all the way down. That's a challenge. Okay, so I want you to make it very clear, but I just want to kind of go back to the discussion that we had earlier. If you guys came into my [inaudible] class and I started with this bridge series and I asked you to go with there before I built the foundation, you probably wouldn't come back because you would feel like this is too confusing for me. I don't like it. I don't know what she's talking about.

It's information overload, but the idea of building them up is, I knew that you guys had that glute strength to maintain the unilateral bridge. I could see it when we were in that bilateral bridge. When we went into the toe taps, the coordination was there. You're able to disassociate the femur from the pelvis. I knew that when we added the arms you guys were going to have it cause we already layered in all of those foundational cues. Well done.

Let's do another transition. Scooch down away from the shoulder blocks a little bit. If you're feeling jammed in God, draw your legs into tabletop. Either one at a time or bilaterally. You might have your Mojo squeezing your inner thighs together and straightening your legs long over the foot. Bar. Good. We're going to do a rollover.

Their headrests are still down. Lift your legs up to the sky and pause. Finding that 90 active arms here. So just like in your bridge, the arms have a big role to play. Exhale, roll up and over into your inversion. Good. I'd like you to stay with legs parallel to the floor. Separate the feet, hip distance and flex the feet. Good. Even fanning the toes. If you have that kind of mobility in your foot. Inhale, roll halfway down. So this is sort of like what we did with the bridge.

And when you're in your halfway point, pause an exhale. Roll back up. Good. Pull your chin away from your chest. Yeah. Inhale, roll halfway down and exhale app. So keep going here guys. Both of these variations that I've selected with the bridging and with the rollover are all about thoracic mobilization and again, I know that in my programming I'm going to take them to a place where I'm going to ask them to curl up into the hundred positions, so why not give them that opportunity to create that movement in the posterior body before I asked them to do that with the added challenge of hands in the straps, good on the next one. Roll all the way down. Feet are still endorse.

I flection lowering the legs towards the foot bar and zipping the legs up together. Good. Try that again. Draw the legs to 90 pause. I want to see active arms and triceps as you roll up and over. Separate the feet. Hip Distance and little wider. There you go. And flex the feet. Inhale, roll halfway down. Exhale as you roll back up. So they're doing a second set here.

The reason I've labeled this a transition is it offers to me as the instructor a transitional opportunity to change their springs for the next flow. Now let me say that I rarely changed the springs for clients in classes. I do that because I want them to be autonomous in their session. I want them to feel empowered and I do that because I need to preserve the intrinsic muscles in my hands and wrists as a teacher. So anybody who's doing a lot of um, uh, work in those deep muscles, a lot of repetitive work, uh, is pretended a potential for having an injury or a strain there.

That includes us as PyLadies instructors. Draw your legs together, points your toes, roll all the way down. Good. Bend the knees in towards the chest, hug the knees, lift the head and breathe. So I've given you two transitional opportunities, the roll lap where they changed their own springs and the rollover where I was changing the springs for them. Both allow for continuous movement without breaking the flow and prepare us for the next sequence. Good. We're going to do our mid back series, single arm. So reach back with your right hand and grab your right strap. Draw that arm straight up towards the ceiling. Good.

And you'll want a little bit of tension. So press a little more. There you go. Draw your left arm up towards the ceiling as well. Good. Why didn't your collarbones anchor your tailbone and bring your legs to the your tabletop position? Yeah. So your ankles are actually going to be a little bit higher level. And Nod your Chin while your head is still down. And as one unit, exhale, curl up, pulling the arms down by your sides. Pause for a moment.

Even though you have one strap, press into the hands as if you have two. And press into the pinky sides of the hands to fire into your lats and your obliques. Good. Turn your palm up on your left hand. That's the one that doesn't have the strap. Yeah. And then take it out to the side. Yep. And then bend the elbow and put it behind the head. Good.

So here's how my little compromise. So you have the support behind your head, right? So you can be here a little bit longer, but because the hand is back here, my expectation is that you're going to curl up a little bit higher. Okay. There it is. Nice. Let's start with the foundation. Inhale, right arm up to the sky and exhale. As you pull the arm down or reminder it's jury. In this stage you guys can keep going. Yep. That you move very quickly from direction cues to foundation cues because you're planting the seeds in this stage that they're going to need to call upon when they do more high level coordination or weight transfer kind of work.

You Foundation again is something that's known or relatively familiar and so if you're teaching a group that's brand new, say you're subbing at a studio, it is a little shot in the dark, right? You are sort of guessing. Okay, well on the schedule it says that this is an intermediate level Polonious class, so you're guessing of where their baseline is going to be. You'll learn very quickly though exactly where that is. If you use this technique, are you guys ready to add a progression? Pull your right arm down. Good. Send the left leg long. Good. When the right arm lifts up, the left leg will bend back into tabletop and that's an inhale. Exhale, press and inhale. Good. Exhale, press and inhale. Two more here.

Exhale, push away. And inhale. Last time hold. Now they've been very successful with adding the long Libra of the legs, so I'm going to take them right to a challenge and they're going to increase. Uh, I'm going to add spinal mobility in here. Okay. By increasing the level of difficulty on an exhale, you'll twist your left elbow towards your right knee. Yep. So they're a, they've added rotation to the exercise. Come back through center, bend the left knee, and as the right arm lifts up and the whole flow starts again, exhale, you'll pull him, press rotate towards your bent knee, continue to reach through that strap. Good.

The arm floats up as you return through center and pull the left knee and keep going again. And I know I sound a little bit like a broken record, but I just want to make it super clear. When I'm in that challenge stage, my verbal cues are very directive because it's complex what they're doing and they need to constantly be reminded. So the benefit of building them up from that foundation into the progression allows you to establish all of those sensations and cues that they need in order to feel successful in this high level movement. One more time. Good. And take it all the way down. Awesome. Lower your head, neck and shoulders. Let's switch straps. You can rest your feet. Let's switch straps. We're not gonna do the same thing on the other side.

And I know I hate to do that to you. Um, but you guys can stay later and do it if you really want. But I want to talk to you about using weight transfer because I feel like we get stuck in our head that weight transfer is quadrupedal kneeling and lifting a leg and it is actually a lot more than that and it's one of my favorite progressions to utilize weight transfer at. Remember is the act of changing your connection or your contact to a stable surface. All right, let's draw the left arm up to the sky. Anchor your tailbone and take your legs to tabletop. Good. [inaudible] you can take your right arm up there too.

Sometimes it's nice to start with the arms and mirroring each other. It kind of is a little easier on the brain wide in the collarbones while your head is down. Nod Your Chin. So my preference is this cranial verti reflection before the head comes up. I think it's a nice opportunity to sort of tell your body on a, on a neurological level, hey, I'm about to curl up and abdominals. I'm going to need you to fire and help me do that. Exhale, lift the head, neck and shoulders as you pull the arms down. Good.

Lift both arms up to the sky and keep the head up. Take your right hand into the same strap as the left. Yep. Now there's a few different variations here you can do with your arm positioning. Um, I believe I've covered it in my radical reformer workshops. So if you wanna learn more variations here, check that one out. We're not going to go there.

We're just going to talk about how we build in the progression. So exhale, pull your arm down to your side. Pause for a moment, see if you can lift up and twist a little bit higher. Good. Inhale, arms. Go Up to the sky. Separate your tabletop legs and exhale, pull through the legs. Good. Inhale, lift the arms up. Exhale, pull to your left. Inhale, lift your arms up and keep going here. See if you guys can do three more. What I did is I had kind of was, I wasn't very nice there. I took them into a combination right away. I had them do an a and a, B and an a and a B. And I didn't break it down.

I didn't say, this is a good work, this is B. Good work. Let's put it together. Um, so I kinda aimed a little bit high with that foundation and you could see right in their body. They were sort of like, what? Huh? Good finish with your arms to the left. Curl up a little bit higher. Awesome. Keep the hands in the straps, lower the head and lift the arms to the sky. Good. Keep your right hand in the strap.

Feel free to put your feet onto the foot bar as you transition. Roll onto your left side. Now the act of going from supine to sideline is a progression. It is a weight transfer and let me tell you why. When they're lying on their back, they've got five points of contact onto that carriage.

They have a one hip to hip, one shoulder to shoulder, and their head if their head is down. When I flipped them onto the side, they've got essentially two, I mean three if you count the head, but they're on one hip and a one shoulder, so I'm asking them to stabilize without having the same amount of their body connected to that carriage. Therefore, it's a weight transfer. Bend your knees in towards you. Take your arm up to the sky. Now I prefer to take my bottom arm underneath through the shoulder blocks. Bend the elbow, create a little cushion. If I know I'm only going to be here for a little while, this is a really nice option for me.

If I'm going to be keeping them here for a really long series, like let's say I go from arms and then I also have a leg series. Then I'll usually provide a prop that supportive of the neck. Good. So let's play a little bit with progressions here. Draw your knees together, draw your knees comfortably towards you and try to align your body in one long line lifting ops for the lower ribs yet so that the hips are stacked. And I just want to say that's totally a side note, but I've been finding that that's been a more successful Q for a really long time. In the sideline position, I talked so much about the rib cage. I talked about creating a little space here, a little mouse hole.

I'm so that if I, if I had a flashlight, the light would go through and I felt that sometimes it wasn't well received. Maybe we're just not connected to mobilizing our rib cage. I mean that would make sense. So lately, go ahead and go back to your flat back. I've been talking about stacking the hipbones on top of each other. So in order to bring this hip bone on top of the bottom one, her ribs will move and shift. So that's just a little side note, but I find that that's been helpful. One for me.

Go ahead and push a little bit into the ropes so that you've got some tension to begin. Slide your shoulder into a neutral position down the spine and exhale, pull your arm all the way down. Yup. Good. Stay here. Lengthen through the ris and there you go. Yeah. Inhale, the arm floats back up and exhale, the arm pulls back down. So starting in my foundation, just to remind her that foundation doesn't mean easy. Uh, I teach classes that are completely foundation based and uh, trust me, they are feeling at the next day and I can tell that I am bringing them to a physical challenge. Um, the progressions actually have a lot to do with more of a neuromuscular connection, right? It's challenging. Like I said, coordination, um, pulling the arm all the way down. Let's play a little bit with a Combo. Flip your pump, good.

Bend your elbow and let's do three tricep extensions. And I'm going to do reduced repetitions because they're going to be working really hard today and I don't want them to leave. That's three. Now sweep the arms straight forward, straight forward. And I often talk about, think of like an elephant train, right? So reach your fingertips forward to the tail in front of you and reach your shoulder blade back to the trunk behind you. And then exhale, pull the arm back three times. That's one and two. Yep. And just go ahead and increase the distance from your hip to rib on that side.

Yeah. And now that you've done it three times, let's put them together. So we're going to sweep there and back. Bend the elbow and straighten the arm. That's once again. Just go ahead and bring that arm down yet. TRICEP extension. Now sweep the arm forward and pull the arm back. [inaudible] repeat it.

Bend the elbow and push and sweep the arm forward and pull. Now, could I increase the level of difficulty here? Absolutely. I could bring them to challenge by either turning up the volume on this coordination exercise or adding in another component. I think I can do it right. I know you guys can do it. Let's add a whole body integrative opportunity here.

Bend your elbow and just pause for a moment. Lift the whole shape of your top leg up yet, and it's going to be higher than the foot bar. I sometimes like to keep that foot bar up, even though people feel it's a little in their way. It's Celts to keep people so that their leg stays lifted if they start to kind of sink down. All right, so let's do our tricep extension and as we do, straighten the top leg. Good. Now as the arms sweeps forward, the leg is going to move backwards.

You're coming into hip extension. Exhale, pull the arm back to the hip and inhale. Bend the elbow and bend the knee. Good, and bring that form down so it's parallel to the ground. Do it again. Push out, sweep the arm forward. The leg moves back and opposition, pull the arm back and bend the elbow and bend the knee. Yeah, do it one more time. Push everything out. Sweep arm forward, leg back. Pull the arm back and bend the elbow and bend the knee.

Very good. Just you can rest that leg. Yup. Just to again drive that point home. And another progression here, a weight transfer would be something like this. Prop yourself up into side lounge position. Okay. Bring your elbow to the inside of the shoulder blocks.

So going into a series in this position would be a weight transfer. They are no longer onto their shoulder, they are onto the teeny tiny little elbow and the majority of their weight is just pivoting on the hip. Okay, good. Excellent. Uh, one exercise we didn't do was our foot work in flection. So let's go ahead and hook up that strap. Lie Down into a supine position again. And let me just talk about that real quick. That's the whole reason we had that sticky pad underneath them.

So go ahead and make sure that sticky is under your bottom. So we're still on the same page. I just skipped this one. Dangle. Your legs are over the foot bar. So I need them to add springs. They are on a blue spring. I need them to add. So one option would be they all wait.

Well I walk around a group of 10 people and adjust their springs. It's not a very efficient way to do it. Um, or it's maybe not a great way for me to do it as an instructor who teaches 25 classes a week. So let's do our roll up transition and they can change their own springs. Lift your arms up to the ceiling, nod your Chin while your head is down. Exhale, flex up and over the thighs. Good. Resting in the forehead. I just want to add one little note here. Um, you know how I talked about extracting information.

So when it comes to this roll-up transition, I will typically do it three times and I give people what I call a get out of jail free card. And so that first time if they need to use a little momentum sometimes or just kind of figuring out what's going on. But if I see that happen again, then it draws my attention to them. And then if I see it happen a third time, then I think to myself, I can help this person. I can help them with exercises that will mobilize their spine a little more. Perhaps I can strengthen the core and teach them how to get into this position without using that momentum. Yeah. Okay. Reach down and add a two springs on.

So you already have a blue that's have two reds and then once those reds are on, take that blue off. Good. The other thing that I love about the roll-up transition is that I'll often say, feel free to use legs to get up, right. Grab a hold of something to get yourself up because it's during the down that all of the strengthening happens. So if they need to grab the thighs and walk themselves up, noon, great. No problem there. Flex forward over your thighs, reach your arms forward.

Inhale as you start to roll down. Good. Lift your arms to the sky. Keep the backs of the legs heavy and real slowly down. It's during this phase that they're building strength and flexibility. Awesome. Okay. Float your arms down beside you. If you're into the shoulder blocks, just move down a little bit. Yeah, take the heels of the feet onto the foot bar. Feet hip distance apart. Good.

Okay. Flip your palms up. Nod your chin to your chest while your head is down. And then exhale, curl head, neck and shoulders to your hundred position. Arms go to a t all the way up to the sides. Take your hands behind your head. Interlace your fingers. Curl up a little bit higher. So that's kind of my negotiation. I'm like, all right, you got your hands behind your head.

You've got that neck support and cradle. But what I'm going to ask from you is when the hands are back here that you curl high or melting the ribs down, push out to two straight legs. Pause for a moment. Anchor the tailbone. So I've given them the sticky. So we're doing footwork, Levy, push all the way up to two straight legs, heels the feet onto the foot bar and push yourself back. I've given them the sticky because I don't want them to slide.

Bend your knees come almost all the way in and let's just take that blue spring off. Free love there. You go in, you're all the way up in your abdominal crunch. Good. And you're going to stay up as you push out. Yeah. So I've given them that sticky. You guys can keep going in and out so that they don't slide back. But some people will slide even when the stickies there and they're going to tell you it's because of their pants and then you can smile.

You don't have to argue with them. But as an instructor, you might know that one of the reasons why they're sliding is because as they press out there rocking into a post, steer your pelvis. So again, good opportunity to extract some information on the next one. Come halfway in and pause. Drop the tailbone down, but curl up higher. Even higher still. Yeah. Awesome. So now I'm going to bring them into progression.

Let's play with a little bit of coordination. Draw your right leg to tabletop. As the carriage pushes out, the leg is in a sharp tabletop position. As the carriage comes in, the leg goes over the folk bar. And I'm going to add onto this. So push out, pause. This time the leg is going to go under the foot bar as you come home.

And now that you know it, flow, press to a sharp tabletop reach, press to a sharp tabletop and you go under. Yep. Good. So they're right into that Combo. Let's drop that left hip and keep a sense of weight in the left hip. My expectation is that they're pushing all the way out through that left leg. We've already done our bilateral foot work, so I've planted all those seeds here. Good.

And it looks to me like I can turn up the volume. I'm going to add a upper body into this. So a whole body integrative challenge. Press out and stay out. Take your left hand up to the sky. Take your right leg up to the sky. Okay, good.

Now reach your pinky finger to your baby toe and as if you're doing saw, see if you can saw off your baby toe three times one tailbone stays anchored, two and three. Now hold the flection in your opera body. Bring the carriage home as you sweep the leg down. And you're going to do that again. So press at out and saw up one and two and three. Hold the upper body. Bring the carriage home. Sweet. But lay down one more time.

Press out, lift and twist. One and two and three. Good. Bring the carriage home, lower the arm down and take a break. Very nice. See how we build and build and build. Now I won't make you do the other side cause you guys have worked really hard.

But I do want to note that when transitioning to the other side, I would start at the foundation again. I wouldn't assume that because they just did the right side, that they're ready to go into the saw or into the bicycle. On the other side. I would actually start with bilateral oppresses Kinda to bring them back to center and then I would go into my unilateral work and then I would go into my whole body integrative challenge. You guys did great. We've got another flow coming up. So we're going to switch bodies. Come on up guys. Okay. So you don't need your sticky,

Chapter 3

Challenge Flow

you can send it away.

I also want to make a note that this class does work. Those three steps of progression that cause me the foundation progression challenge throughout the class. But because we're switching, you guys are kind of coming into some challenge or progression territory. Okay. You didn't get your foundation like group one. Um, so let's go ahead. We're going to put the foot bars down. Let's roll your um, gear bar in to one and one. So it just roll this guy in. Yeah. Uh, yeah. And we're going to change the springs to a blue. And actually my preference, um, and this is just a thing for me and you might not agree, but I will usually keep this platform free so that I can stand on it or put my hands on it. And so in a group, um, I'll typically have them set up this way so that it's free for no matter what I do. But that's just me. Yeah, no, it doesn't touch. Yeah, you're on a blue. Good. Okay.

Let's come to a kneeling position facing towards the foot bar. Knees are towards the front edge and then hands are onto the platform. Good. And I like to have the heel of my hand towards the front edge of the platforms. I would say even scooch forward with the heel of the hand a little bit.

And that way you can wrap your fingers and really work that bird on a perch kind of feeling. Yep. Now I'm, this isn't a, a workshop going through variations, but I will say that if you're uncomfortable on the platform, you've got that foot bar right there. So you could always use the foot bar. Now notice their positioning right now, their, they're quadro pet kneeling, but they're joint over joint alignment is not where we want it to be. So let's find it. Bringing their shoulders over their wrists means they're going to kind of shift their weight back a little bit. Yep. And now we need to bring their knees underneath the hips.

So instead of moving the knees on the carriage, you're actually gonna slide the carriage back so that the knees are underneath the hips yet. And here is their quadrant head kneeling position. Beautiful. The ribs are lifted, the shoulders are neutral, the neck is long. Yeah, there it is. And I have started to cue a little bit more of the sense of a anterior tilt in the pelvis, a feeling of pulling the sit bones up while maintaining a closed rib cage. Yep. Okay. So here we are.

Now see if you can keep your carriage still and do a cat. Exhale, flex the spine. Inhale, lengthen back to that neutral position. Here's their foundation. Uh, keep going. You're just kept. Yep. Um, so I, uh, have been fortunate enough to work with some professional athletes and let me tell you that you can stay in that foundation place and you can make even like the biggest, strongest guys shake its foundation doesn't mean easy, right? Not at all good. And on the next one, length and back out to your neutral. So that would've been your time to give them all the foundational cues and not tell a story like I just did. All righty. So now we're going into a progression because they did such a great job in the progression I'm going to choose is weight transfer. Let's send our left leg back. Yup.

[inaudible] and let's send her right arm forward. Good. And then keeping the height of the arm and the leg and keeping the carriage stable. Inhale, windmill, the right arm to the right and the left leg to the left. And exhale, bring them back to where they were and see if you can do that three more times. Inhale and exhale. Awesome. Their next are staying in alignment with their spine. Their ribs are staying lifted. Good. And pause.

Let's turn up the volume. I want you to draw your left knee and right elbow to touch as you flex your spine, knee to nose. Inhale, lengthen the whole thing out. Good. Returning through neutral. Yep. So you can tell that this challenge has really kind of taken them to that edge, right? Starting to get some wiggly wobbilies and that is awesome. That's a great thing to see when we see them wiggle and wobble or maybe the carriage moves a little bit and returns, they're learning recovery, they're learning what it feels like to not be stable and then they're learning to find their stability again. And I think that's a very functional thing to know.

Go ahead and lower the left knee down. Lower the right knee down and sit your bottom back onto your feet. Really good guys. Yep. We are going to do something on the other side, but not the same thing. So you'll feel kind of balanced. Go ahead and come back to your four point kneeling position. Shoulders are right over the wrist. Good fingertips are squeezed.

Push the carriage back so that your knees are underneath your pelvis. Yeah. This time. Send the right leg back. Good. And send the left arm forward. Awesome. Good. I want you to pulse the arm and the leg up and down. Soften your elbow on your stabilizing arm. Good. Lengthen through your neck.

Awesome. Ribs are closed. Care just steady. Once I've given them the direction, I'm able to go into foundational type cues. Nice. Now on the next one, keep the leg up. Lower the arm down. Good. You're going to push a, you can put it right down onto the platform. Left. Yep.

You're going to push your left leg back into your plank position. So push the carriage and the left leg back. You're actually coming into hip extension. Exactly. There it is. And then you're gonna bring the left knee back underneath you the whole time. Oh, so go ahead. Lower that yet. The whole time the right leg stays lifted.

[inaudible] try that again. So start with the knee underneath the hips. Keep the shoulders over the wrist. Push your left knee back. So you're in hip extension. You're in like a plank position. And bring the knee underneath you again. Yeah, one more time. Push. I'm about to give them a combo. I'm teaching them the first part and pull. Good.

Now when you push the left knee back, bend your elbows and do a push up. Push the left knee back. Bend your elbows. Do a pushup. Yeah. As you straighten your arms, bring the left knee underneath you the whole time. The right leg is staying lifted. Press the carriage out as you bend your elbows and pull the carriage home. Good.

Keep your shoulders over your wrists in your chest, over the platform. Bend your elbows there. Straighten your arms. One more time. Push up as the carriage glides out. Lift up, lower the right knee. Sit back and take a break. Nice. This is a big challenge. Yeah. Rebuild the spine. Come up and let's turn to face back for some seated facing back work.

Sit. So that you have a hands width or five fingers behind your sacrum. Send your legs through those shoulder blocks, crossing your ankles for it. Necessity versus fashion, right? So I don't think you need to cross some girl. There you go. Reach forward and grab a hold of those loops. Good. All right. Let's build a foundation. Lengthen your spine, reach your arms forward and turn your palms up. Lighting your collarbones.

Keep your legs heavy and exhale. Flex the spine. Allow the pelvis to roll back away from the femurs coming into your c curve position. There it is, keeping the elbows lifted. Exhale, give me a bicep curl and pause. Good fingertips pointing up. Lower the elbows down to the height of the pelvis so you can go quite low. And then exhale, lift the elbows up to the height of the shoulders. That's it. Inhale as you lower and exhale as you lift.

So this is going to be their baseline. This is a great opportunity for me to discuss how the shoulders stay stable as the humerus moves up and down. This is a great time for me to discuss things like co contraction, right as the elbows draw up, the naval pulls down. This is a great time for me to discuss a lengthening sensation in that post Steria chains. So by deepening the c curve, you actually get longer through the back body. Good. Leave the elbows up, flip the fingers in towards the body and the elbows wide.

Now flip the palms back behind you with your pinkies up. Press the arms back as you dive four head down towards the knees and reach the backs of the palms towards each other. Good. Keeping the head low, circle the arms high are the Michel holders and around the toes and rebuild this spine coming all the way up. And that's actually a flow that I like to do a lot. And I just want to sprinkle in this concept of the beautiful thing of combining some of this fusion type work with our traditional kind of work to one doesn't have to replace the other in my opinion. Reaching the arms forward. Flip your palms up. We're going to continue to build here. Exhale, roll back into your c curve position. Bend your elbows to your 90 degrees.

Good pause. So I was asking them to move their arms up and down before right down and up. Now I'm going to ask them to keep their arms where they are and move their spine down and up. Okay. So as you lower, you almost go to your hundred position. Do you feel that it's like you could stay there and do the hundred, but why would you come on back up? Right. Inhale, you're lowering down and as you lower your, uh, bend, your elbow actually increases. Yeah. So keep going down in the shoulders. There it is. And then exhale. See Curve. Yes.

Inhale and focus on this movement coming from the ribs versus powering through with the arms. And now let's add a little weight transfer in here. Inhale, lower the shoulders down. As you see curve up. Lift the leg. It doesn't have to be high. Inhale, lower down. And as you see, curve up, lift the other leg and lower down. You're good. Keep those elbows lifted. Yes. Okay, one more time. Good. Lower the legs. Come to your c curve. Flip. So the pink, the fingers are in good flips. So the pinkies are up. Push the arms back, dive the forehead down, reaching the arms back behind you.

Circle the hands up over the shoulders, around the toes. Rebuild the spine and come all the way up. Very nice guys. Hook up your straps. Good. How are you feeling? Okay, you're doing great. I'd like you to transition to kneeling facing back. So just on the knees facing me. Not to worry.

You won't be kneeling for very long. Okay. Have your knees back a couple of inches away from the shoulder blocks. Good. I want to do a yoga flow. This is one of my favorite things to do. I actually will do this particular flow, um, in the beginnings. Uh, especially if like an athletic class, like a jump board class. And then I will repeat it again at the end cause I feel like it's just as a really nice energy and space to be in.

Place your hands onto the rails, walking your hands about six inches forward of your shoulders. There'll be little adjustments as we go. And then curl your toes underneath you, lift your hips up and press your body backwards coming into your downward facing dog. So hips up high, like the letter v. Think of your arm pits touching the shoulder blocks. They don't really have to. And think of your head dropping down towards the floor. Inhale, lower your heels as low as you can go. Maybe even the hang off the carriage. Exhale, lift your heels up three times one and head dropping down. So you're getting a little bit of traction in the neck.

Yeah. Two and keep your heels up for three good. Lower your knees all the way down and sit your hips all the way back to a, down to at child's pose position. So there's a great foundation. Let's continue to build good. Lengthen out so the shoulders are over. The risks. Curl your toes underneath you and press back to downward facing dog.

Hips go up, heels go down. Let's play a little bit with weight transfer. Take the right foot up to the sky and a three legged dog. Now in three legged dog, we're actually trying to square the hips internally. Rotate the right femur and Dorsiflex the foot.

So it's a little different than our Air Basque [inaudible] style. Nice. Awesome. Step the right foot through the shoulder blocks onto the floor. Forward of your nose. So see if you can get it all the way through the shoulder blocks onto the floor. Yeah. For whatever your nose. There you go.

Lower your back knee down onto the carriage and float your arm. [inaudible]. Okay, so it's a weight transfer. Good. Lower the arms back down onto the rails. And that was the easy part. The hard part is getting back to your three legged dog. So what you need to do is push down into the hands, flex the spine, and pull your heel towards your booty.

Yet as you go into your dog and you can take extra steps together there. Yeah, bend that knee. There you go. Let's try that again. So you're in your downward facing dog. The leg goes through the shoulder blocks. Okay. Onto the floor. Forward of the nose. The back knee rests.

The arms float up. Good. Yeah. So part of the challenge in this one is those quick twitch muscle fibers to go boom. Right? To get you there. Yeah. So it's good information to learn about our bodies. Hands are down. Good. Okay. So in order to get up, what I want you to think about doing is a cat with your spine.

And I want you to think about pulling your knee to your nose in your heel to your booty. You Go. Now she asks, can we cut this part out and go back to your three legged dog, but we can switch sides. So go ahead and take that foot down. Good. Lift your left leg up. Okay, good. Dropping the head down. Yup. The leg comes through the shoulder block.

So try to keep this knee up all the way onto the floor. Little baby hops there and then the back knee can lower lift the chest. Yeah, but this part is worth it, right? There you go. Yeah. Tada. Place the hands down onto the rails. Lift your back. Knee up. Okay. Pause here. So I want you to think about going into a cat with your spine. Yeah. And then try pulling your heels. Touch your butt. You're so close.

Yes. And you're back to your three legged dog. One more time. Step the foot through. Good. Lift the arms up. Lower the back knee down. So arms are up, back, knees down. Good. You ready for it? Hands go down. Back knee comes up. Exhale, lift heel to booty. Yup.

There you go though. That was the best one yet. Like comes up, foot goes down, knees can drop. Sit back into a child's pose position. Very good. Now that was a big progression. That was a weight transfer. The volume was pretty high, right? There's a lot going on. We could have continued to build some spinal mobility, some coordination. Very good.

Let's move on from our yoga flow. We're going to go into a knee stretch series. Now. This is actually a really fun one. So come on off. I think you'll like it better. Um, put your bar in mid position and lock it in. Good. And we're actually gonna go to a reduced spring settings. So we're on a blue, which is light.

But I'd like you to go to a yellow and I'll tell you why in a second. Now I wouldn't stand on the reformer and do things like, um, planking and long stretch and have my feet back here like elephant on a yellow [inaudible]. But when the feeder forward on the carriage, the yellow actually, because the springs grow in resistance exponentially, it feels quite supportive. When you're in that pushed out position, you're looking at me like, yeah, place your hands onto the foot bar and then step your feet onto the carriage with your toes towards the front edge. [inaudible] wrap your toes like a little birdie on a perch. Excellent thumbs on the same side of the fingers. Flex the spine into a c curve and when you're in your c curve, try to pull the foot bar up. Like pull it. There you go. Yup.

You and your c curve. Awesome. Try not to lean back. Instead, go up. Yeah. Inhale. Lengthen the spine through neutral. Lift your tailbone, lift your heart and try to push the foot bar down. And when you push the foot bar down, maybe you can lift your sake grim a little bit. Yeah, the carriage doesn't even move in yet. Exhale, seeker flex the spine, scoop, pull up, you get this wide, it means for the shoulder blades, head drops down. Good. And then inhale, move through the c curve into neutral tailbone. Very good. One more c curve. Exhale, scoop.

Now keep your seeker of position, but squeeze into the foot bar. Push down into the foot bar. Keep your c curve position and your shoulders over your wrists and inhale. Push the carriage back into a plank. Keeping the shoulders over the rest of the heels. We'll lift up. Yeah, you're in your plank. Nice. Nod Your Chin towards your chest.

Flex your spine and bring the carriage underneath you and home again. The heels will lower down. Do it again. Exhale, push out. Lengthened out. Shoulders. Stay over the risk. Good. This time, lift the head up and come into a neutral spine. Head Up. Yeah. Nod Your Chin towards your chest. Flex your spine and bring the feet back underneath you.

Lowering the heels down. Good. This next one, we're going to stay out. Lengthen out. Good. Lifting the head. Good. Keep the upper body exactly where it is. Bend your knees underneath your knees to navel. Exhale, straighten the legs. You've got five of them. That's one. Keep pushing the sternum up.

That's too good. Three hips a little bit higher. Yep. Four and that's five. Straighten the legs, nod the Chin and flex the spine to drag the feet underneath you. Heels will go down. Good. Let's continue to build. Step the feet all the way together. Keep the shoulders over the wrists, find your seeker physician good and walk your toes a little bit further forward so you can get that sense of wrapping. Yep. And lengthen all the way up.

The head will come up. Good. This time. Keep the shoulders where they are and pivot on the toes. So the hips point to the right just a little, just a bit, and he'll bend the knees in and exhale. Straighten the legs. You've got three of them. One and two. So adding that rotation, push all the way up to two straight legs.

Pivot through center and over to the other side. Pull the knees and and under one keep the hips lifted. Two and three. Pivot through center. Nod the chin. Flex the spine. Straight legs as you draw the carriage underneath you. Yeah. All right, stay here. This is also a transitional opportunity.

I want you to slide your right leg back so that the knee comes between the shoulder blocks and the foot hangs off the carriage lower down onto your right knee and keep sliding the knee back a little bit more right there. Good. Lift your arms to the sky. Awesome. You're in your proposal position facing front. Ready to do some single arm series. Put your left hand onto your thigh. Good look back behind you on your right side and grab your right strap.

Keep your left hand on your thigh and bring your right arm forward. Palm up so that your arm is in line with your chin. Pause for a moment. Awesome. Square the shoulders, square the hips. Drive the front heel down and let's build a strong foundation. Inhale, the arms sweeps down. The hand is in line with the pelvis. Exhale, the arm lifts up. Ribs are closed, spine as long. Keep going. Now this is an exercise I love to incorporate into group classes and I'll tell you why.

I get a little bit nervous sometimes teaching the kneeling work facing front, especially when I'm teaching my athletic group of overachievers. When I ask them to slowly lift their arms, they power up, they momentum and they get that wiggly wobbly by being in this proposal position. They are very stable, forward to back, but they are not stable side to side so they have to move slowly and maintain control. Otherwise they're going to wiggle and wobble themselves off the carriage on the next one. Hold the arm up, pause for a moment. Send your left arm long to meet your right. There you go. Turn your palms in towards each other. You can keep them shoulder with though.

Yeah. Good. I'd like the strap arm to lift up to the sky as you or just your arm lowers down to the floor and then switch. Gesture arm goes up to the sky as the strap arm lowers down to the floor and then switch. Good. So here's their progression. Inhale and exhale. Awesome. Try One more each.

I would call this a slow swim. Good. Reached both arms forward and flip the palms down. Now I'm going to take them to challenge because they can bend your right elbow. That's the one with the strap in it.

And the challenge I'm going to add is a whole body integration. And what we're adding is spinal mobility into an exercise that's already a whole body. Excuse me, an upper body focus. I'd like you to push your right arm forward towards the foot bar. Leave it windmill, your left arm open to the ocean view. If you don't have an ocean view, I guess you're going to have to say something else in your studio and then rotate your torso towards that beautiful blue ocean.

Good. And then as you come back through center, the left arm closes and you bend the right elbow. So bend it right in like this, like a row and then you're ready to do it again. So it looks like this, you press, you rotate, come back through center and you bend. And if you want to go a little bit quicker, it can go as one movement. Press and rotate and center and bend.

But don't forget that the challenge is that rotation. So cervical spine and t spine is moving in that rotation. I know you've been up here for awhile last time. Good. Come through center. Lower your left hand to your thigh, lower your right arm down to your side, hook up your strap and take both hands on onto. I got afraid of. Take both hands onto the foot bar. Slide your right knee forward.

Take your feet onto the carriage beside each other and you're ready to go into another series of your knee stretches, which I'm not going to make you do, but I do want you to feel how you can get to proposal from here. So the transition from being up into this knee stretch star was slide your left foot back. Knee goes through the shoulder blocks, foot hangs back off of the headrest. Well the carriage is in its home position. The arms float up and there you are in your proposal position. Place the hands down onto the foot bar. Slide your back foot forward to meet your front.

And there you are in your knees. Stretch start. Awesome guys. Good. Carefully come on off to one side. Well done. Next group, come on up my next victims.

Chapter 4

Standing Floor Series and Short Box

So those of you following along, we're on the next uh, page. So we're on page three. This is our standing floor series. Uh, and then we'll be bringing in some short box work to, uh, I have to say this is one of my favorites at the moment. You're gonna keep your yellow spring on. Cause again, even though I'm switching bodies, this would be a class flow all the way through.

Take a seat on your carriage and face towards the front doors. Good. Go ahead and grab the strap that's closer to you and play set around the ankle on your inside leg. So a little teaching tip and it's something that I personally struggle with is stopping to use the words left and right because that just confuses everybody, right? And it shouldn't, but it does. And it's like the more you say it in a day, the worse it gets. So I'm, I've a personal challenge to say inside versus outside.

So your inside leg would be the one closer to the shoulder blocks into the well into the police and your outside leg would be the one that's closer to the foot bar and the gear bar. And the reason that's a good habit to get into is if you teach in a studio where the reformers are set up, but Bartow foot bar, you may not have less than rights at the same, right? So if everyone gets off on the mirror side of the room, then their lefts and rights are not the same. So that's your inside leg. Good. Come up to standing. Okay.

Take your hands onto your hips and come into what I would call an athletic stance. So that's feet, hip distance apart are slightly wider in a parallel position. Look back behind you and make sure that carriage is going to be behind your bomb if you were to sit on it. Good. Alrighty. So from here, bend your knees, shift your weight back as if you're going to sit on the carriage, drive your heels down, and exhale, rise up. Do that again. Inhale, bend your knees and exhale. Take your arms down by your sides. Let's add the arms. As you sit your hips back, the arms reach forward and opposition. Exhale, lower the as you rise up. Good. Inhale and exhale. Good. Pause for a second. Just to be clear, the first set was foundation, right? We just sat down and stood up. We added upper body, so that was a progression.

We're now going to add a weight transfer with the upper body. So we're going into challenge. Boom, boom, boom. It might be that quick. So don't think that you have to stay in a foundation for 10 12 repetitions. If you've got movers like you guys, you might do just what I'm doing. Okay? And now we're moving on and now we're moving on.

But I do still build in that order. Here's your challenge. Sit the hips down. Reach the arms forward as you rise up, lift your heels. Yeah. Inhale, sit back, arms forward. And as you rise up, lift your heels. Good. Keep going. Okay. When you sit down into your squat, just shift your shoulders back a little bit and lift your heart a little more.

Yeah, good. And as the arms lift up in your squat, go ahead. Go there, pause for a second. Try to get the biceps by the ears yet, and that's going to fire into that whole posterior chain. Rise up to standing. Good. Two more times. Okay. Inhale and exhale.

Perfect. It's supposed to be hard. It's a challenge. Good. Lower the heels down and put your hands on your hips. So that might be it. You might do that flow, boom, boom, boom and move on with the rest of your sequence. But I'm going to continue to build here with you guys.

I want you to take a baby step towards your foot bar. [inaudible] good. And you actually can take a little bit of a bigger step cause you've got beautifully long legs bend into both knees, into a deep squat and shift your weight to your outside leg. Your inside leg is going to straighten so you can just sort of slide it on the floor. And if the carriage comes all the way into the stopper here, then you know, oh I need to step a little bit closer to the foot bar. But you guys are perfect. I want you to step or slide your right leg and to meet your left.

And then step, we're slide it out. Keep going in and out. So this may have been the progression you chose. You may have done squat, had them come up, take a step and now they're doing weight transfer. Slide. Good. Now I can take this weight transfer and I can turn up the volume.

I can take them to challenge and I believe that they're ready for it. Slide the foot wide and stand tall. Good. Take your hands down. Come into your squat position. Your legs are wider, but otherwise you know it. Now stay here for a second cause this one's definitely easier when it's done quicker. Let me show you. You're going to exhale. Step the strap foot in to touch the knee on the standing leg and then go back to where you are, right. Exhale and inhale down.

Exhale up and in. Heel down. A little slower on the up though so that you maintain connection with that strap. So no momentum. Yes. Good. Stand all the way tall on your standing leg and go back to your squat position. You've got three more. I want them to have that Aha moment. Yep.

This is weight transfer. Big Time. Good. So when you're in your squat, arms are up and when you're standing, arms are down. One more time. That's okay. Wobbles are good. Recovery is a great skill to have.

Good. Okay. Lower the heel. Lower the foot, I should say, and rise up. Nicely done. Take your foot out of the strap. Let's grab our boxes. We're gonna put them on in short box. You're welcome.

If you normally use your short box over the shoulder blocks, you're going to want to do that now. I think you probably do. Yeah. Okay. Add your springs to stabilize the carriage. Okay. And let's put our foot bars down and expose that foot strap. Good. Take a seat. When you're ready. Slide the feet under. Yep. That's perfect.

You can just leave it just like that. Okay. There you go. How was he's on? Good. Bring the toes all the way forward onto that foot bar. Right on top. Yeah. Good. There you go. You got it.

Good. Okay, so we're sitting nice and tall. We've got ample box behind so we can go into some inversions. Did I tell you we were going to do an inversion? Whoops. Surprise. Reach your arms forward. Lengthen up, up, up, up, up. Good. Ah, you can just reach your arms forward, but lengthen the spine up. Thank you. Closing the ribs. Good. Let's build a foundation. So on an exhale, roll the pelvis back away from the femurs. Good.

Pause on an inhale. Lift the arms up to the sky. Good. Before the arms and the spine move. Let's move the cervical spine by nodding the chin towards the chest. So that's the same thing you guys did to come into your hundred. Exhale, roll up and over the thighs. Arms stay parallel to the ground. Belly draws back.

Crown of the head reaches forward and create a little space between the ear lobes and the shoulders. Good. Rebuild the spine from the lower back first. So base, middle, and then the head. Good. Grow Tall. Do it again. Exhale, roll back pelvis away from the femurs. Inhale, arms come up. Stay through the abdominal wall. Leave the arms, but nod the chin towards the chest. Ah, there it is. Exhale. Pull the ribs back in and as you flex up and over the thighs. So keep going. Keep going. Reaching those arms forward. Yeah. Inhale, rebuild the spine from your base first, so lower back, middle back, and arms parallel to the ground and you're up.

There's their foundation. Let's continue to add on. Exhale as you roll back into your [inaudible] curve position. Good. Take your right leg out of the strap and into tabletop. Hold behind the knee. Good. If he needs to adjust, please do. Exhale, kick the leg up to the sky three times as if you're going to do tree bend in kick one and two each time you kick scoop abdominals a little bit more. That's three. Good. Ben, the leg to tabletop and take the hands behind the head.

Elbows are wide. Inhale as you lower the shape of the body down. Exhale as you scoop up towards the knee. Good. Inhale low or the shape of the body down. Exhale, scoop up towards the knee. One more time in heel. Lower the shape of the body down. Exhale, scoop up and set all the way tall. Placing the foot down, putting the foot back in the strap and reaching the arms forward. Nice guys. Let's see how we do. On the other side. So inhale, grow tall. Exhale, roll the pelvis back. Good. There's that foundation that you know and left.

Now here's the weight transfer. Taking the one foot out of the strap. They have to work to stabilize. Good hold behind the knee. Let's just get comfy here before we start to move. Straighten the leg up to the sky and bend the knee. Each time you kick up, navel draws in and back. Good. Find your tabletop position. Arms float back behind you.

Interlace the hands behind the head and lower the shape of the body. Exhale as you come up. Focus on scooping. Inhale, lower. Exhale, focus on t spine mobilization. One more time. Inhale, lower exhale, ribs to hips. Come all the way up to seated. Plant the foot and rest the arms for a moment. Very good.

Should we do it? Should we push them there to challenge? Yes, we should because they want to go there. Their bodies are saying they want to go there yet they're ready for it. So we started with the foundation both feet in the straps. We rolled back. We understood how to come up. We then brought them to a progression, which was challenging in a weight transfer exercise they did. Great. So let's continue to build reaching the arms forward. Inhale. Good.

And actually go scoot your bums back just a little bit. [inaudible] Yup. And your toes will probably come off that foot bar and that's totally okay. Inhale, arms forward. Sit up tall. Exhale. Roll the pelvis back away from the femurs. Continue to roll back the head all the way down into the well and reaching the arms back to the inside of the well onto the floor.

Inhale, lift your arms straight up towards the ceiling. Nod Your Chin towards your chest and exhale. Roll all the way up over the thighs, gliding the ribs down towards the hips. Good. And inhale. Rebuild the spine. Coming all the way up. Yeah. One more time. Like this. Inhale. Exhale, roll pelvis back away from the femurs. Good.

Letting the head drop, letting the arms drop. Pause. Can you guys stay here for one second? Come up if you need to. What I'm looking for in an inversion is fear and hesitation because I can help those people right away. Those are the people I'm going to go towards. There's no fear or hesitation here. They're just allowing their body to take the shape. Yeah, it's a beautiful thing. Arms go up, not the chin towards the chest. Exhale, flex the spine. So do your best to scoop, to come up and over and inhale as you rebuild the spine, coming all the way back up.

So I'm listening to your bodies and your bodies are saying bridge, bridge, bridge. So I said, okay, we'll do, we'll do the Highbridge. Inhale. Exhale as you roll back just as you did before. Good. Reaching the arms back. Dropping the head. Yeah. Place the hands onto the wooden rails. Try to get the hands close to underneath your shoulders. There you go.

Okay. Close to underneath your shoulders. Go ahead, take your feet out of the straps and walk your feet towards the box. Good. Listen to my cues because they're important. Inhale to get ready. Exhale. Push up with your legs into Highbridge position. So feet down. Push up with your legs into Highbridge position. Good. Push down into your feet. Push with your booty, push with your legs, push with your arms too. Everything up.

Maybe their bodies weren't same bridge all the way up straight in your elbows. You got this girlfriend. Push down with the arms down with the legs. Yeah, yeah. There you go. Can you straighten your elbows? There you go there yet all the way up.

Yes. Yes. Lower the hips. Straighten the legs. You're going to feel the foot bar assist you as you lift up. Lift your arm straight up towards the sky. Nod Your Chin towards your chest. There's your foot bar. Exhale. Go all the way up over the thighs. Drop your head and breathe it out. Yeah, I pushed them to a challenge.

Good. How are you feeling? Backs. Okay, good work guys. Good. Alrighty. A, the limiting factor there for both of them was not spinal flexibility. It was opera body strength. So if you were my clients, we would be doing a lot of upper body work. It was that right? Pushing up with the arms. Yeah. Now, the thing about bridges, and again we don't have a lot of time to get into all the intricacies of these exercises, but the thing about Highbridge crossed my heart. The more you do it, the better it gets. Like in a row, like if you do three bridges, number three is always stronger than number one, which is kind of interesting because you would think I'd be tired by the time I get to number three, but it's not. It's your body starts to really connect to what the exercise is. Good.

Okay, so walk your feet back against the box, heels back against the box. Move your foot bar up a notch and lock it in. Yeah. Good. And then reduce your springs to one green. So you can take all the rainbow colors off and you just have the green God. Lift your heels up nice and high.

[inaudible] awesome. Take your hands onto the foot bar. Thumbs on the same side as the fingers. Good. And then come to a hover where your shoulders are over your wrists. Push the box all the way out. You're in a plank position. Good. Inhale, bend your knees under you. Exhale, straighten your legs. You're in a knee stretch.

Bring your shoulders right over your wrists and then see if you can actually get your wrist a little bit higher. Yeah, on the foot bar. So you're using the fingers to hold you up. Then muscles in the hands, hips are low, and these stretchers have a little bit of vigor in them. So exhale, DePaul. Shh. Inhale to push. Okay, good. There you go. Now stop when the knees are underneath the hips and let's do protraction.

Retraction the Scapula three times one. So bring your knees underneath your hips. Good. Bring your shoulders over your wrist. So push your knees back so they're under your hips. There you go. Protraction. Retraction three times. Good.

Push out to two straight legs all the way out. Shoulders. Stay over the wrist. Second set of knees stretches in and out. Push and pull. Nice guys. Push and pull. Good. Bring the knees underneath the hips. It's like you're doing tabletop position. Reverse tabletop. Yeah, protract. Retract. Just the Scapula.

Slide them in. Push them out. Good. Slide them in. Push them out. One more time. Get pushed out to two straight legs. Lift your hips up high to the sky. Bring the carriage all the way home and go flat feet for a second. Good. I took them right into a combo. How mean of me? Good.

We're going to play a little bit with weight transfer. Lift your heels up nice and high again. Okay. Keep your shoulders over your wrists and lengthen out to a high plank position. Okay, good.

Take your left foot forward onto the platform and bend into the knees. So the Shin touches the foot bar so you could even slide the foot forward. So it's more of your heel that's on [inaudible]. Exactly. Yep. Tone your quadricep on, on your back leg. Notice how you're kind of pitched forward in this lunge, right?

So stay like that. Reach your arms up, put your arms back down and step the foot back to meet your right, left foot steps forward. This is a weight transfer exercise. Uh, the other foot. I think I messed it up. Reach your arms forward. Okay. Put your arms down and step the foot back to meet your left.

Now that you know at flow a little bit quicker. Step and lift, lower and step. Again, step and lift. Lower and step. It's almost a little bit like a mountain climber. Married a lunge and this is their baby. Okay, good. One more time.

Take both feet back. Bring the carriage all the way home. The hips will come up. The feet can go flat. I'm going to push them into challenge, so I already gave them a weight transfer. I'm going to turn off the volume on that weight transfer. How you doing? Good. Okay. Aren't you guys bad? You're not on this group. Lift your heels up high. Don't worry, I'll get you next time. Keep your shoulders over your wrist.

Push out to two straight legs. Step your left foot forward, foot onto the platform. Good. You're not doing the same thing, so there's going to be another component into it on your exhale. So go ahead and keep your hands on that foot bar levy. On Your exhale, I want you to lift your hips up high. Lift your left knee towards your nose and your left heel towards your bum. Yep. And I call this flamingo. Exactly. Put the foot back on. Come into that deep lunge and reach your arms up and then put your arms back down. Step your left foot back to meet your right.

And let's go slow on the other side. Take your right foot forward. Good. Exhale, Pike Heel too. But see if you can bring that carriage all the way into the stopper and then stand onto the platform and go into that lunge and then lift the arms up. Yup. And now that you know it, if you want to flow a little quicker, you can, you step it back, you step to the platform, you scoop and pull the carriage underneath you. So see if yes, there it is. You step onto the platform and you lift the arms. Good.

You step back, you step forward, you scoop. Flex the spine into your pike. Yep. Foot to the platform, arms to the sky. One more per side. Step back. Step forward. Scoop up. Good. Step back to the platform and go to your arm. Reach last time. Step back, step forward.

Pike. Exhale, flats. Good step forward. Arms Up, arms down. Good. Take both feet back, bringing the carriage home and sit down onto your box. Nice. It's big time weight transfer, not only right to left leg but from legs to arms, all kinds of good stuff. All right. A cardio lunges on long box and stretches on the short box. Pardon me. Cardio Lenses on the box.

And we already did a little bit of it and yours a stretches. So you're almost done guys. Five minutes, you got this hands go onto the platform. Good. So our, excuse me onto the foot bar. So, uh, the cardio lunge series is a series that I, uh, love to include in classes and I see it included in a lot of classes. But one of the things that I see about that particular series is we go from zero to challenge really quickly and it is a really, really dynamic sequence. So this would be a great time to offer a reset exercise. And remember, resets are things like a plank, a bridge, a four point kneeling exercise. It's during those exercises that you're going to talk about all of the polarities foundations and principles that they need to incorporate into that highly dynamic flow.

It's not the right time to plant those seeds during that flow. So at this point those things should already be in their head, which for you guys they are, cause we really built the class up to this point. Okay. I have you on a green, which I think is pretty supportive. If your shoulders are starting to get tired, you can always try a red, it'll decrease the work in the upper body but increase the work in the core. So that's your call heels, her lifted high and feed our back against the box. Good.

Shift your shoulders over your wrist and push out to a plank to straight legs. Nice. Okay. Take your right foot onto the platform and straightened both legs. Push back into what I would call scissor splits. So two straight legs. This could also be called or is called a pyramid lunge.

So you might have that nomenclature yet. She just linked the nene her hip to rib on that side yet. And see if you can straighten this leg all the way, even if your hips come up a little higher to do it. Yeah, you're extremely flexible. Nice job. Okay, so do you remember that Flamingo position? Exhale. Lift the hips. Flex the spine. Pull the heel towards the butt. Inhale, scissor splits or pyramid lunge. Exhale, flamingo, knee to nose. Heel to butt. Good. Inhale, scissor splits. So two straight legs all the way. Good. Exhale, heal. TBA. Inhale. Send it out. One more time. Like this. Exhale. Heel to bum, and inhale. Send it out. Very good.

We're going to change what? We're going to change his instead of landing on the platform, your right leg is gonna land on the floor. It's going to go into the inside or the outside of the spring. Just like this. Okay. Flamingo first, lift your hips up. Heel to bum. Land on the floor. Bend into your front knee, and you're in what I would call a crescent lunge. Yeah.

Exhale, come up into your flamingo, pulling your heel towards your balm. Do that two more times or three if you're fast. Good. When you're in the crescent lunge position, give yourself a little up stretch opportunity to lengthen for that t spine. Now put the two together. Land on the platform, scissor splits, Flamingo land on the floor. Crescent lunge, Flamingo.

Good land on the platform. Scissor. So two straight legs, Flamingo land on the floor. Chris and her bend into that front knee. One more. Uh, for each. Yeah. Landing on the platform. Two straight legs and Flamingo and landing on the floor. Now stay here. Reach your arms forward. Biceps by the ears.

Good. Then your back knee in their sweaty. There you go. Can you do one arm? There you go. Bend your back. Knee in little scooters. Push and push and push. Maybe they can lift both arms, maybe not.

M push and push. Three. Try to pitch forward a little bit more. Yeah. To place your hands onto the platform. Lift yourself up and take both feet on. Very good. Let's do the other side. That one I don't think we can get away without doing the other side. Okay, so our foundation, let's take the left foot forward. Push out to two straight legs. Good.

Pulling the hip back and breathing. Okay. So it can just be that hold, finding that peer Midland [inaudible]. If you find that maybe this is a challenge for them, then you can stay here a little longer in the foundation. You can just lift the hips up. So bringing the carriage homeward all the way, all the way, all the way, all the way. And exhale, push back. Right.

This might be a place that you live. You plant all of the seeds that they need to know for the dynamic series and exhale, push. Great. From here, let's add the flamingo part. So you'll exhale, flex the spine, pull your heel towards your bum, try to bring that carriage into the stopper and then land in your scissors. Splits foot to the platform. Yep. That's actually the progression where we added that Combo.

So you want to get that foot all the way back up to the platform. Exhale into your go heel to bum. Inhale, scissor splits onto the platform. Yep. Exhale, flex the spine. Heel to bum. Inhale land. Good. One more time. Like this. Exhale, flex and inhale land. So now that they have those components, which by nature is already a combination.

I'm going to turn up the volume and add that second element to it. So I'm taking that coordination and I'm going woo. Up here with that. Exhale, Flamingo. Good land on the floor. Bend into your front knee. There is there crescent lunge. Exhale, Flamingo land onto the platform. Two straight legs. There is their peer mentors, scissor lunge. Exhale, Flamingo and landing. Good. Exhale, Flamingo and straight legs.

One more time. Exhale flamingo and land on the floor. Pause here and try a little band and extends with your back knee. Focus on the extension, so just a baby bend and exhale. Push like a scooter. Push and push and maybe an arm can come up.

Maybe not. Maybe both arms can come up. Good. Nice. Take both hands onto the foot bar, straighten your back leg and exhale. Pull the hips up, carriage home and land onto the carriage. Nice. Take a seat and take a break. Very good. Now the way this class format went down is that big challenge was really at the end, right with the big high bridge.

The high level coordination of those cardio lunges, and it's during that state that you are not in your comfort zone. You're a very outside of that comfort zone. In fact. Um, so you'll want to bring them back in and that might be something like a reset exercise. It might be something like feet and straps, something that's very familiar to them. You guys I think deserve just a really nice stretch. You want to just take a nice stretch? Come on off. That's good. Go ahead and stand in your well, facing towards your short box.

Good. Stand back. So you're um, you know about a half a legs distance away from that box and take your right heel onto the box. Yeah. Foot is flexed. Put your hands onto your hips, pull your tailbone back. Good. And see if you can actually pull your right hip back a little bit more than you think you need. So don't lean forward yet. Just sort of pull this guy back. Hmm. Does that feel different? Lift your arms out. That's a breath in and then lean for it. But don't round your spine. Just start to lean forward. [inaudible] pause.

See if you can keep your arms up for a second. Biceps by the ears. Yeah, this is just not nice of me cause I told them that they were going to stretch and I'm making them work a little bit more. But flex the spine now and take the hands onto the box or your thigh, wherever they reach. Good. And you can even use this strategy in something like this and your stretches. Rebuild the spine, lift the arms up. Good. I can increase the coordination here.

Arms up by adding some spinal mobility. So let's all rotate to our right and open our arms to a tee. Yup. And come back to center and do it again. Rotate and open the arms to a tee and come back to center. Good. Rotate and open the arms to a t.

Pause. Good as if you're doing saw. Reach towards your baby toe. Good. Head down, arm back. Take a stretch, rebuild back to vertical. Awesome. Arms come up, you come to center and the lake can float down or you can help it down. Good. Wiggle it out a little bit. You guys seem a little serious in that one. And then take your left leg up, hands on hips.

So just pull your tailbone back and pull your left hip back. So this way if possible yet what I'm trying to do is get this belly of the muscle right in here to get pulled. So I'm trying to pull the distance from the back of your knee, uh, away from your sit bone on that side. Yup. Good. Lift your arms up to the sky. [inaudible] and while you're here you can get a little up stretch sensation and then try to keep that up. Stretch sensation as you lean forward.

Don't flex yet. Just lean. Even if you feel really restricted, come on up a little more. Up, a little more up a little more. Yeah. Cause this stretch is very different. This is all hamstring right now. And then as they flex their spine and go forward, relax the neck and shoulders. Now it's that whole posterior chain, the back, lower back, the hamstring. Good. Rebuild the spine. C'Mon up. Take those arms up with you.

Good. And by the way, every time I ask them to keep those biceps by the ears, they're getting post Steria dealt work, they're working the postural muscles along the spine. They're kind of getting this the type of work that they would have in their prone arms pulling strap sort of series. So even we didn't do a lot of extension in this class. Their extensors have really been working. Rotate your left as you open your arms. Good.

Pulling the left hip back and then rotate back through center as you lift your arms. Two more pull and lift last time. Hold that one. And as if you're doing saw, start to reach your pinkie finger towards your baby toe head can drop down. Good. You can rotate that palm in. Sure. Getting that twist and reach. Nice balance. Rebuild the spine, the arms come up, the arms float down and the leg comes down and you can help it come down. Very nice. Awesome job guys. Okay, so yeah, you've got a really good workout, right?

I made you hold things a little bit longer than I would in a typical class and maybe we did more reps in some instances or less reps in other instances. I just wanted to get the idea across that we have these three stages and it's not easy, hard, super hard. It's not beginner, intermediate advance. This application can be used for all levels within one exercise, within a sequence of like five exercises and within a class or over a long window of time to have a strategy to help try to get somebody to that next evolution in their practice. The words that I used in the class were very connected to the workshop. I just again, want to be clear that in teaching it's not, oh, let's see if you can do this progression. As a teacher, that's the roadmap that I have internally in my head wondering where are they today, how they're moving today? What do they need today?

Trying to extract this information using their movement to build the type of class that's going to benefit them for that particular day. You guys did great. You feel good. You guys did great. There's two more movers over here that are sitting here, smiling, drinking wine. I'm just joking. They're not. All right guys. Well, thank you so much for joining me. And now that you know this secret strategy, um, if you look back through my videos on Polonius anytime, you'll definitely see it.

So if you're looking for more inspiration and more movements and choreography, um, I've got lots of videos on plays anytime and you'll start to see kind of how I use that foundation progression challenge technique. Thanks for joining me.

Related Content

Comments

Amazing as always. I have learnt so much from Courtney on Pilates anytime. Thank you for sharing your knowledge.
7 people like this.
Courtney, really loving this workshop. I've taken your workshops in person and online, and they are fabulous in either format; however, given the amount of content (information) given in this workshop, I think I prefer the online version. Thank you so much for offering this on Pilates Anytime, although a trip to Encinitas would have been nice too.

Tip: Print the PDF workshop manual before you begin. So much good information and lots of room to take notes.

Pilates Teachers: Trust me, you will benefit from this no matter how long you've been teaching, how experienced you are or how much training you've had. You will love.
1 person likes this.
Thanks for a lot information!:) how can I download your PDF workshop manual??
Oh ~ Once you purchase the workshop, there will be a link to the pdf below the description. If you have any trouble downloading it, please email us at support@pilatesanytime.com.
Judy B
Amazing! well worth the money! I'm just starting out and this was very informative.
Where is the pdf file ..
wow amazing.. Thank you..
Great workshop! I really loved the sequences and the progression. It's a great way to of thinking! Thank's! Please thing to do this kind of workshop on a wunda chair.
Tina ~ There is a link underneath the description once you purchase the workshop. If you go to the full site or mobile version of the site, you should see it. If you have any trouble accessing it, please email us at support@pilatesanytime.com.
Terrific guidelines! Thank you😃👍
1-10 of 26

You need to be a subscriber to post a comment.

Please Log In or Create an Account to start your free trial.

Footer Pilates Anytime Logo

Move With Us

Experience Pilates. Experience life.

Let's Begin